If you’ve just bought a license in our Black Friday Sale then we are delighted to welcome you into the Gravity Forms community. Getting started with Gravity Forms is a very quick and easy process and we have plenty of resources to help support you every step of the way.
In this article, we discuss how to get Gravity Forms up and running in just three easy steps, as well as share some top tips to help you get the most out of our WordPress form builder, whatever your project.
All new customers also receive a useful onboarding email series packed full of educational material, so make sure you keep an eye out for those in your inbox.
Ready to find out more? Watch the video or read on…
Get Started with Gravity Forms in 3 Easy Steps
Gravity Forms is a powerful WordPress form builder, enabling you to create any type of form for any occasion. It has a wide assortment of features and add-ons, helping to cater to specific form requirements and integrate with countless third-party services if needed.
Gravity Forms is also extremely user-friendly, so you can easily create beautiful and unique new forms in minutes, and have fun doing so!
If you’ve just made a license purchase and are ready to get started, watch our Three Step-Quick Onboarding Guide, or follow these three simple steps below to help you install the plugin and create your first form…
Step 1: Install Gravity Forms
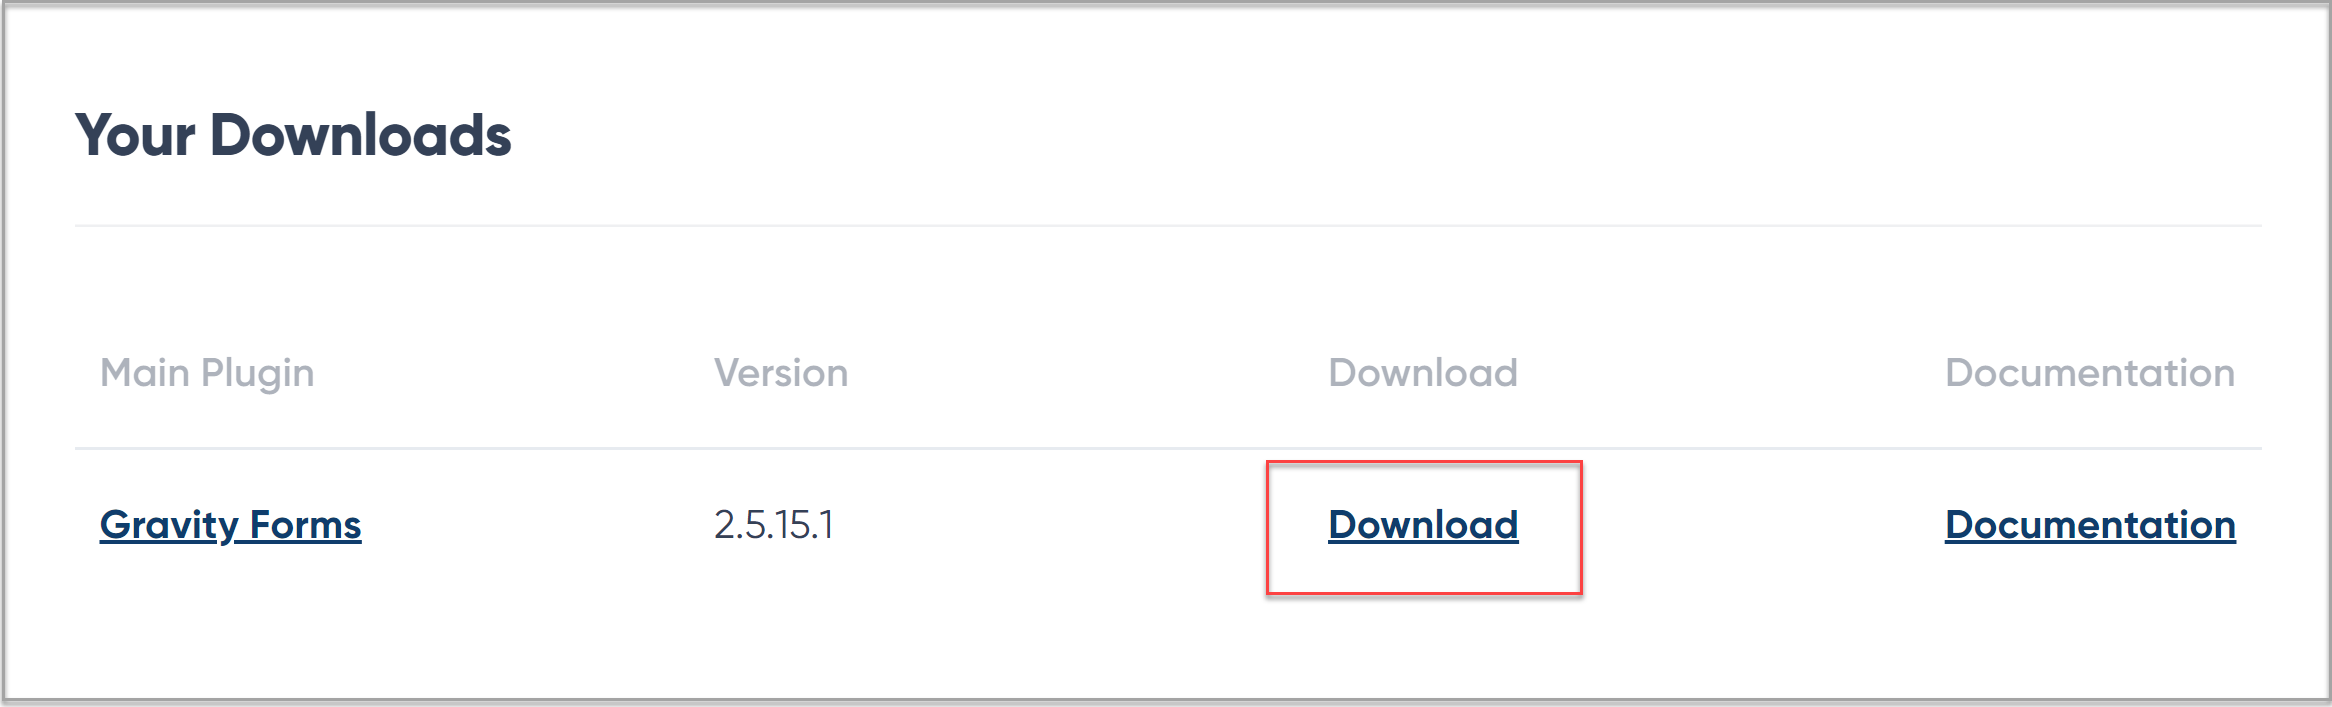
To install the Gravity Forms plugin, open your Gravity Forms Account dashboard and select Downloads. Then, next to Gravity Forms (Core) click on Download. The plugin will now download to your computer as a .zip file.
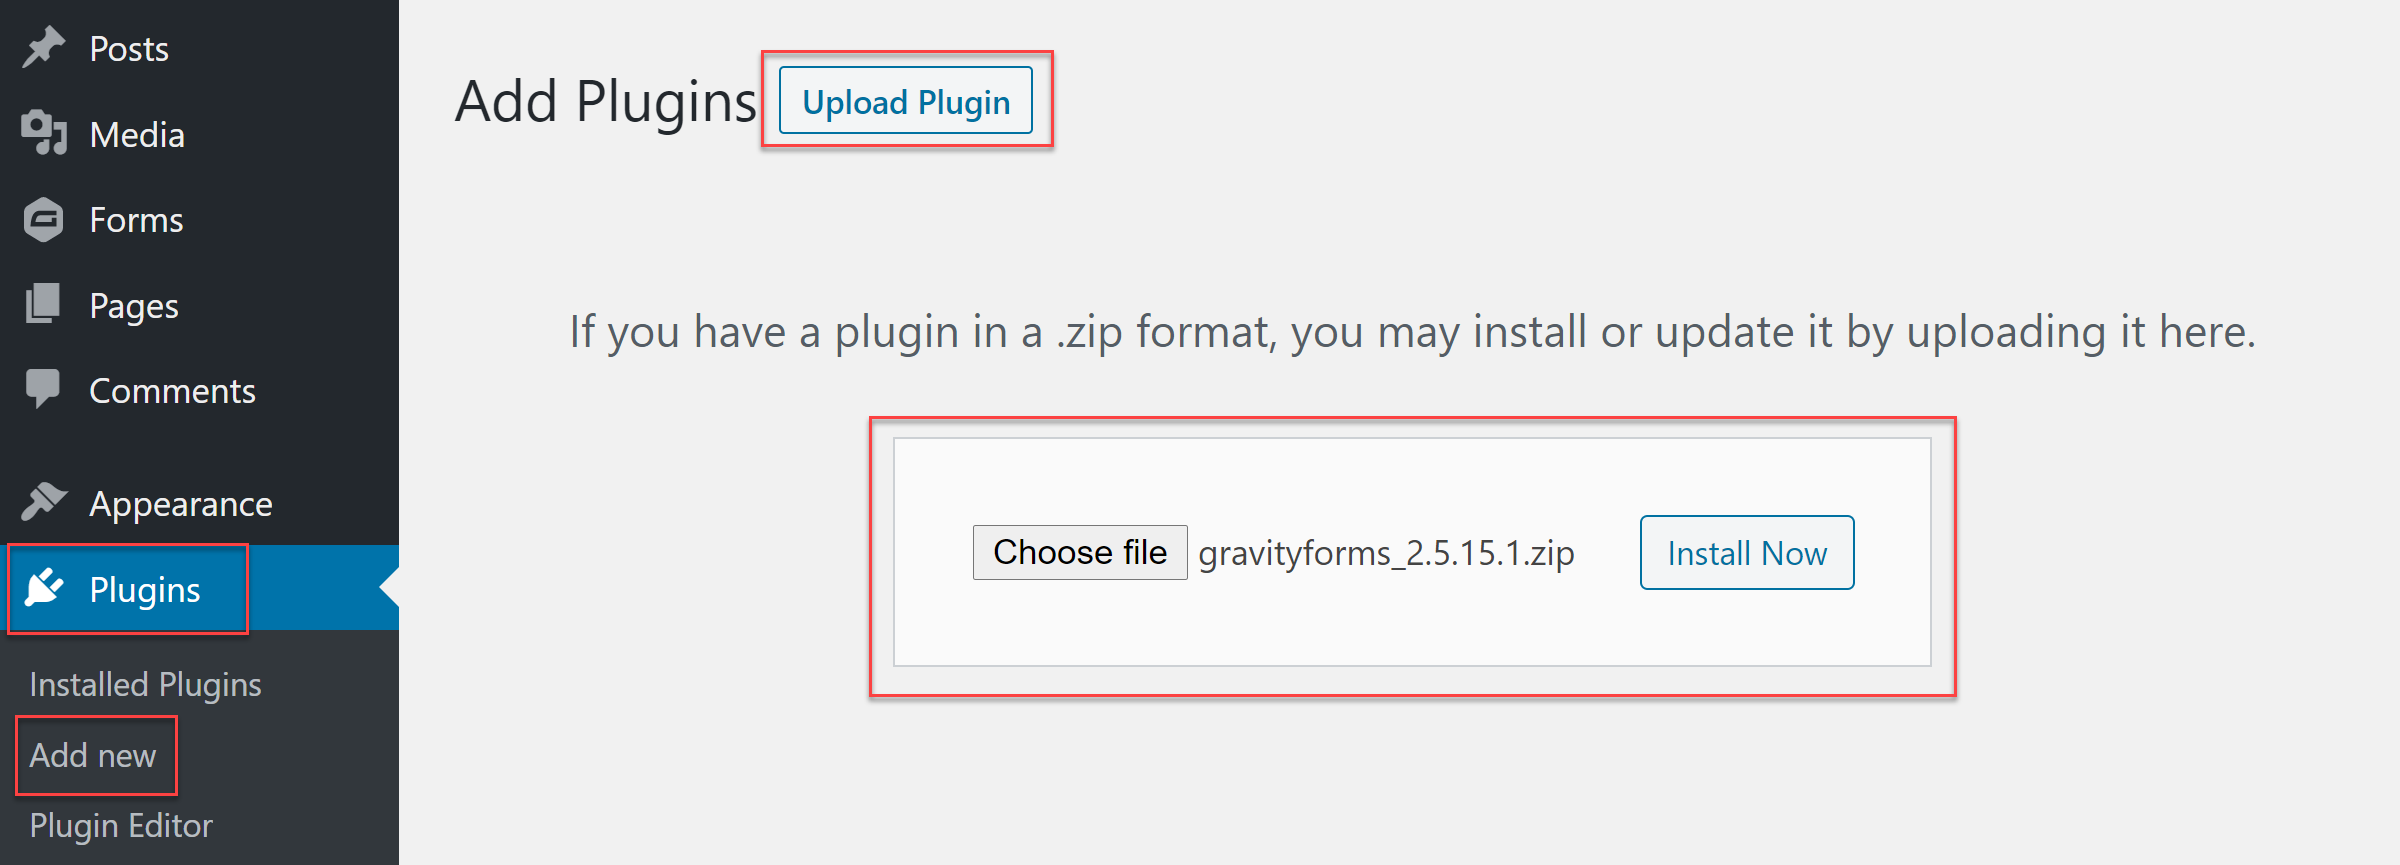
Next, navigate to your WordPress dashboard and select Plugins > Add New from the menu. Click on Upload Plugin and then select the Gravity Forms file from where you downloaded it. Once the file has uploaded select Install Now > Activate Plugin.
Gravity Forms will have now been successfully installed on your WordPress website. Follow the instructions to register the plugin with Gravity Forms – once you’ve done so, the plugin is ready to use!
For further information on how to install Gravity Forms, watch this video tutorial or check out our documentation.
Step 2: Import a Form from Our Form Template Library
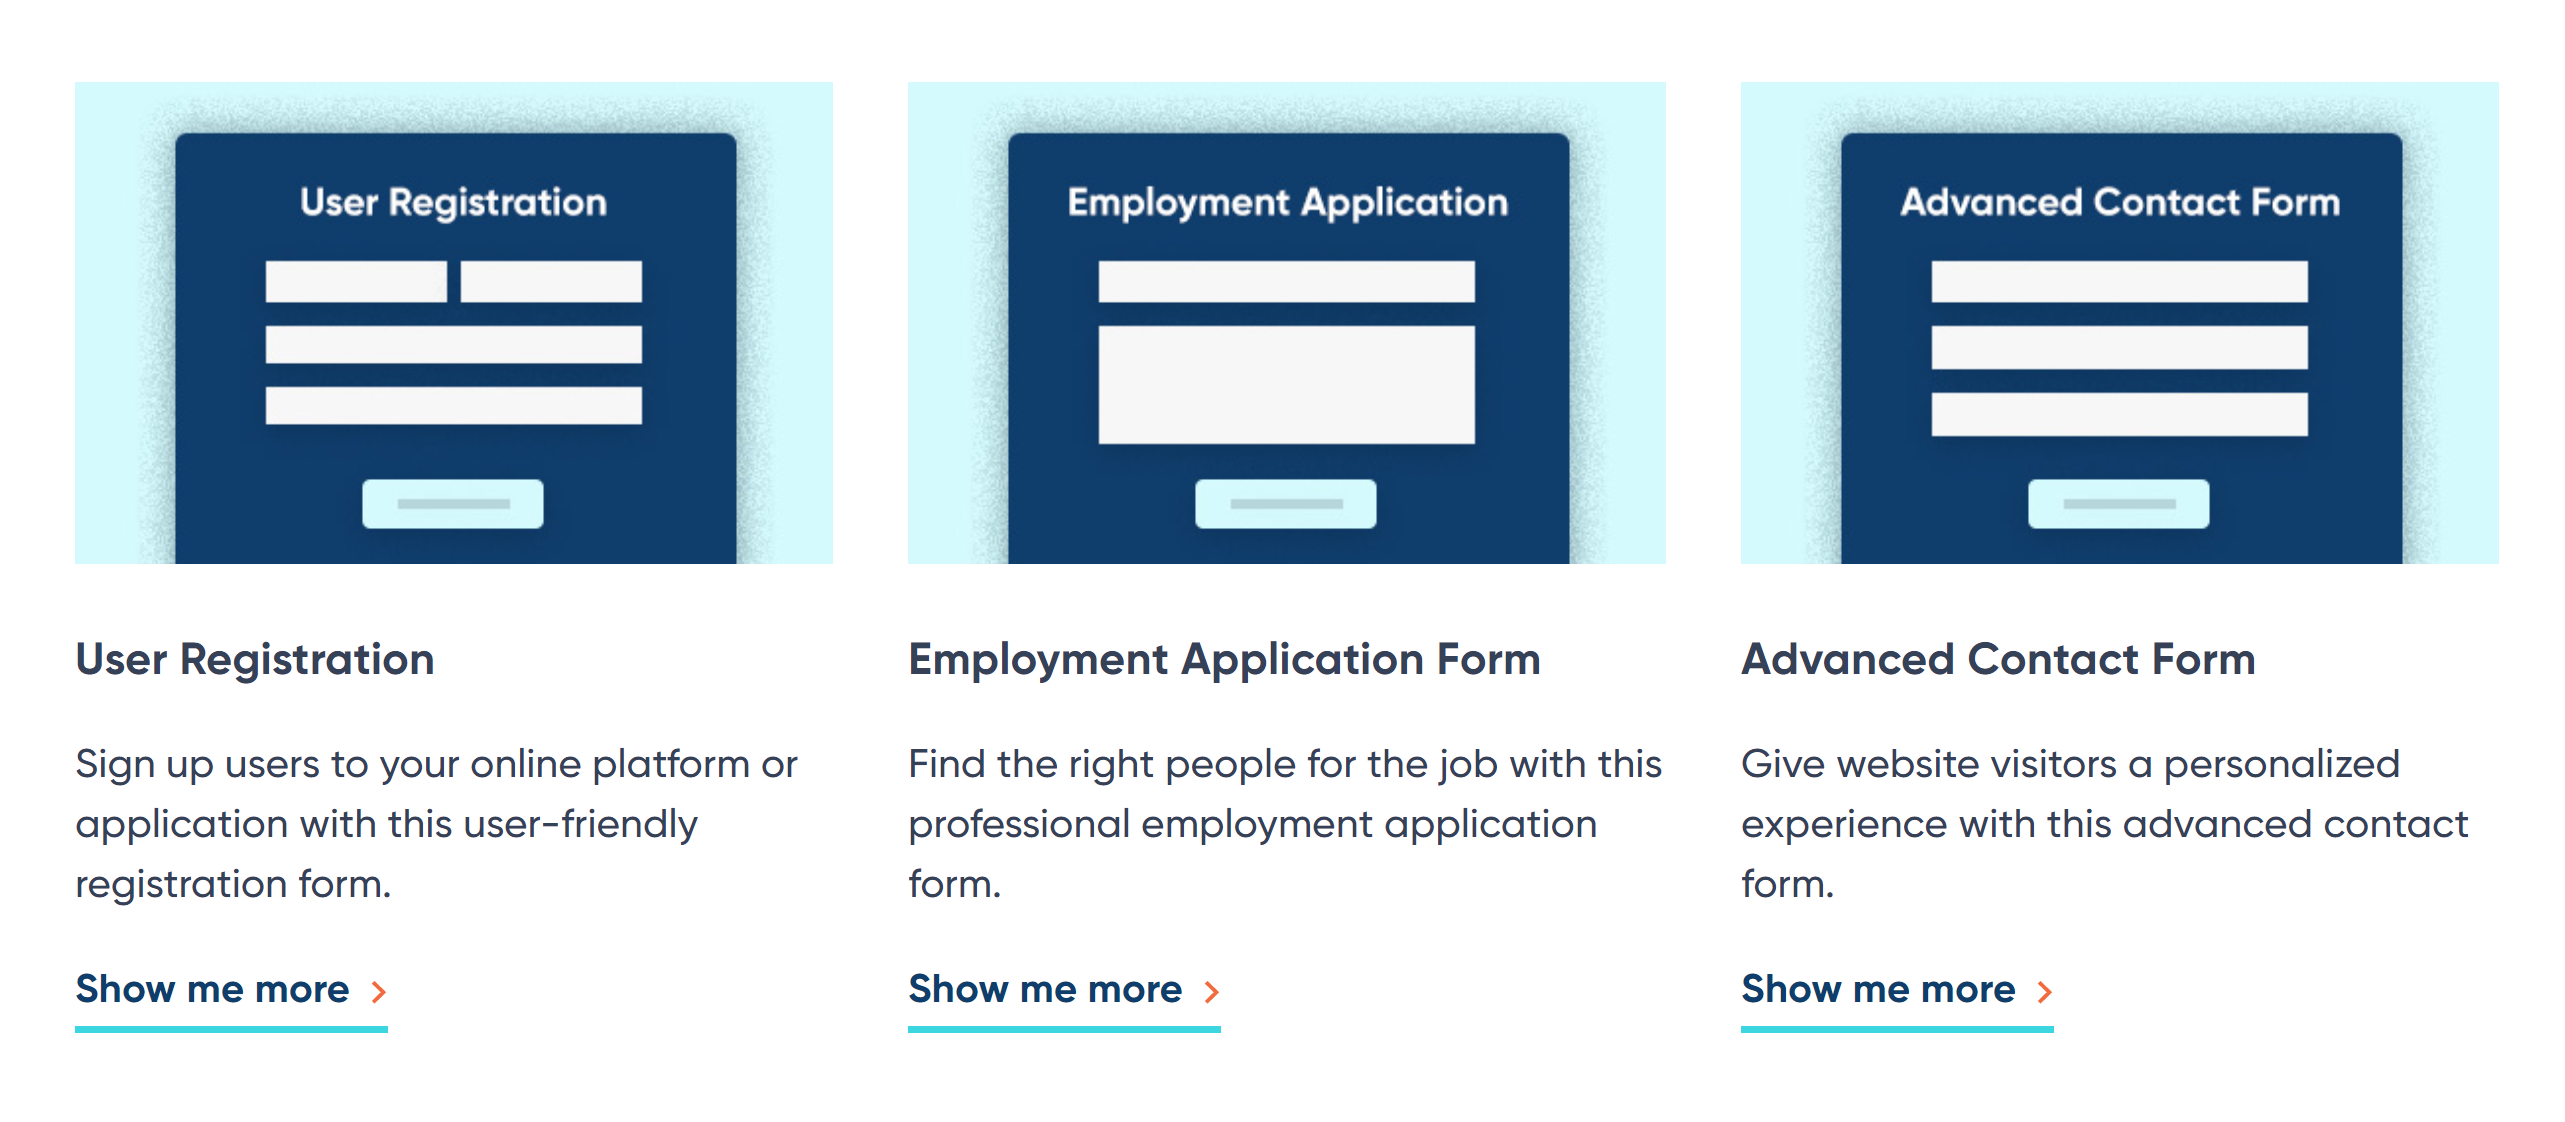
Our form template library is packed full of stylish ready-to-use forms that convert. These form templates are totally customizable, and can all be imported and used on your site for free. From basic contact forms to payment and user-registrations forms, we have something for every project.
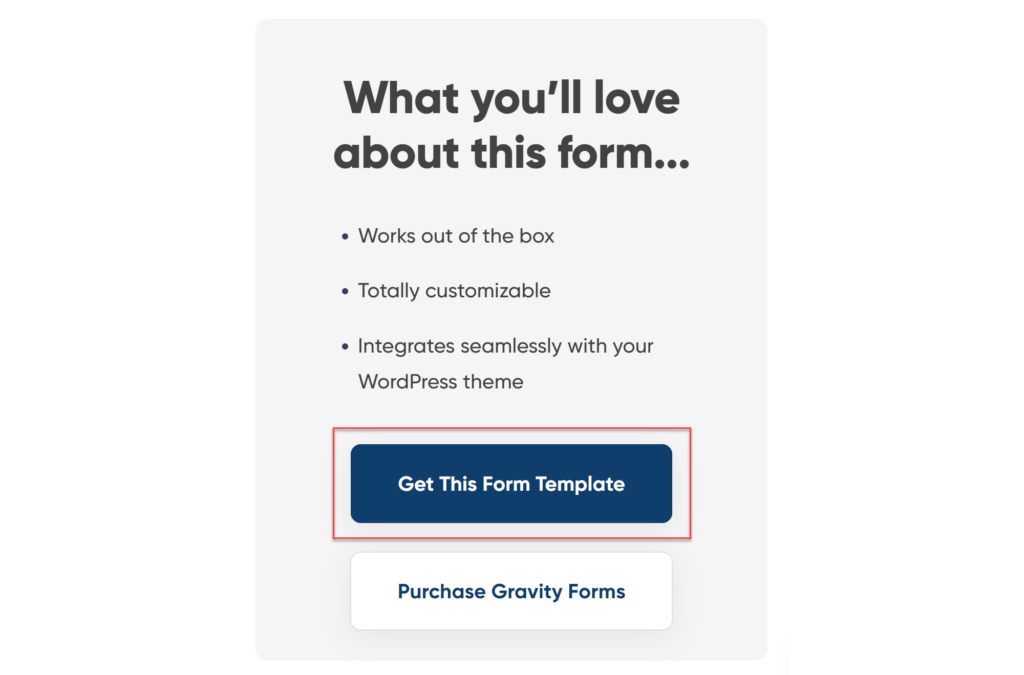
To import a form template to your WordPress website, select the form you would like to use from the template library and click on the Get this Form Template. The form will then download to your computer as a .JSON file.
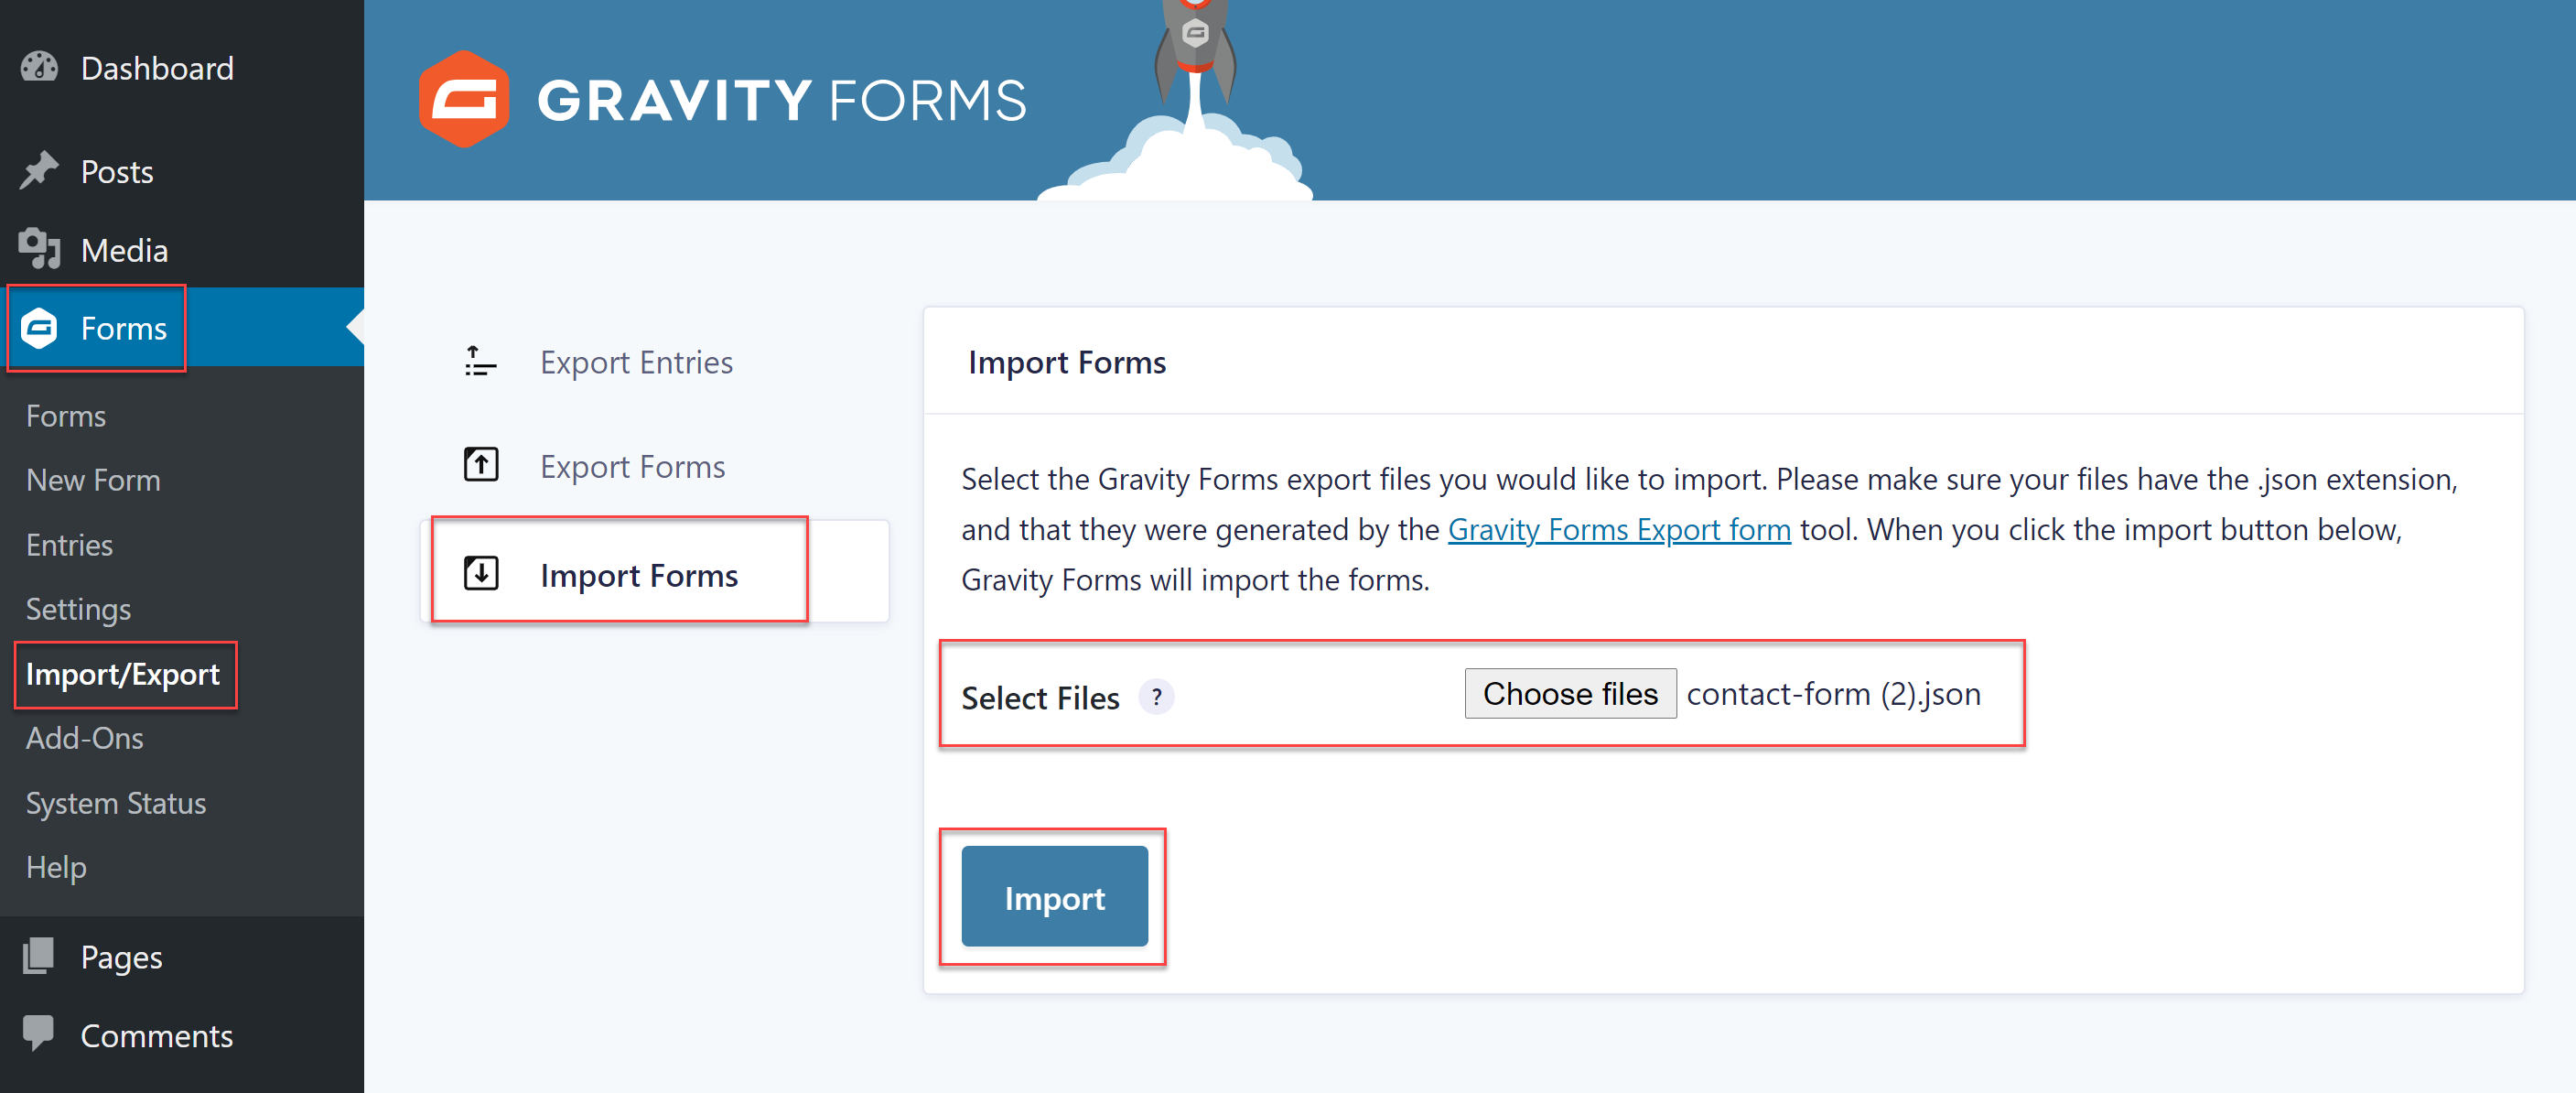
Next, open your WordPress dashboard and select Forms > Import/Export > Import Forms > Choose Files. Select the form template file from your computer and hit Import.
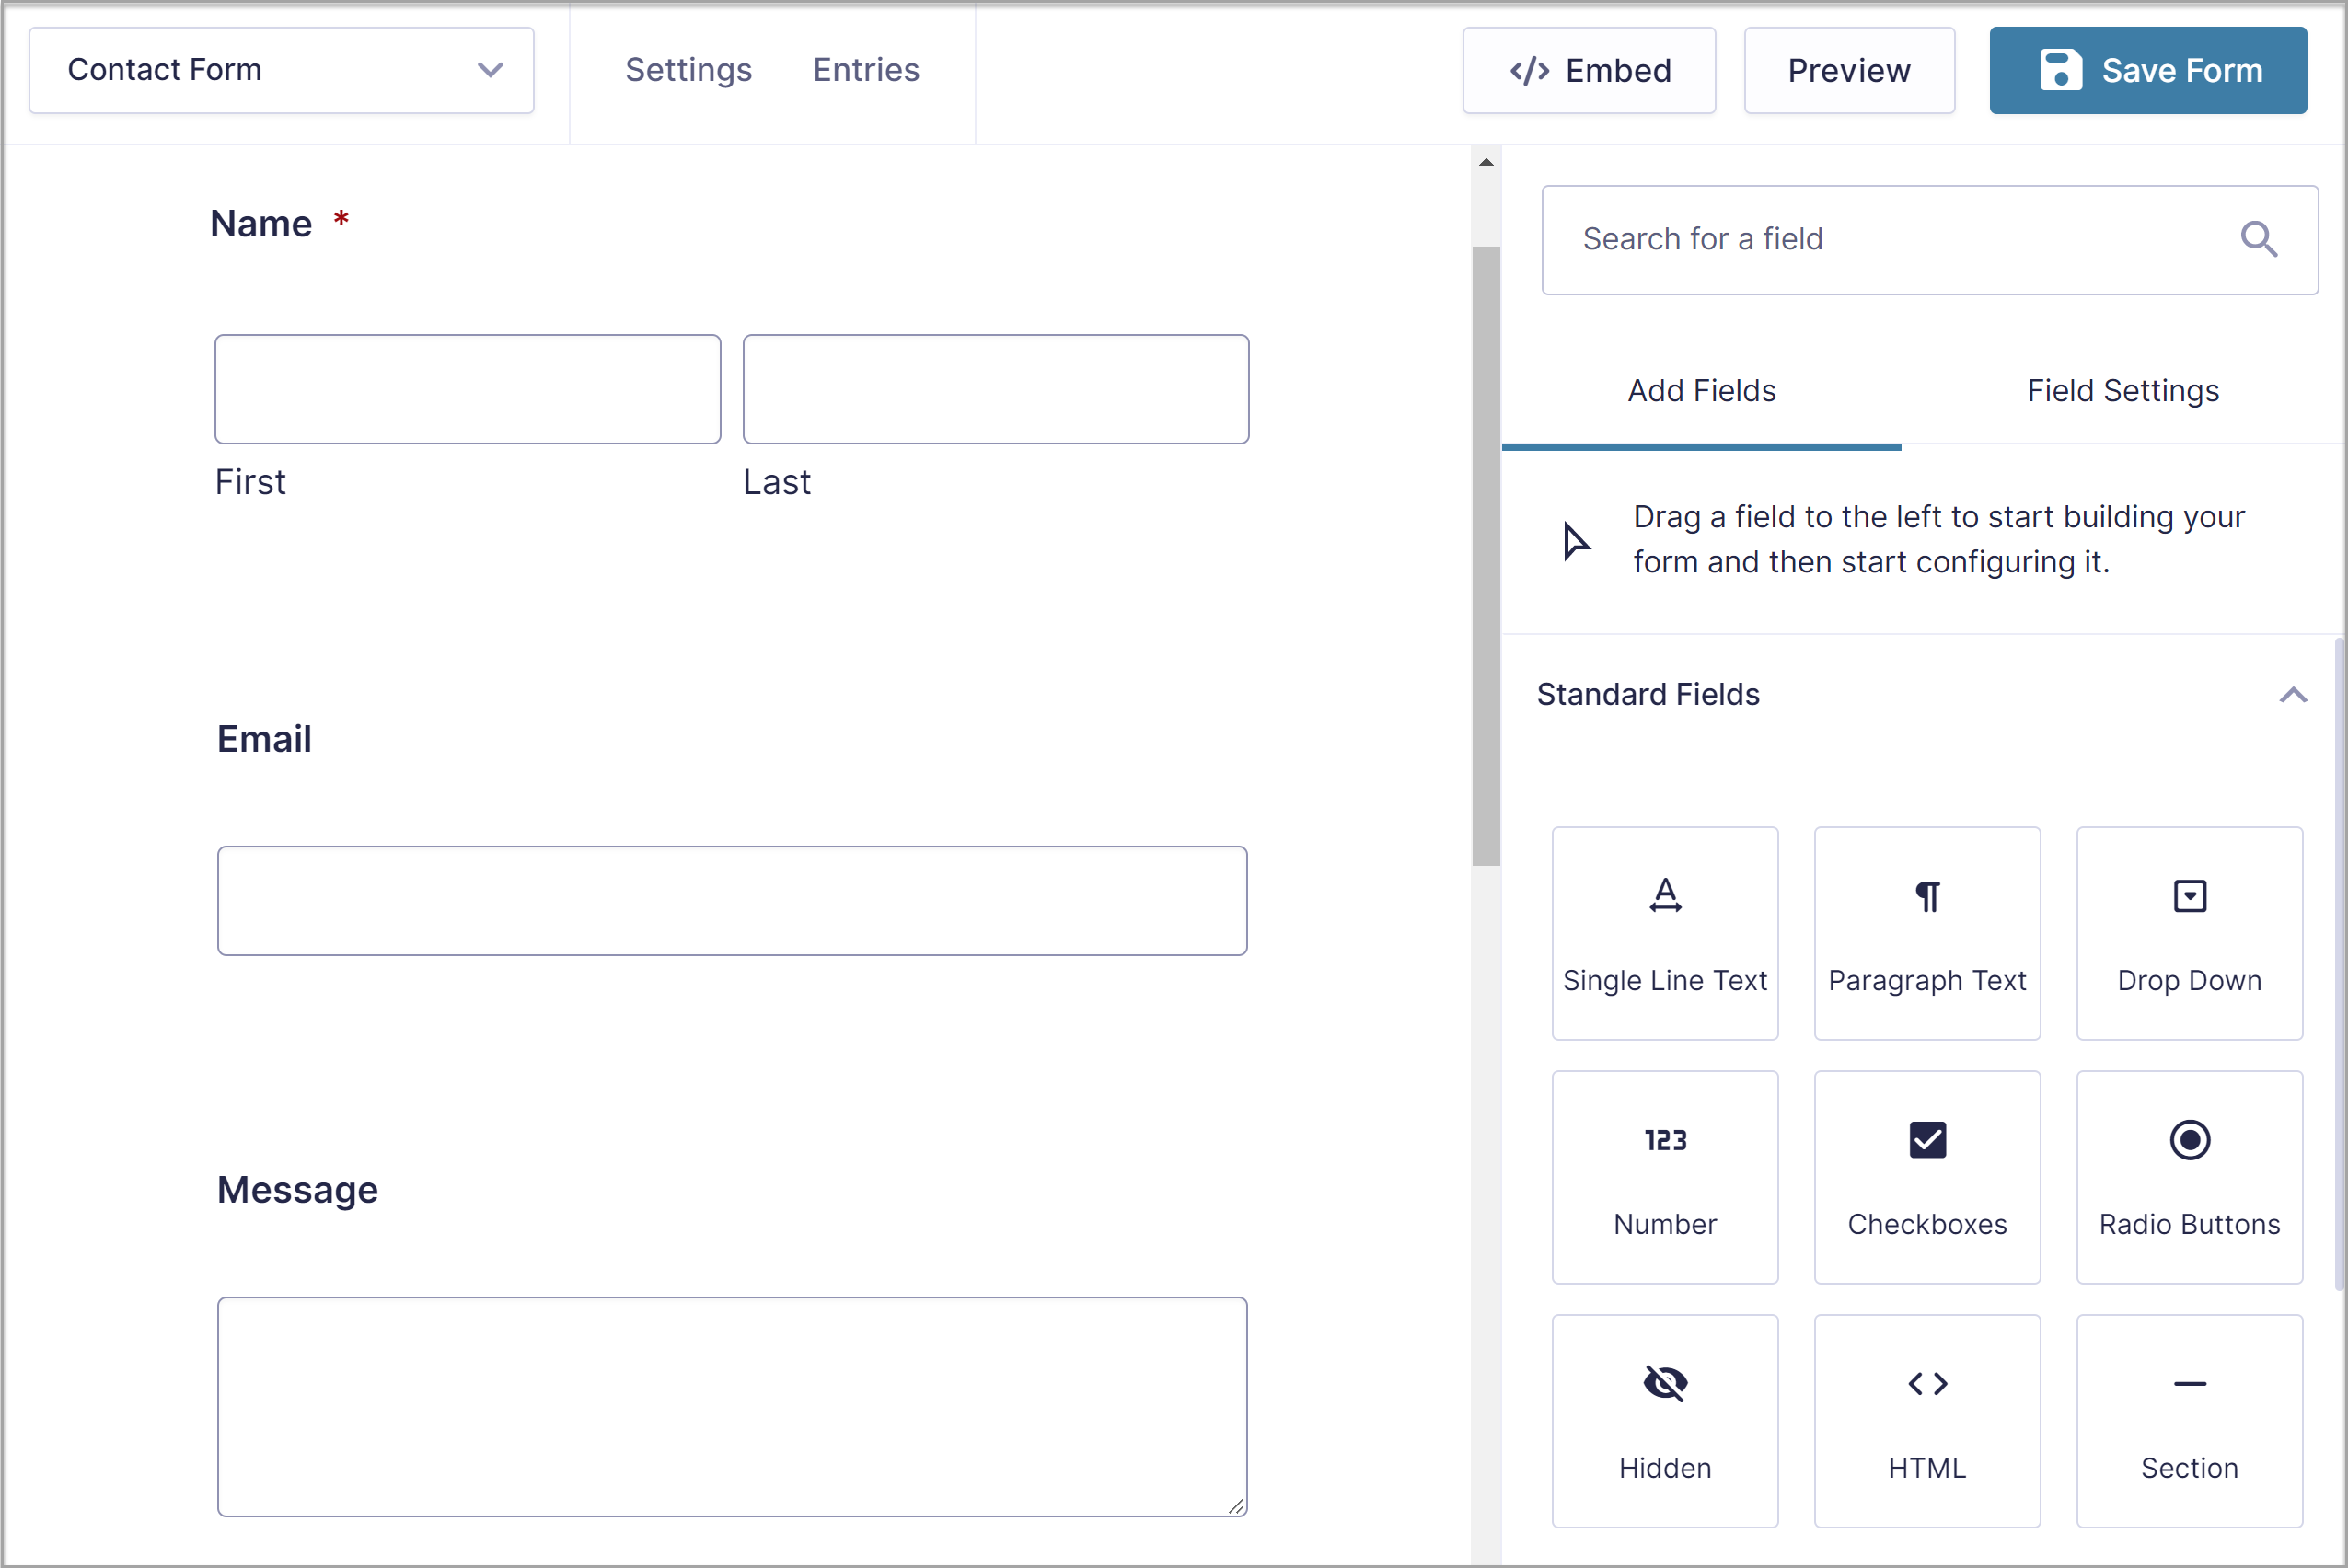
The form template will now be ready to customize within the form editor.
As mentioned, all the templates are totally customizable – within the form editor you can easily add, edit, or delete any of the form fields, by simply dragging and dropping them into and around the editor canvas.
You can also configure each of the fields’ settings, enabling you to customize the form to your specific requirements.
We have created a number of Starter Guides to help you get your new project off the ground using our form templates. These include…
- Starter Guide: How to Import and Customize a Basic Contact Form
- Starter Guide: How to Create a Webinar Registration Form
- Starter Guide: How to Create a Donation Form
- Starter Guide: How to Create a Request a Quote Form
- Starter Guide: How to Create a Survey with Gravity Forms
- Starter Guide: How to Set Up User Registration on your WordPress Website
Alternative Step 2: Create a Form From Scratch
Instead of using a form template, you can create a form from scratch within the form editor.
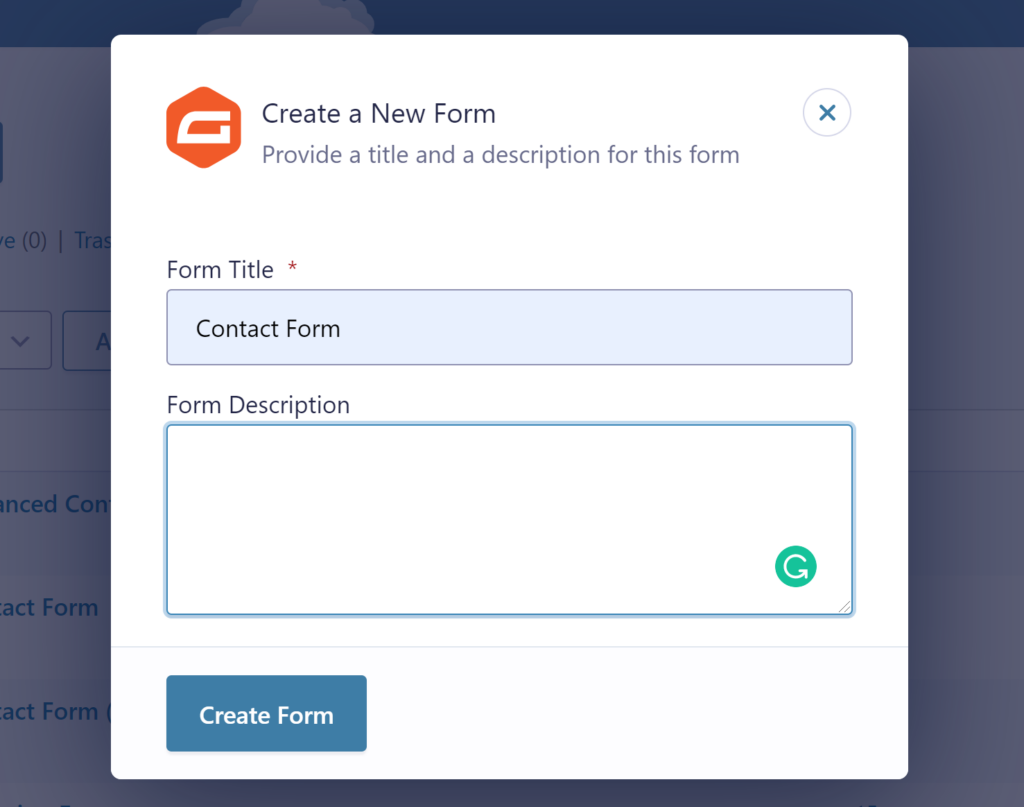
To do so, select Forms > Add New from within your WordPress dashboard and then give the new form an appropriate name.
In the form editor, you can then create your own form by dragging and dropping the form fields you require onto the editor canvas. Again, you can configure and personalize each field via the Field Settings.
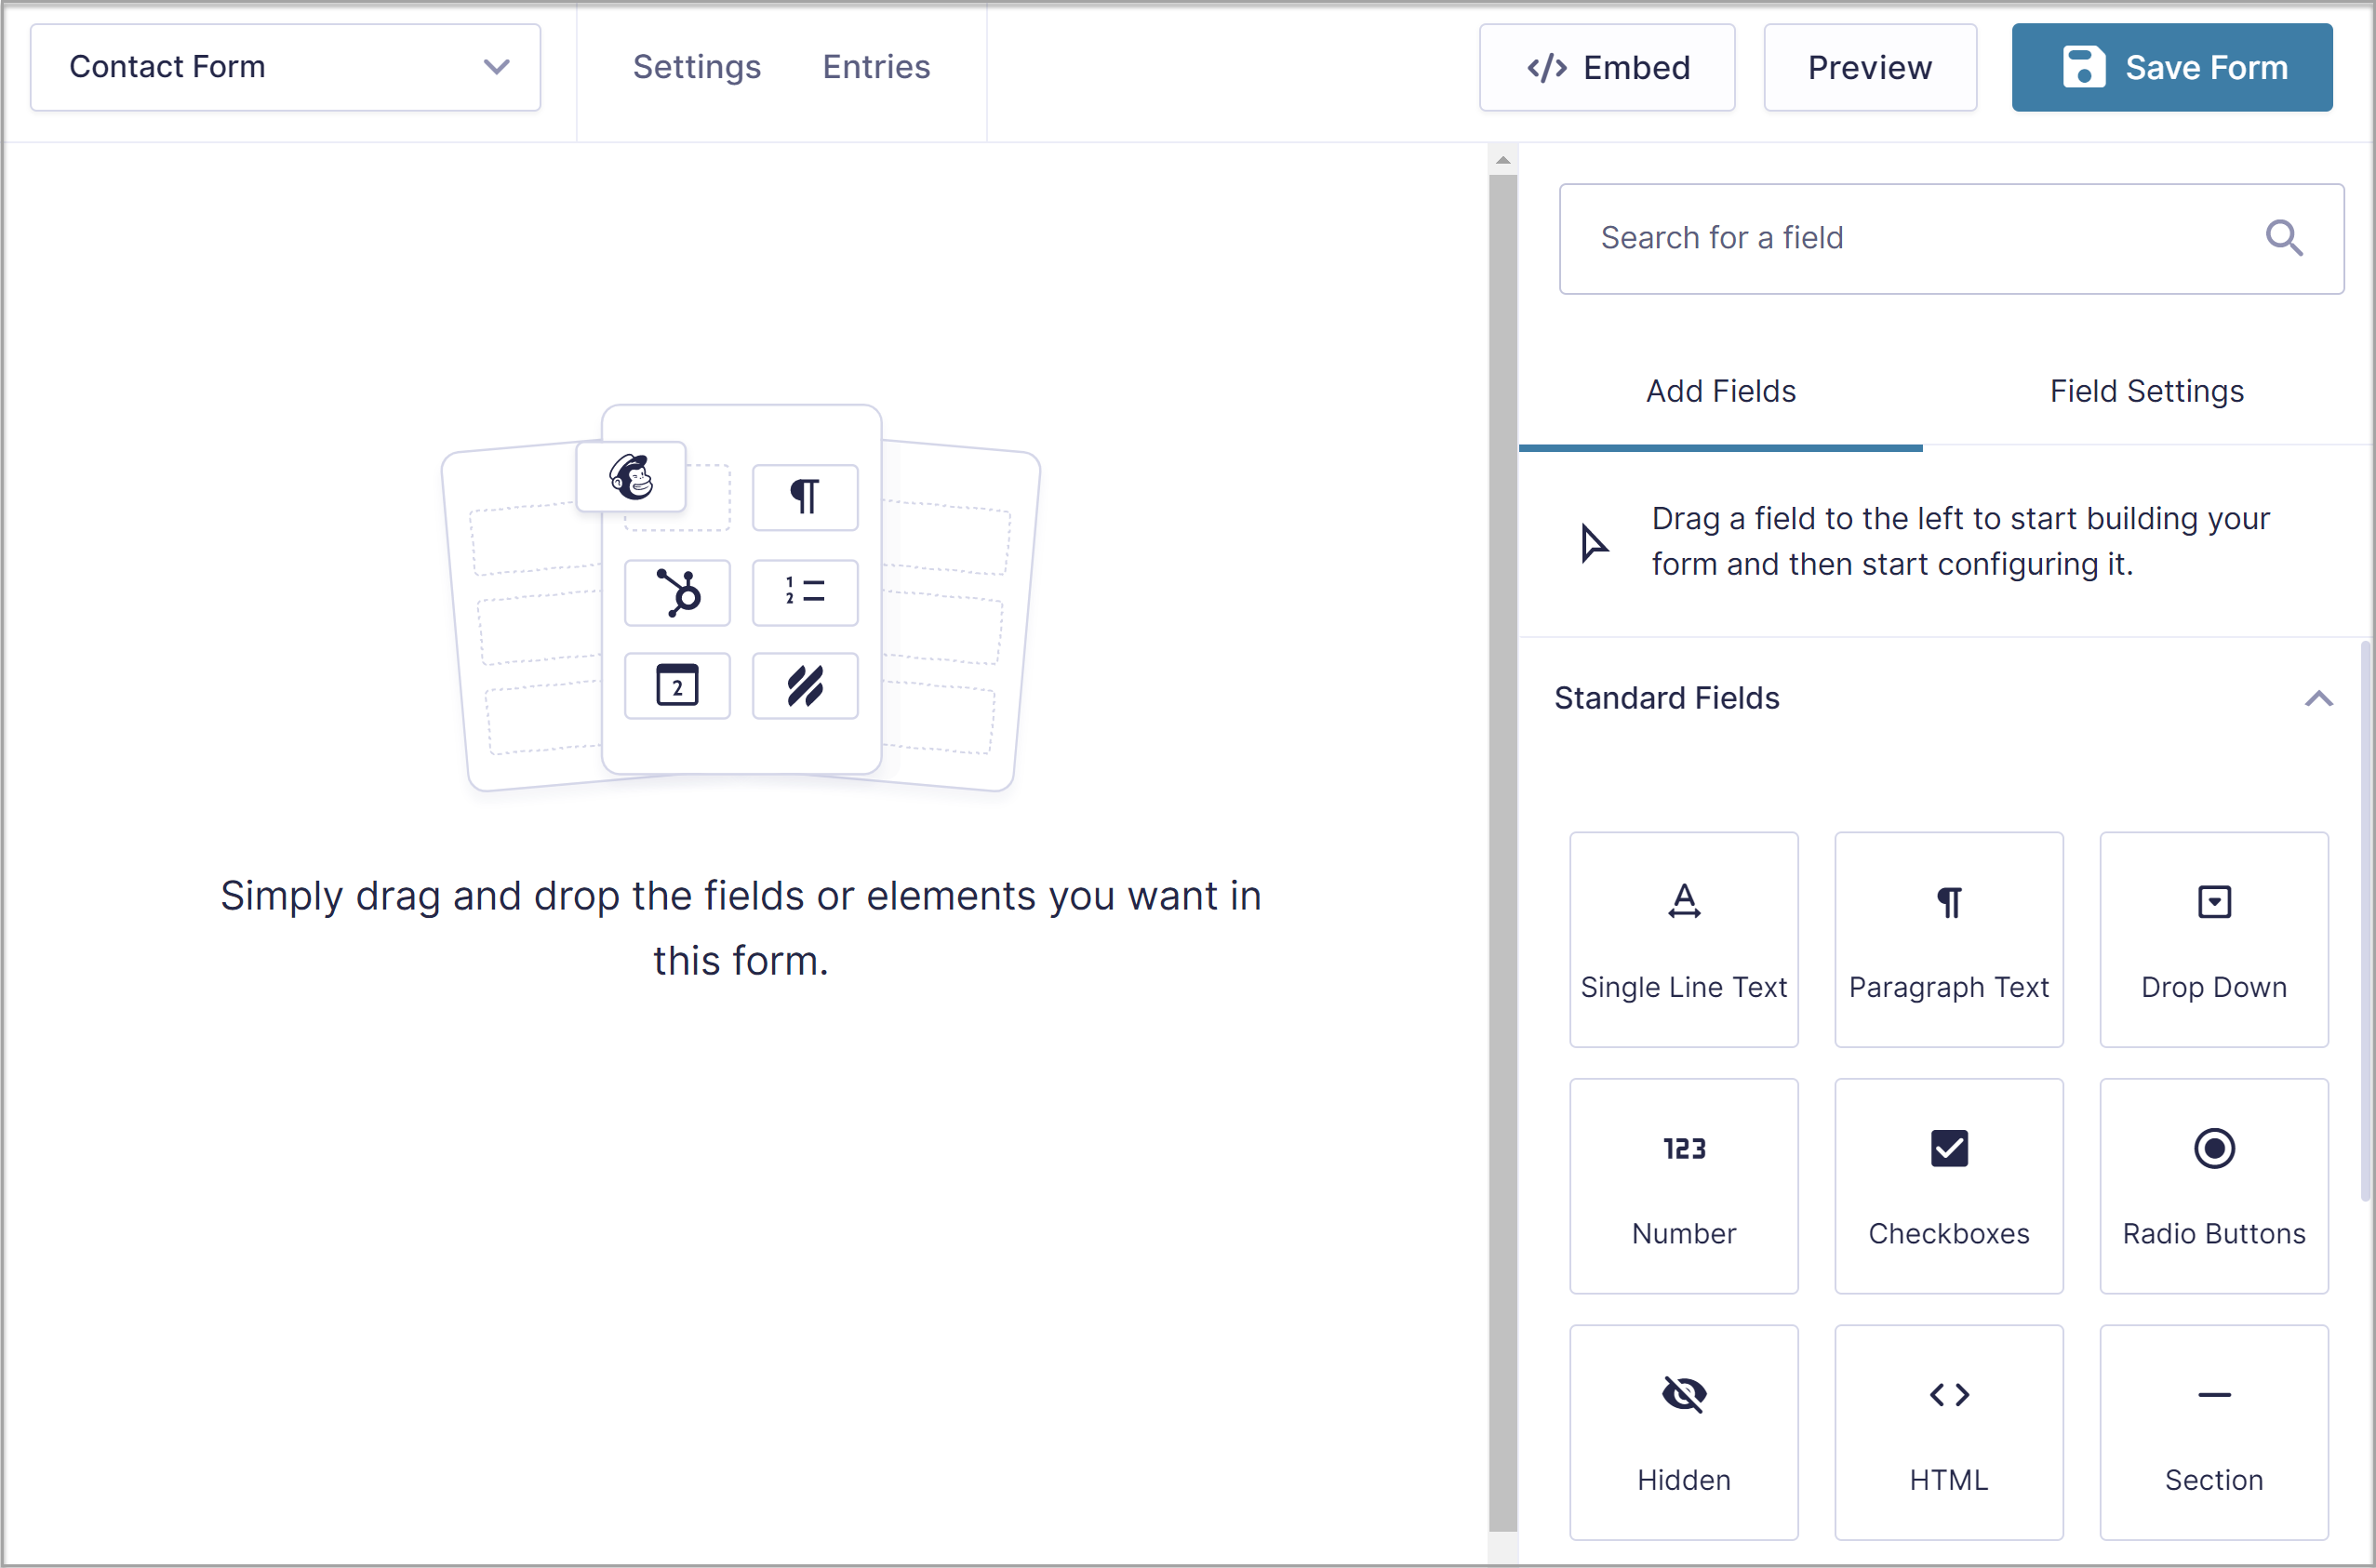
The selection of fields and features that you will find within the form builder is vast, and the opportunities for form design are endless. These ‘How to…’ tutorials from the blog will give you an idea of the available features and functionality that you can implement using Gravity Forms…
- How to Create a Multi-Page Form
- How to Add Images to a Form
- How to Accept File Submissions Through a Form
- How to Add reCAPTCHA to your Forms
- How to Collect and Store Consent with the Gravity Forms Consent Field
For more information on how to create a form from scratch, have a read of this article – How to Create a Form in WordPress – or for further in-depth detail, have a read of our Docs.
Bonus Step: Install an Add-On (or Three!)
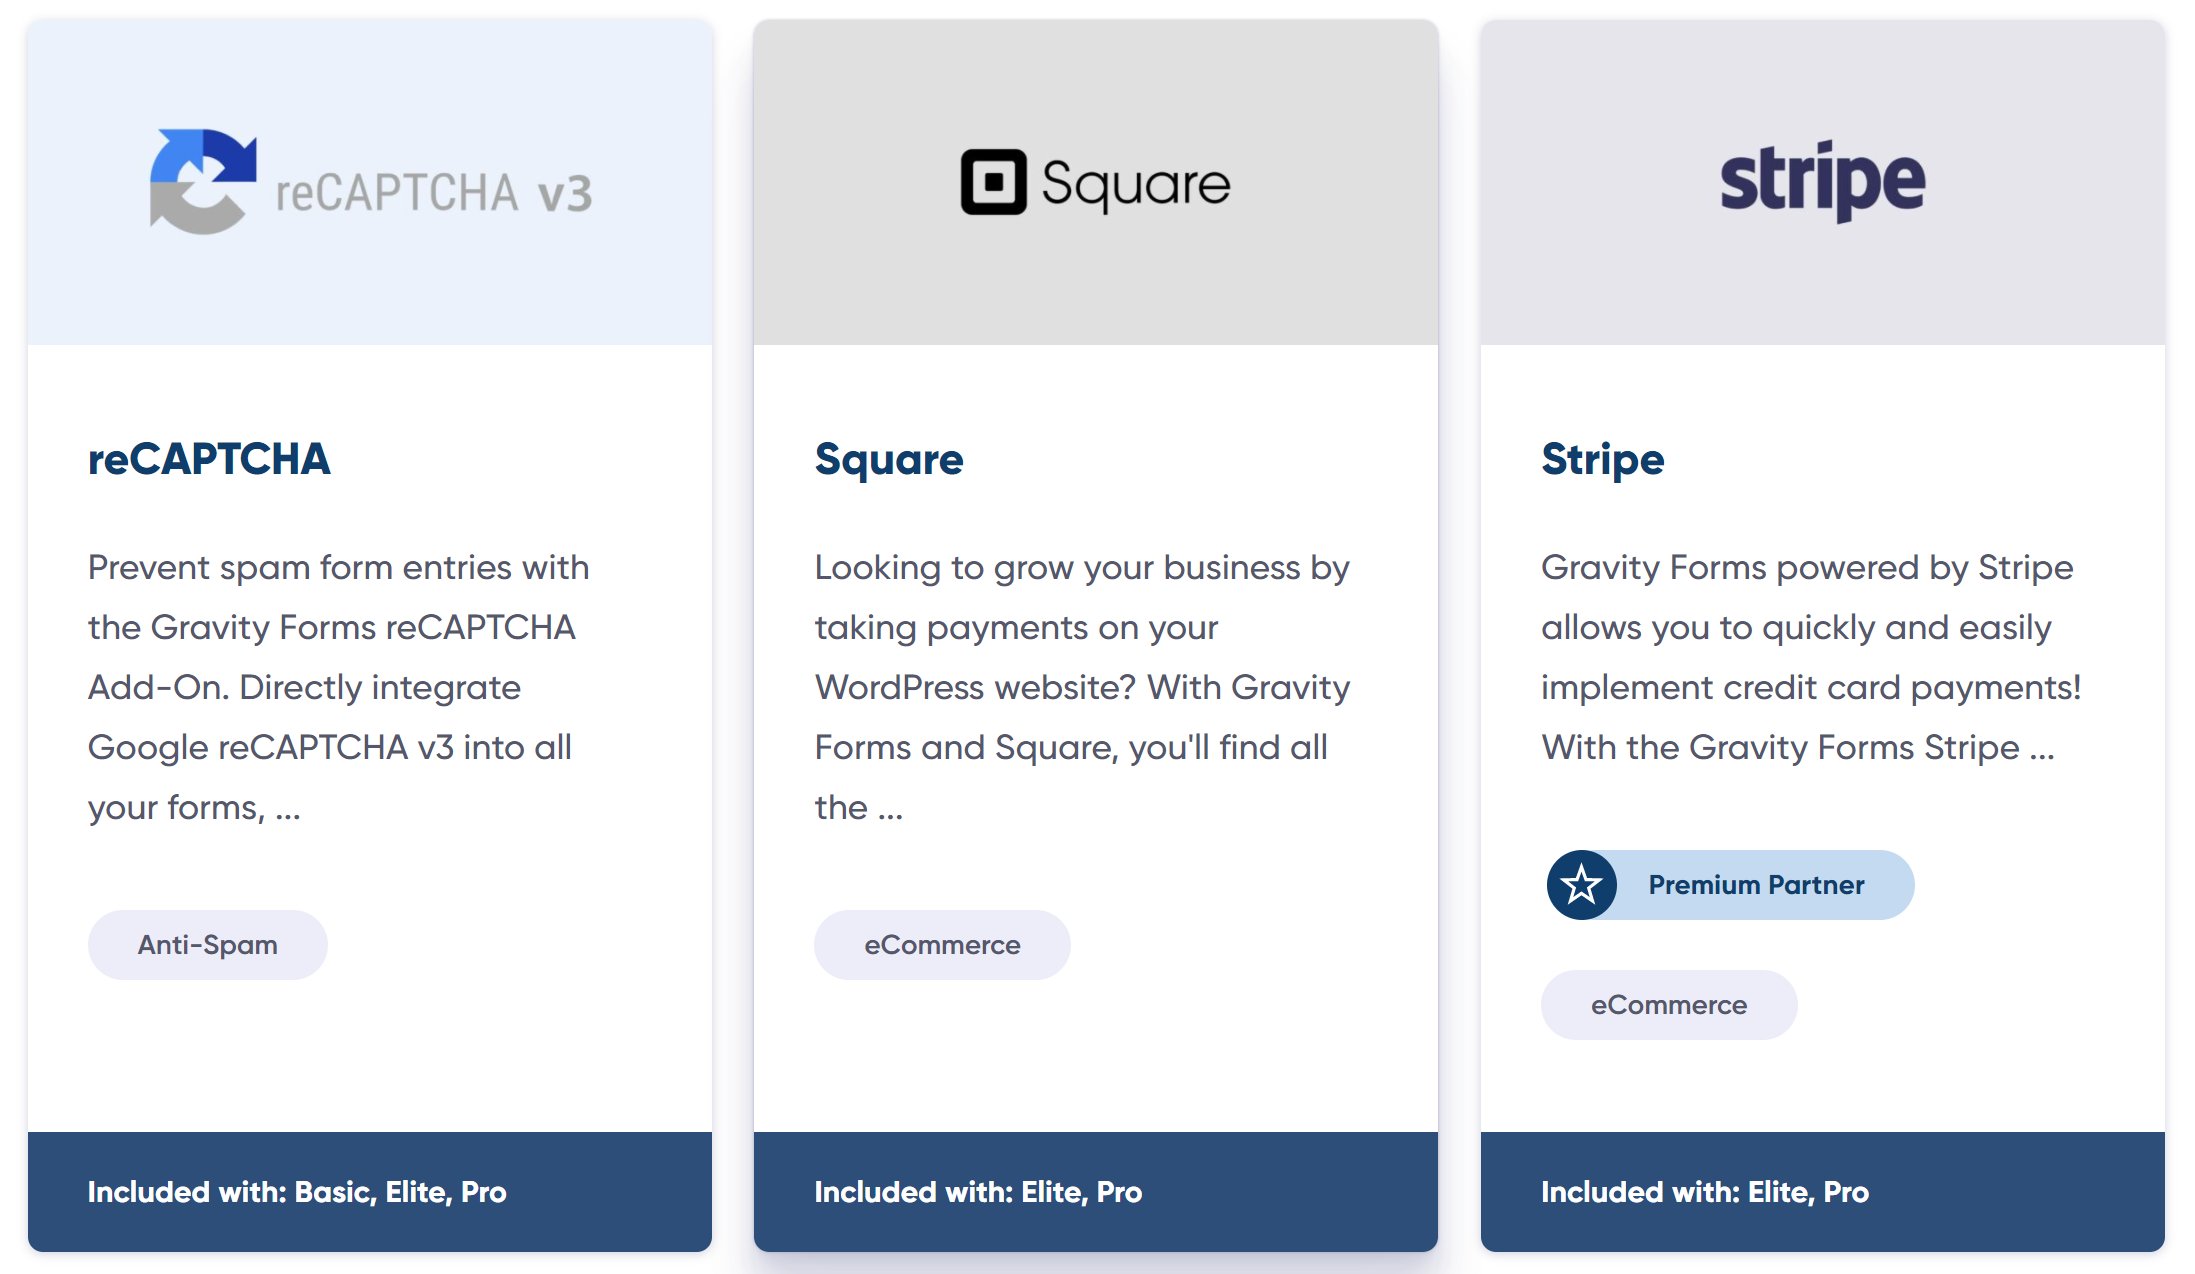
One of Gravity Forms’ key features is its wide assortment of add-ons, which enable you to easily integrate your forms with third-party services.
You can sync a form with an email marketing provider or CRM to help manage your leads, integrate Gravity Forms with a payment processor and start accepting payments on your site, create polls, quizzes, and surveys for your website visitors, or connect with Zapier to gain access to thousands of further third-party integrations.
To install any Gravity Forms Add-On, within your WordPress dashboard select Forms > Add-Ons to navigate to the Gravity Forms Add-On browser. Here you can browse the add-ons and Install > Activate any you would like to use that are accessible to your license type.
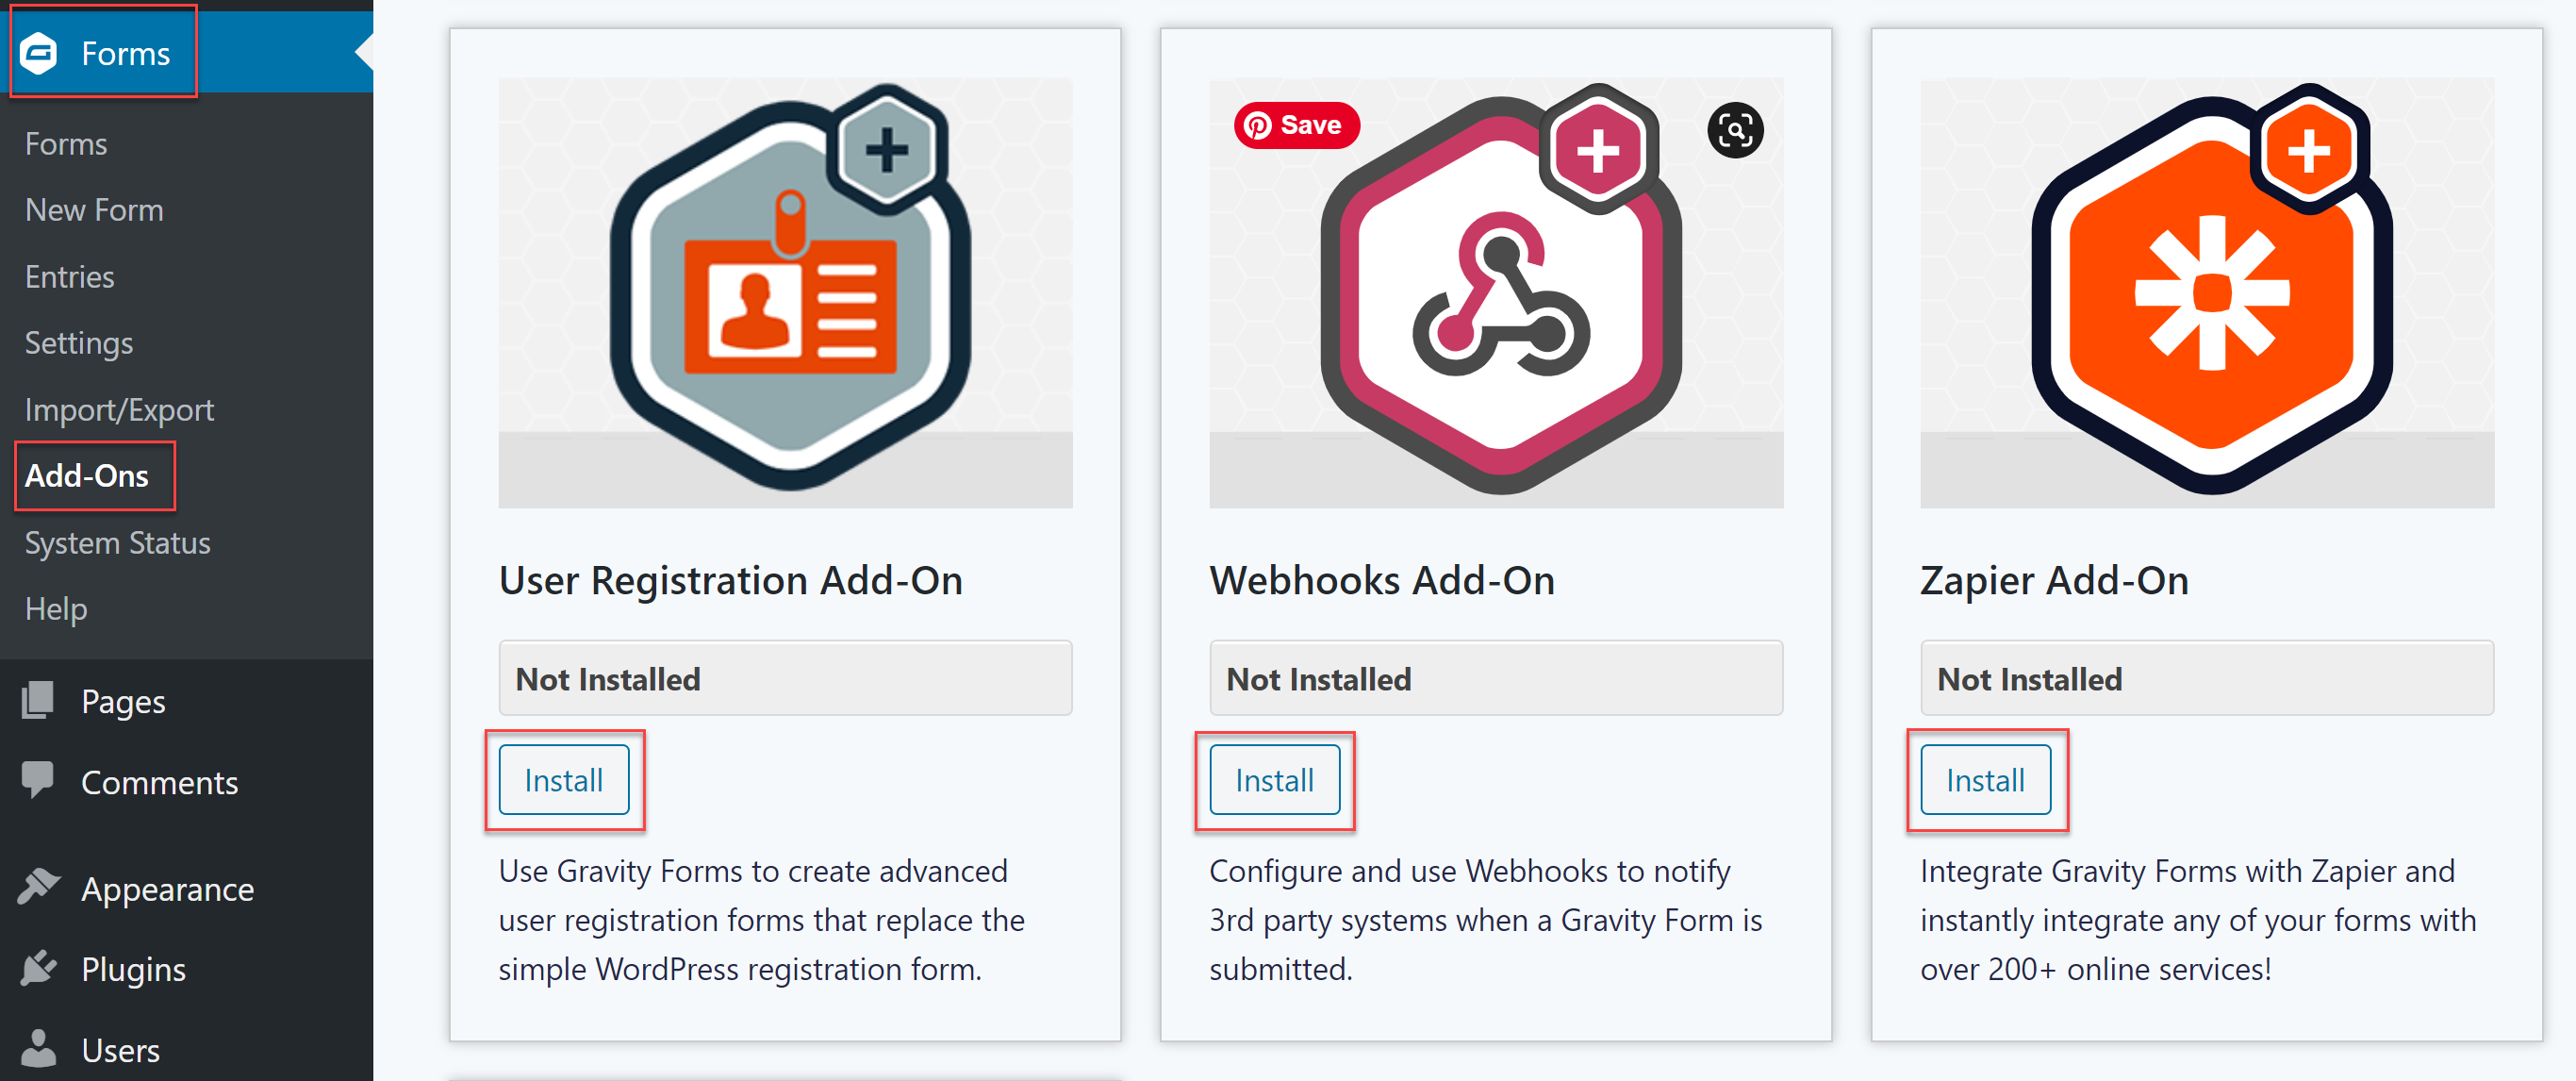
Depending on the add-ons you have selected, you may now need to configure the Gravity Forms Settings to complete integration, as well as create Form Feeds to sync your forms with the specific add-ons.
For more information on how to install and connect each individual add-on, check out our extensive add-on documentation.
Step 3: Embed Your Form in Your WordPress Website
Once you have created your form to your exact specifications and installed any necessary add-ons, the last step is to embed the form in your WordPress website.
Within the form editor you’ll find the Embed Form flyout, which gives you the option of selecting to display the form on a new or existing page or post. To get started with the Embed Form flyout, within the form editor simply click on Embed, which you will find in the top right corner of the screen.
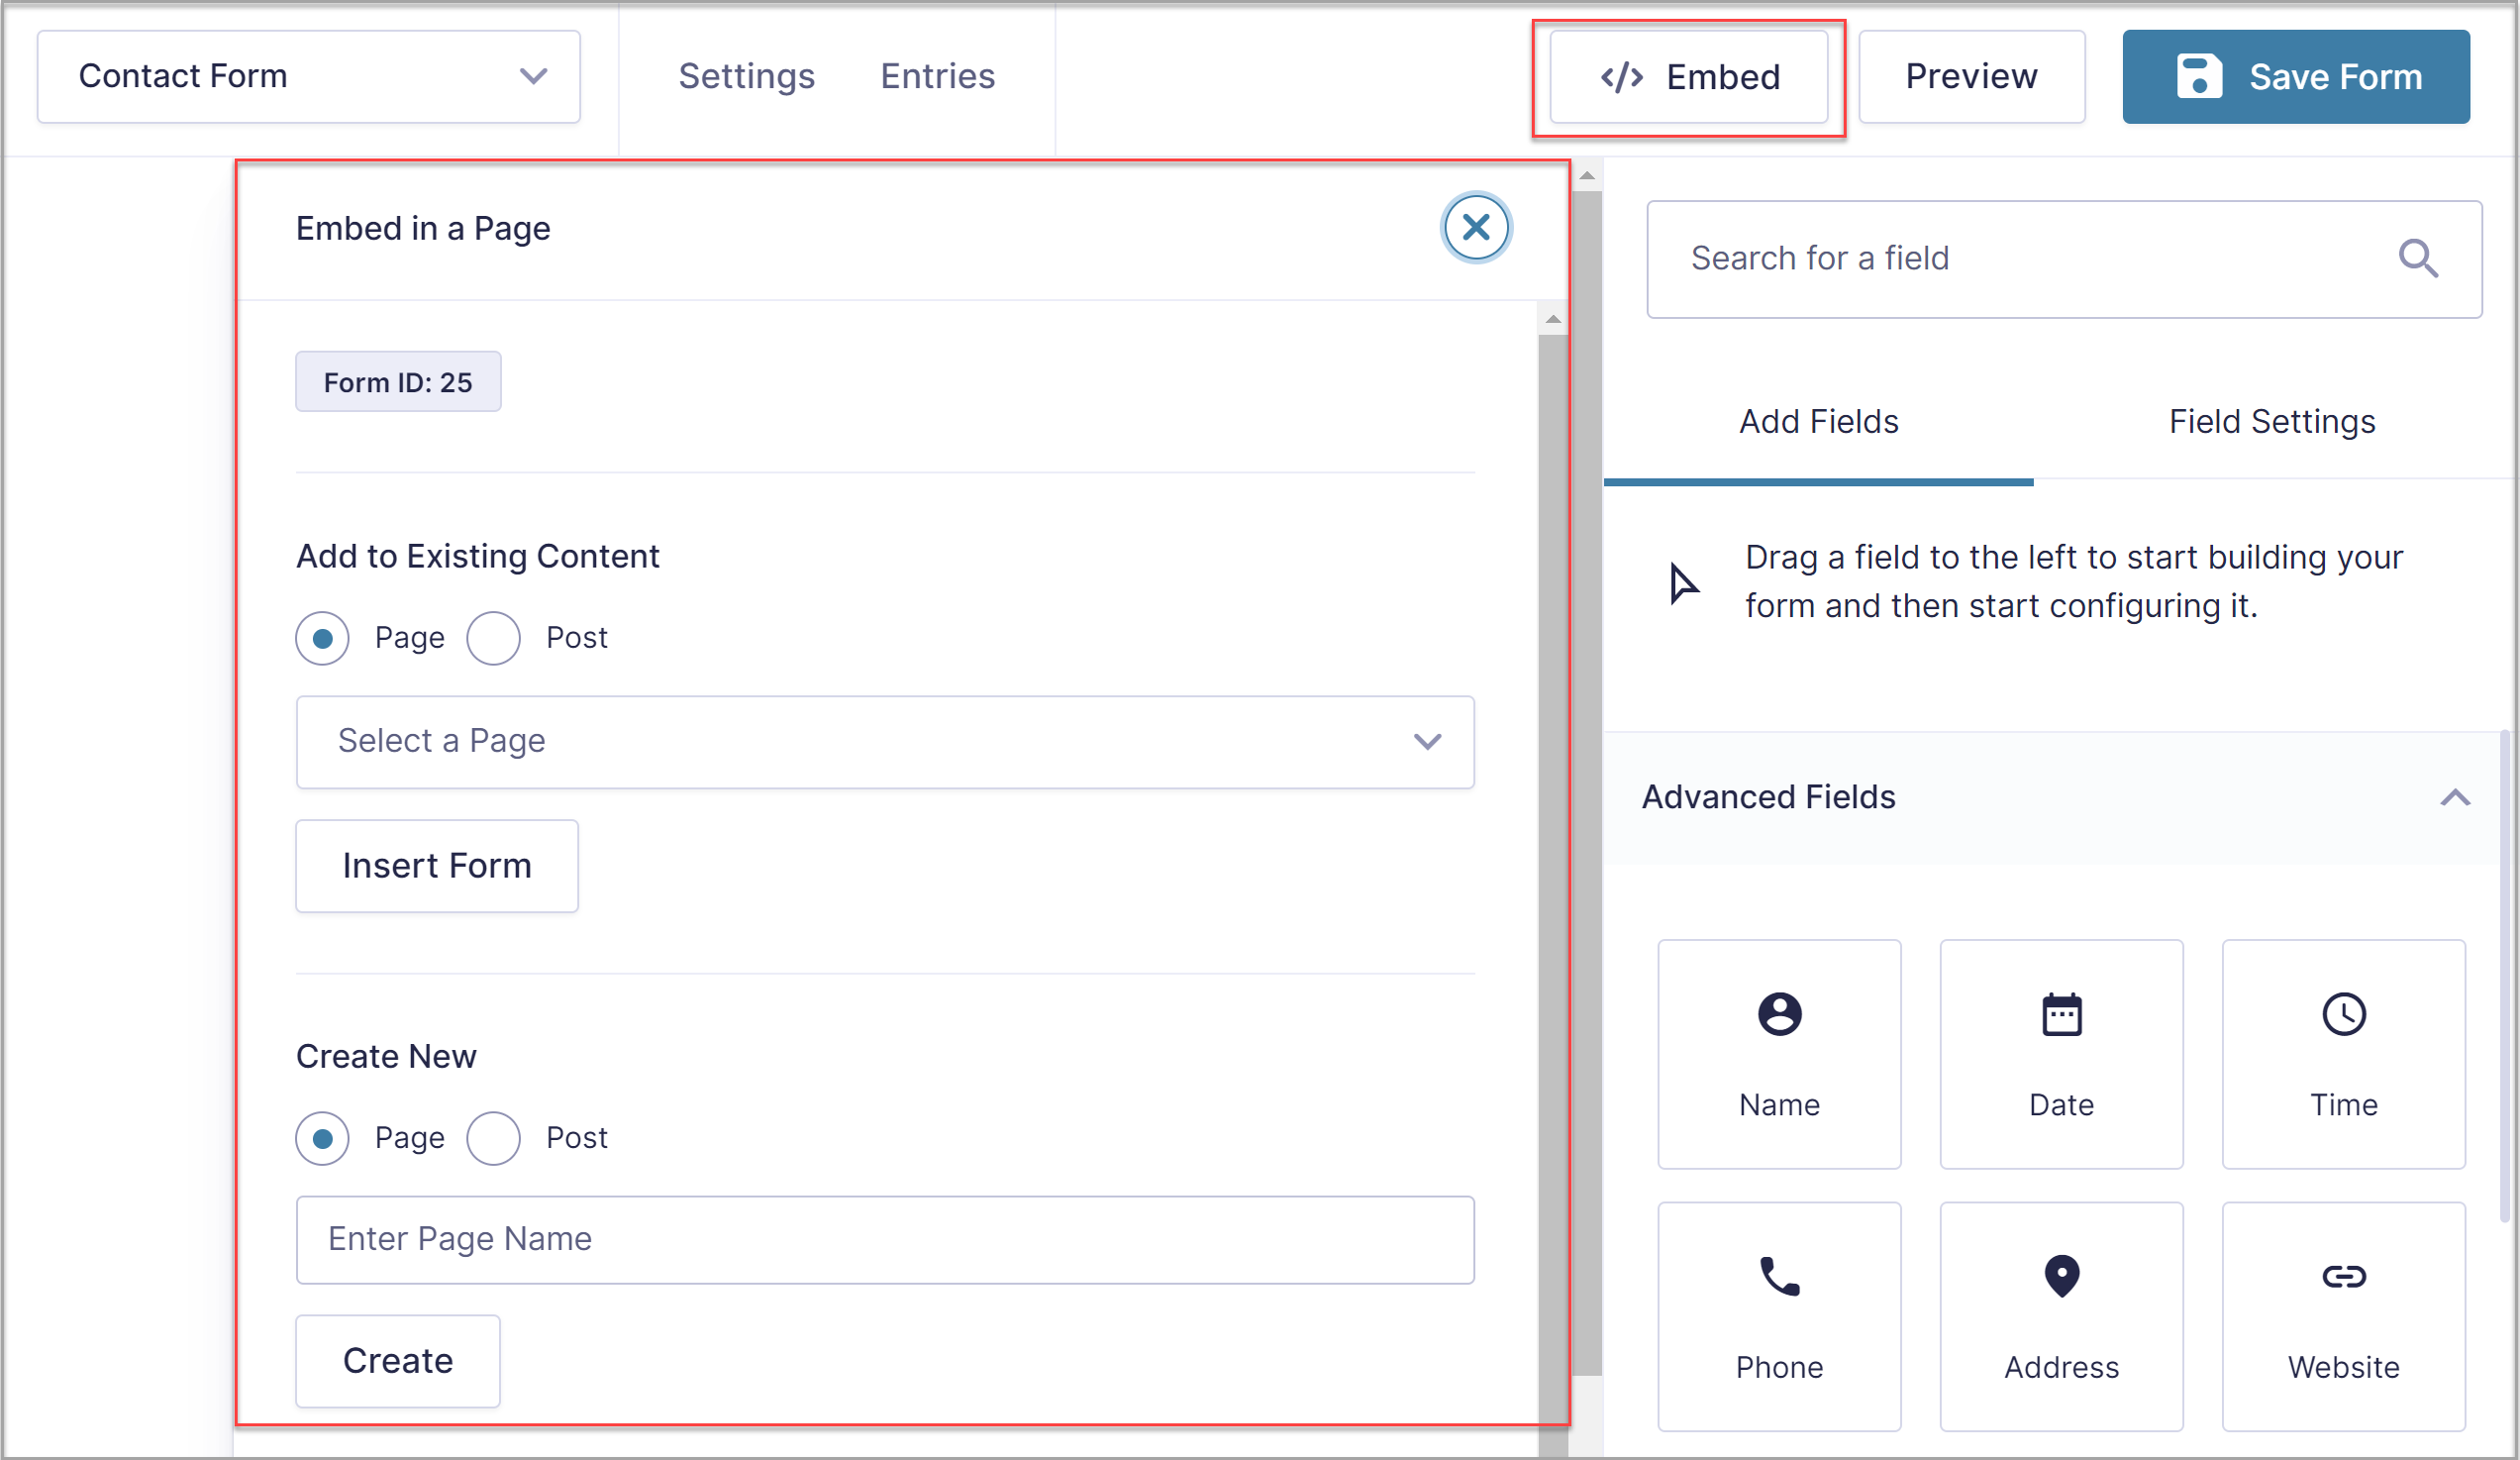
Then, within the Embed Form flyout select the page or post where you would like to add your form. Alternatively, you can choose to create a new page or post. Now select Insert Form (or Create) and the WordPress editor will automatically open your new or existing page or post.
If you have chosen to embed your form in an existing page or post, you will find the Gravity Forms block highlighted under Embeds. Drag and drop the block, positioning it within the existing content where you deem appropriate.
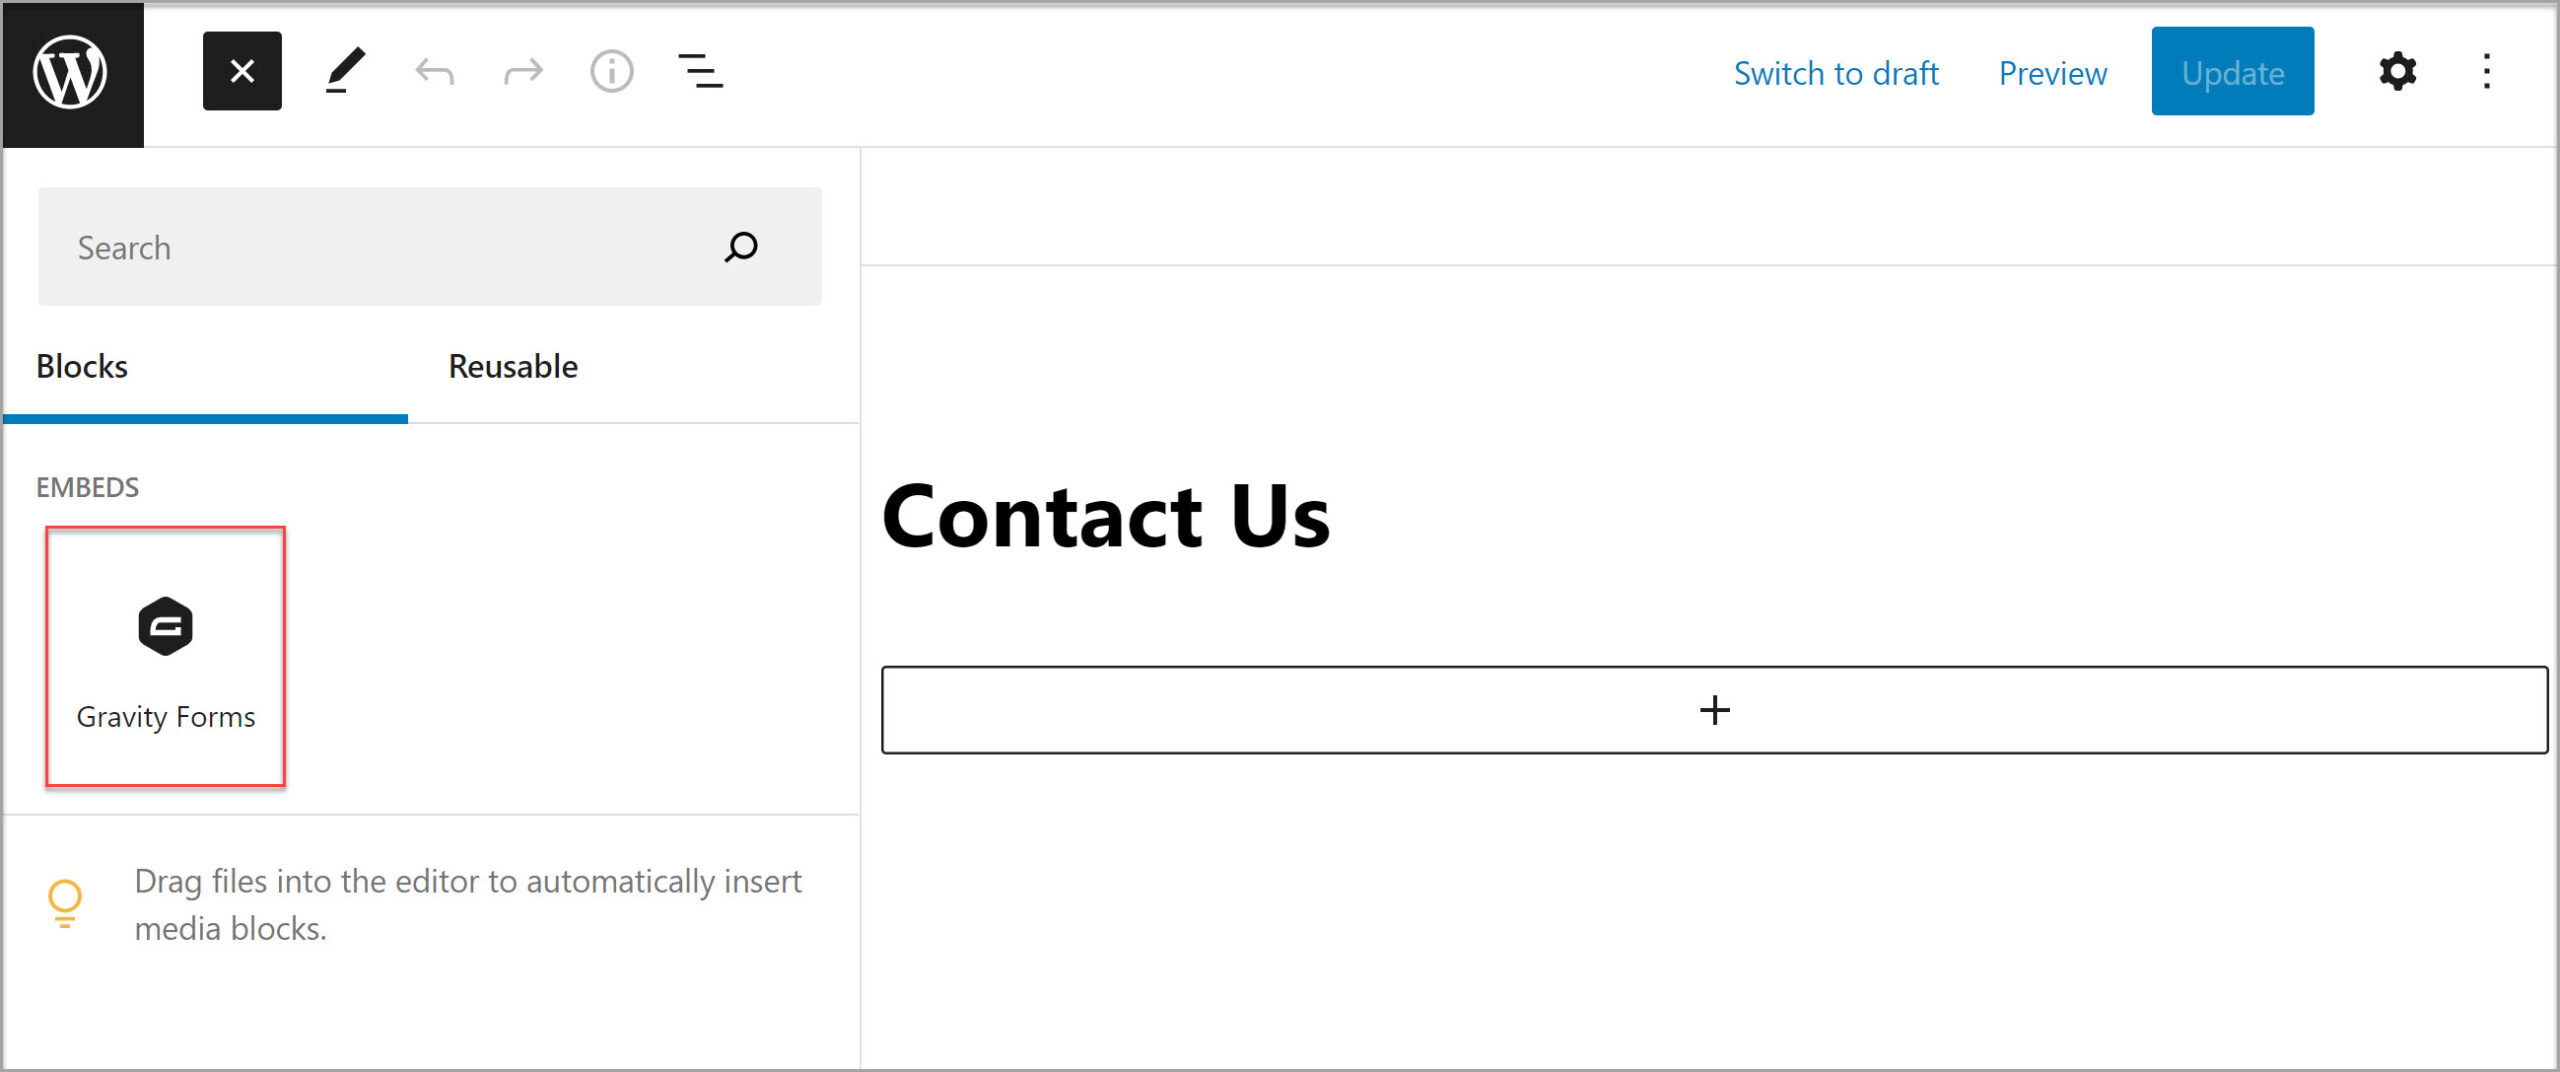
If you have chosen to create a new page or post, you will find the form automatically embedded within the Block editor.
If needed, you can use the Block Options to control how the form appears on your site. A few options include:
- Toggling the title of the form on or off
- Toggling the description of the form on or off
- Embedding the form on the front-end using AJAX, so confirmations and changes between form pages can happen without page reloads
When you’re done going through these options, save your changes and then view your page to see the form in action.
For more help with this process, read this article – How to Embed a Form in WordPress. If you use the Classic Editor, check out this helpful article in the docs – Adding a Form Using the Classic Editor.
Gravity Forms Resources
As you can see, getting started with Gravity Forms is a very quick and easy process. But Gravity Forms is so much more than just a lead generation tool. So for those of you who are looking to extend your forms or create advanced solutions, here are some resources and extra reading to help…
- Dedicated Gravity Forms User Guides – View our New, Intermediate, and Advanced User Guides, find out which add-ons we recommend you install with your plan, and access links to further support materials based on your experience and skillset.
- Video Library – Our detailed Video Library walks you through how to use our most popular and useful features. Video topics include:
- The Gravity Forms Documentation Site – Find in-depth documentation on every aspect of the form builder, and how to extend its functionality, including:
- The Gravity Forms Blog – Keep up-to-date with our action-packed blog that regularly shares a range of articles, from Starter Guides and How Tos, to Case Studies, and Announcements.
- Gravity Forms Customer Case Studies – Our blog has published a number of customer case studies showcasing interesting forms, features, and integrations. These case studies also share insight into the agencies behind the forms and how they use Gravity Forms on a daily basis – truly interesting reads!
- Gravity Forms, Gravity Flow, and the National Compassion Fund
- An Online Training Course (Gravity Forms, Zapier, and Asana)
- Creating an Accessible Application Form for a Government Agency
- Generating Leads with Gated Content Using Gravity Forms and Gravity Wiz
- Building a Webinar Registration System with Gravity Forms and Zapier
- Gravity Forms Third-Party Certified Add-Ons – The Certified Add-ons provide extra features and functionality not available in the Gravity Forms plugin, enabling you to further enhance and extend your forms, solve niche problems, and create unique solutions.
- The Gravity Forms Facebook Community – We have an active Facebook group where our community hangs out and discusses all things Gravity Forms. If you aren’t already a member then we’d love you to join us!
- Gravity Forms Support Team – And of course the fantastic Gravity Forms support team is always on standby, waiting to help you with any problems or questions you may have. Simply open a support ticket to get in touch and one of our team will take care of you!
Keep Up to Date With Gravity Forms News
To keep up to date with what’s going on at Gravity Forms, make sure you sign up to our newsletter, where we share monthly updates, top news and announcements, resources, articles from the blog, and much more…

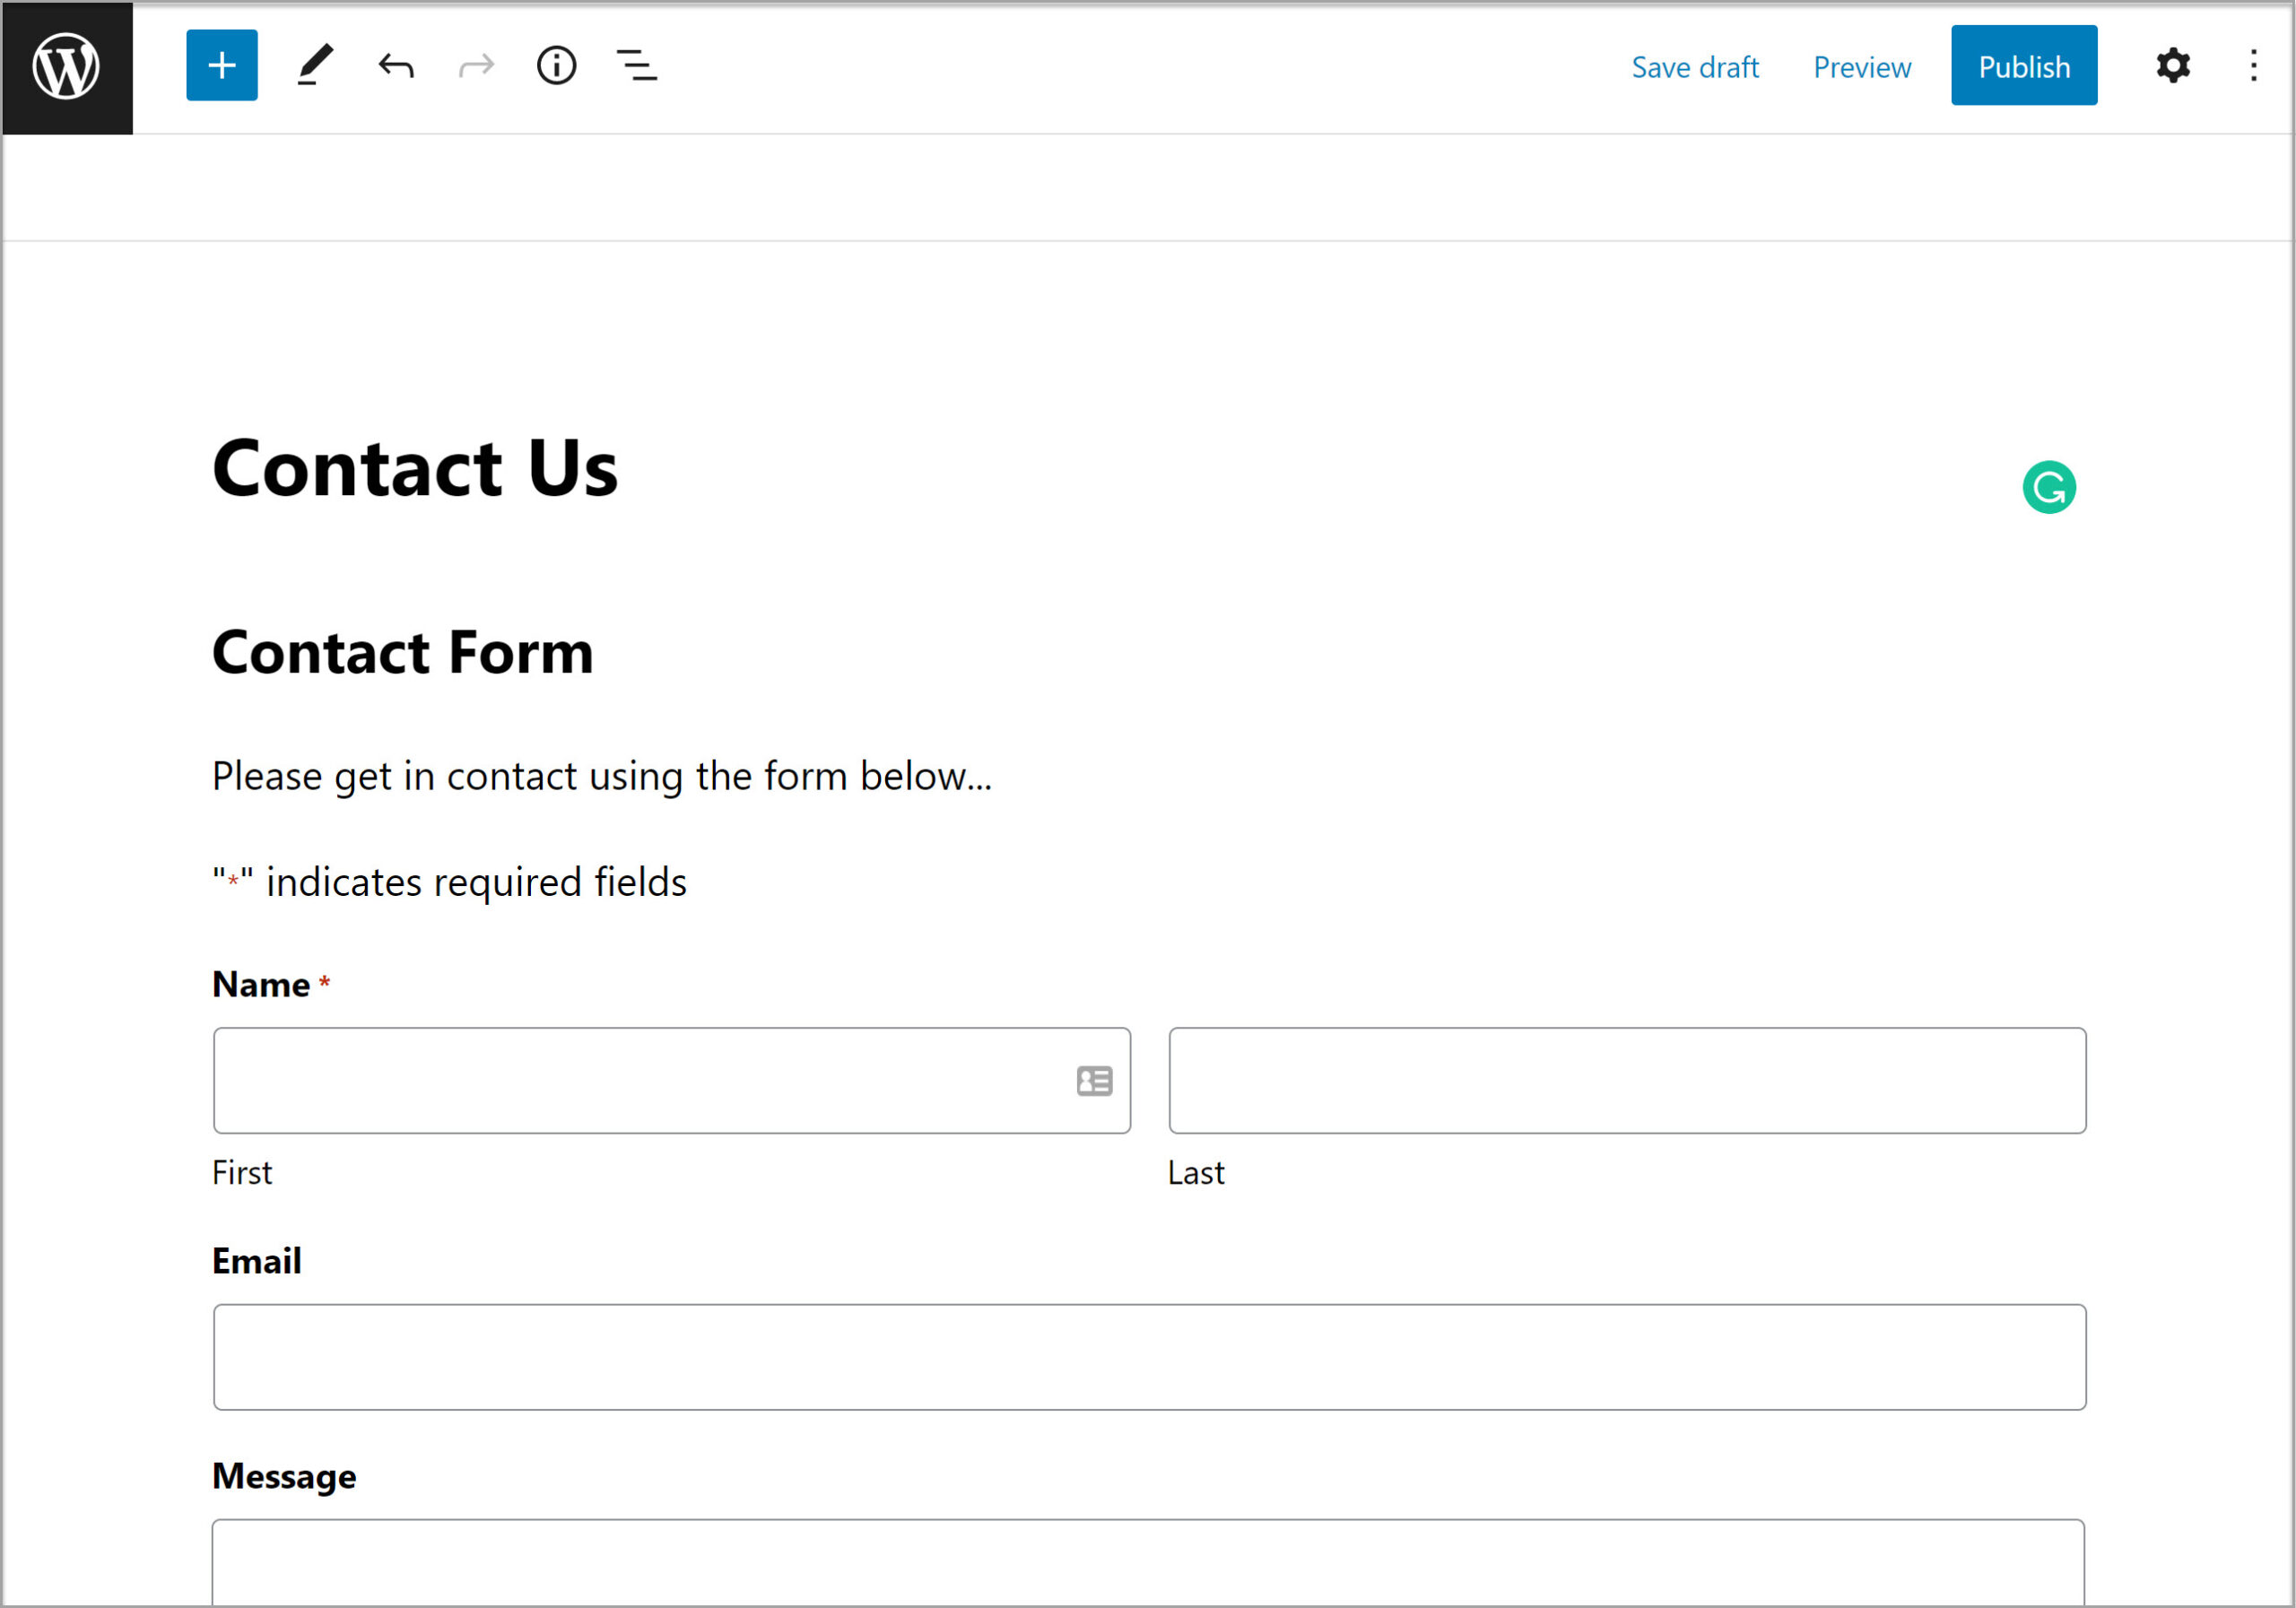
"*" indicates required fields