Hey there and welcome back to the channel, it’s Dustin from the Gravity team.
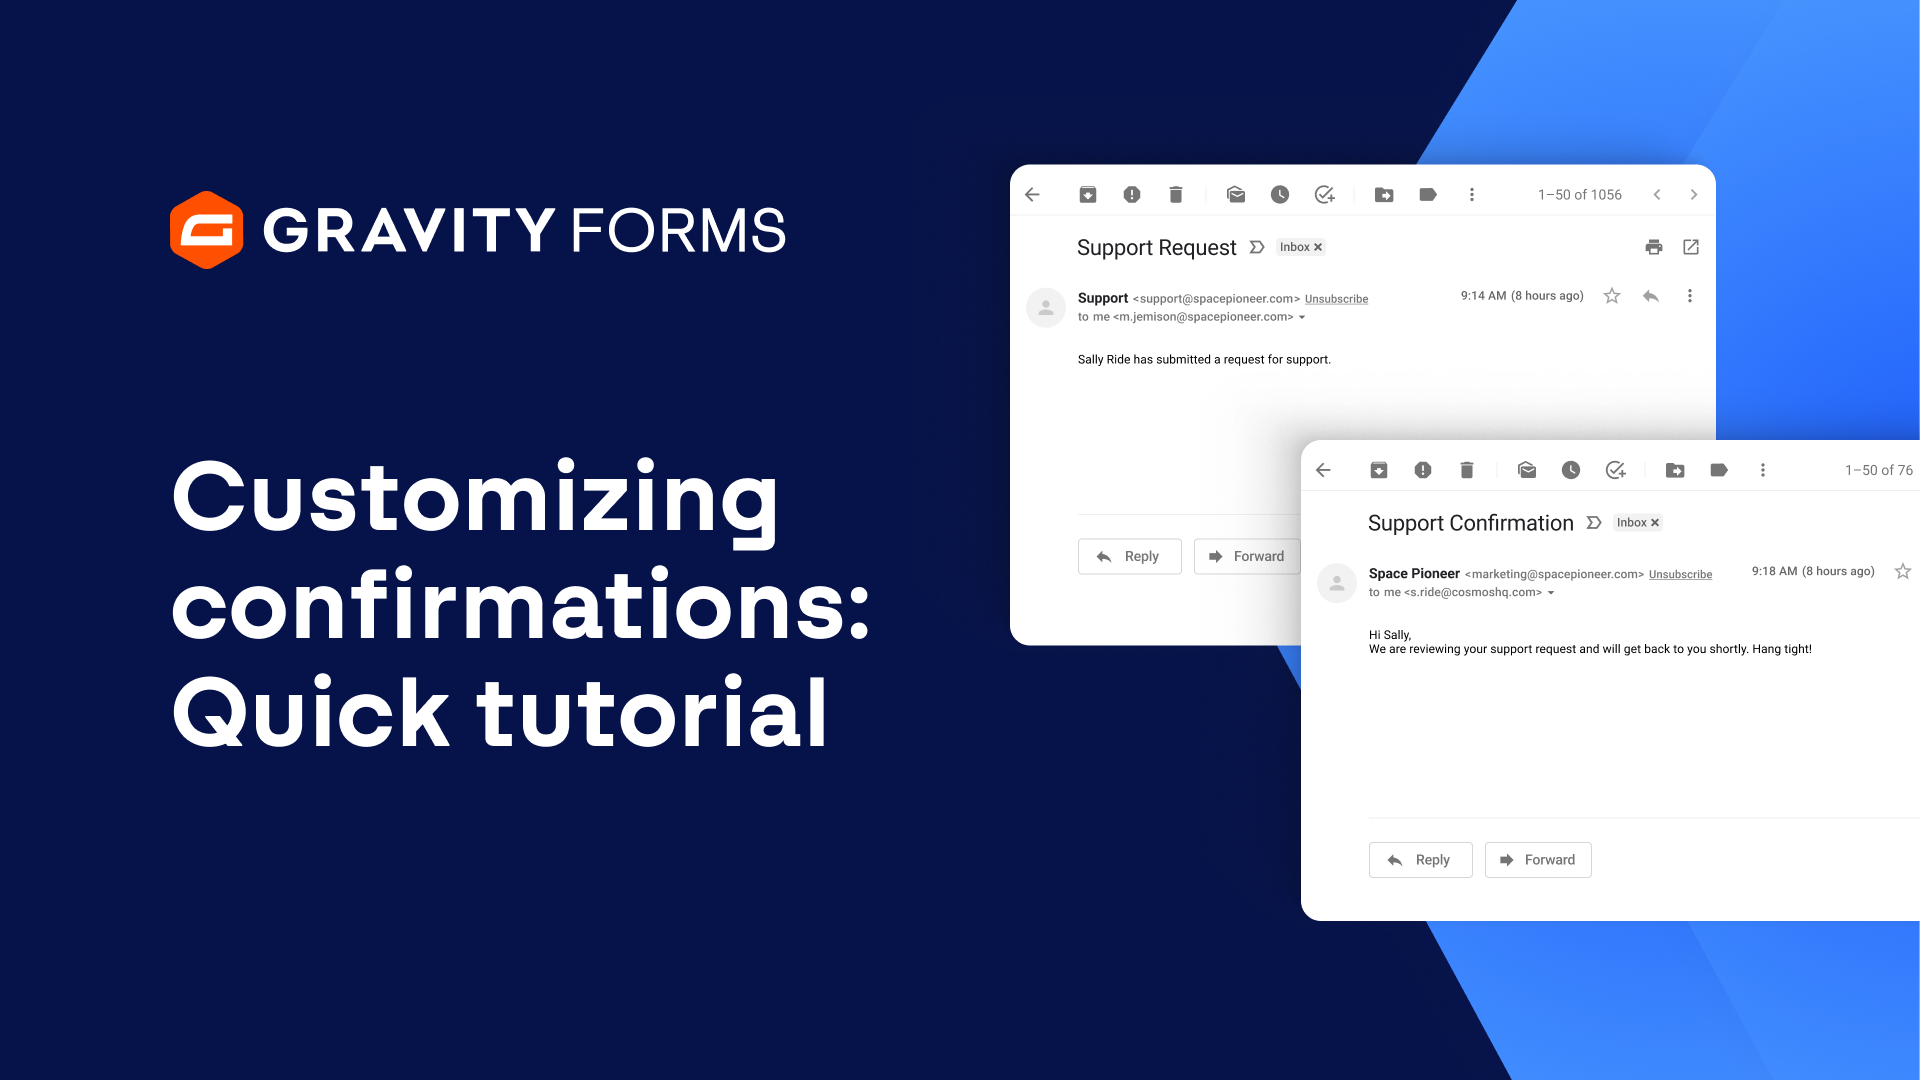
Did you know you could customize the message a user sees when they submit a form on your WordPress site?
Confirmation messages are a great way to create a friendlier and more personalized form submission experience. So let’s dive in and see how to set them up.
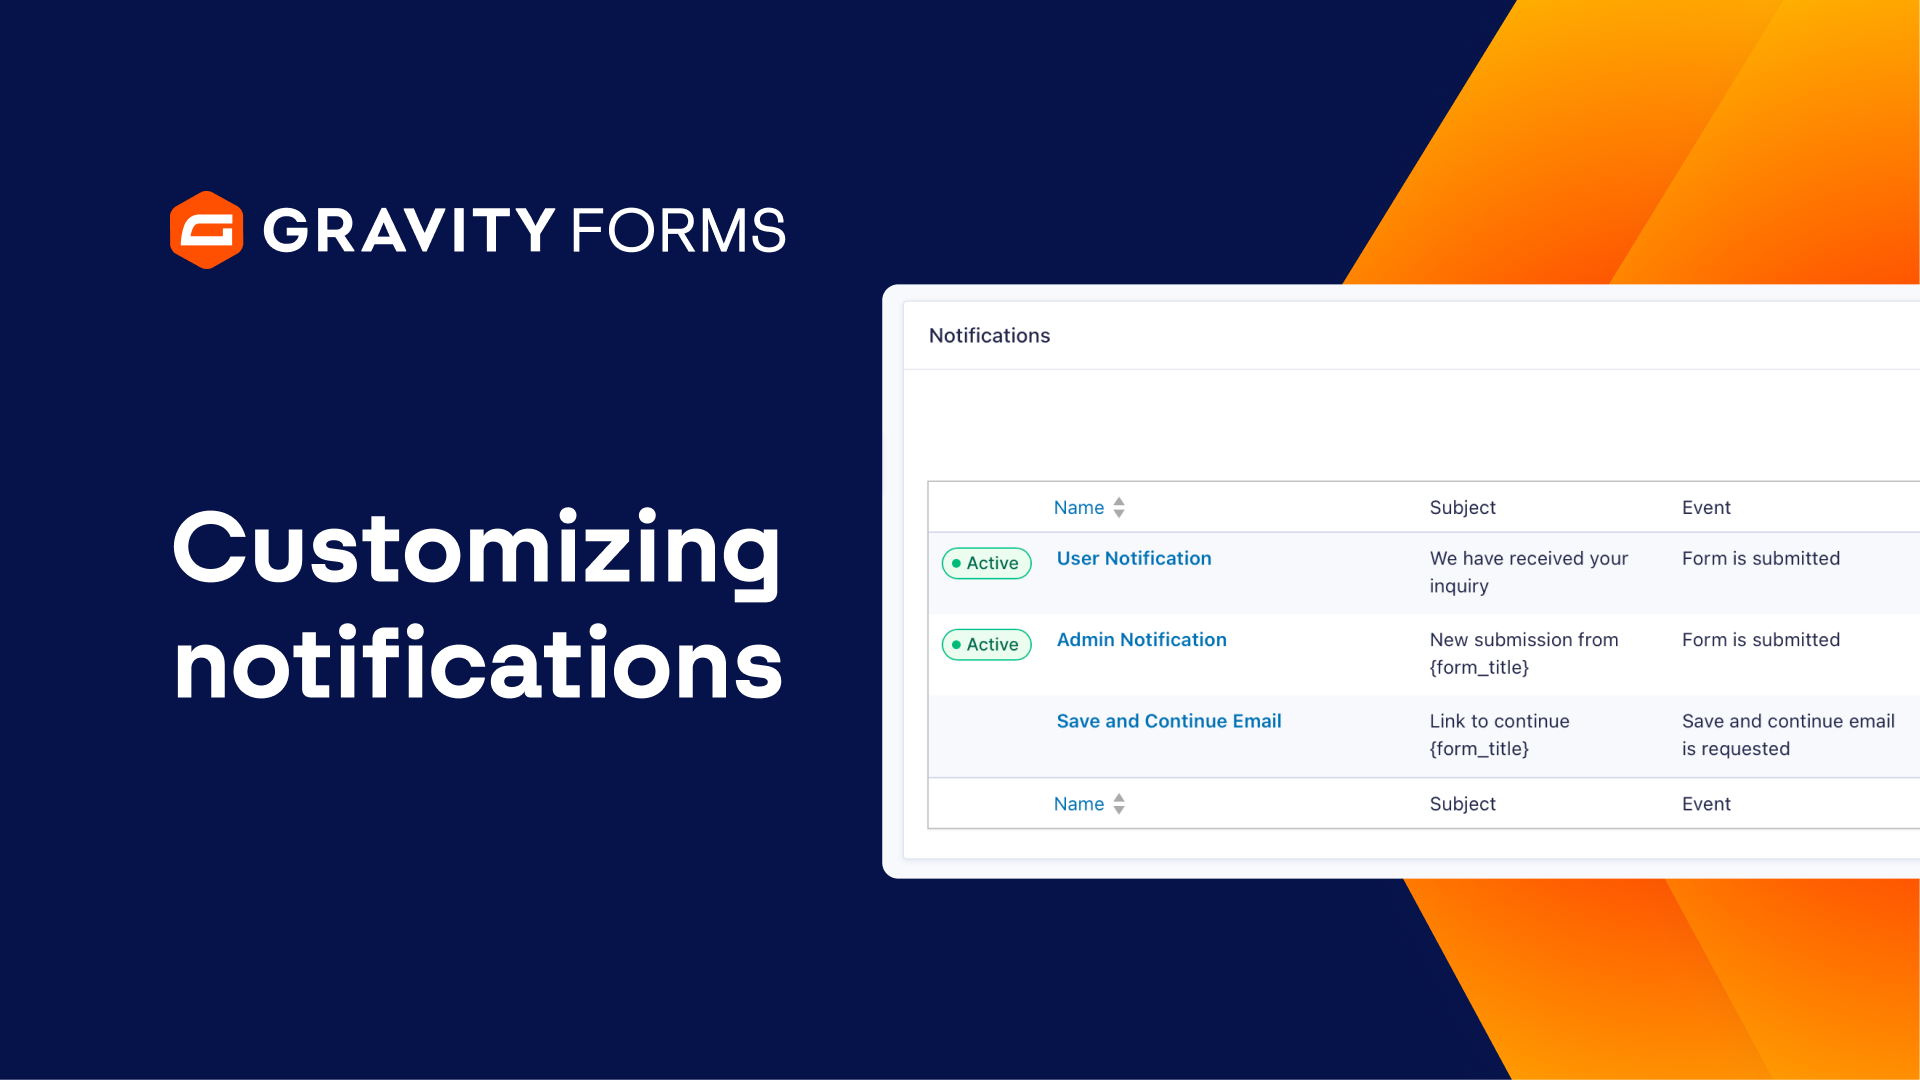
To get started, head to your form’s settings page and select Confirmations. From here, you’ll be able to edit the default confirmation and even add additional confirmations.
Multiple confirmations can be a great choice if you want to have different confirmation messages based on how a user answers your form.
For example, my newsletter signup form includes an option to also let users sign up for the Gravity Forms demo. I’d like to create two confirmations based on how users respond to this form – a simple thank you message if they opt out of trying the demo, and a URL redirect to the Gravity Forms demo signup page if they opt in. Let’s take a look at how to set that up.
I’ll start by creating a new confirmation message and naming it ‘Demo Opt Out’. There are three Confirmation Types you can use – Text, Page, and Redirect. The Page and Redirect confirmation types will direct users to another page on your site or a different URL entirely, while the Text confirmation type will display a simple message upon form submission.
I’ll leave my confirmation type as Text and enter the message the user will see if they opt out of the demo. I can even make this message a bit more personal with merge tags. For example, I can use the First Name merge tag to address the user by the first name they submitted on the form.
The next step is an important one. I’ll need to customize my conditional logic for this confirmation to only display this message if the user opts out of trying the Gravity Forms demo. Then I’ll save everything and head back to the Confirmations settings.
I’m next going to select Add New to create the confirmation that will send users to our demo. I’ll call this confirmation ‘Demo Opt In’ and set the Confirmation Type to Redirect. Within the Redirect URL field, I’ll enter the Gravity Forms demo URL.
I’m then going to use the Pass Field Data via Query String’ field to create a query string using merge tags so that the user’s name and email will be autopopulated on the demo signup form when they are redirected to the Gravity Forms Demo page. For more information on using query strings, be sure to check out our documentation, linked below.
Once again I’ll need to customize the conditional logic for this confirmation and have it only redirect the user if they opt into trying the Gravity Forms demo. Then, I’ll save this confirmation.
Finally, it’s important to test your confirmations and make sure everything is working properly. If I submit a test submission and opt out of the demo, I’ll be greeted with the personalized confirmation message I set up earlier.
And if I submit another form and opt into the demo, I can see that I’m redirected to the Gravity Forms demo page with my name and email automatically populated in their respective form fields thanks to the query string I set up.
And that’s all there is to it.
Confirmation messages can go a long way to making your forms feel both friendlier and more professional.
We hope you found this video helpful. If you did, consider liking it and subscribing to the channel for more Gravity Forms guides. And if you have any questions, be sure to let us know in the comments. See you next time!
Summary
When a form is submitted on your site, you can choose to present the user with a confirmation message or direct them to a new page. In this video tutorial, we’ll take a look at how to edit the default confirmation message or create your own, so you can make it relevant to your specific form or audience.
To learn more about query strings, head on over to our docs site.