

If you’re a charity or nonprofit, you know that every little bit counts. Every dollar is another tool to impact your cause. So you surely want to accept donations through your website.
Taking donations online opens your organization to a massive audience. Anyone can send a donation whenever they want, whether they’re on your donor list or attend one of your events.
In fact, a donation form on your website opens more opportunities to market your organization on the web. The donation page is somewhere you can send your social media followers and email subscribers.
You could slap a PayPal donate button on your website, but that locks you into PayPal’s platform. Besides, they don’t give you many customization options.
With Gravity Forms, however, you can create a clean, customizable, high-converting donation form that accepts money and captures all of those valuable leads. (After all, each donor is a source of future donations!)
Ready to learn how? Let’s dive in!
Step 1: Create a Gravity Form
The first thing you’ll need is a new form!
If you haven’t already, install Gravity Forms to your WordPress dashboard. If you need help with that, read our Getting Started Guide documentation .
Create a new form by clicking New Form under Forms on the left side of your dashboard. Give it a name that distinguishes it from your other forms. Use something like “Donation Form.” (If you’re new to Gravity Forms, here is our guide on creating new forms.)
Step 2: Build Your Form
Like most forms, slimmer is better. Limit the fields on your form to only the ones you need to achieve the form’s purpose.
In the case of a donation form, you probably don’t need more than the donor’s name, email address, and donation amount. It’s safe to ask a few more questions if you think they are necessary but don’t get carried away. Limit yourself to no more than six fields.
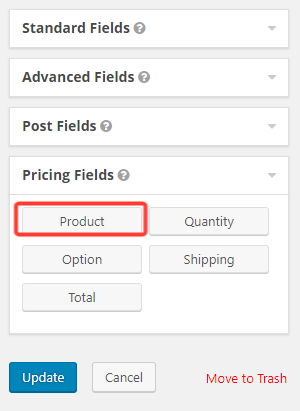
The most important field on your donation form is the donation amount. Create this form using the Product field under the Pricing Fields tab. Click and drag it into your form.
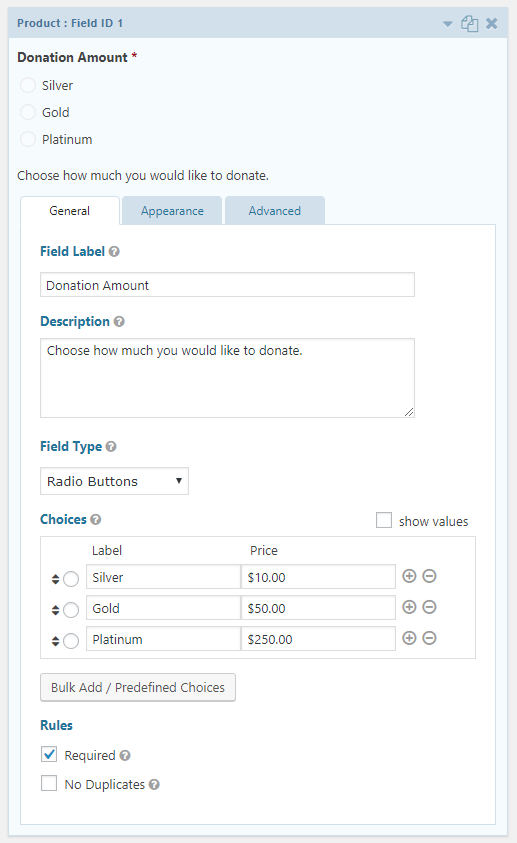
Next, customize the product field.
Give it a name that clearly identifies the field, such as “Donation Amount,” and a description that gives donors instructions to use the field, such as “Choose how much you would like to donate.”
Under Field Type, change the option from Single Product to either Drop Down or Radio Buttons.
Under Choices, create labels and a few options for donation amounts.
Finally, make sure to check the field as Required at the bottom.
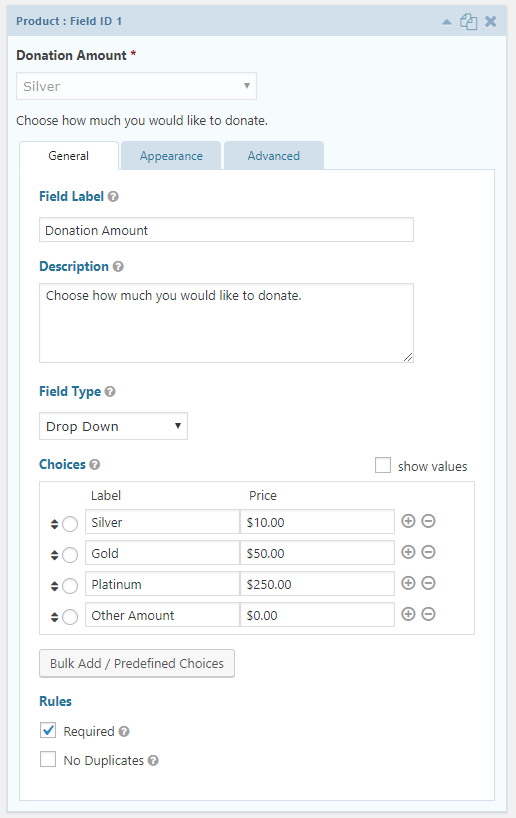
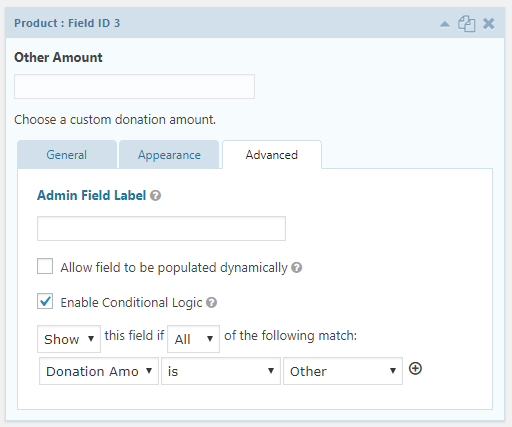
What if your donors don’t want to donate any of your recommended amounts? It’s smart to give them an option to add their own value.
Add another choice to your product field. Call it something like “Other Amount.” It should look like this.
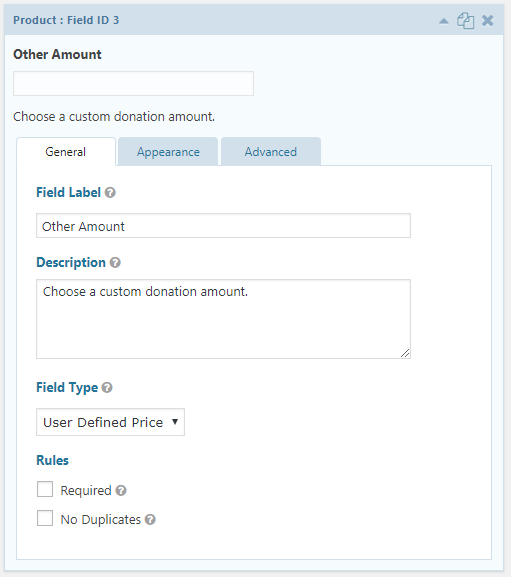
Then add a section Product Field. Give it a name and description. Set the Field Type as User Defined Price.
Now we need to set this field so it only appears if the donor selected “Other Amount” in the previous field. This is called conditional logic. Here’s an article explaining how to use it.
On the Advanced tab, select the checkbox next to Enable Conditional Logic.
Create a rule that reads as follows: “Show this field if all of the following match: Donation Amount is Other.”
Your final step is to add the Field Total field to the end of your form.

Your donation form is complete!
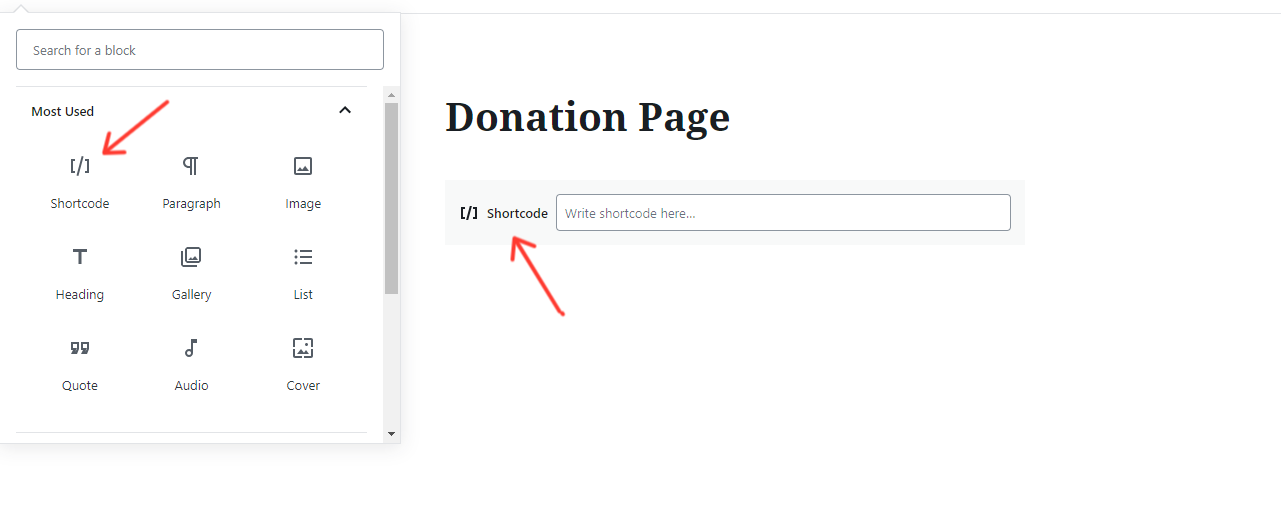
Step 3: Embed the Form on a Page
Like every Gravity Form, you’ll need to embed this one on a page.
Open a WordPress page and add a Shortcode Block. Paste your Gravity Forms shortcode into the space provided.
Gravity Forms shortcodes are based on the form’s ID number. The format is straightforward:

Replace # with the ID number of your form. You can find this number on the form list page next to the form’s title.
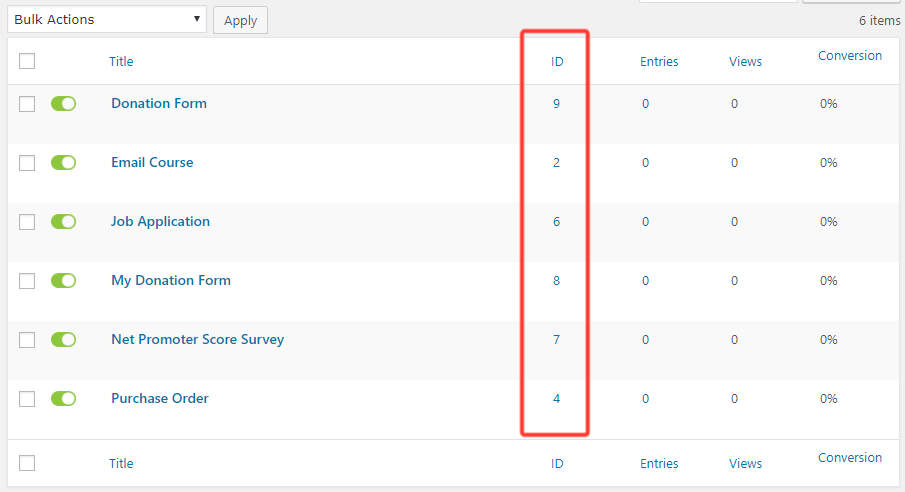
You can also set the title and description to “true” if you want them displayed on the page above the form.
Alternatively, you can use the Gravity Forms Gutenberg Block. Once you install this plugin, simply add the Gravity Forms block to your WordPress page like any other block. Read our documentation if you have any questions.
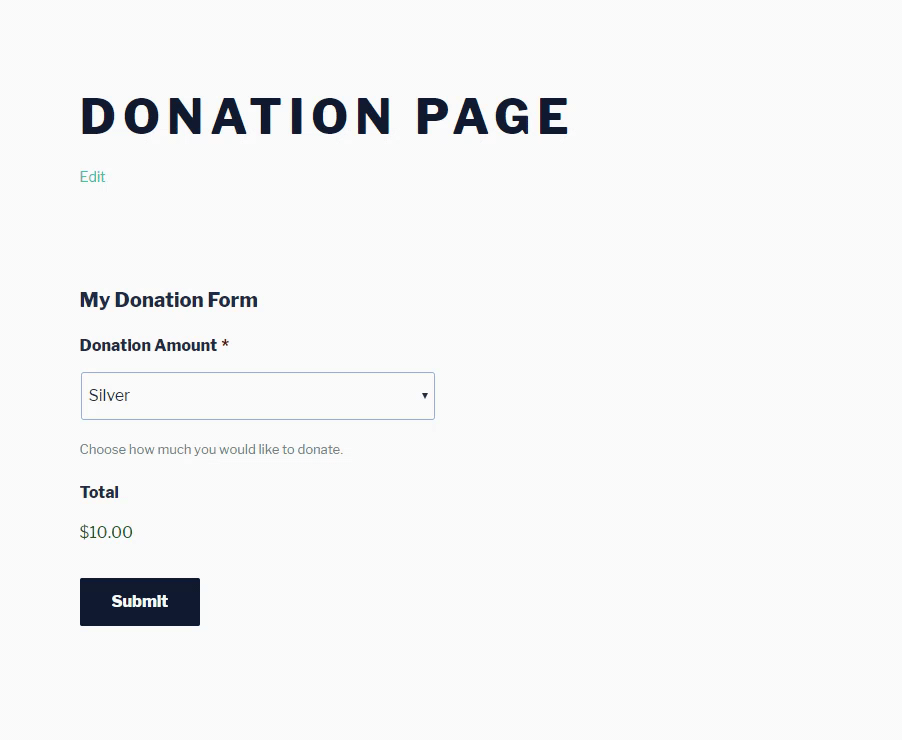
Your form will look something like this (depending on your theme’s styling):
Step 4: Integrate with Your Payment Processor
Now that your form is ready, it’s time to link it with your payment processor so you can actually collect money.
Gravity Forms integrates with several payment processors. You’ll need to install the appropriate add-on.
- Gravity Forms Stripe Add-On
- Gravity Forms PayPal Payments Standard Add-On
- Gravity Forms PayPal Payments Pro Add-On
- Gravity Forms Authorize.Net Add-On
Most of our users rely on Stripe and Paypal payments to process all of their transactions in their WordPress forms. All of your visitors can feel that their information is secure when they see your form relies on the brand name and reliance that Stripe and Paypal are well known for. Another option is our Authorize.net add-on, it is extremely versatile. Most third-party banks, payment processors, and merchant accounts can connect through it.
Each payment add-on has unique configuration steps. Follow the documentation instructions for each add-on to complete the setup.
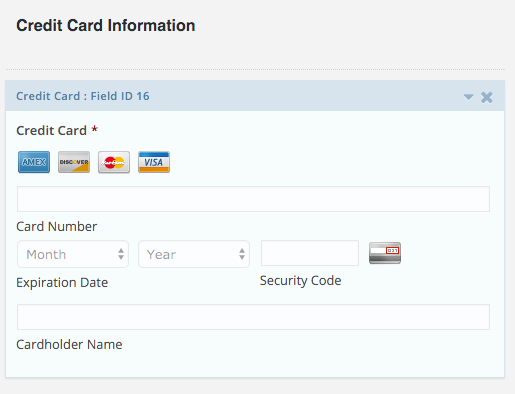
Your final step is to return to the form editor (where you made the donation from originally) and add a final field to the bottom. Under Pricing Fields, adds the Credit Card field.
Where to Place Donation Forms
Ideally, your donation form should be all over your website. Every page is a chance to convert a web visitor into a donor.
It’s considered best practice to place a donation button on every single page, usually in the header. Use a bright color so your call-to-action stands out.
Here are four critical places to embed your donation form.
1. Beneath Your Blog Posts
If you create blog content, you’ll want to include your donation form at the bottom of each post. Since blog content is a common way for people to learn about your organization for the first time, you’ll want to prompt them with a donation opportunity.
2. On Your Sidebar
Sidebar donation forms are great to keep your form visible at all times, right alongside the content of every page. For an added benefit, make your sidebar sticky so it stays visible when the user scrolls up and down the page.
3. Lightbox / Overlay
A lightbox or overlay is a popup that appears when a user presses a button or after a certain period of time. These are useful because they force the user’s attention. Yes, they annoy some users, but there’s no doubt that they work.
4. Dedicated Landing Page
Even if your entire site is dedicated to collecting donations, it’s important to have a clean landing page that makes your entire argument in one place. It should have a clear headline, body copy, testimonials, and your donation form.
What’s nice about a landing page is that you can duplicate it and make basic changes for different audiences. For instance, you might change the copy and suggested donation amounts for different segments of your donor list.
Test Your Donation Form
Now that you know how to accept donations through your website with Gravity Forms, make sure to experiment with fields, design, and placement. Little changes can lead to big conversions.
If you’re a current Gravity Forms user, we hope you found this guide helpful. If you don’t already use Gravity Forms, we have a few different license plans that feature integrations with the various payment services described in this article. You can find a comparison of the plans and pricing here.
If you’re still not sure what plan best fits your needs, you can refer to our add-on page to compare the plans and avaialble integrations.


