

Forms are a vital part of any website. But for many novice WordPress users, the idea of creating a form can be overwhelming. Thankfully, creating a form in WordPress doesn’t have to be hard. With the right plugin, you can easily create all kinds of different forms for your website.
In fact, you can create a form in WordPress in a few simple steps:
- Choose a WordPress form plugin.
- Install the plugin on your WordPress website.
- Create a new form.
- Add form fields to your form.
- Embed the form into a page or post on your website.
In this article, we’ll walk you through each of those steps and show you how easy it is to create a form for your WordPress website that is effective and converts. Let’s begin…
Key takeaways
- Creating a form in WordPress is simple with Gravity Forms’ drag-and-drop editor and embed options.
- Advanced features include conditional logic, multi-page forms, save-and-continue, quizzes, surveys, user registration, and secure payment processing.
- Customizable field types make it easy to build contact forms, applications, donation forms, and order forms.
- Pre-built templates let you quickly import and customize common forms like contact, survey, or application forms.
- Gravity Forms integrates seamlessly with marketing, CRM, and payment tools for lead generation, automation, and ecommerce.
Choose a WordPress Form Plugin
When it comes to WordPress form plugins, Gravity Forms is one of the most popular choices amongst WordPress users – and with a powerful array of features and a reputation for security and reliability, it’s easy to see why!
With Gravity Forms, you can create a form to your exact specifications, using the intuitive, drag-and-drop form builder and a wide assortment of features and enhancements, including conditional logic, multi-page forms, quizzes, surveys, user registration, and more.
Gravity Forms also integrates with numerous third-party apps and services so you can sync your forms with the tools your business already uses. Integrations include email marketing solutions, CRMs, payment processors, and more, enabling you to extend the functionality of your forms as your needs determine.
Types of forms you can create with Gravity Forms include…
- Simple and Advanced Contact Forms
- Newsletter Opt-In Forms
- Surveys, Quizzes, and Polls
- Application Forms
- Payment and Order Forms
- And more – the only limit is your imagination!
For further information on Gravity Forms, and its many features and integrations, check out this article – Gravity Forms: There’s Never Been an Easier Way to Create a Form.
Install a WordPress Form Plugin on Your Site
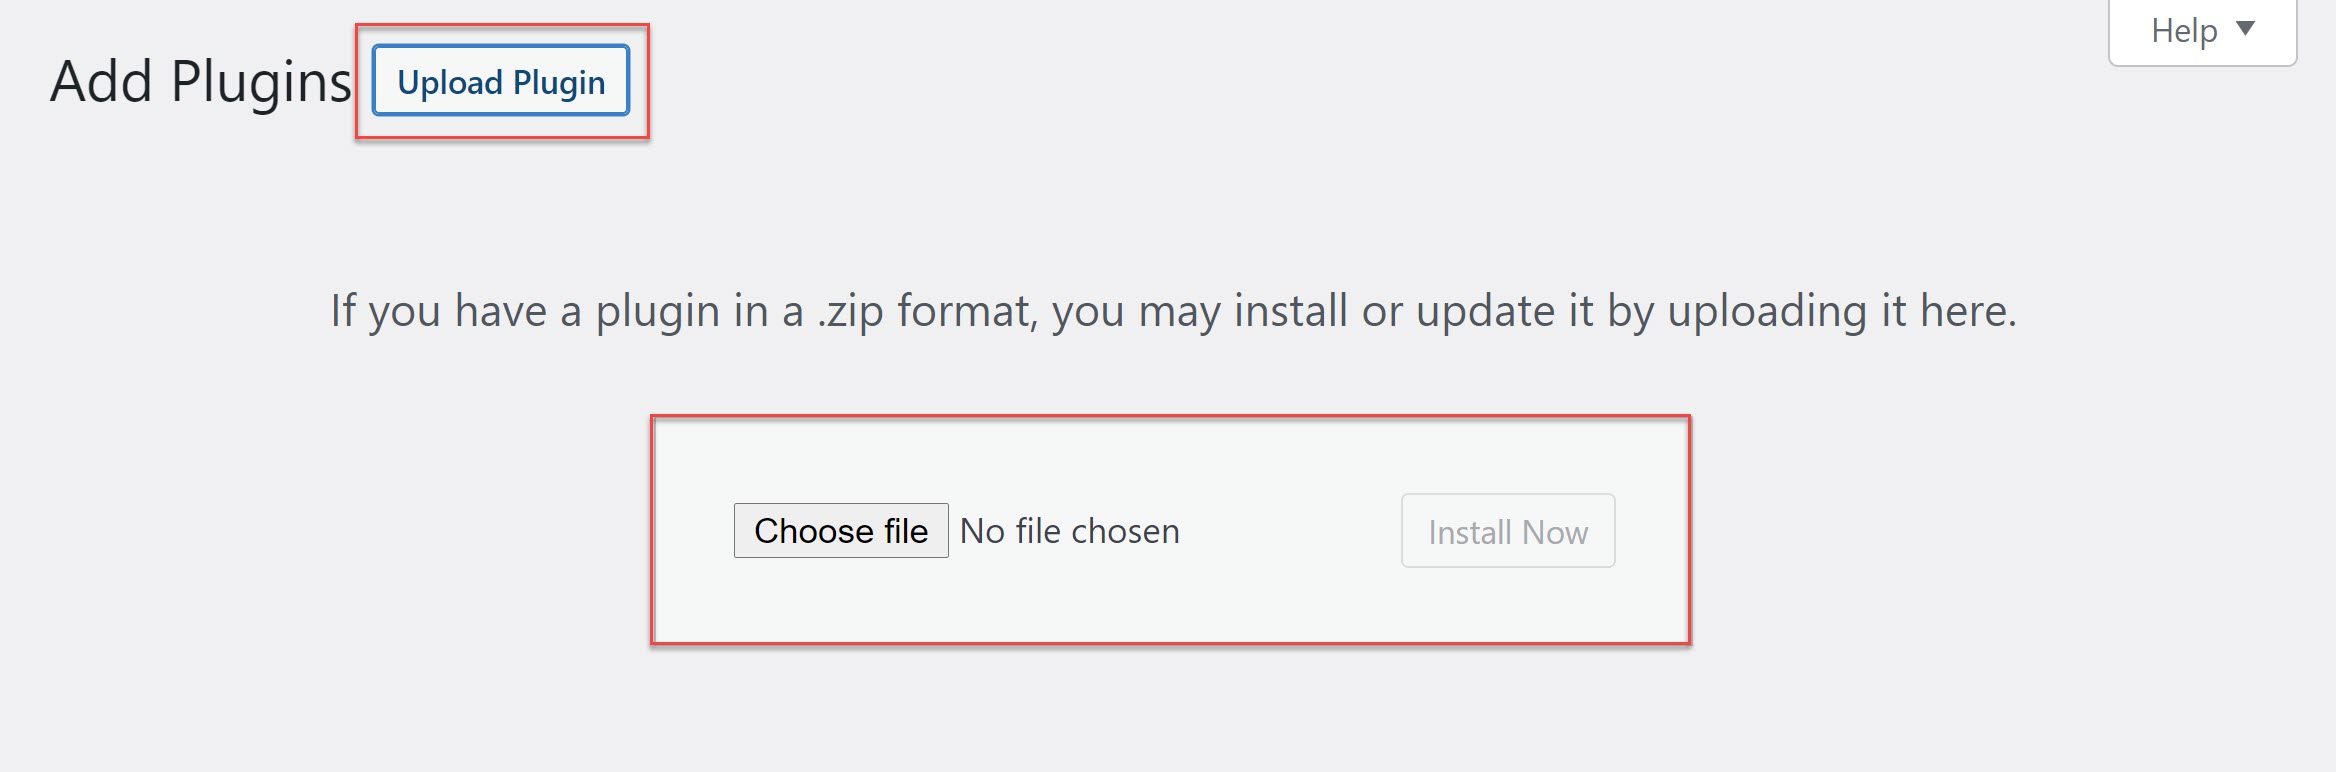
Once you’ve checked out Gravity Forms and chosen the right license for your project requirements, make a purchase and download the plugin. You will then need to install it on your WordPress website.
To do so, open your WordPress dashboard and go to Plugins > Add New > Upload. Locate the plugin zip file on your computer and click Install > Activate.
Once the plugin is installed, follow the instructions to register the plugin with Gravity Forms.
For more information on how to install Gravity Forms, check out this Getting Started documentation.
Create a New Form
Now that the basics are out of the way, the next step is to create a form. Within your WordPress dashboard, go to Forms > New Form and then give your new form a name.
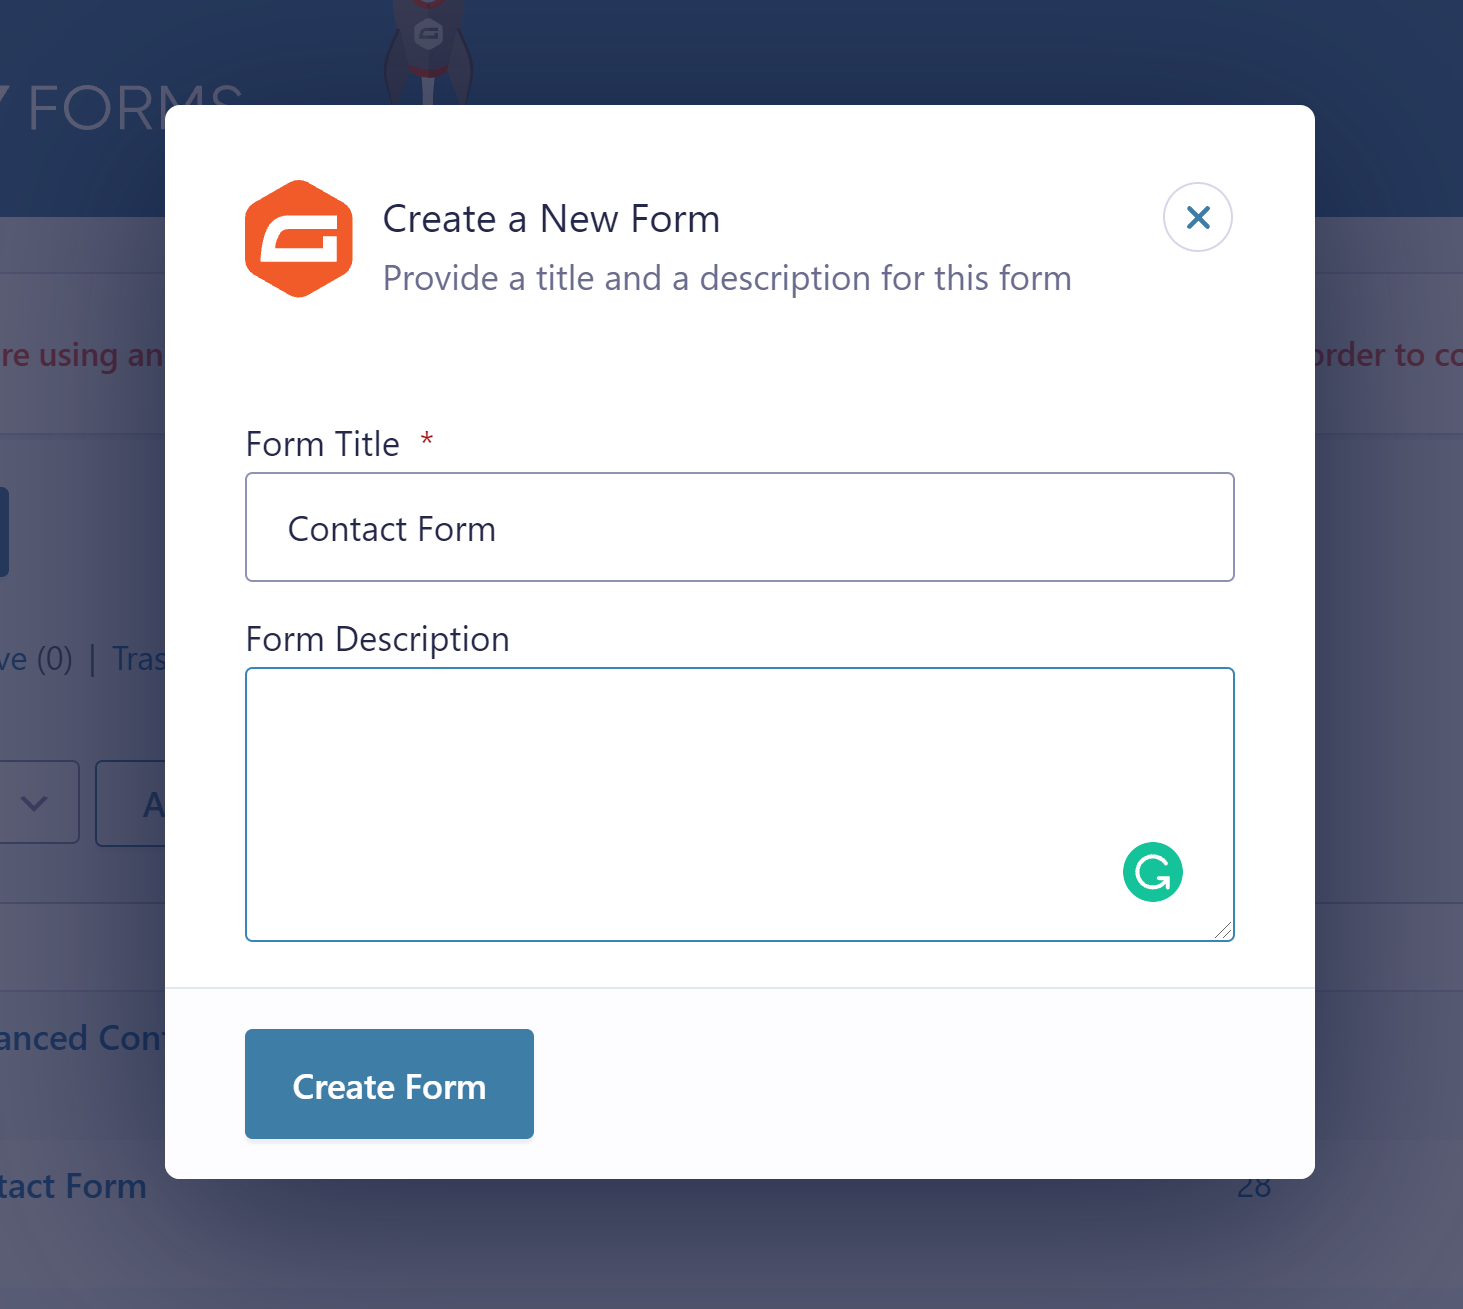
Once a new form is created, you’ll be sent directly to the form builder where you can begin to build your form.
Add Form Fields
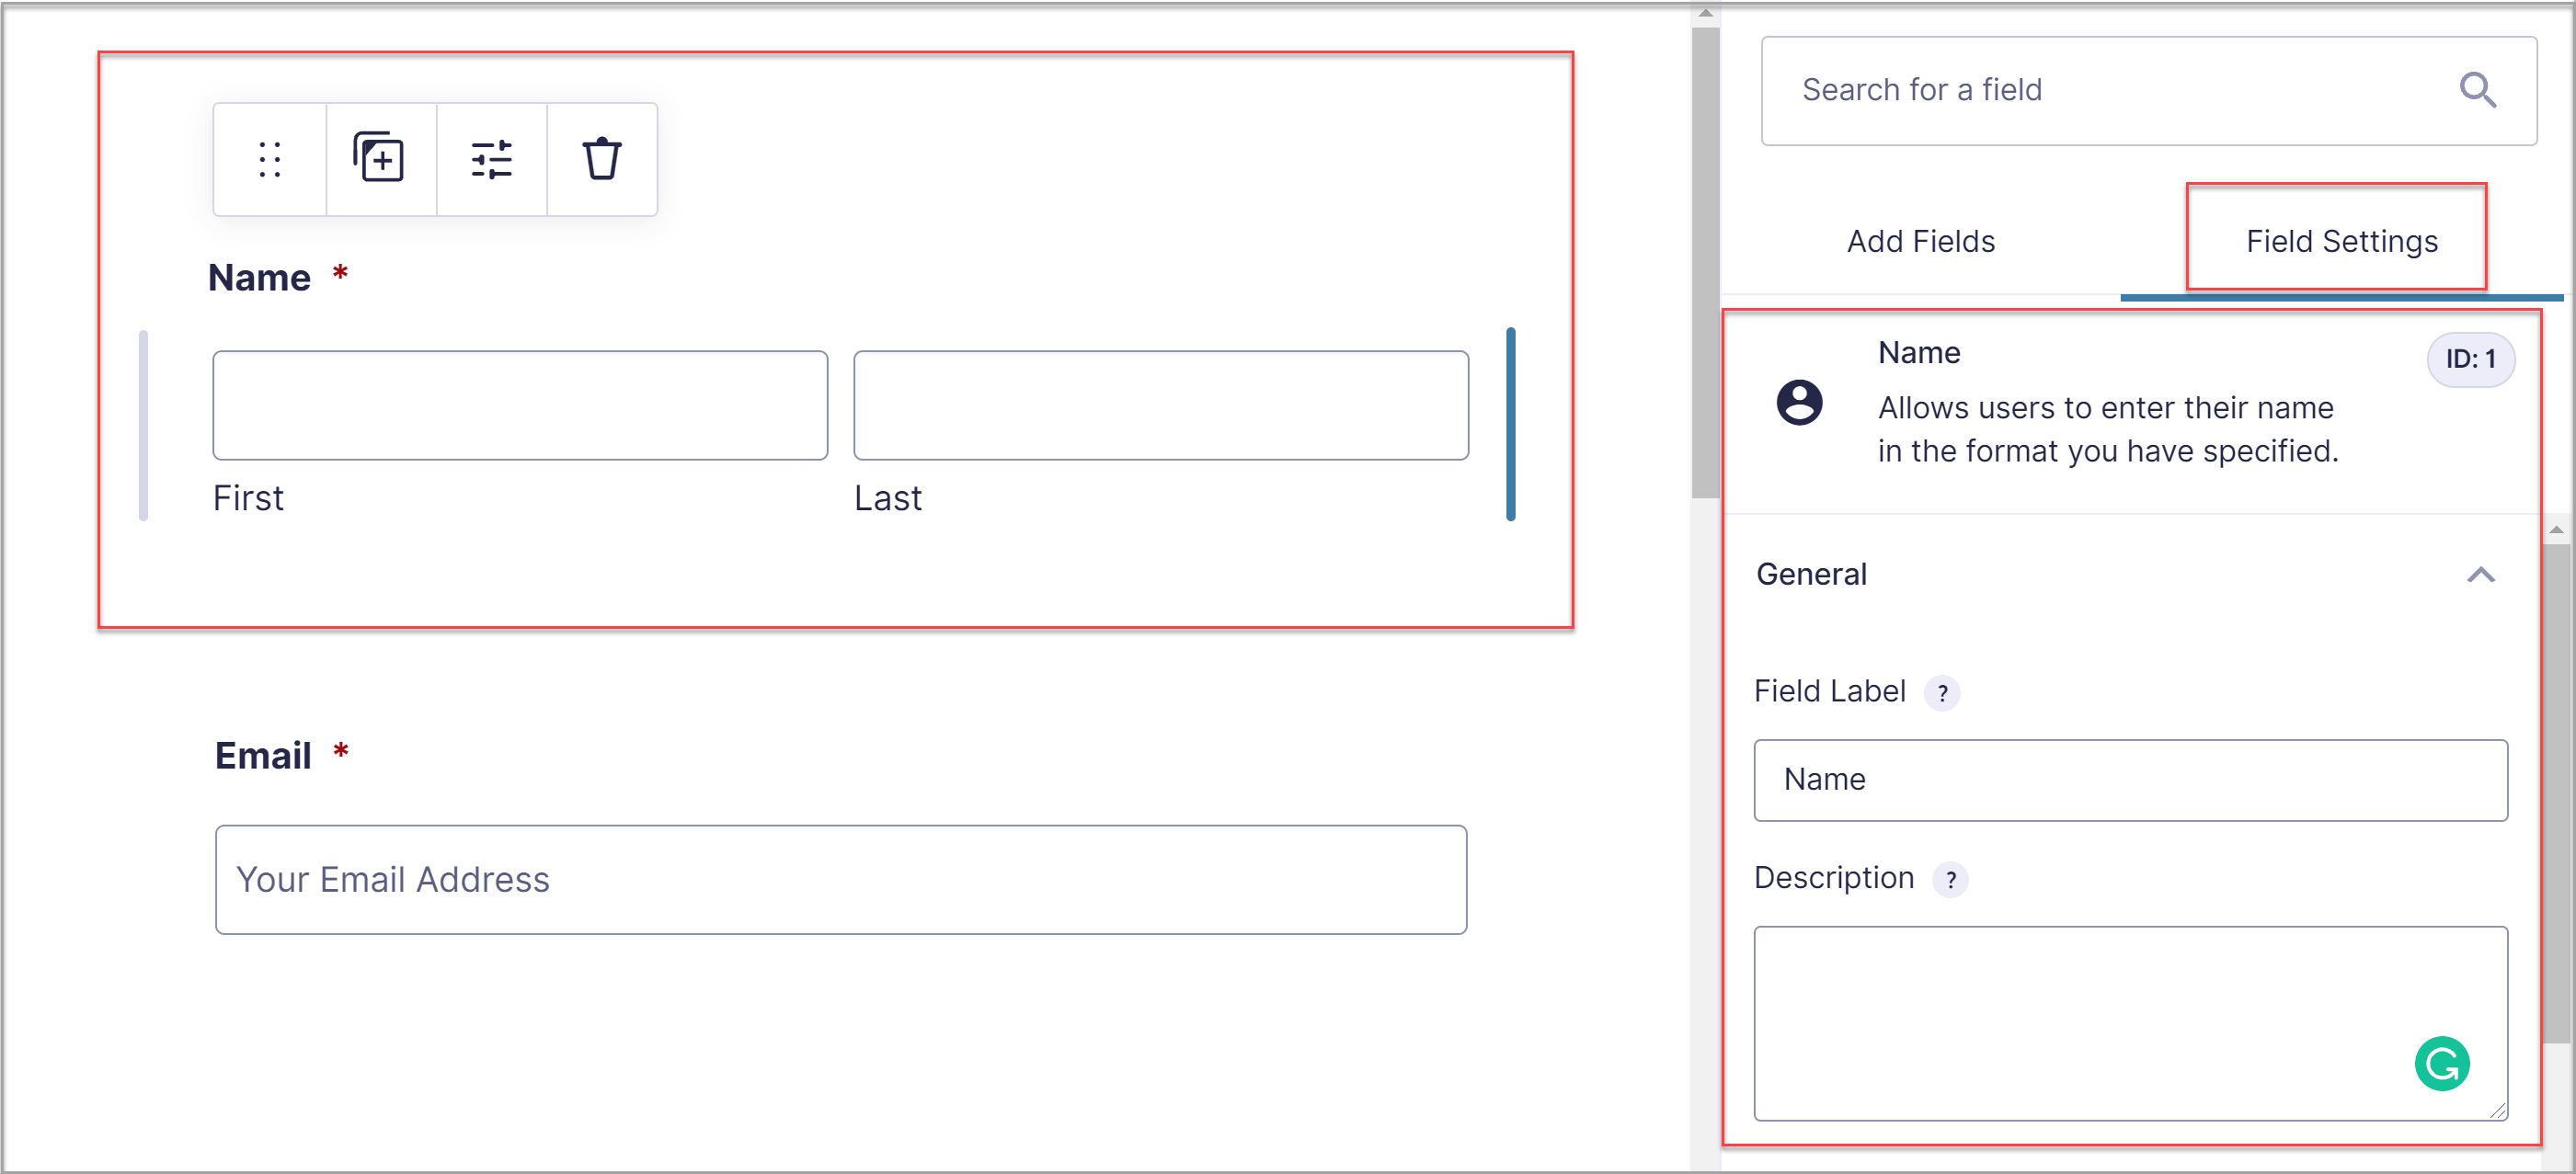
The form builder allows you to visually create your form and manage every aspect of how your newly created form will act on both the front-end and admin of your WordPress site.
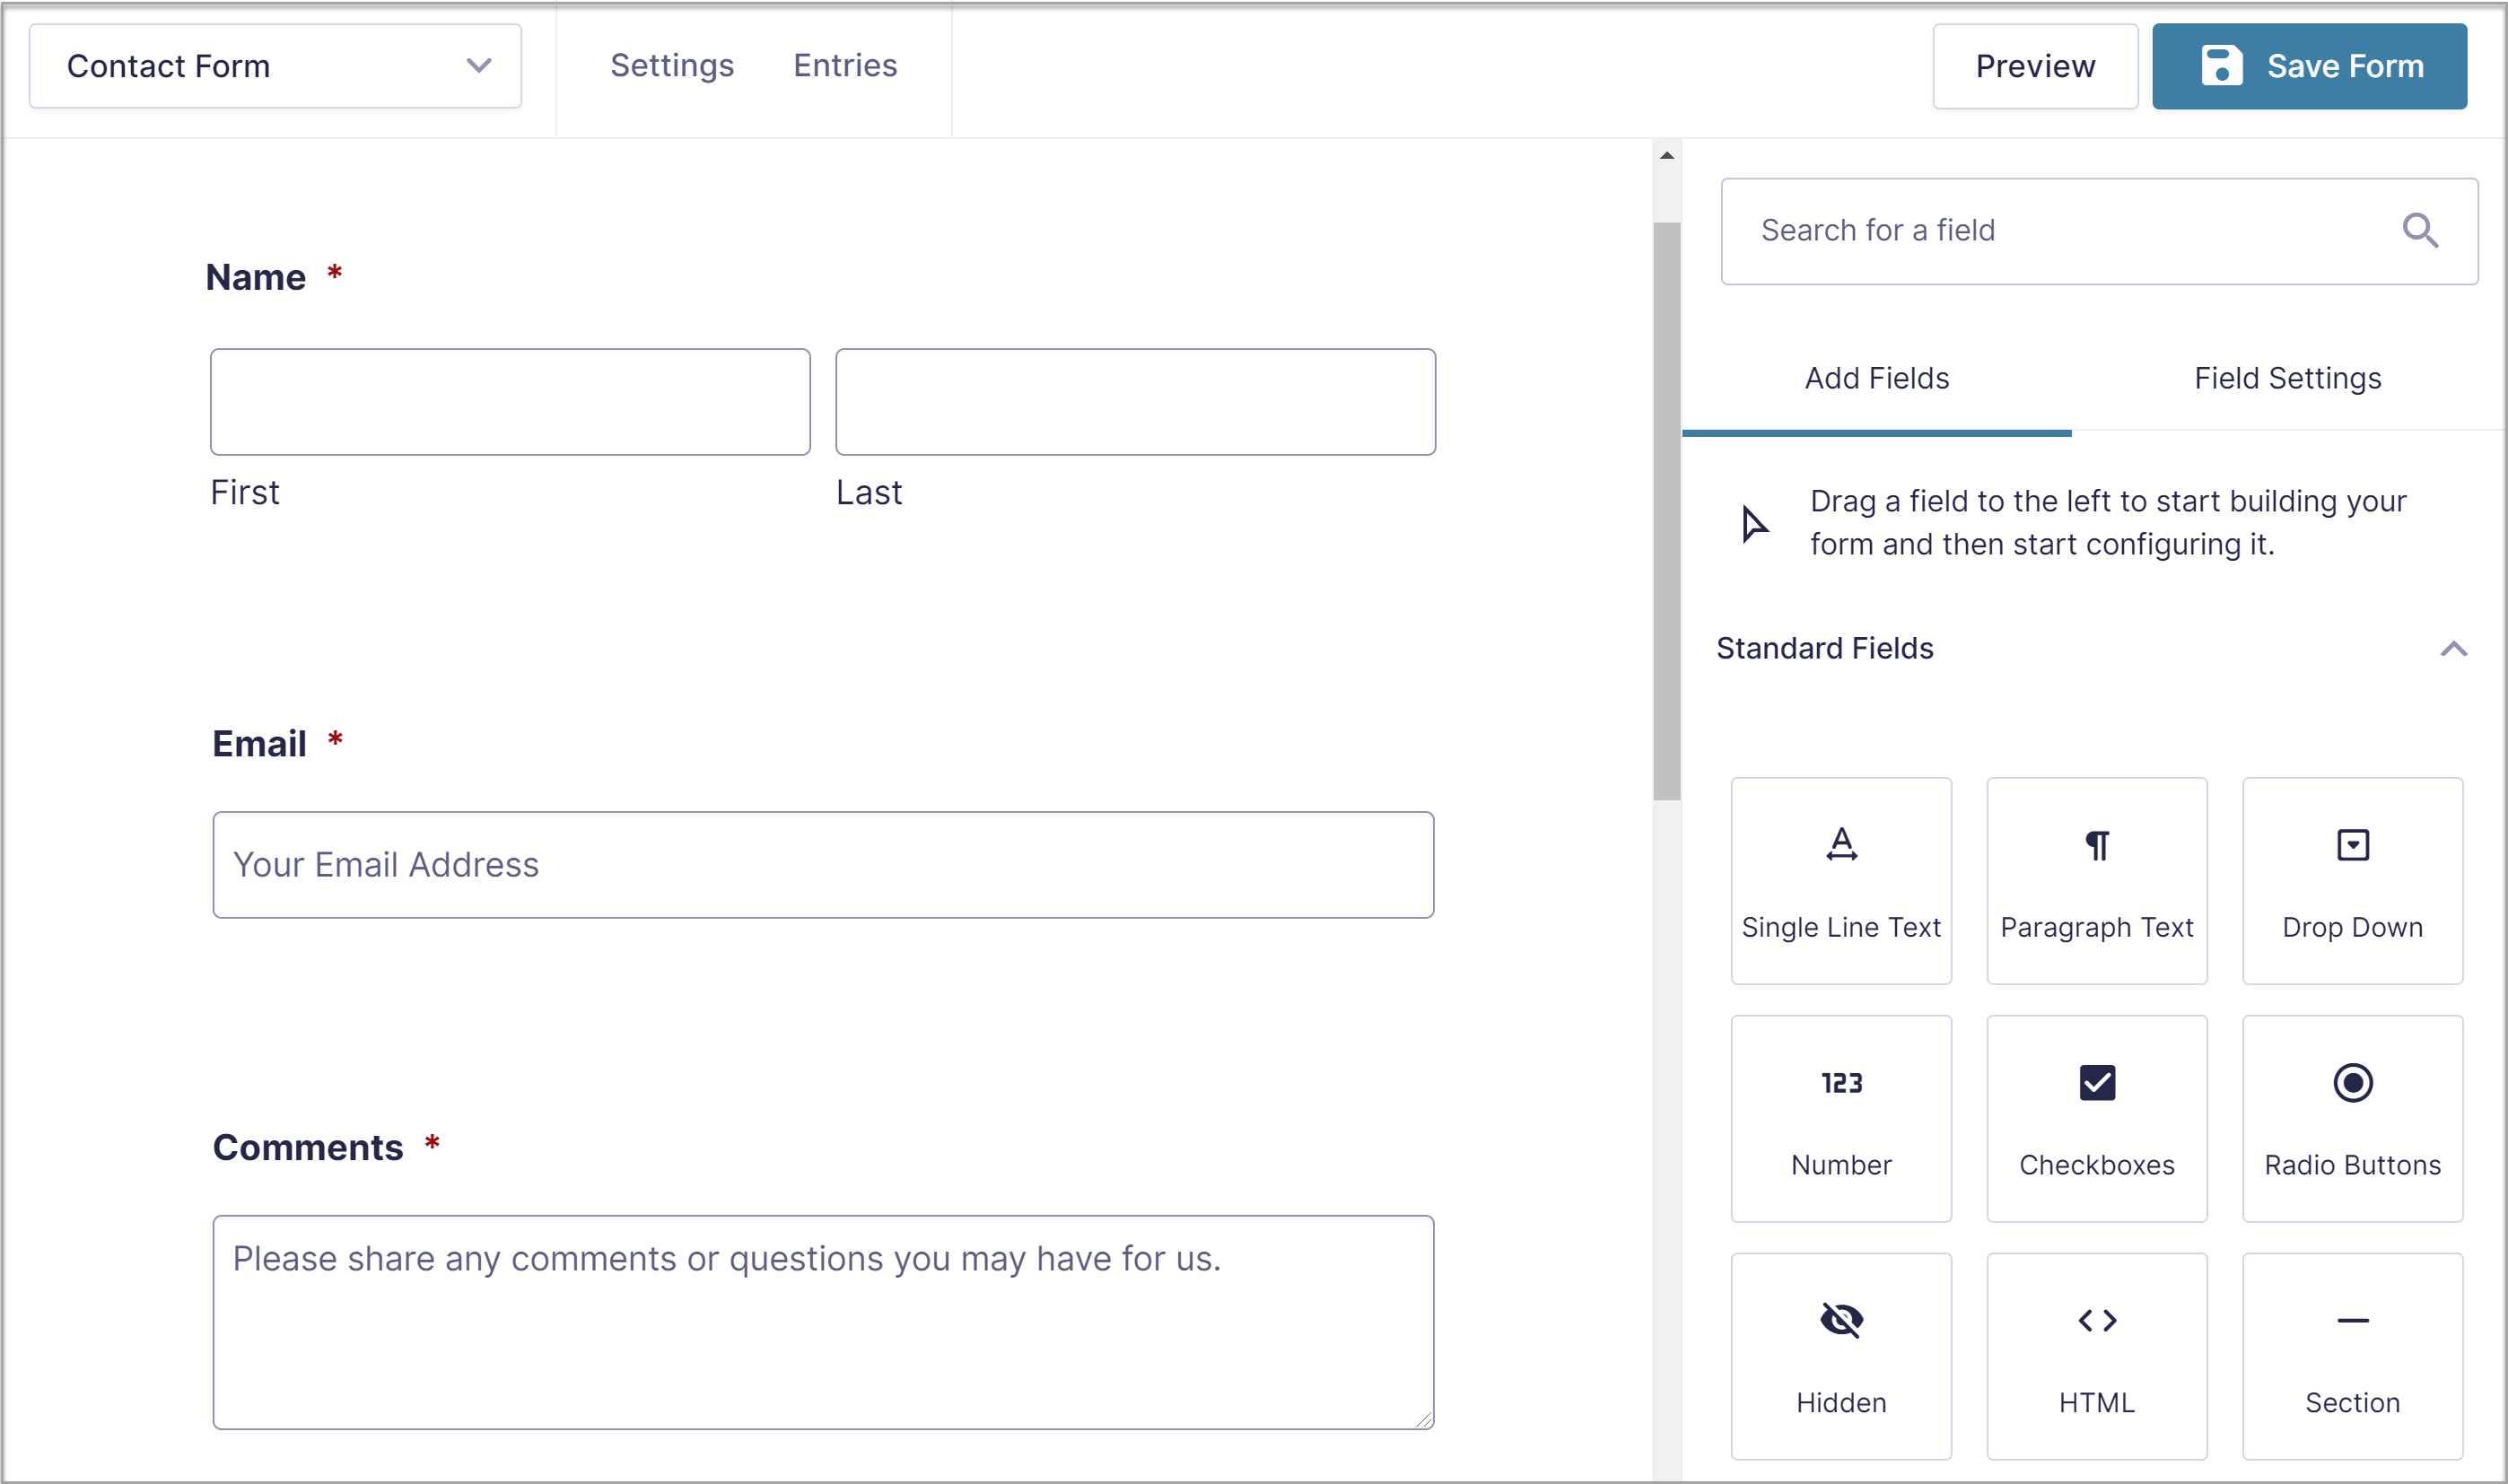
To add a field in the form builder, just drag it from the field listing on the right to the form builder canvas on the left. The fields are divided into several sections:
- Standard Fields – such as Paragraph Text, Checkbox, Radio Buttons, and Dropdown fields.
- Advanced Fields – such as Name, Email, Phone, and Address fields.
- Post Fields – these are useful if you want to create posts from form submissions.
- Pricing Fields – use these to integrate payment gateways and configure product options.
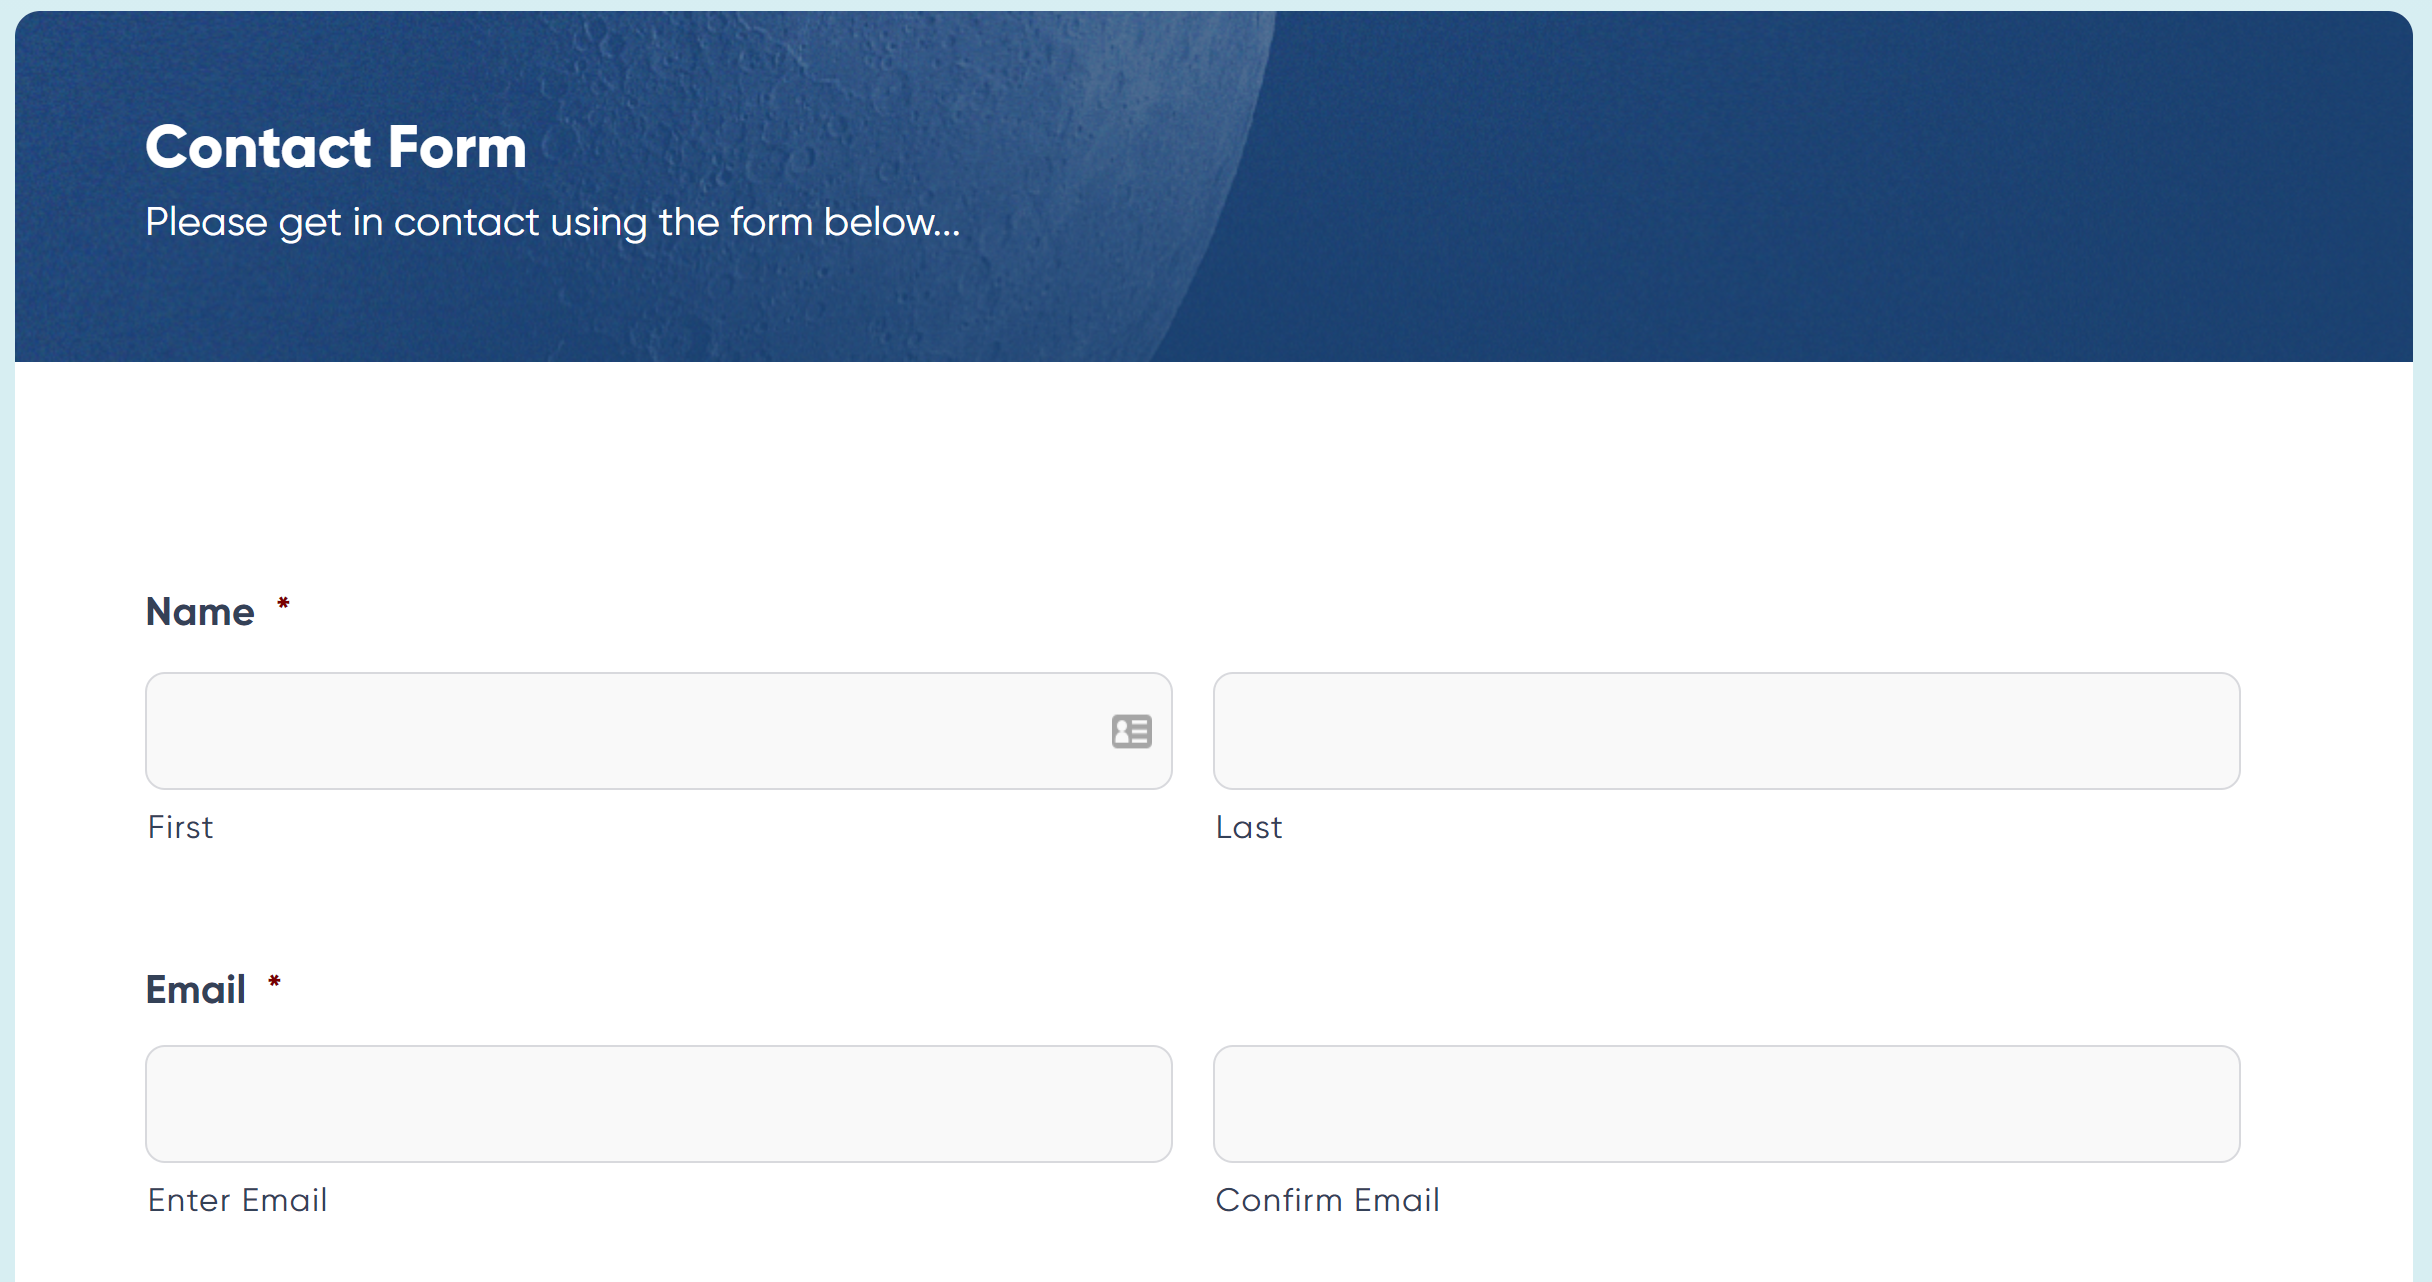
You can add as many form fields as your heart desires, but for a basic form, you will only need a few fields. For a contact form, we recommend…
- Name
- Paragraph Text (re-label as Comments or Questions)
- Consent Field (ensure users agree to the handling of their data)
- CAPTCHA (to prevent spam submissions)
For more information on the different form fields that you can use, take a look at the field type documentation.
Once you have selected your form fields, you can then configure settings for each field such as customizing field labels, creating a CSS class to style the form, enabling conditional logic for individual form fields, and much more.
At any point in time, you can preview the form by clicking the Preview button. When you’re done creating your form, click on Save Form.
After you have created the form, you can go through the Form Settings and configure notifications and confirmation messages to ensure a positive experience for your users once they have submitted a form.
Embed the Form In a Page or Post
Of course, creating a form won’t help things much if nobody can access it. Don’t worry, embedding a form into a WordPress post or page is just as easy as creating a form.
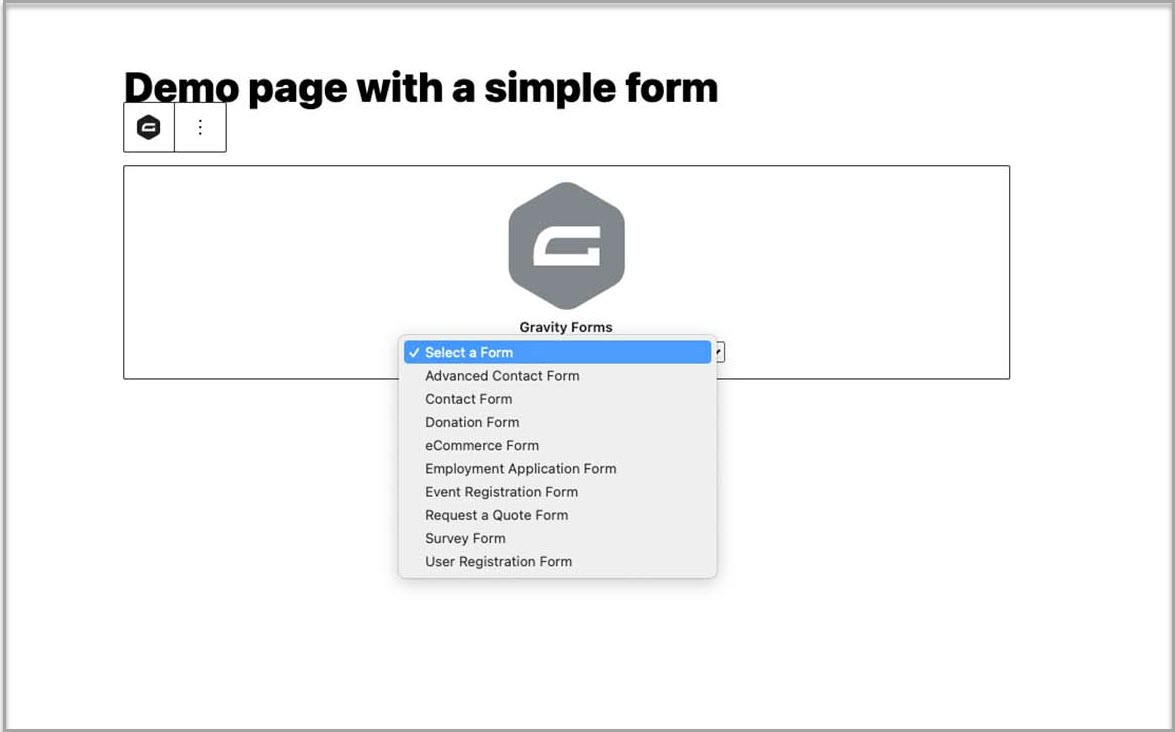
Within your WordPress admin, navigate to the post or page where you want to place the form. Click the Plus sign in the block editor and search for Gravity Forms. Under Embeds, click on Form – this will insert the Gravity Forms block.
Then, select the correct form from the drop-down menu to insert that form into the page.
Lastly, save your changes and then view your page to see the form in action.
For more in-depth information on this subject and the other methods you can use to embed a form, check out this article – How to… Embed a Form in WordPress.
Save Time With Form Templates
As you can see, creating a simple contact form is a quick and easy process with Gravity Forms. However, you don’t have to start from scratch every time you need to create a new type of form.
The Gravity Forms template library is packed full of stylish, fully customizable form templates, that you can use as a starting point for any project.
To download a template, simply scroll to the bottom of the appropriate form template page and click on Get This Form Template. The form will now download to your computer as a JSON file.
Then go to your WordPress dashboard and click on Forms > Import/Export > Import Forms. Locate the form template and press Import.
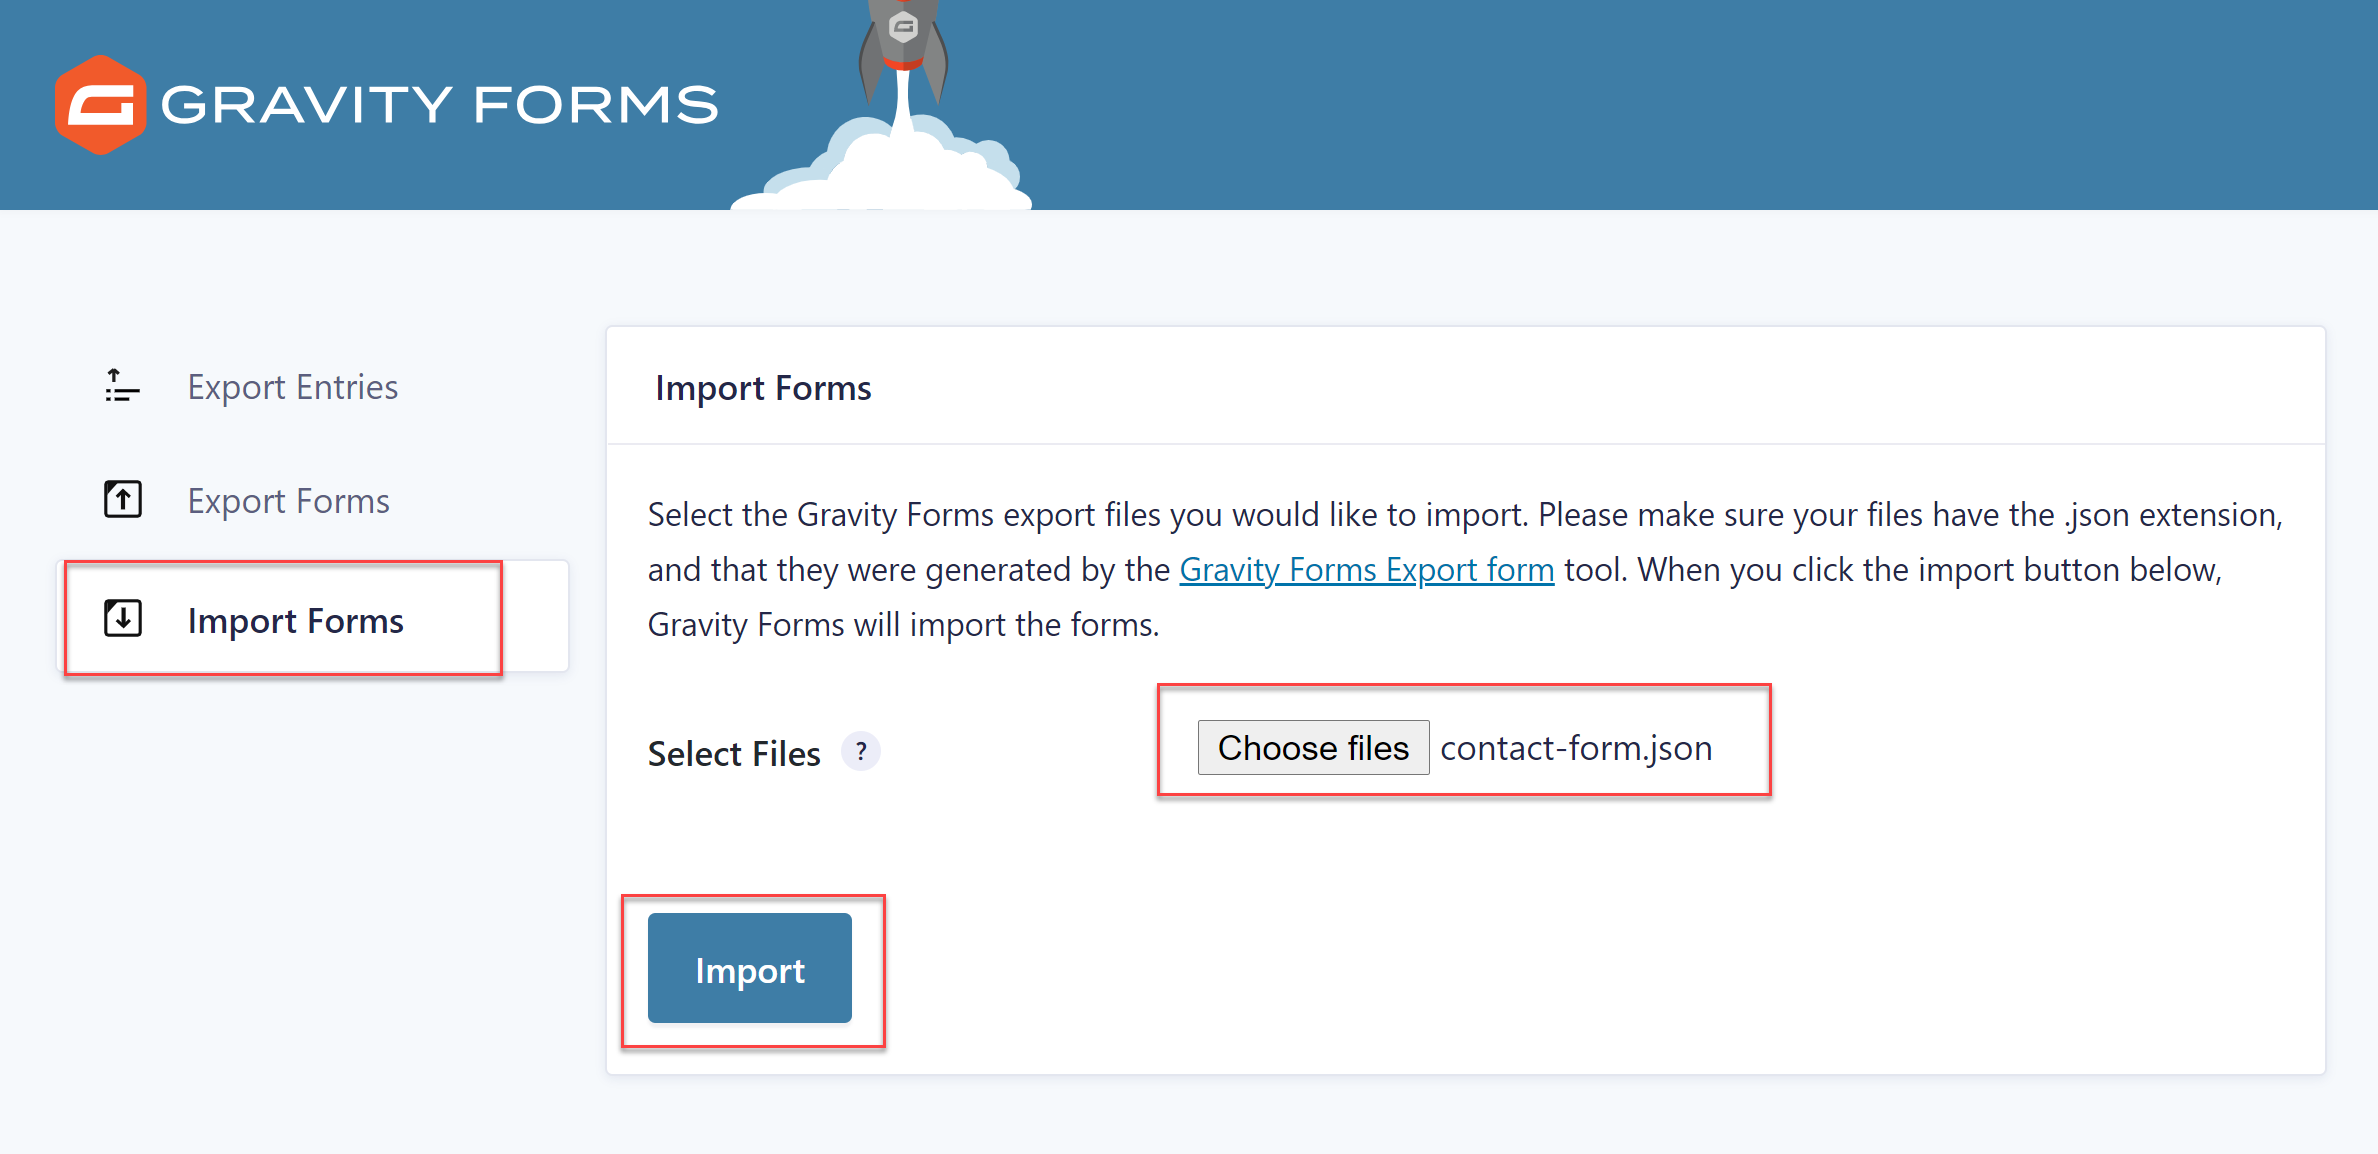
This will import the form onto your site, allowing you to proceed with the next step of editing and customizing the form.
To help you get started with a pre-built form template, check out this article – How to Import and Customize a Basic Contact Form.
Where Do I Go From Here?
The logical next step is to integrate your form with an email marketing service. Gravity Forms syncs with numerous email marketing platforms and CRMs including Mailchimp and HubSpot. Simply install and connect the appropriate add-on and then automatically send all form submissions to your chosen email marketing tool, where you can organize your leads and engage with your audience in a timely fashion.
As your form requirements grow, you will find the wide assortment of Gravity Forms integrations invaluable. Take payments on your website with Gravity Forms and Stripe, PayPal, or Authorize.Net, send form file uploads to Dropbox, or sync your forms with over 2,000 further applications and services using our Zapier Add-On. Whatever your needs, Gravity Forms can accommodate them!
Don’t Have Gravity Forms Yet?
If you don’t have Gravity Forms, don’t worry. You can still test out everything in this article for free inside your own personalized Gravity Forms demo and see why Gravity Forms is the top choice for WordPress sites worldwide.
Already sold on using Gravity Forms? Purchase our premium WordPress form plugin today!

If you want to keep up-to-date with what’s happening on the blog sign up for the Gravity Forms newsletter!
"*" indicates required fields


