 Gravity Forms makes it easy to create all kinds of forms for your WordPress website. From simple contact forms to event registration forms and payment forms, Gravity Forms can handle it all. But the problem with having numerous forms is that you constantly need to check the entries table to see new form submissions. Or do you?
Thanks to the Gravity Forms Notification feature, you can get notified about new submissions via email, enabling you to give your visitors and users a timely response, as well as send notifications to your users too.
In this post, we’ll discuss why you should create custom notifications for form submissions. In addition to that, we’ll show you how to set them up and use merge tags to personalize notification messages, as well as how to use conditional logic to send different notifications depending on how a user filled out a form.
Short on time? Then check out this notifications video, giving you an overview of Gravity Forms notifications and how to quickly set them up…
Why Setup Custom Notifications?
Gravity Forms notifications are emails that are automatically sent when forms are submitted. By default, notifications are set up to be sent to the site admin. As mentioned earlier, notification emails are beneficial because they allow you to immediately get notified about form submissions. You can then send timely replies to your website visitors and users.
But that’s not the only reason why notifications are useful. You can also set up custom notification emails to be sent to anyone who submits a form. Doing so allows you to notify them that their submission has been successful.
You can also use this opportunity to send a more personalized message letting them know when they can expect a reply or tell them what to do next now that their form has been sent. For example, this can include booking an appointment, visiting a specific page on your site, or similar.
Lastly, you can set up custom notifications to notify appropriate team members of form submissions relevant to their department. For example, if you have a sales department, you can create a form that registers pre-sale inquiries and set up notification emails that go only to the sales department.
How To Set Up Notifications – To Send To Users After A Submission
So now that you know why setting up custom notifications is useful, let’s take a look at how to set them up. For this to work, you’ll need to have a form already set up on your website with Gravity Forms.
1. Access The Form
Start by logging into your WordPress website and go to Forms > Forms to access all of the forms on your website. Then, hover over the form you want to set up the notifications for and click on Edit. Once the form editor loads, click on Settings > Notifications.
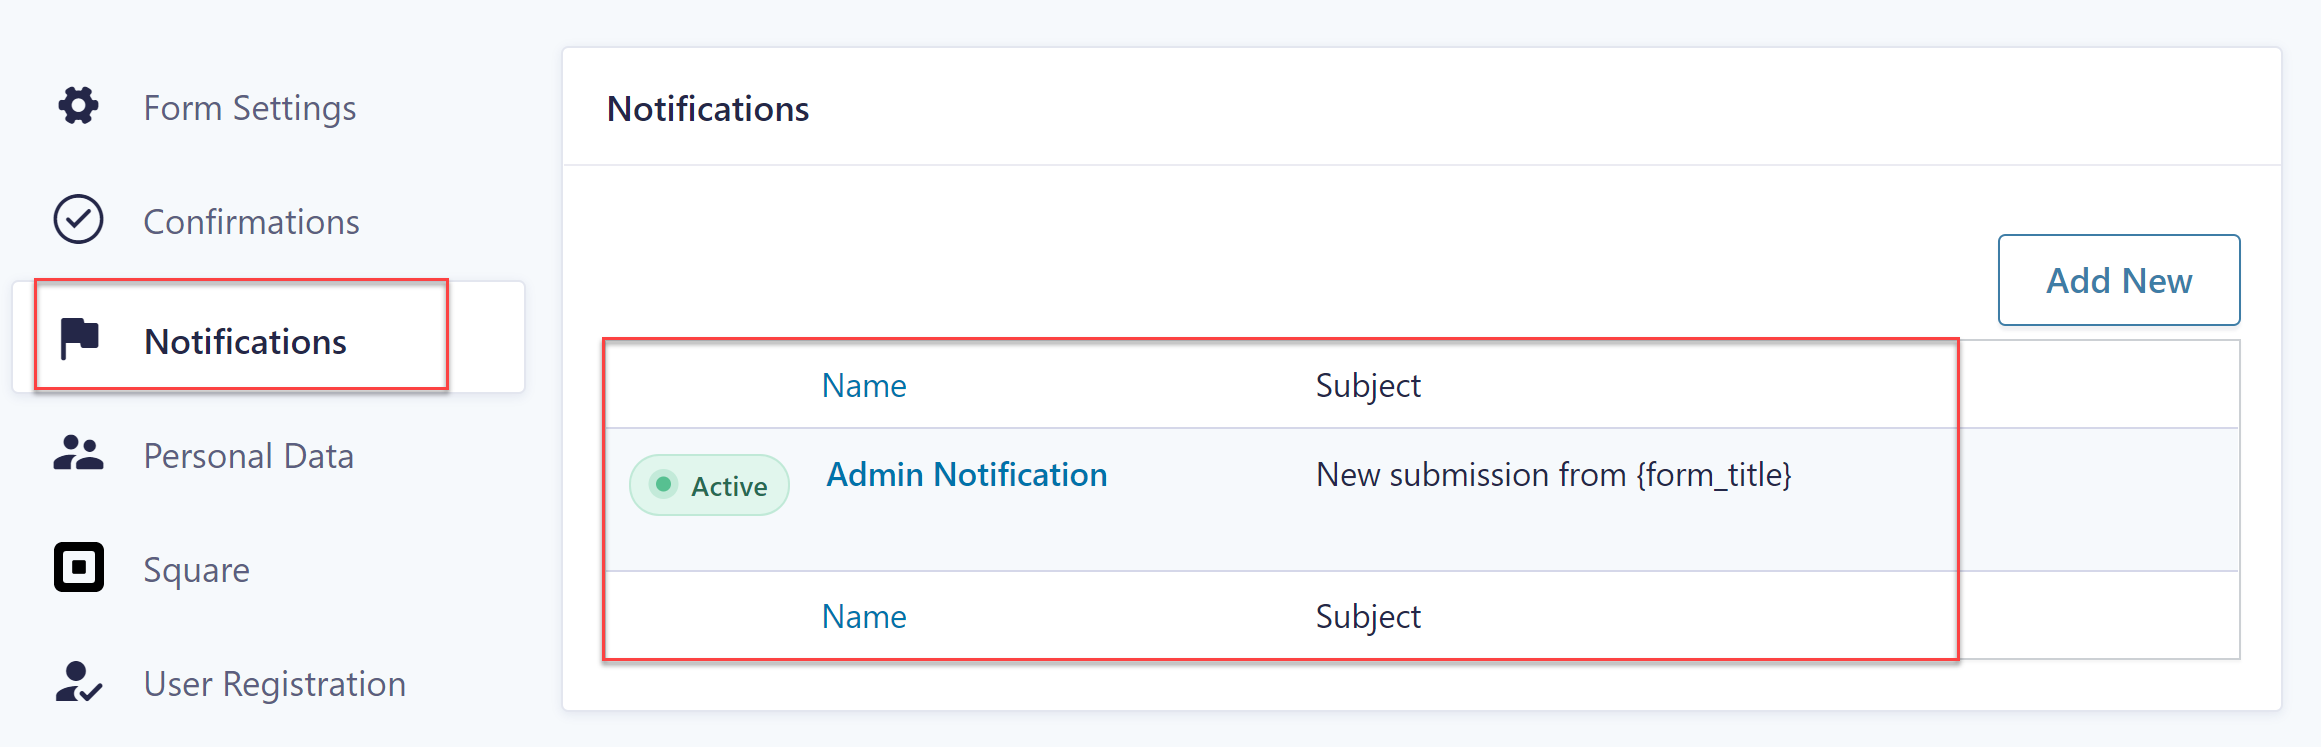
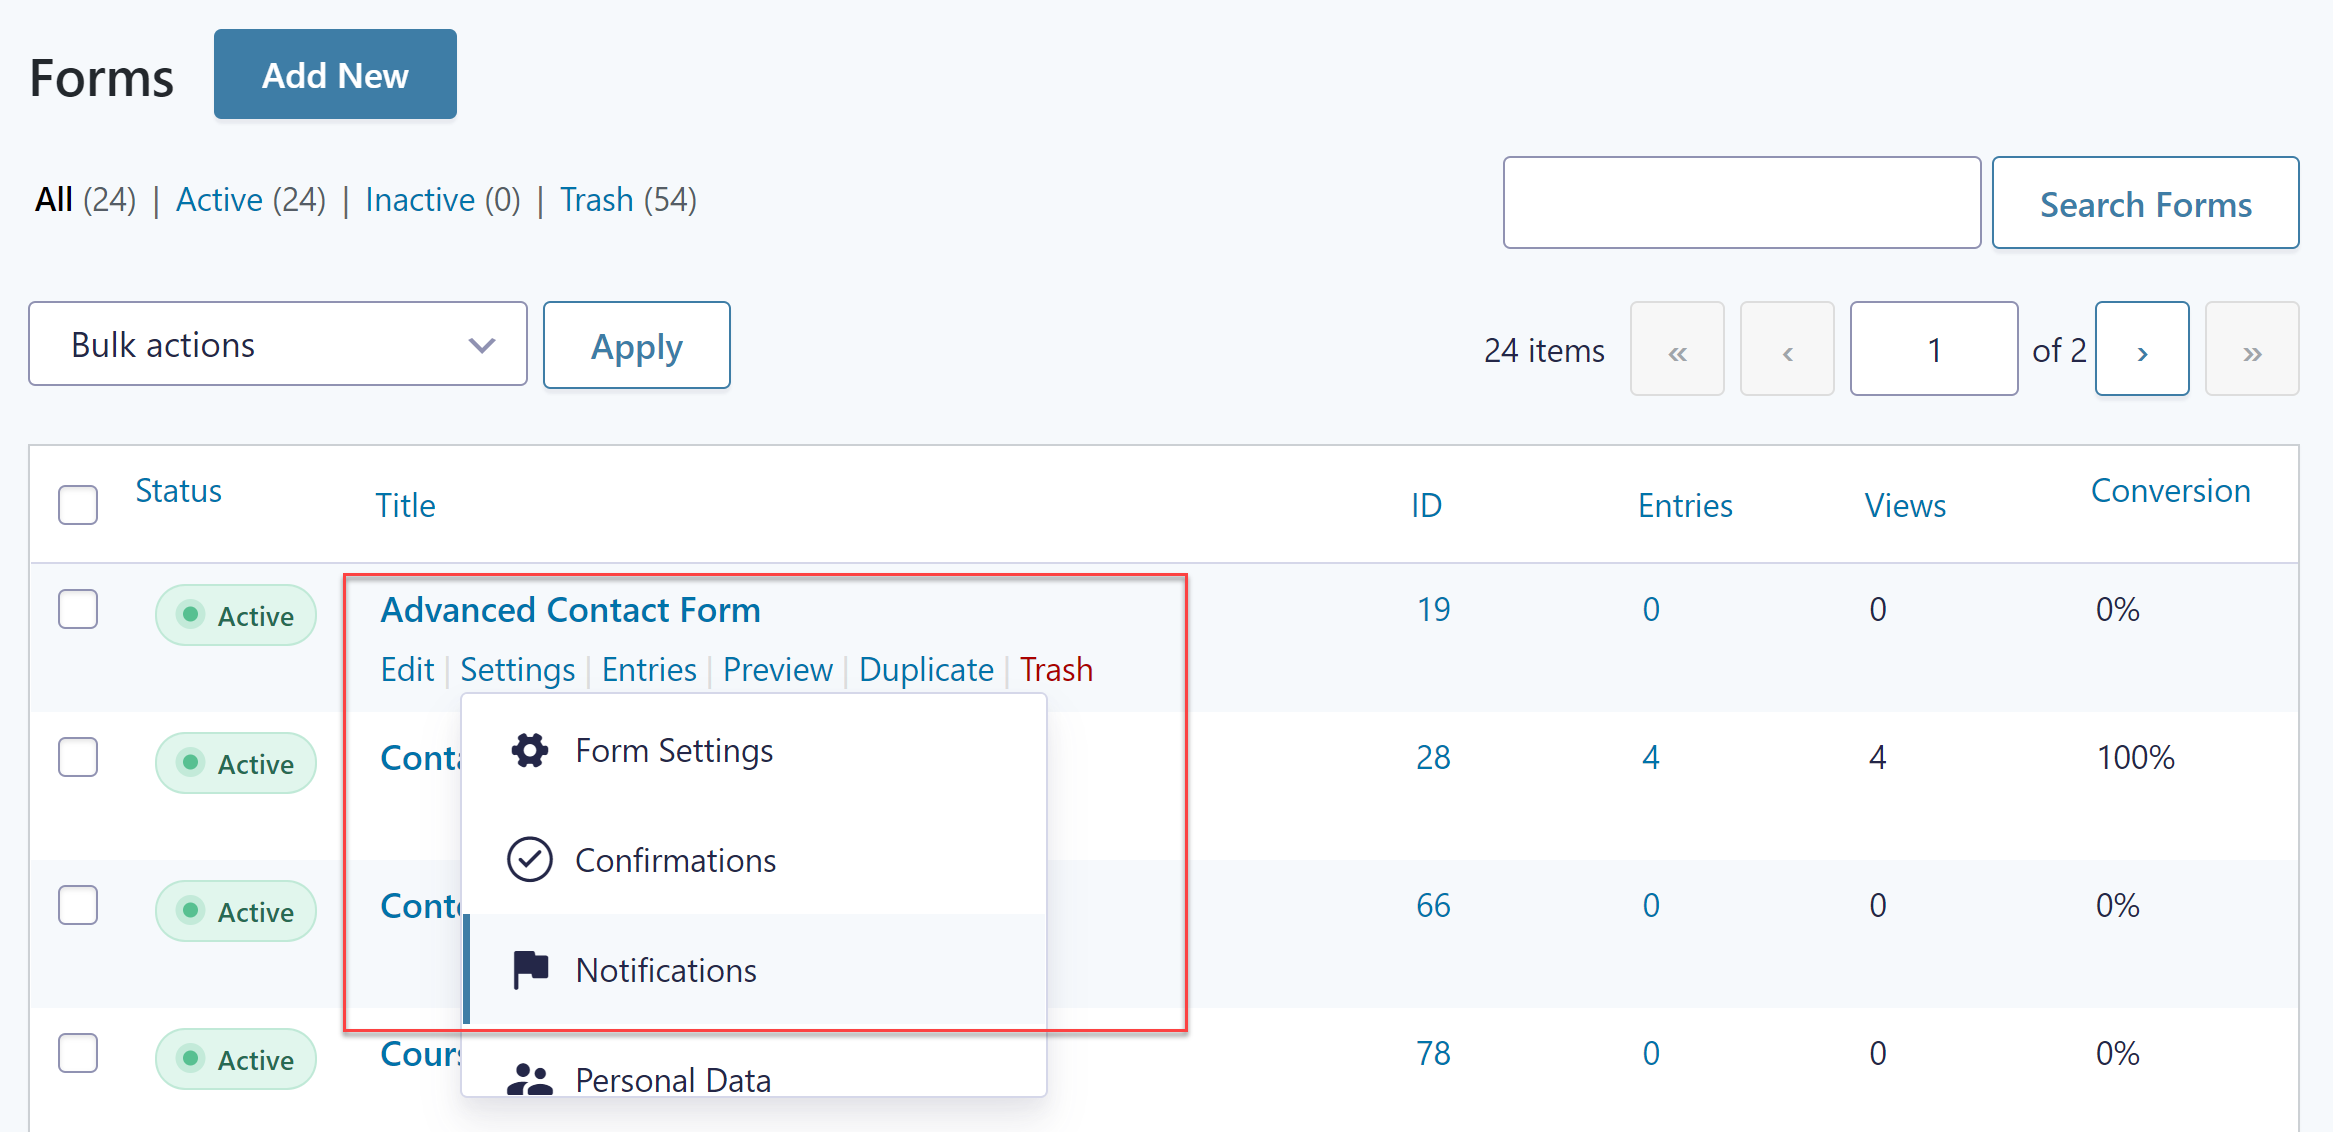 You can now see all the notifications that exist for that particular form. By default, there should already be a notification that sends submission information to the admin of the site.
 In the next few steps, we’ll set up a notification that goes to users who submit the form.
2. Create a New Notification
Click on the Add New button to start setting up a new notification. Give it a name such as “User Notification”. This will make it easier to see which notifications are set up and their purpose.
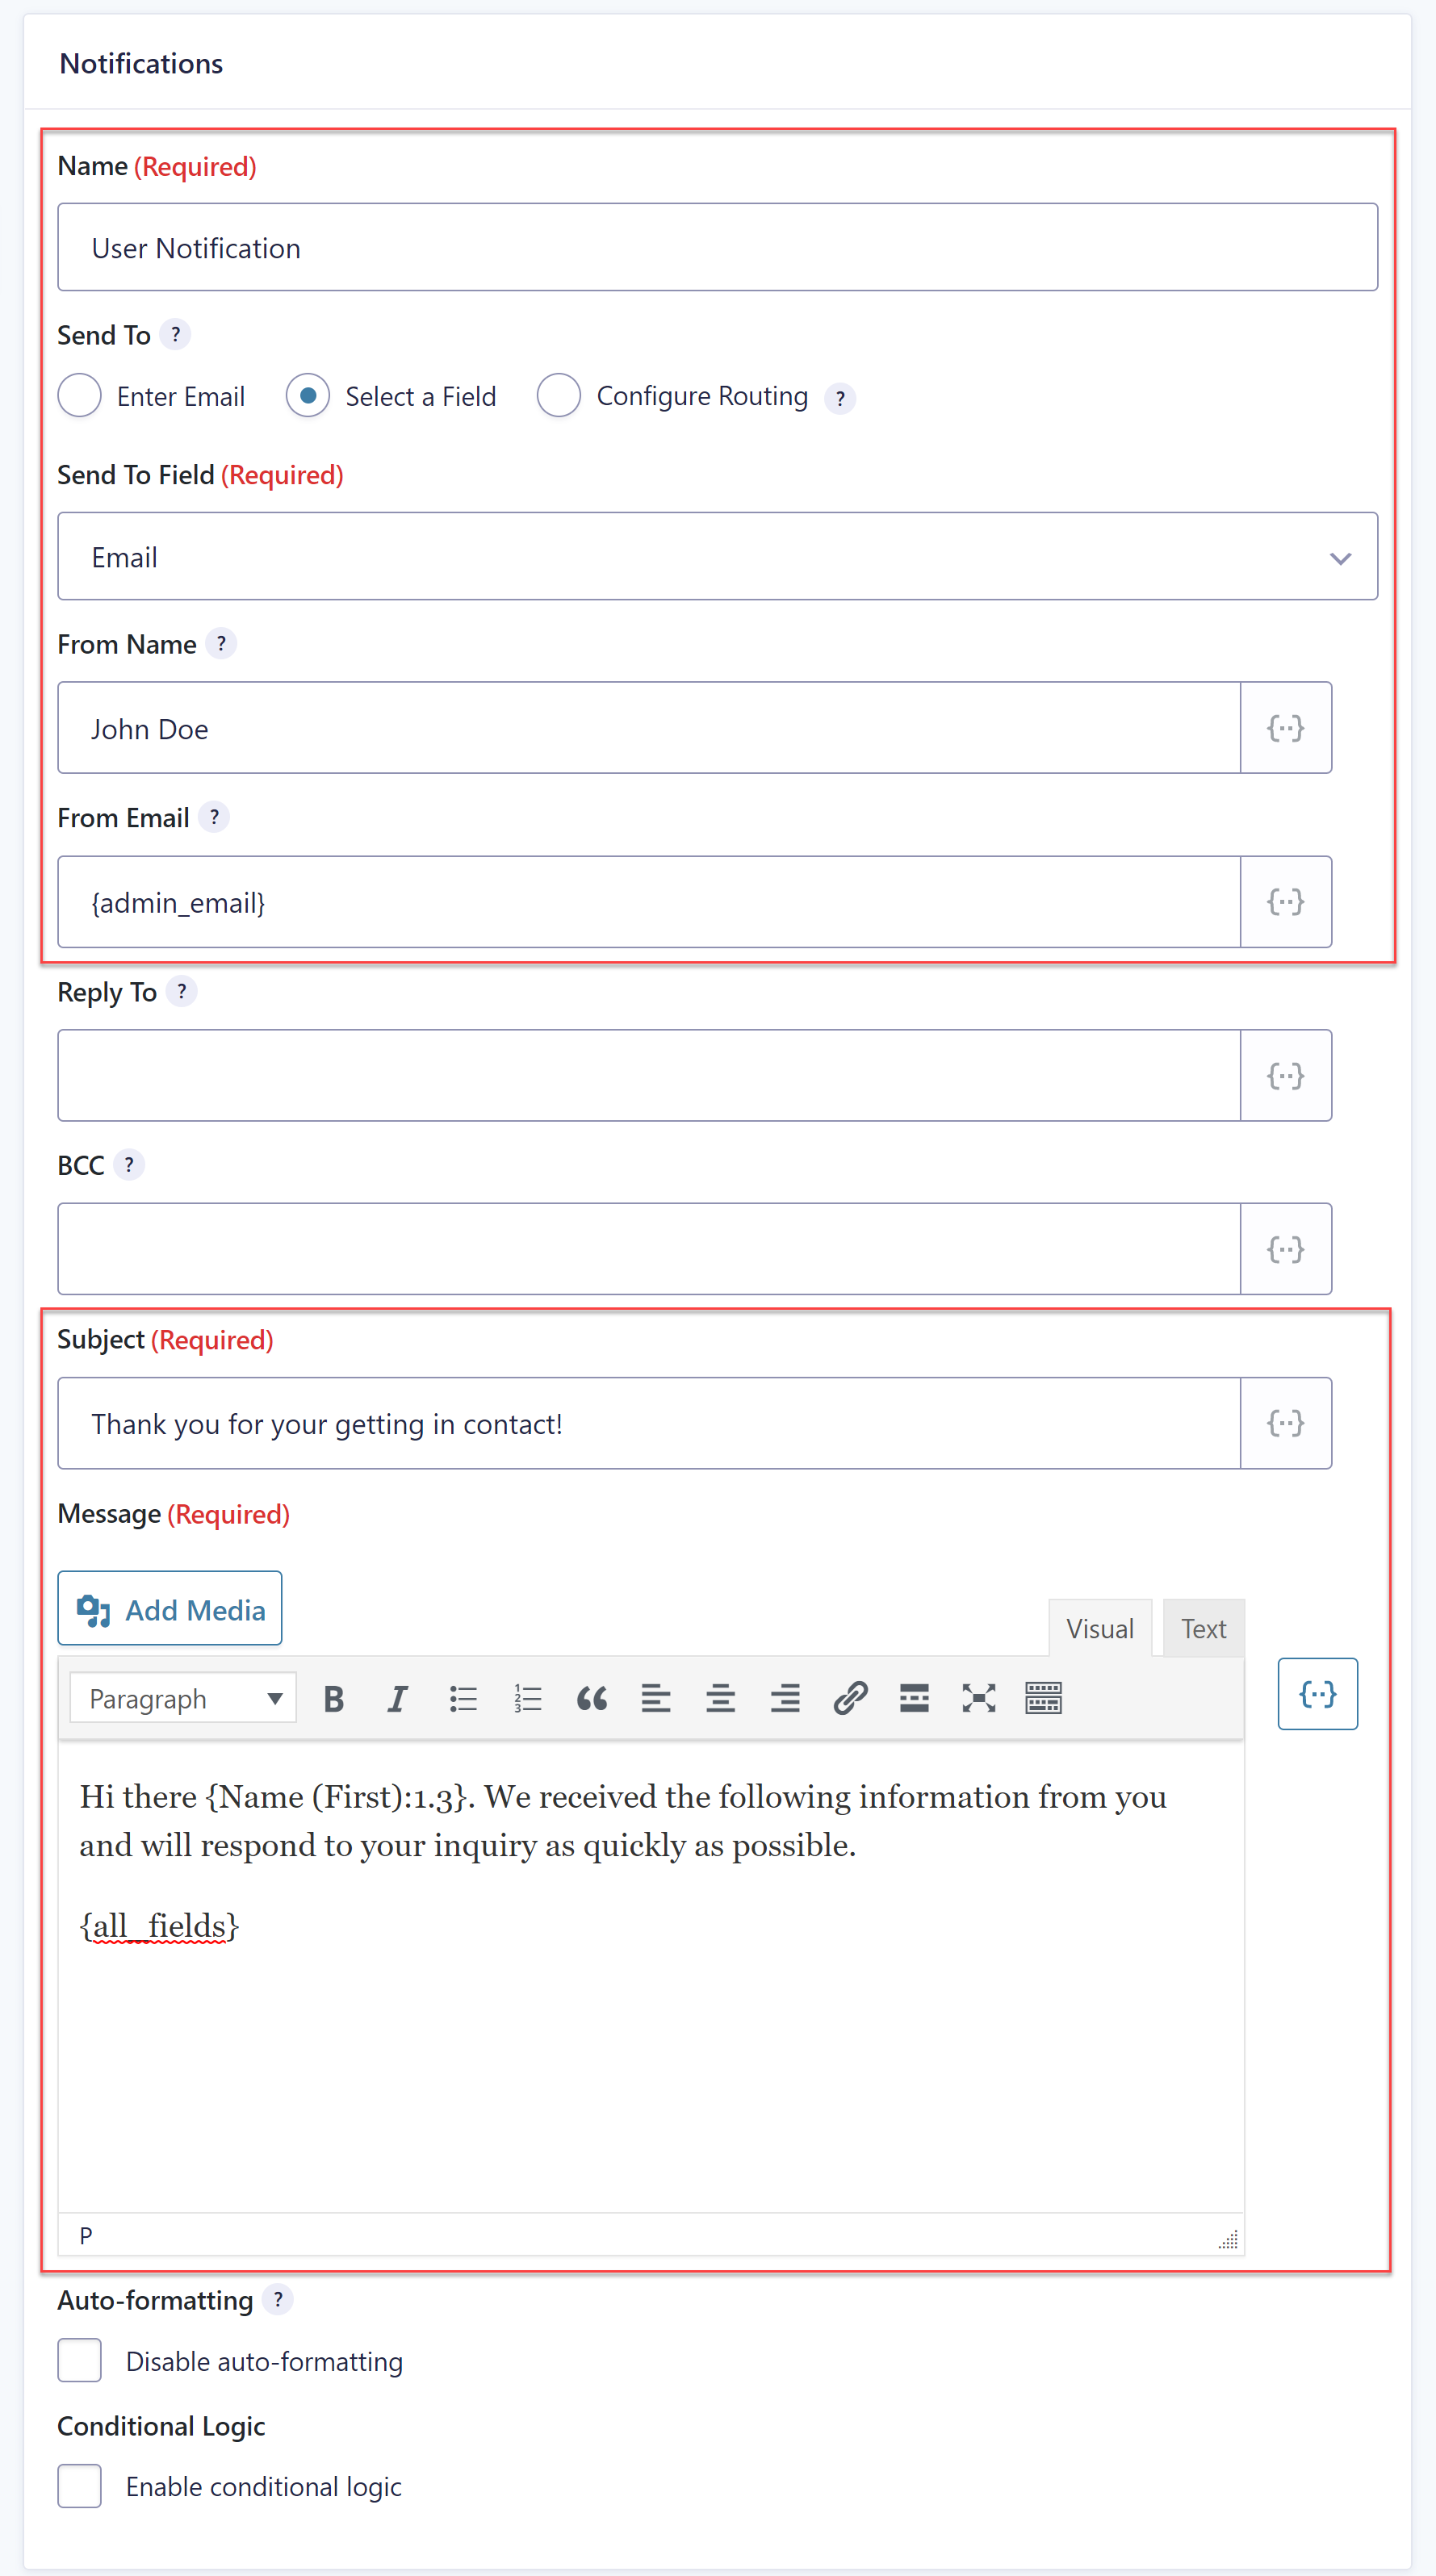 In the Send to field, select the Select field option. Then, choose the Email field from the drop-down menu next to Send to Field.
Under the From Name and From Email fields, enter the name and email address you’d like to send the notification from. It’s recommended you use an email address from your domain name to ensure it gets delivered to the inbox instead of ending up in a spam folder.
You can also set up the BCC field if there’s anyone else in your company that needs to receive this notification. If not, feel free to leave this field blank.
Lastly, make sure you fill out the subject field and the message field with what you want your notification to contain (more on this to follow…)
For further information on notifications, have a read of this article – Configuring Notifications in Gravity Forms.
3. Use Merge Tags To Personalize The Notification Message
By using merge tags, you can dynamically populate submitted field values and personalize the subject and the message field of your notification. To do this, scroll down to the Message field and click on the icon on the right hand side.
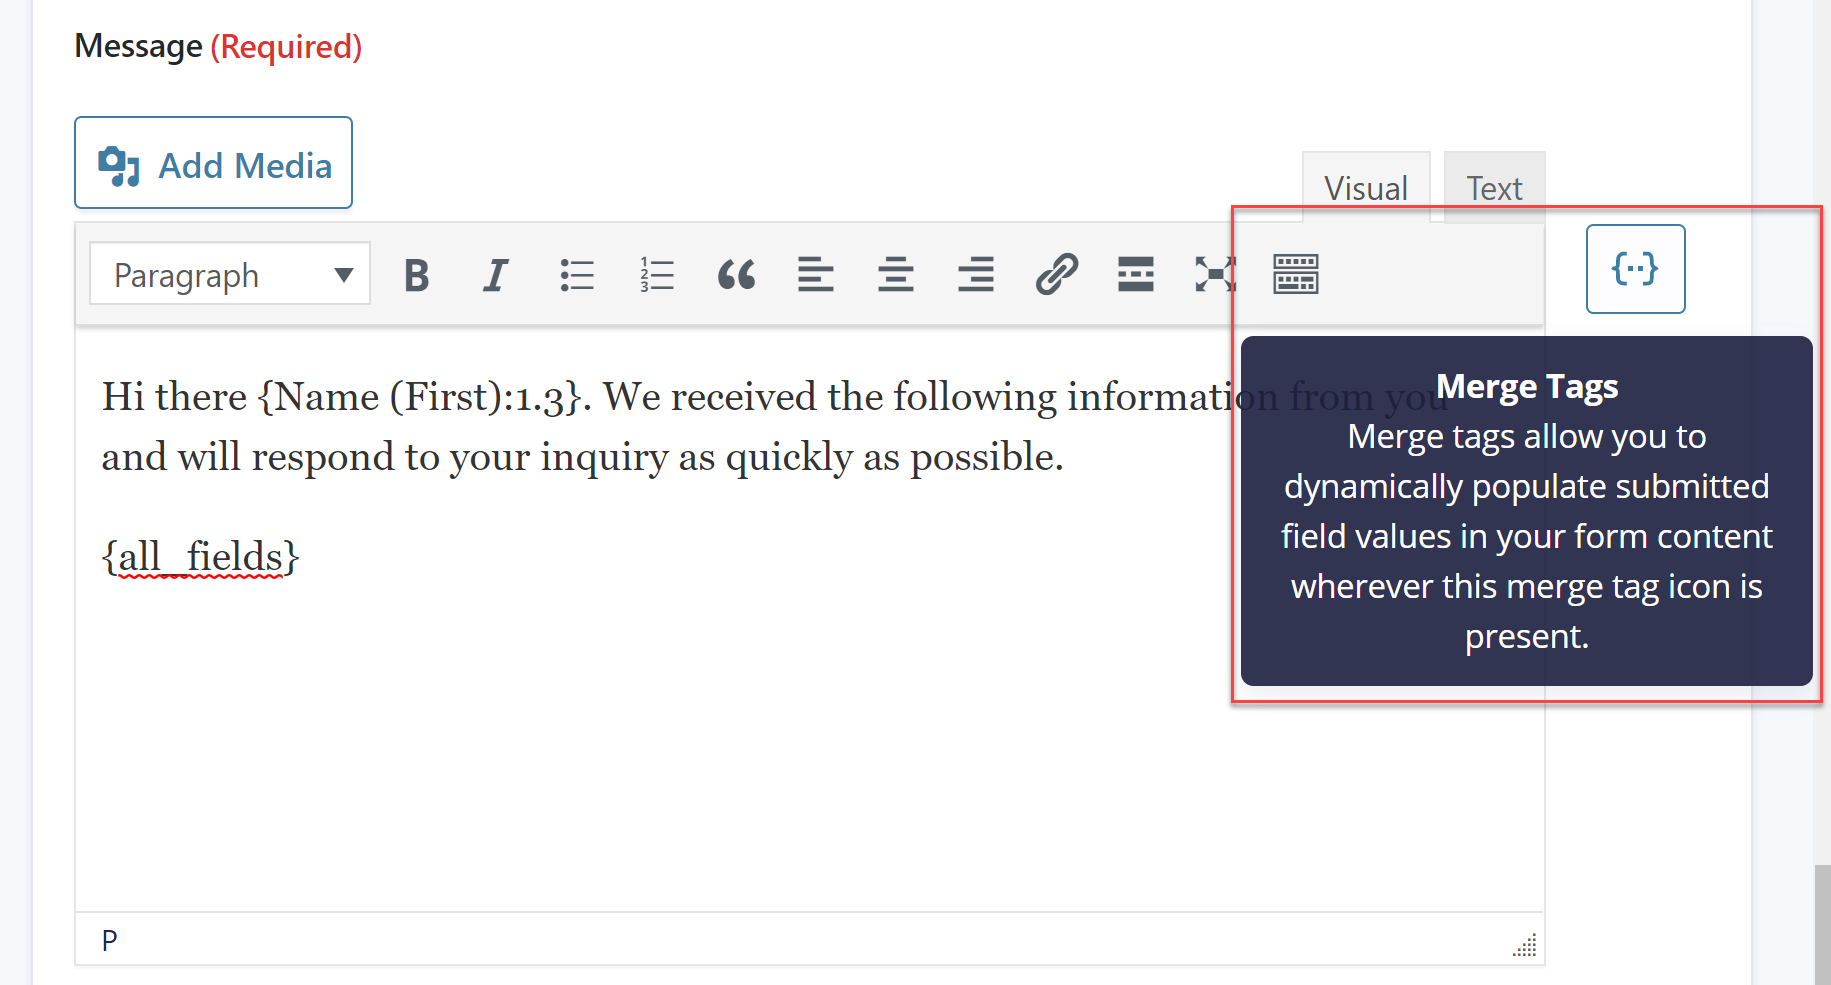 It will show you available merge tags you can add to this field. For example, you can easily include the name of the user who filled out the form. You can also add merge tags to other notification fields, including the Subject, From Name, and Reply To fields.
To further enhance your form notification message, check out this article – Creating Customized Form Notification Emails.
4. Configure an SMTP Email Service
In some cases, due to server settings, WordPress email notifications aren’t always as reliable as we’d like them to be. If you find that you’re not getting notifications on form submissions, it’s recommended to configure an SMTP email service to help with deliverability of your notifications.
Gravity Forms makes it easy to connect services like SendGrid, Mailgun or Postmark to solve deliverability issues. You’ll need to sign up for an account with the service of your choice, and then install the appropriate SMPT email Add-On, following the instructions to complete the integration of the service with Gravity Forms.
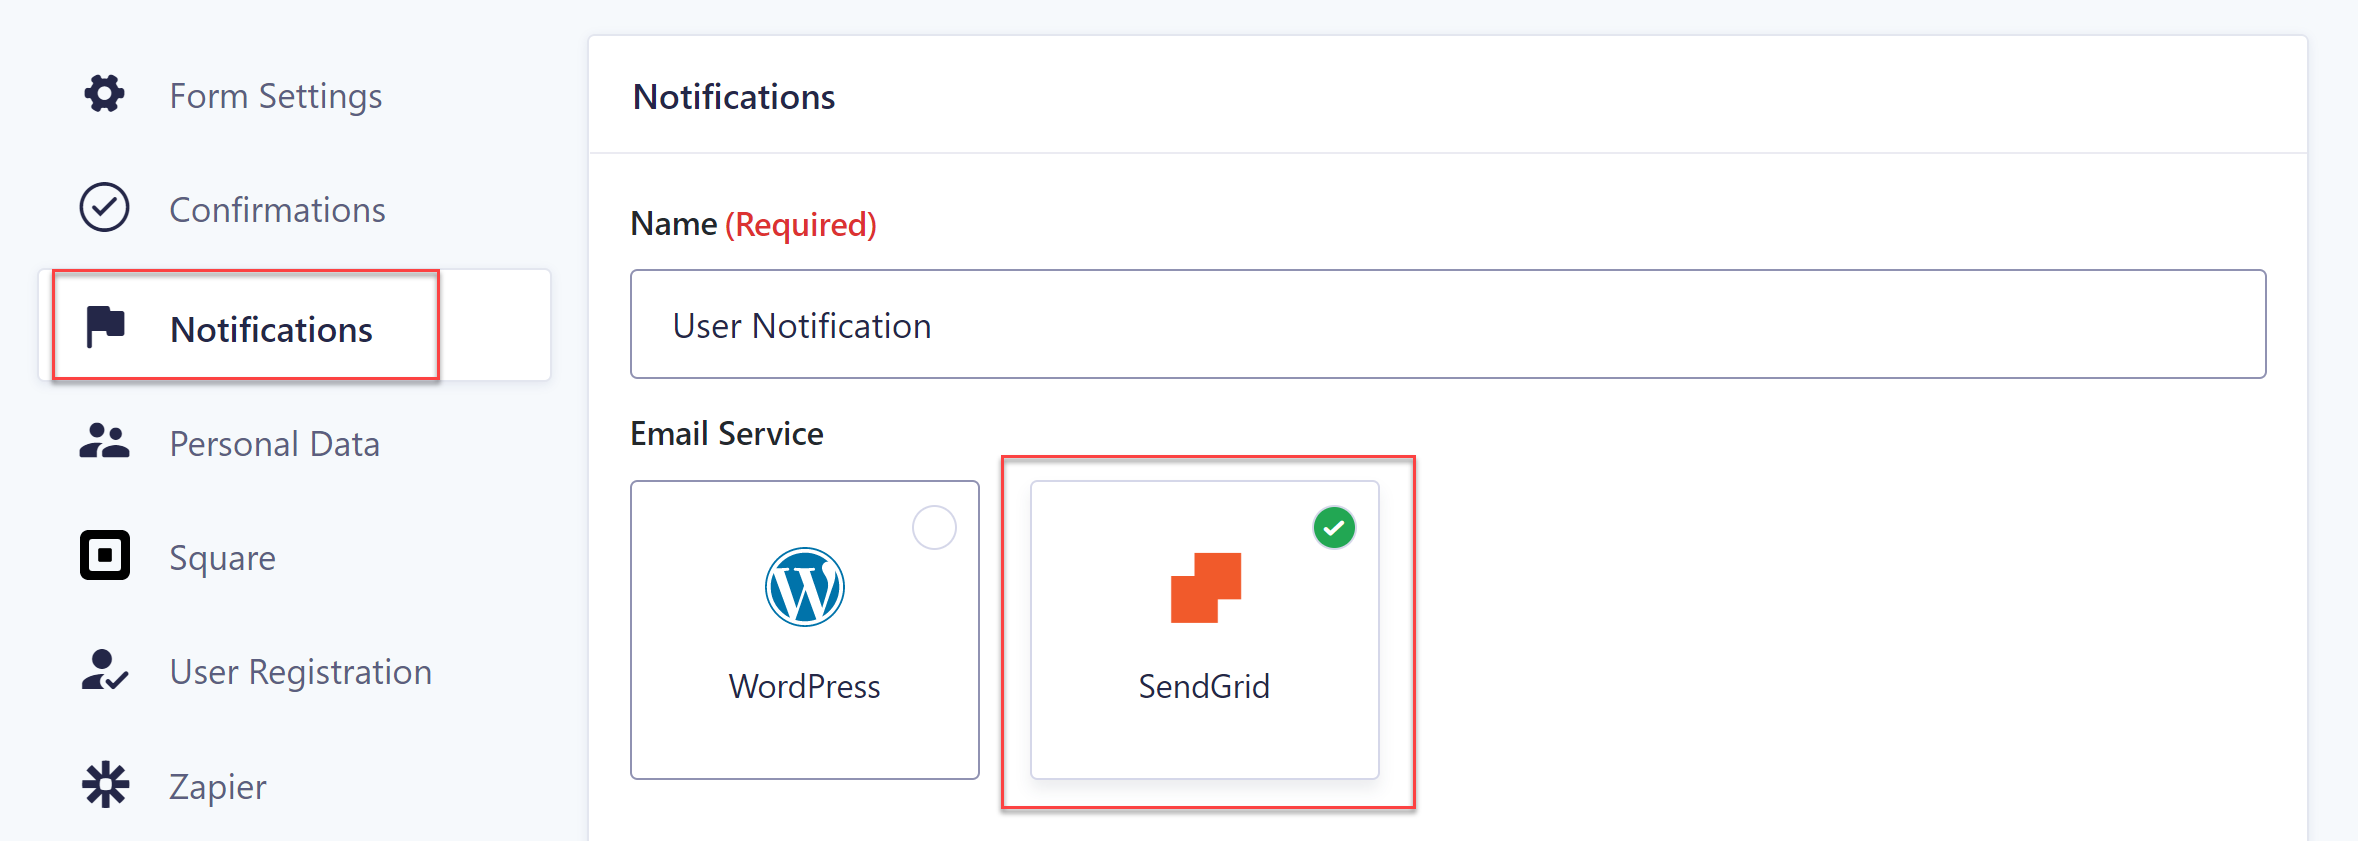
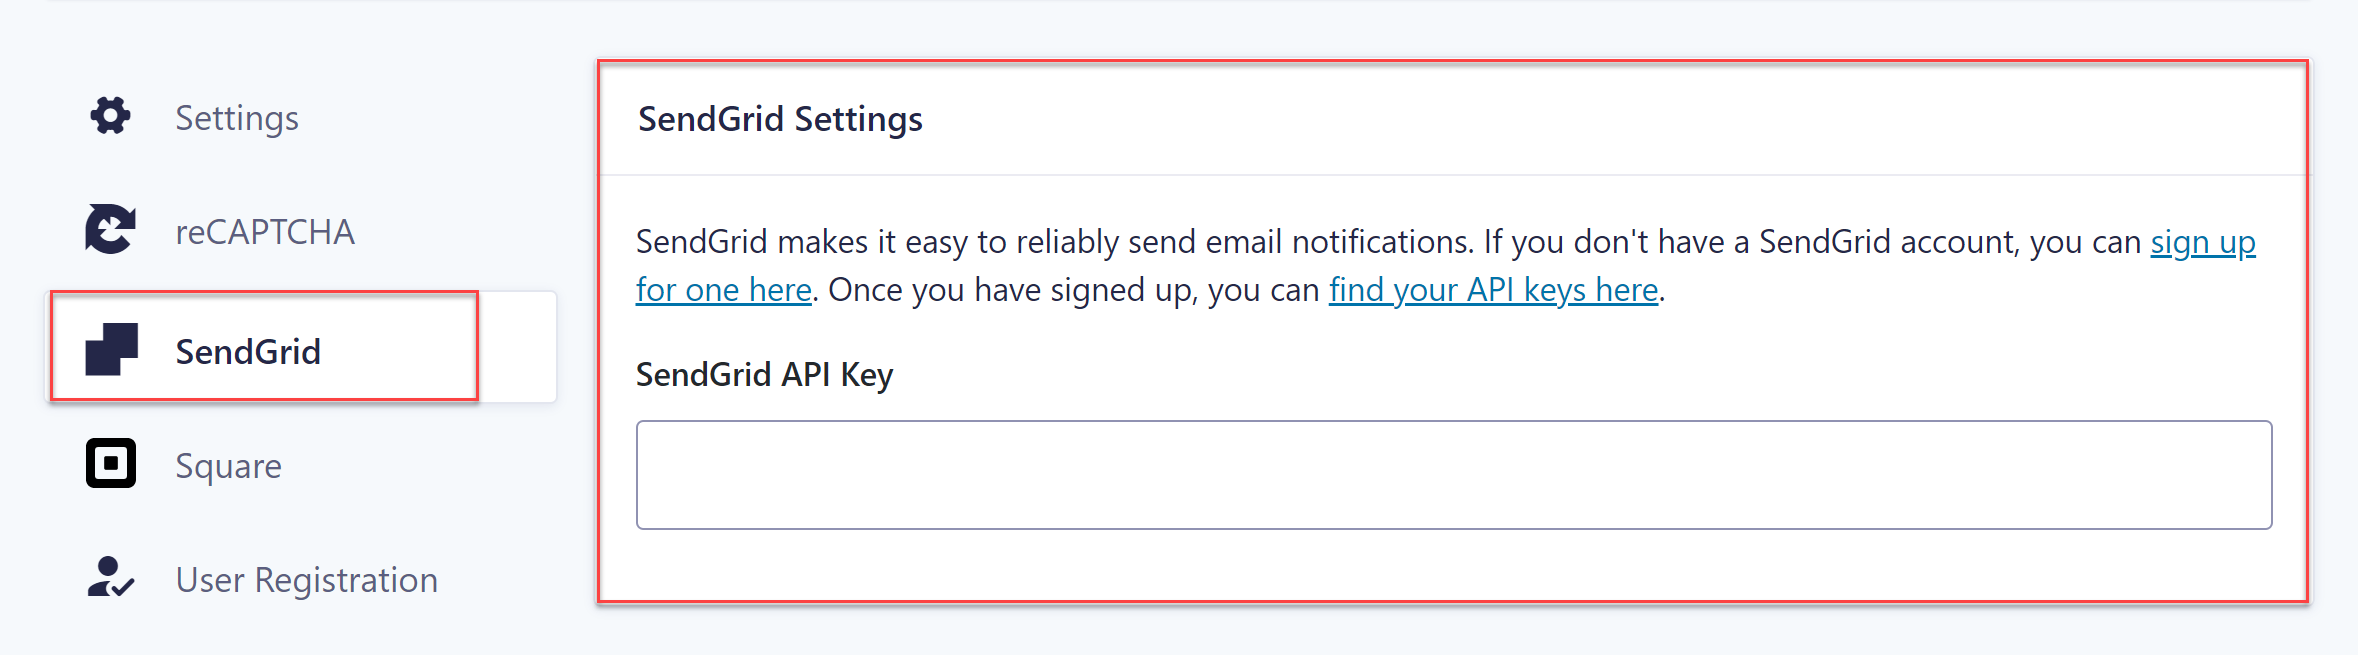 Once you’ve completed the installation process, go back to your form Notifications and select the corresponding email service.
 For more information on using SendGrid to send your Gravity Forms notifications, check out the Gravity Forms documentation.
5. Save And Test Notification
The last step in this part of the tutorial is to save your notification and test the settings. You can fill out the form using an alternate email address to make sure it’s working and that users will indeed receive notifications once they submit the form.
How To Use Conditional Logic With Custom Notifications
Another interesting feature that can be used with custom notifications is conditional logic. This allows you to send notifications based on how a form was filled out.
For example, let’s say you use Gravity Forms to sell products. You can enable custom notifications to be sent based on the shipping method, payment method or even shipping and billing address.
Simply select to Enable Conditional logic and then select appropriate conditions. In this example, you can set the notification to be sent to users who have selected the Standard Shipping method.
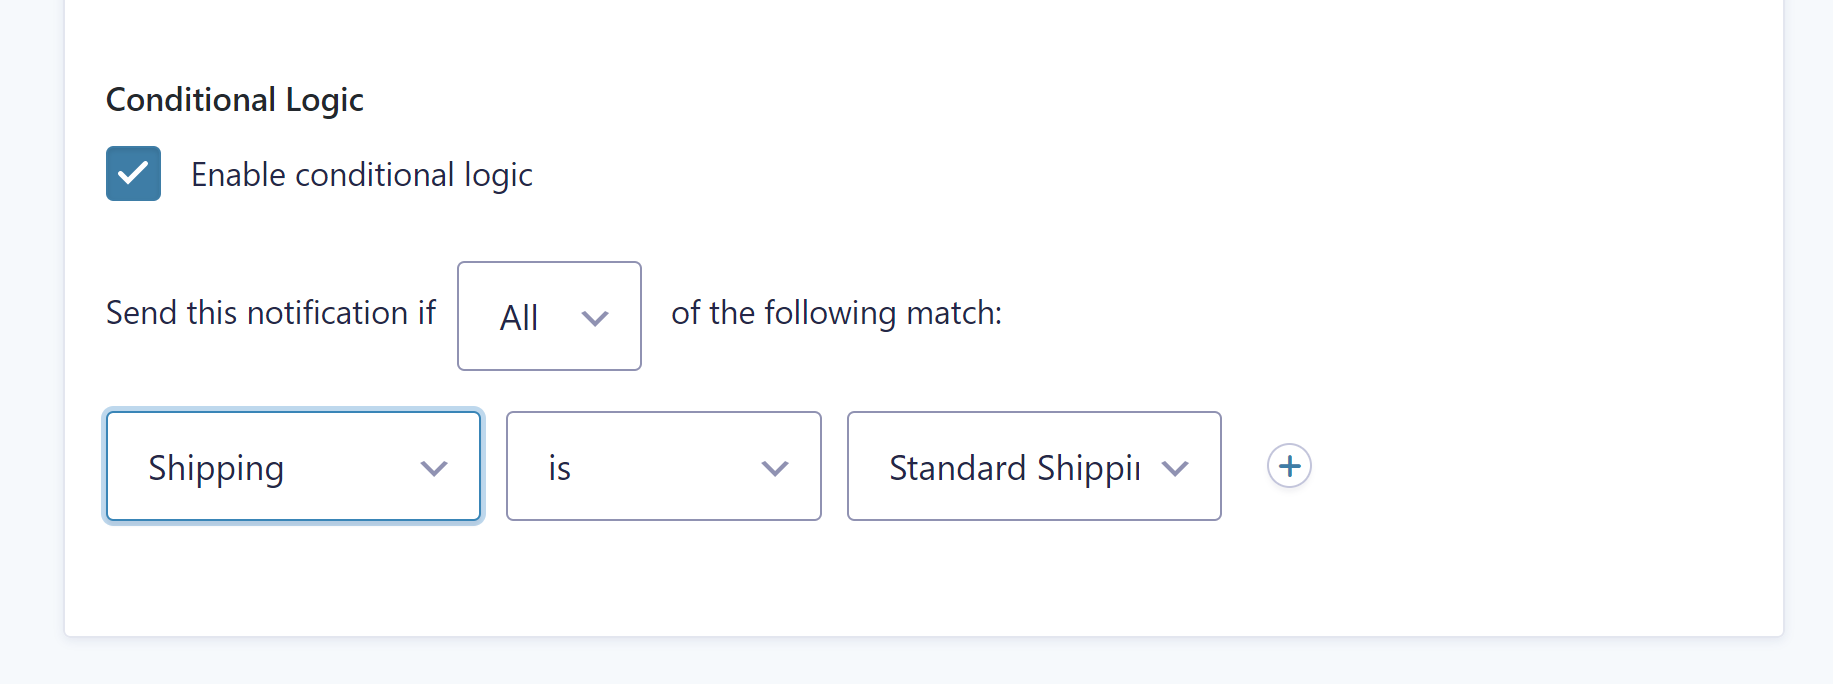 You can also group several conditions. For example, you can configure notifications to go to users who have chosen Standard Shipping method and paid with a credit card.
This allows you to send very targeted and personalized form notifications to your users and provide them with a better user experience.
Ready to Setup Custom Notifications For Form Submissions?
As you can see, setting up custom notifications for form submissions is quick and easy with Gravity Forms. These resources can help you further with ‘after form submission’ customizations…
- How to… Configure a Custom Confirmation Message – Make sure your confirmation messages are up to scratch, as well as your notifications!
- How to… Redirect Users to a New Page or URL After Form Submission – Provide your users with next steps, more information, or a more personalized experience immediately after they’ve submitted a form by sending them to a new page or URL.
- After Form Submission: Automate Your Processes – Gravity Forms’ certified add-ons provide advanced functionality to enable you to easily automate your processes and extend your after form submission user-experience.
If you don’t have Gravity Forms, don’t worry. Head on over to the Gravity Forms demo and test the custom notifications feature out for yourself for free. Check out our form builder, customize the form templates, or create a form from scratch! Enjoy!
Already sold on using Gravity Forms? Purchase our premium WordPress form plugin today!
Newsletter
If you want to keep up-to-date with what’s happening on the blog sign up for the Gravity Forms newsletter!
"*" indicates required fields