Looking for a way to connect your WordPress forms to Klaviyo?
With the Gravity Forms Klaviyo Add-On, you can easily sync contacts to Klaviyo when they submit a form on your WordPress site. You can create new contacts or update an existing contact if the email already exists.
In addition to mapping form data to core Klaviyo profile fields, you can also map data to custom profile properties that you’ve set up in Klaviyo.
In this post, we’ll introduce you to the Gravity Forms Klaviyo integration and some of its key features. Then, we’ll show you step-by-step how to set up everything and start syncing WordPress form submissions to Klaviyo.
Why use Klaviyo with Gravity Forms?

Klaviyo is a customer relationship manager (CRM) that’s specifically built for B2C brands (business to consumer).
It offers tools for marketing, customer service, AI, analytics, and more and is used by over 200,000 brands, including big names like The Body Shop, Vans, Claire’s, Vuori, and more.
If your business operates in the B2C space using WordPress, it can be a great option to pair with your WordPress website and Gravity Forms.
Klaviyo has a permanently free plan and its paid plans start at just $20 per month, so it’s suitable for businesses of all sizes.
Key features of the Gravity Forms Klaviyo Add-On
With the Gravity Forms Klaviyo Add-On, you can easily connect any of your forms to any of your Klaviyo lists.
The add-on works using the same feed-based system as other Gravity Forms add-ons, which makes it easy to set up the integration and also lets you leverage conditional logic for your feeds.
Here are some of the key features that you can access with the add-on:
- Connect to your Klaviyo account using a simple authorization process – Connect to Klaviyo just by clicking a few buttons instead of needing to work with API keys.
- Create or update Klaviyo profiles – Create a profile for new contacts or update existing profiles if a contact’s email already exists in Klaviyo.
- Map form fields to Klaviyo fields – Map form fields to core Klaviyo profile fields such as email, first name, last name, and phone number.
- Map form info to custom profile properties – You also have the option to map form fields or other form data to custom profile properties that you’ve added in Klaviyo.
- Add conditional logic to your feed – You can choose to only sync a contact to Klaviyo if certain conditions are met. Or, you can sync contacts to different Klaviyo lists based on your conditions.
- Background processing – Gravity Forms processes the feed asynchronously, so sending data to Klaviyo won’t slow down the form submission process.
- Optional API key setup – For developers working on client sites, it’s also possible to connect to Klaviyo using an API key.
How to connect WordPress to Klaviyo with Gravity Forms
Now, let’s get into the full step-by-step guide on how to sync Gravity Forms and WordPress to Klaviyo.
We’ll take you through every step in the process, from installing the add-on and creating your Klaviyo account to connecting Gravity Forms to Klaviyo and setting up your first Klaviyo form feed.
Let’s go through it…
1. Install the Gravity Forms Klaviyo Add-On
To get started, you’ll need to install and activate the Gravity Forms Klaviyo Add-On on your WordPress site.
The Klaviyo Add-On is available on all Gravity Forms licenses. So, as long as you have an active license, you can follow this guide and connect Gravity Forms to Klaviyo.
If you’re not holding a Gravity Forms license yet, you can purchase your license here.
Once you’ve installed the core Gravity Forms plugin and added your license key, here’s how to install the Klaviyo Add-On:
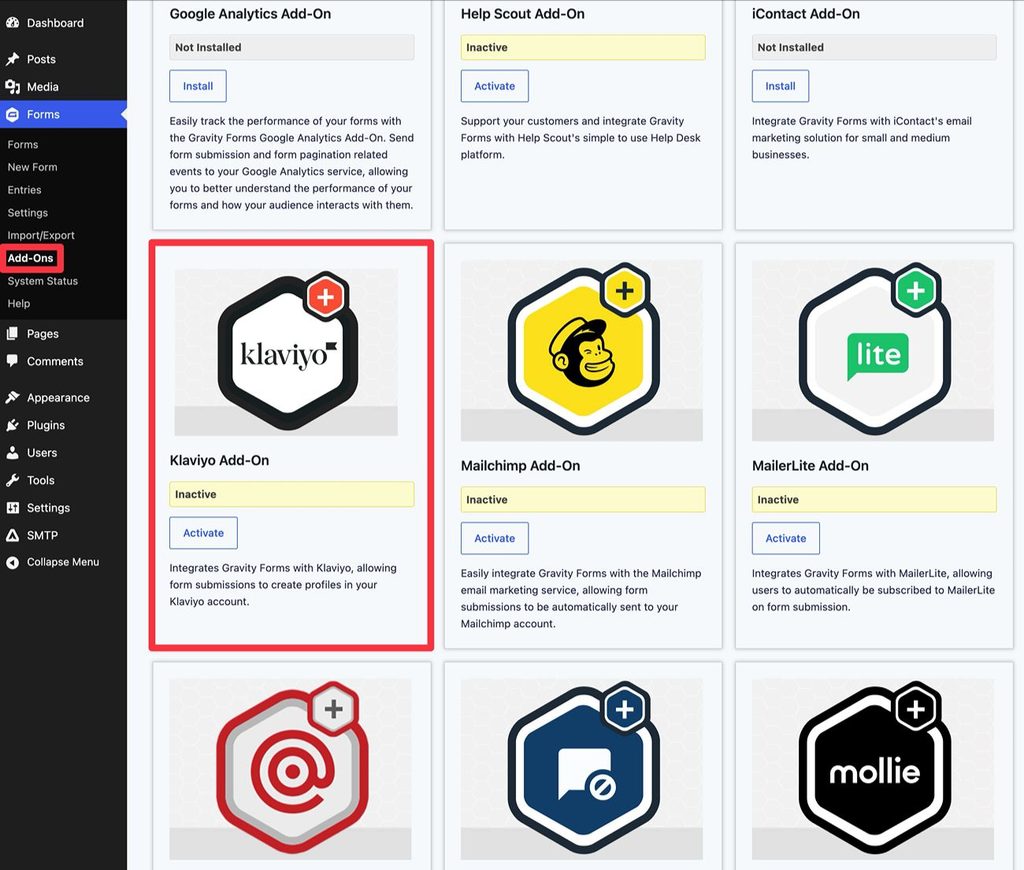
- Open your WordPress dashboard.
- Go to Forms → Add-Ons.
- Find the Klaviyo Add-On in the list of add-ons.
- Click Install Now to install the Klaviyo Add-On.
- Once the installation process finishes, make sure to activate the add-on on your site.
2. Create your Klaviyo account (if you don’t already have one)
If you already have a Klaviyo account, you can skip ahead to the next step.
However, if you haven’t signed up for Klaviyo yet, you’ll need to do so before advancing.
Klaviyo has a permanently free plan that supports up to 250 profiles and 500 emails per month.
To exceed those limits and access additional features, paid plans start at $20 per month and go up from there based on your usage needs and the features that you need access to.
You can sign up for a free account here.
3. Connect Gravity Forms to Klaviyo
To connect Gravity Forms to Klaviyo, you can use the Klaviyo authorization flow, rather than needing to work directly with API keys*.
Here’s how to set it up:
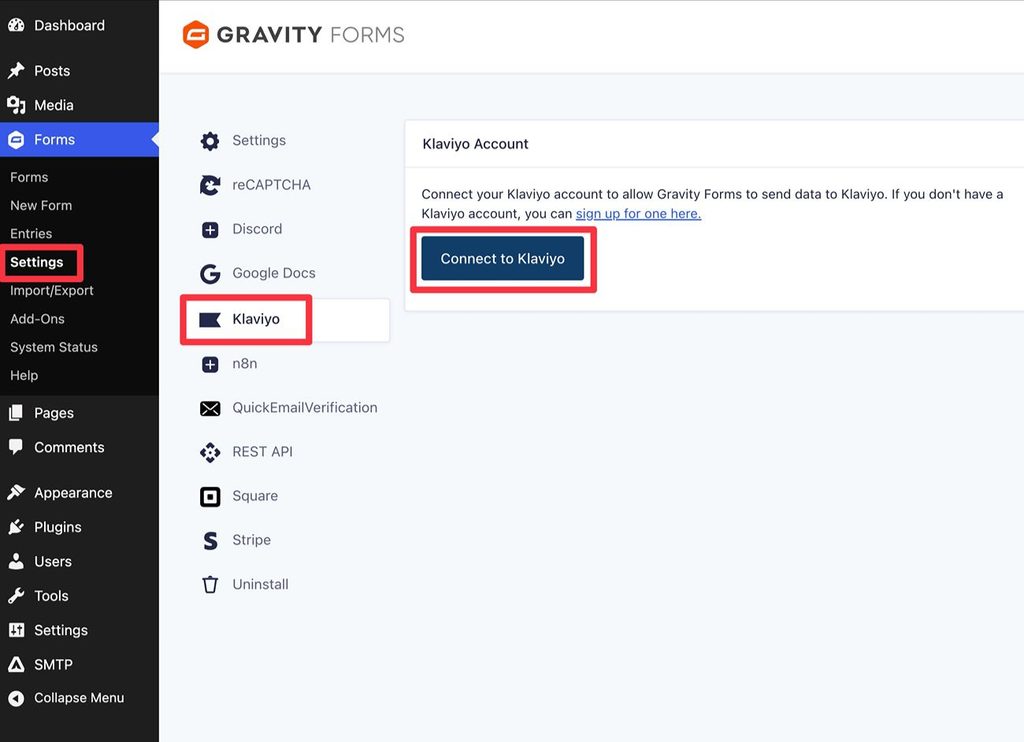
- Open your WordPress site’s dashboard.
- Go to Forms → Settings.
- Select the Klaviyo tab inside of the Gravity Forms settings area.
- Click Connect to Klaviyo.
You should then be redirected to the Klaviyo website. If you aren’t already logged in to your Klaviyo account, you’ll be prompted to do that first.
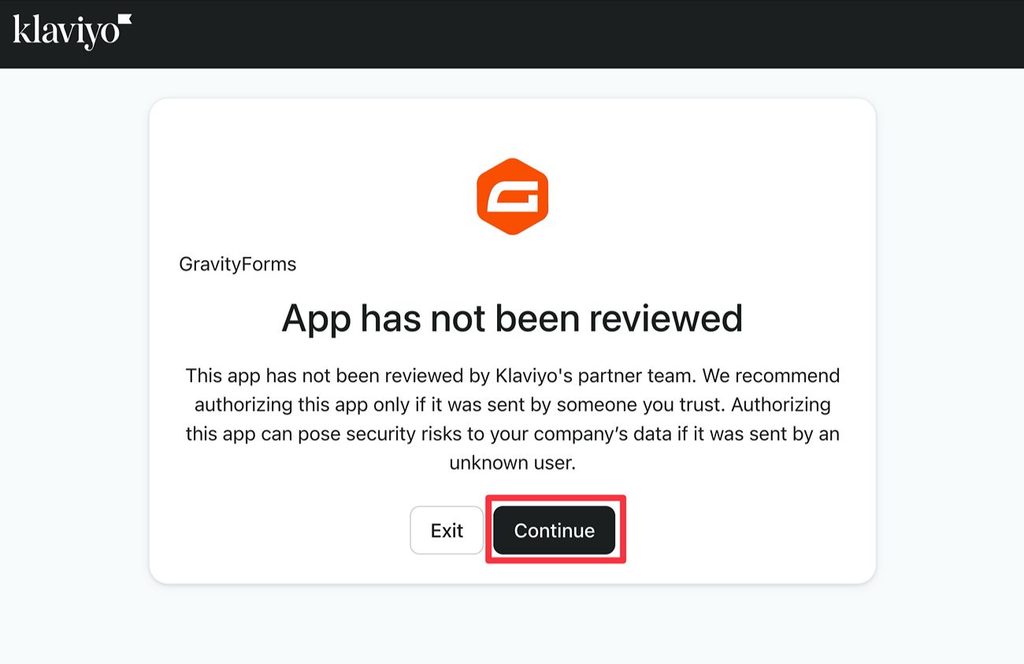
Then, you might see a notice telling you that the app hasn’t been reviewed yet. Because this app comes from the Gravity Forms team, you can click Continue to advance.
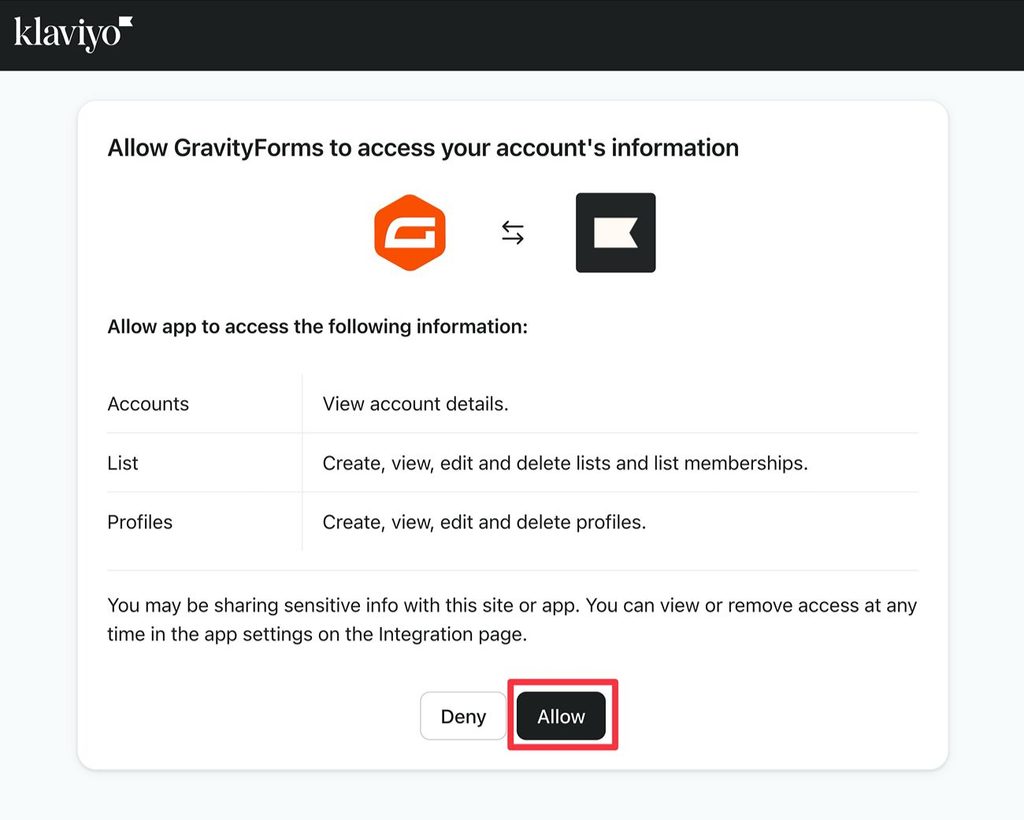
On the next screen, Gravity Forms will request the permissions that it needs in order to connect your WordPress site to Klaviyo. Click Allow to grant those permissions and advance.
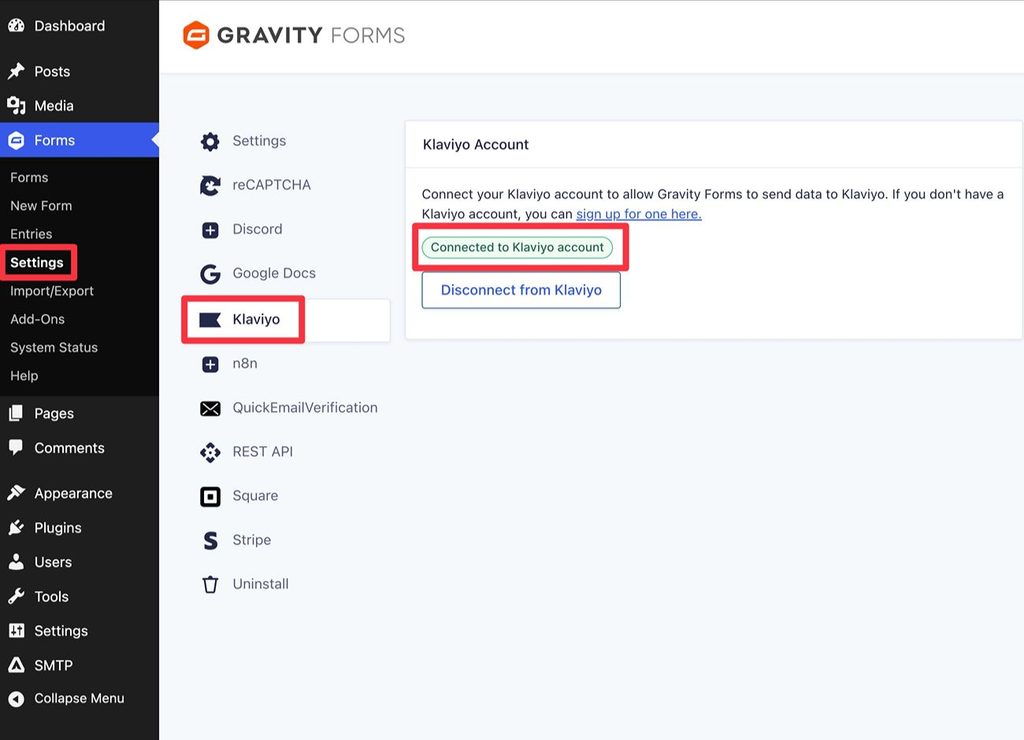
After clicking Allow, you should be redirected back to your WordPress dashboard. In the Klaviyo settings in Gravity Forms, you should see a Connected to Klaviyo account success message.
*If you’re working on a client site or another site where you can’t use the authorization flow, the add-on does give you the option to connect via API key. To do this, you’ll need to enable the gform_klaviyo_allow_api_key_configuration filter.
4. Set up the form that you want to connect to Klaviyo
Next, you need to create or edit the form that you want to connect to Klaviyo.
You can create a new form by going to Forms → New Form and choosing one of the available templates or a blank slate. Or, you can edit an existing form on your site that you want to connect to Klaviyo.
To connect a form to Klaviyo, the only minimum requirement is that you have an Email field to collect the form submitter’s email address.
However, you’ll also be able to map form data to other core fields in Klaviyo (e.g., name and phone number), as well as set up custom field mapping to map form data to any custom fields you’ve added to Klaviyo.
Essentially, you should make sure that your form has fields to collect all of the information that you want to sync to Klaviyo.
For this example, we’re using the pre-made Event Registration Form template.
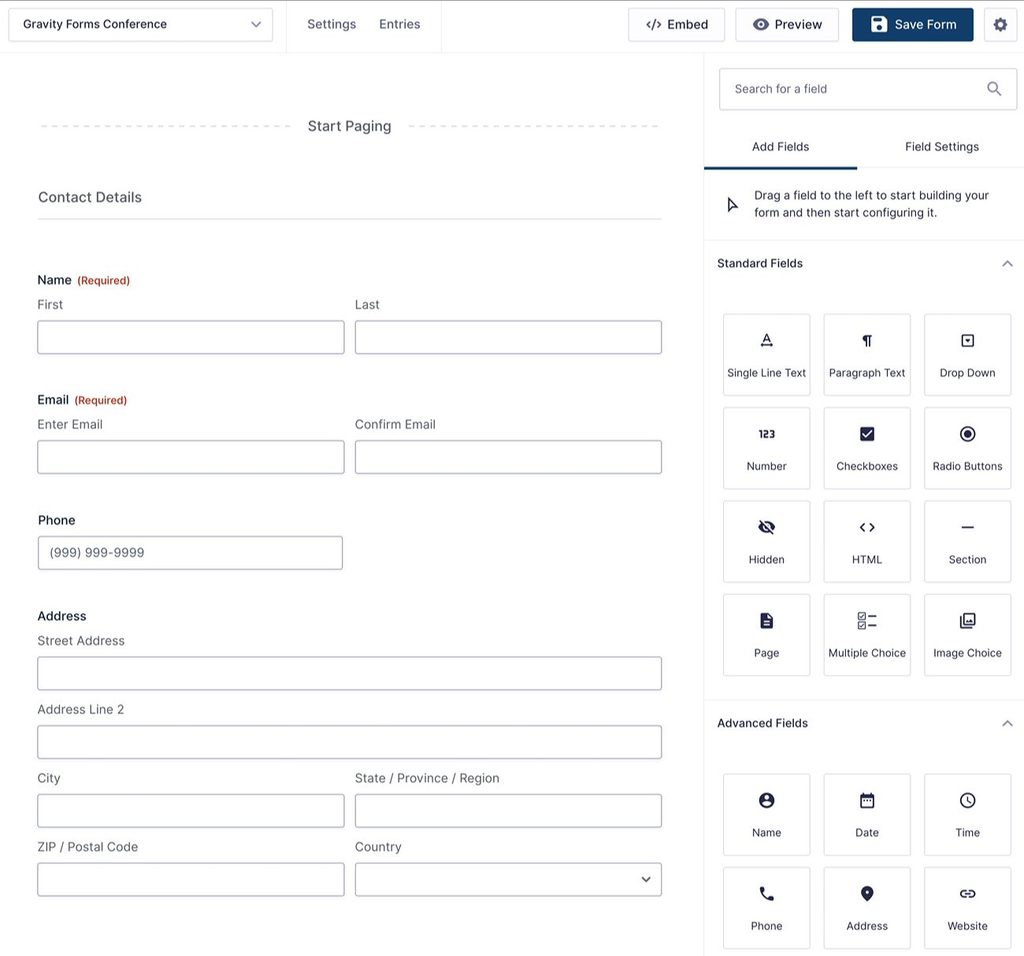
5. Create a Klaviyo feed for your form
Once you’ve finished setting up your form fields, you can connect your form to Klaviyo by creating a Klaviyo feed.
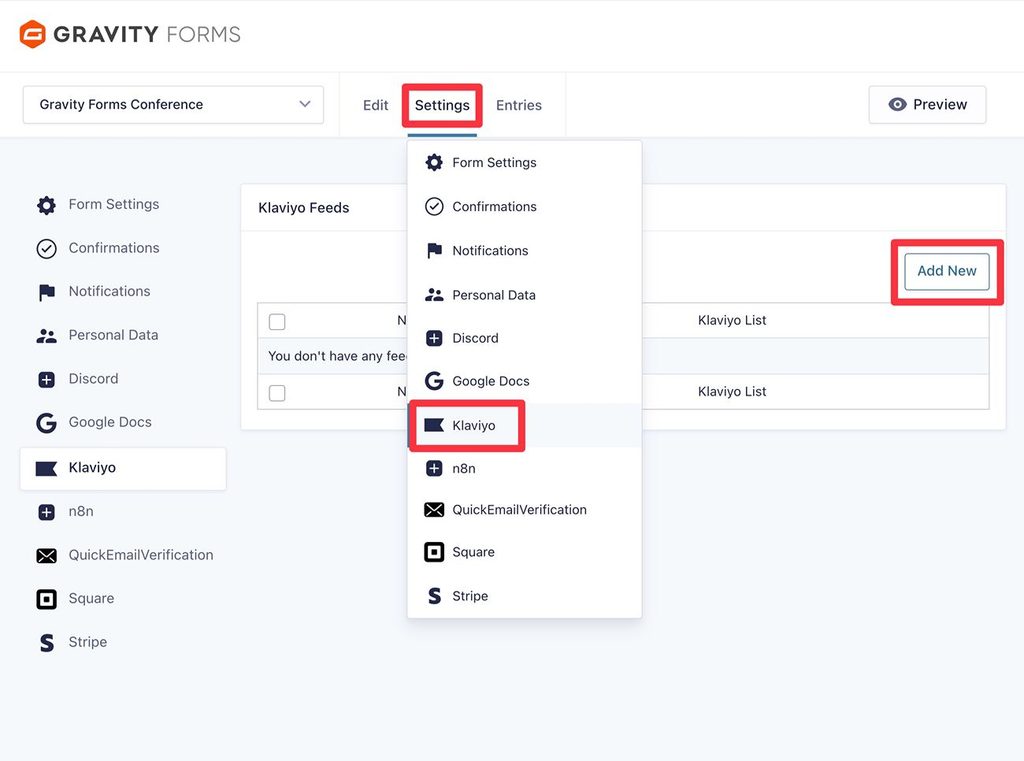
To get started, go to Settings → Klaviyo inside of the form editor. Then, click Add New to create your first feed.
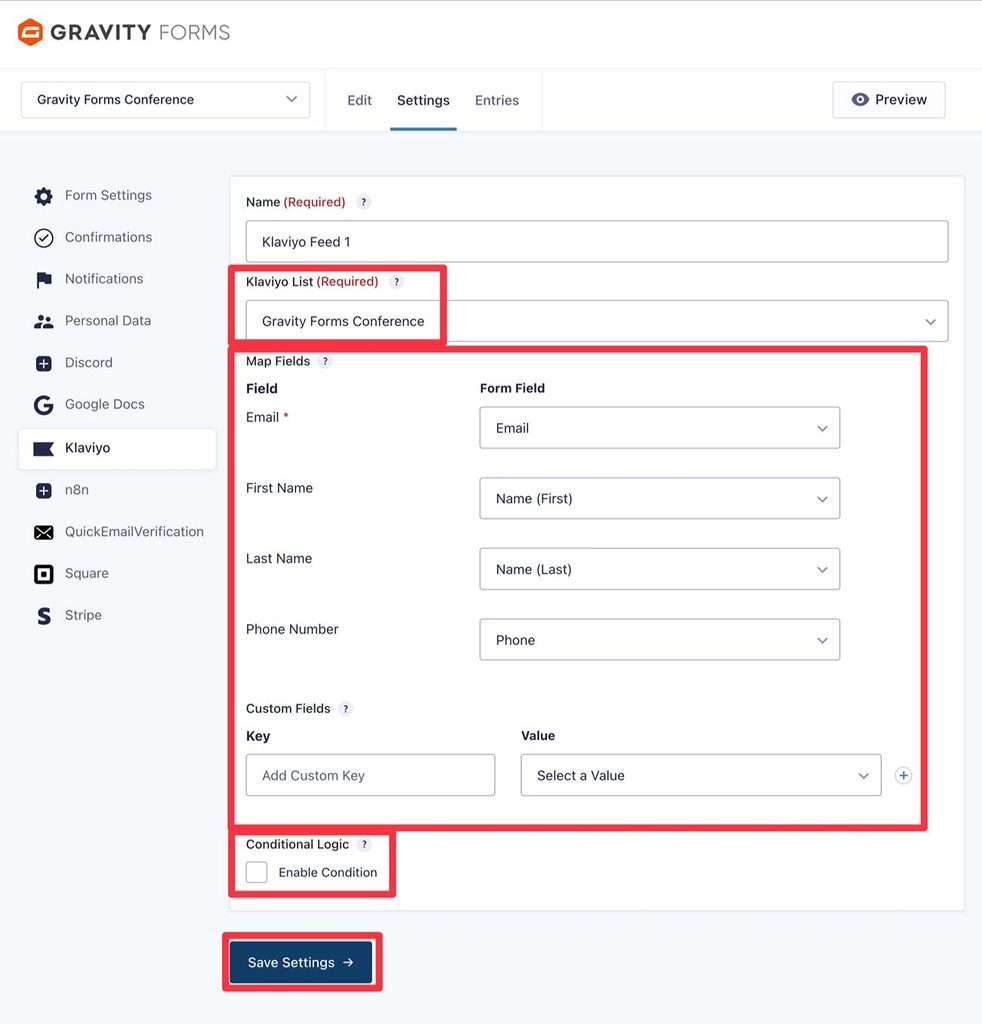
On the next screen, you can configure your feed.
First, you can use the Klaviyo List drop-down to choose which list to add contacts to.
The drop-down will automatically populate with all of the lists in your Klaviyo account. If needed, you can create a new list inside of the Klaviyo dashboard by going to Audience → Lists & segments → Create.
Once you choose the list, you’ll see some additional options to map the fields from your form to the fields in Klaviyo.
The only required field mapping is the form submitter’s email address, but you can set up additional mapping to default fields or custom fields according to your preferences.
Finally, as with other Gravity Forms feeds, you also have the option to add conditional logic rules. Here are a couple of common examples for how to use conditional logic:
- Only sync contacts to Klaviyo if they fill out the form in a certain way. You can add a rule so that the feed only triggers if one or more conditions are met.
- Add contacts to a different Klaviyo list based on how they fill out the form. You can do this by creating two or more feeds, each connected to a different Klaviyo list. Then, add a conditional logic rule to each feed so that it only triggers if the correct conditions are met.
Once you’ve configured your feed, make sure to click the Save Settings button at the bottom.
6. Embed and test your form
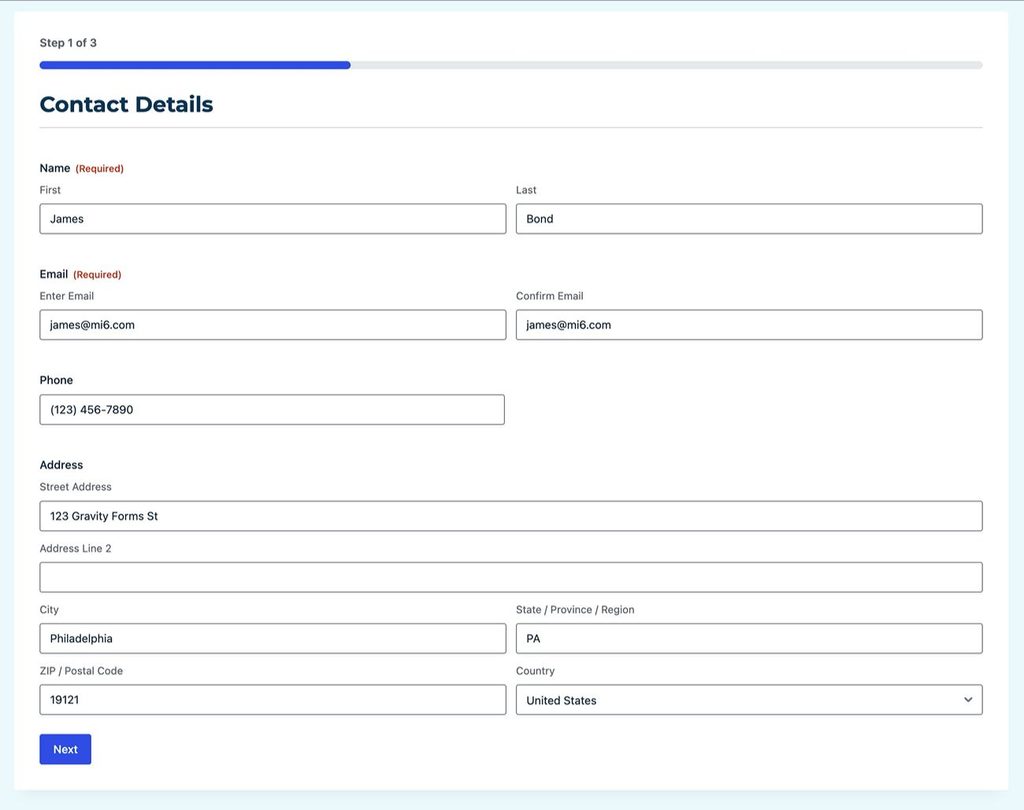
To finish things out, we recommend testing your form with some sample information to make sure the mapping is working as you intend it to.
If you haven’t already, you’ll first need to embed the form somewhere on your site. You can do this using the Gravity Forms block, shortcode, or PHP function.
Then, you can submit the form using sample information. If you added conditional logic rules to your Klaviyo feed, make sure to fill out the form in such a way that the feed will execute.
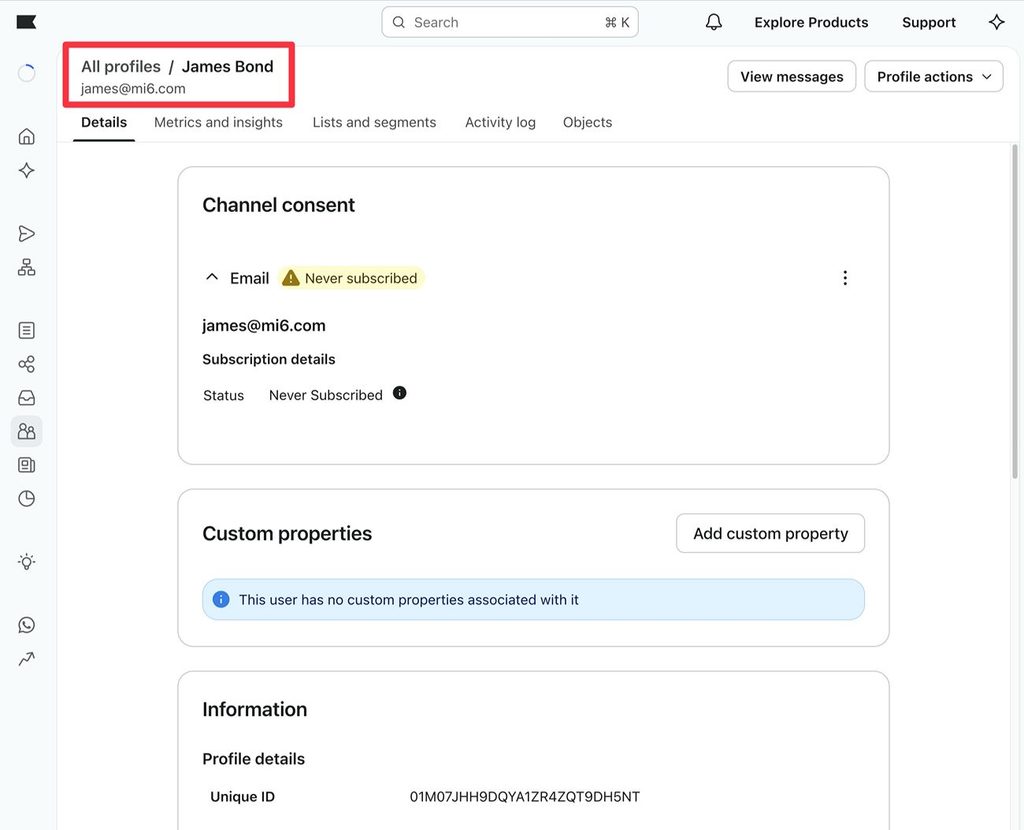
Then, if you open your Klaviyo list, you should see your contact:
If you open the entry details page in your WordPress dashboard, you’ll also see a log of the Klaviyo sync in the Notes section.
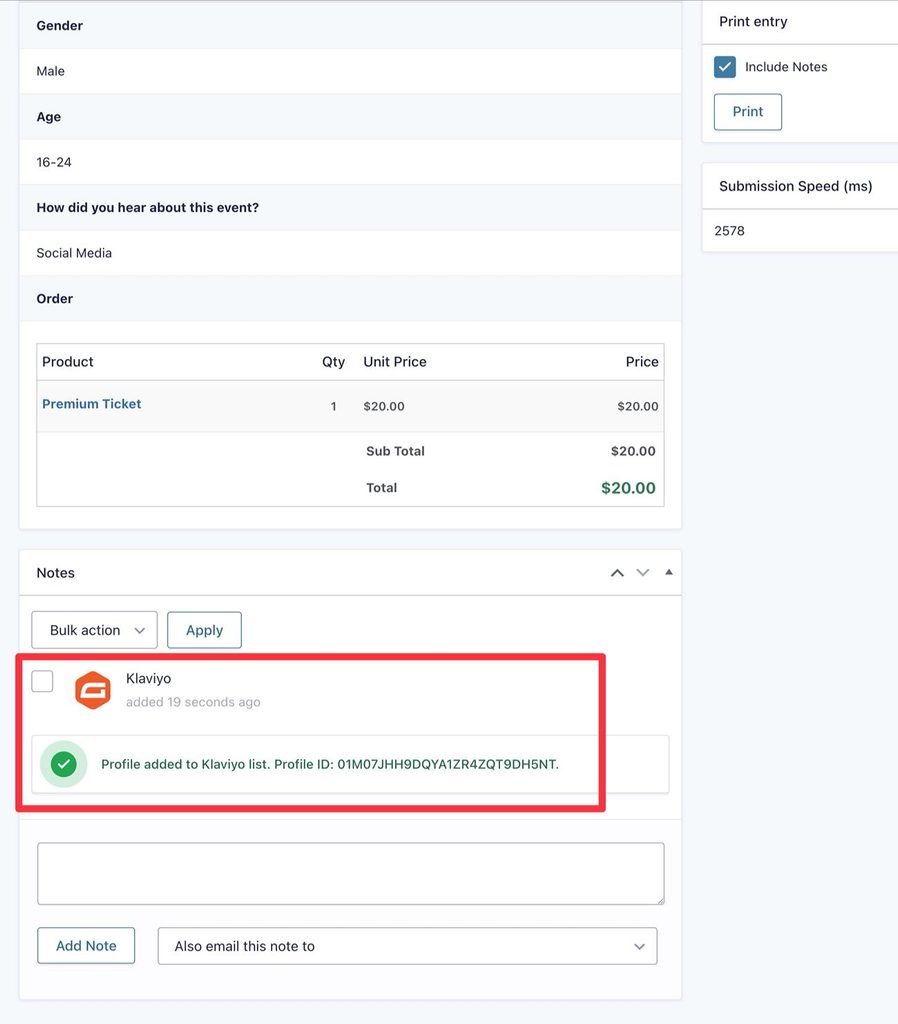
And that’s it! If you want to connect additional WordPress forms to Klaviyo, you can repeat these steps to create a Klaviyo feed for each form that you want to integrate.
Try the Gravity Forms Klaviyo Add-On today
With the Gravity Forms Klaviyo Add-On, you now have an easy way to connect your WordPress forms to your Klaviyo lists.
You can map form fields to Klaviyo fields, including support for custom fields. If needed, you can create conditional rules to add contacts to different Klaviyo lists depending on how they fill out the form.
The Klaviyo Add-On is available on all Gravity Forms licenses, so give it a try today if you’re already using Gravity Forms on your site.
If you’re not a Gravity Forms license holder yet, you can purchase a new license here or create a free demo site to try out all of the official add-ons that Gravity Forms offers.

Newsletter
If you want to keep up-to-date with what’s happening on the blog sign up for the Gravity Forms newsletter!
"*" indicates required fields