
Written by the Editorial team from WP connect…
Are you using Gravity Forms for collecting data on your WordPress website and SendGrid for sending emails, SMS, and segmenting contacts? Then this article is what you’re looking for!
Read on as we walk you through how to get the most out of our SendGrid for Gravity Forms Add-On so that you can automatically transfer your collected data from WordPress to SendGrid.
The Gravity Forms to SendGrid Add-On simplifies the process of connecting Gravity Forms and SendGrid without using a third party such as Make (formerly Integromat) or Zapier.
Let’s begin…
What is SendGrid?
SendGrid (also known as Twilio SendGrid) is a cloud-based email service that allows companies to send email communications. It provides a range of tools and features to help businesses manage and optimize their email campaigns, including:
- Email delivery
- Email templates
- A/B testing
- Automation
- Analytics
- Integrations
SendGrid is a Denver, Colorado-based company founded in 2009. Twilio acquired it in February 2019.
Essential offers start at 19,95$/month for 50 000 emails/month.
Why Connect Gravity Forms to SendGrid?
If you use Gravity Forms to generate leads, distribute resources, collect email addresses, or handle event invitations, SendGrid can help you:
- Create dynamic lists of contacts
- Make marketing automation for your qualified contacts
- Personalize your communication with your contacts by segmenting them
- Send SMS messages to your contacts
- Track commercial opportunities
While there is an official Gravity Forms SendGrid Add-On which allows you to automatically send form notifications through the SendGrid service when a form is submitted, the benefits of using ours are numerous!
You will be able to :
- Add and manage multiple feeds (create as many forms as you want and customize your options for each form).
- Map your SendGrid attributes with any field of your form (your SendGrid attributes can be viewed directly on WordPress and associated with form fields).
- Choose one or several lists where you want to send data (in SendGrid, your contact will be created or updated automatically).
- Activate double opt-in if you want to (for each form, you can enable double opt-in which ensures that your contacts receive a confirmation email before joining your mailing list. Email templates created in SendGrid are available).
and
- Add conditional filters and actions (create simple or advanced conditions and actions).
How to Connect Gravity Forms to SendGrid (without Make or Zapier)
Step 1: Install the SendGrid for Gravity Forms Add-On
Start by buying and installing the SendGrid for Gravity Forms Add-On on your WordPress site.
Step 2: Activate Your Add-On License
After installing and activating the SendGrid for Gravity Forms Add-On on your WordPress website, you will need to obtain your license key to begin using it. You can find this key in the email you received or by accessing your WP connect account.
To activate your license key, go to the Gravity Forms settings in the WordPress dashboard, Forms > Settings. From there, click on the SendGrid insert in the left menu. In the License Activation section, paste your license key and click Activate.
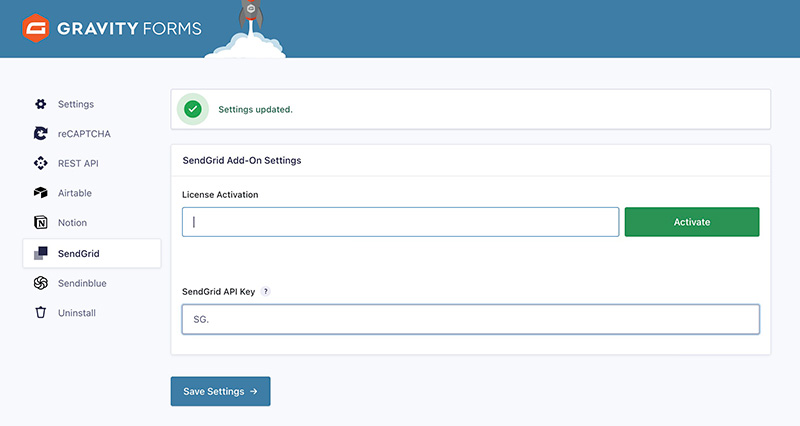
Step 3: Activate Your SendGrid API Key
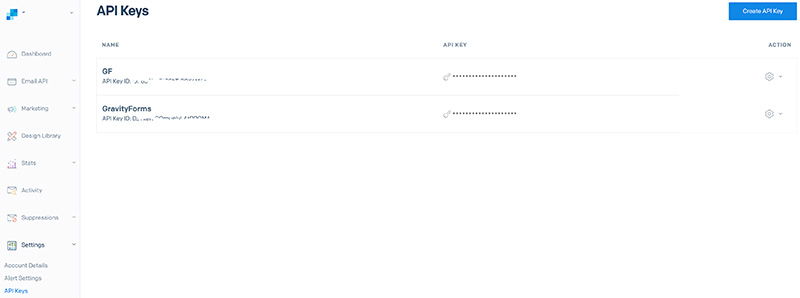
Log in to your SendGrid account and go to the API Keys page by clicking on Settings in the menu (bottom left).
Then, click on the Create API key button. A new key will be generated, which you should copy and save somewhere safe as you will not be able to retrieve it later for security reasons.
After obtaining the API key, return to the Gravity Forms settings in the WordPress dashboard and paste the key into the designated field. Then, click Save Settings. If the process was successful, a green icon should appear to confirm that your API key has been activated.
Step 4: Create Your First Feed
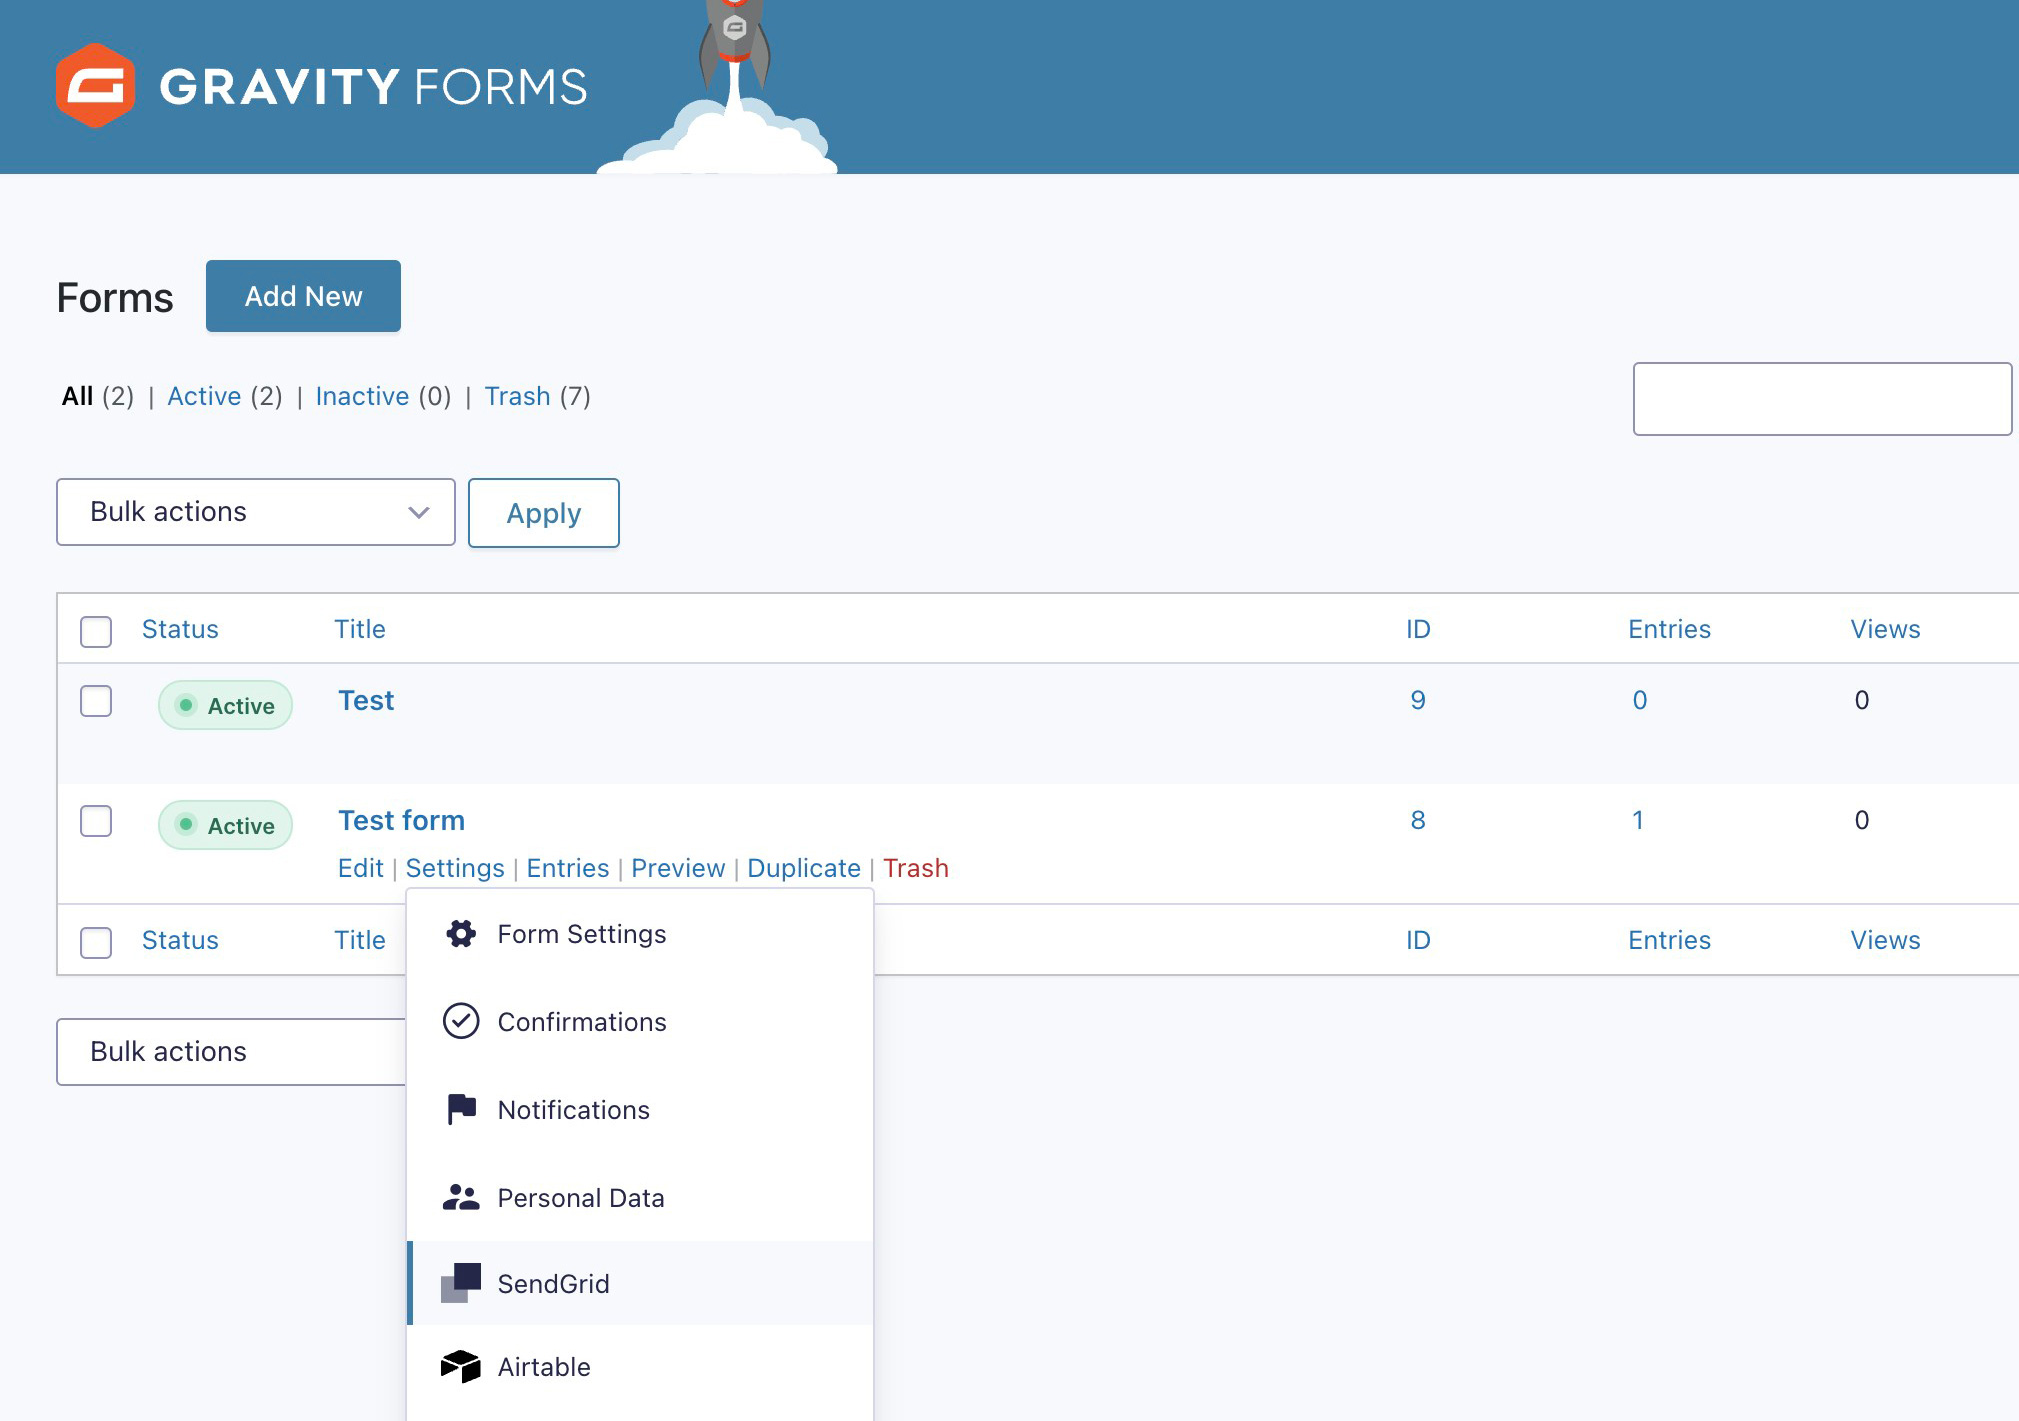
To set up a feed between Gravity Forms and SendGrid, navigate to the list of forms in the WordPress dashboard and select the form you want to work with. From the form’s settings, select SendGrid.
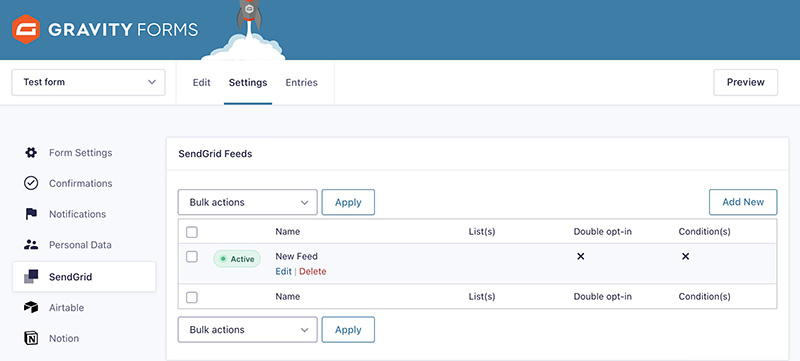
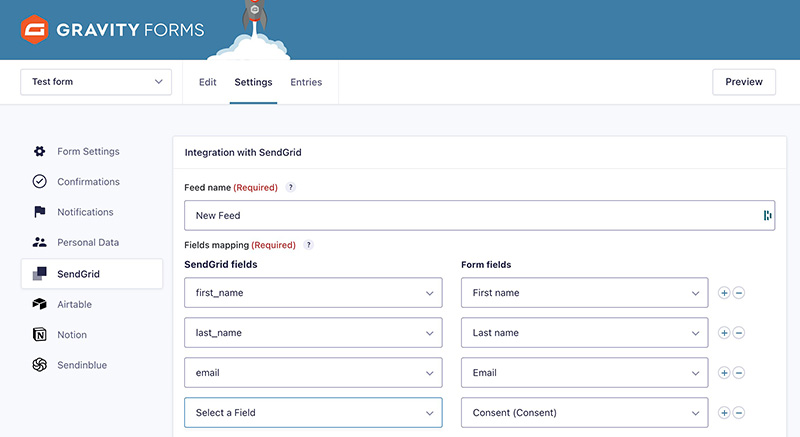
On the following page, you will be able to create a feed that connects the two tools. To get started, click Add New. This will bring you to the feed configuration page, where you can name your feed. Choose a descriptive name that will help you identify it easily.
Step 5: Mapping Contact Fields & Attributes
To link the attributes of your contacts in SendGrid with the fields of your Gravity Forms forms, follow these steps:
- In the SendGrid Attributes section, click on Select a field and choose one of the contact attributes created in your SendGrid account (e.g. email address).
- In the Forms Fields section, click on Select a field and choose the corresponding field from your form (e.g. Email field). The SendGrid and Gravity Forms fields are now linked.
- To map additional fields, click the + button on the right and repeat the process for each field you want to send to SendGrid.
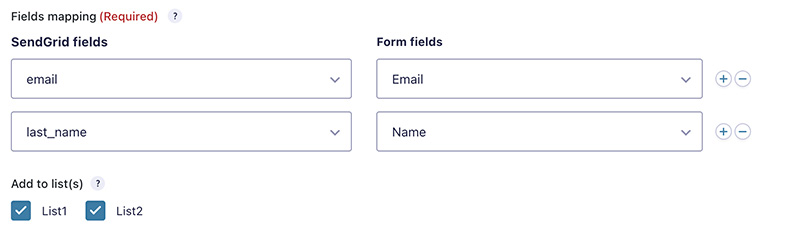
Step 6: Choosing One or Several SendGrid List(s)
Below Add to list, you’ll find all the contact lists created in your SendGrid account. You just have to check the list or lists to which you want to send the data.
For example, you can select a Contacts list and a Newsletter list.
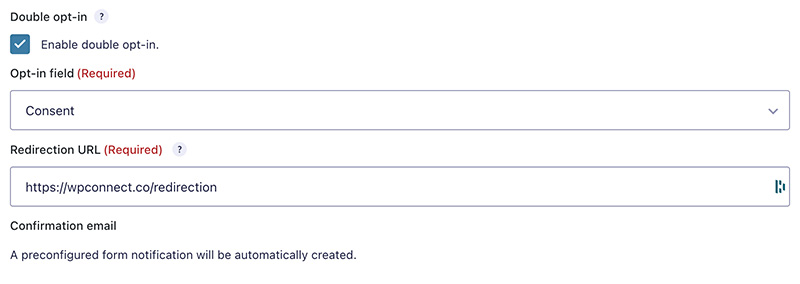
Step 7 (optional): Enable Double Opt-In
If you wish, you can enable double opt-in.
Double opt-in is a feature that allows you to verify the validity of the emails being transferred to SendGrid and ensure compliance with GDPR guidelines.
Here’s how to enable it:
- Check the Enable Double Opt-In box.
- In the Double Opt-In Template field, choose the email template that will be used to send the confirmation email. If no template appears, you will need to create one in your SendGrid account.
- In the Redirection URL field, enter the web address that you want to redirect your contacts to once they have clicked on the validation link in their email (e.g. a thank you page on your site).
After submitting the form, your contacts will receive an email containing a validation link. Only those who click on the link will be added to your SendGrid list.
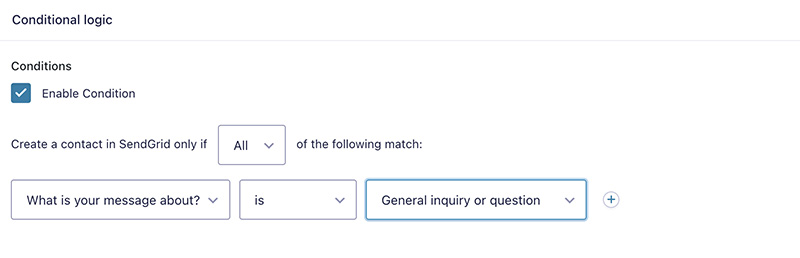
Step 8 (optional): Add Conditional Logic
You can use conditions to add contacts to your SendGrid list based on specific criteria. For example, you can create a condition that only adds people who have checked a consent box in your contact form to your list, or transfer contacts to a specific list based on the content of the form (e.g. the “Subject of your request” field).
To create a condition:
- Click Enable Condition
- On the left, choose a field from your form
- Select the criteria that will trigger the sending of the contact to SendGrid (e.g. the value of the field)
For example:
– Option IS “No”
– Subject IS “Other request”
– Occupation IS NOT “CEO”
– etc.
Once your feed is finalized, click on Save Settings. That’s it! The contacts who have completed your form will be sent to SendGrid!
Step 9: Check Your Feed Between Gravity Forms and SendGrid
To test your feed, it’s simple: enter information in your Gravity Forms form, validate, and go to your SendGrid account in Marketing > Contacts.
If all goes well, you should find the data you just entered in the form in your list.
Final Thoughts
And there you go!
You have everything you need to send your contacts customized emails or SMS to the right person at the right time.
We hope that our SendGrid for Gravity Forms Add-On will be helpful to support your customers, prospects, and subscribers with personalized emails.
If you are a fan of Gravity Forms, look at our Gravity Forms Add-Ons for Notion and Airtable. These two no code tools will allow you to create easy-to-use visual databases and much more! You can also check our Sendinblue for Gravity Forms Add-On.
About the Contributor:

WP connect is a plugin creation studio for WordPress, created by a team of passionate developers and innovators. We focus on building bridges between WordPress and the No Code ecosystem. We create best-in-class plugins that seamlessly link WordPress and No Code tools. Our no-hassle approach is the cornerstone of our model, with an unconditional commitment to user experience and an inclusive pricing policy.
Newsletter
If you want to keep up-to-date with what’s happening on the blog sign up for the Gravity Forms newsletter!
"*" indicates required fields