
Looking for a way to connect Gravity Forms to Drip to automatically sync WordPress form submissions to your Drip account?
With the Gravity Forms Drip Add-On, you can easily connect the forms that you create with Gravity Forms to your Drip account.
As part of that, you’ll be able to fully control field mapping between your form and your Drip account, including support for mapping form fields to custom fields that you’ve added in Drip. You can also apply tags to contacts and set up conditional logic rules to give you more control over how/when to sync contacts to Drip.
In this post, we’ll introduce you to how the Drip Add-On works and show you step-by-step how to set it up and connect Gravity Forms to Drip.
Note: The Gravity Forms Drip Add-On is part of Gravity Labs — our home for experimental add-ons. It’s free with your Gravity Forms license, but it’s experimental and outside our official support. Labs is also how we learn what our community wants to see in the product, so if you try it, let us know what you think.
Why use the Gravity Forms Drip Add-On?
The Gravity Forms Drip Add-On lets you connect all of the forms that you create with Gravity Forms to your Drip account.
You can create dedicated email subscribe forms that connect to Drip.
Or, you can also add a Drip integration to any other form on your site. For example:
- Payment forms
- Donation forms
- User registration forms
- Event registration forms
- Content submission forms
- Etc.
The add-on also gives you a lot of flexibility for mapping the data from your forms to your Drip account.
First, you can map any form field in your form to the standard data fields in Drip, such as email, phone number, address, etc.
Then, you can also map form fields to any custom fields that you’ve added in your Drip account, which gives you the ability to sync as much data as you need between your WordPress site and your Drip account.
You can also apply one or more tags to a contact when they submit the form.
Finally, you also have the ability to set up conditional logic rules.
For example, you could only sync a contact to Drip if they fill out the form in a certain way.
Or, you also have the option to sync contacts in different ways depending on how they fill out the form, such as applying a different set of tags and/or setting up different field mapping rules.
How to sync Gravity Forms submissions to Drip
Now, let’s get into the full step-by-step guide on how to connect your WordPress forms to Drip.
For this tutorial, the only thing that we’ll assume is that you already have a Drip account that you want to connect to your WordPress website.
If you don’t have a Drip account, you can register for one here. While Drip does not offer a permanently free plan, it does offer a 14-day free trial, with no credit card required.
Once you have your Drip account, here’s every step that you need to follow to connect Gravity Forms and WordPress to Drip…
1. Install the Gravity Forms Drip Add-On
To get started, you need to install and activate the Gravity Forms Drip Add-On on your WordPress website.
Because the Drip Add-On is currently part of Gravity Labs, you’ll do this a little bit differently than the official Gravity Forms add-ons that you might be using.
Again, Labs add-ons are free with any Gravity Forms license, but they sit outside the normal suite of Gravity Forms add-ons.
Here’s how to install it:
- Go to the Drip Add-On page at Gravity Labs.
- Log in to your existing Gravity Forms account on Gravity Labs, if you haven’t done so already.
- Click the Download button.
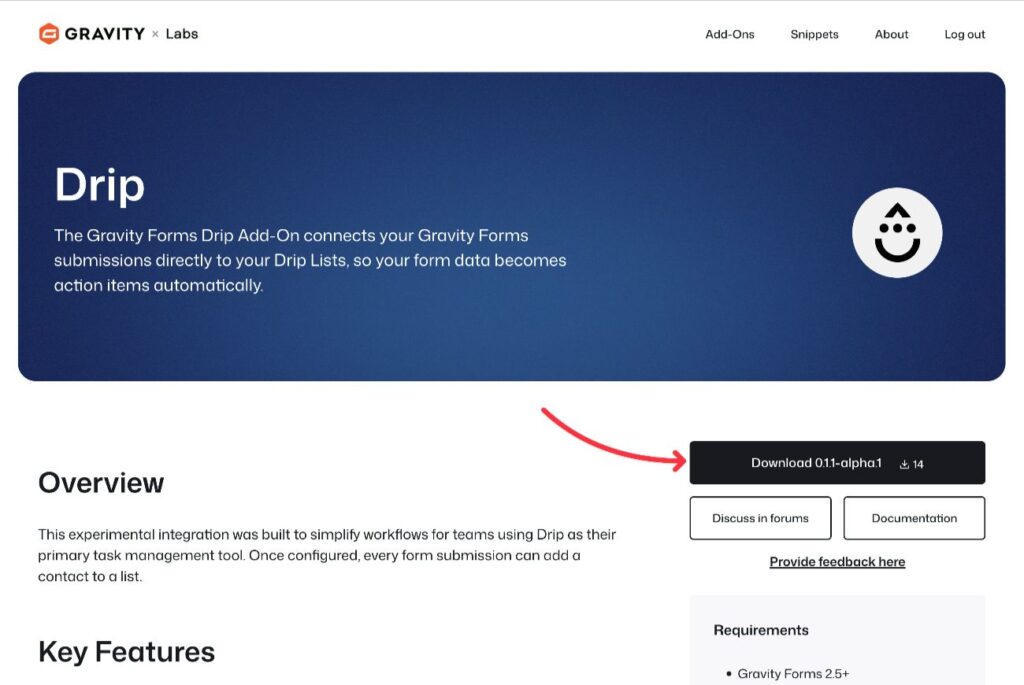
Once you download the ZIP file for the Drip Add-On to your local computer, you can upload and install it like any other WordPress plugin:
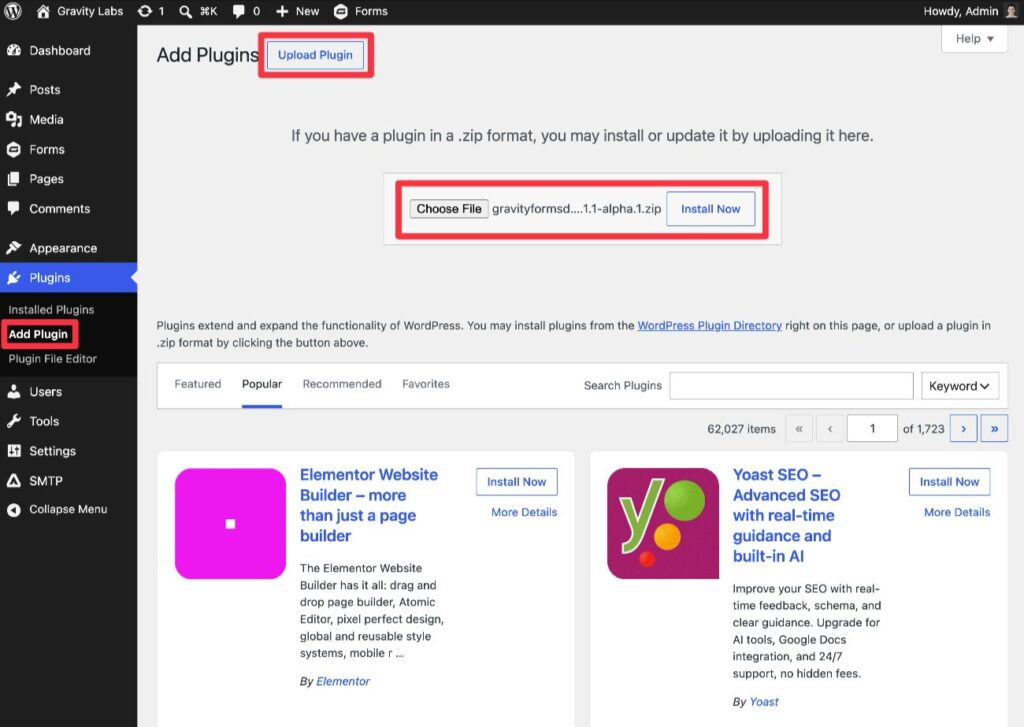
- Go to Plugins → Add Plugin in your WordPress dashboard.
- Click the Upload Plugin button.
- Select the ZIP file and click Install Now.
- On the next screen, make sure to activate the plugin.
2. Locate Drip API Token and Account ID
Next, you’ll need to get two pieces of information from your Drip account:
- Drip API Token
- Drip Account ID
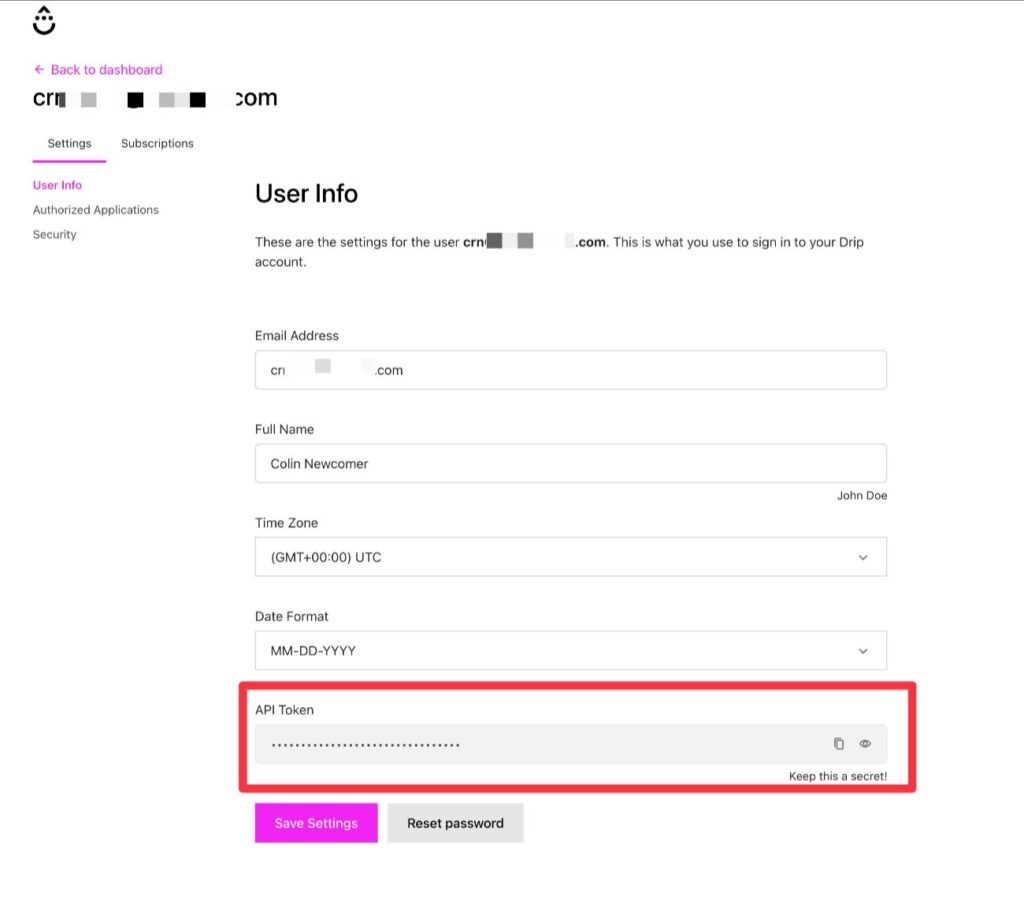
To locate your Drip API Token, you need to open your User settings page.
You can click this link to open the page directly. Or, click on your username in the top-right corner of the Drip interface and then select User settings from the slide-out.
At the bottom of the User Info section, you’ll see the API Token. Copy this value to a safe place because you’ll need it in the next step.
In addition to the API Token, you also need to locate your Account ID.
You can get this number from the main URL of the Drip dashboard.
The URL will look something like this:
https://www.getdrip.com/6351864/dashboard
The number in between “.com/” and “/dashboard” is your Drip Account ID.
For example, in the URL above, the Account ID would be 6351864.
3. Connect Gravity Forms to Drip
Once you have your Drip API Token and Account ID, you’re ready to connect Gravity Forms to Drip.
Here’s how:
- Open your WordPress dashboard.
- Go to Forms → Settings.
- Select the Drip tab in the Gravity Forms settings area.
- Add your Drip API Token and Account ID to the relevant boxes.
- Click Save Settings at the bottom.
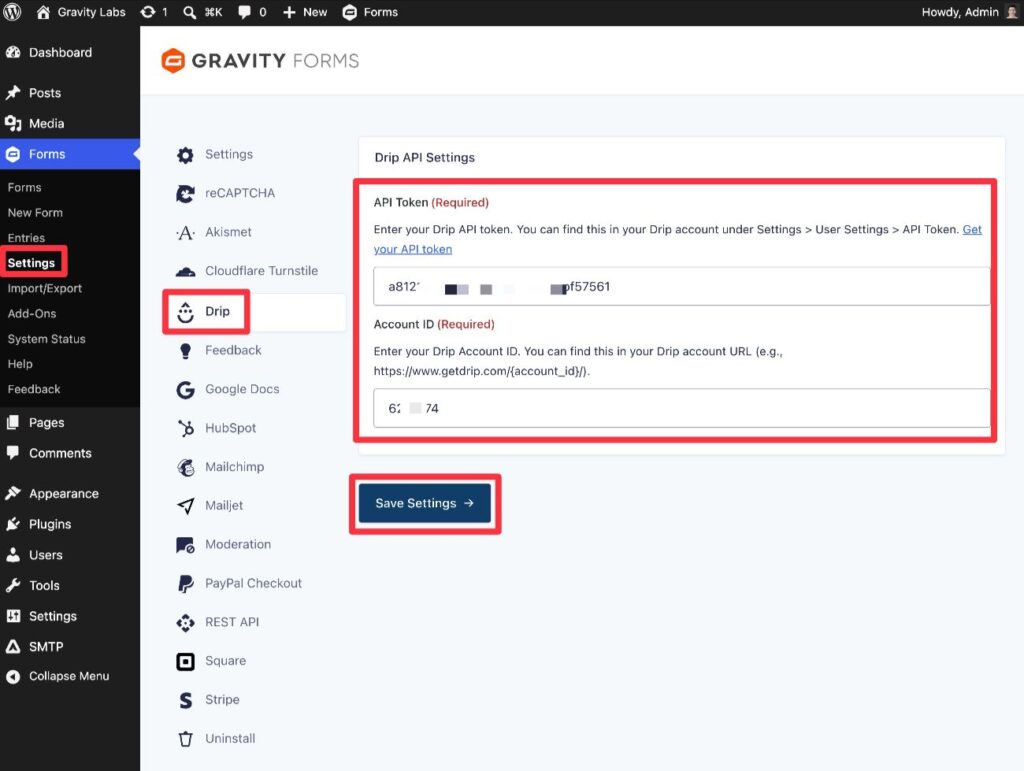
If Gravity Forms is able to successfully connect, you should see green check marks appear next to both the API Token and Account ID.
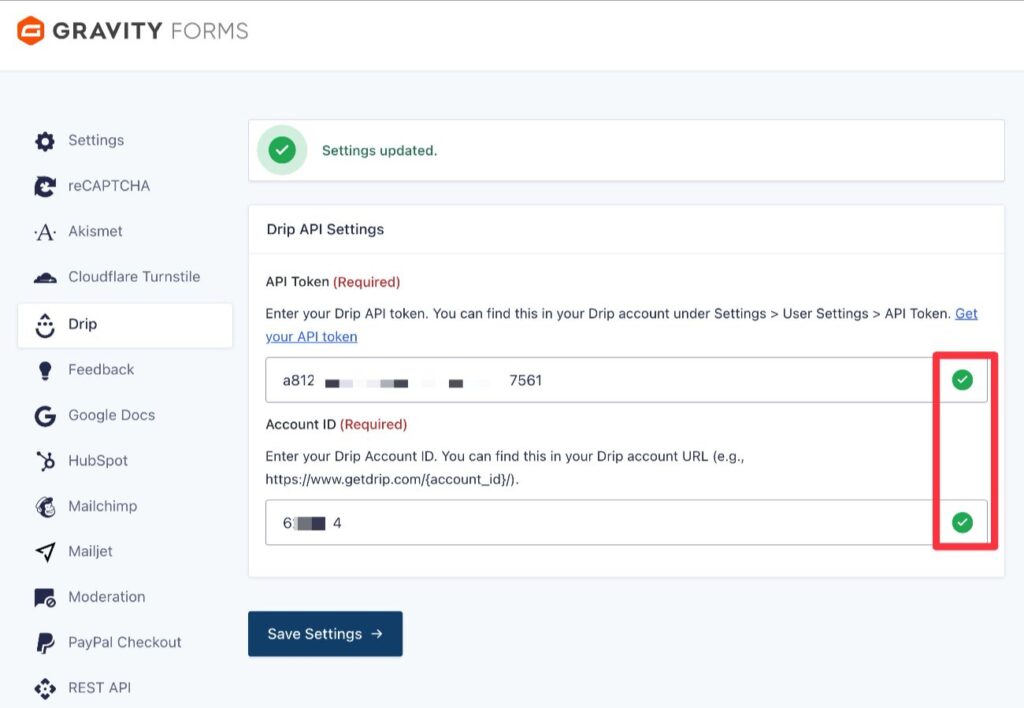
If you see a red X instead, check to see if you made a typo or accidentally pasted in the wrong value to each box.
4. Create or edit the form that you want to connect to Drip
Now, you’re ready to connect your first WordPress form to Drip.
To get started, you need to either:
- Create a new form that you want to connect to Drip (Forms → New Form). You can use one of the many pre-made templates to save time.
- Edit one of your existing forms that you want to connect to Drip.
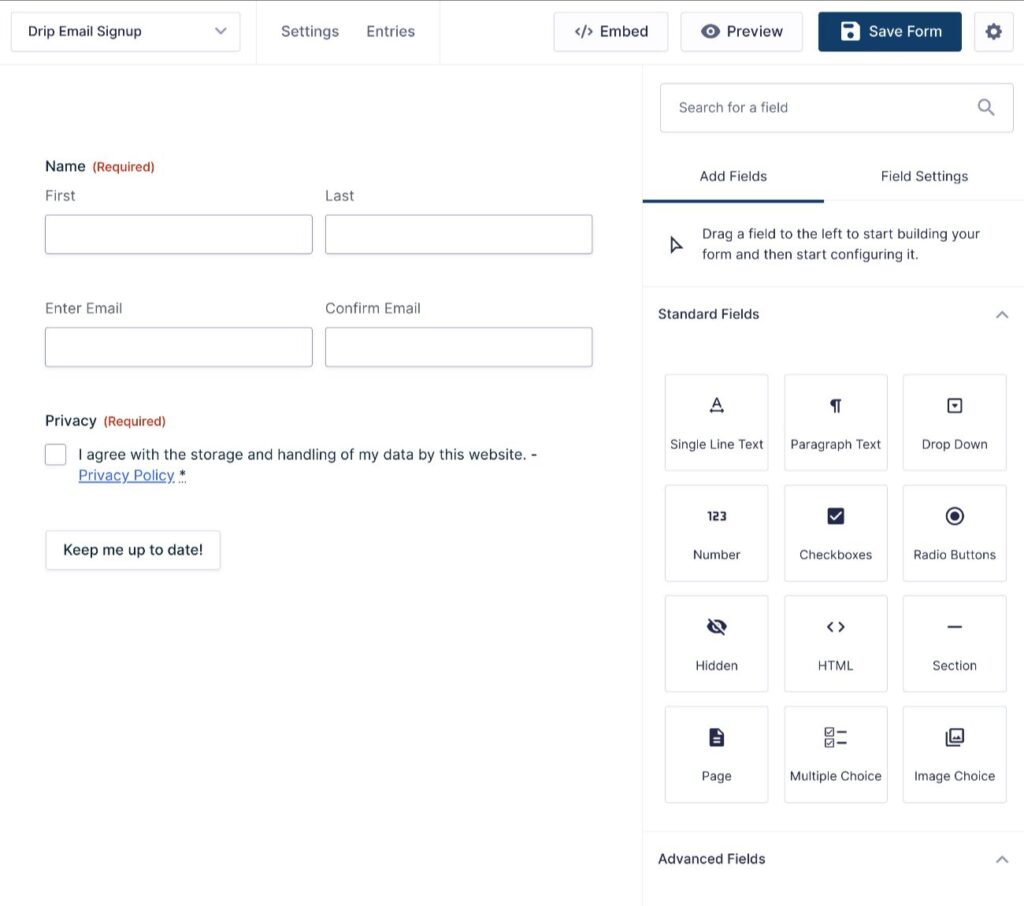
For this tutorial, we’re just using a simple email opt-in form that we created using the pre-made Newsletter Signup Form template. However, you can also connect any other type of form to Drip.
The bare minimum requirement is that you have a field to collect the person’s email address.
However, you’ll also be able to map form fields to other standard Drip fields, along with any custom fields that you’ve added to Drip. More on that next.
If you want the ability to map data to other standard Drip fields or custom fields, make sure you use the form editor to add fields to collect those details.
5. Create a Drip feed for your form
Once you’re happy with the form itself, you can set up a feed to control how to sync form submissions to Drip.
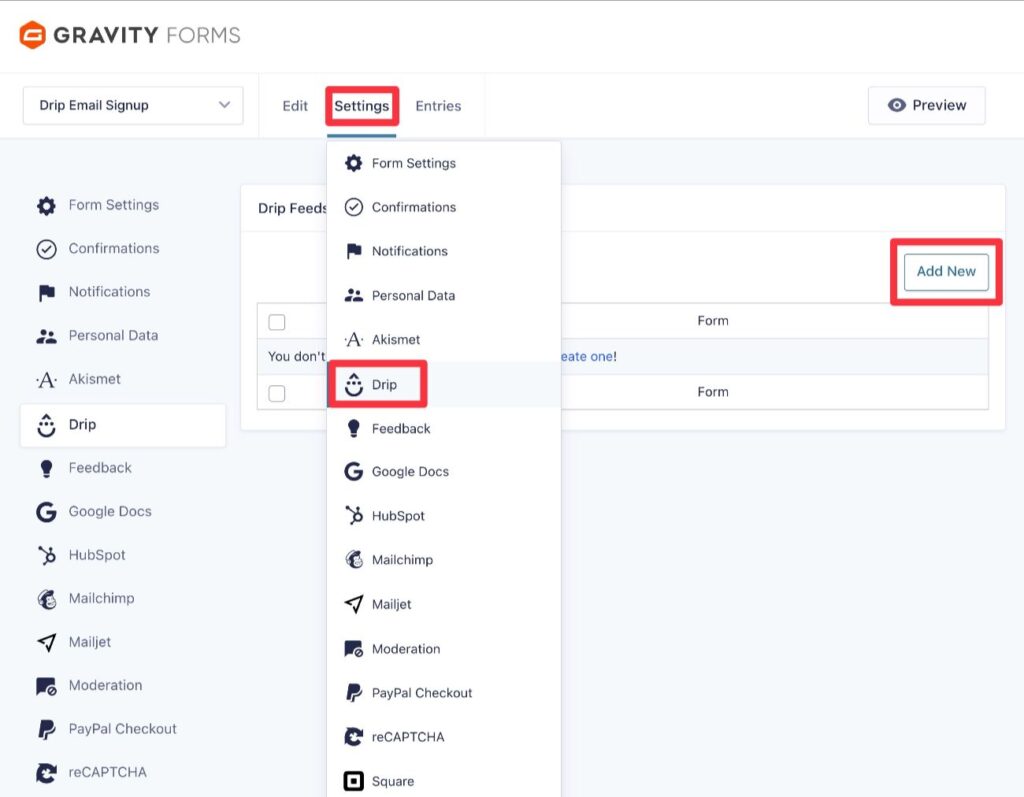
To get started, go to Settings → Drip inside the form editor. Then, click Add New to create your first feed.
You’ll now be in the interface where you can configure your feed.
First, use the Email Address drop-down to choose which form field to map to the email address in Drip. Usually, this will be the Email field from your form. It’s the only field mapping that you’re required to set up.
Below that, you can map additional form fields to other standard Drip fields, such as the name, phone number, and address. These are all optional, so you don’t need to set up field mapping if you aren’t collecting that information.
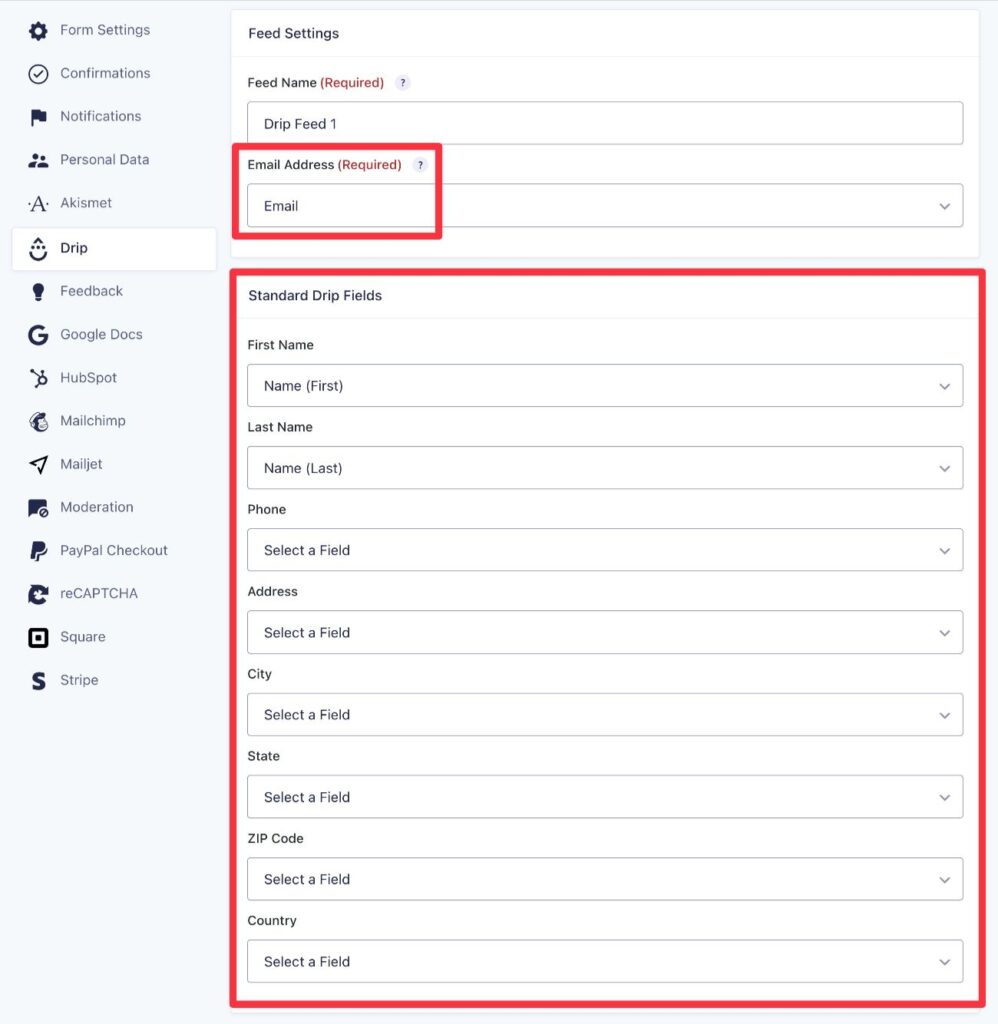
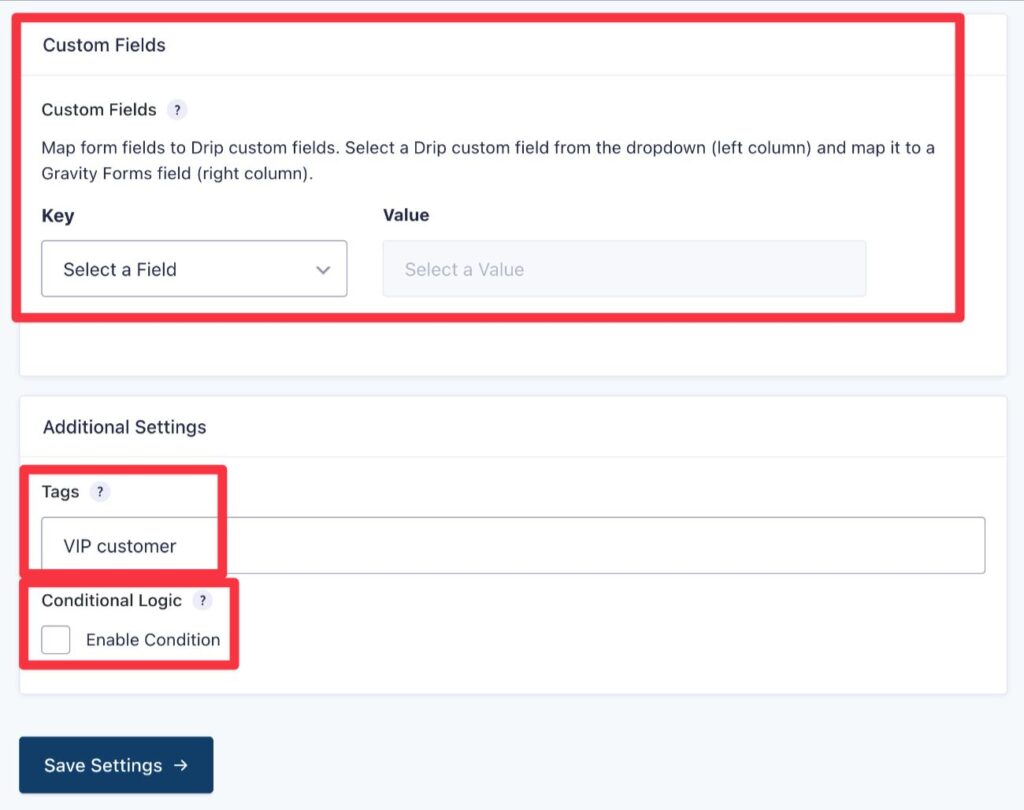
Below that, you can also set up custom field mapping in the Custom Fields settings. This allows you to map form fields to any custom fields that you’ve set up in Drip. As with the previous fields, this is entirely optional.
Finally, you can use the Additional Settings to configure two more options.
First, you can apply one or more tags to the subscriber in Drip. If you want to add multiple tags, separate each tag with a comma.
Then, you also have the option to add Conditional Logic, which lets you only execute the feed if certain conditions are met.
For example, you might only sync a subscriber to Drip if they check an opt-in box that’s part of your form.
Or, you also have the option to create multiple Drip feeds and use conditional rules to control when to execute each. For example, this would let you apply different tags to subscribers based on how they fill out the form and/or map form fields in different ways.
Once you’ve made your choices, make sure to click the Save Settings button at the bottom.
6. Embed and test your WordPress form
To finish things out, we recommend embedding and testing the form to make sure the Drip integration is working as you want it to.
You can embed the form anywhere on your site using the Gravity Forms block, shortcode, or PHP function.
Then, submit a test entry via the form.
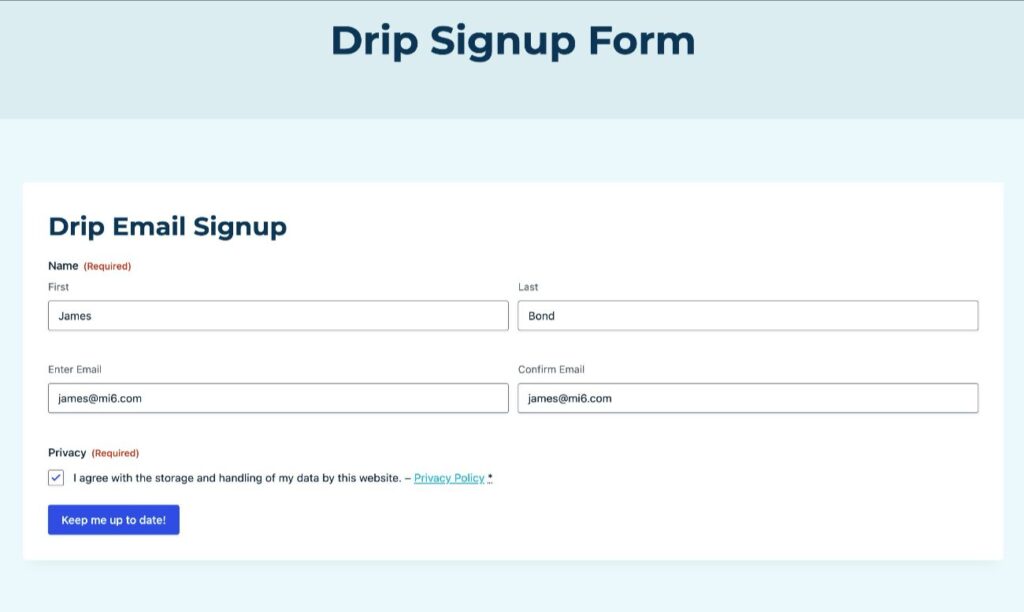
If everything is working properly, the contact should show up in your Drip account, along with data from any field mappings that you’ve set up.
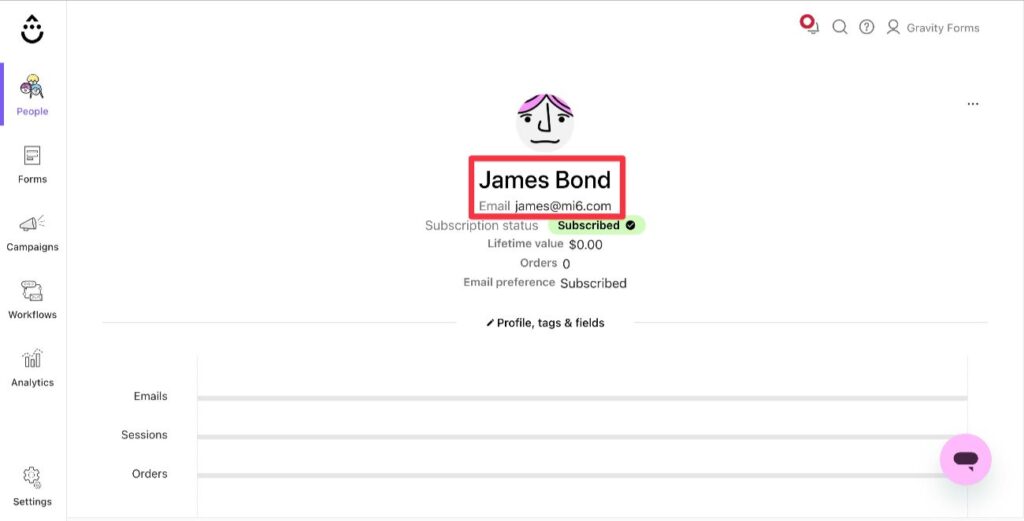
If everything looks good, you’re all finished!
Try the Gravity Forms Drip Add-On from Gravity Labs
The Drip Add-On is available now in Gravity Labs. It’s free with any Gravity Forms license.
As a Labs add-on, it’s experimental and sits outside our standard support – and your feedback helps shape what we build next. If you give it a try, we’d love to hear how it works for you.

Newsletter
If you want to keep up-to-date with what’s happening on the blog sign up for the Gravity Forms newsletter!
"*" indicates required fields