

One of the best ways to learn more about your audience is to add a survey to your website. When done right, a survey has the potential to engage your audience and grow your business. With Gravity Forms and the Survey Add-On, you can quickly and easily create and add surveys to your WordPress website.
In this article, we explain why you should consider adding surveys to your website, show you how to add a survey to your website with Gravity Forms, and share some top tips for creating effective surveys.
Why Add Surveys To Your Website
Surveys are a great way to learn more about your audience — your clients, customers, and website visitors. But that’s not the only reason why surveys are useful. Here are a few more reasons why you should consider adding surveys to your website.
- Collect visitor feedback on your website so you can improve user experience and increase your conversion rates.
- Create job or employee satisfaction surveys for your employees so you can improve the workplace and create a great working environment.
- Collect customer feedback on your products so you can make the right improvements.
- Gather feedback from your readers to learn more about what type of content you should be publishing.
- Create market research surveys to figure out what type of product or service you should create next.
- Create a customer service satisfaction survey so you can see where and how your support channels could improve.
Five Tips For Creating Good Surveys
As you can see, there are plenty of ways to make use of surveys. But if you want people to actually fill out your survey, there are a few things you need to keep in mind. Here are five tips to help you create an engaging survey.
1. Define A Clear Goal For Your Survey
You should establish a clear goal for your survey. As we’ve mentioned above, there are several use cases for having surveys on your website so knowing what you hope to achieve with your survey will help you ask the right questions.
For example, a clear goal for your survey could be wanting to understand why your visitors are leaving your website instead of reading more posts.
2. Save More Personal Questions For The End
Think of your survey as a conversation. You don’t start off by asking someone their age and other personal information. You start off with small talk and gradually move on to more personal topics. Your survey should be structured in the same way.
3. Use Closed-Ended Questions
Closed-ended questions are those where answers are pre-populated for your visitors and users. Multiple choice questions or checkbox questions are examples of closed-ended questions.
The reason they work better is because the respondent can easily select the answer and move on to the next question instead of trying to formulate a response in their own words.
4. Offer A Survey Incentive
Some people might be hesitant to fill out your survey. After all, filling out a survey takes time so if you’re running into the issue of people not being interested, consider offering a little incentive. This can include offering a discount code or sending them a Starbucks or Amazon gift card!
5. Don’t Let Your Survey Get Too Long
Finally, don’t make your survey too long. If your survey is too long, your audience might give up halfway through the survey. Keep your survey on the shorter side and you’ll reap the benefits such as more thoughtful responses and higher completion rate.
Survey Add-On: Intro

The Survey Add-On for Gravity Forms allows you to easily create surveys and add them anywhere on your site. This add-on is available with our Elite license. You can create both client/customer facing surveys as well as surveys targeted at your employees.
Let’s take a look at the top features that the Survey Add-On has to offer…
- Ease Of Use – The Survey Add-On is extremely easy to use. All you have to do is install the Survey Add-On, then within the form editor add the Survey field to your form and configure it to your liking.
- Survey Field Types – Within this Survey field, there are 8 Survey field types from which you can create your questions. Survey field types include Rating, Likert, Rank, Checkboxes, Dropdown, Paragraph Text, and many more. These options enable you to create custom surveys, appropriate to your survey goals and audience.
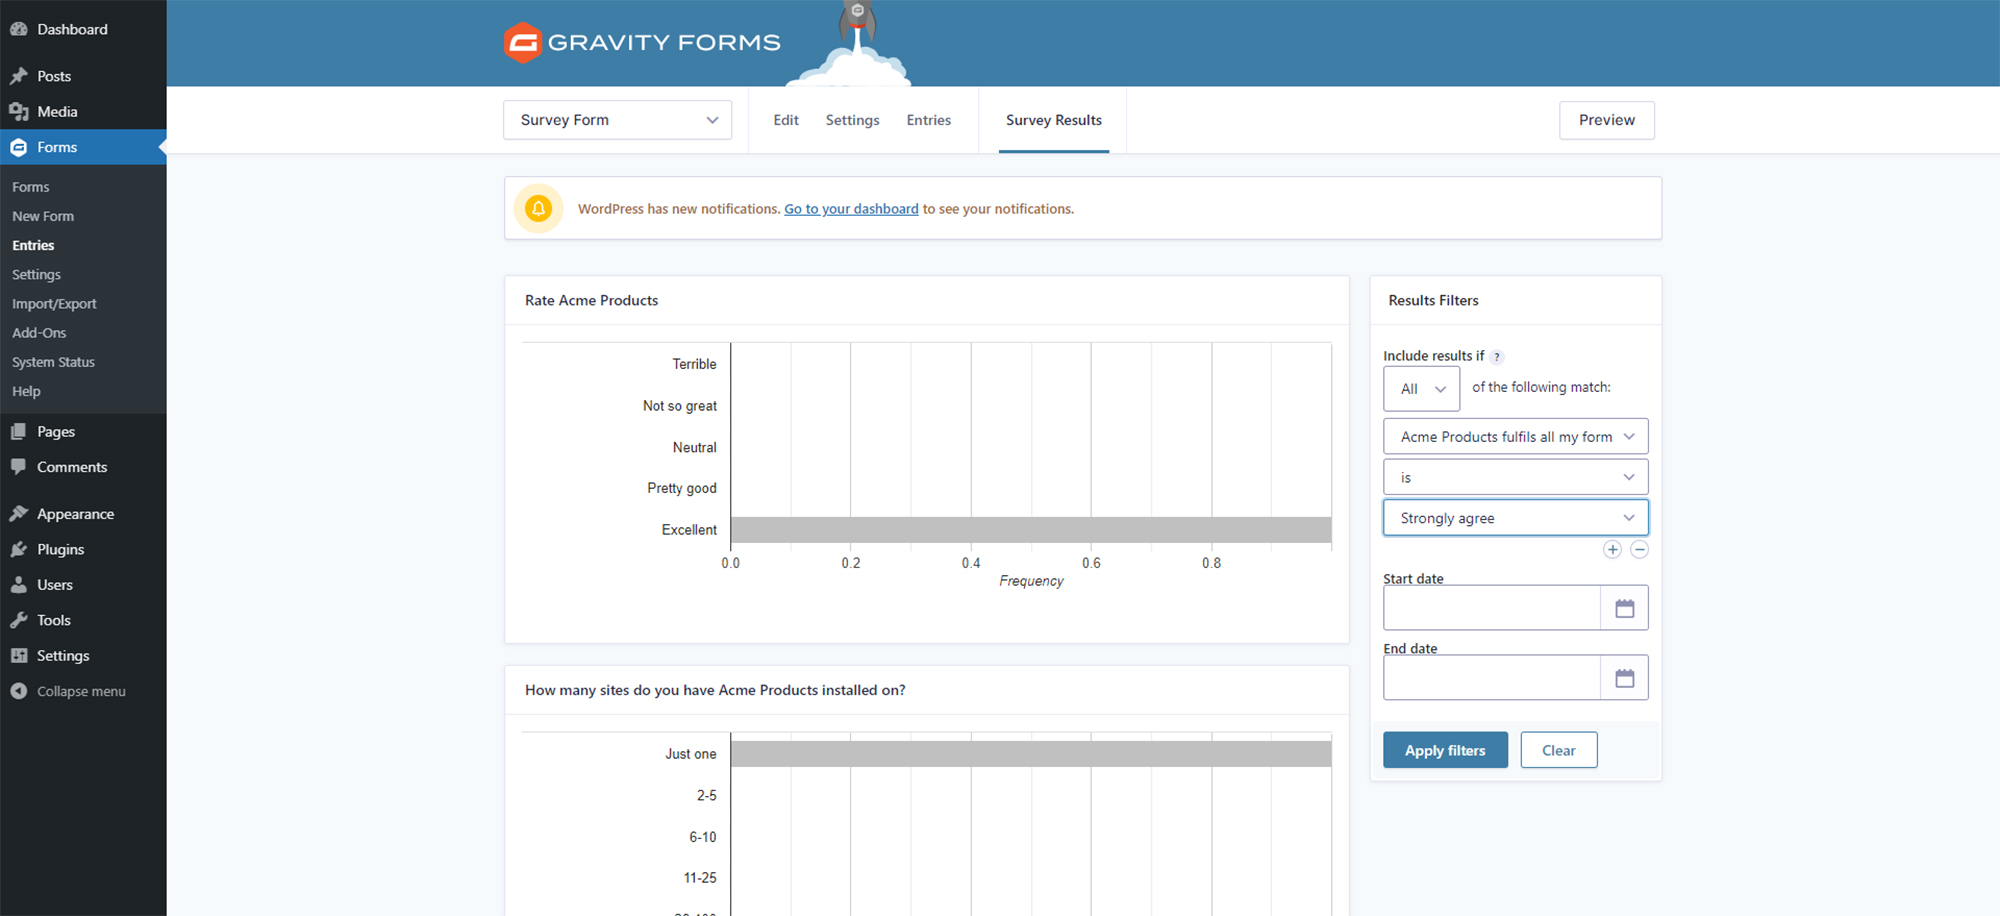
- Survey Results – With the Survey Add-On you can easily see the results to a survey right in your WordPress dashboard. What’s more, you can also filter the results by the start and end date as well as conditions that you set. For example, you can view only the good ratings or the bad ratings.
How To Add Surveys To Your Site With Gravity Forms And the Survey Add-On
Now that you know the benefits of creating surveys and how the Survey Add-On can help you succeed, let’s take a look at how you can use it to add a survey to your website.
Step 1: Install Gravity Forms
The first step is to install Gravity Forms on your website. The Survey Add-On is available with our Elite license so make sure you’ve selected this license, then complete your purchase and download the plugin to your computer.
Log into your WordPress dashboard and go to Plugins > Add New > Upload. Press Choose Files and locate the file you downloaded. Press Install > Activate, then follow the instructions to register the plugin.
For more information on how to get started with our plugin, check out the Getting Started with Gravity Forms documentation.
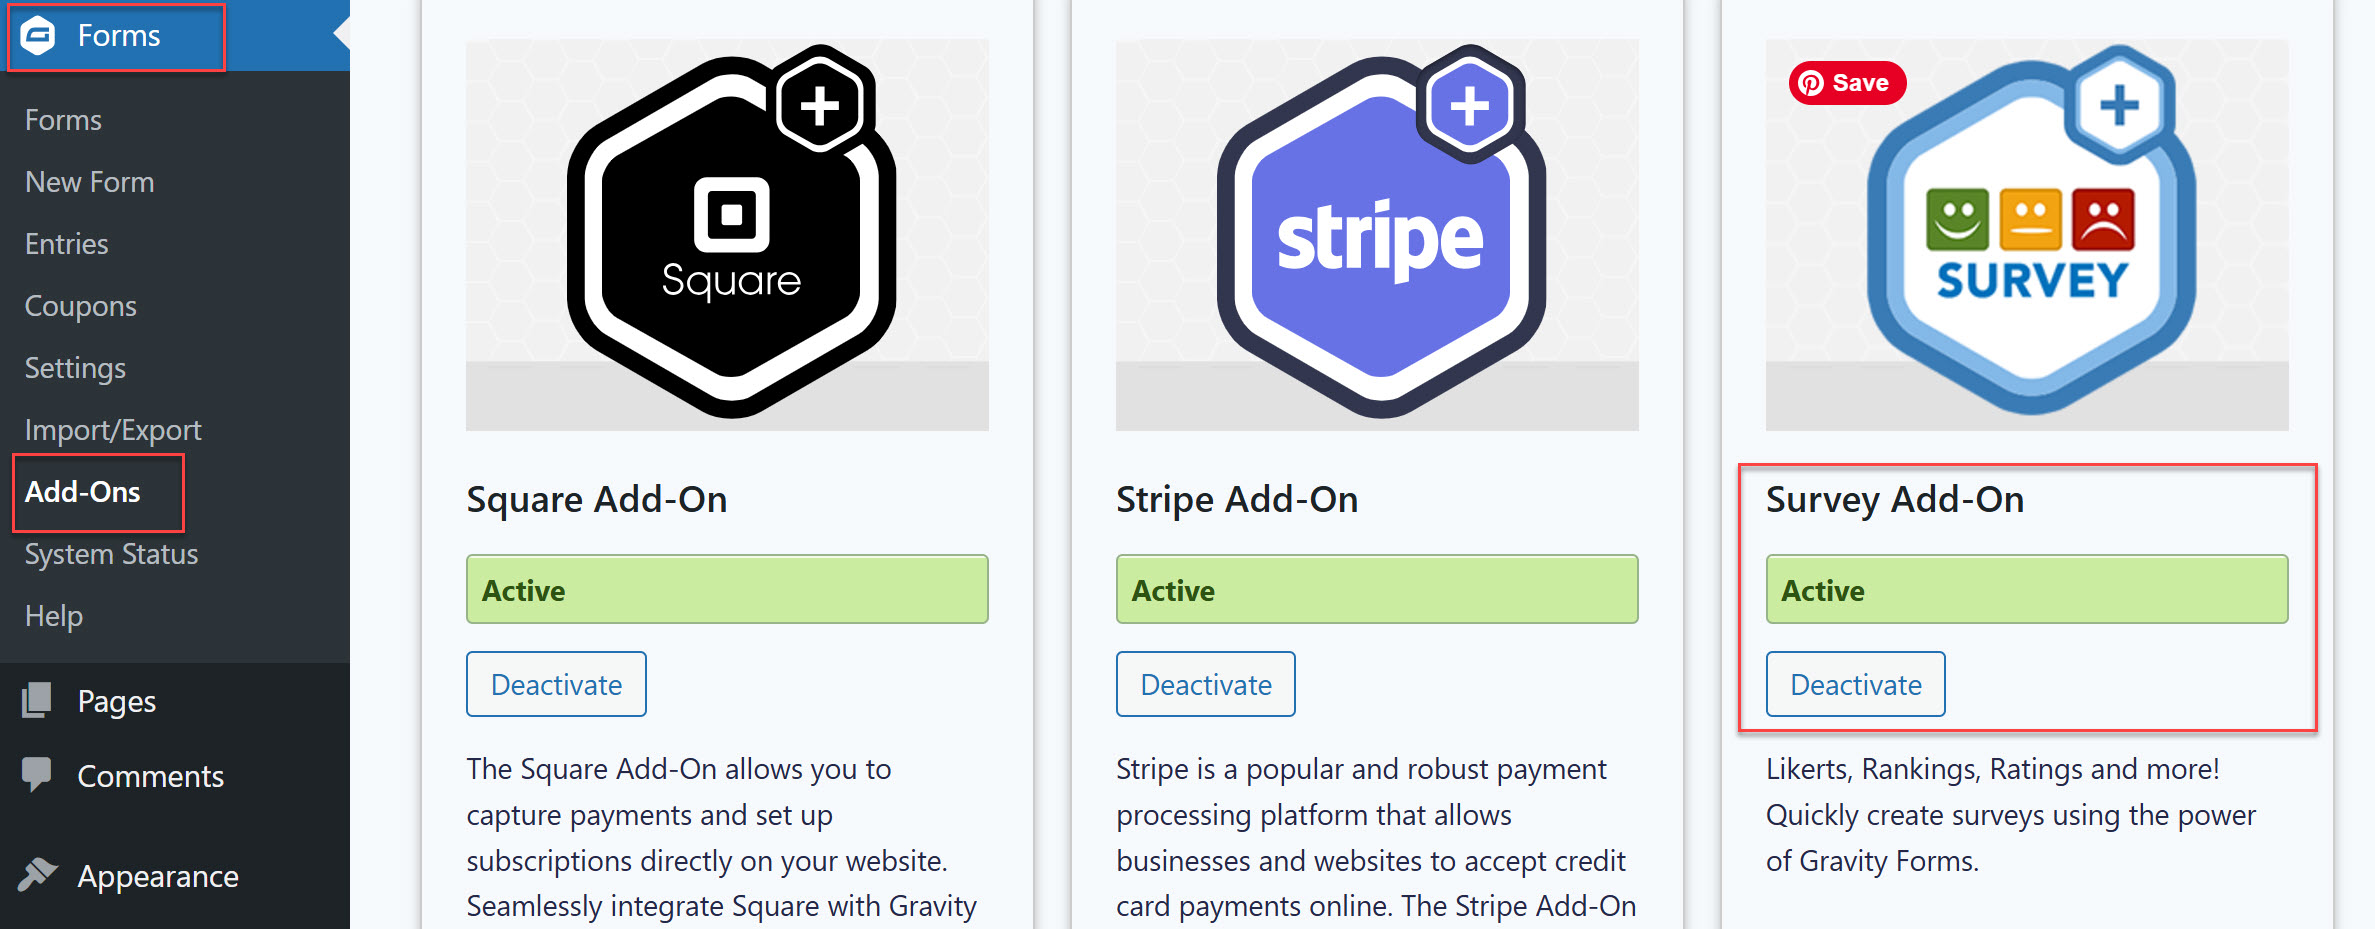
Step 2: Install The Survey Add-On
The next step is to install the Survey Add-On. Go to Forms > Add-Ons and locate the Survey Add-On. Click Install > Activate.
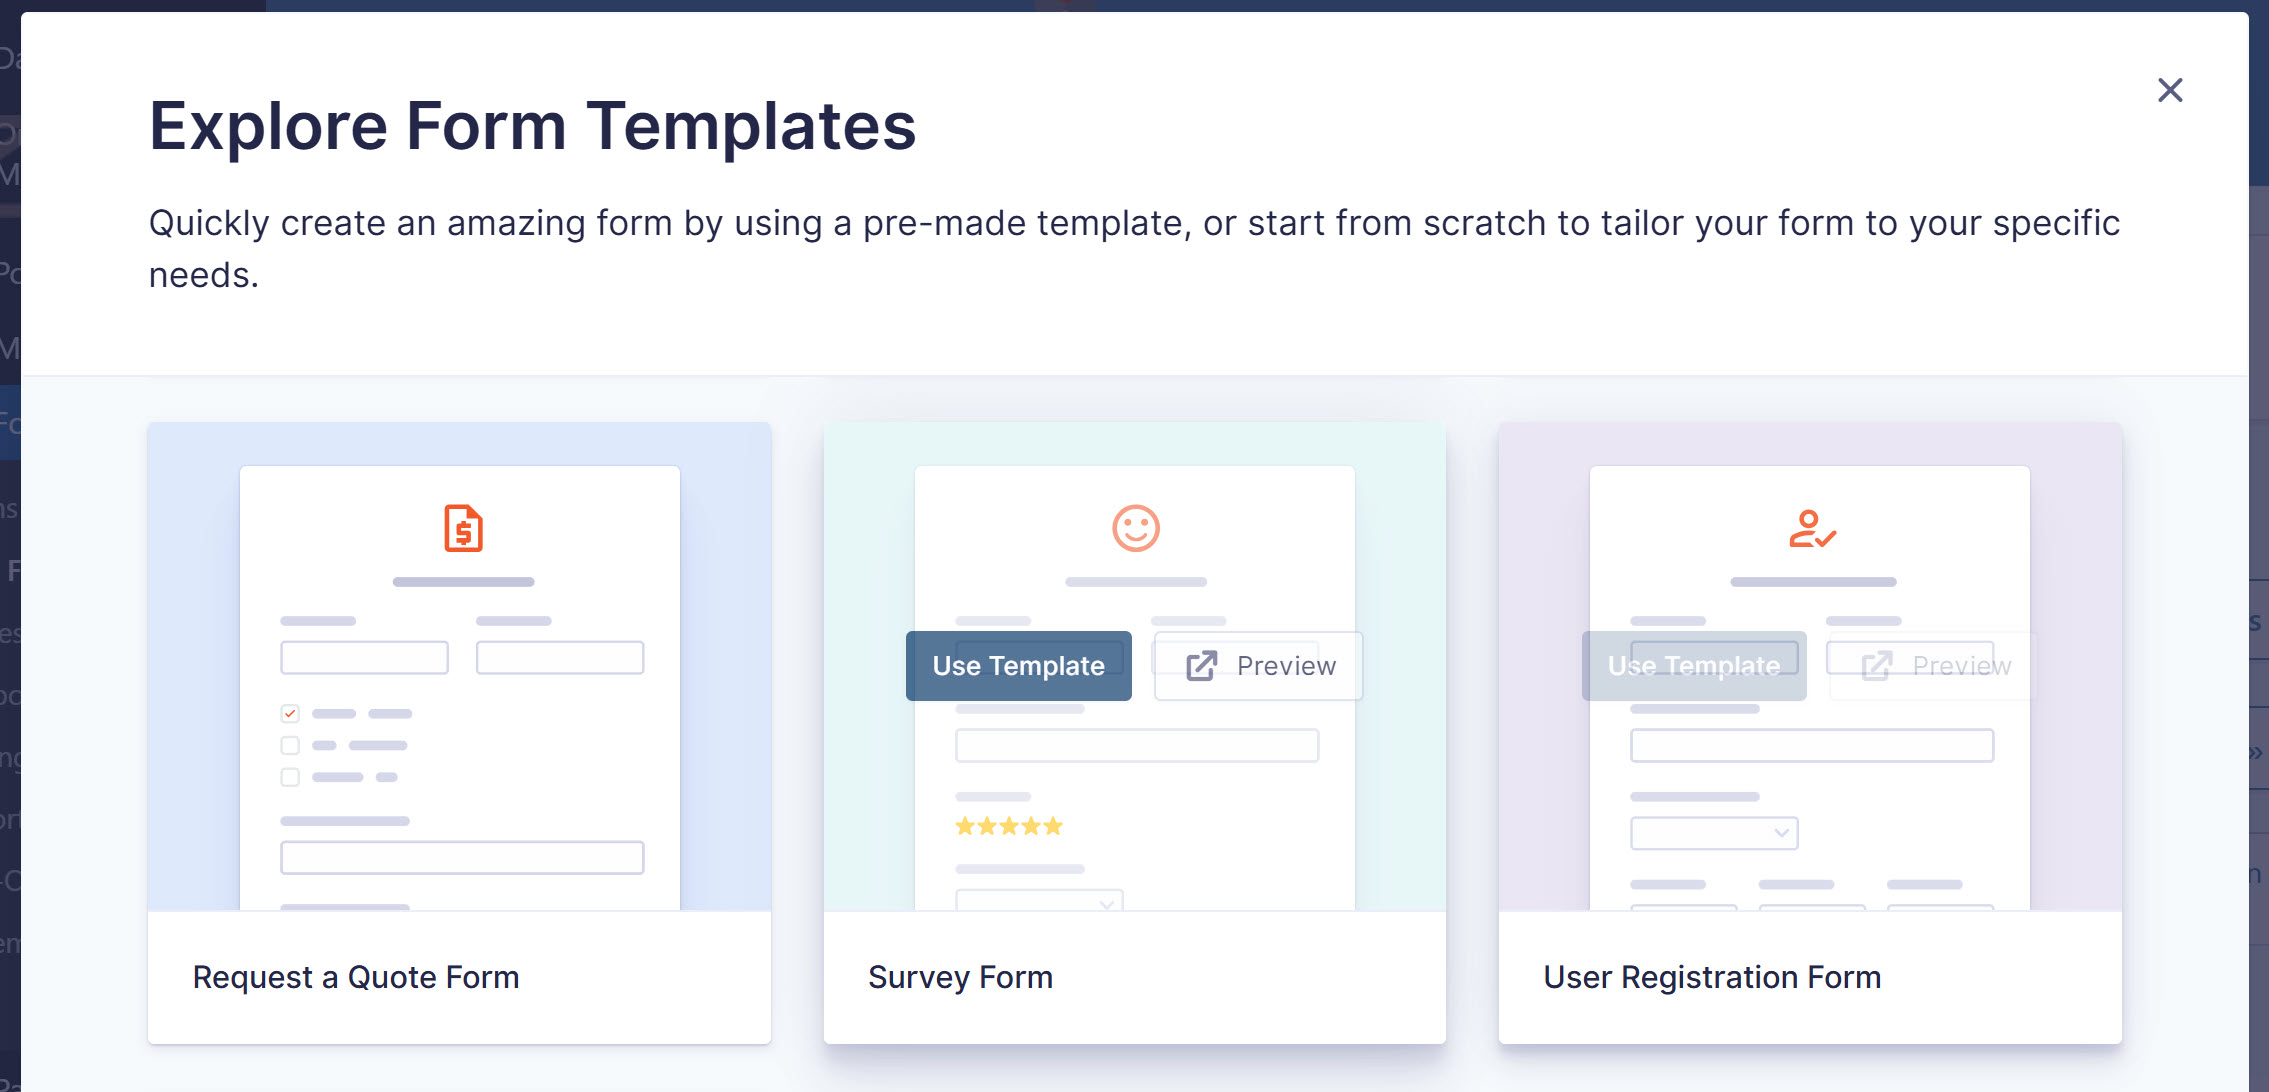
Step 3: Select the Survey Form Template
Next you need to actually create a survey. Luckily, you don’t have to start from scratch as we have a survey form template that you can use. All 0ur templates are fully customizable so are great to use as a starting point.
To select the survey form template, navigate to Forms > New Forms. Then scroll down through the Form Template Library – here you can find and select Survey Form.
Step 4: Customize the Survey Template
Once the Survey form has opened within the form editor, you can then customize the survey to match your needs. Add more fields, delete the ones you don’t want, change the survey field types, and create your questions.
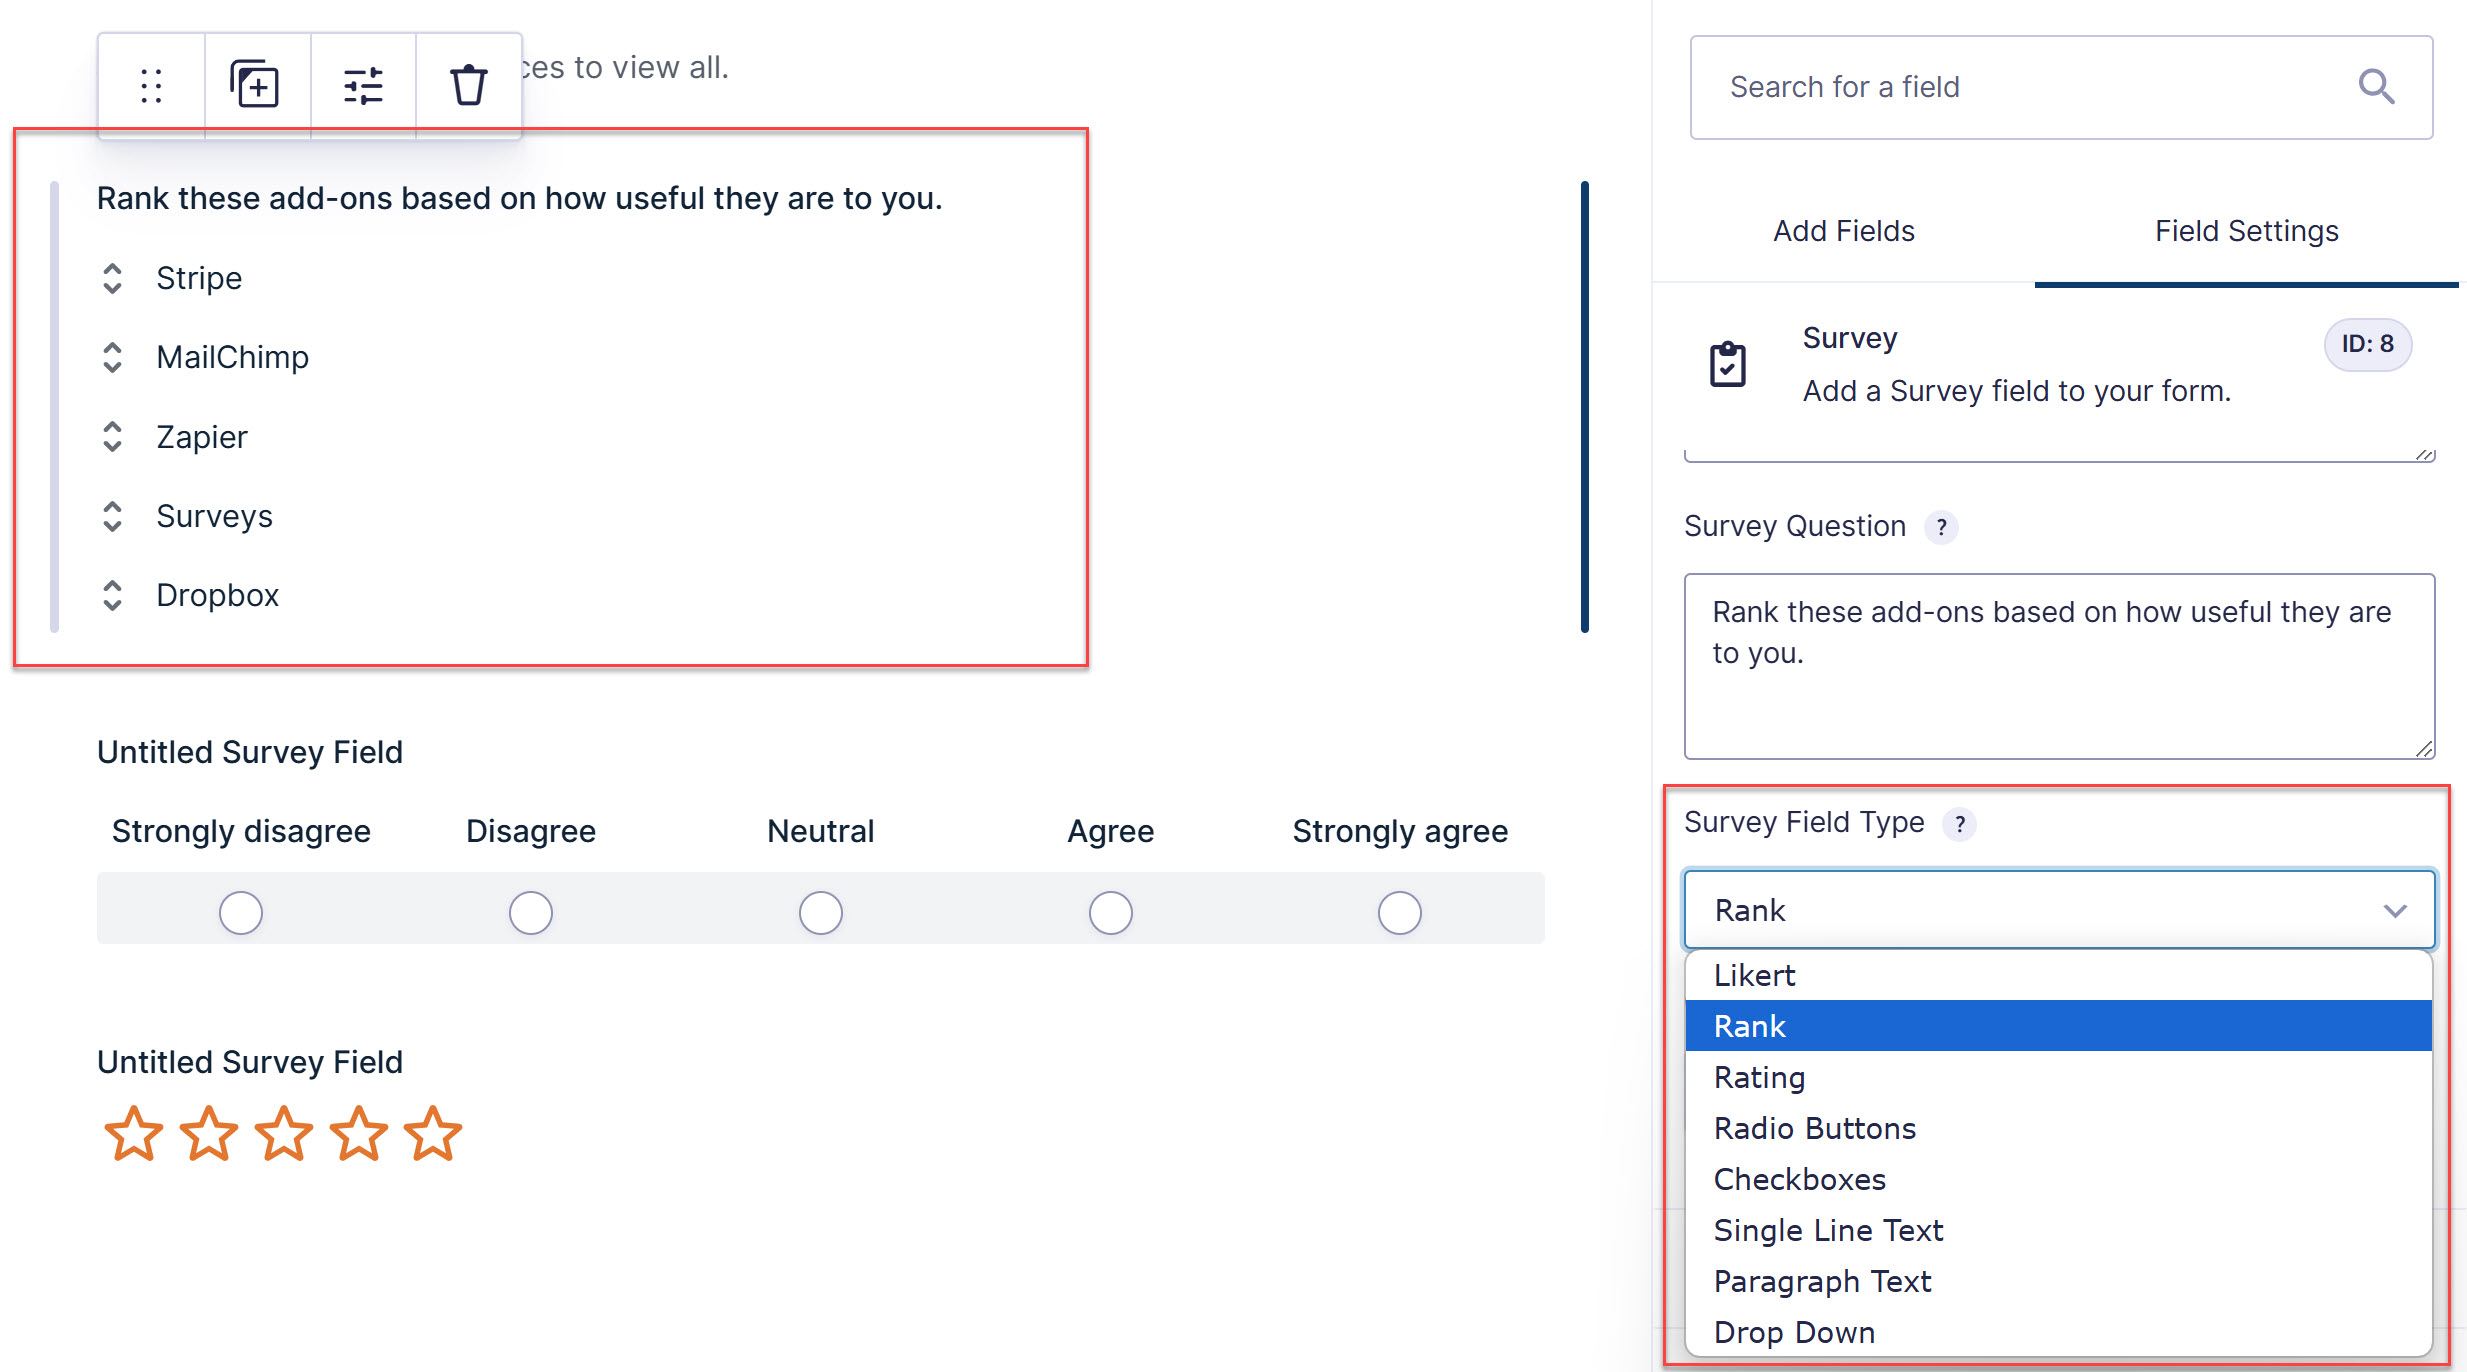
Remember there are numerous survey field types to choose from, including include Rating, Likert, Rank, Checkboxes, Dropdown, Paragraph Text, and more.
For more information on the Survey field, check out the Survey documentation.
You can also apply conditional logic to survey fields, allowing you to dynamically show or hide fields based on specific responses within these survey fields. This enables you to create more tailored user experiences, asking follow-up questions or triggering actions based on user inputs in survey fields.
Step 5: Embed the Survey On a Page or Post
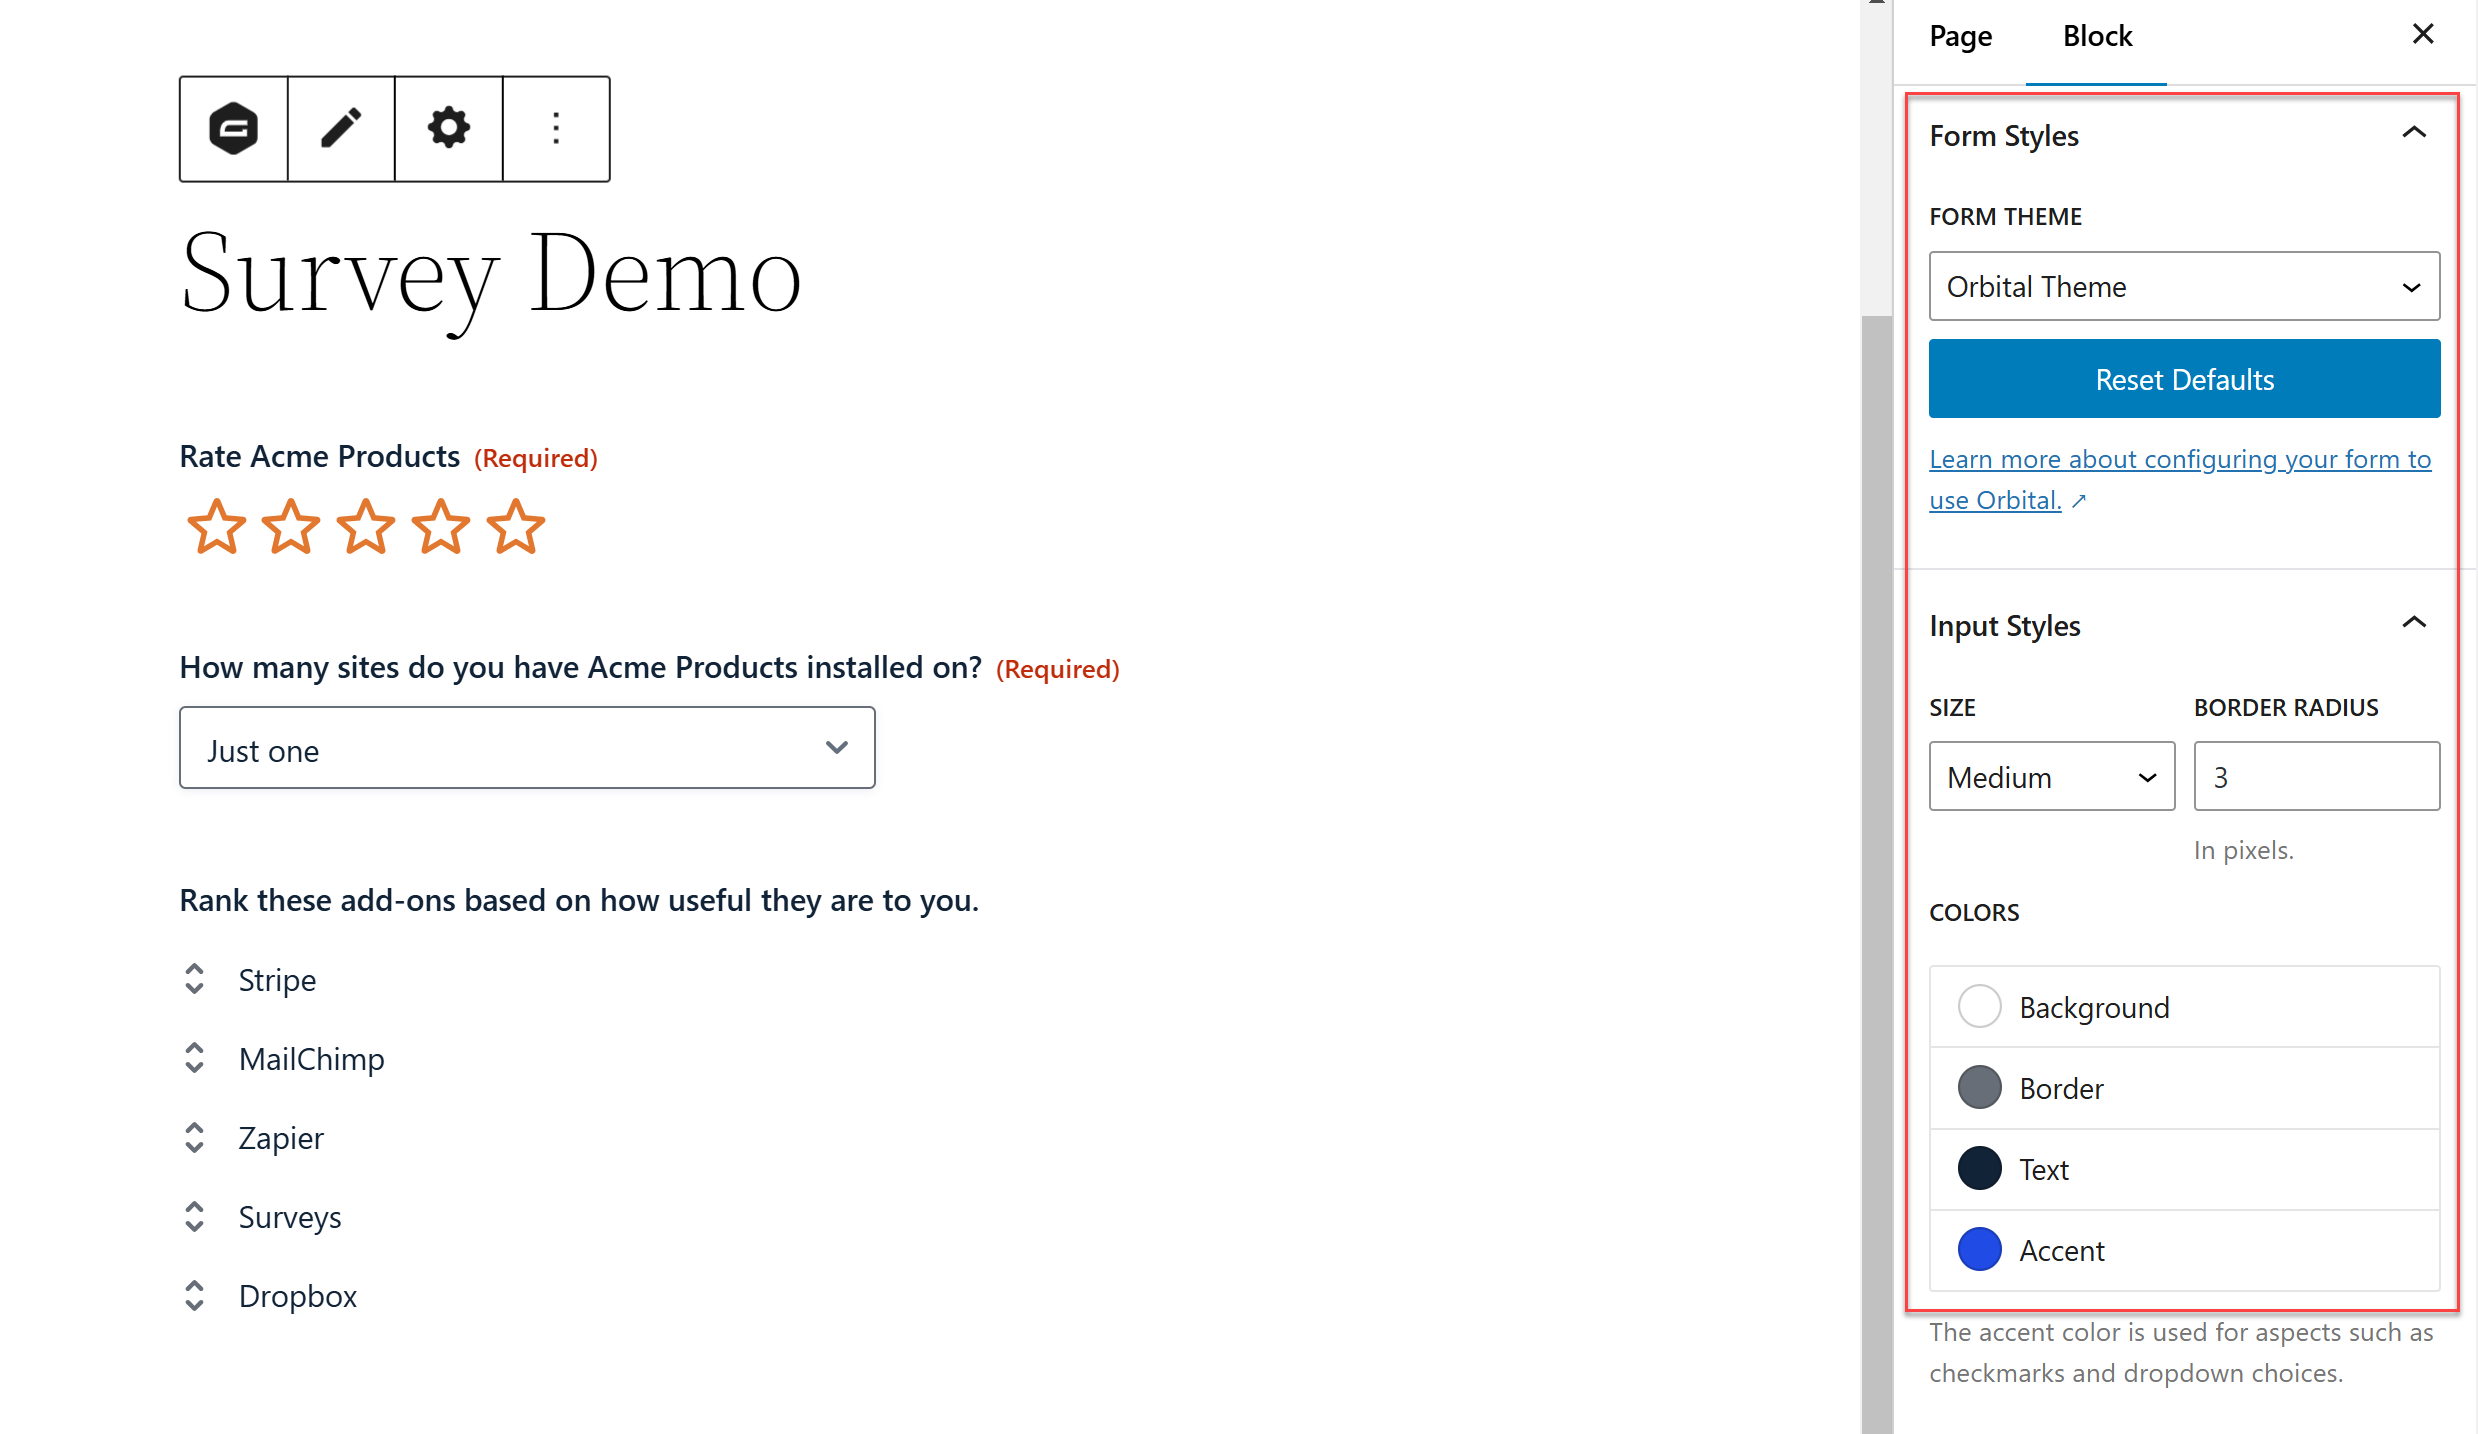
When you’re happy with your survey, click the Embed button to add the survey to a page or post on your site. Within the Gravity block in Gutenberg, you can also select the form theme Orbital, which will give you styling options to ensure your survey form fits with your site’s branding.
For more information on how to style your survey, check out this ultimate guide – How to Style Forms in Gravity Forms.
Now hit publish and start promoting your survey!
View Survey Results
As mentioned, with the Survey Add-On you can easily see the results to a survey right in your WordPress dashboard.
Within the form editor, click on the Survey Results tab to view and filter the results.
Ready To Add Surveys To Your Website?
Creating surveys with Gravity Forms and adding them to your site is quick and easy. If you want to learn more about using surveys on your website and the Gravity Forms Survey Add-On, these resources might help you:
- Gravity Forms vs SurveyMonkey for WordPress Surveys
- How to Create Online Surveys with the Conversational Forms Add-On
- Survey Add-On Documentation
Don’t have Gravity Forms yet? Take our free demo for a spin to find out more about our form builder. Play around with the intuitive drag and drop form editor, customize our form templates, and see how you can easily extend your forms with our powerful add-ons, including Survey!
Newsletter
If you want to keep up-to-date with what’s happening on the blog sign up for the Gravity Forms newsletter!
"*" indicates required fields


