

Whether you have an online business, or a physical store, selling products through your WordPress website can be a very successful venture – if you get the process right! Using a form plugin like Gravity Forms can enable you to accept payments for products (and services) through secure, user-friendly forms, helping to boost revenue and customer satisfaction.
In this Starter Guide, we’ll look at how to sell products on your WordPress website with the help of Gravity Forms. We’ll talk about how to import and customize our eCommerce form template, add any extra features that you may need, and integrate the form with a payment gateway. We also discuss some top tips to ensure your form’s success.
Let’s get started…
Creating An Effective eCommerce Form
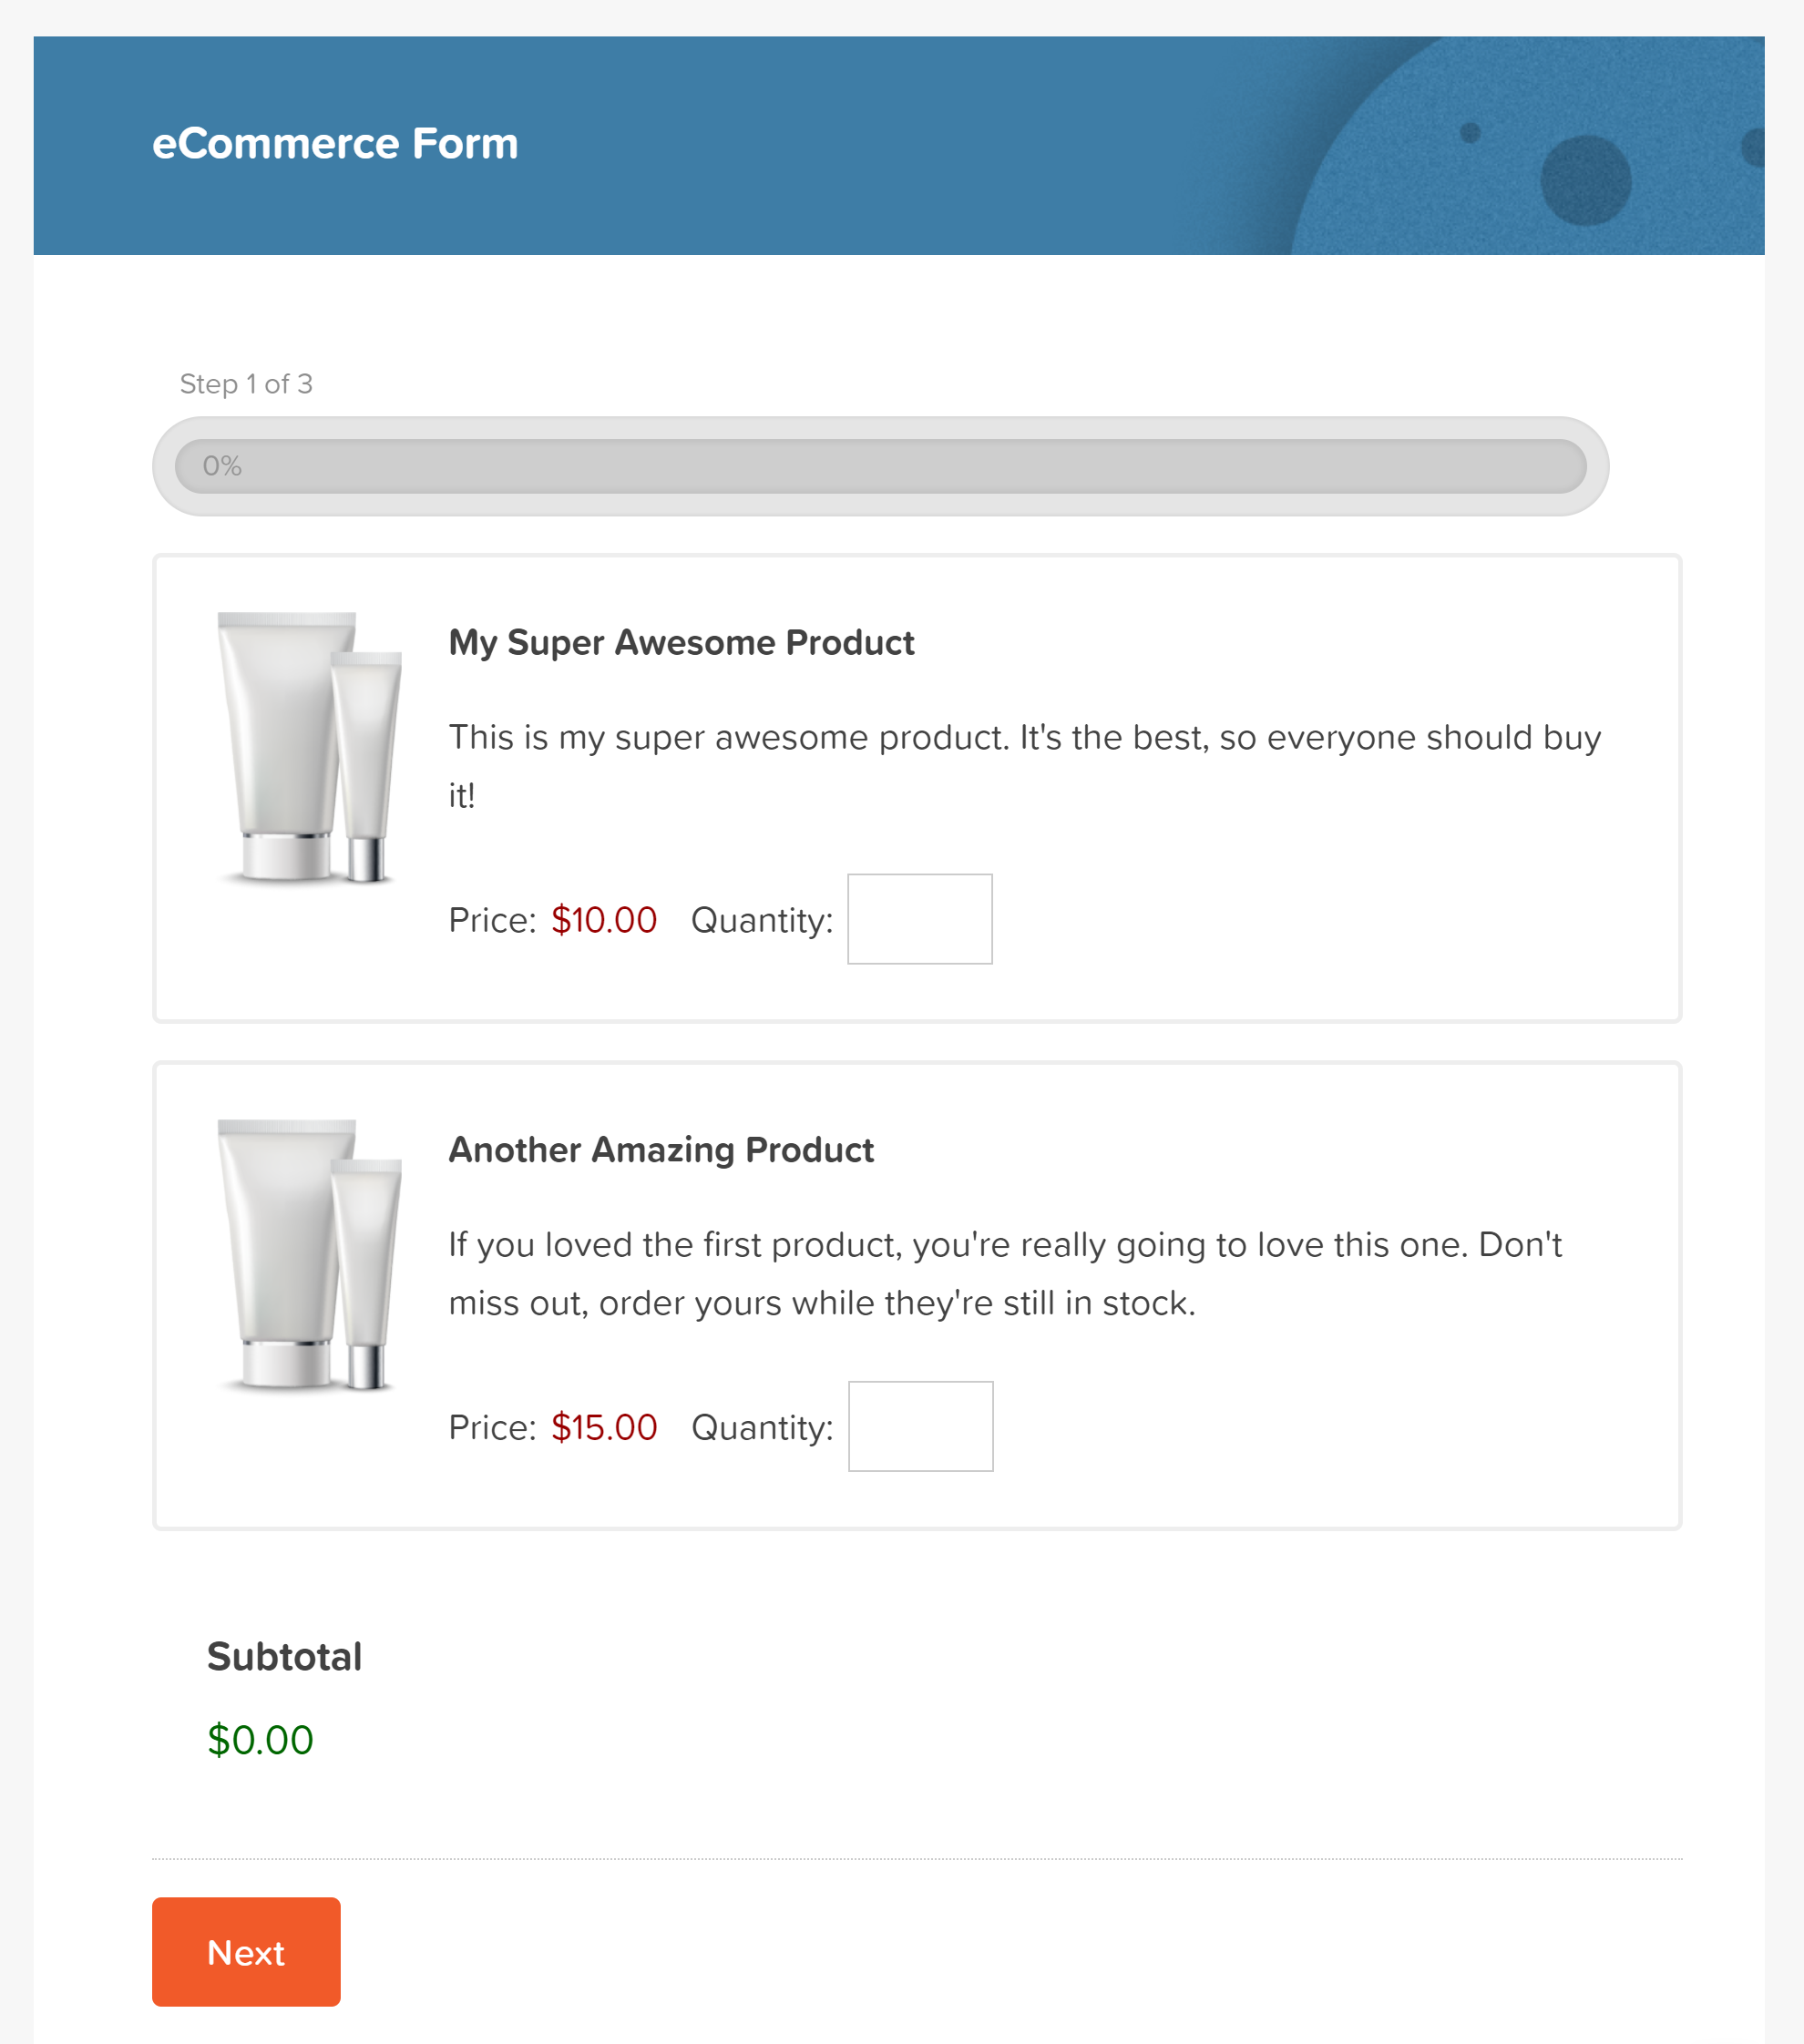
Creating an eCommerce form with Gravity Forms is a quick and easy process. Within the form builder you will find a number of pricing field options that you can add to your form. These fields allow you to build an eCommerce form that displays your products and their prices, as well as show shipping information, and of course, take payments.
But before we walk you through the eCommerce form creation process, there are a number of points to consider. The tips below will help you create an eCommerce form that converts your visitors into buyers:
- Ask only for necessary information – Before you create your form, think about the products or services you’re selling. Then, ask for only the absolute necessary information. For example, if you’re selling digital products, asking for their address is unnecessary.
- Use page breaks to make your form easier to use – Long and complicated checkout forms lead to buyers abandoning the cart and never completing the purchase. Add page breaks to your form to clearly display the number of steps in the checkout process.
- Select the right payment processor service for your customers – Gravity Forms integrates with numerous payment processor services, helping to cater to the needs of your business and those of your customers. So whether you need to charge for one-off payments or subscriptions, accept major credit cards or local currencies, or sell within the US or globally, we have a payment processor that will work for you.
With those top tips in mind, let’s find out how to create an eCommerce form…
Import Our eCommerce Form Template
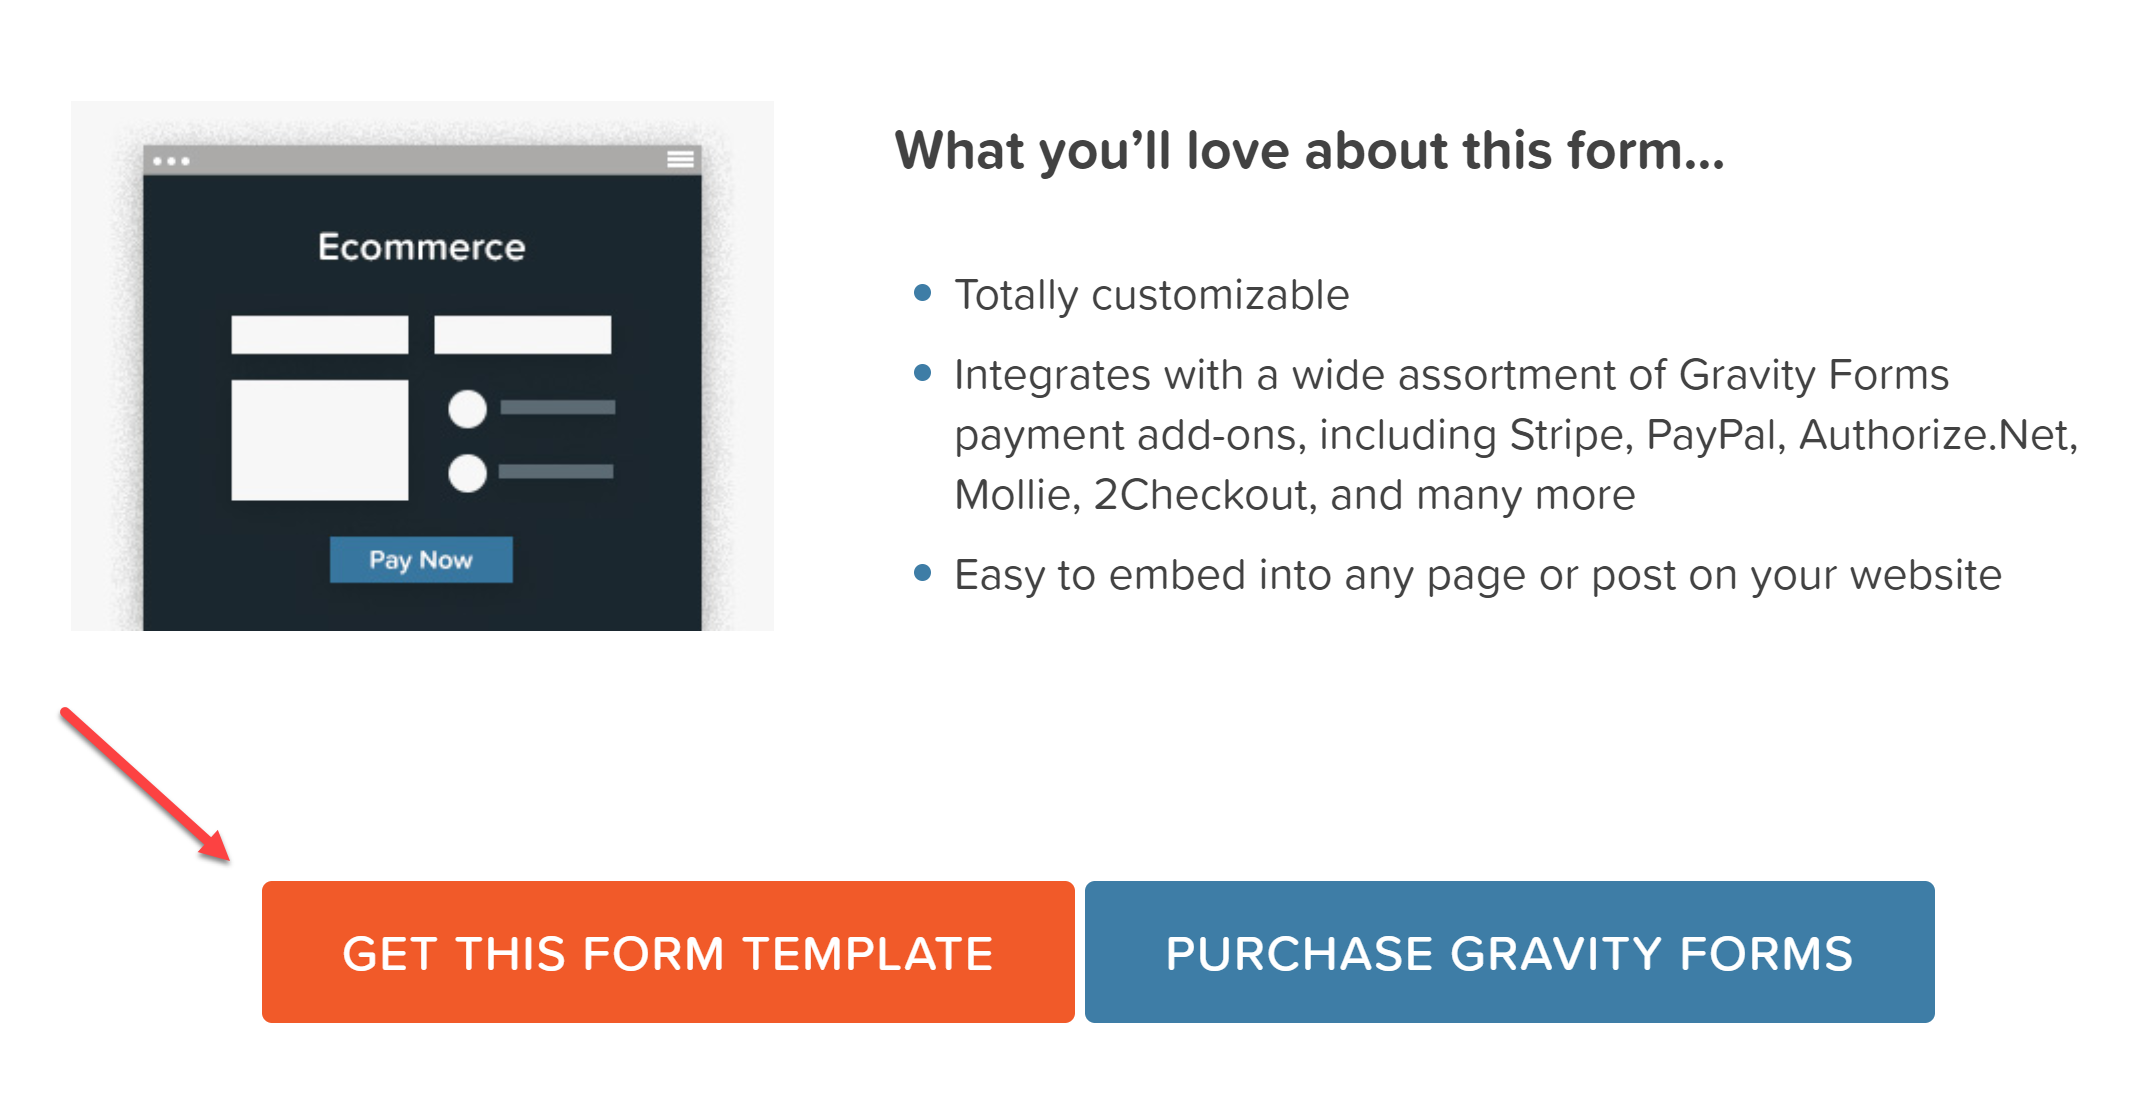
If you visit our Gravity Forms Template Library, you’ll find a pre-built eCommerce form template. This saves you the trouble of building the form from scratch. Instead, you can download the template and import it onto your site. As with all our templates, the eCommerce form template is completely editable and customizable.
 To use this template, all you have to do is click on the Get this Form Template button at the bottom of the page. The form will then download to your computer as a .JSON file.
 With the form template downloaded, go to your WordPress dashboard and click on Forms > Import/Export > Import Forms > Choose Files. Select the ecommerce-form.JSON file from your computer and press Import.
 Once the import is complete, the eCommerce form template is ready to customize within the form editor.
Customizing The eCommerce Form Template
To customize the form, go to Forms and then click the Edit link under the newly imported eCommerce form. As you can see, the template includes the following fields:
- 2 product fields for 2 products
- The subtotal field
- The fields for entering the buyers personal information, and billing and shipping address
- Shipping options
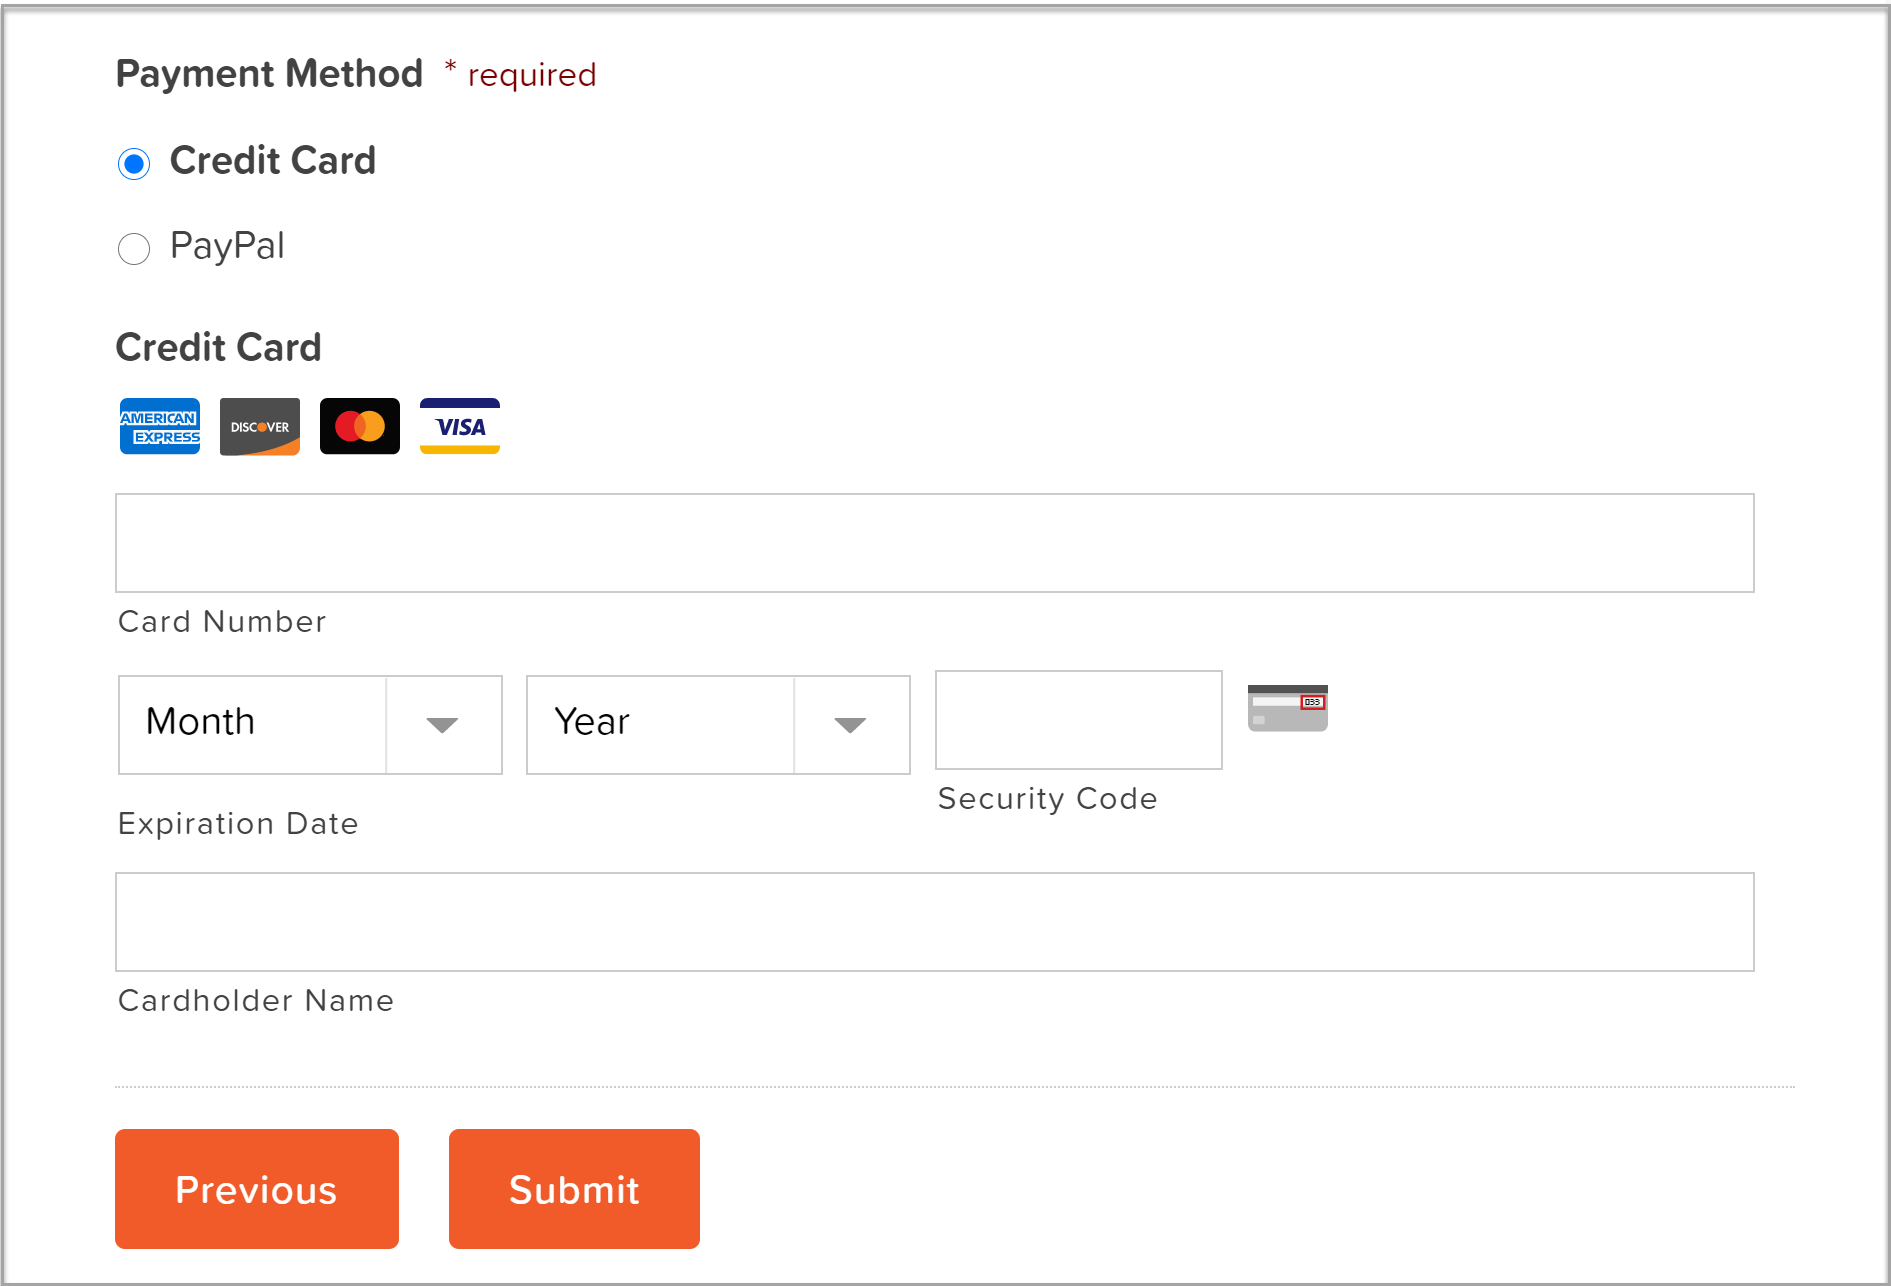
- Payment information
- And page break field to break the form into multiple pages
The form is pretty thorough by default so the bare minimum includes customizing the product fields. You may also want to add more product fields if you have more than two products to sell.
If you sell digital products, you will also want to remove shipping address fields and the shipping options.
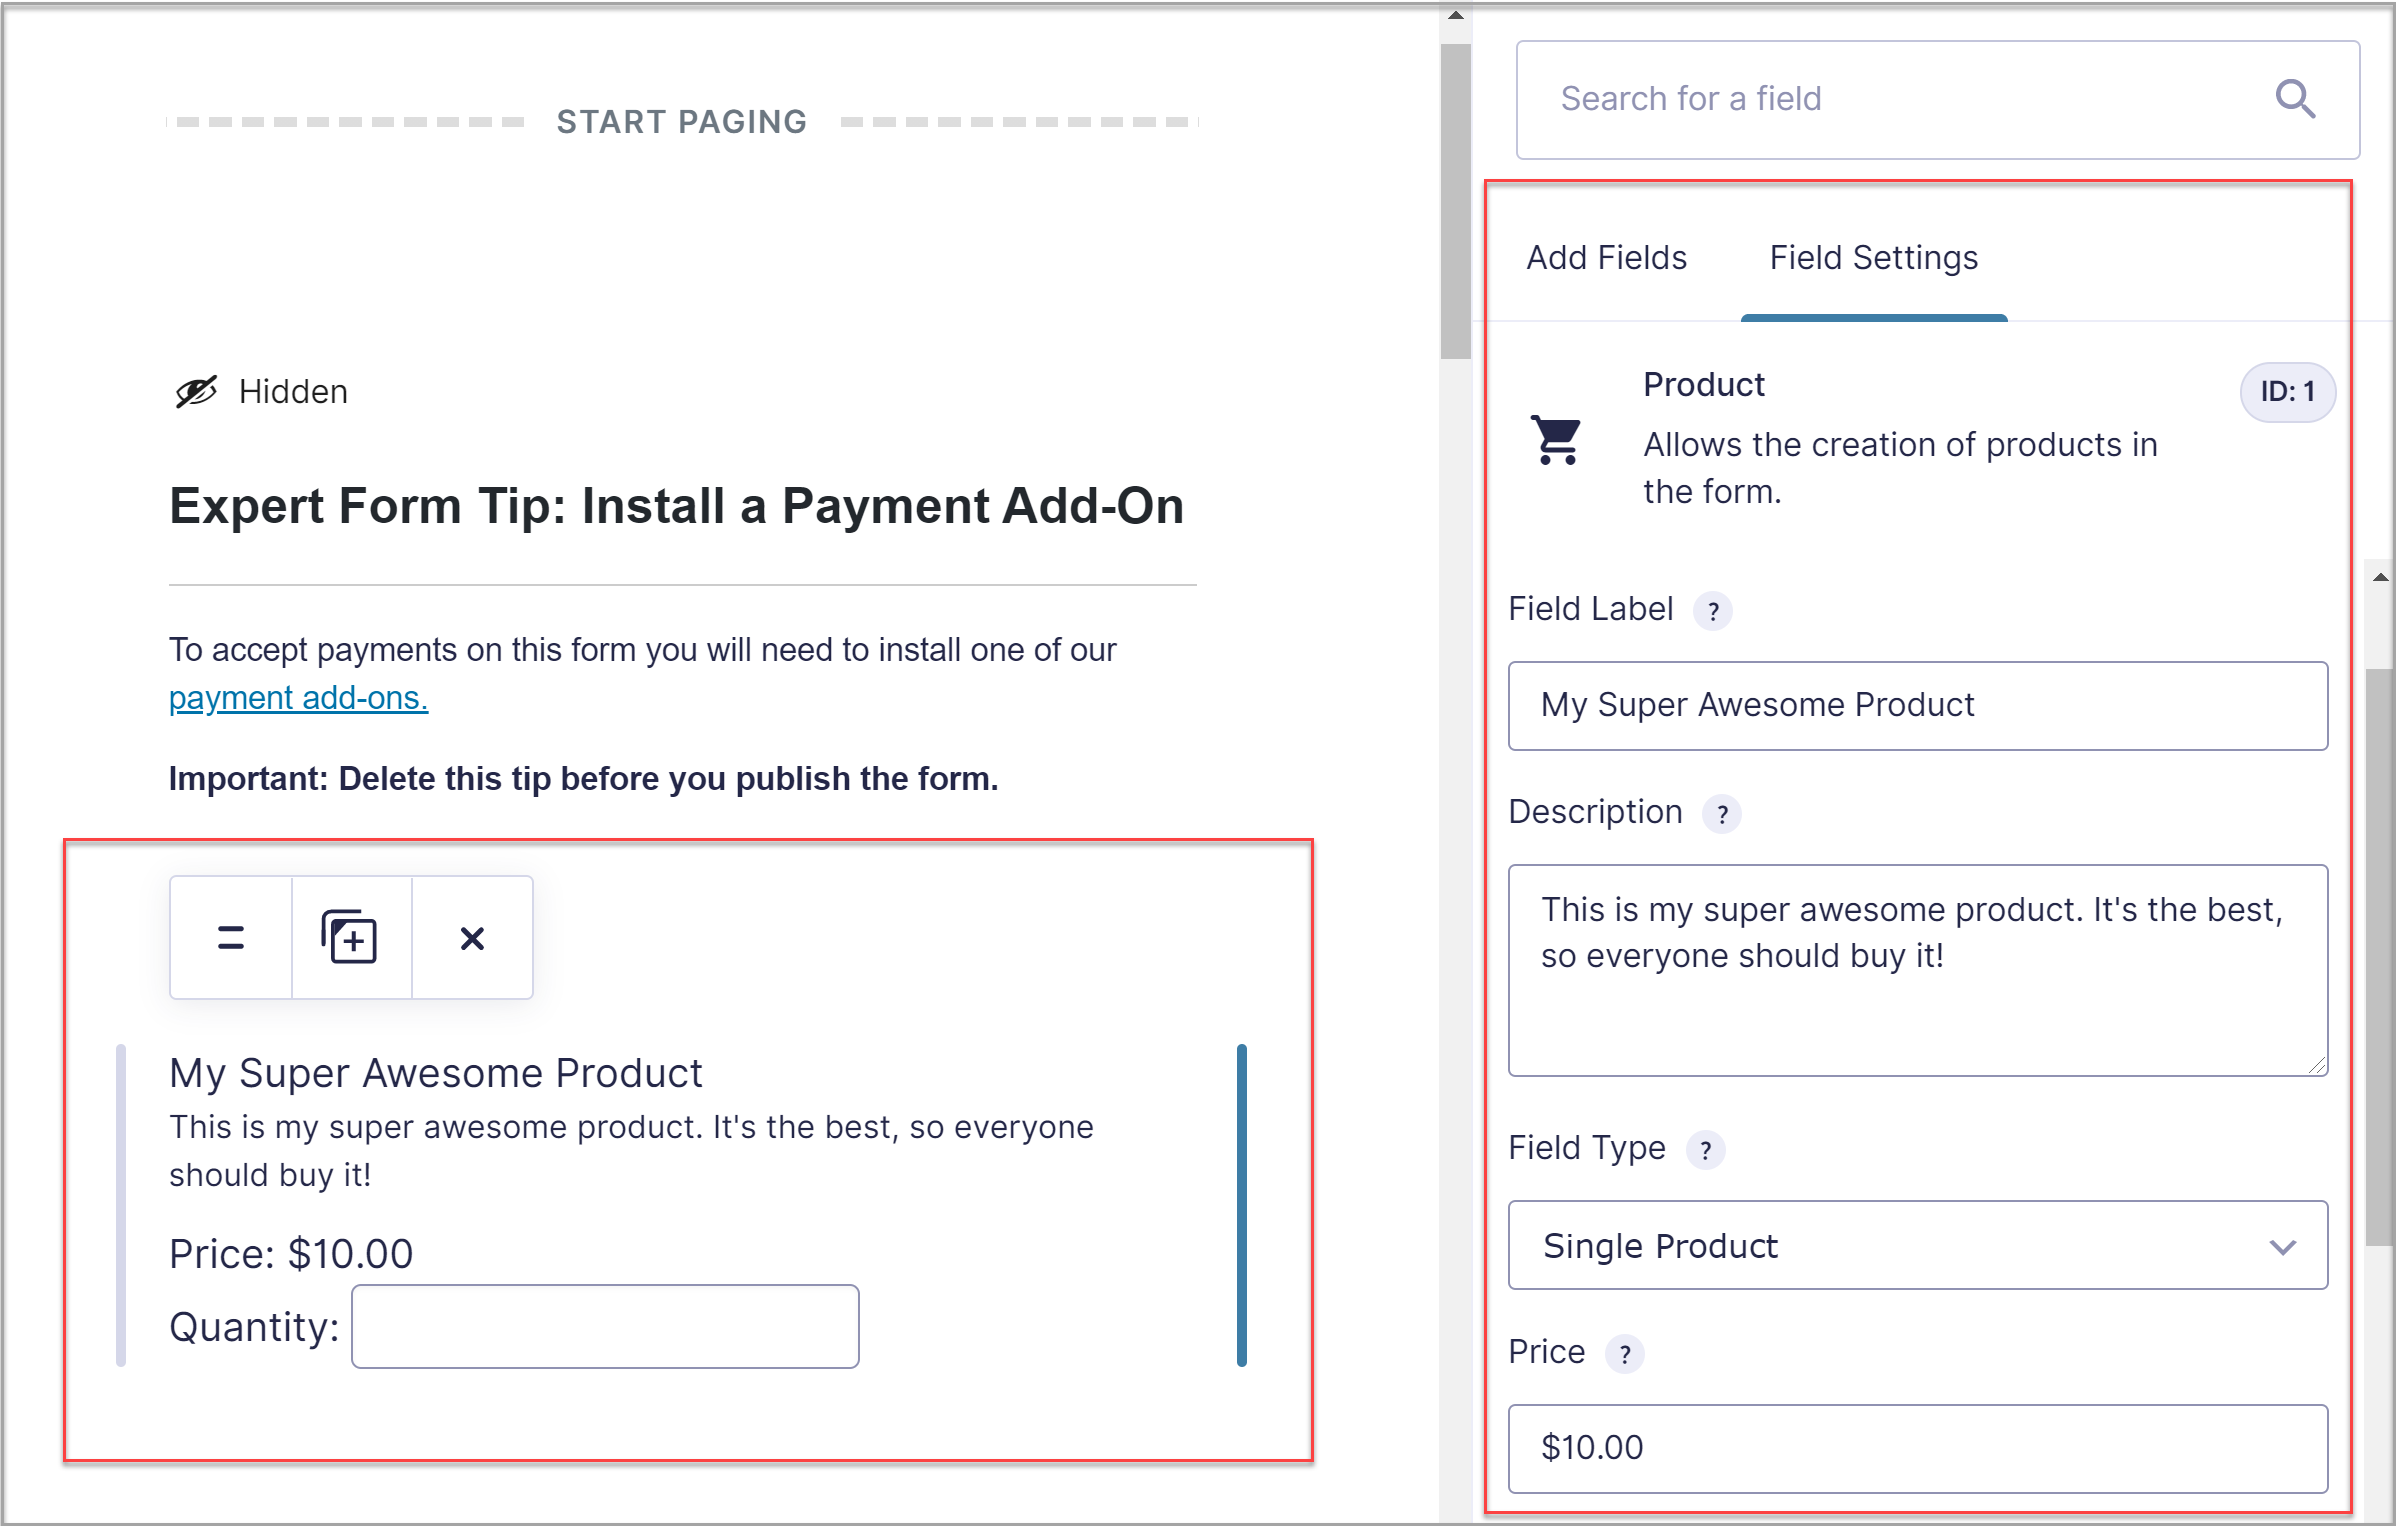
Customizing the Product Fields
To customize a product field, click directly onto the field and then make any necessary changes within the Product Field Settings – here you can alter the field label, description, product type, price, and much more.
 When you’re selling products, displaying images on your form is a must. This allows your customers to see the product before buying it. There are two ways to go about this:
- You can upload the images to your WordPress media library and then use the HTML field to add the image to the form. Note that this solution requires some coding skills.
- Alternatively, you can use the Image Choices add-on from JetSloth to add product images to your form.
eCommerce Form Pagination
By now, you’ve probably noticed that the eCommerce form is, in fact, a multipage form. This makes it easy for customers to see all the steps involved in the checkout process. To add more pages to your form, you need to add the Page field to your form. This field is located under the Standard Fields section.
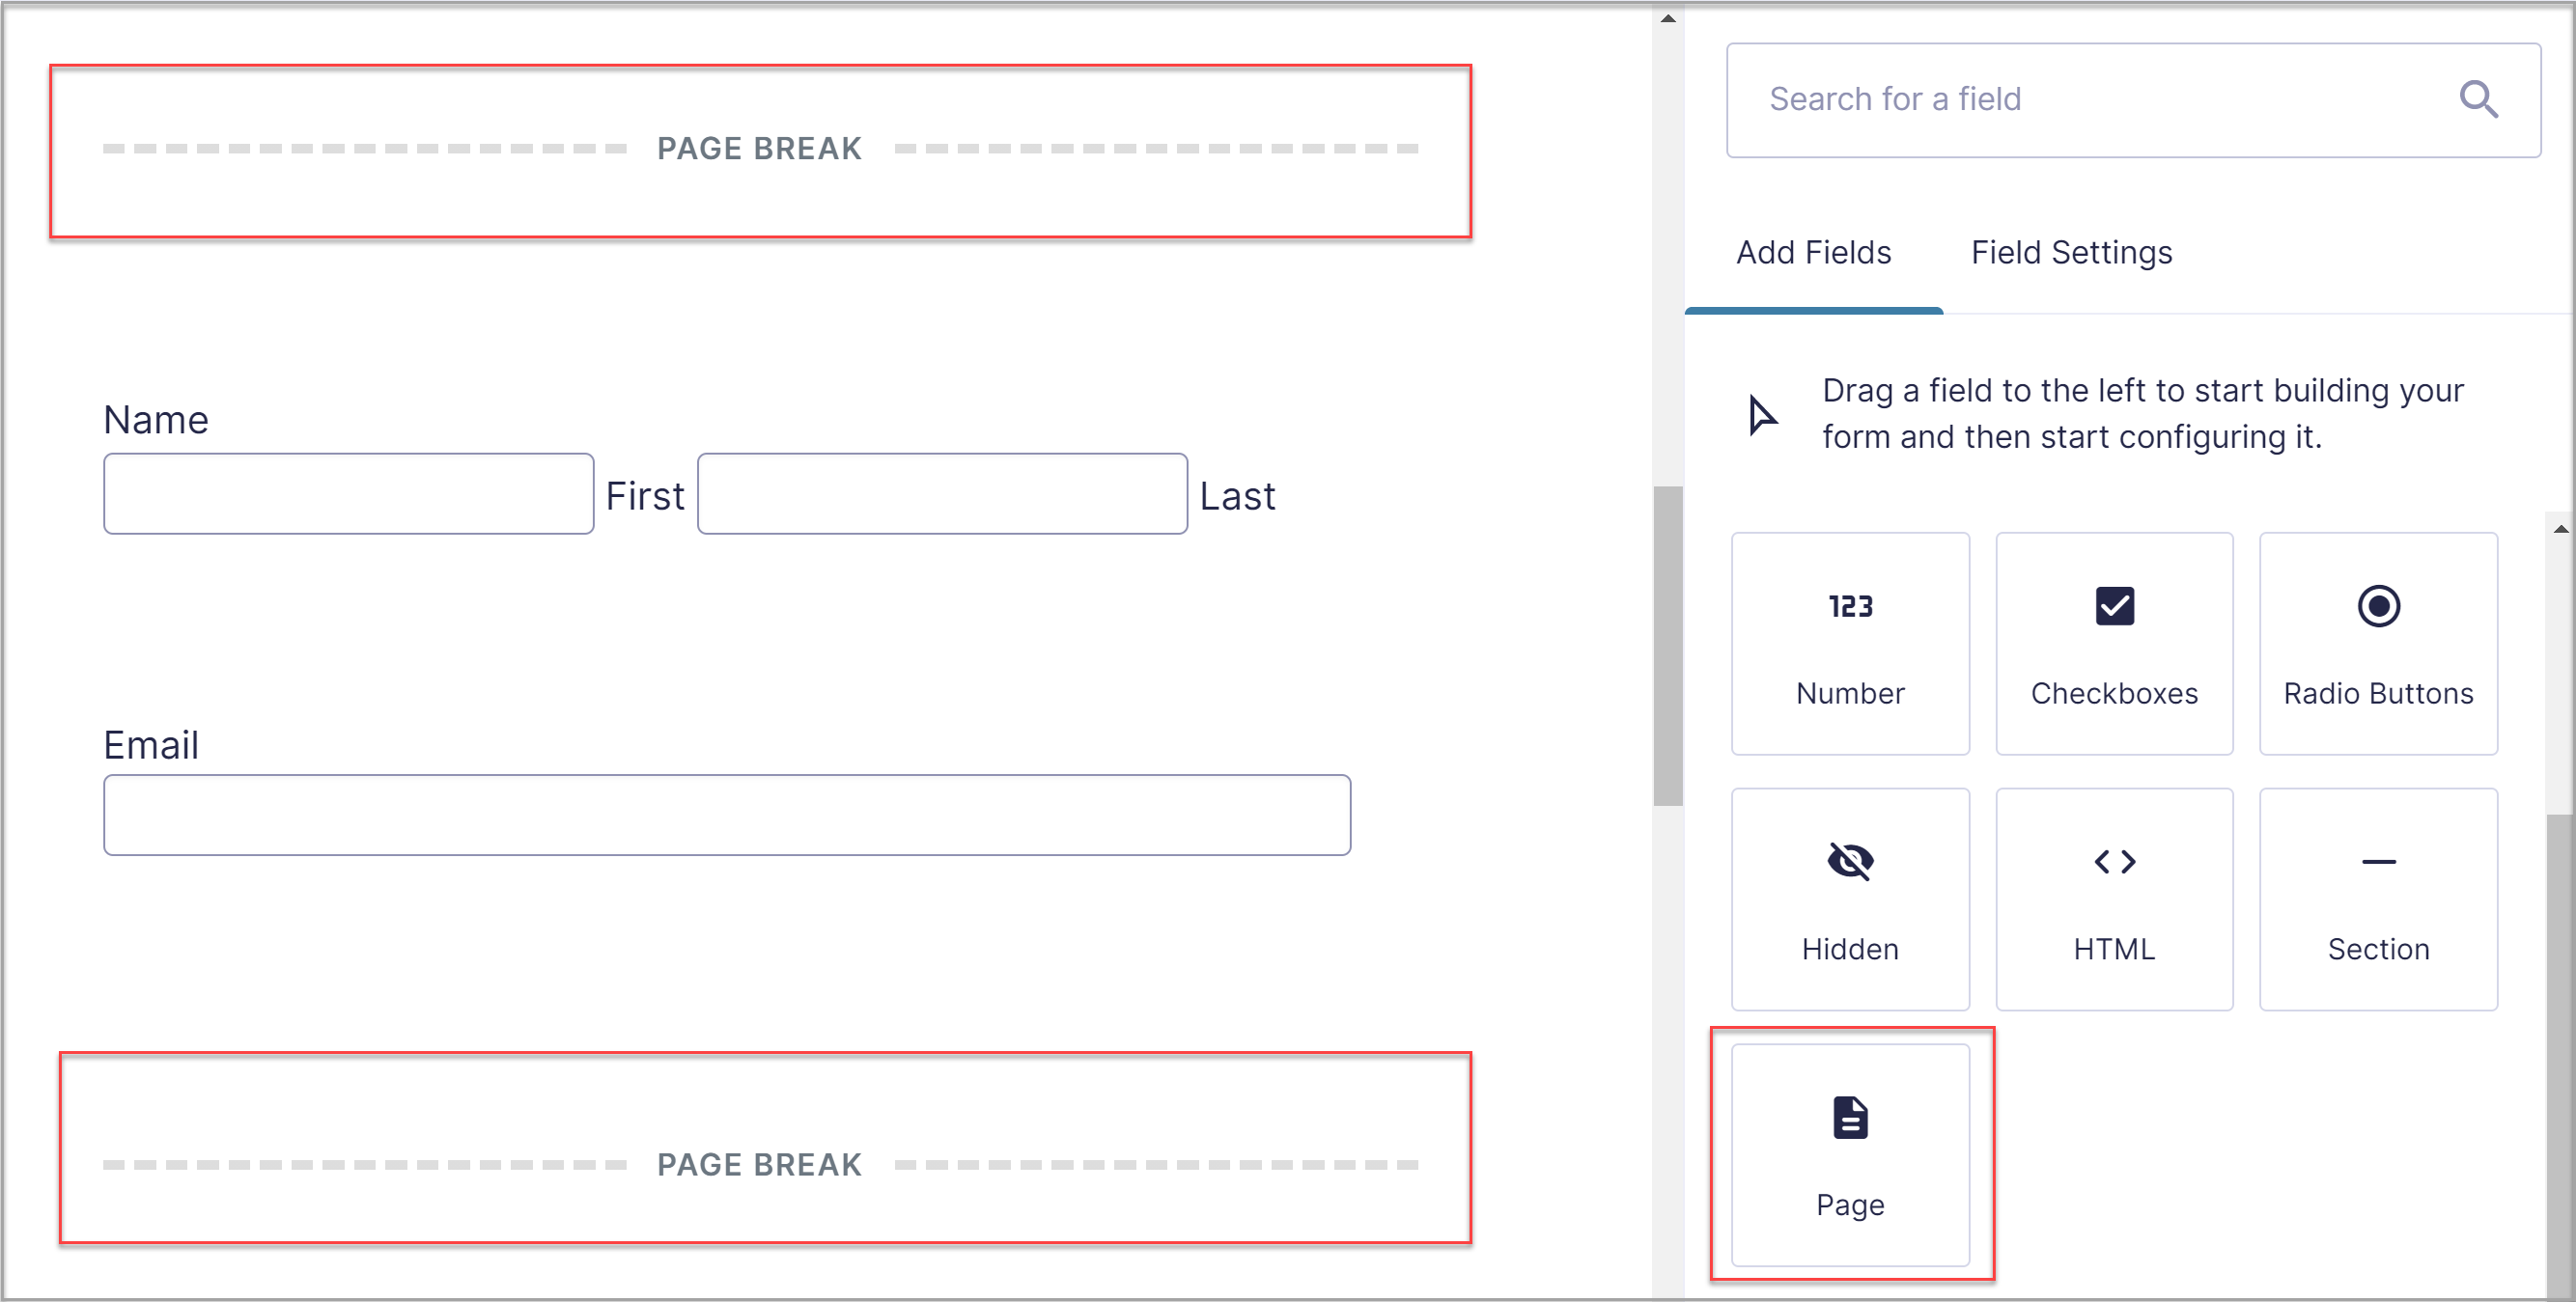 You can then customize the Page Field Settings. You can customize what the text says for the next and previous buttons, add a custom CSS class to the field, and enable conditional logic, if you want the next page to display only if certain conditions are met.
It’s worth mentioning that the first Page field on the form allows you to customize the Progress bar and even name the pages so the users know what to expect. You can choose between a progress bar, steps, or no indicator. You can also customize the color of the progress bar.
Integrating a Payment Add-On
You’ll notice a section at the top of the form prompting you to install a payment Add-On. This is necessary so you can accept payments from your customers.
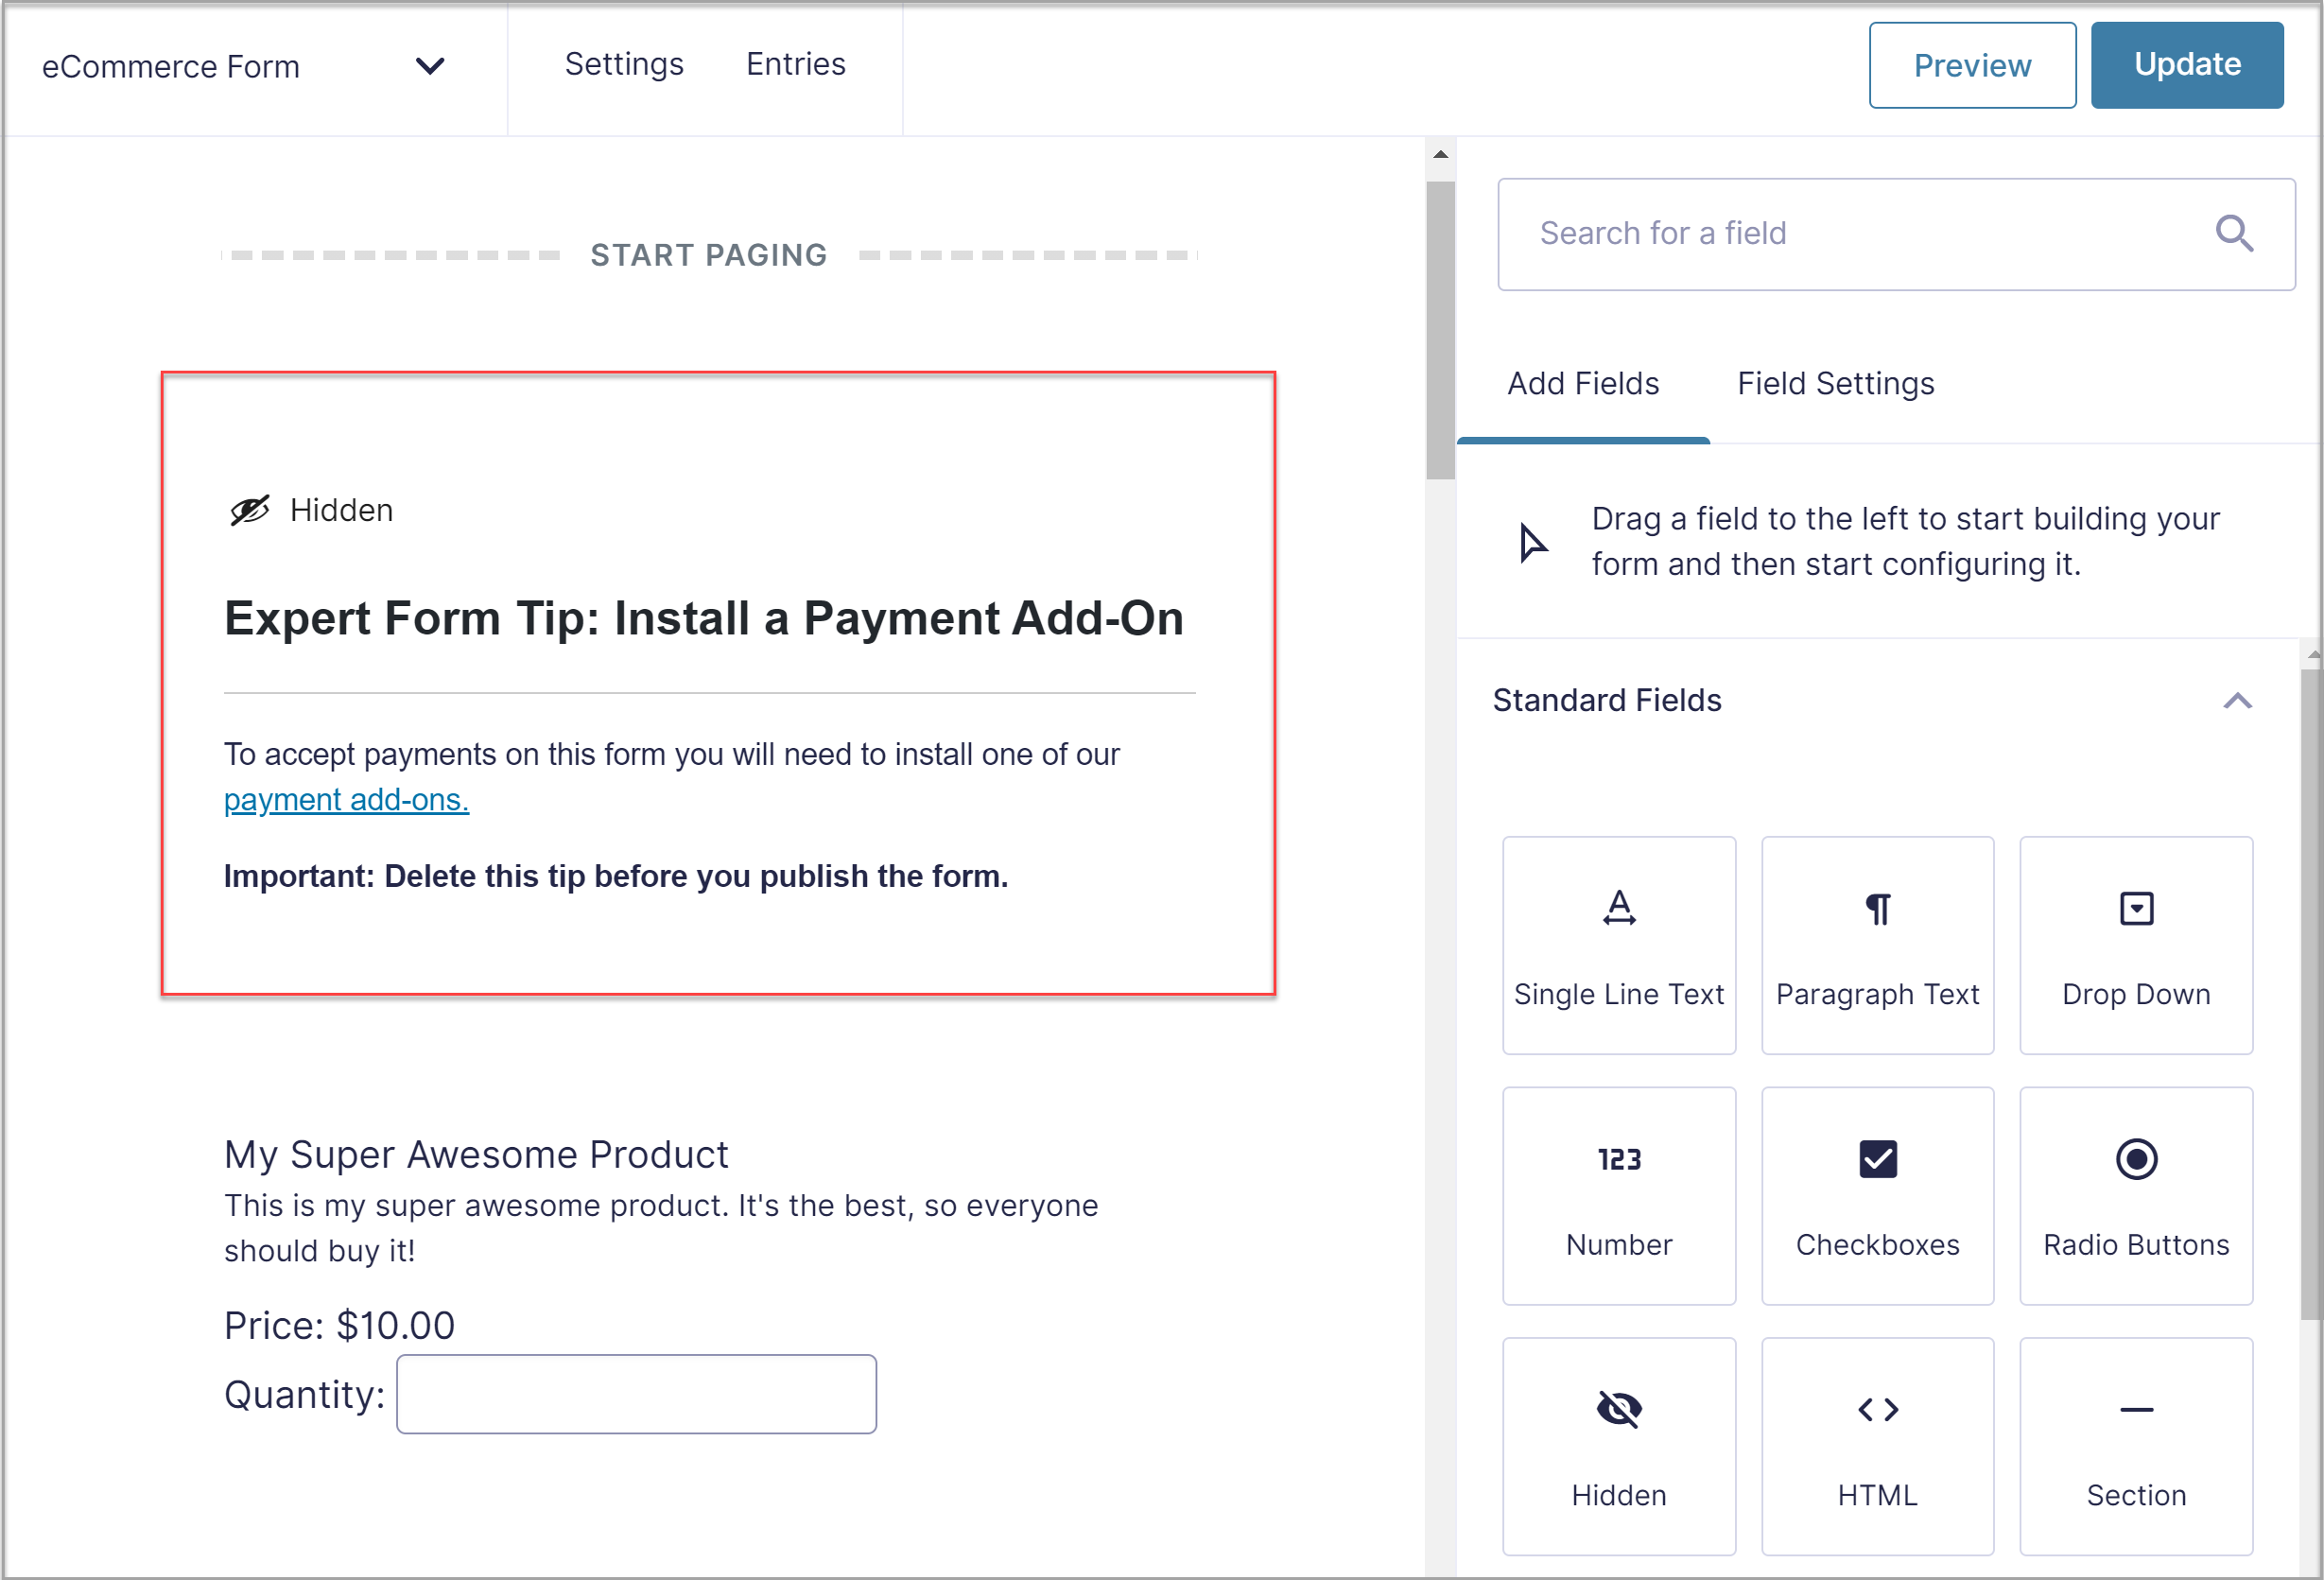 Gravity Forms supports major payment processors such as Stripe, PayPal, Square, 2Checkout, and many others. Once you’ve decided which payment processor is right for your business, you will need to…
- Install the appropriate payment Add-On from the Gravity Forms Add-On Browser.
- Connect your website with your payment processor account in the Gravity Forms Settings.
- Add a Payment Field (ie – Square) to your form.
- Create a payment Form Feed to sync your form to the payment processor.
 For more information on how to integrate your form with a payment processor, check out the documentation for each individual add-on on our docs site.
Enhance Your eCommerce Form With Addons
So, now you’ve seen how to quickly create an eCommerce form by importing a template and how to customize it. I’ve also shared how you can add more pages to your form and covered how you can add images. However, there are a couple of Gravity Form Add-Ons that can make your eCommerce form even better. Here are a couple of options to consider:
- Build your very own product configurator by using JetSloth’s Image Choices Add-On.
- Use JetSloth’s Color Picker Add-On to create a product visualizer.
- Make your form even more eCommerce friendly by adding extra product fields such as taxes, discounts, subtotal, and more with eCommerce Fields Add-On by Gravity Wiz.
Are you ready to sell products from your website? Don’t forget to download the eCommerce form template from our template library!
Don’t Have Gravity Forms Yet?
If you don’t have Gravity Forms yet, don’t worry. You can still test out everything in this article for free inside your own personalized Gravity Forms demo and see why Gravity Forms is the top choice for WordPress sites worldwide.
Find out how easy it is to customize our form templates using the intuitive drag-and-drop form editor, as well as extend any payment form with powerful features and add-ons…
Newsletter
If you want to keep up-to-date with what’s happening on the blog sign up for the Gravity Forms newsletter!
"*" indicates required fields


