

Finding out what your audience wants and needs should be at the forefront of your business strategy, whatever your niche or industry. However, getting that information can be challenging. Sure, you could get a good idea of what content is popular with your website visitors through your website analytics. But nothing beats getting that information straight from the source.
And the easiest way to find out what your audience thinks about your content, products, or services? Ask them directly by setting up a poll on your WordPress website.
In this ‘How to’ article, we’ll discuss why you might want to use a poll on your WordPress website. In addition, we’ll show you how to easily add a poll to your WordPress website with the Gravity Forms Poll Add-On, how to view the poll results in your dashboard, and how to display them on the front-end of your website…
Benefits Of Using Polls On Your Site
As mentioned earlier, polls can be extremely beneficial when it comes to learning more about your audience. More specifically, here are three benefits to adding a poll to your WordPress website.
Create interesting content for your website visitors
If you’re a blogger or a content creator, you can use a poll to ask your visitors what they think about your content. You can ask them what type of content they’d like to see more of as well as what topics they’d like to learn more about.
Improve Your Offers Or Create Offers Your Audience Wants
If you’re a business owner, another way to use polls is to learn more about what your audience struggles with. You can then improve your existing offers or use the answers to develop programs, products, and services that solve those struggles.
Improve And Encourage Website Engagement
A poll can also help you increase user engagement on your website. As a result, people will spend more time on your site which will lead to a boost in your site’s SEO.
If you’re a content creator or a business owner looking to learn more about your audience, adding a poll to your WordPress website is crucial. Let’s find out how to do it…
The Gravity Forms Poll Add-On

The Gravity Forms Polls Add-On makes it easy to add a poll to your website using Gravity Forms. You can add fields to your form that ask your visitors questions, capture their responses, and display the results of the poll after they submit the form.
You can add simple “Yes/No” questions, ask them to select from a list of choices, or select multiple options. You can also add as many Poll questions to your form as you want to help you get a better idea of what your audience wants.
How To Create A Poll With Gravity Forms
 Adding a poll to your WordPress website with Gravity Forms couldn’t be easier. First, you’ll need to make sure that the Polls Add-On is installed and activated on your site.
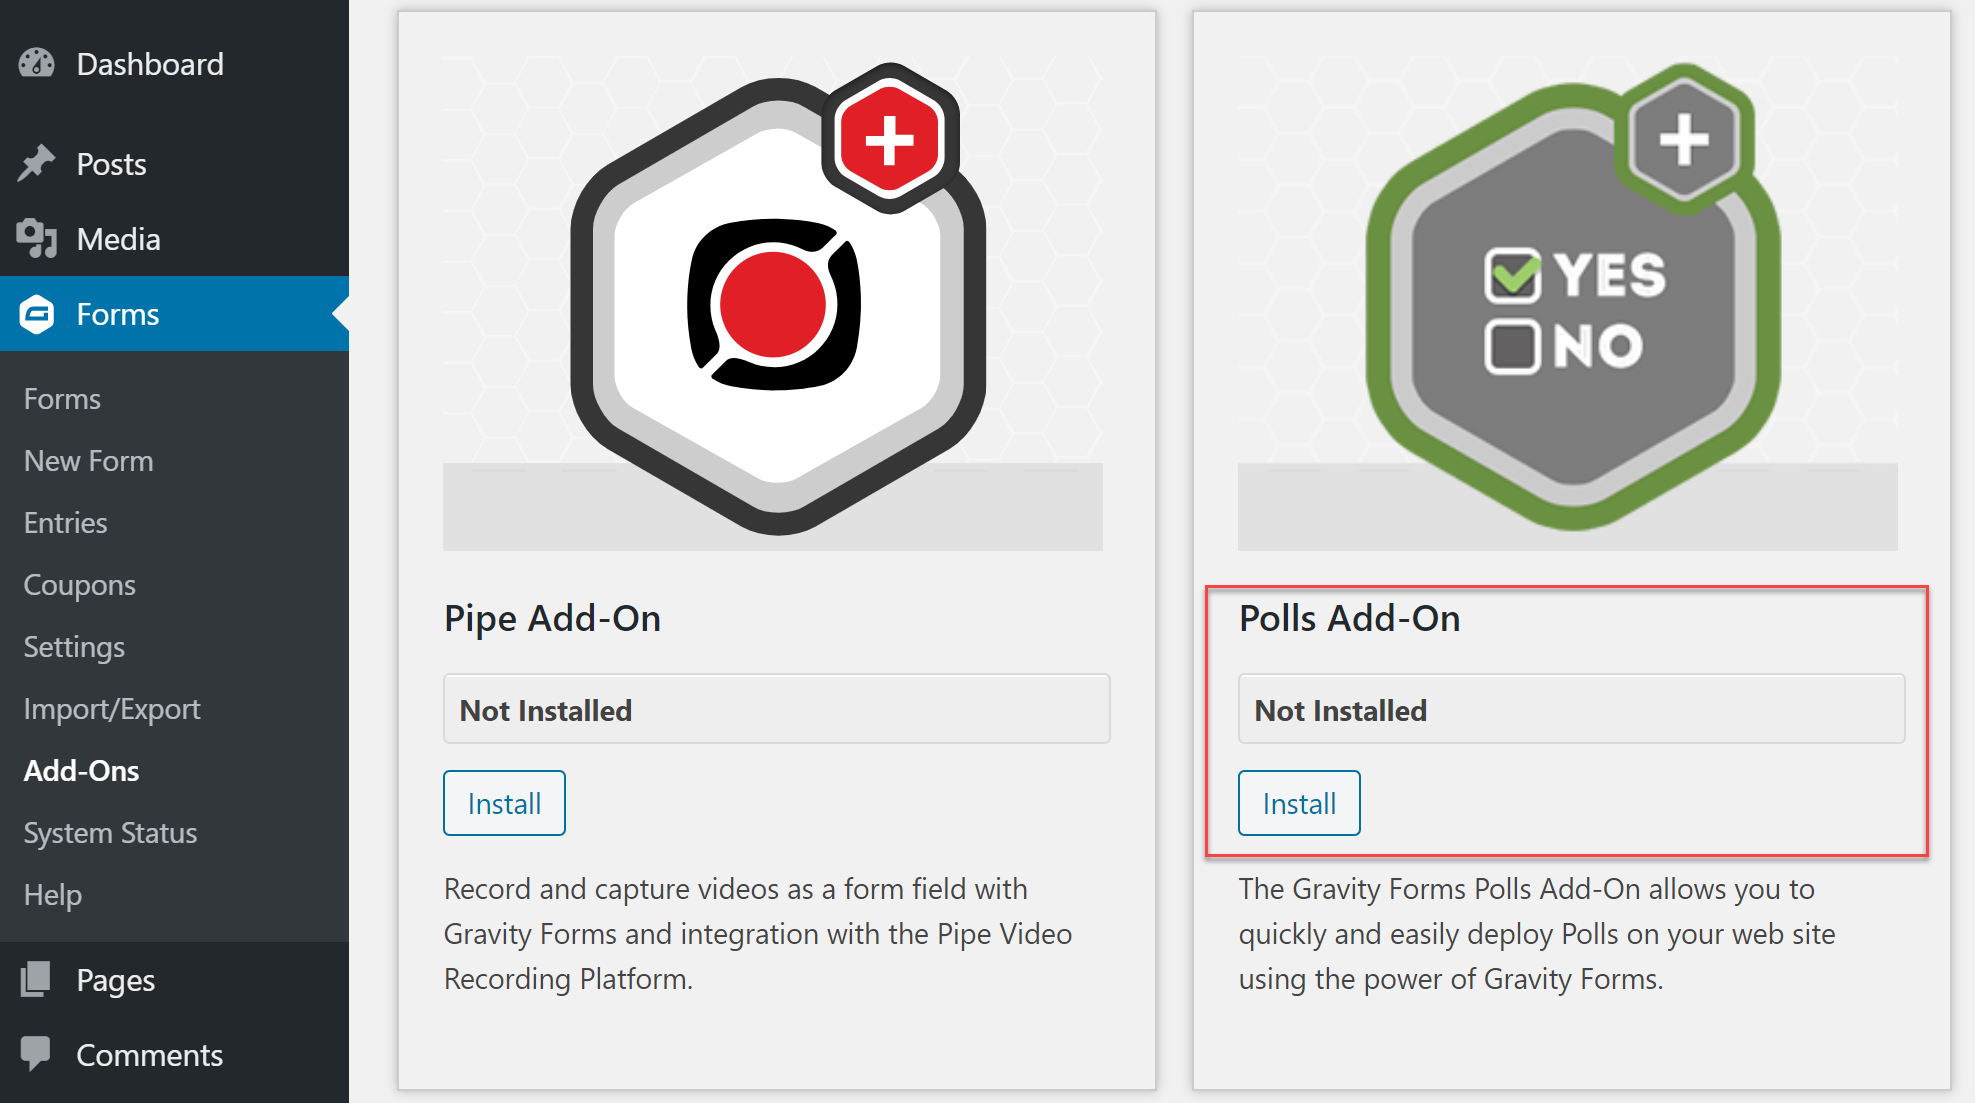
To do this, go to Forms > Add-Ons in your WordPress dashboard. Scroll all the way down to Polls Add-On and click on Install. Once the add-on has been installed, click on Activate.
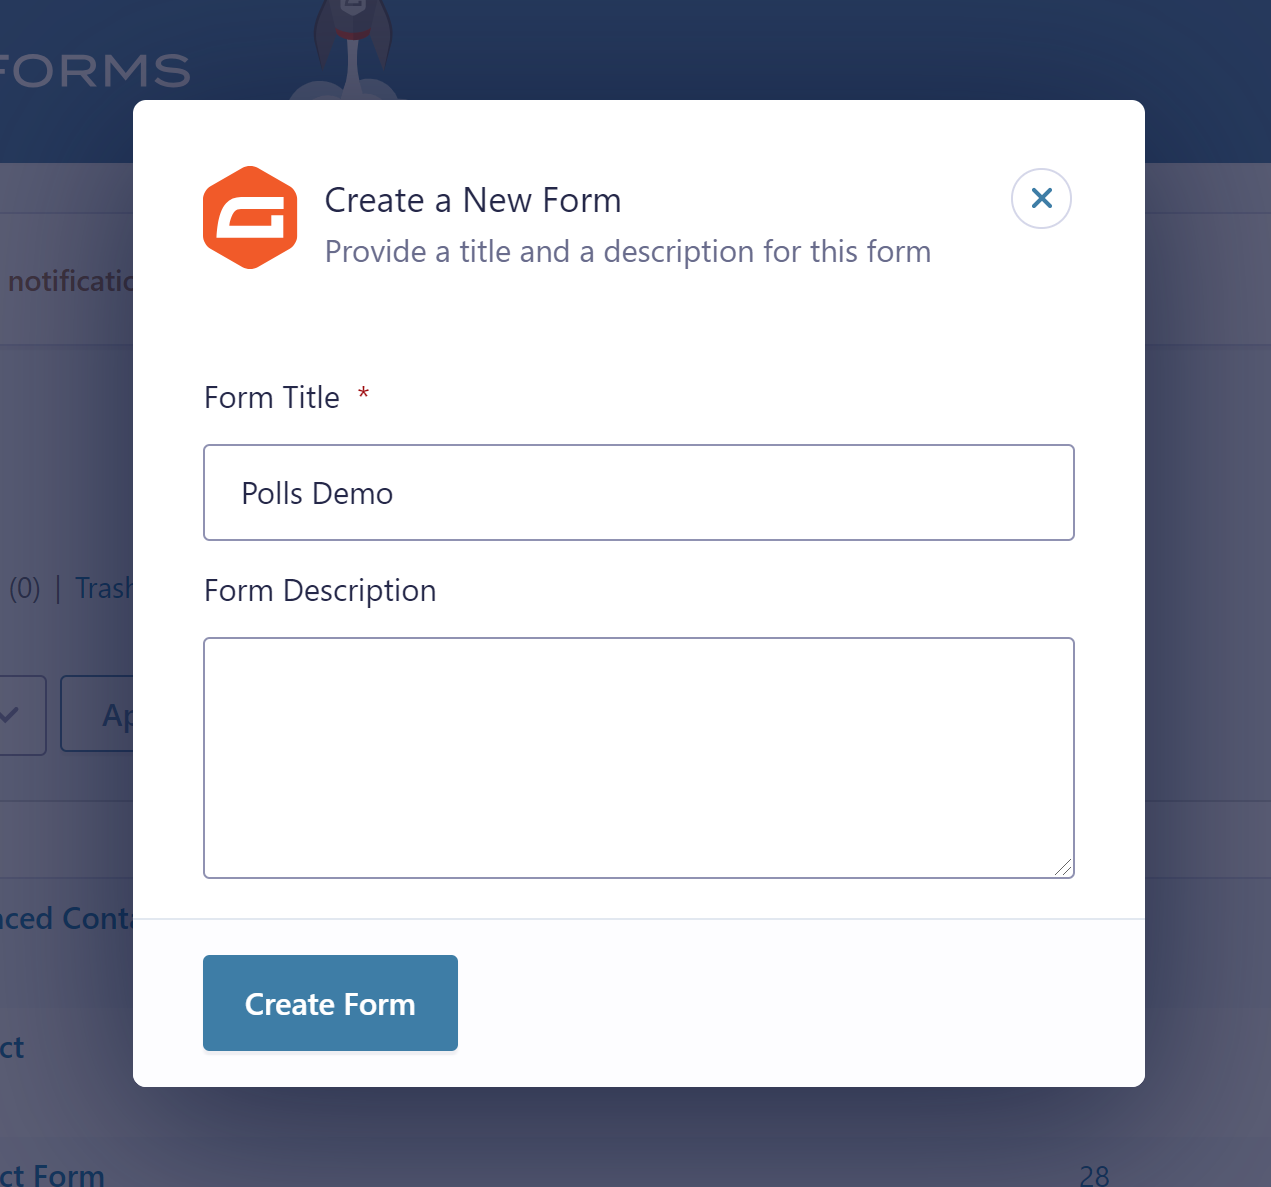
 Now that the Polls Add-On is active, let’s create our poll. You can use an existing form or create a new one. For this tutorial, we’ll create a new form and name it Polls Demo.
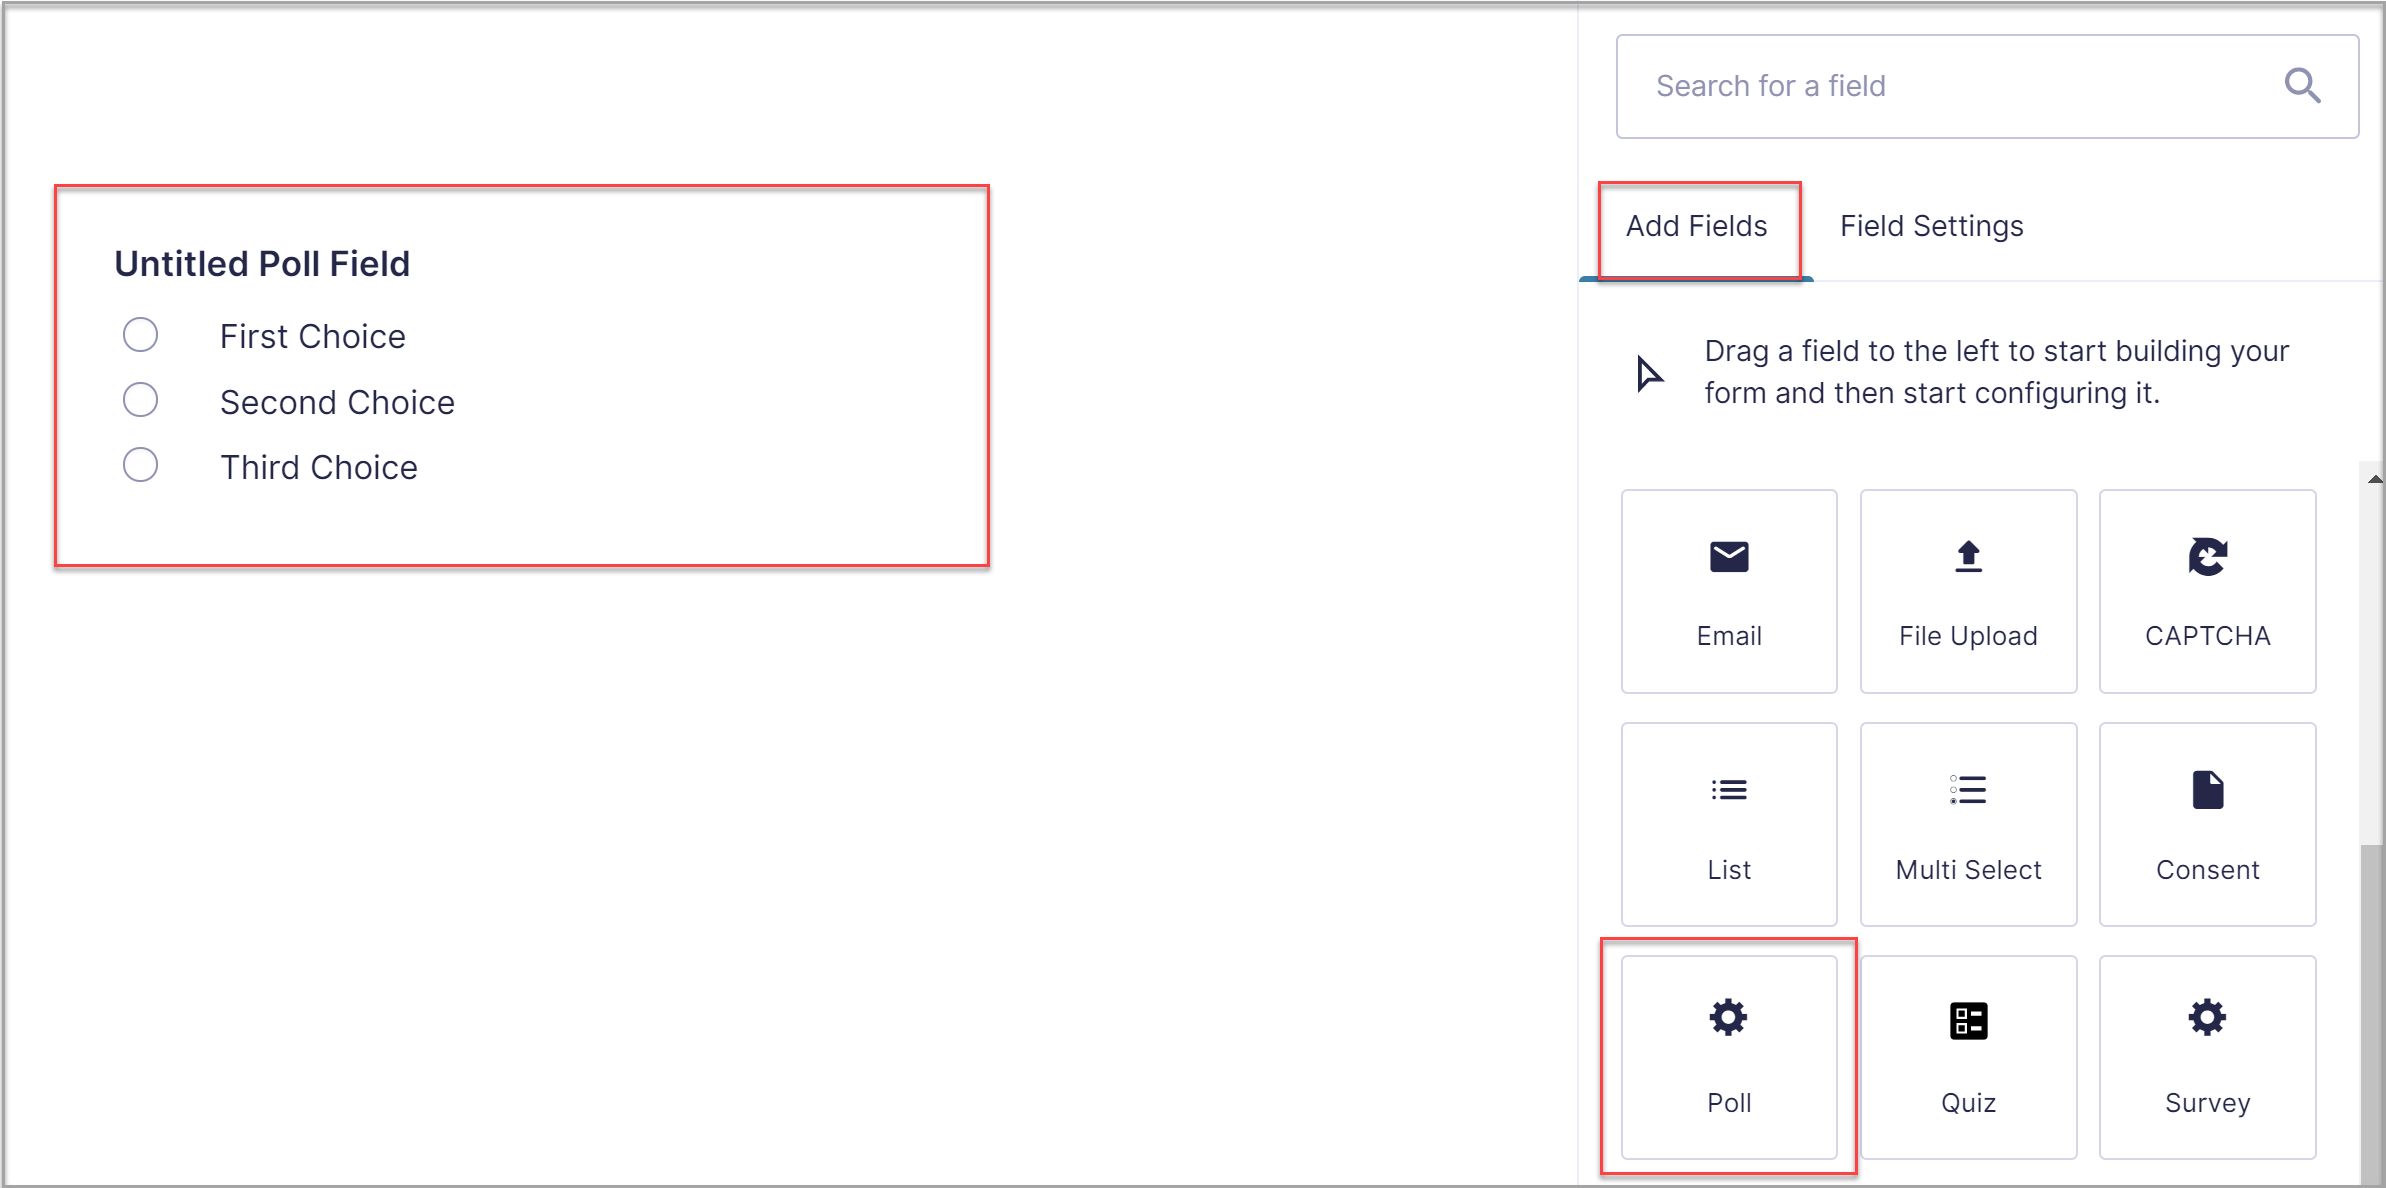
 Once the editor opens up, click on the Advanced Fields and either click the Polls field or drag it onto the page.
 Under Poll Field Settings > General, you can use the Description field to provide guidance or explain to your visitors how to answer the question.
The Poll question field is where you enter your question. Other options include selecting the type of poll, adding choices, and making the field ‘required’.
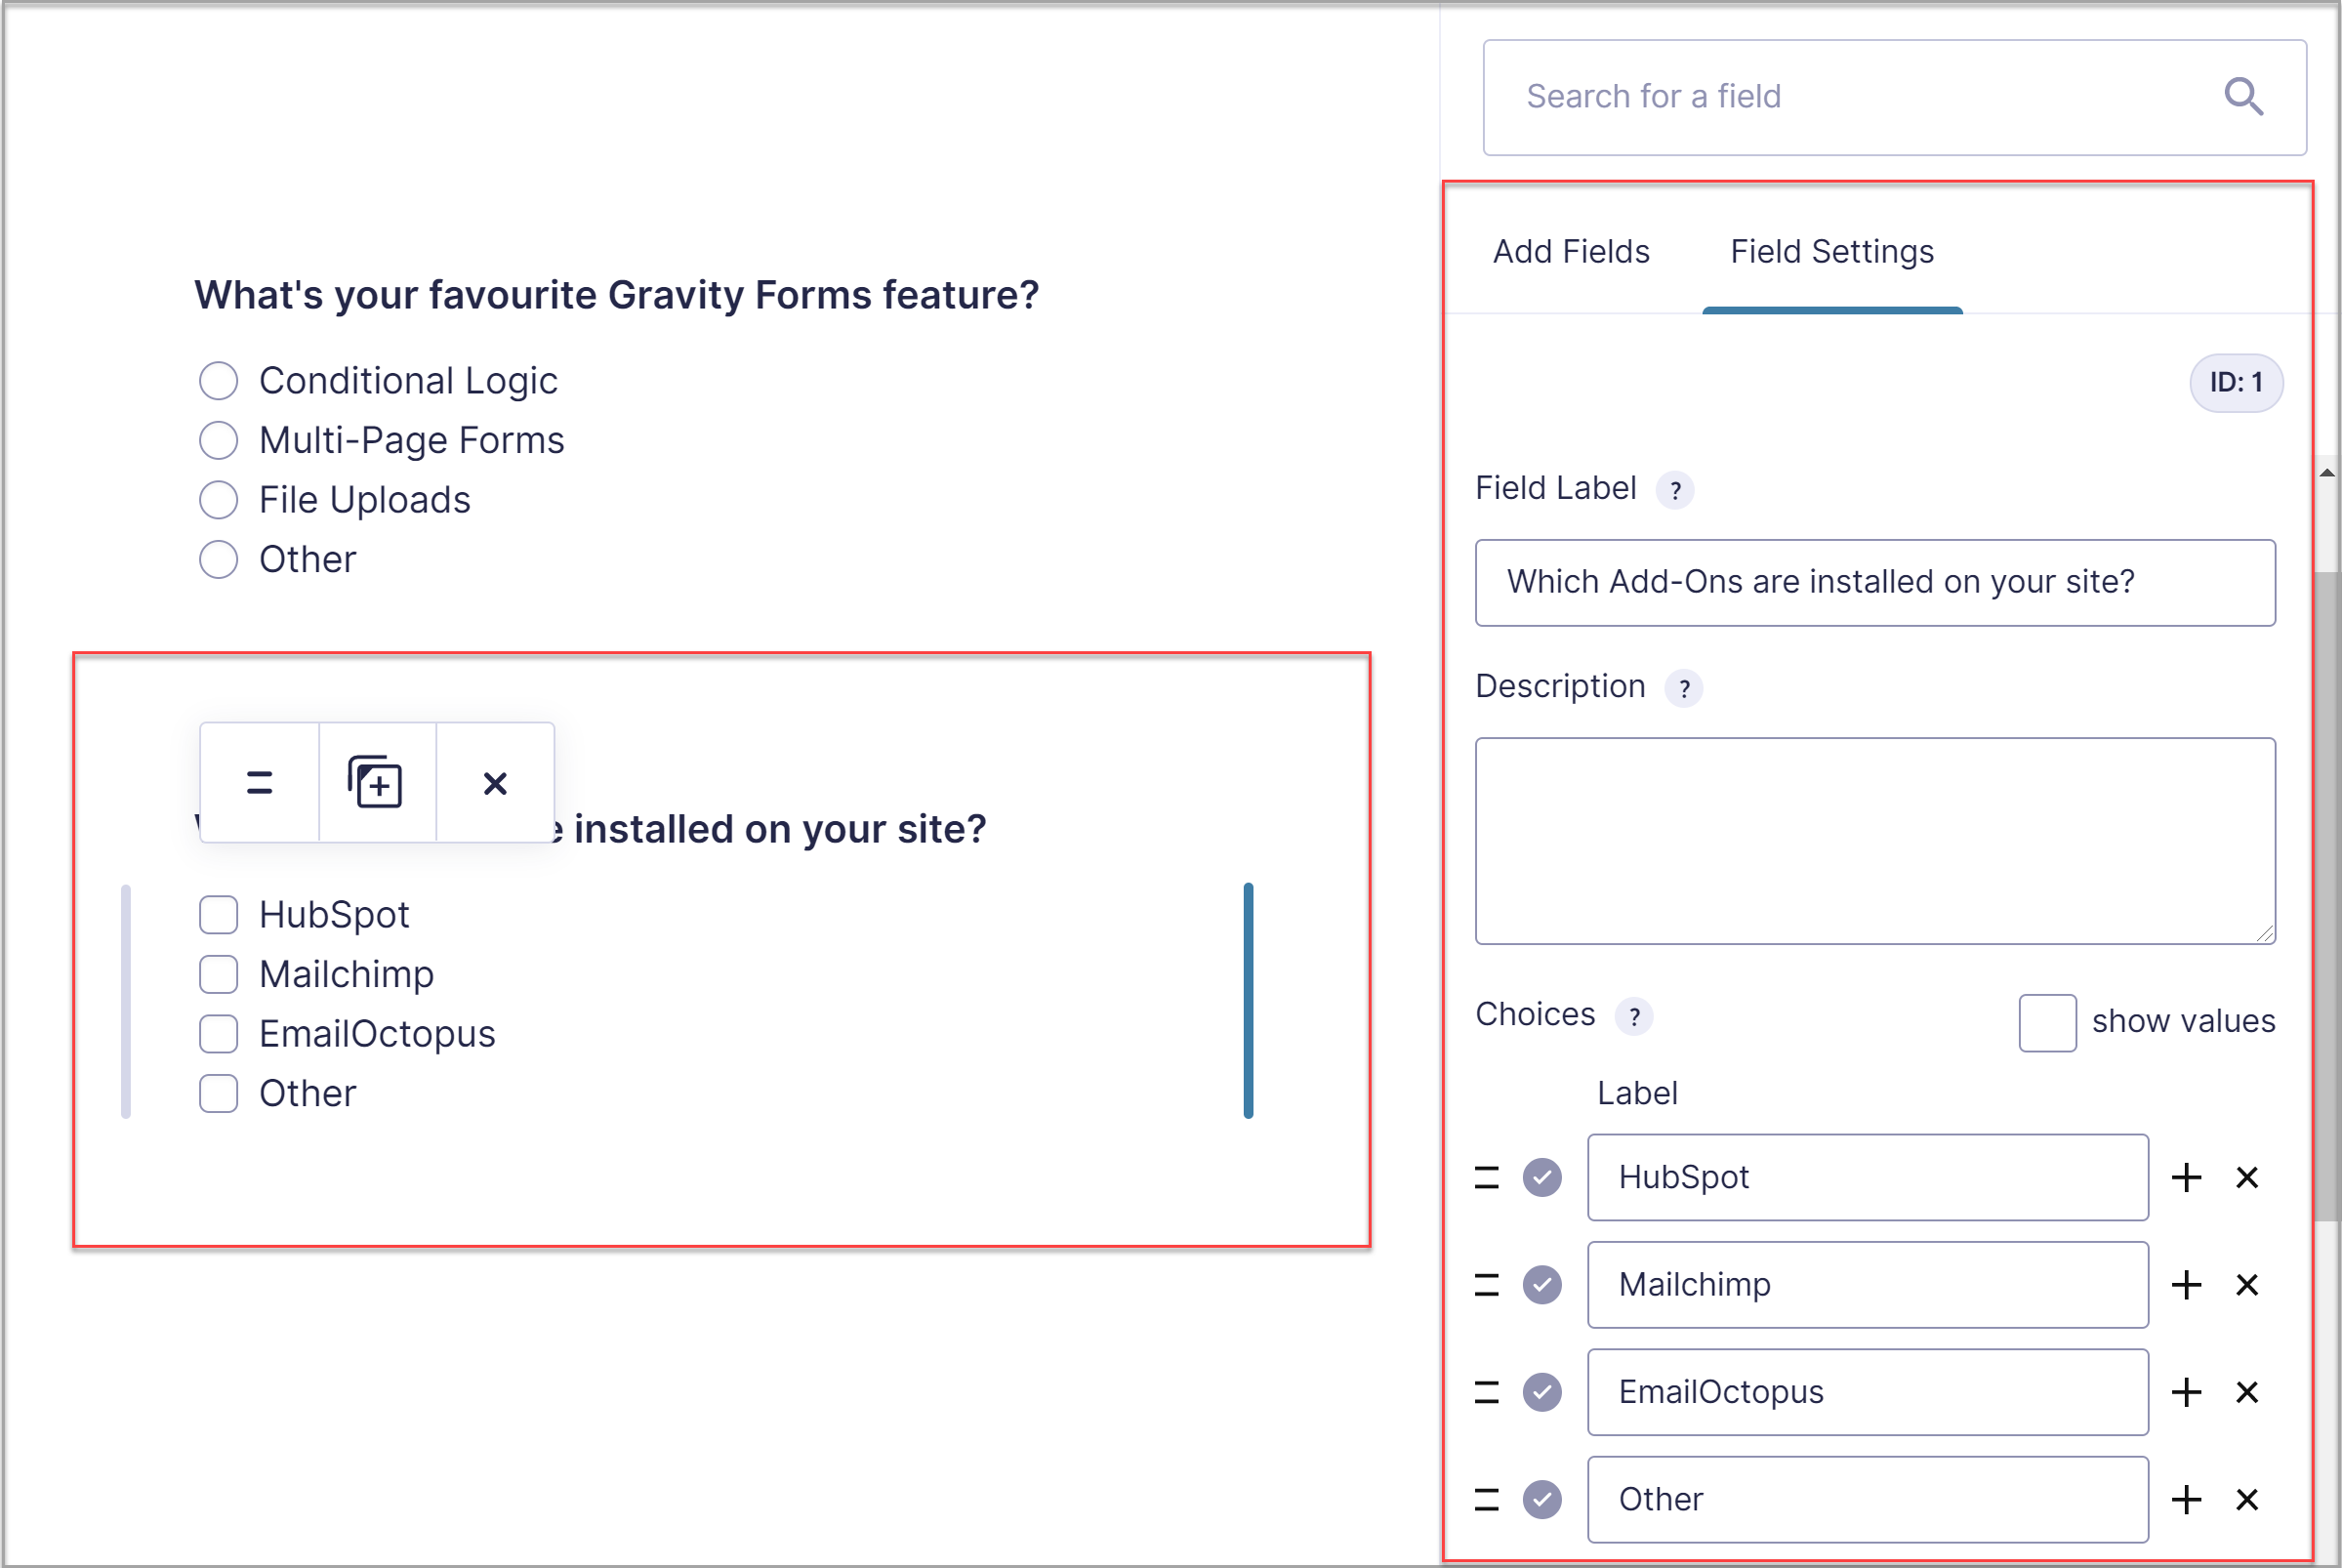 Under Appearance, you can also customize where the labels appear, enter a custom CSS class, and add a custom validation message.
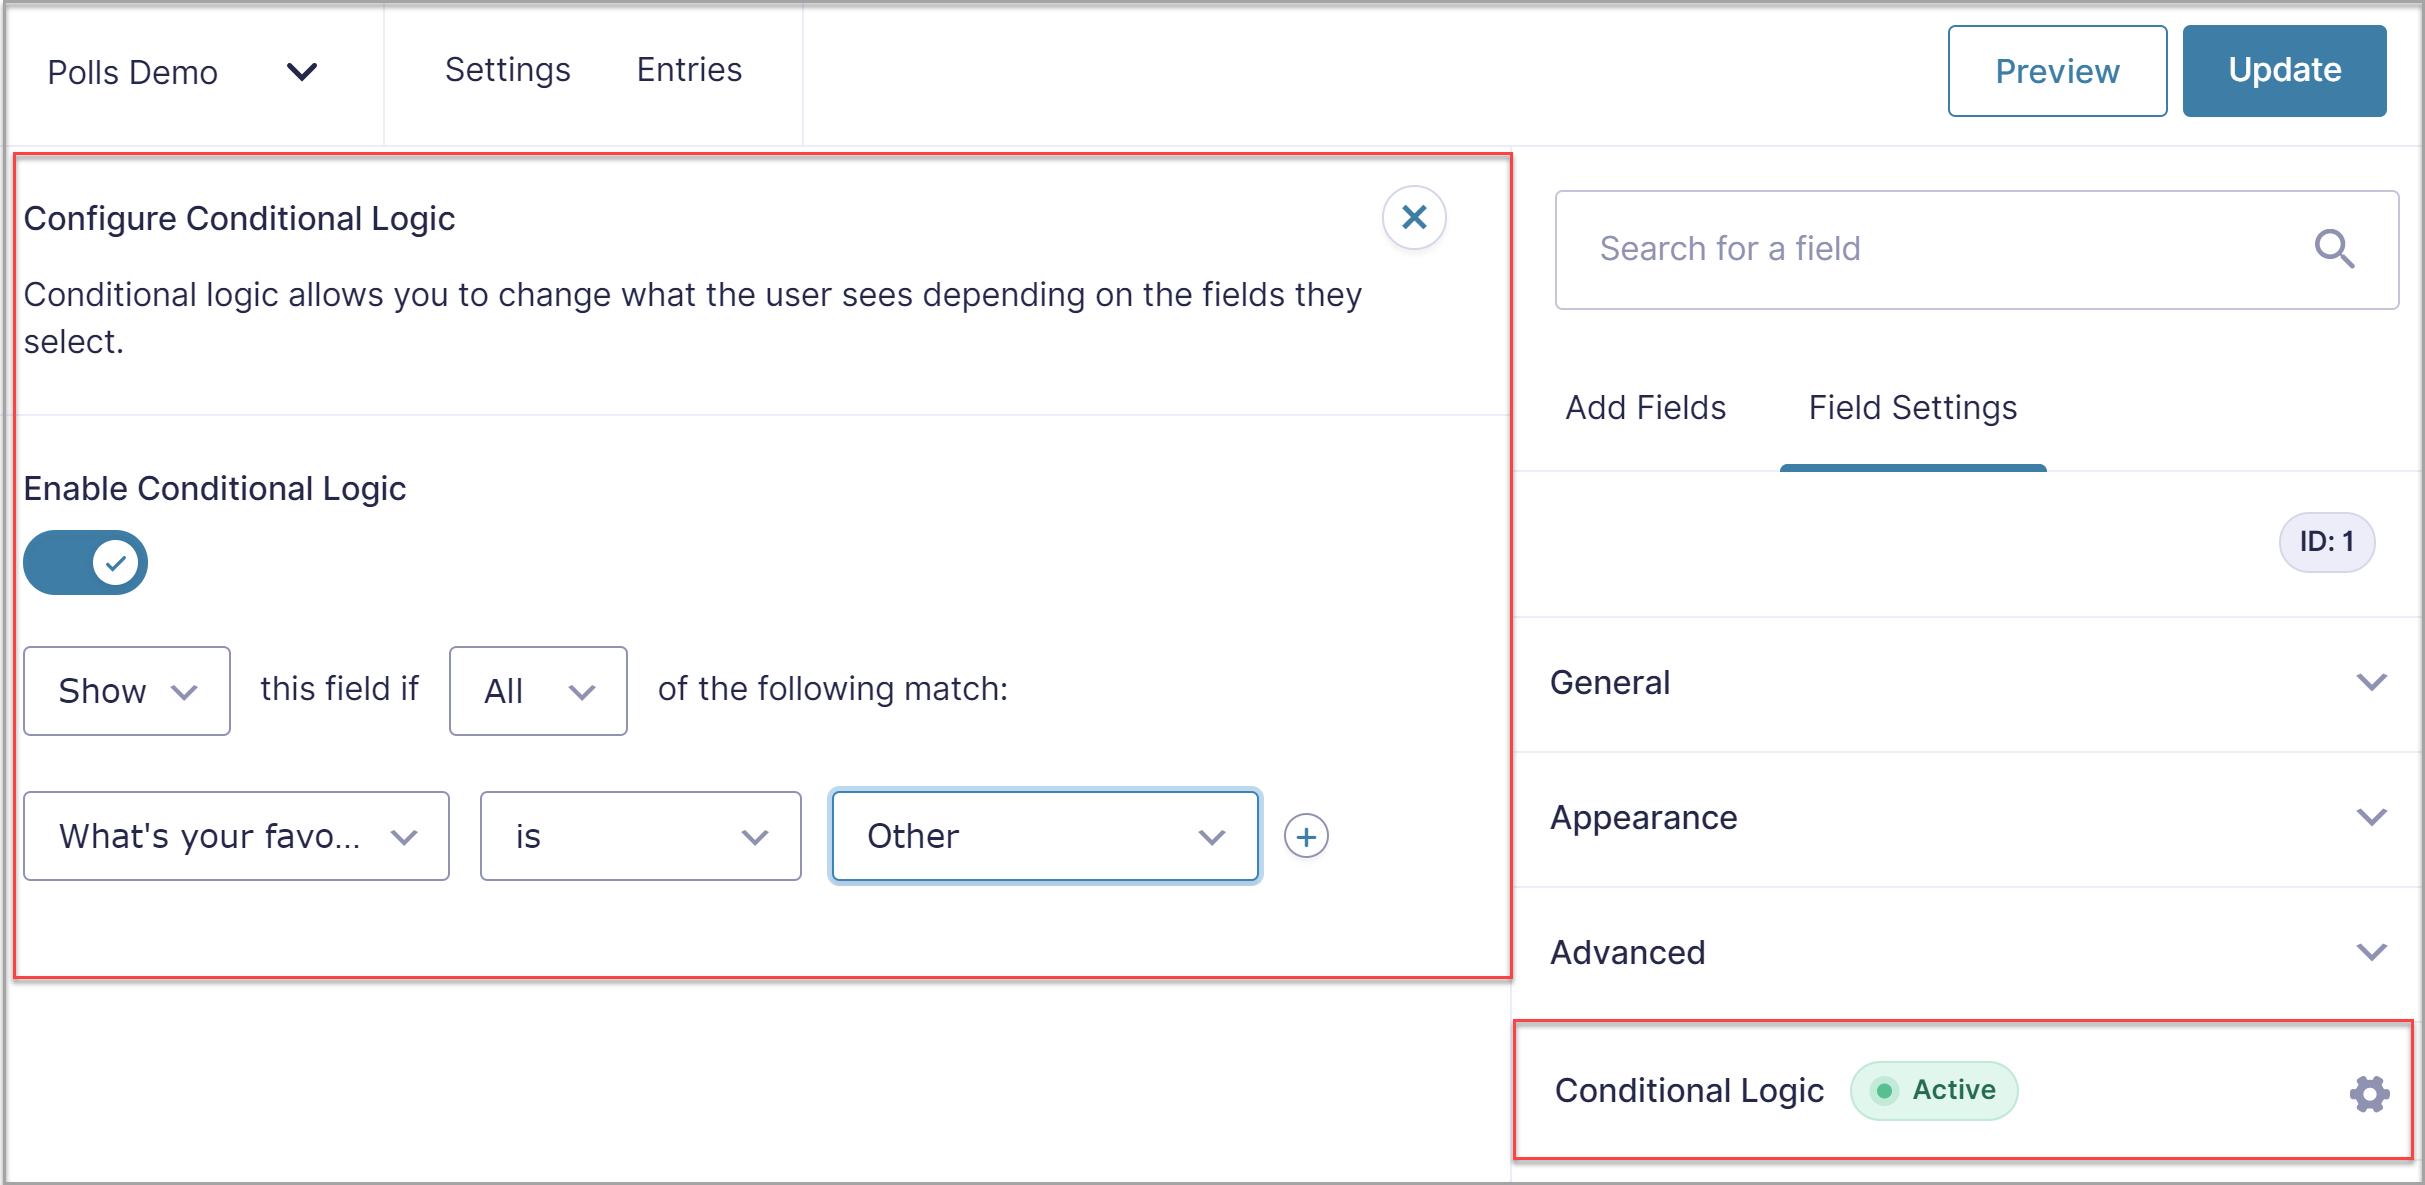
In addition to that, you can use conditional logic with your poll. This means that you can send people to different questions based on their answers. Note that you will need at least two questions in your Poll before you can enable conditional logic.
 To add more Poll questions, all you have to do is drag another Poll field onto your page.
When you’re done creating your poll, click on Update and then Preview to see your poll in action and make sure it’s working.
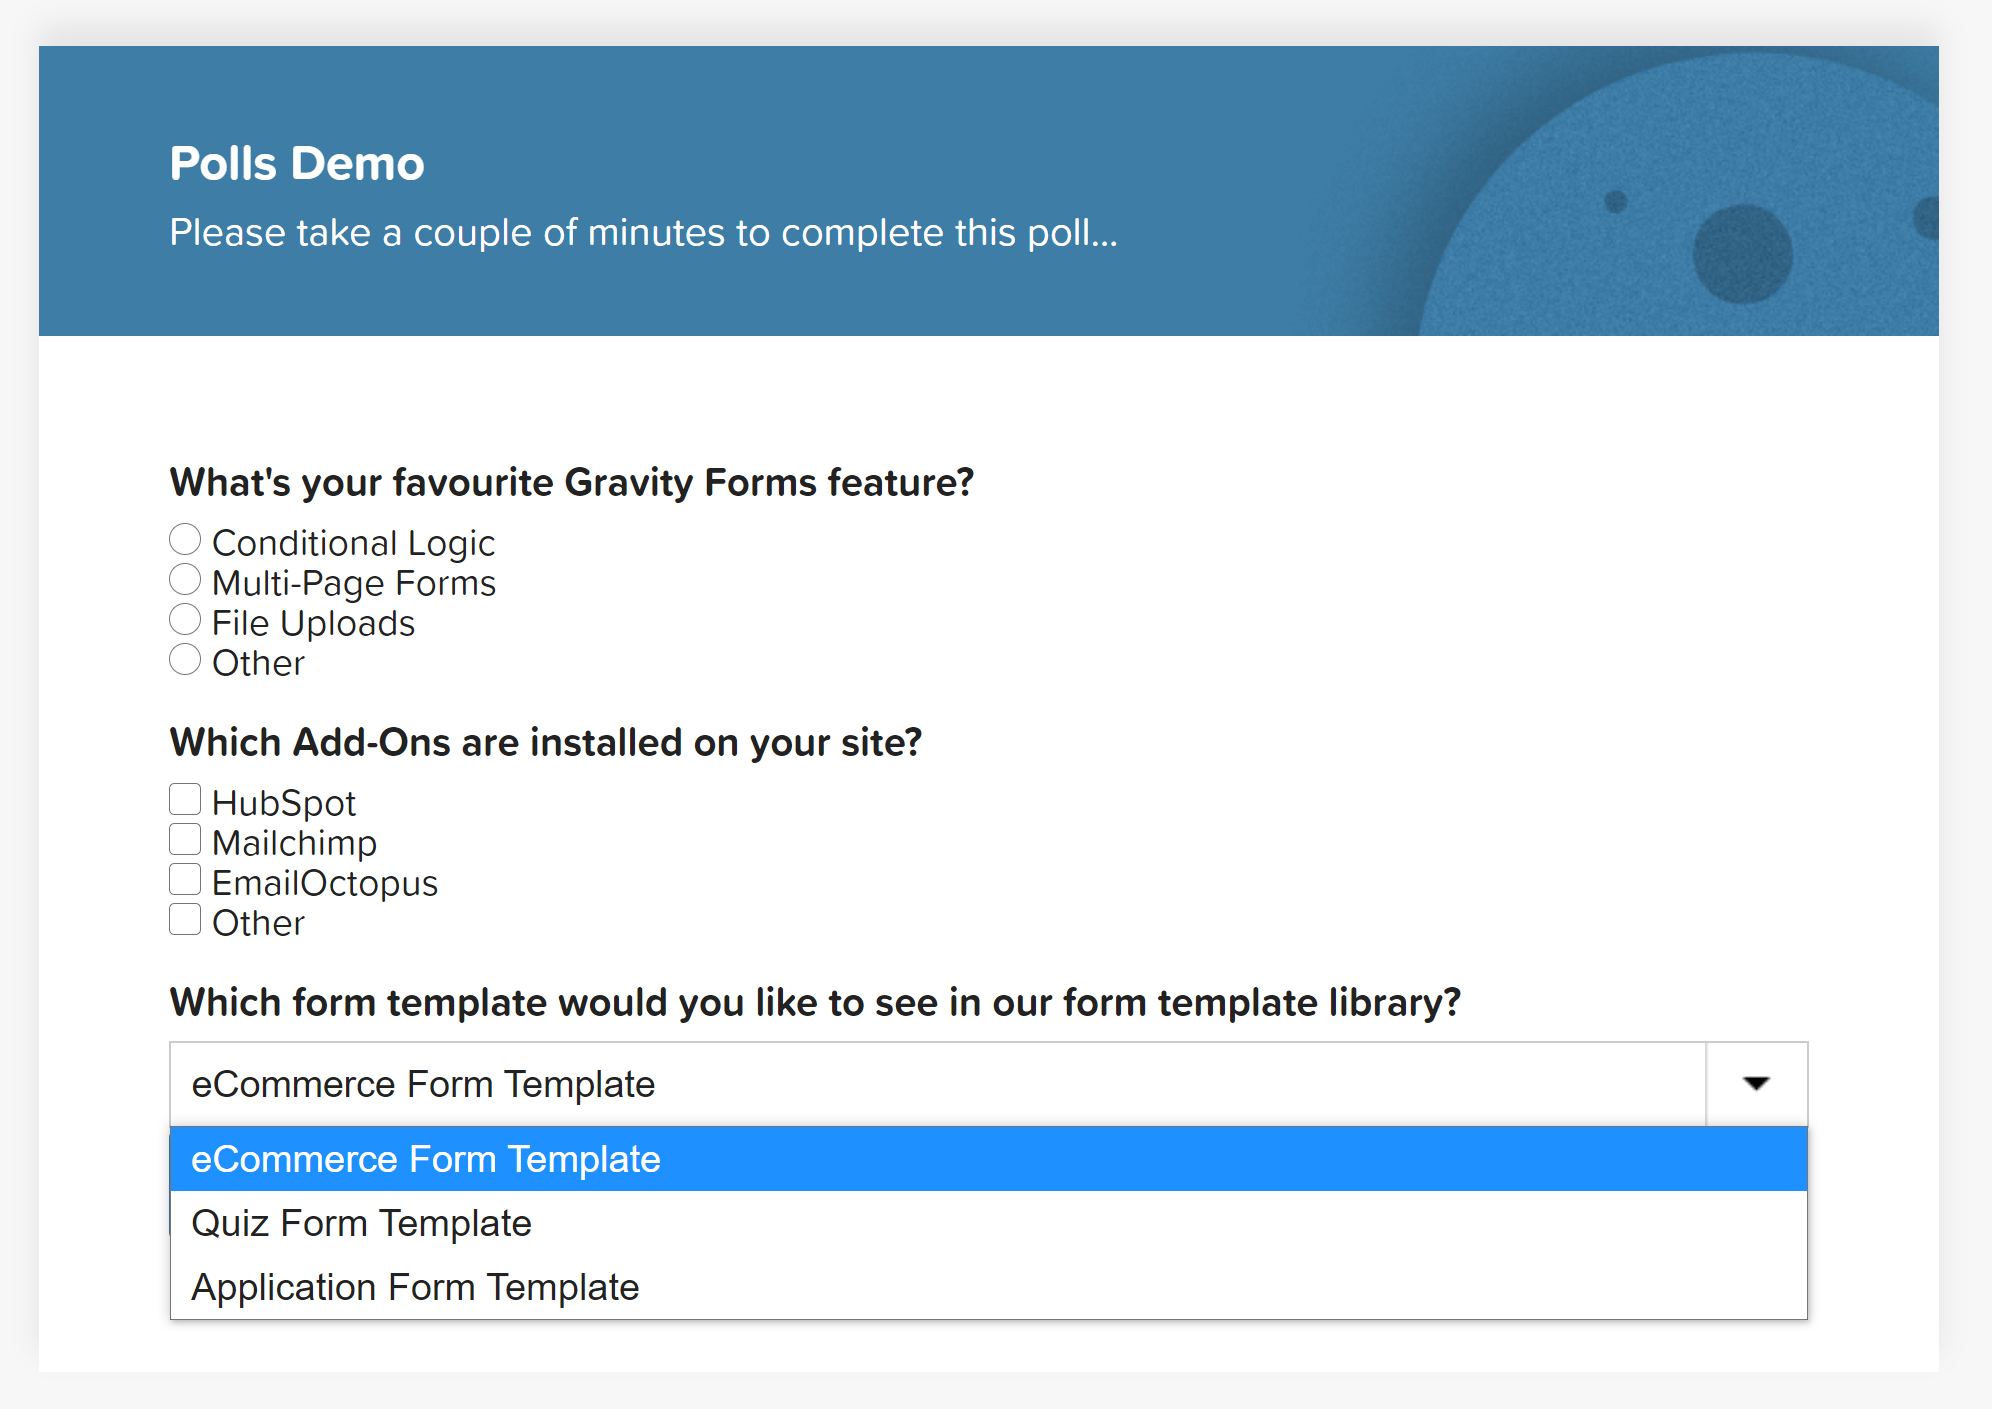
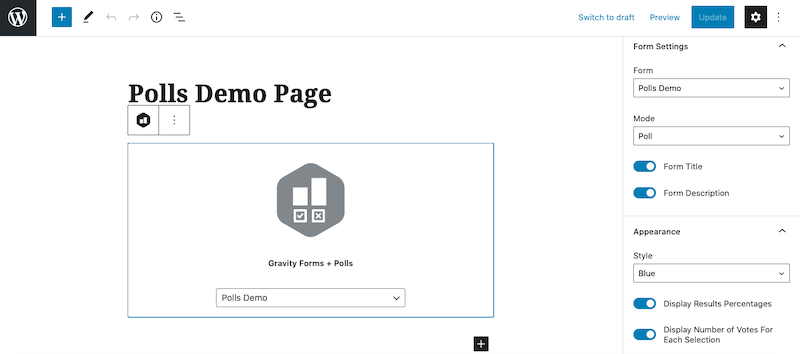
All that’s left to do now is to add it to a page or a post on your site. Create a new page for your poll or edit an existing post or page. Once the editor loads, select the Polls block and then choose your form from the drop-down menu.
You can then configure extra options for the Polls block. You can select the style of the block, choose whether to display poll name and description and whether the form should display the poll or the results.
When you’re done, click Publish or Update and you’re done!
How To View The Poll Results In Your Dashboard
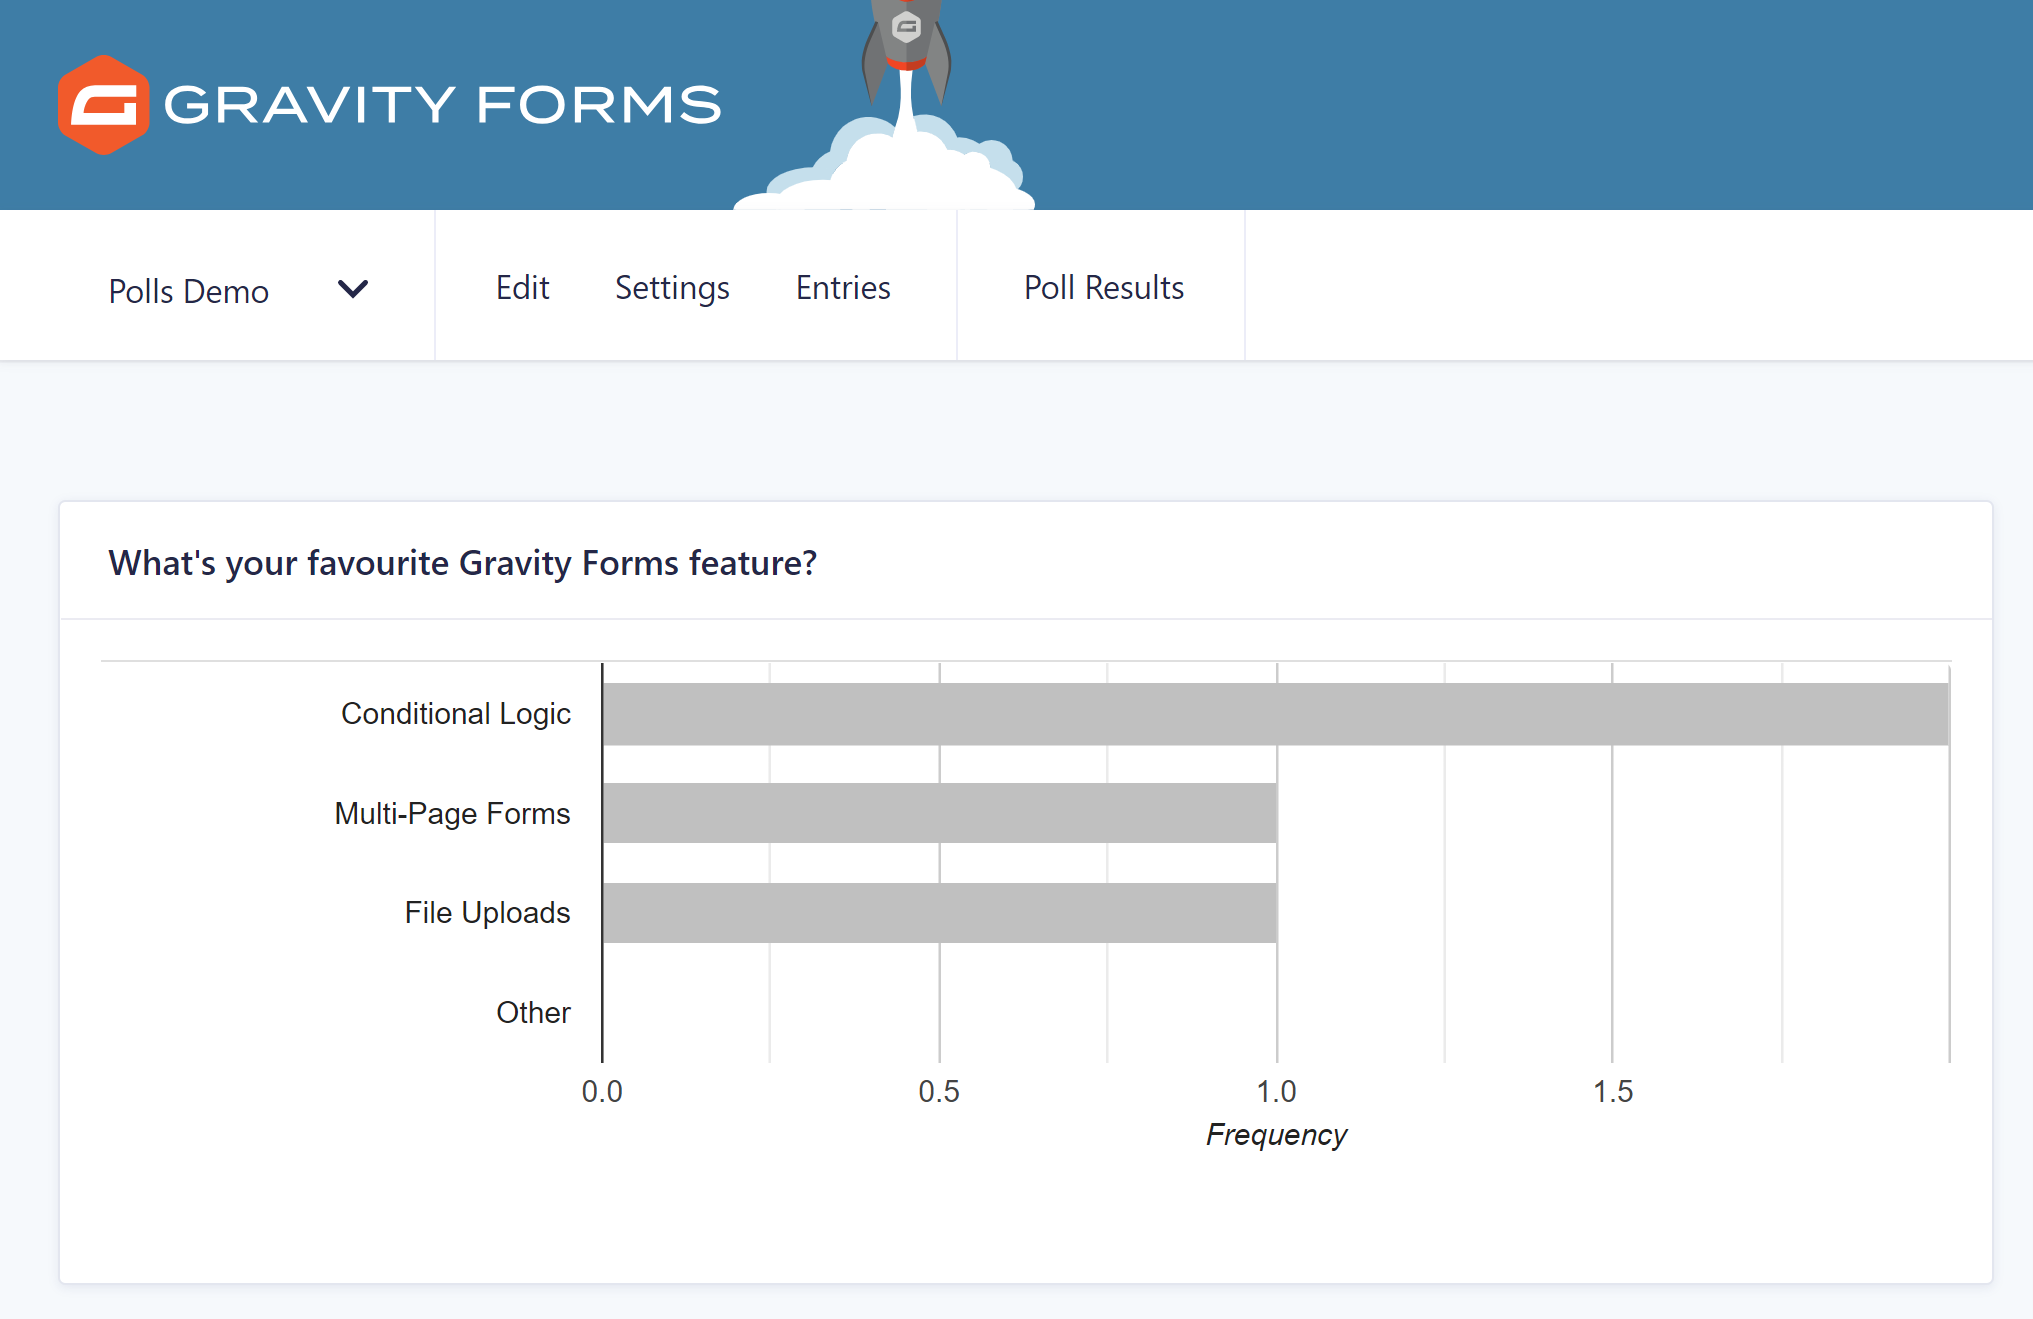
Viewing the results of your poll is easy. You can view them in your dashboard by going to Forms > Entries. Then, select your poll from the drop-down menu. Click on Poll Results and you’ll see all the questions as well as which answers your visitors selected.
 You can even filter the results based on dates to see how the answers change over time or by poll questions if you just want to see answers for a specific question.
Displaying Poll Results On The Front-End Of Your Site
 By now, you know how to add a poll to your WordPress website as well as how to view the results of the poll in your dashboard. But what if you want your visitors to see the results too?
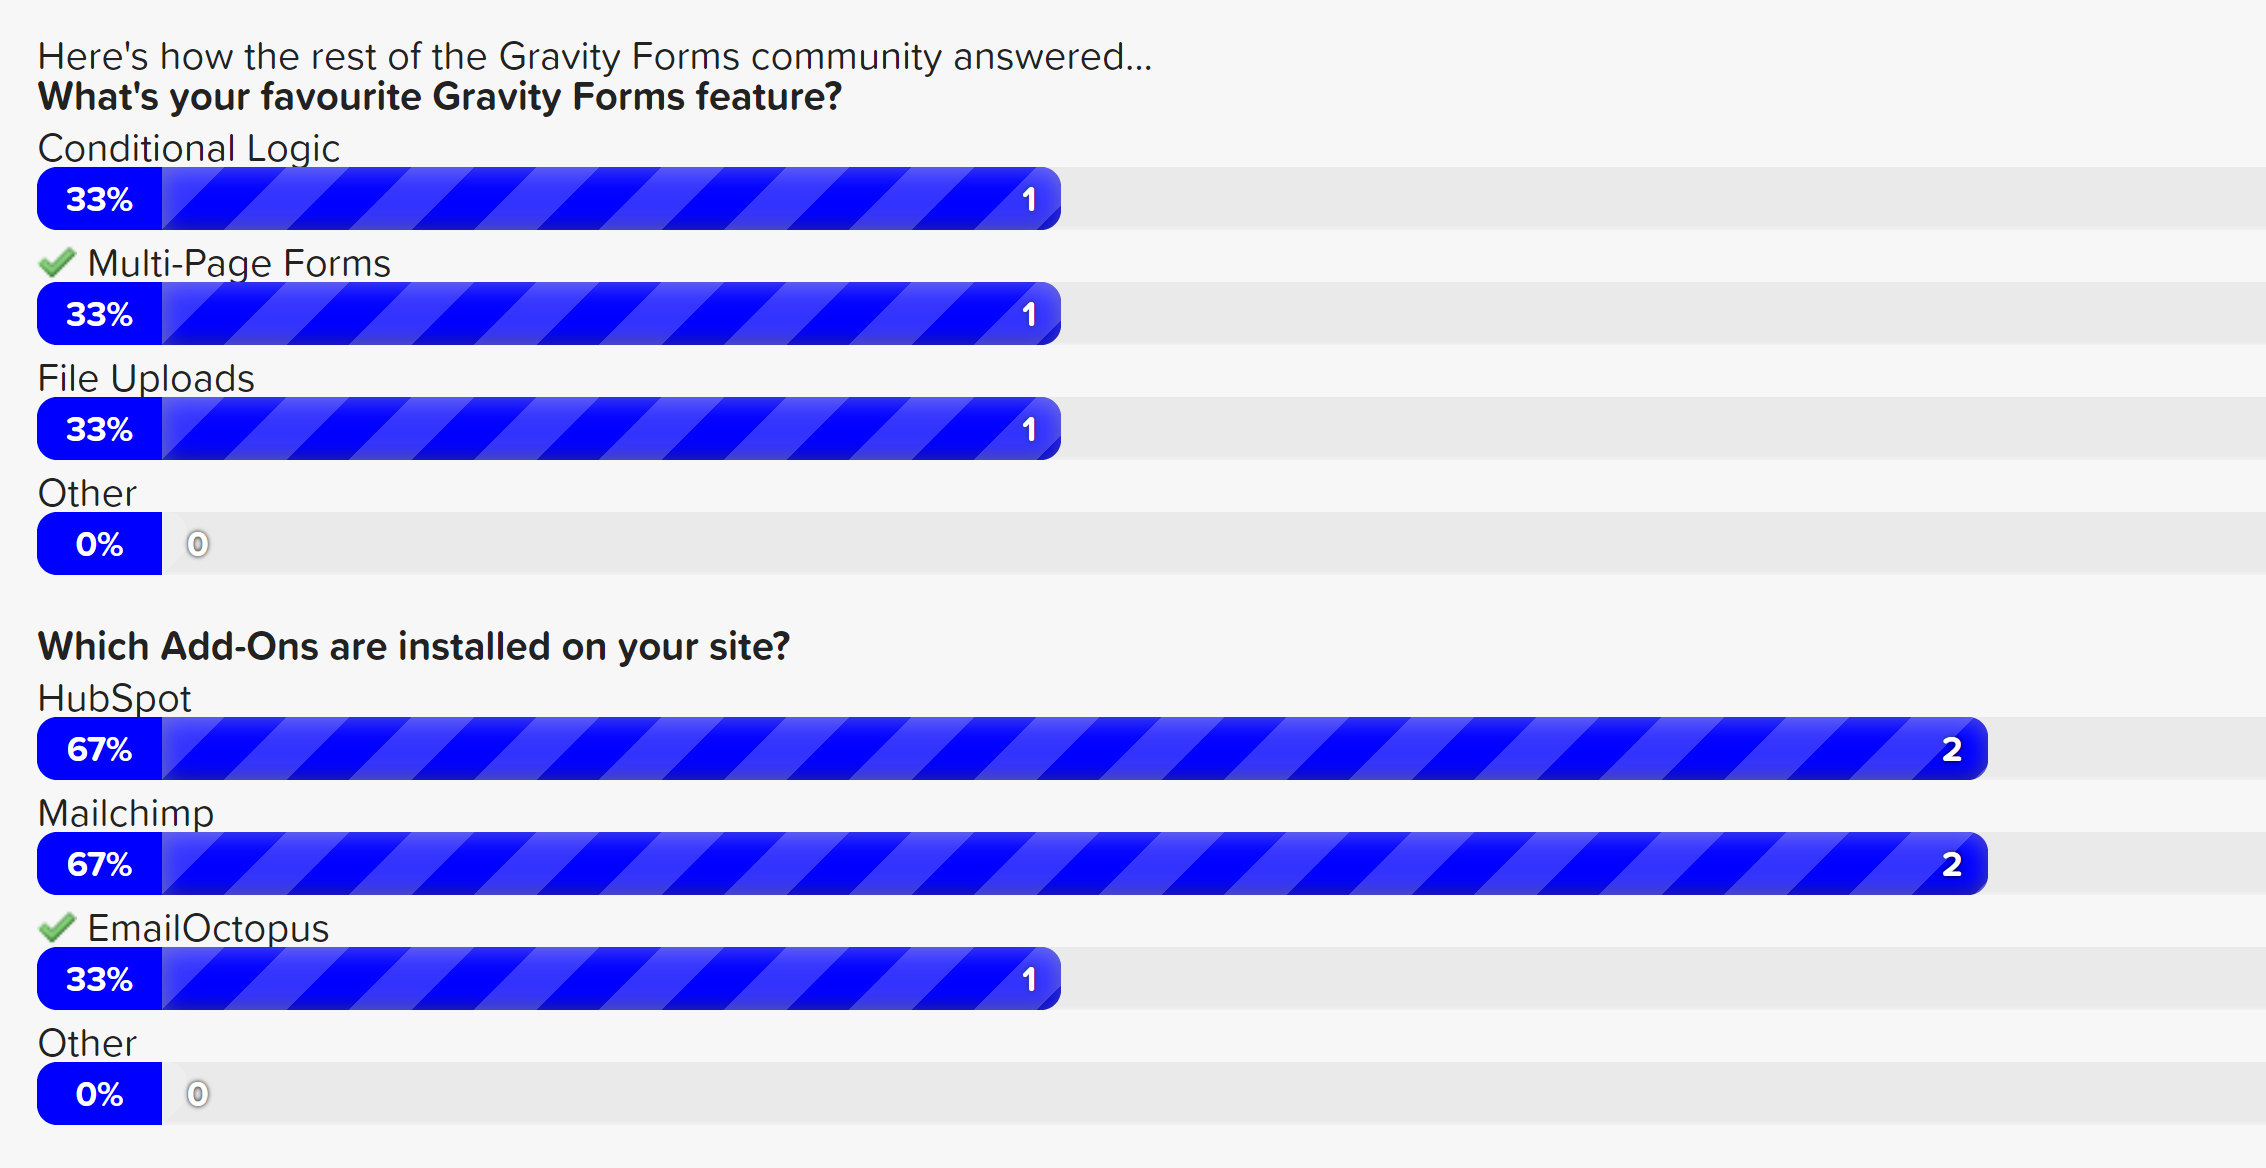
Showing your visitors the results of the poll is useful if you’ve asked for their input and they want to know which option got the most votes. For example, maybe you’ve created a poll asking them what the topic of your next article should be or which feature should be added to your product next.
Luckily, Gravity Forms makes it easy to display poll results on the front-end of your website. There are two ways to do it…
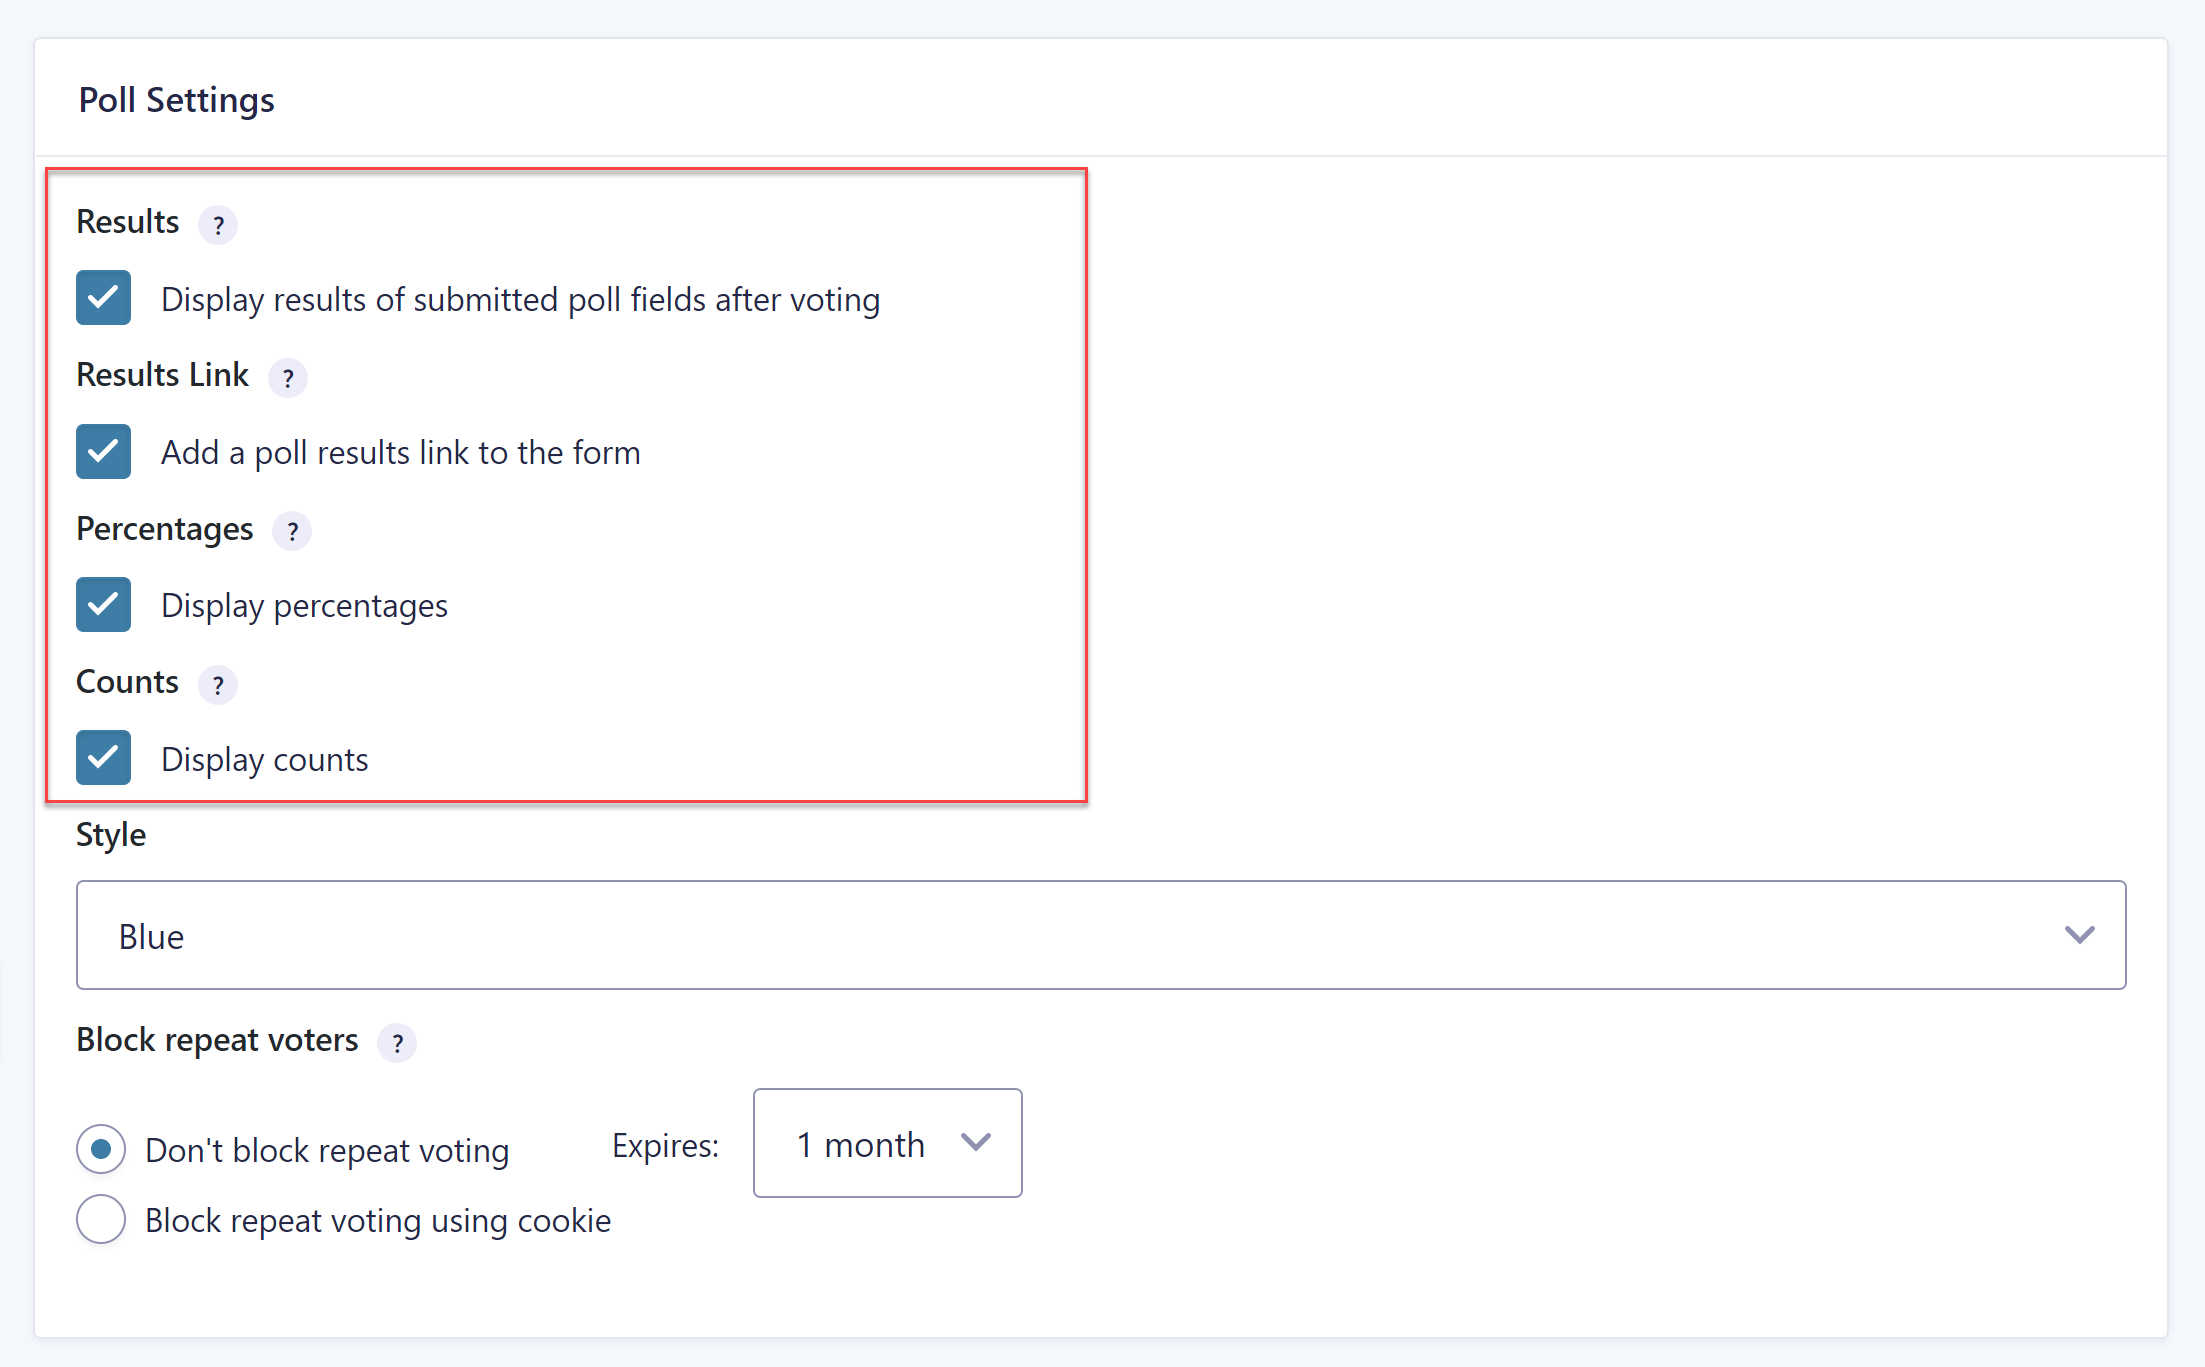
First, you can enable the option to show the results upon submission or have a link to the results page below the poll itself. This creates a sense of instant gratification and allows people to see which options are getting the most votes.
To do so, within the form editor, select Settings > Polls, and alter the Poll Settings accordingly.
 Another option is to create a separate page for poll results. For this to work, first, you’ll need to disable the option to display results upon submission as well as the link to the results page on your existing Poll form.
Then, you’ll need to create a page and insert the Poll block. Choose your poll from the drop-down menu to add it to the page.
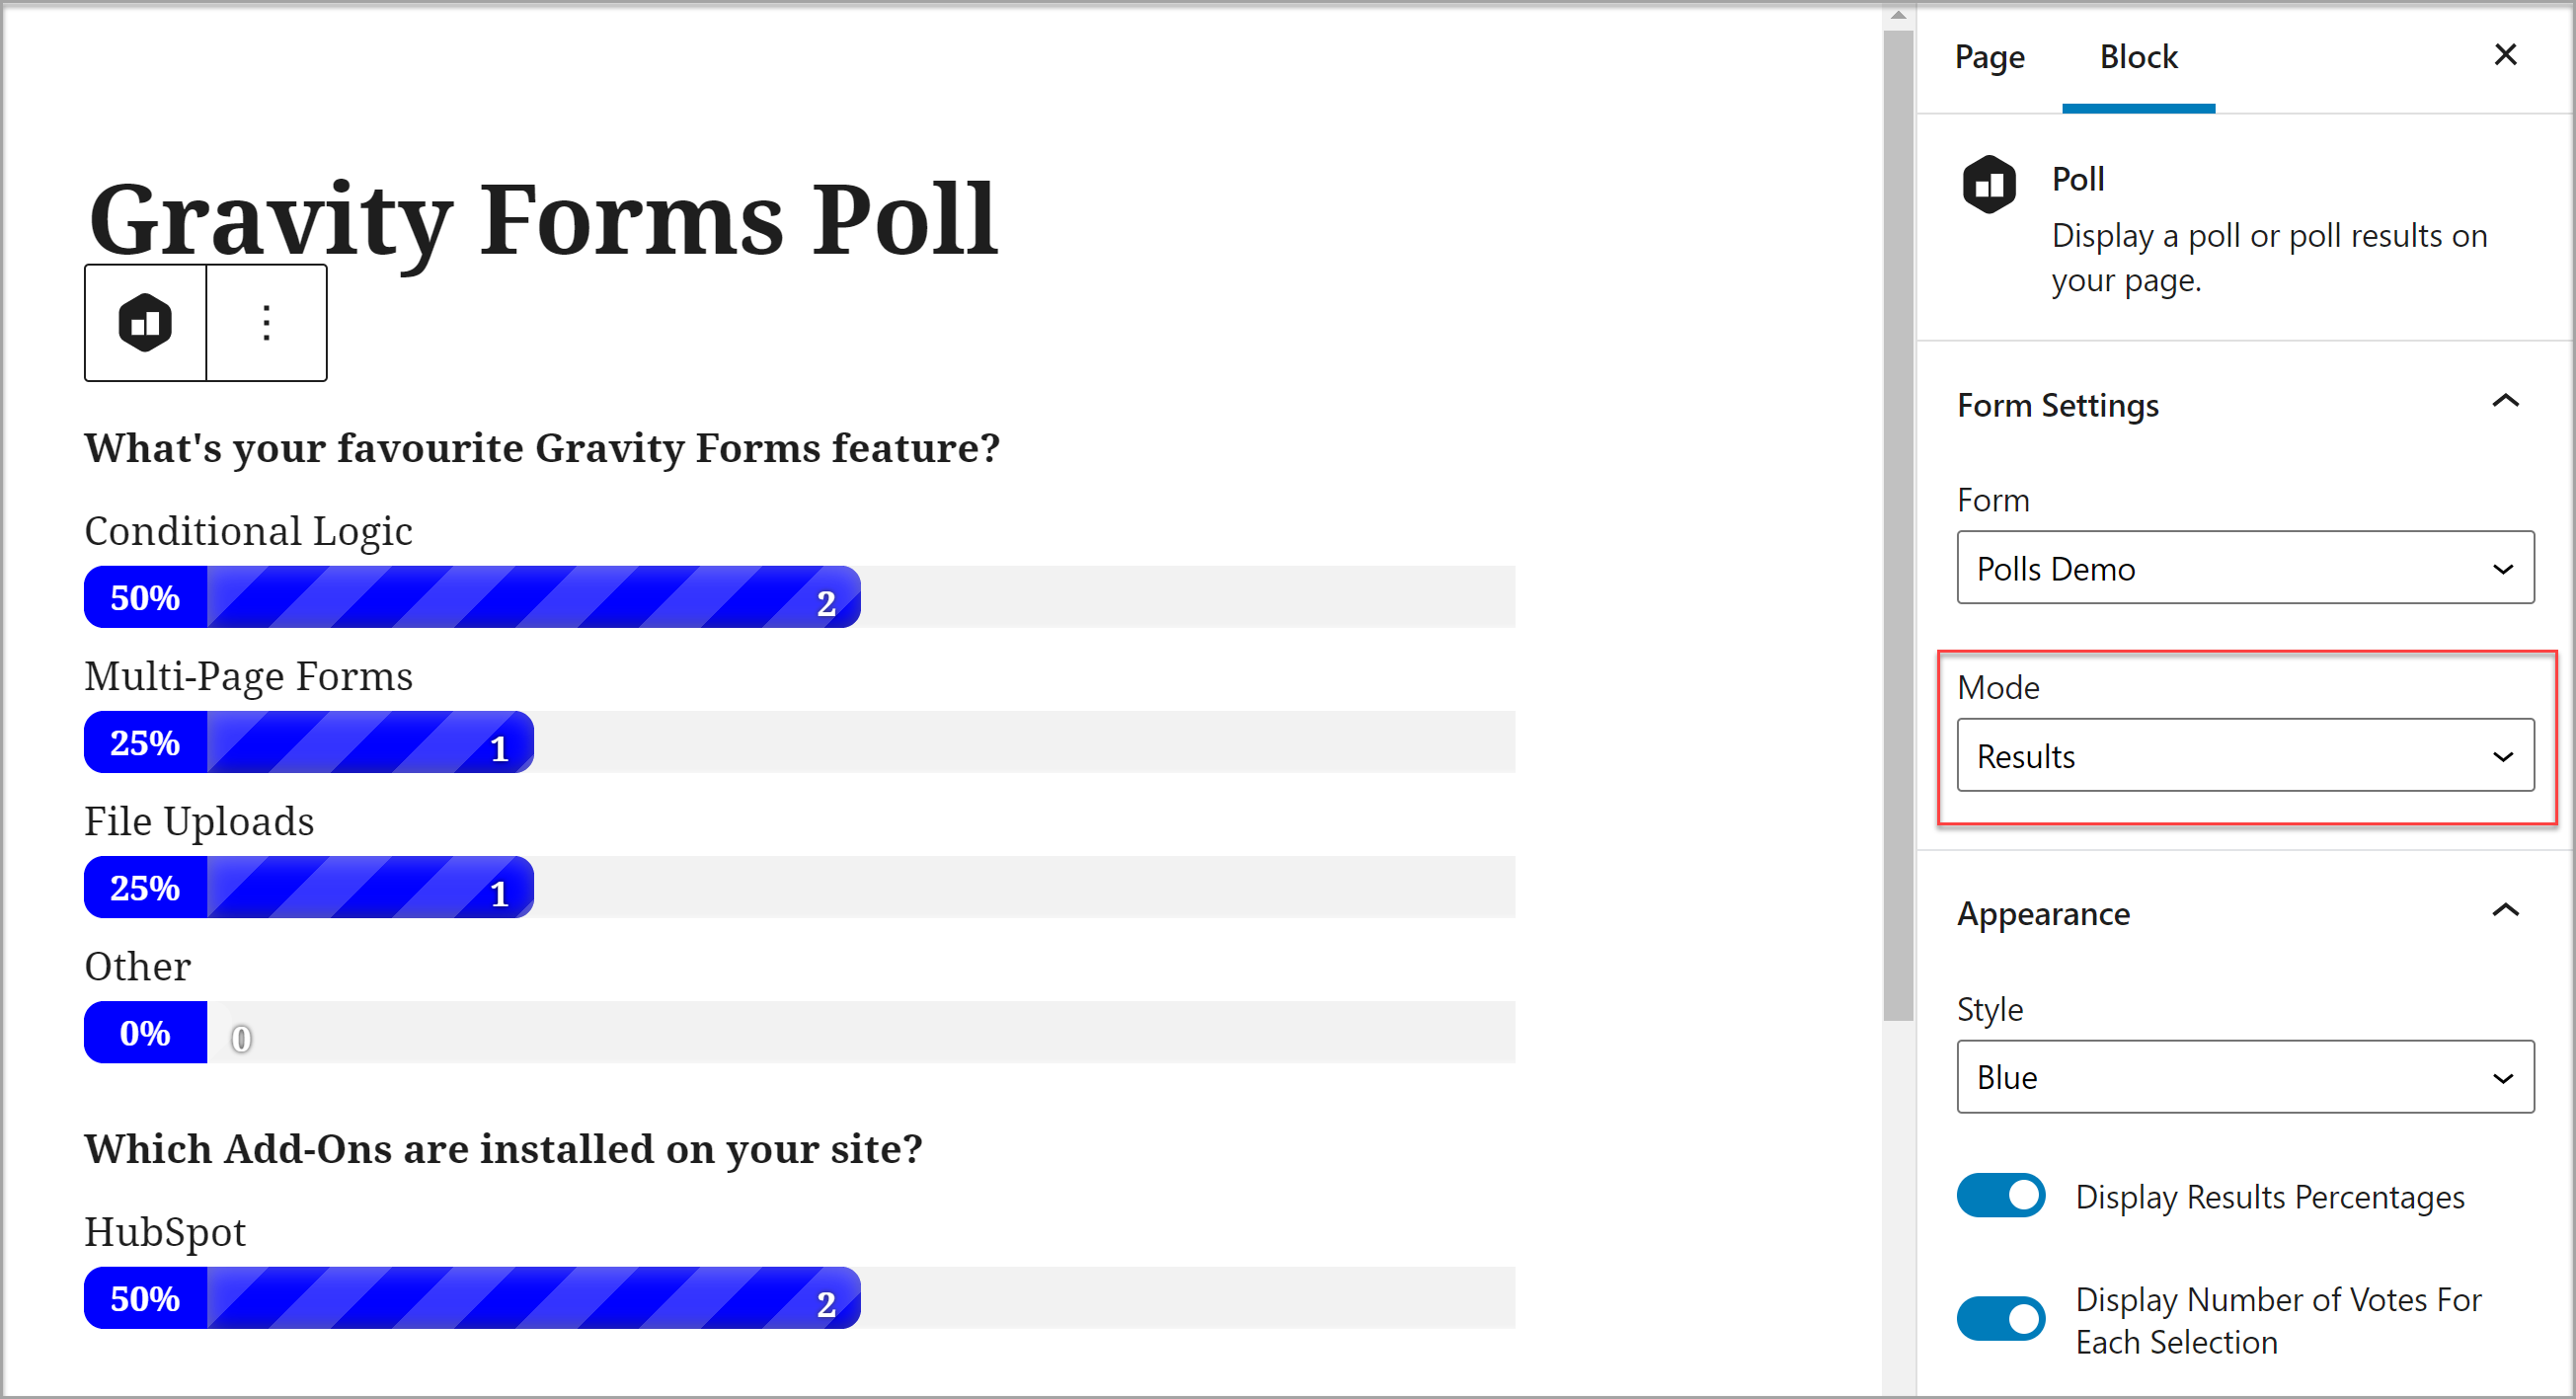 Lastly, switch the form to the Results mode and publish the page. This option is a good choice if you’re running a poll during a certain period and want to show the final results of the poll.
Ready To Add A Poll To Your WordPress Website?
As you can see, adding a poll to your WordPress website with Gravity Forms and our Poll Add-On is quick and easy. For more in-depth information on how to get set up with this add-on, check out the Gravity Forms Documentation.
If you don’t have Gravity Forms or the Polls Add-On, don’t worry. Head on over to the Gravity Forms demo and test the Polls feature out for yourself for free!
Newsletter
If you want to keep up-to-date with what’s happening on the blog sign up for the Gravity Forms newsletter!
"*" indicates required fields


