

If you’re like most entrepreneurs, you’re always looking for ways to reduce your workload and get more done in the same amount of time.
One of the best ways to grow your business is to free yourself from repetitive, laborious tasks that suck your time and energy by taking advantage of automation.
Form data is easy to collect, but what comes next can be challenging. When a job applicant fills out a form, you may need to plug that info into Greenhouse. When a client fills out a form, you may have to create a Trello card. When a customer makes a purchase, you may want their data stored in a Google Sheet.
These are just some of the time-intensive tasks that businesses struggle with every day.
We’ve built a big selection of add-ons to help you move and manipulate your form data, but if we don’t have an integration that meets your unique needs, check out Zapier.
Gravity Forms and Zapier make a powerful pair. When used together, you can do pretty much anything you could ever want with your form data.
In this article, we’re going to introduce you to Zapier and explain how to connect it to Gravity Forms.
What is Zapier?
Zapier is an automation tool that lets you connect more than 3,000 apps. By connecting two apps together, you can automate many of the manual tasks you perform every day, saving countless hours and a lot of stress.
For example, let’s say you want to make a post on Facebook every time you publish a new blog post. Instead of posting manually each time, you could create a Zapier workflow that automatically shares new blog posts.
Here are some of the most common Zaps:
- Create a digest of new Xero sales invoices every week and send to your Gmail.
- Send a push notification to your phone every time you make a sale.
- Get Slack notifications for new Workable job applicants
- Create a new Trello card any time you make a new Evernote note.
- Send GitHub issues to Teamwork as tasks.
- Add new Zoho Recruit candidates to a MailChimp list.
For some more inspiration, check out Zapier’s book with 300+ ways to automate your business:
Zapier Terms
Before you dive into Zapier, it’s important to understand a few key terms.
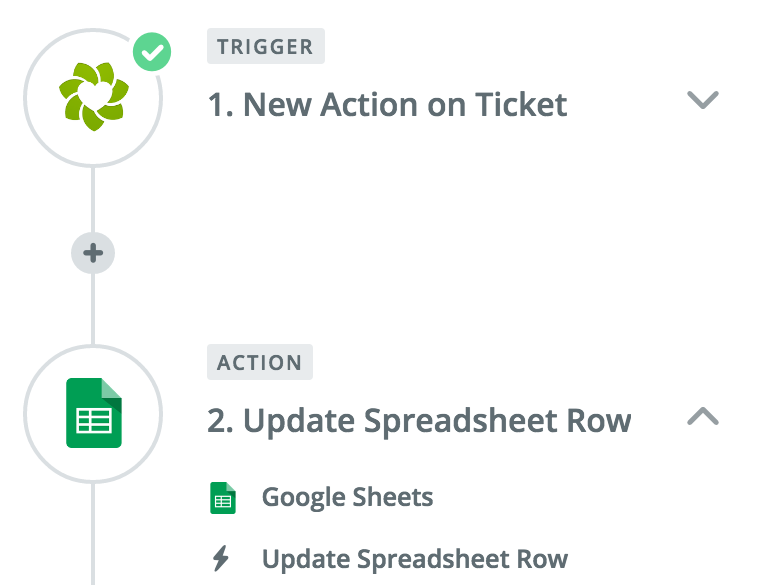
Zap – This is Zapier’s name for an automated workflow. You’ll create a Zap to connect two applications together. Zaps consist of two components: A trigger and an action.
Trigger – A trigger is an event that starts a Zap. Zapier will monitor an application for the trigger so it knows when to complete the workflow.
Action – An action is an event that completes a Zap. It’s the thing that happens when Zapier identifies a trigger.
Task – Every piece of data that passes through a Zap is called a task. Each task is something you would have had to do manually without Zapier.
Here’s an example…
Let’s say you have clients who send you projects by email. You want a way to quickly assign them to your team. You can set up a workflow – a Zap – that creates a Trello card any time you “star” an email in Gmail.
In this example, the trigger is whenever you click a star icon next to an email in your inbox. The action is the creation of the Trello card Zapier. Each time Zapier makes a Trello card is a task.
How to Connect Gravity Forms and Zapier
Okay, let’s get down to it. Here’s a step-by-step process to connect Gravity Forms and Zapier.
Step 1: Create a Zapier Account
Your first step is to open your own Zapier account. The free account lets you use 20 Zaps at once. You can access premium features for free for two weeks.
Step 2: Explore Zapier
This step isn’t necessary, but we strongly recommend it.
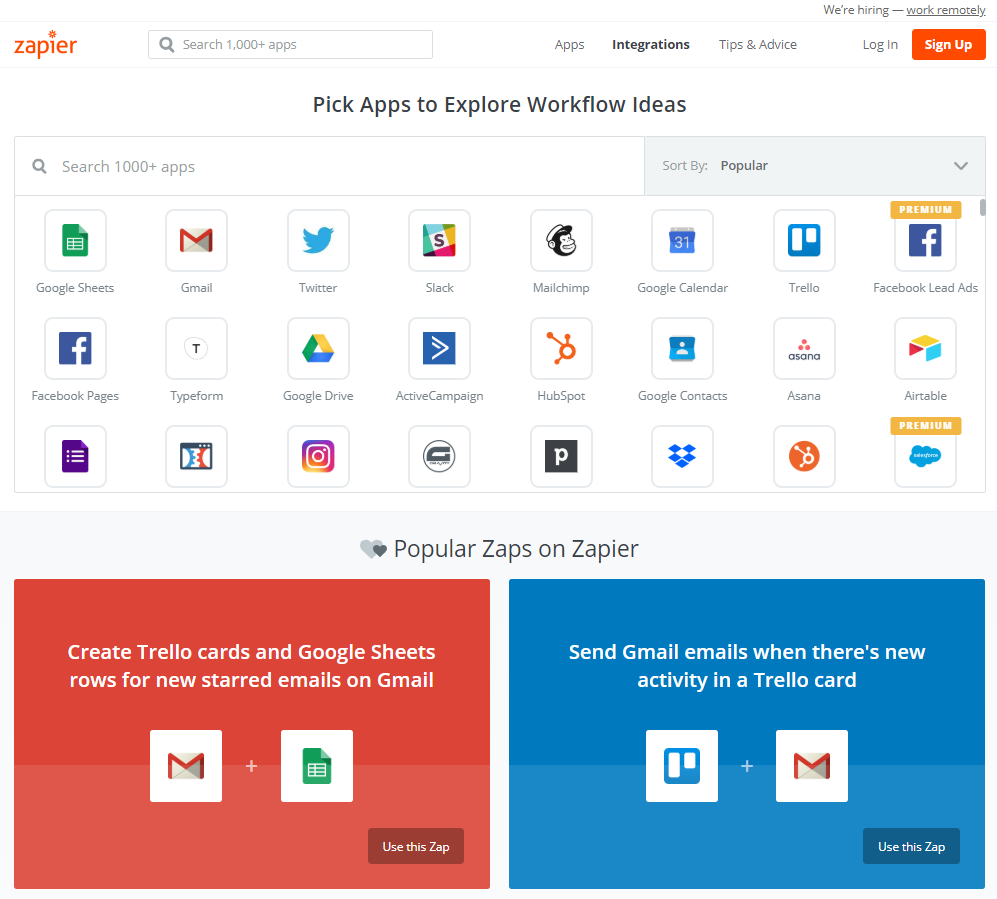
Zapier is a powerful tool you’ll find useful beyond a Gravity Forms, so poke around the apps page and the integrations page. These will give you inspiration for other kinds of Zaps that might help your business. As you’ll see, Zapier works with many tools you probably use every day.
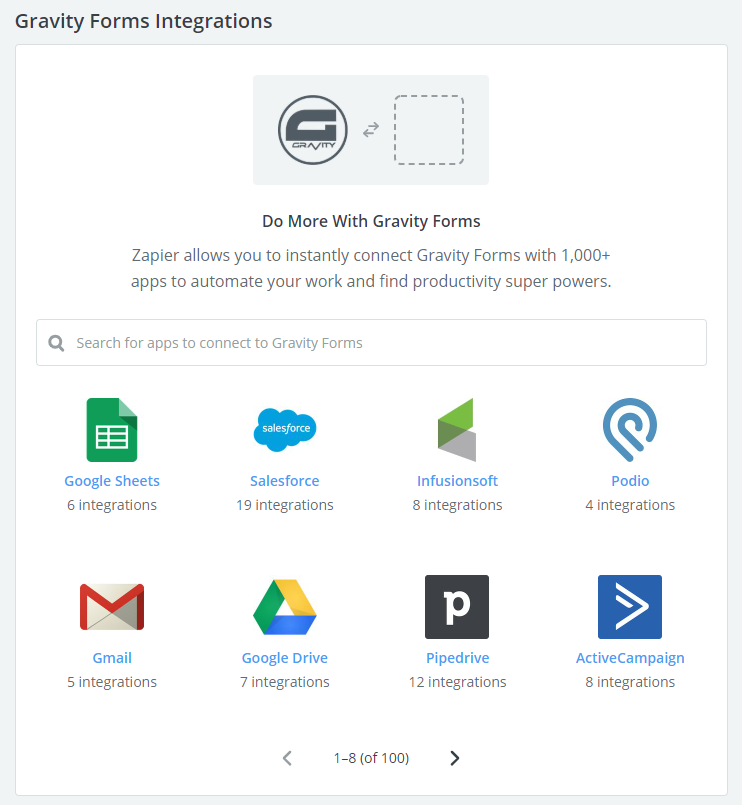
Zapier has pre-built some Gravity Form Zaps, as well. Check out the Gravity Forms Integrations page to see how most people use these two apps together.
For the purpose of this guide, we’re going to assume you want to do something simple like sending all Gravity Form submissions to a CRM like Salesforce.
Step 3: Install the Gravity Forms Zapier Add-On
If you have a Pro or Elite Gravity Forms license, you’ll definitely want to use the Zapier Add-On. It’s a seamless, easy-to-use way to push the data you collect with Gravity Forms to countless applications and services.
Please note: You don’t need to use Zapier if we already provide an Add-On for the service you want to connect to. For instance, you don’t need to hook Gravity Forms to MailChimp via Zapier because we already have a direct integration to MailChimp. Learn more here.
Follow these steps to add the Zapier Add-On to your WordPress site.
- Download the Zapier Add-on and take note where you save it.
- Hover over “Plugins” on your WordPress Admin Dashboard and click “Add New.”
- On the Add Plugins page, click the “Upload Plugin” button.
- Click the “Choose File” button to select the Add-On from wherever you saved it.
- Click the “Install” button.
- Click the “Activate Plugin” button.
If you prefer to install the Add-On via FTP, read this guide.
Step 4: Create Your Form
If you don’t already have a form you want to connect to Zapier, you’ll need to set one up. Read this guide to learn how to set up a Gravity Form: How to Create a Form in WordPress.
Step 5: Set Up Gravity Forms as Trigger
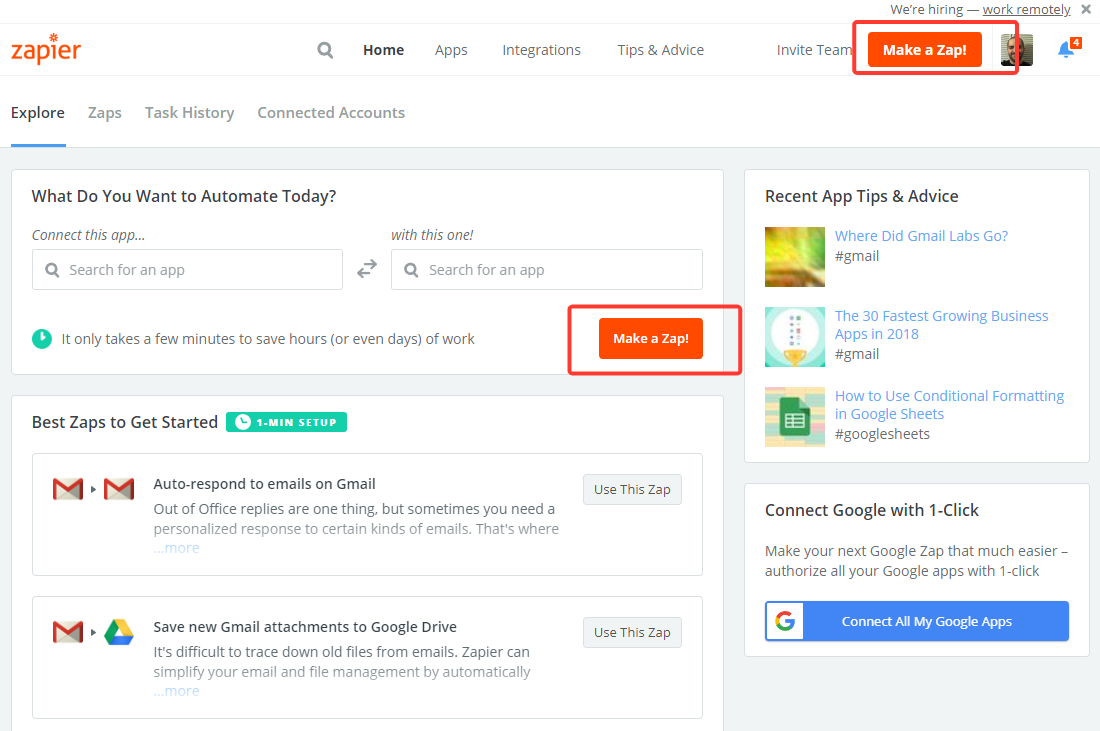
Visit any page of Zapier’s site and click the “Make a Zap” button.
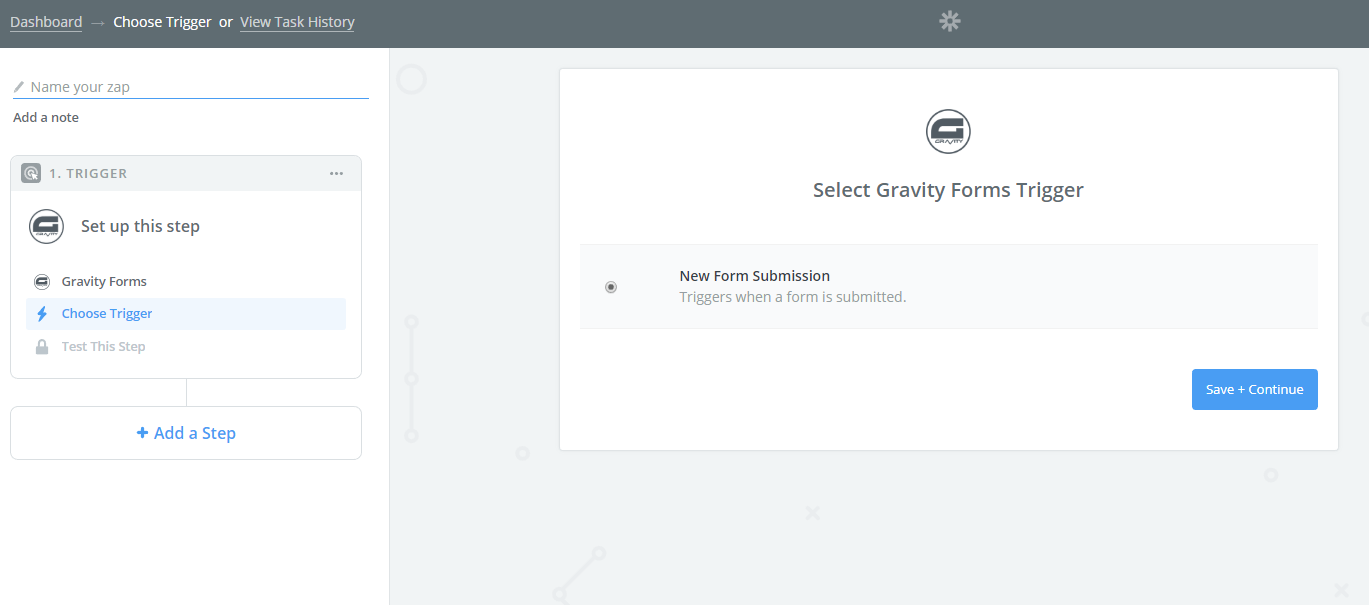
On the Zap creator page, type “Gravity Forms” into the search bar to use Gravity Forms as a trigger. Next click “Save + Continue.”
Next you’ll have to test the trigger. Zapier also needs to make sure you have the Zapier Add-On in Gravity Forms.
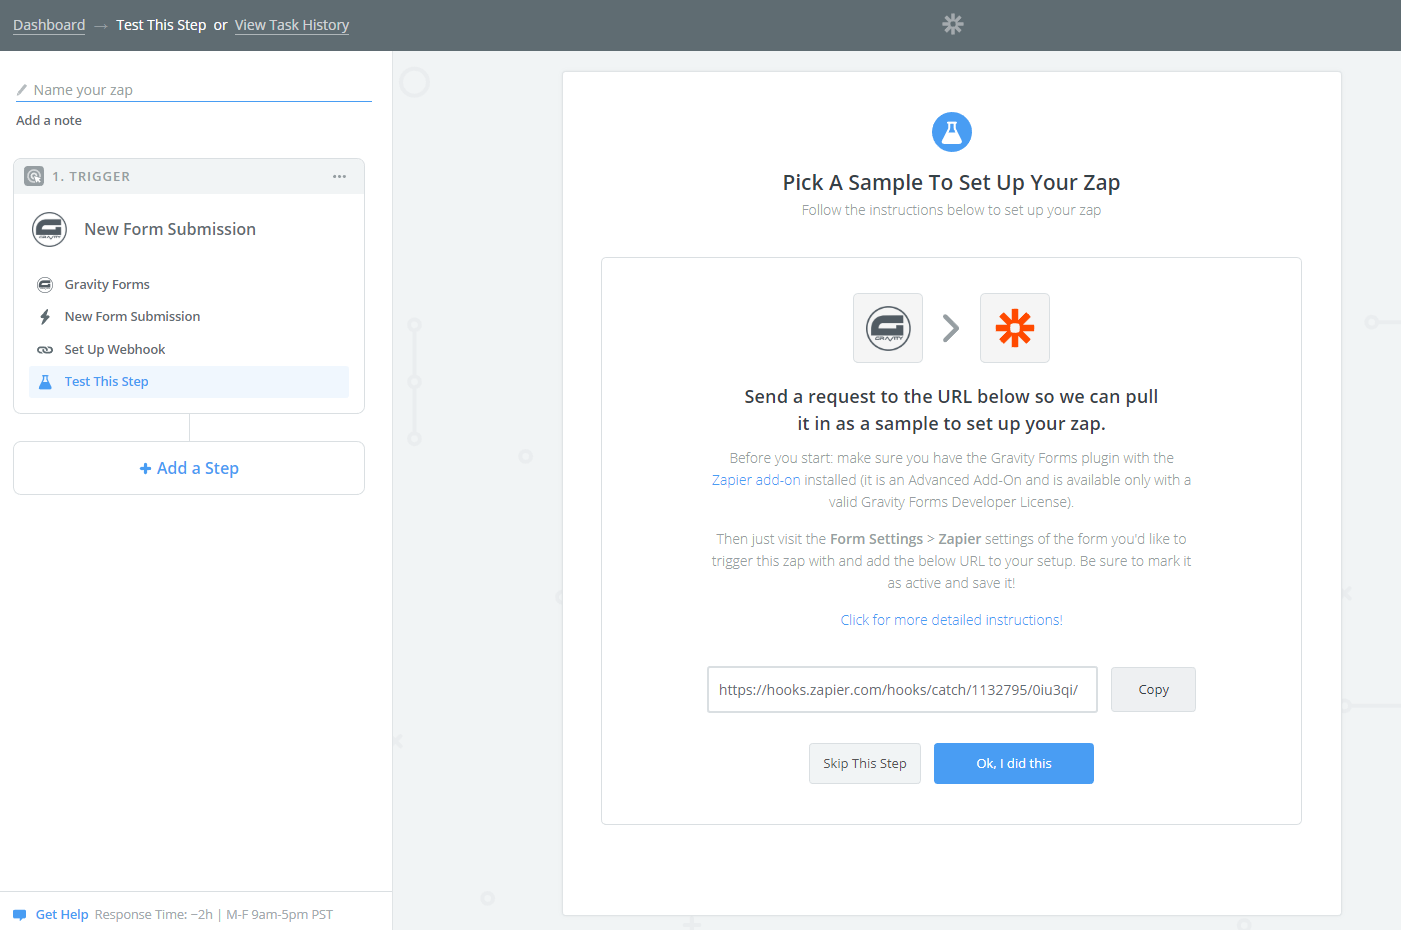
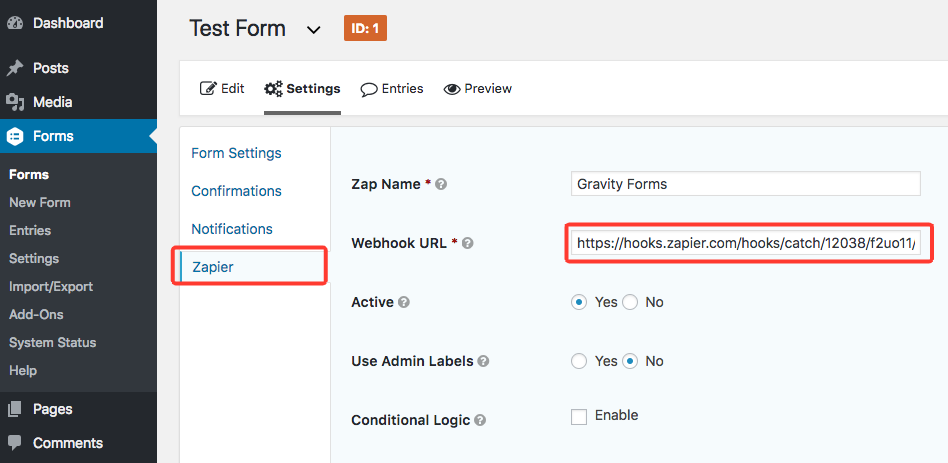
Copy the URL that Zapier supplies. Go to your WordPress dashboard and into the form you want to connect with Zapier. Select the “Settings” tab and then the “Zapier” settings. Click “Add New” to create a new field. In the page that appears, give your Zap a name and paste in the URL you copied into the “Webhook URL” field.
If your form doesn’t have any submissions, submit one so Zapier has something to test. Then head back to Zapier and click the “Ok, I did this” button.
Step 6: Set Up Your Action
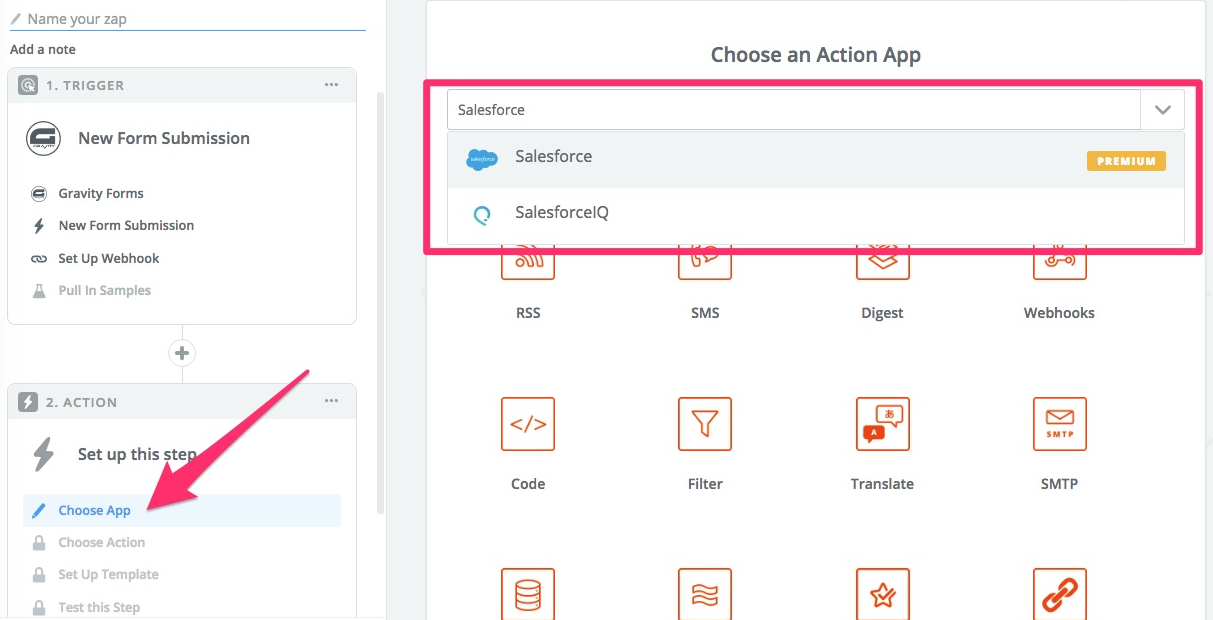
Your next step is to tell Zapier what you want to do with the data it collects from your from. This is the action.
Zapier will ask you to choose an action app. Select from one of the recommendations or type in the app you want to work with. For this example, we’re going to send the data to Salesforce, a popular CRM.
What happens next depends on the app you chose. Since every app is made differently, your possible actions are different. In the case of Salesforce, you have five options.
- Create a new lead
- Add a lead to a campaign
- Create a custom object
- Add a contact to a campaign
- Create a contact
Once you select an option, Zapier will walk you through the process of connecting to that app. It might also ask you a few questions that are specific to that app.
Finally, Zapier will ask you to name your new Zap and turn it on. Your Zap will begin to function immediately.
Get Creative!
The strength of Gravity Forms and Zapier is that you can integrate any app you can imagine. Take some time and explore the possibilities. You may be surprised with what you can do!


