Do you want your website to keep your audience updated on relevant events happening in your industry, company, or locale?
An events calendar plugin may be the perfect way to manage this process. Creating and displaying a calendar on your WordPress website grants users easy access to information regarding relevant events in a familiar calendar format.
Configuring your website events calendar is a straightforward process with our third-party developer, GravityView. The Gravity Forms Calendar extension allows you to create and display an aesthetically pleasing calendar on your site in minutes, tapping data from Gravity Forms. Best of all, you don’t need any coding skills to make it your own — just your imagination.
Let’s dig into the step-by-step process for creating a calendar to display on your WordPress website.
How to Create a Calendar with GravityView
In order to use Gravity Forms Calendar, you must first install Gravity Forms and the Gravity Forms Calendar extension.
Note that you do not need the GravityView plugin on its own to use Gravity Forms Calendar.
Here’s how to get started after everything has been installed:
#1: Create a New Calendar
Navigate to Forms on the WordPress dashboard, then click Forms in the submenu. Hover over a form record to reveal the Create a Calendar option.

#2: Add a New Calendar Feed
After you click to Create a Calendar, you’ll be given the option to add a new feed or edit an existing one.
If you don’t have any feeds yet your screen will look like this:

If this is your first calendar (and first feed), click the link to create one and a Feed Settings screen will open for calendar configuration.
You’ll notice that there are four mandatory fields: the feed name, start date, end date, and event title. Optional fields to flesh out individual event details include the event start and end time, an event description, a custom URL, and an event color.

You can use Merge Tags (use the button to the right of the input field) to display relevant form fields for the Event Title and Event Description.
Note that Feed name is used to help you distinguish the nature of the content on the backend but is not displayed publicly.
#3: Configure Additional Calendar Settings
After setting up a calendar feed, you can choose to allow or prevent editing and set up criteria for including/excluding events.
You can also modify the appearance of the calendar that will display on your website. Layout lets you set the default view of your calendar to Grid, Agenda, or List.
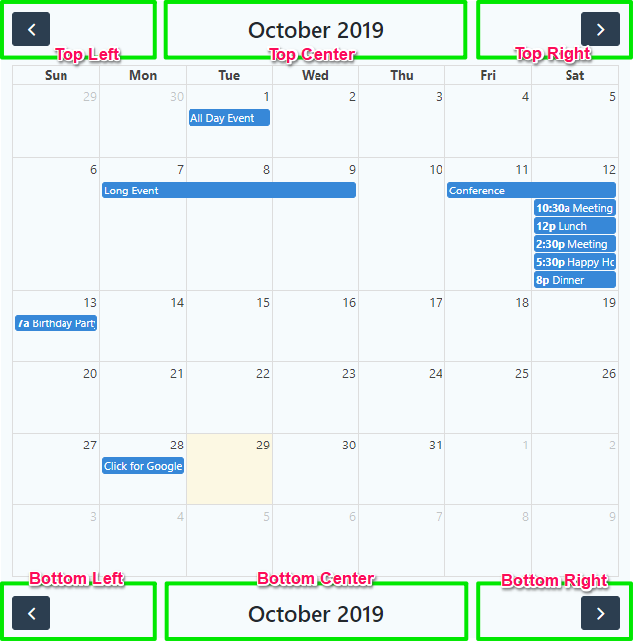
You can also enable controls that allow users to change the calendar view on their computers.
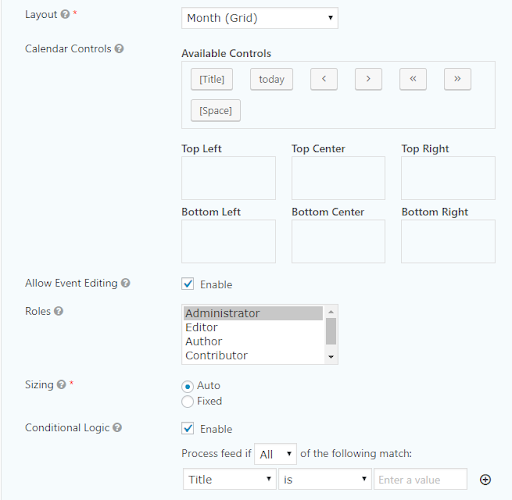
Specifically, Calendar Controls allow users to select the current date, month, and year.
Setting up the controls is as easy as dragging and dropping them where you want them to display:
#4: Click “Update Settings” to Apply Calendar Changes
Once you’ve landed on the right mix of customization, click Update Settings to apply all changes and return to your list of Calendar Feeds.
How to Display a Calendar with GravityView
So you’ve figured your first calendar — congratulations!
https://giphy.com/gifs/animal-parrot-5PSPV1ucLX31u
Now it’s time to push it live to your website. All it takes is a few simple steps.
There are four ways to display your new calendar on WordPress:
- Shortcode
- WordPress widget
- Gutenberg block
- GravityView widget
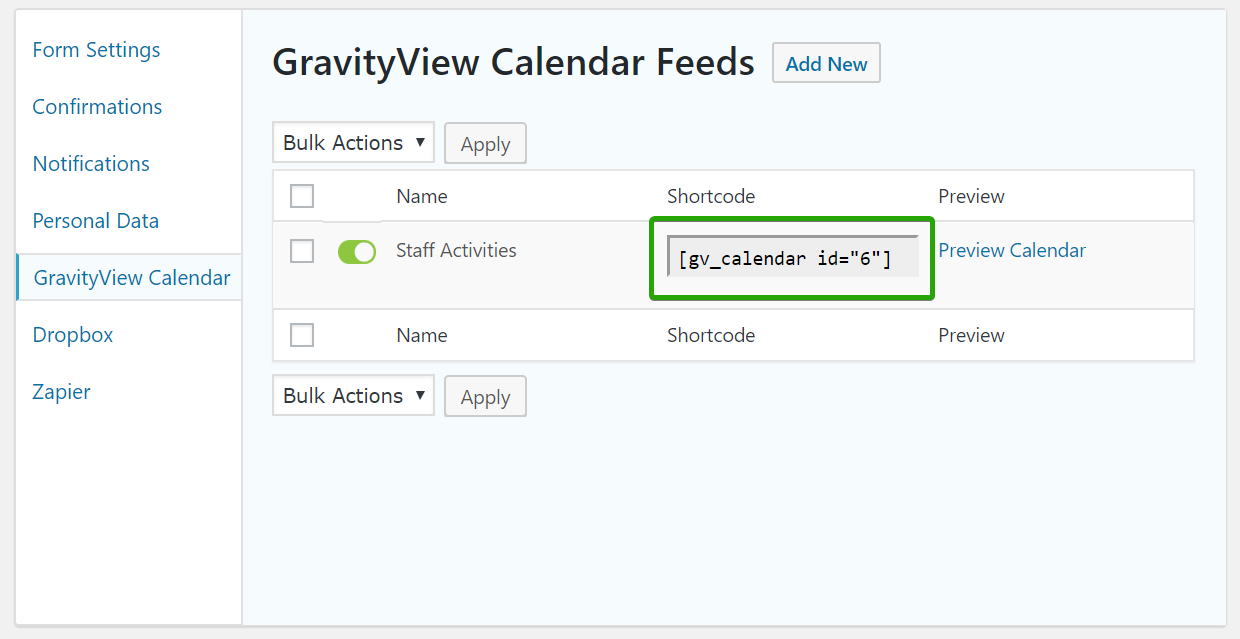
#1: Gravity Forms Calendar via Shortcode
On the Forms list, hover over the relevant form record, then over the Settings option. Click on GravityView Calendar.
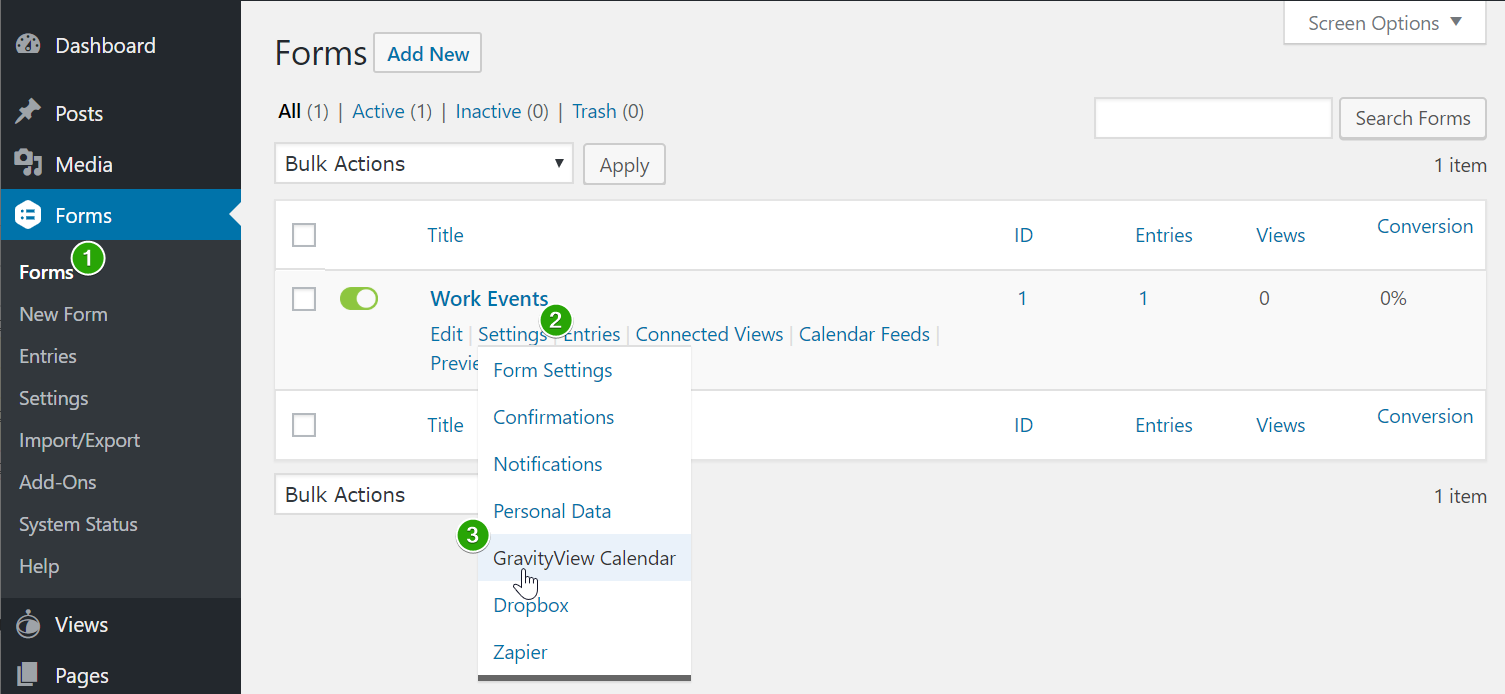
Your calendar’s shortcode is displayed in the Shortcode column. Copy and paste it anywhere you want it to display on your site (such as pages, posts, or sidebars).
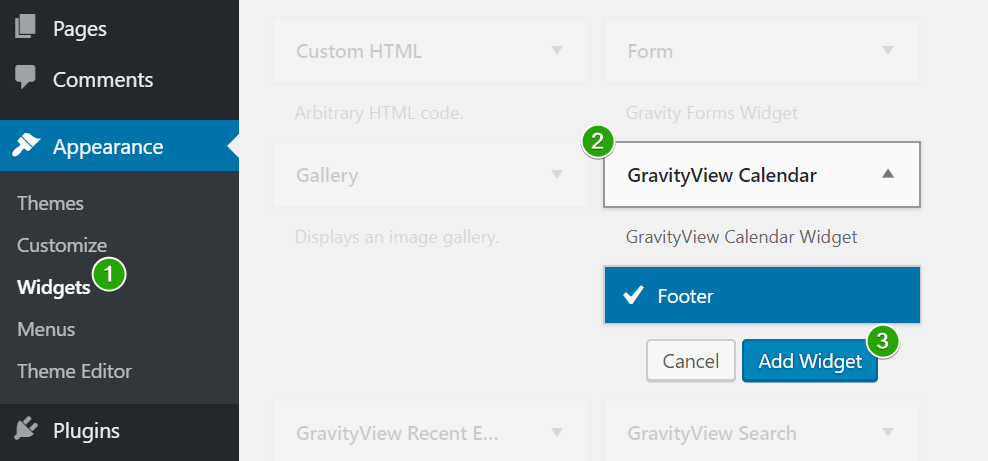
#2: Gravity Forms Calendar via WordPress Widget
On the WordPress dashboard, click on Widgets under Appearance. Navigate to GravityView Calendar and click on Add Widget.
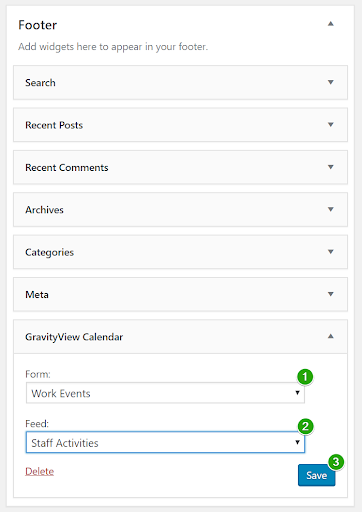
Configure the widget by selecting Form and Feed (to designate a specific calendar), then click Save to complete setup.
#3: Gravity Forms Calendar via Gutenberg Block
Inside the post editor, click + to add a new Gutenberg block.
Select GravityView Calendar from the list of options.
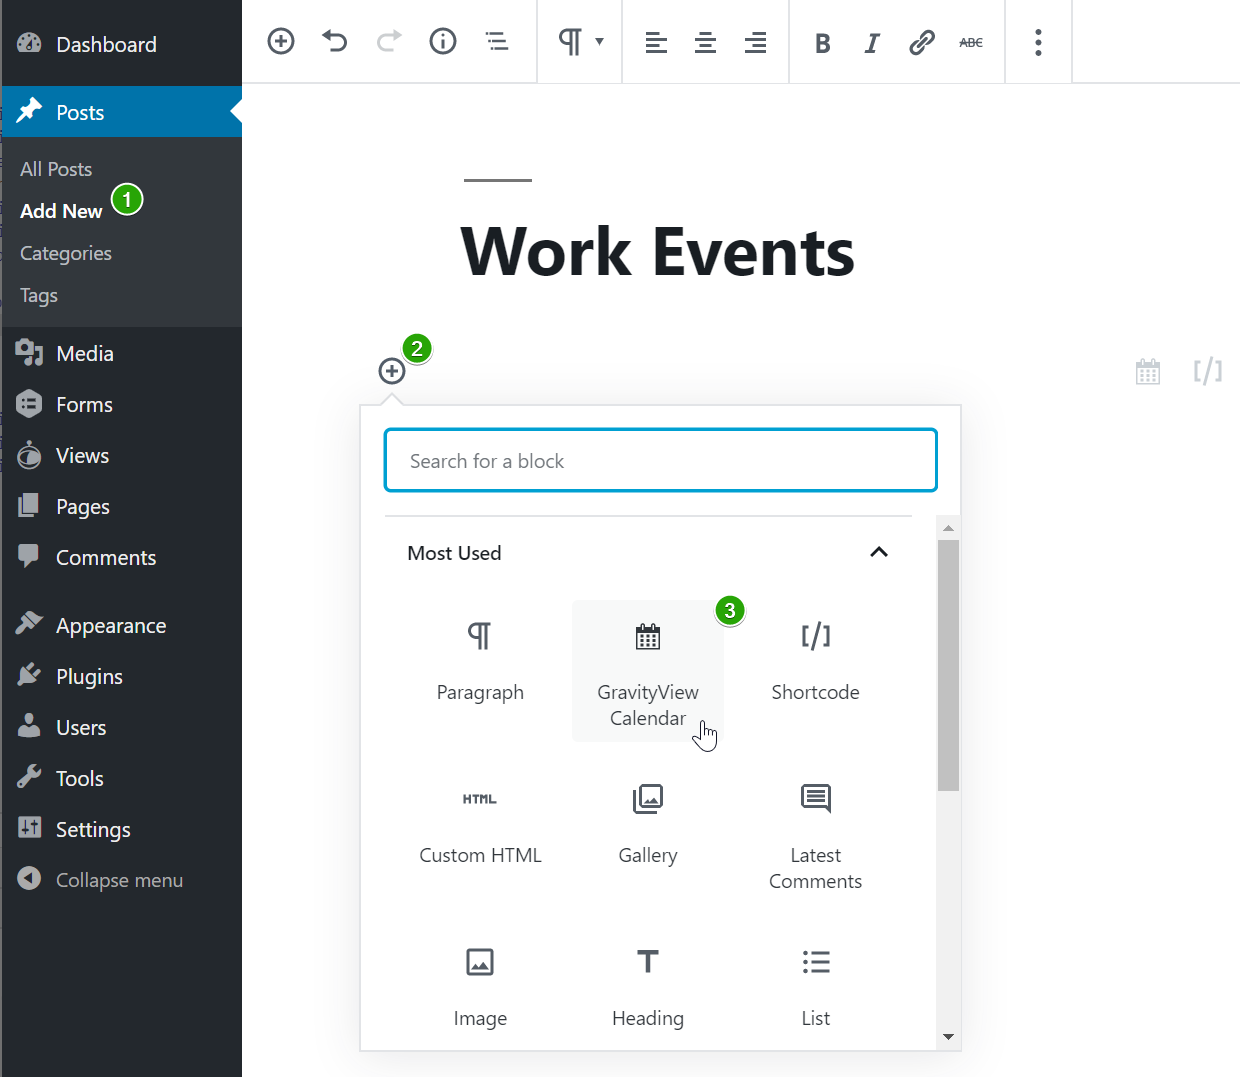
Finally, select the calendar Form and Feed from the block settings.
#4: Gravity Forms Calendar via GravityView Widget
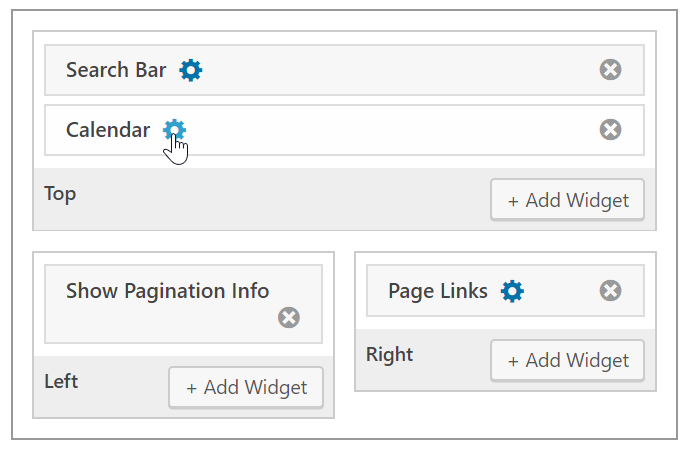
If you have GravityView already installed, click on + Add Widget and select Calendar.
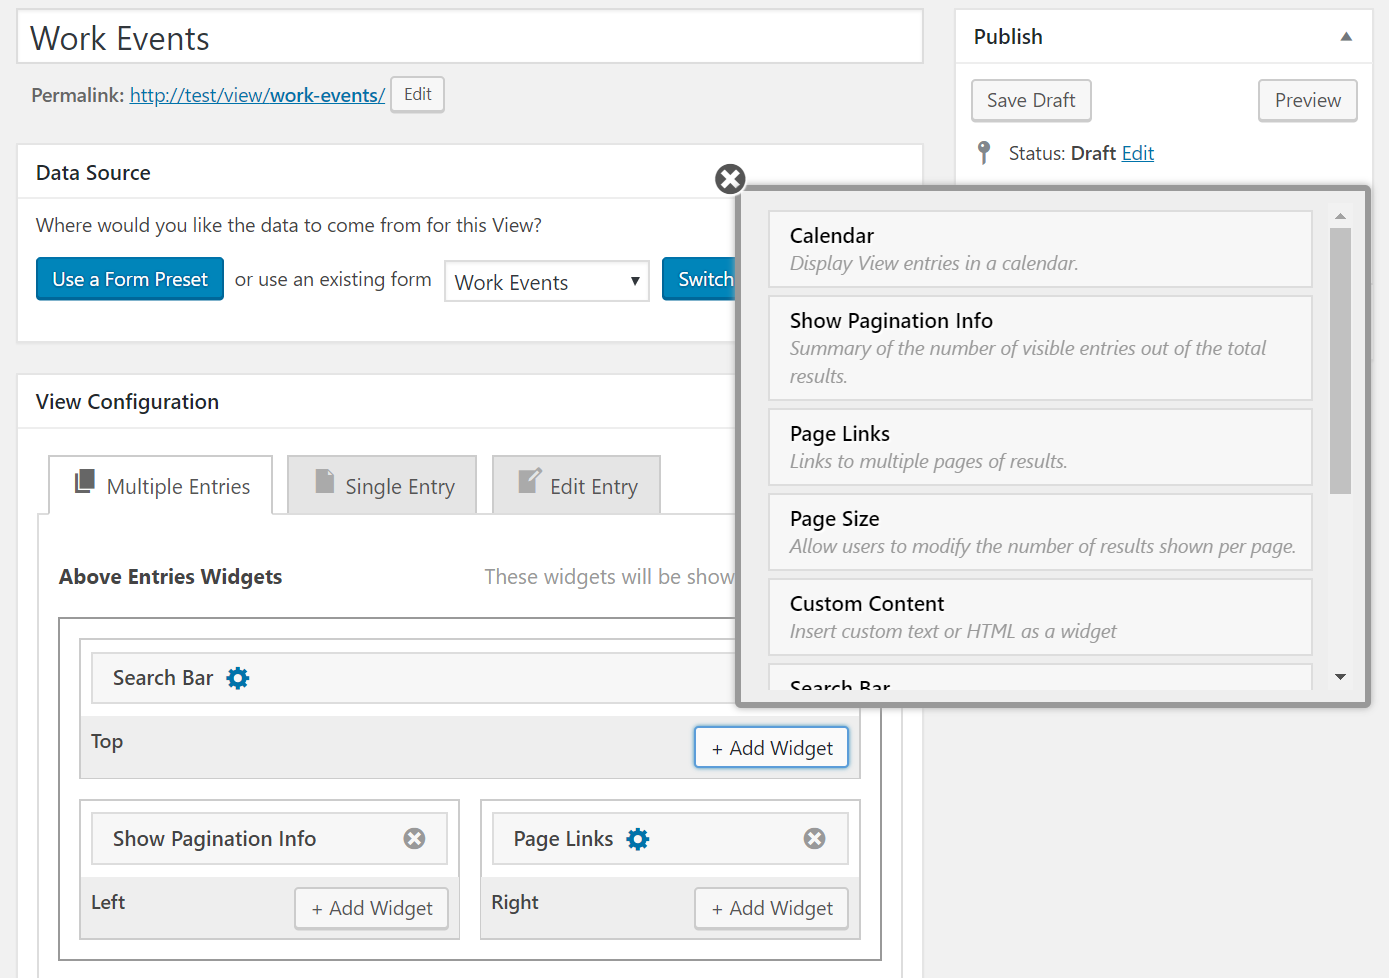
Once the widget has been added, you can use Settings to configure the calendar.
As shown below, you can display all View entries or just those shown on the page.
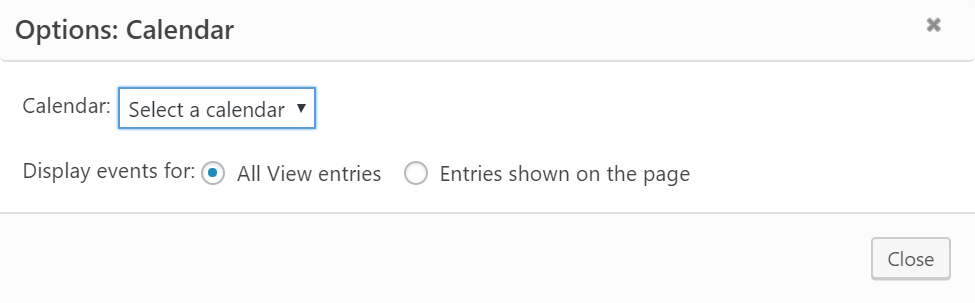
Remember to save the changes to your View so you don’t lose your customizations.
Why You Should Choose GravityView as Your Gravity Forms Calendar Integration
As you’ve likely noticed, launching a Gravity Forms Calendar is a matter of following a few non-technical steps.
Drag and drop functionality for modifying the calendar’s appearance or editing events empowers users to customize the calendar to their liking, without requiring coding skills. You can have a new calendar published on your website in minutes.
That said, many actions and filters are available to those with advanced development skills who require additional customization options.
We think that the best way to create usefulness around extending an existing tool is by knowing the product inside and out.
Gravity Forms has hundreds of community add-ons, and the team behind GravityView is proud to be one of the first developers of Gravity Forms add-ons. As such, the team at GravityView knows the plugin almost as well as the team at Gravity Forms!
A purchase of GravityView plugins grants you access to our top-quality support, in combination with a 30-day no-questions-asked happiness guarantee.
Final Thoughts: How to Create and Display a Gravity Forms Calendar in Minutes
Putting a calendar on your website is an efficient way to communicate with your visitors about all of your company’s (or community’s) important events.
Using Gravity Forms with Gravity Forms Calendar is the perfect match for easy, custom calendar creation.

If you want to keep up-to-date with what’s happening on the blog sign up for the Gravity Forms newsletter!
"*" indicates required fields