Somewhere in your company, right now, someone is about to spend money nobody approved.
Not maliciously. They asked their manager in passing, the manager said “sure, sounds fine,” and the order went in. Then the invoice arrived, finance had no record of the approval, the manager didn’t remember the amount being that much, and now three people are reconstructing a purchasing decision from memory and a Slack scroll.
A purchase order form fixes the capture problem. Multi-step approval fixes everything after it. In this post we’ll build both, and the division of labor is simple: Gravity Forms captures the purchase request, and Gravity Flow handles everything after submit. It routes the request to the budget holder, pulls in a second approver automatically when the amount crosses a threshold, and hands the approved PO to accounting. Every decision timestamped, every dollar accounted for.
If you’re an agency, this is the build behind one of the most common client asks there is: “purchases over a certain amount need sign-off from two people.” That sentence describes a workflow, and it’s one you can deliver in settings screens, not custom code.
Let’s get into it…
For agencies: your client brings the problem, you bring Gravity Flow
Listen for the sentence “purchases over a certain amount are supposed to get signed off.” Supposed to is the tell: the client has a policy and no system, and they think the fix is discipline. It isn’t. It’s the build below, on the site you already run for them.
Two approval steps and one condition sound like a custom development quote. They’re an afternoon of settings screens. And every client that spends money has a version of this: purchase orders here, expense reimbursements, discount approvals, budget requests. One pattern, sold as many times as you can spot it. Start with the client whose bookkeeper complains the loudest, because finance teams are the best internal champions a workflow build can have.
Managing your own company’s purchasing rather than a client’s? Everything below works exactly the same. Let’s get into it…
The problem with purchase requests
The request is easy. Everything around it leaks:
- Approvals happen out of band – A nod in a meeting or a “go for it” on Slack isn’t a record. When the invoice lands, nobody can prove what was agreed.
- Spending limits exist on paper only – The policy says purchases over $1,000 need director sign-off. The policy lives in a PDF nobody opens mid-purchase.
- Finance finds out last – Accounting sees the spend when the invoice arrives, which is exactly the wrong end of the process to discover a problem.
The fix isn’t more policy. It’s a workflow that enforces the policy automatically: a request goes in, it reaches the budget holder, big amounts pull in a second approver without anyone having to remember the rule, and finance gets the approved PO before the money moves.
What this workflow does
Here’s the finished system:
- An employee submits a purchase request with the item, vendor, amount, and department.
- Gravity Flow routes the request to that department’s budget holder for approval.
- If the amount is $1,000 or more, a second approval step fires automatically and the request goes to the director too. Under $1,000, that step is skipped entirely.
- On final approval, the PO details are pushed to your accounting system and the requester is notified.
- Every approval, skip, and handoff is logged in the entry’s timeline.
Step 1 is Gravity Forms. Steps 2 through 5 are all Gravity Flow. As before, we’ll move through the form quickly and spend our time on the workflow.
For agencies: where you’ll see this
Two clients you’ll recognize:
- The office or program manager ordering supplies, where anything over a set dollar amount needs director sign-off, and right now that rule is enforced by everyone remembering it exists.
- The facilities purchase that needs two sign-offs, budget holder and finance both, before the order goes out. Today that’s a forwarded email thread. After this build, it’s two workflow steps.
Both are the same pattern with different names in the routing rules.
What you’ll need
- Gravity Forms (any license) to build the request form
- Gravity Flow to add the approval workflow on top
Gravity Flow is a separate plugin that extends Gravity Forms. With both installed and activated, you’ll find a Workflow tab in each form’s settings. That tab is where everything from Step 2 onwards happens.
Step 1: Build the purchase order form (Gravity Forms)
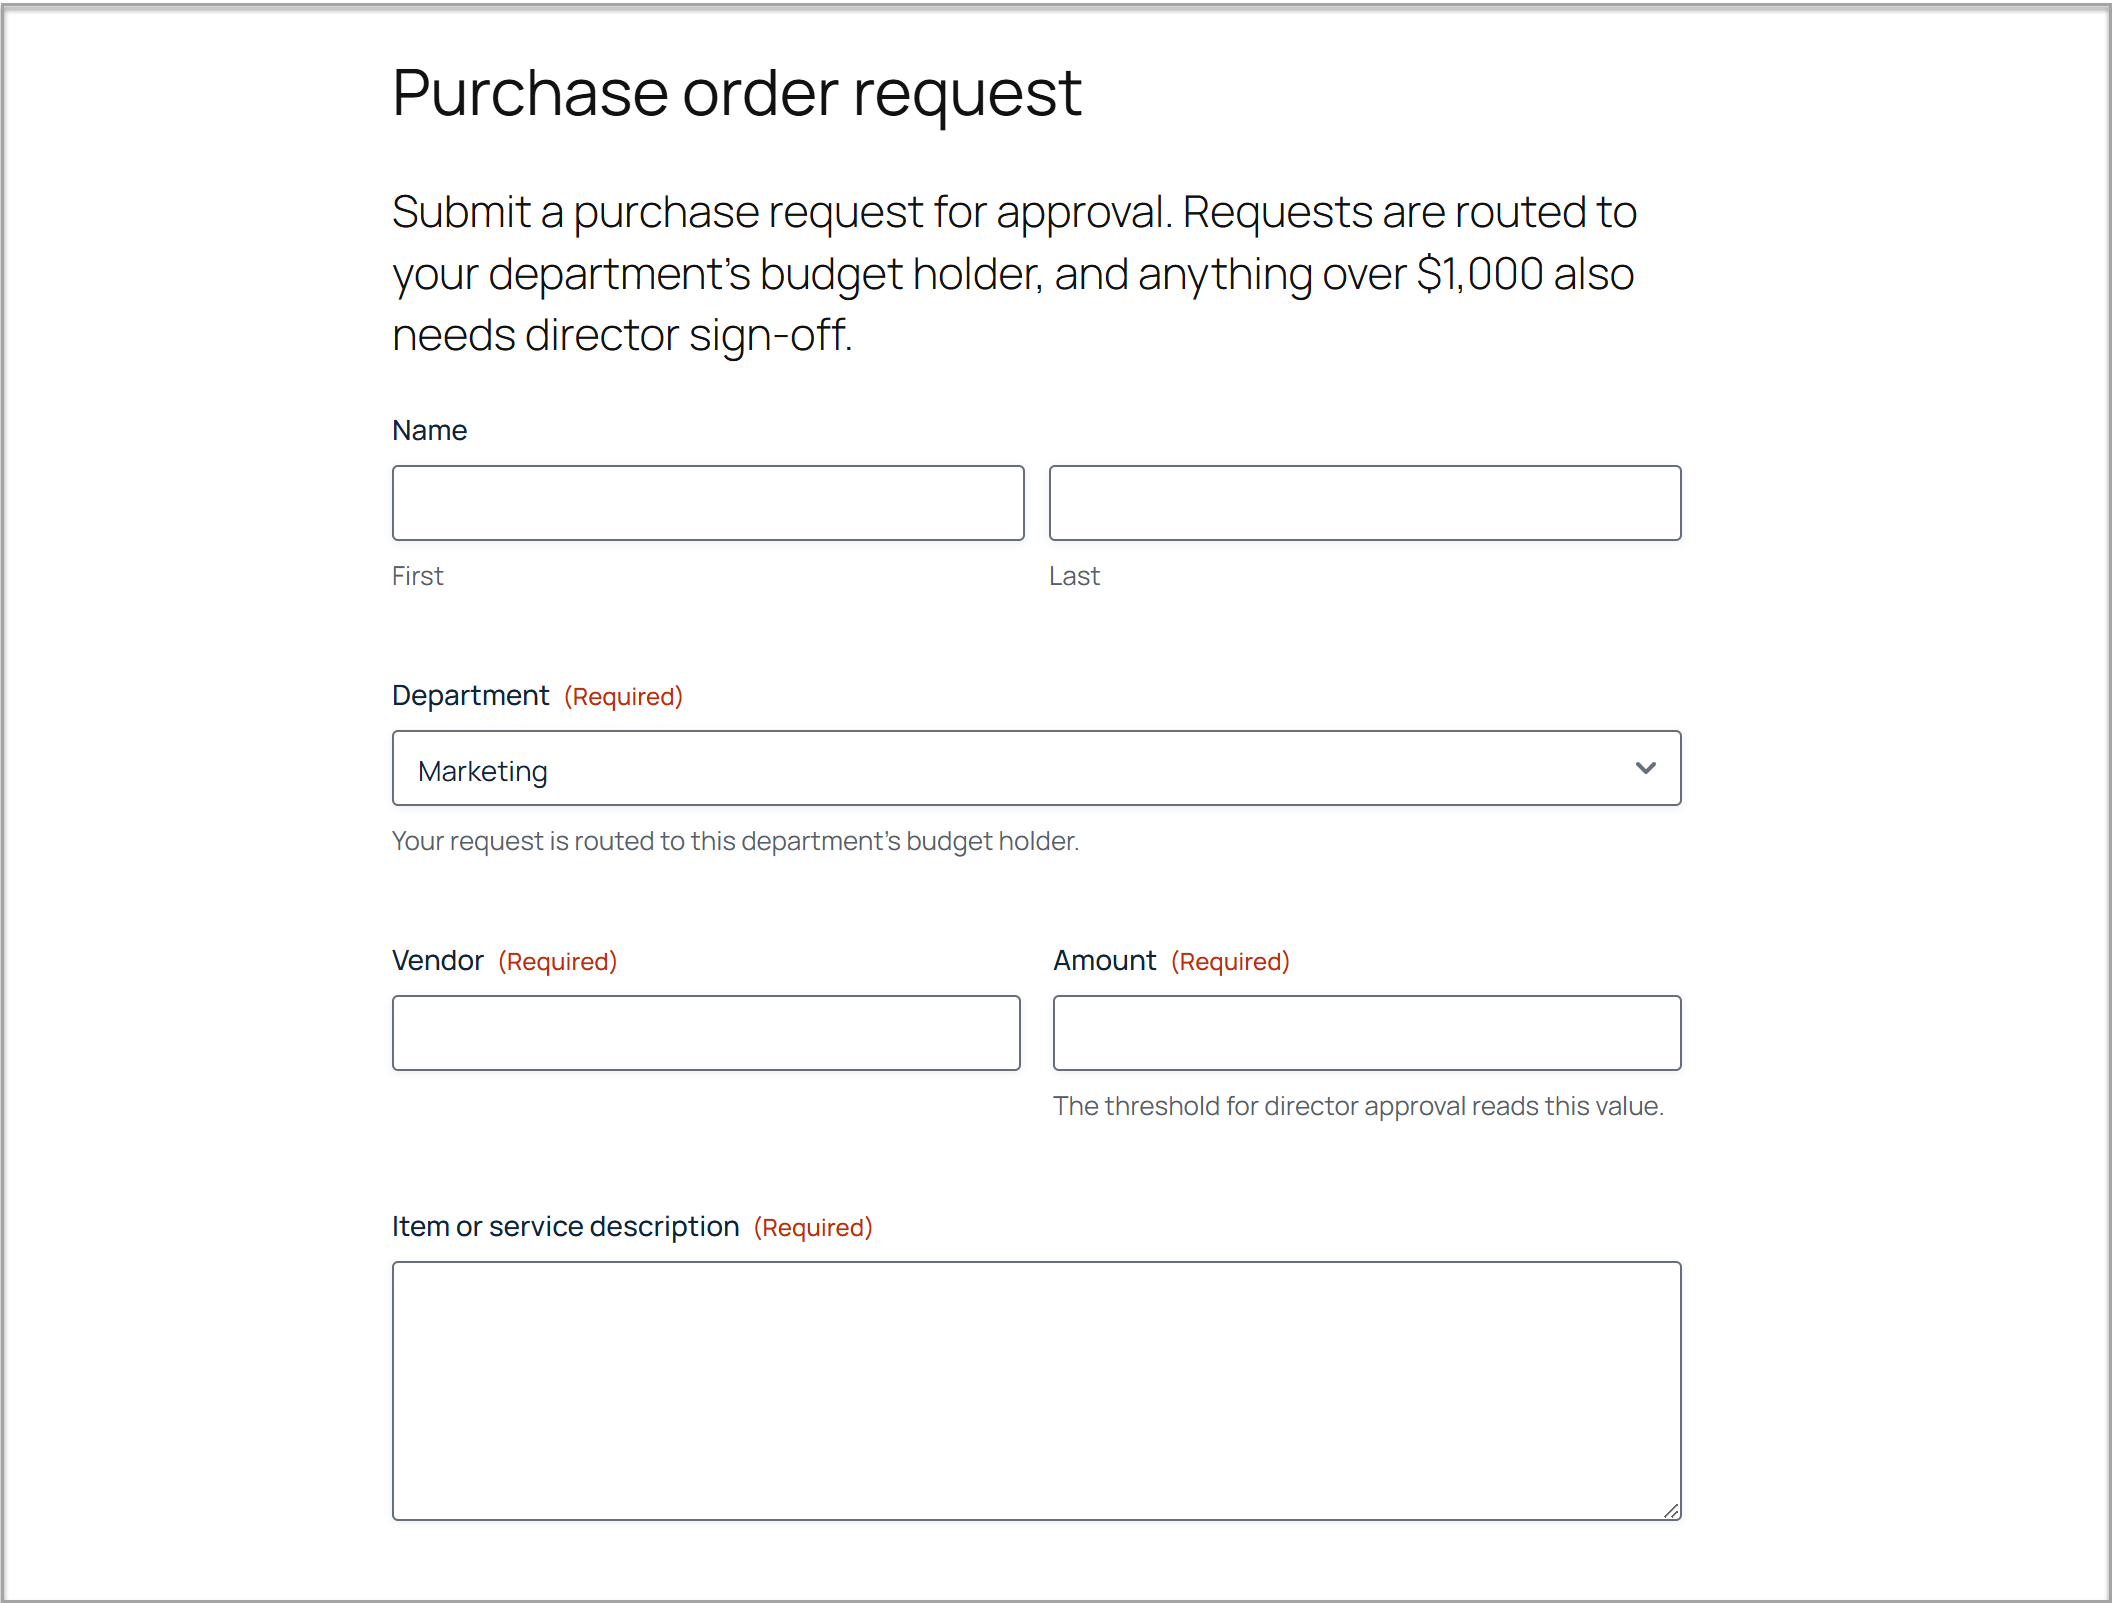
Create a new form with the fields your purchasing process needs:
- Requester name (or require login and let the entry record the user)
- Department (dropdown). The first approval routes on this.
- Vendor (single line text)
- Item or service description (paragraph)
- Amount (Number field, formatted as currency). The threshold logic routes on this, so make it a proper Number field, not a text field someone can type “about $500” into.
- Needed by (Date field)
- Quote or vendor documentation (File Upload, optional)
That’s the form. If you want request numbers on your POs, the Unique ID Perk or an auto-incrementing entry ID in your notifications handles it. Our form creation documentation covers the basics if you need them.
Now for the workflow. From here on, everything we build lives in Gravity Flow.
Step 2: Add the budget holder approval (Gravity Flow)
Open the form’s Workflow tab and add a new step. Set the type to Approval and name it “Budget holder approval.”
In the assignee settings, choose Routing and build a rule per department, the same pattern as any routed approval:
- If Department is Marketing, assign to the Marketing budget holder.
- If Department is Engineering, assign to the Engineering budget holder.
- If Department is Operations, assign to the Operations budget holder.
Each budget holder gets an email with the full request, including the uploaded quote, and approves or rejects from the notification. No logging in to the WordPress admin, no forwarding PDFs around.
Using Gravity Flow 3.1? If your departments need entirely different purchasing workflows, not just different approvers, the new Choice Routing step can send each request down its own path based on the Department dropdown. Here, every request follows the same route and only the approver changes, so routing the assignee is the simpler build.
Step 3: Add the threshold approval
This is the step that turns a written spending policy into an enforced one, and it’s the mechanic this whole post exists to show you.
Add a second Approval step and name it “Director approval.” Assign it to your director or finance lead. Then, in the step’s settings, enable condition logic and set the condition:
Only apply this step if Amount is greater than or equal to 1000.
That one setting does all the work. A $400 software renewal gets budget holder approval and moves straight on. A $6,000 hardware order gets budget holder approval and then lands with the director, automatically, because the amount tripped the condition. Nobody checks the policy PDF. Nobody has to remember the rule. The workflow is the rule.
You can stack these as deep as your policy goes: a third step above $10,000 for the CFO, a board-level step above $50,000. Each is just another Approval step with a condition on the amount.
Agency note: when a client says “different sign-offs at different spending levels,” this is the entire build. One approval step per level, one condition each. It sounds like a custom development quote. It’s an afternoon.
Step 4: Send the approved PO to accounting
An approved request that never reaches finance is only half a workflow, so close the gap with an Outgoing Webhook step after the final approval.
The webhook sends the entry data (vendor, amount, description, approval details) to your accounting system the moment the last approval lands. If your accounting platform accepts inbound webhooks, connect it directly. If not, use Gravity Flow’s dedicated Zapier step instead: it fires at this exact point in the workflow, after final approval, and Zapier carries the PO into QuickBooks, Xero, or wherever your ledger lives. (That timing is the difference from the Gravity Forms Zapier Add-On, which triggers at submission, before anything has been approved.) Either way, finance sees the approved spend before the invoice arrives, not after.
If your process is lighter, a notification step emailing the PO details to your accounting inbox does the job with zero integration work. Start there and add the webhook when volume justifies it.
Step 5: Close the loop
Add notification steps so decisions reach people:
- On final approval: notify the requester that they’re clear to purchase, with the PO details attached.
- On rejection at either step: notify the requester with the approver’s note, so they know what to fix before resubmitting.
And as always, the entry’s timeline records everything: who approved, at which step, when, and which steps were skipped and why. When an auditor or an accountant asks about a purchase from last March, the answer is the entry link, not an inbox search.
The workflow at a glance
Here’s the complete build, end to end:
Purchase request submitted → Budget holder approval (routed by department) → Director approval (fires only at $1,000 and above) → PO to accounting (webhook or Zapier step) → Requester notified. Every step logged in the entry’s timeline.
Two approval steps, one condition, one webhook, and a handful of notifications. Before rolling it out, run one request under the threshold and one over it to watch the director step skip and fire.
From policy PDF to enforced process
That’s the build. Requests can’t skip approval because approval is the only way through. Spending limits enforce themselves. Finance sees POs before invoices. And when anyone asks who approved what, the answer is logged, timestamped, and one click away.
Because it all runs on your own WordPress site, there’s no per-seat procurement SaaS, no data in someone else’s system, and nothing to learn beyond a form.
Already using Gravity Forms? The form is the part you already know. Gravity Flow adds the routed approvals, threshold logic, and audit trail on top. Check out Gravity Flow pricing to get started, or sign up for a free, personalized demo to see an approval workflow in action.
Building for clients? Threshold routing is the pattern to bank. The expense reimbursement workflow coming up in this series uses the exact same mechanic, and we’ll link back here rather than teach it twice.

Newsletter
If you want to keep up-to-date with what’s happening on the blog sign up for the Gravity Forms newsletter!
"*" indicates required fields