For more information on using the Brevo Add-On, check out our docs site.
Welcome back to another video, Dustin here from the Gravity team.
Brevo is a powerful, all-in-one email marketing platform that can help you grow your audience, nurture customer relationships, and automate your marketing efforts.
And with the Gravity Forms Brevo Add-On, you can send form submission data directly from WordPress to your Brevo dashboard.
Let’s take a look at how to set the add-on up and use it with your forms.
First, head to your WordPress dashboard to install and activate the Brevo Add-On. Then open your Brevo dashboard and click on your company name to access the SMTP & API setting. Click on the ‘API Keys’ tab and select ‘Generate a new API key’.
Give your key an appropriate name, then copy it and store it in a safe place – you’ll be unable to access it again after closing this screen. Head back to your WordPress dashboard and head to your Gravity Forms settings page to access the Brevo settings.
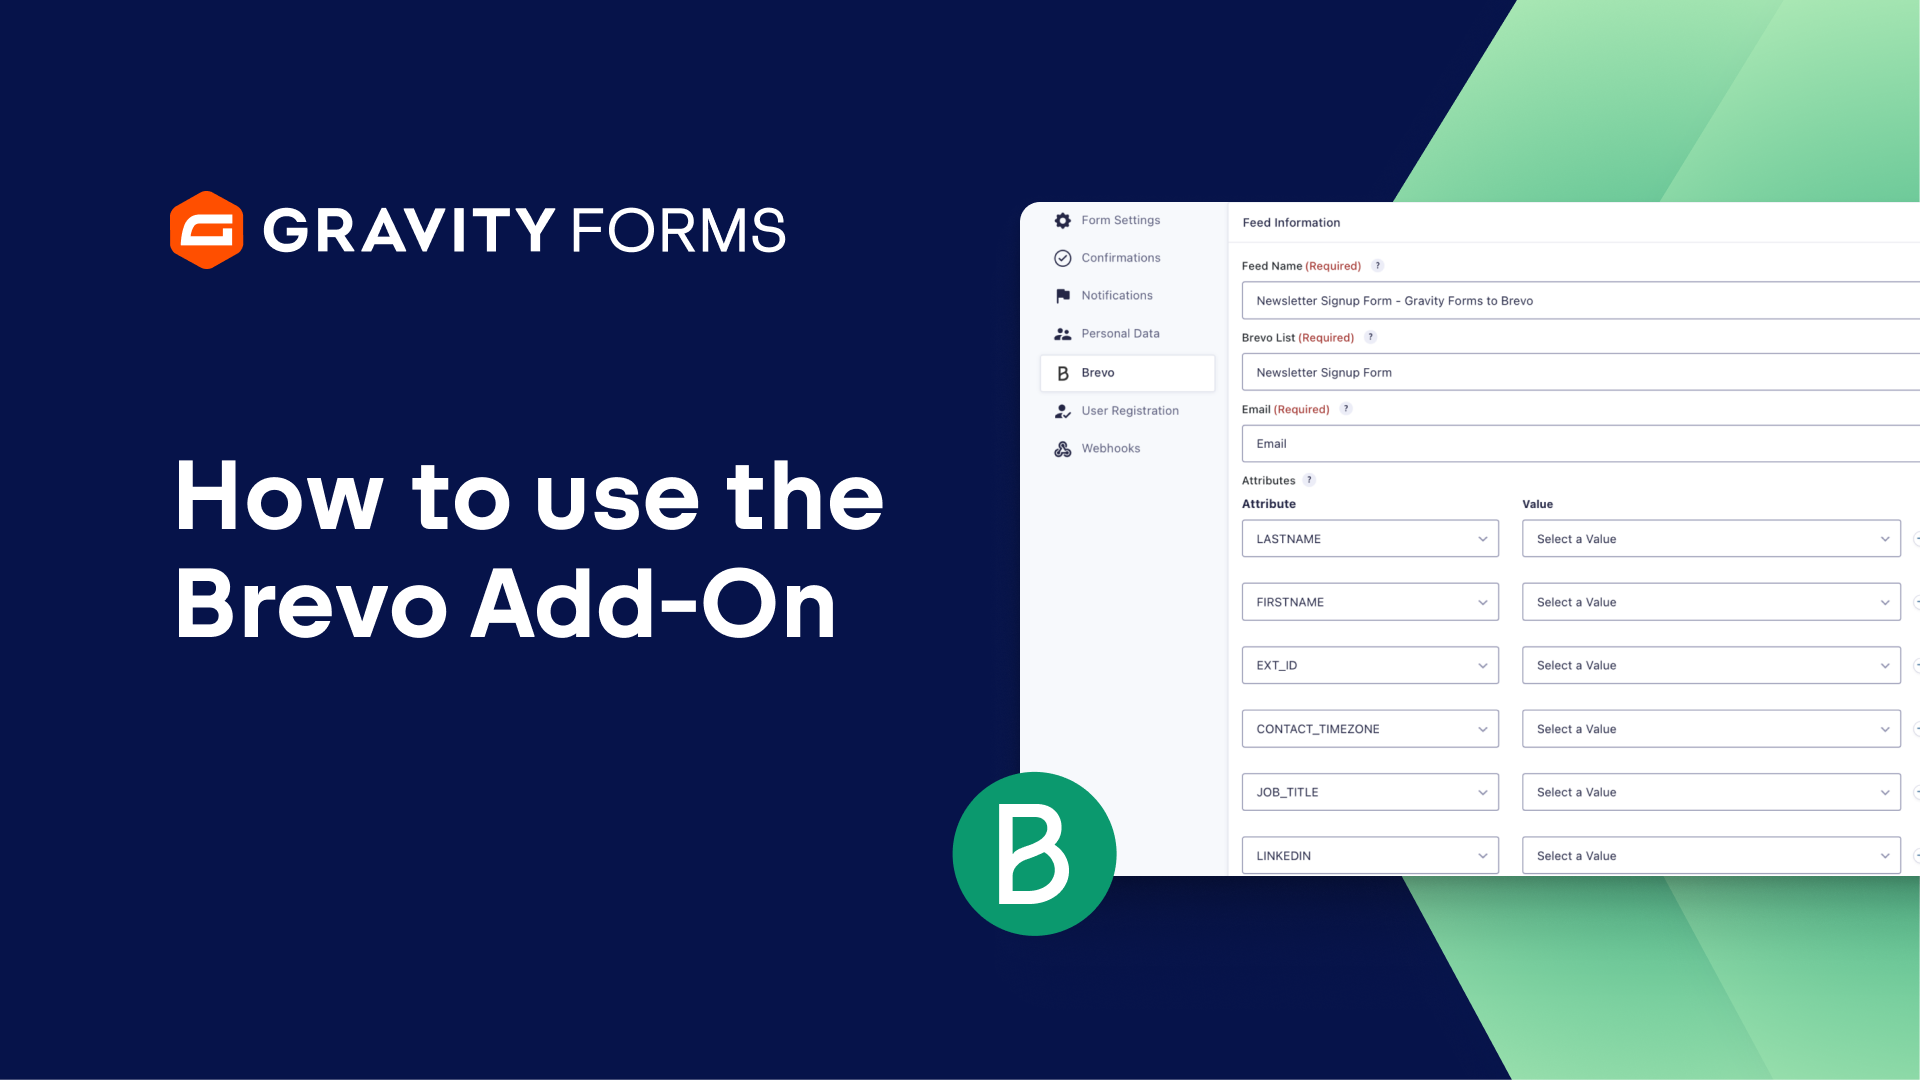
Paste your key in the API Key field and save your settings. Next, head to the form settings for the form you’d like to use with Brevo. For this example, I’m going to use a Newsletter Signup Form.
Click ‘Add New’ to create a new feed that you can use to send data from this form to Brevo.
From here, you will want to give your feed a descriptive name and select the Brevo List you would like to add your contacts to. Then, be sure to check that the ‘Email’ field is mapped to the appropriate form field.
Next you can map the rest of your form fields to their appropriate Brevo attributes. If you need to create any new attributes, simply head to your Brevo dashboard and click Contacts. Then, select Settings and click on Contact attributes.
From here, you can create new attributes and they will automatically show up within Gravity Forms. For instance, I’ll create a Newsletter Frequency attribute and assign it the Multiple-Choice Attribute type. Now, when I go back to my feed settings, I’ll be able to map this attribute to the Newsletter Frequency choice field on my form.
You also have the option of enabling Double Opt-In. If enabled, Brevo will send a confirmation email to the user after they submit this form and only add them to your list upon confirmation. For Double Opt-In to work, you’ll need to set up a form within your Brevo account that uses the same list as this feed and has Double Opt-In enabled.
For example, I’ll head to my Brevo account, select Contacts, then select Forms. From here, I’ll create a simple Newsletter Confirmation Form and select the same Brevo list I used with my feed.
Then, I’ll simply use the default double opt-in template to create the form. If I go back to my WordPress dashboard, I’ll then be able to select my newly created Email Template.
You’ll also need to enter a Redirect URL that the user will be sent to when they click the link in the double opt-in email. I’ll set mine to a simple thank you page.
Finally, you can also enable conditional logic and only process this feed when certain conditions are met, such as the user agreeing to your privacy policy.
When you’re done, be sure to save your settings and you’re good to go.
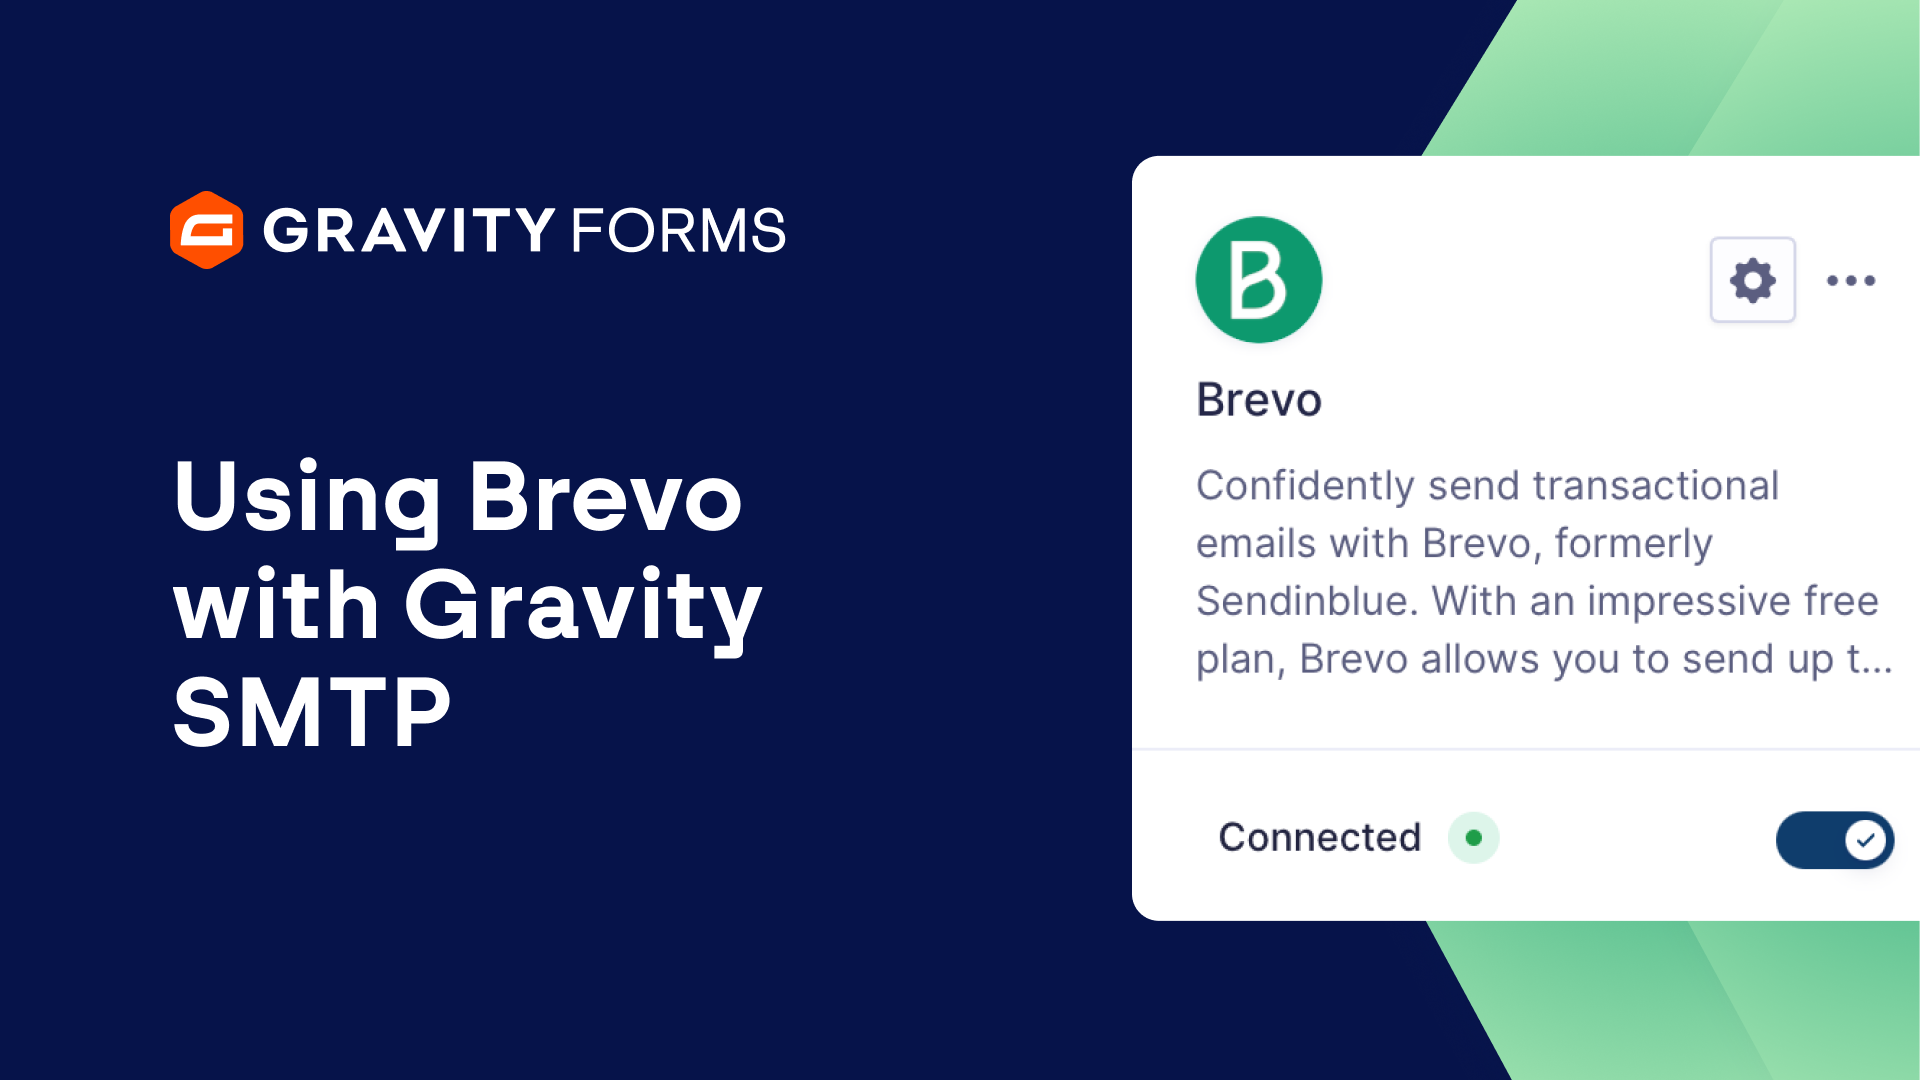
If you’d like to take things a step further, you can fully integrate Brevo into your workflow by using the Gravity SMTP Brevo integration to handle your transactional emails.
We have a full guide on setting it all up, linked below.
Thanks as always for watching, I’ll see you in the next video.
Summary
Brevo is a powerful, all-in-one email marketing platform that can help you grow your audience, nurture customer relationships, and automate your marketing efforts. In this video tutorial, we’ll show you how to get up and running with the Gravity Forms Brevo Add-On.
If you’d like to fully integrate Brevo into your workflow by using the Gravity SMTP Brevo integration to handle your transactional emails, be sure to check out our video on setting it all up, linked here.