For more information on using the Gravity Forms PayPal Checkout Add-On, check out our docs site.
PayPal and Gravity Forms make it easy to accept payments on your WordPress website.
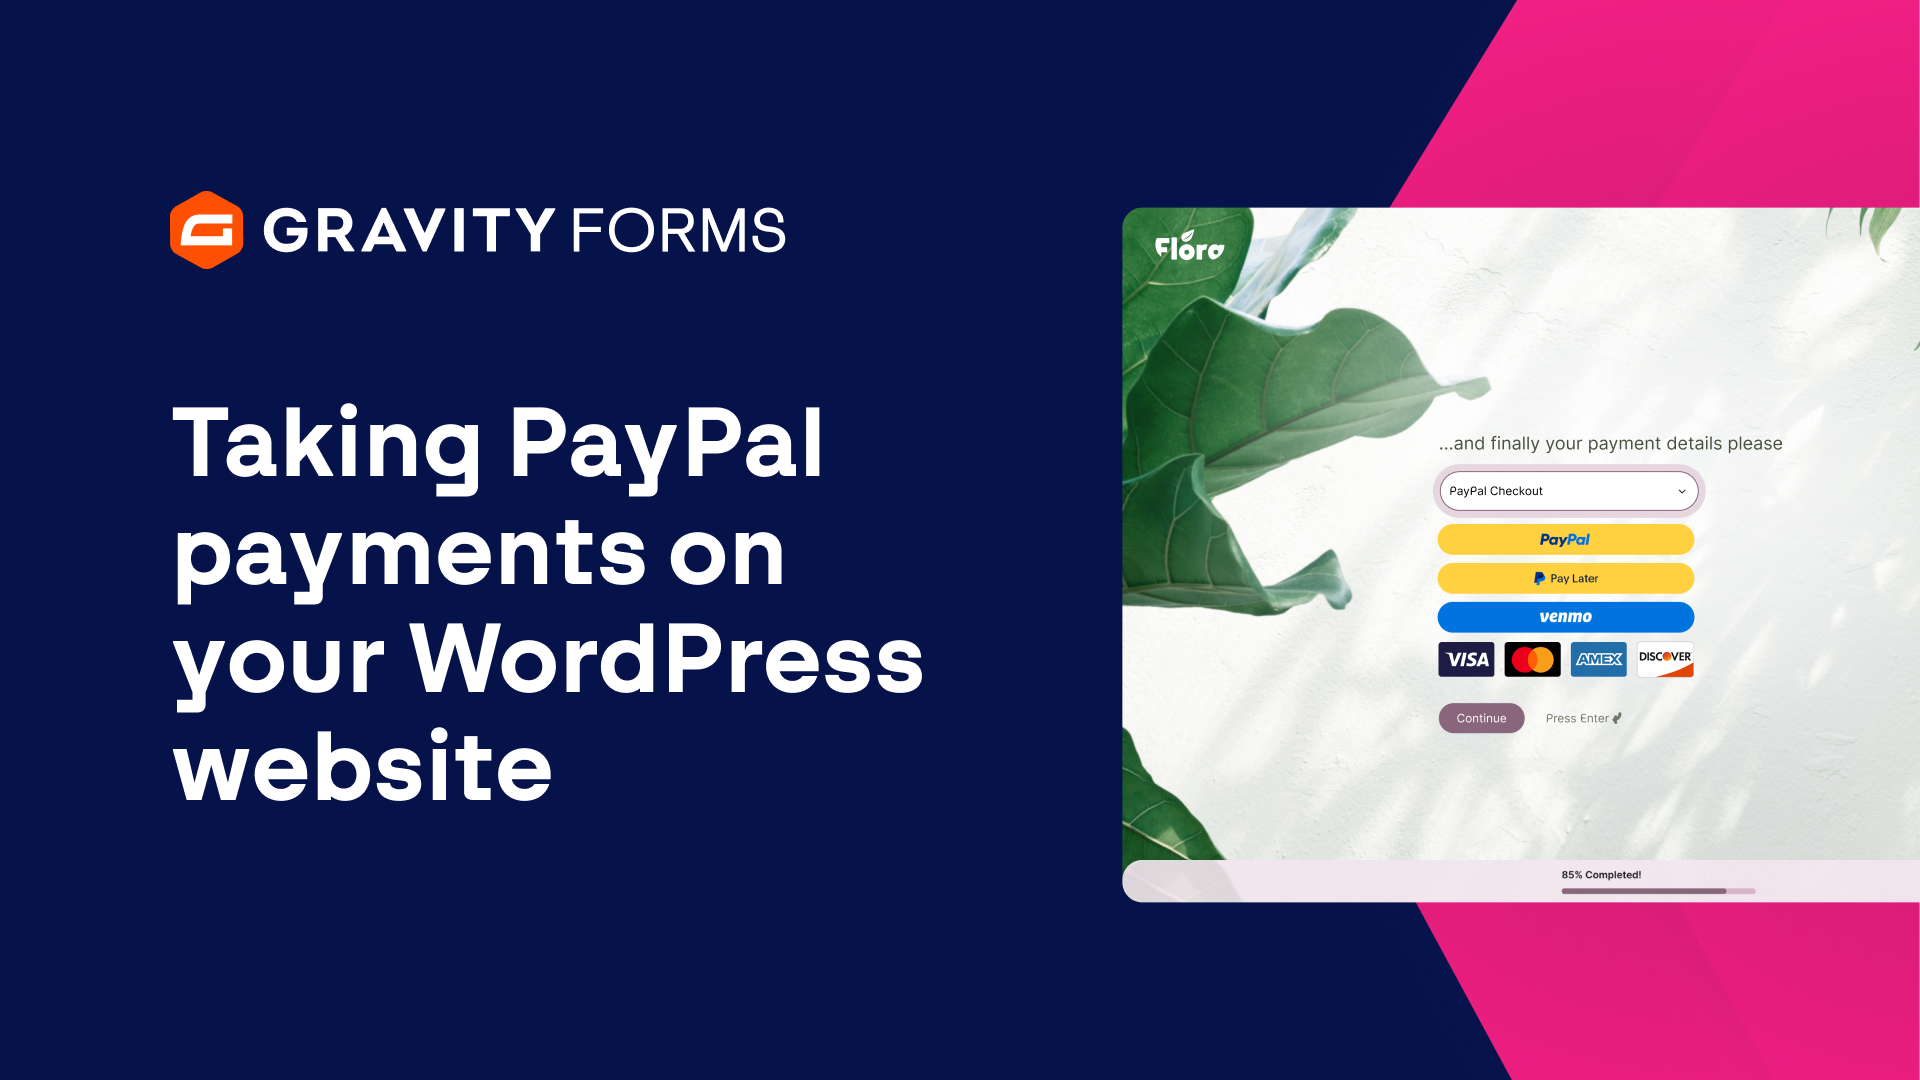
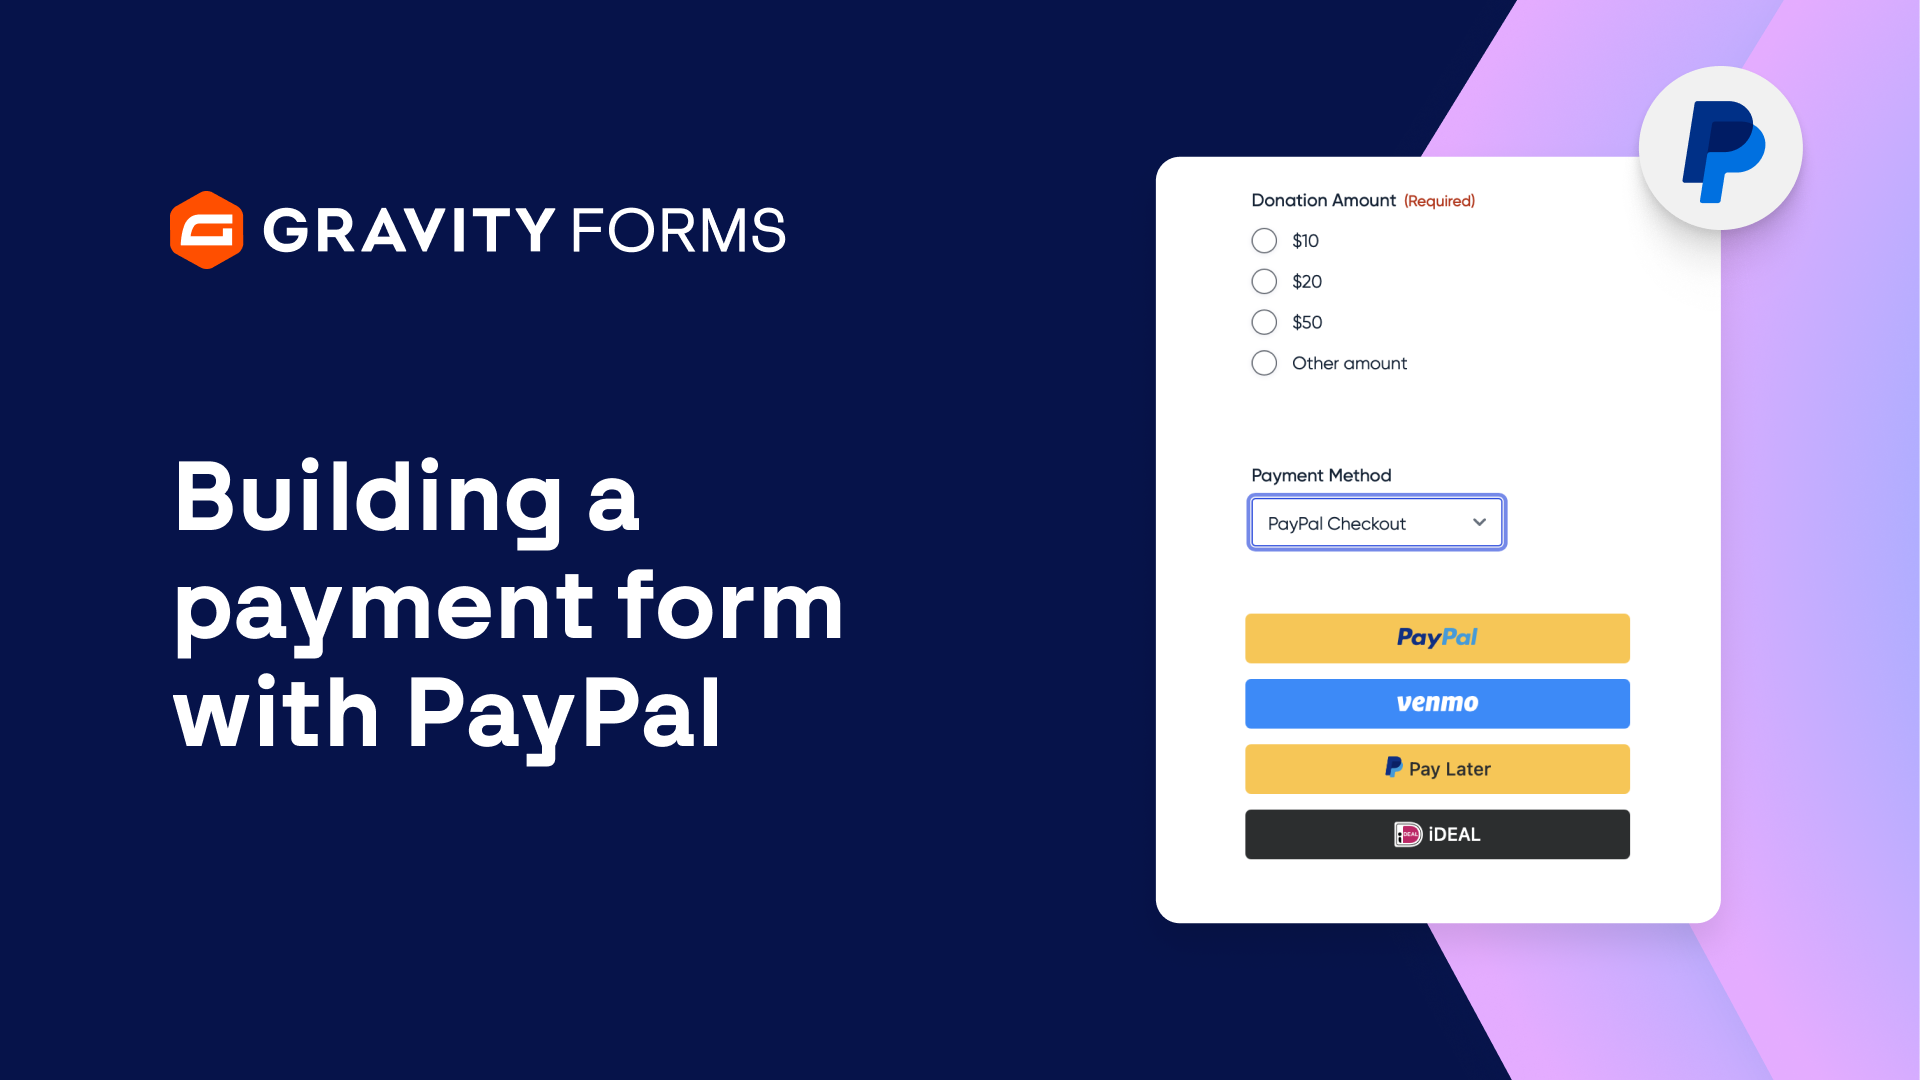
With the Gravity Forms PayPal Checkout Add-On, you can accept payments via PayPal, Venmo, Pay Later, and country specific payment options on nearly any device.
In this video, we’ll take a look at everything you need to start accepting payments with PayPal.
To get started, head to your WordPress dashboard and navigate to the Add-Ons page.
From there, install and activate the PayPal Checkout Add-On.
Then, head to the Gravity Forms settings and select ‘PayPal Checkout’.
From here, you can select ‘Connect with PayPal’ to sync Gravity Forms with PayPal.
Next, you can easily create a new form using the ‘PayPal Checkout Form’ template.
You can tailor this form to your liking, including customizing the products you are selling and the appearance of the PayPal Smart Payment Buttons.
When you’re done customizing everything, save your changes and head to this form’s settings and select ‘PayPal Checkout’.
From here, you can edit the default feed for this form to configure the data that it will send to PayPal.
Be sure to give the feed a descriptive name, then set the Transaction Type to ‘Products and Services’.
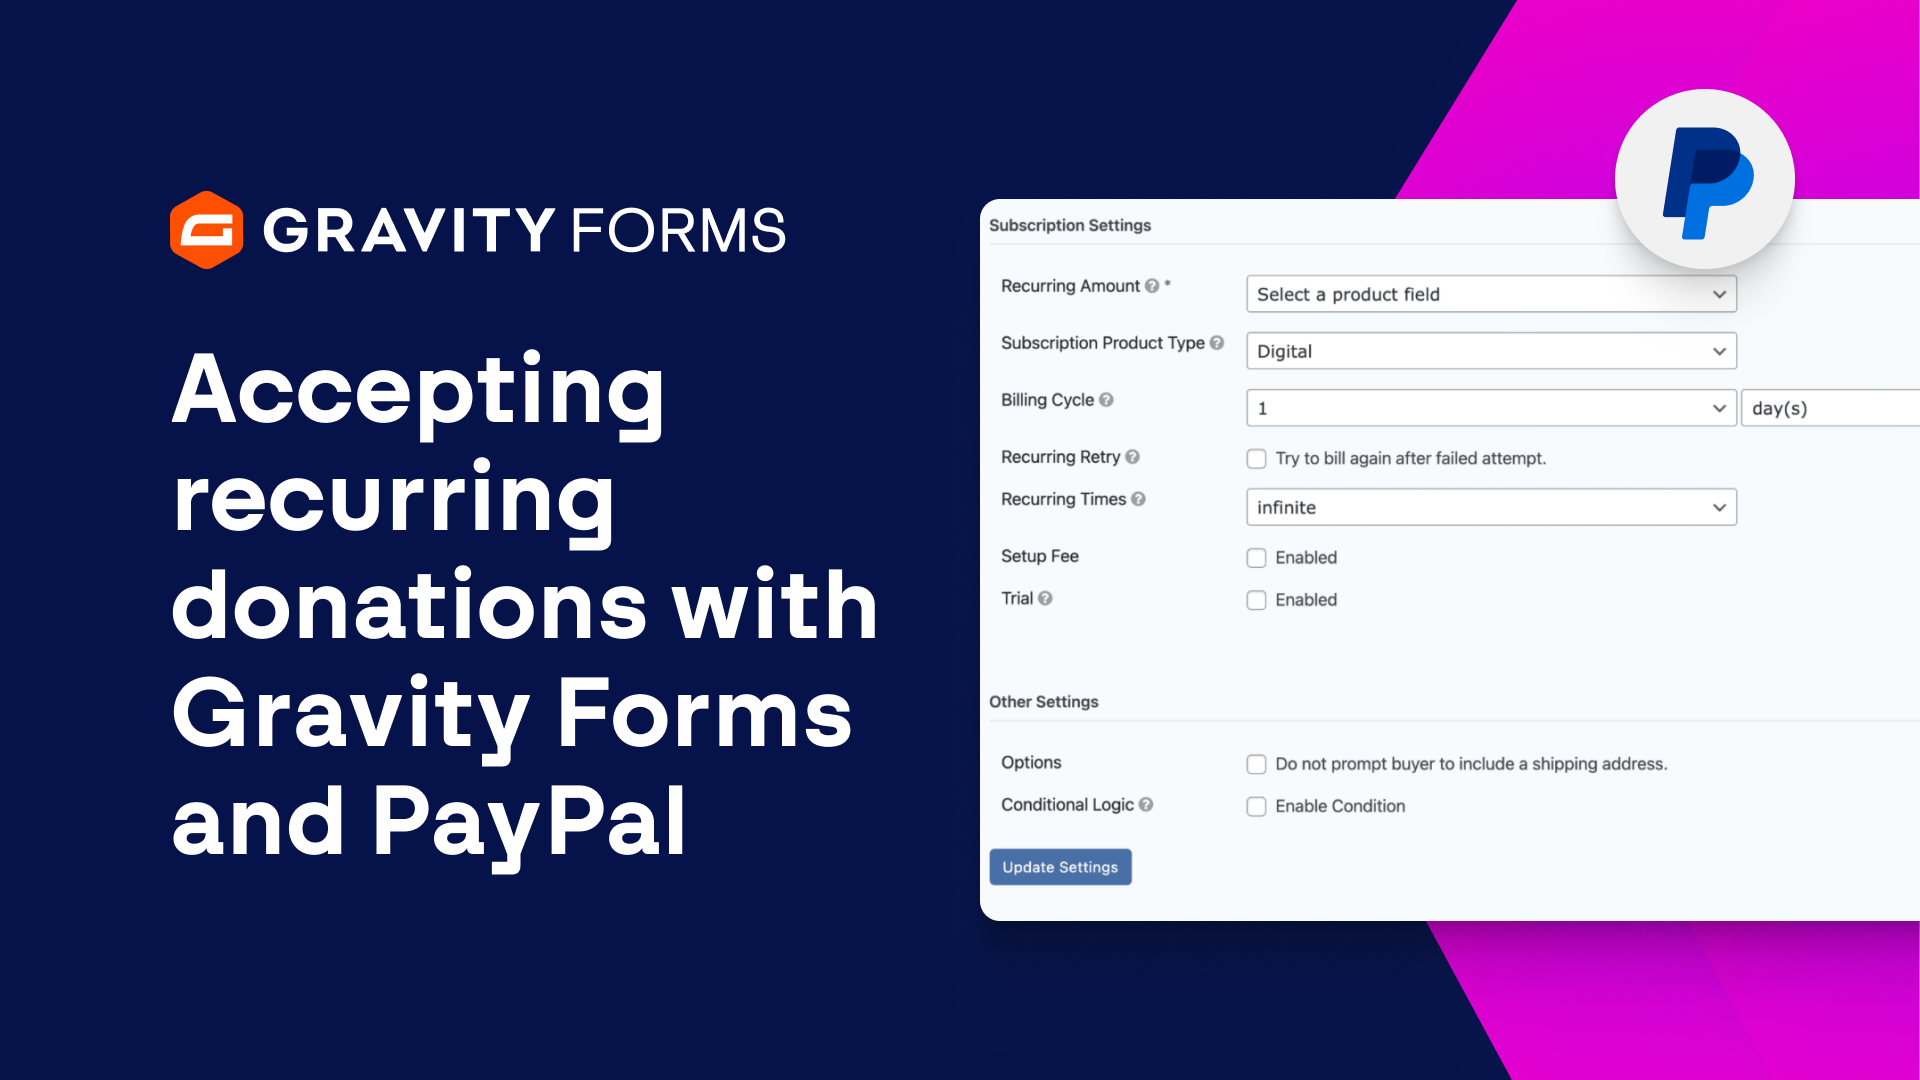
If you are looking to set up a recurring subscription, be sure to check out our detailed guide, linked in the video summary.
Next, map the Payment Amount to its corresponding form field and choose whether or not you want to enable the ‘Authorize only’ option.
If this option is enabled, payments will only be authorized when a user submits this form.
The payment can then be captured by clicking the ‘capture’ button on the entry details page.
Then, map the Billing Information fields to their corresponding form fields and select whether or not you would like to prompt the buyer to include a shipping address.
There are further conditional logic and user registration options that you can customize, if needed.
When everything is good to go, save your settings and embed your form on a page or post.
Now, thanks to Gravity Forms and PayPal, you are ready to start accepting payments on your site.
For more guides and tutorials on all things Gravity Forms, be sure to check out our video library.
From everyone on the team at Gravity, thank you for watching!
Summary
PayPal and Gravity Forms make it easy to accept payments on your WordPress website. In this tutorial, we’ll show you how to use the Gravity Forms PayPal Checkout Add-On to start accepting payments via PayPal, Venmo, Pay Later, and country specific payment options on nearly any device.
If you are looking for a guide on setting up recurring payments with PayPal, check out this video.