

No matter what your small business is about, web forms should be an important part of your digital strategy.
High-quality forms can help you create better experiences for your customers, while also streamlining and automating your own workflows on the backend. You can use forms to generate leads, collect payments, register users for your website or events, gather customer insights, and lots more.
Let’s dive into some of the types of form your business can use to support growth and how to optimize those forms for better conversions and user experience. Importantly, we’ll end with a step by step tutorial, helping you get set up with Gravity Forms and HubSpot.
Why Gravity Forms and HubSpot Make a Perfect Pair for WordPress Forms
If you want to create any type of form on WordPress, you can use the Gravity Forms WordPress plugin.
With Gravity Forms, you can design your own forms using a drag-and-drop interface and a variety of different field types.
You can also go beyond basic web forms thanks to useful features such as conditional logic, calculation fields, and more.
More importantly, Gravity Forms also lets you integrate your forms with other tools and services that your business is using so that you can automate key actions.
For example, you could collect payments with Stripe, add tasks to your project management software, store leads in your HubSpot CRM, and more – all without lifting a finger.
Pair Gravity Forms With HubSpot for Full Automation
Because Gravity Forms offers a dedicated integration with HubSpot, you can automatically sync your form submissions straight to HubSpot, including mapping form fields to custom fields in HubSpot.
By pairing these two tools, you can use Gravity Forms to collect information from customers and access other integrations (such as in-form payments) while still being able to benefit from all of the sales, marketing, and customer service features in HubSpot.
For example, you could use the form that you build with Gravity Forms to initiate a marketing automation flow in HubSpot.
Key Tips to Optimize Your Forms for Conversions
Before we get into the specific types of forms that you can use to grow your business (and how to create those forms), let’s discuss some general tips for how to optimize your forms for conversions.
That is, how to optimize your forms to make it more likely that people submit them. After all, you need people to actually submit your forms if you want to use forms to grow your business!
Understanding these principles before you start building your forms will help you get things right from the beginning.
To see how effective a form is, you can focus on its conversion rate, which is the percentage of people who actually submit the form after viewing it.
Here are some general tips to optimize any web form:
- Keep forms as short as possible — As a rough rule, the more form fields your form has, the less likely people are to fill it out. That doesn’t mean you should leave out important fields, but it does mean you should leave out unnecessary fields whenever possible.
- Split long forms into multiple pages — If you must create a longer form, you can split it into multiple pages to make it more accessible to users.
- Personalize form experiences — Whenever possible, you want to personalize the form to the individual user. Gravity Forms helps you do this with features such as conditional logic and dynamic field population.
- Use a clear call to action (CTA) — Your form submit button should have a clear CTA to drive action. For example, if you build a quote form, it would be better to use “Get Quote” instead of a generic “Submit.”
- Address any doubts — Make sure to address any doubts that the person might have. For example, if you ask for a person’s email, you could include a notice that you’ll never send spam emails.
For more information on improving form conversion rates, check out this article – Increase Form Conversion Rates with these Five Simple Tips.
Forms for Your Website
While your business might have unique needs when it comes to forms, here are some example form types that can benefit most businesses.
Payment Forms
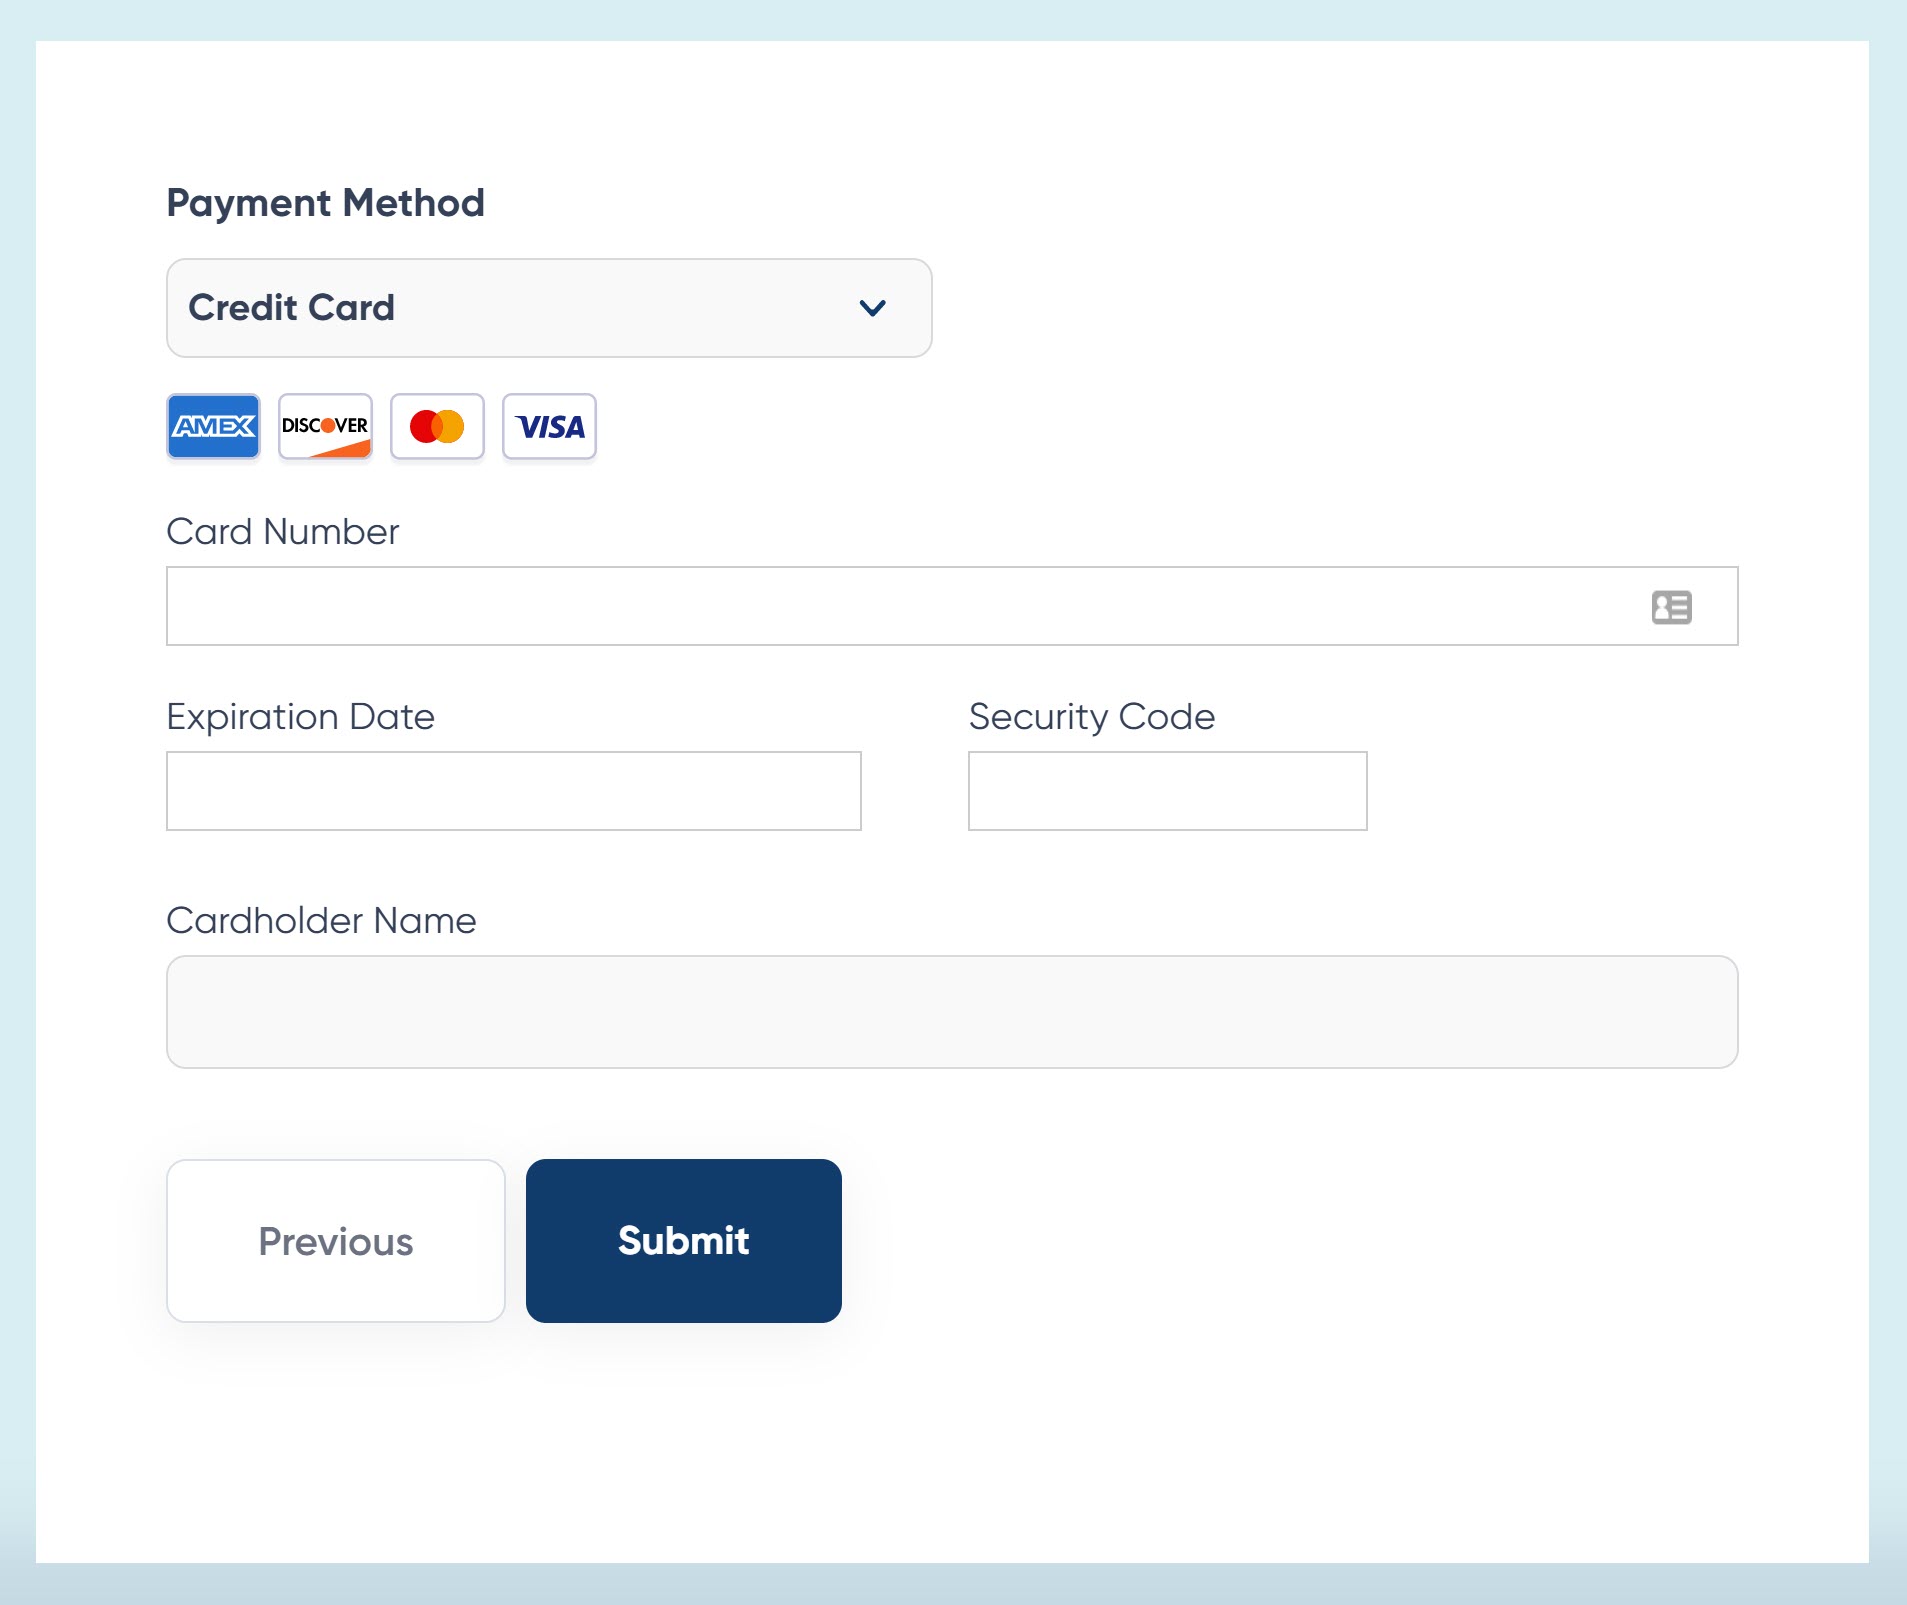
If you sell products or services, you can create a form to streamline how you sell online.
For example, maybe you sell some type of productized service. Rather than just having clients contact you and then invoicing them at a later date, you could create a sales form that accepts payment right away and streamlines the entire process.
What’s more, you could also build other automations into your form. For example, after a customer pays for the service, you could have your form automatically add the customer to your CRM, trigger a new task in your project management software, and more.
Or, you could automatically start the fulfillment process for physical products.
This helps you not just get paid quickly, but also streamline your entire sales workflows.
Gravity Forms can also integrate with popular payment platforms such as Stripe, PayPal, and others. Via these integrations, you can also offer other payment options such as Apple Pay, Google Pay, Venmo, and so on.
You can also incorporate calculations and discount codes into your forms, so you can adjust the price of your product or service based on a person’s inputs.
For more information on Gravity Forms integrations, read this article – Gravity Forms Payment Add-Ons: A Breakdown.
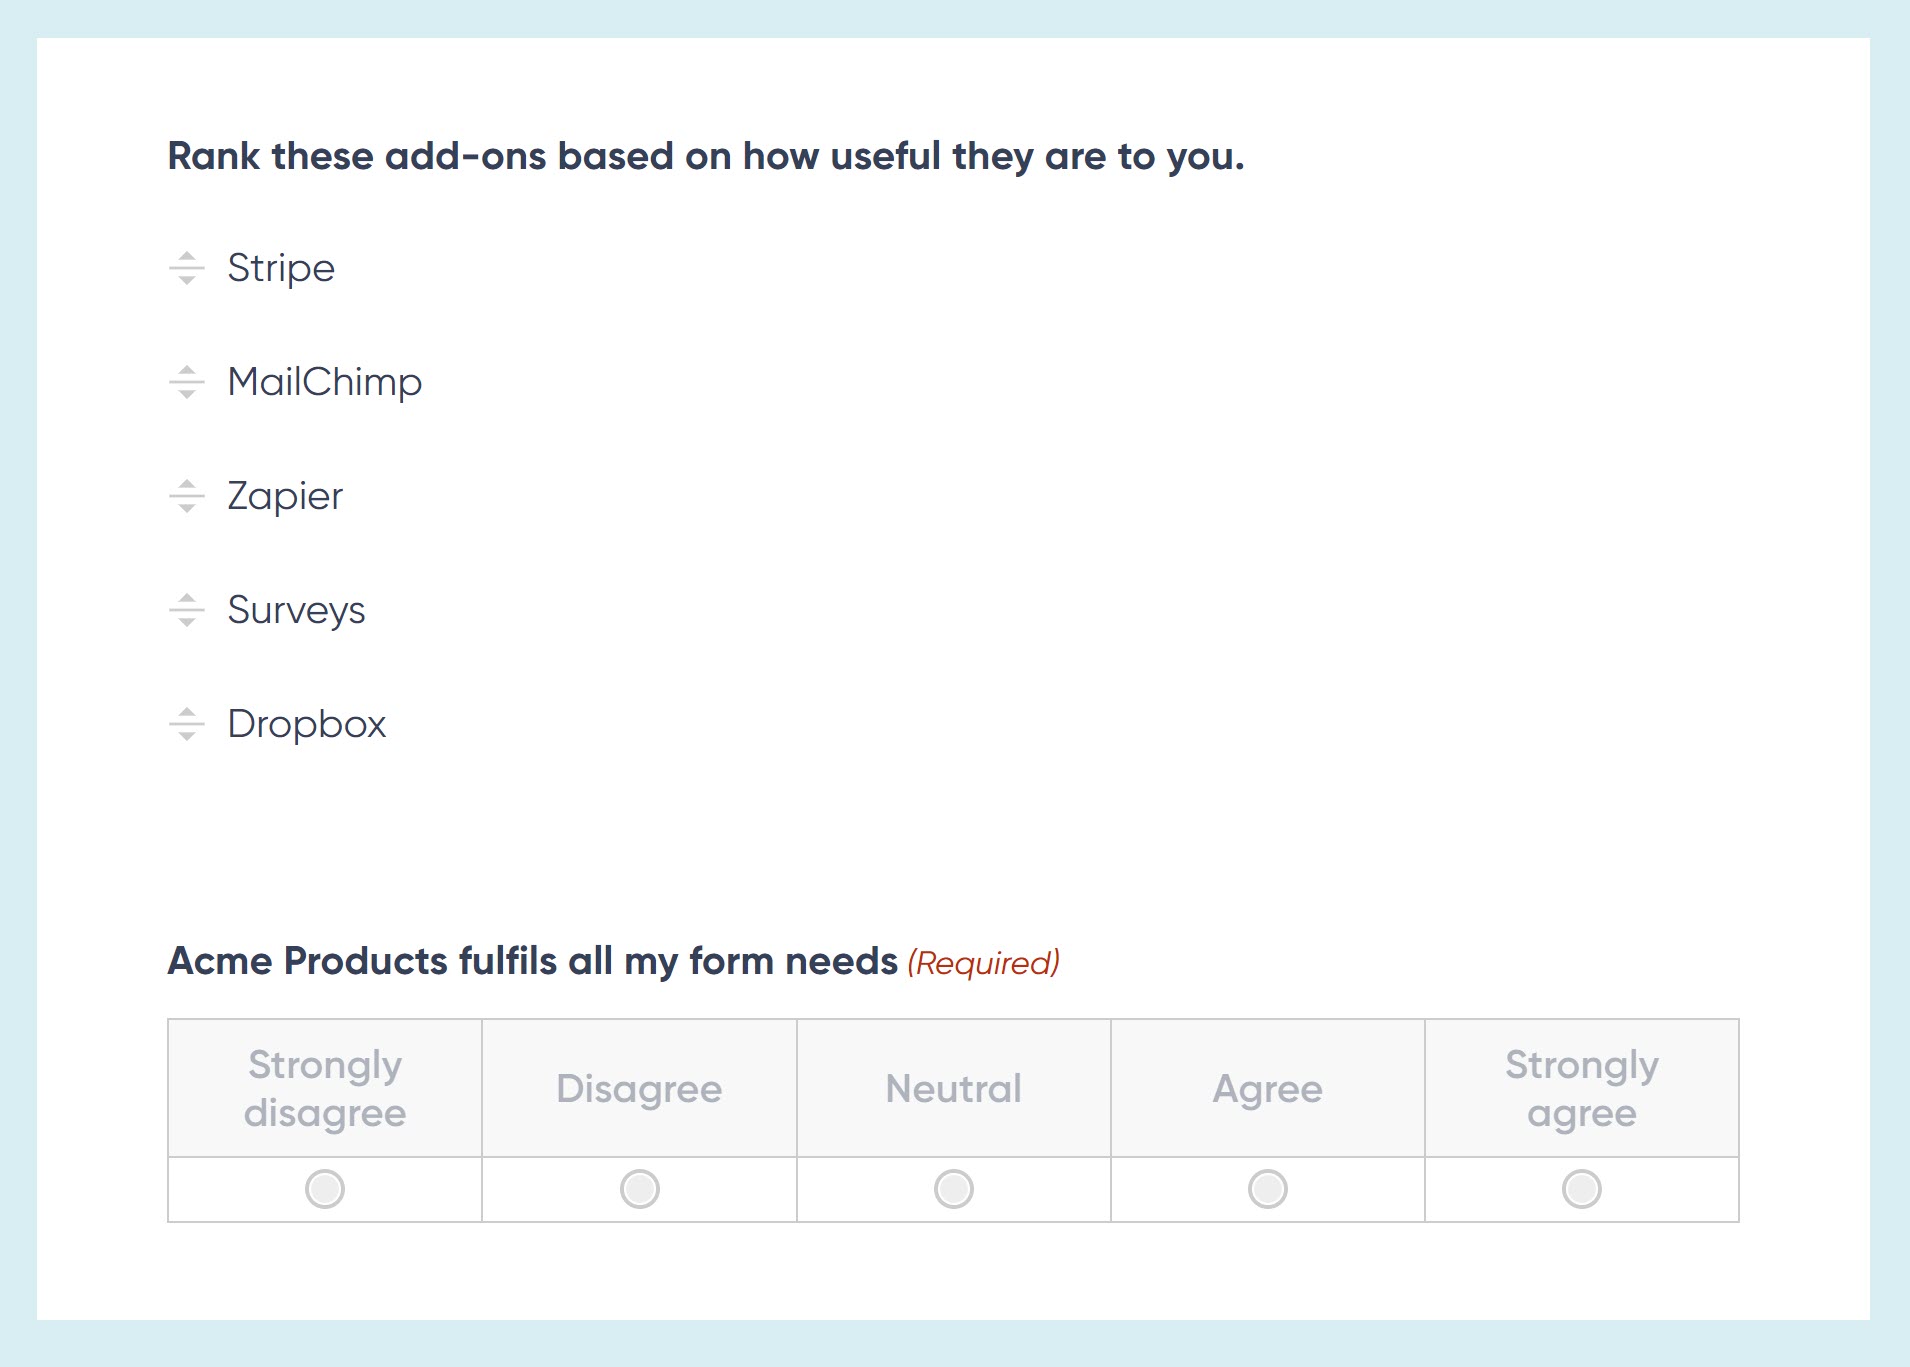
Customer Surveys
Gathering insights from your customers can be a great way to grow your business and better match what your customers are looking for.
You can learn what you’re doing well, where you could improve, and where you might want to focus your efforts going forward.
Here are some examples of the types of surveys that you can create to support your business:
- Product or service feedback
- Customer onboarding
- Churn questionnaire
- Market research
- Employee engagement
To gather these insights, you can .
With the Gravity Forms Survey Add-On, you can select from 8 survey field types, including Likert, Rank, Rating, and many more, helping you create surveys that are tailored to your business and gather the insights that you need.
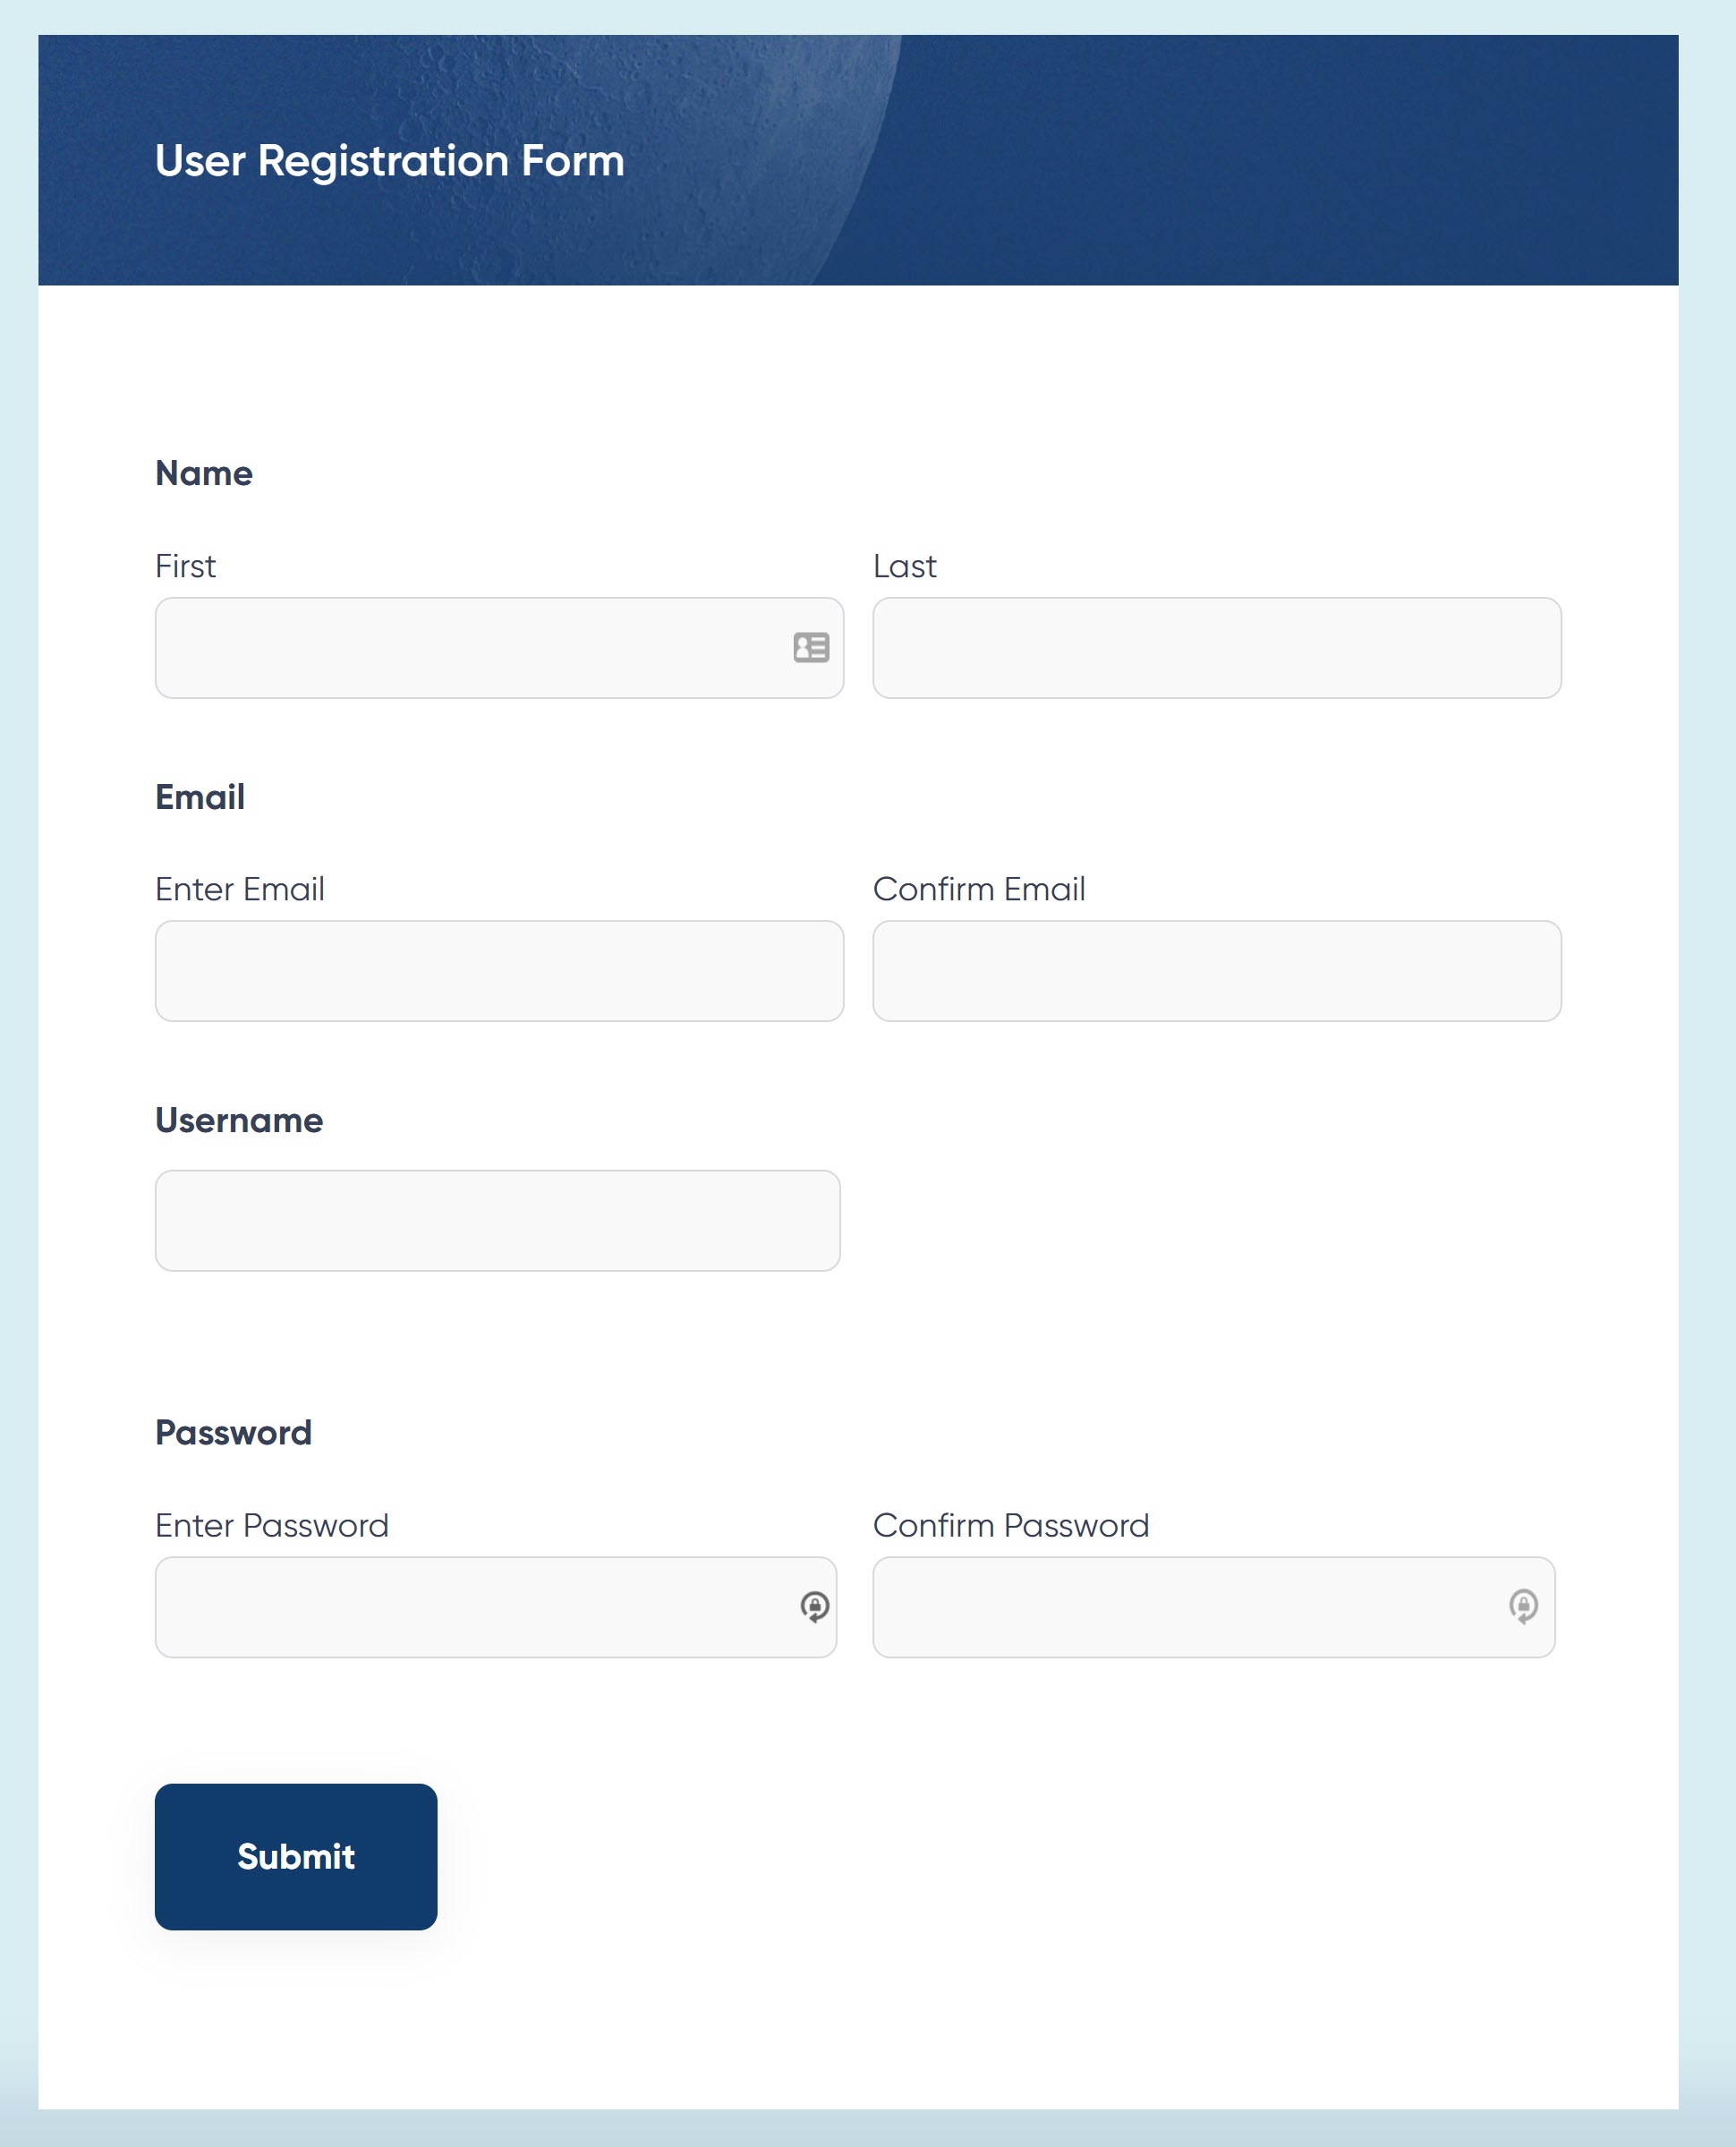
User Registration Forms
There are lots of different use cases in which you might need to implement user registration on your website.
Common examples are membership websites, eCommerce stores, online courses, internal services for employees (e.g. managing vacation requests), and so on.
Or, if you host in-person or online events, such as a webinar, you’ll want to have an optimized registration form so that people can register to join your event.
To create a solid experience for your users while also accessing more functionality, you can use Gravity Forms to design your own custom registration form.
Beyond improved user experience, here are a few of the biggest benefits of creating dedicated registration forms:
- Add custom fields to collect additional information from users.
- Sync user information to external services, such as your CRM. Combined with the custom information that you collect, this lets you segment your users as needed and stay in touch via your marketing efforts.
- Assign users different user roles to control what they can do on your site.
- Charge for access to register on your site, which is great for any type of paid community.
How to Start Building Forms on Your WordPress Site
Let’s now put theory into action with a step by step guide on how to implement any of these forms on your WordPress website.
1. Choose a Form Template
For the easiest way to get started, you’ll want to choose a pre-built form template that suits your needs.
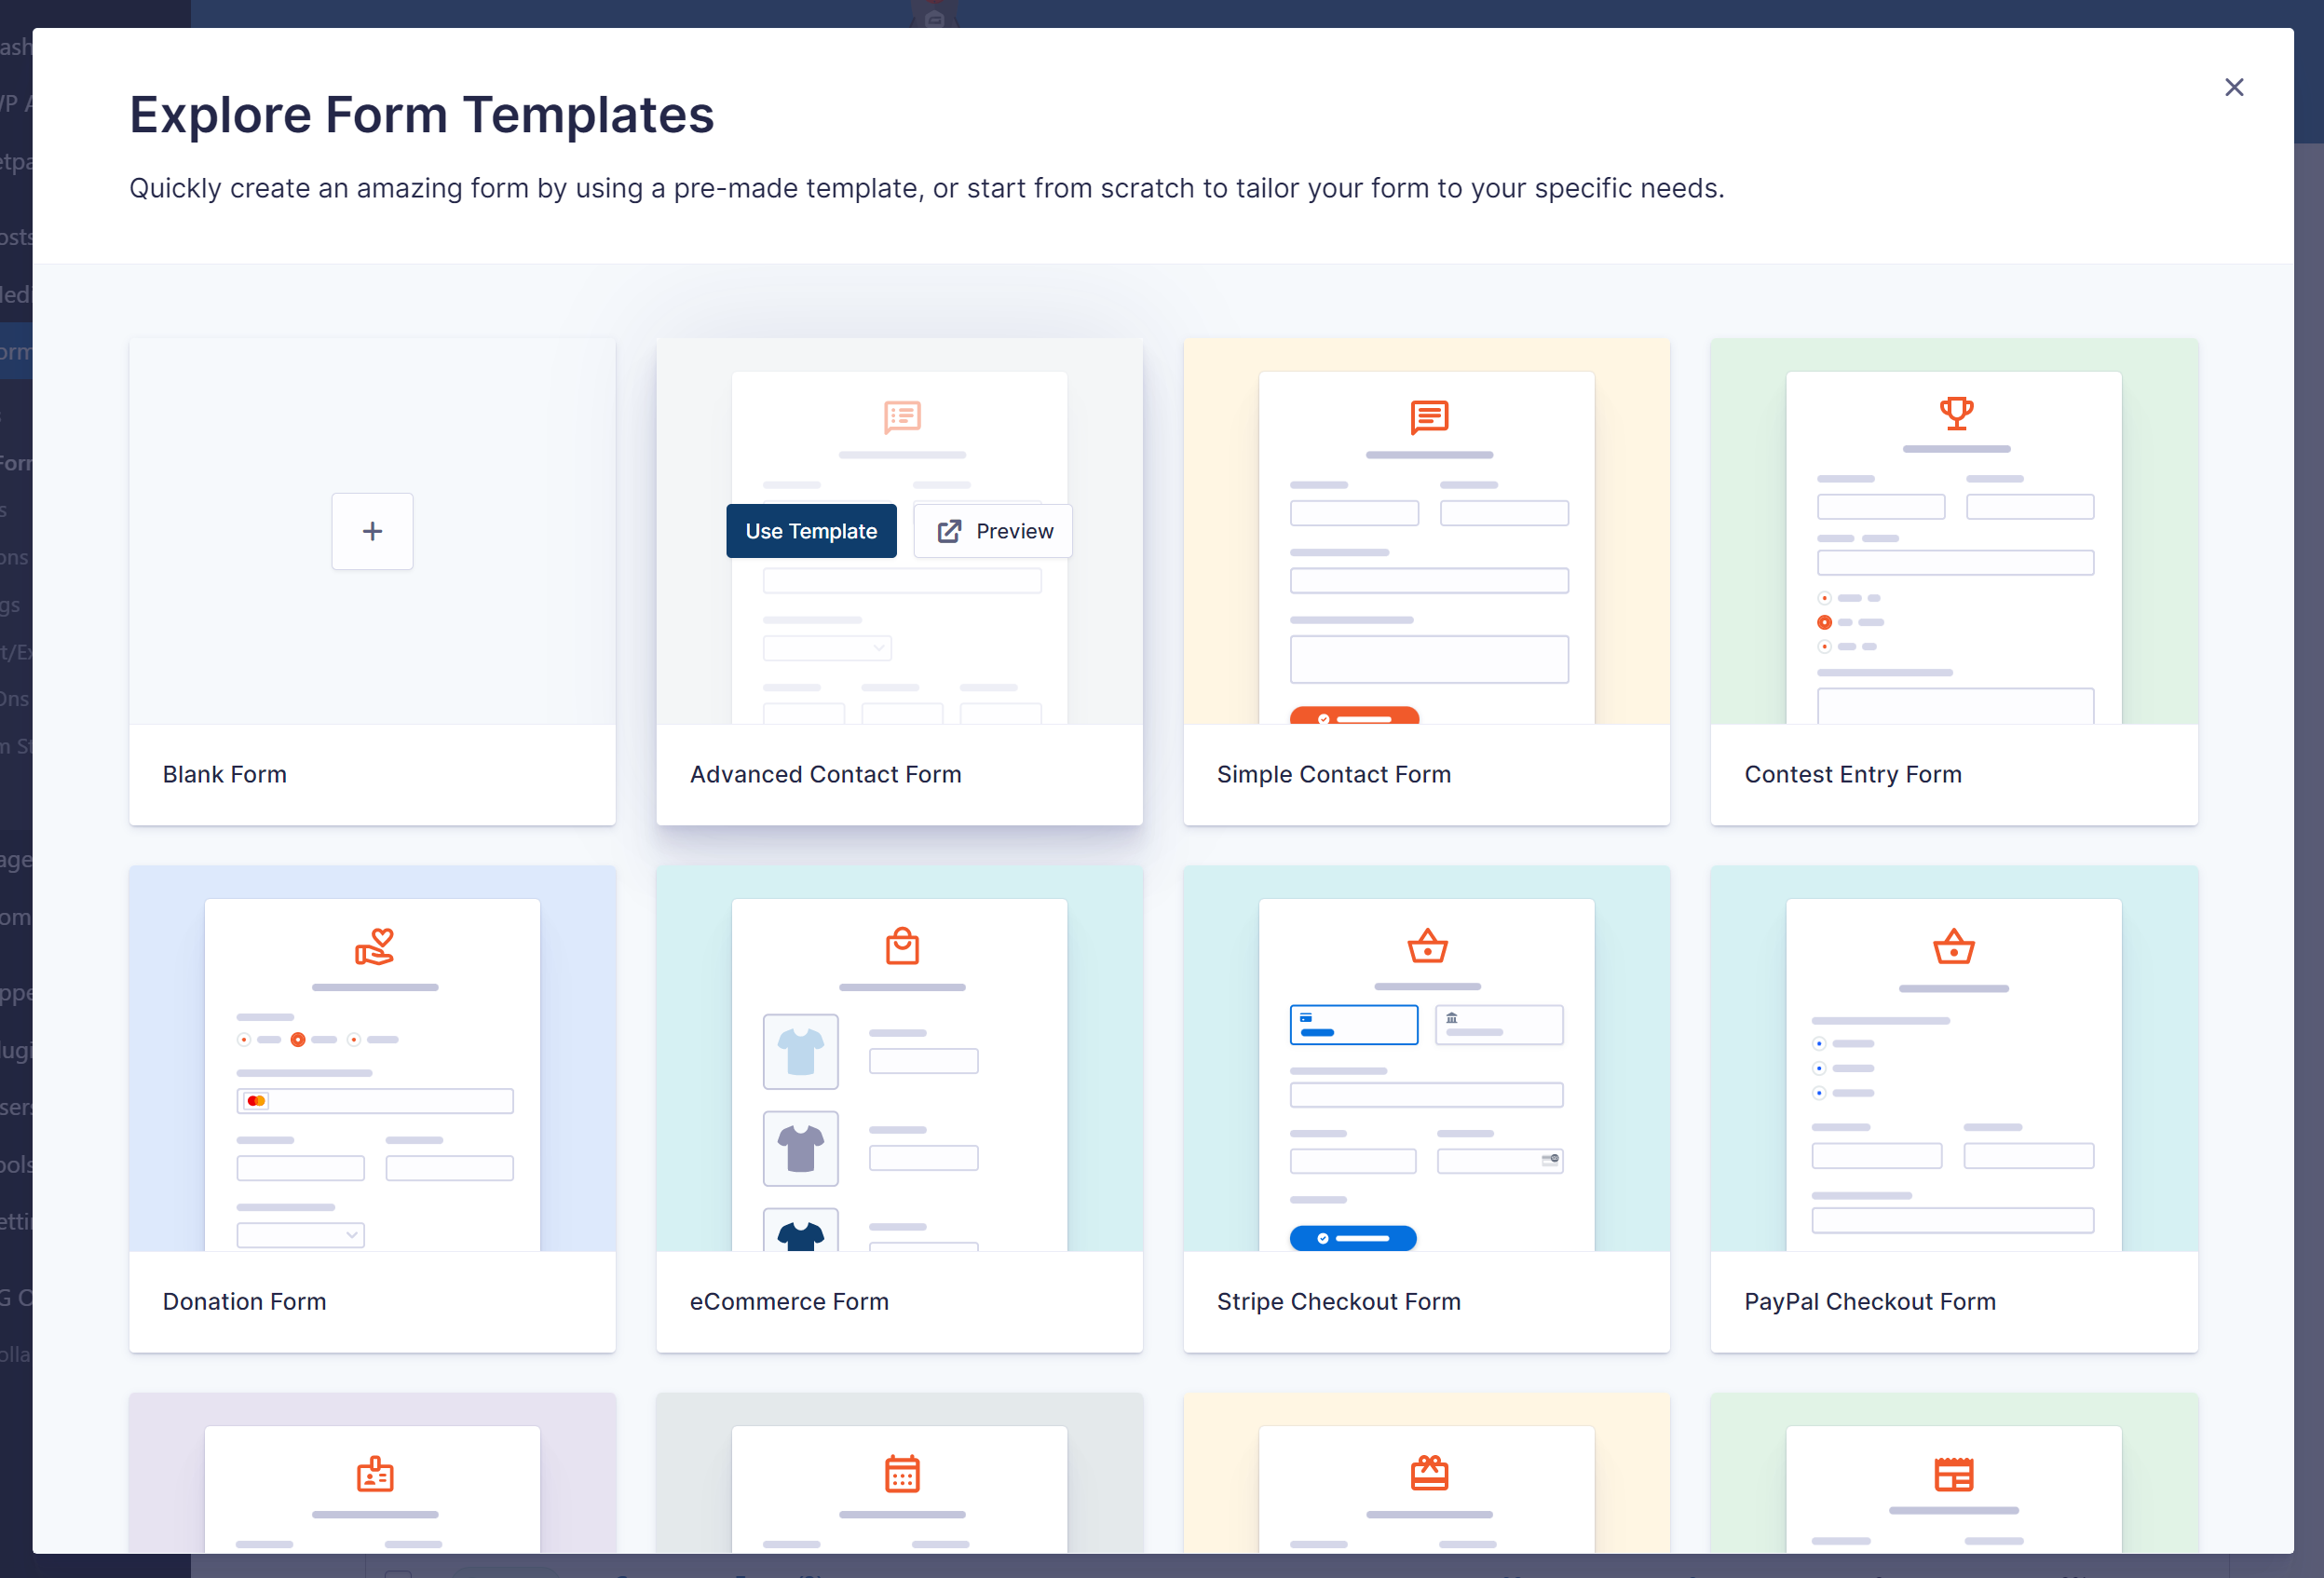
While you do always have the option of building your form from scratch, using a template will help you save time and also ensure that you don’t miss any important fields or configuration options.
Don’t worry, though – even if you start with a template, you’ll still be able to fully customize the form to match your needs. This includes adding or removing as many form fields as needed.
Gravity Forms has a built-in template library, but if you’re not yet a customer you can browse all of the form templates directly from the Gravity Forms website – click here to open the template library.
2. Customize Your Form Template to Match Your Needs
Once you’ve selected your form template, you’re ready to customize it to match your form requirements! With Gravity Forms, you can do all of this using a visual, drag-and-drop editor.
To kick things off, you’ll want to work on the form fields that will be available to your users. You can add or remove form fields, as well as configure settings for each field such as customizing field labels, enabling conditional logic for individual form fields, and much more.
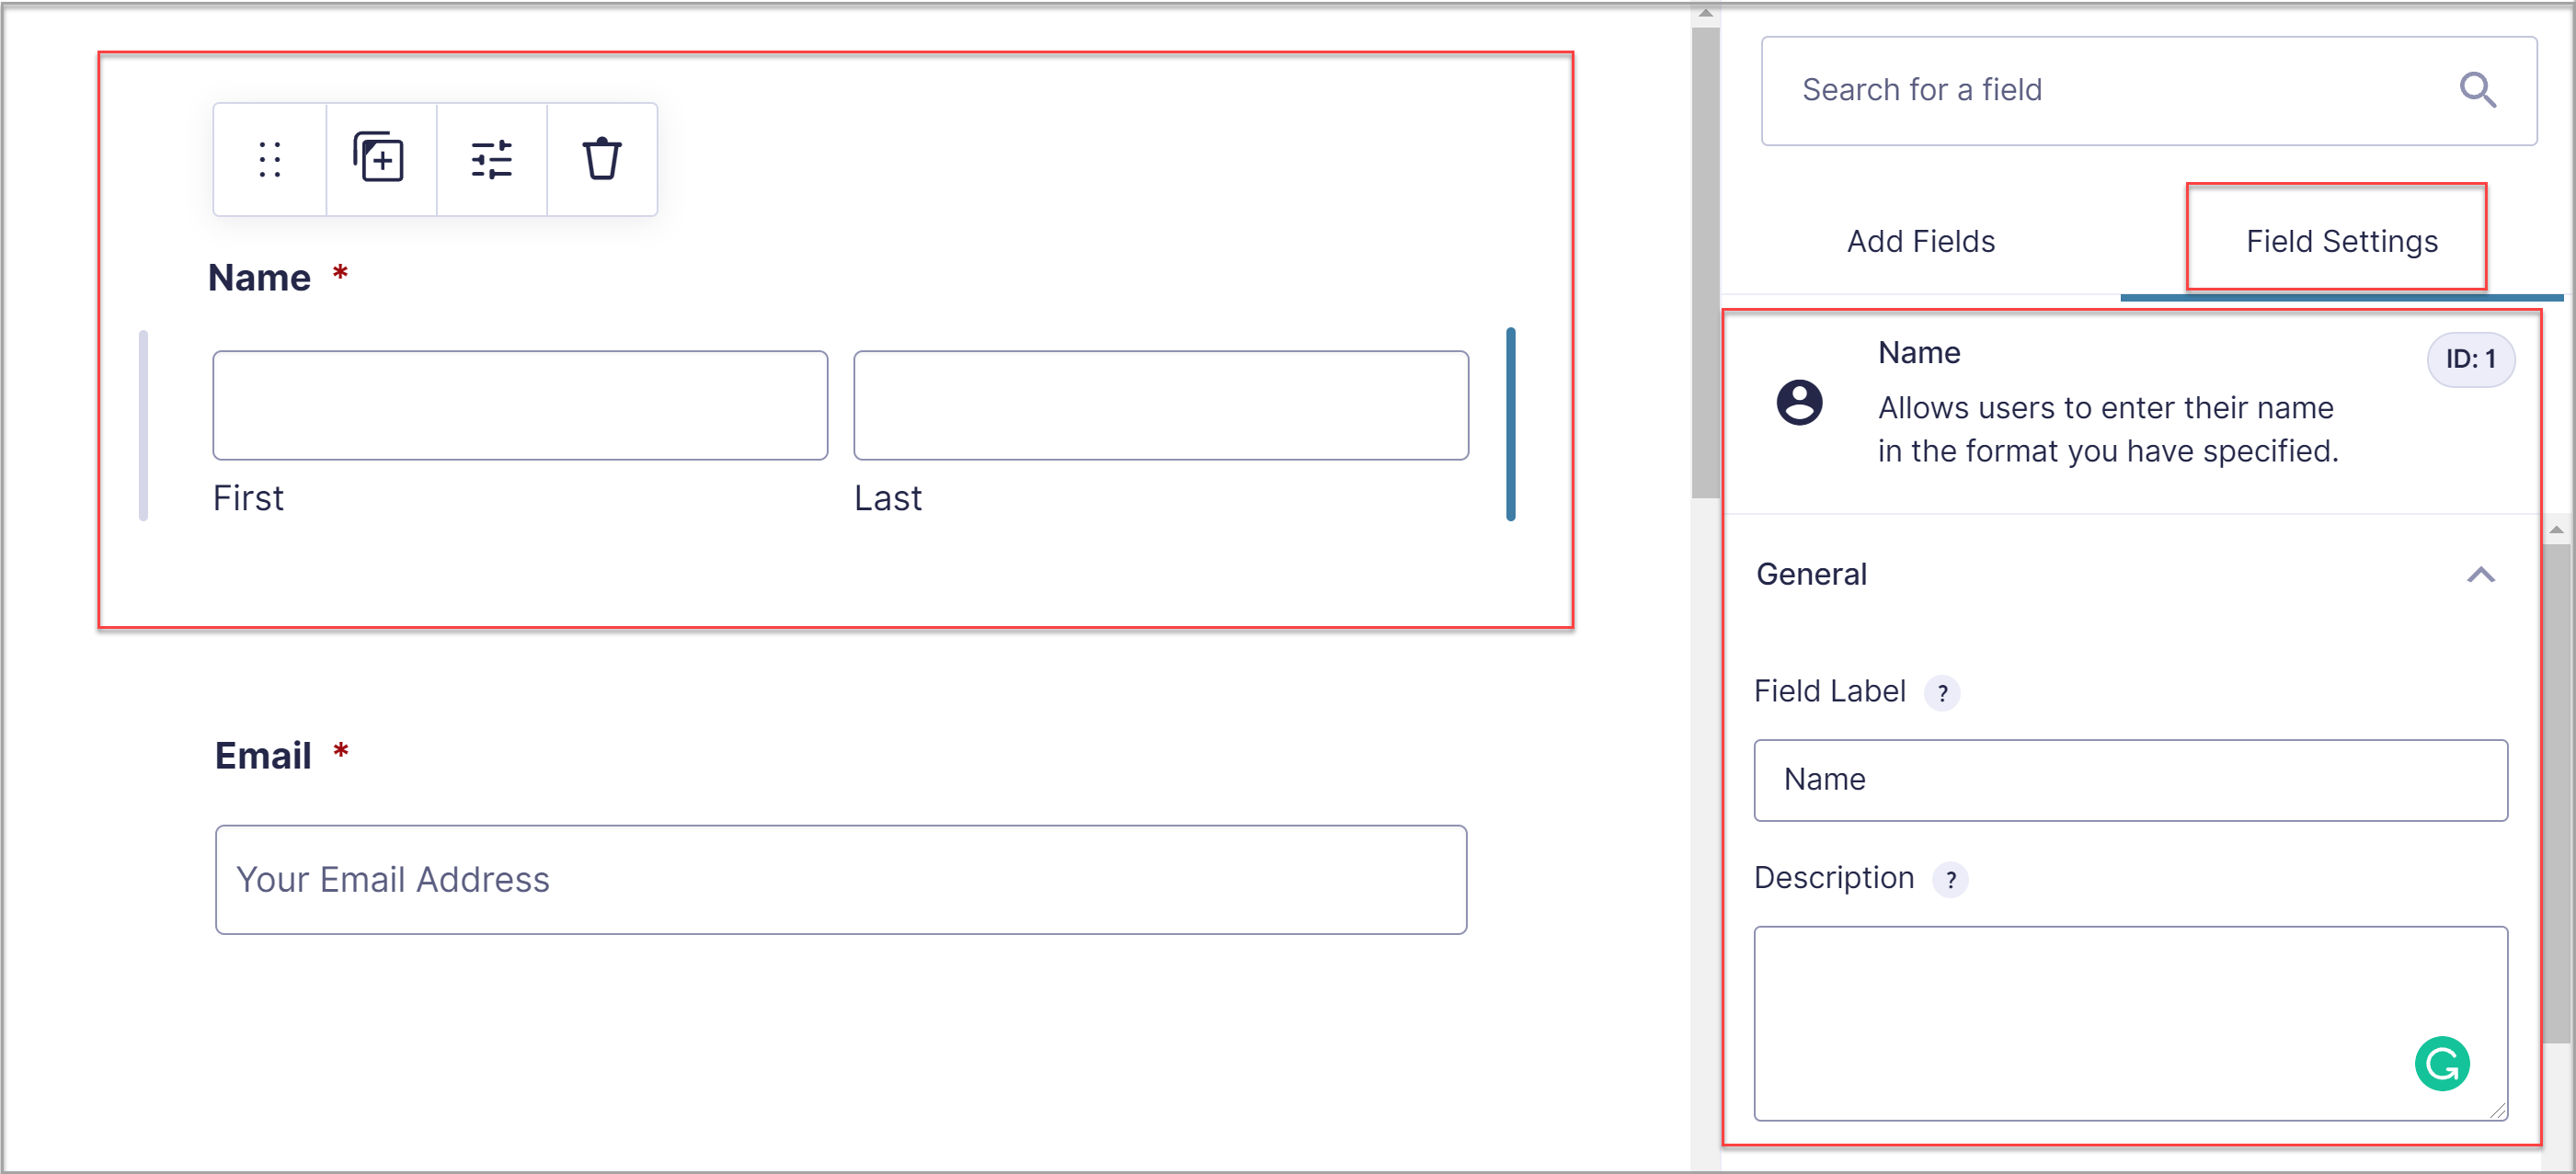
After you have created the form, you can go through the Form Settings and configure notifications and confirmation messages to ensure a positive experience for your users once they have submitted a form.
3. Connect Your Form to HubSpot
Once you’ve finalized the form, you’re ready to start setting up the backend integrations to connect this form to your workflows.
To start, you can connect your form to your HubSpot CRM so that the form will automatically sync new leads to your CRM.

Here’s how to do this:
- Install the HubSpot Add-On, which you can access from the Gravity Forms Add-On Browser, within your WordPress dashboard.
- Go to Gravity Forms → Settings → HubSpot and follow the instructions to connect Gravity Forms with your HubSpot account.
- Navigate back to your form and select Settings → HubSpot and create a new HubSpot Feed.
- Configure the settings, including mapping form fields to the HubSpot CRM.
Check out the Gravity Forms HubSpot documentation for more information on setting up the HubSpot Add-On.
4. Install Additional Add-Ons to Extend Your Form If Needed
In addition to connecting your form to HubSpot, you also might want to set up other integrations and features to help streamline your workflows.
The exact features that you might want will depend on the type of form that you’re creating.
Here are some examples:
- If you’re creating a user registration form, you’ll want to set up a connection to automatically register form submitters as WordPress users.
- If you’re creating a sales form, you might want to set up a payment processing integration so that you can accept payments directly from the form.
- If you’re building a customer insights form, you might want tools to aggregate data and analyze customer responses more efficiently.
With Gravity Forms (and most other WordPress form plugins), you’ll add these additional features by installing official or third-party add-on plugins.
With Gravity Forms, you get access to a large library of official add-ons that come directly from the Gravity Forms team, as well as lots of third-party add-ons from other developers.
Once you install an add-on, you’ll get new settings related to that add-on. For example, installing the User Registration Add-On lets you configure user registration behavior for your form:
5. Embed Your Form on WordPress
Once you’ve finished setting up your form, the final step before you can start gathering form responses is to embed that form on the frontend of your site.
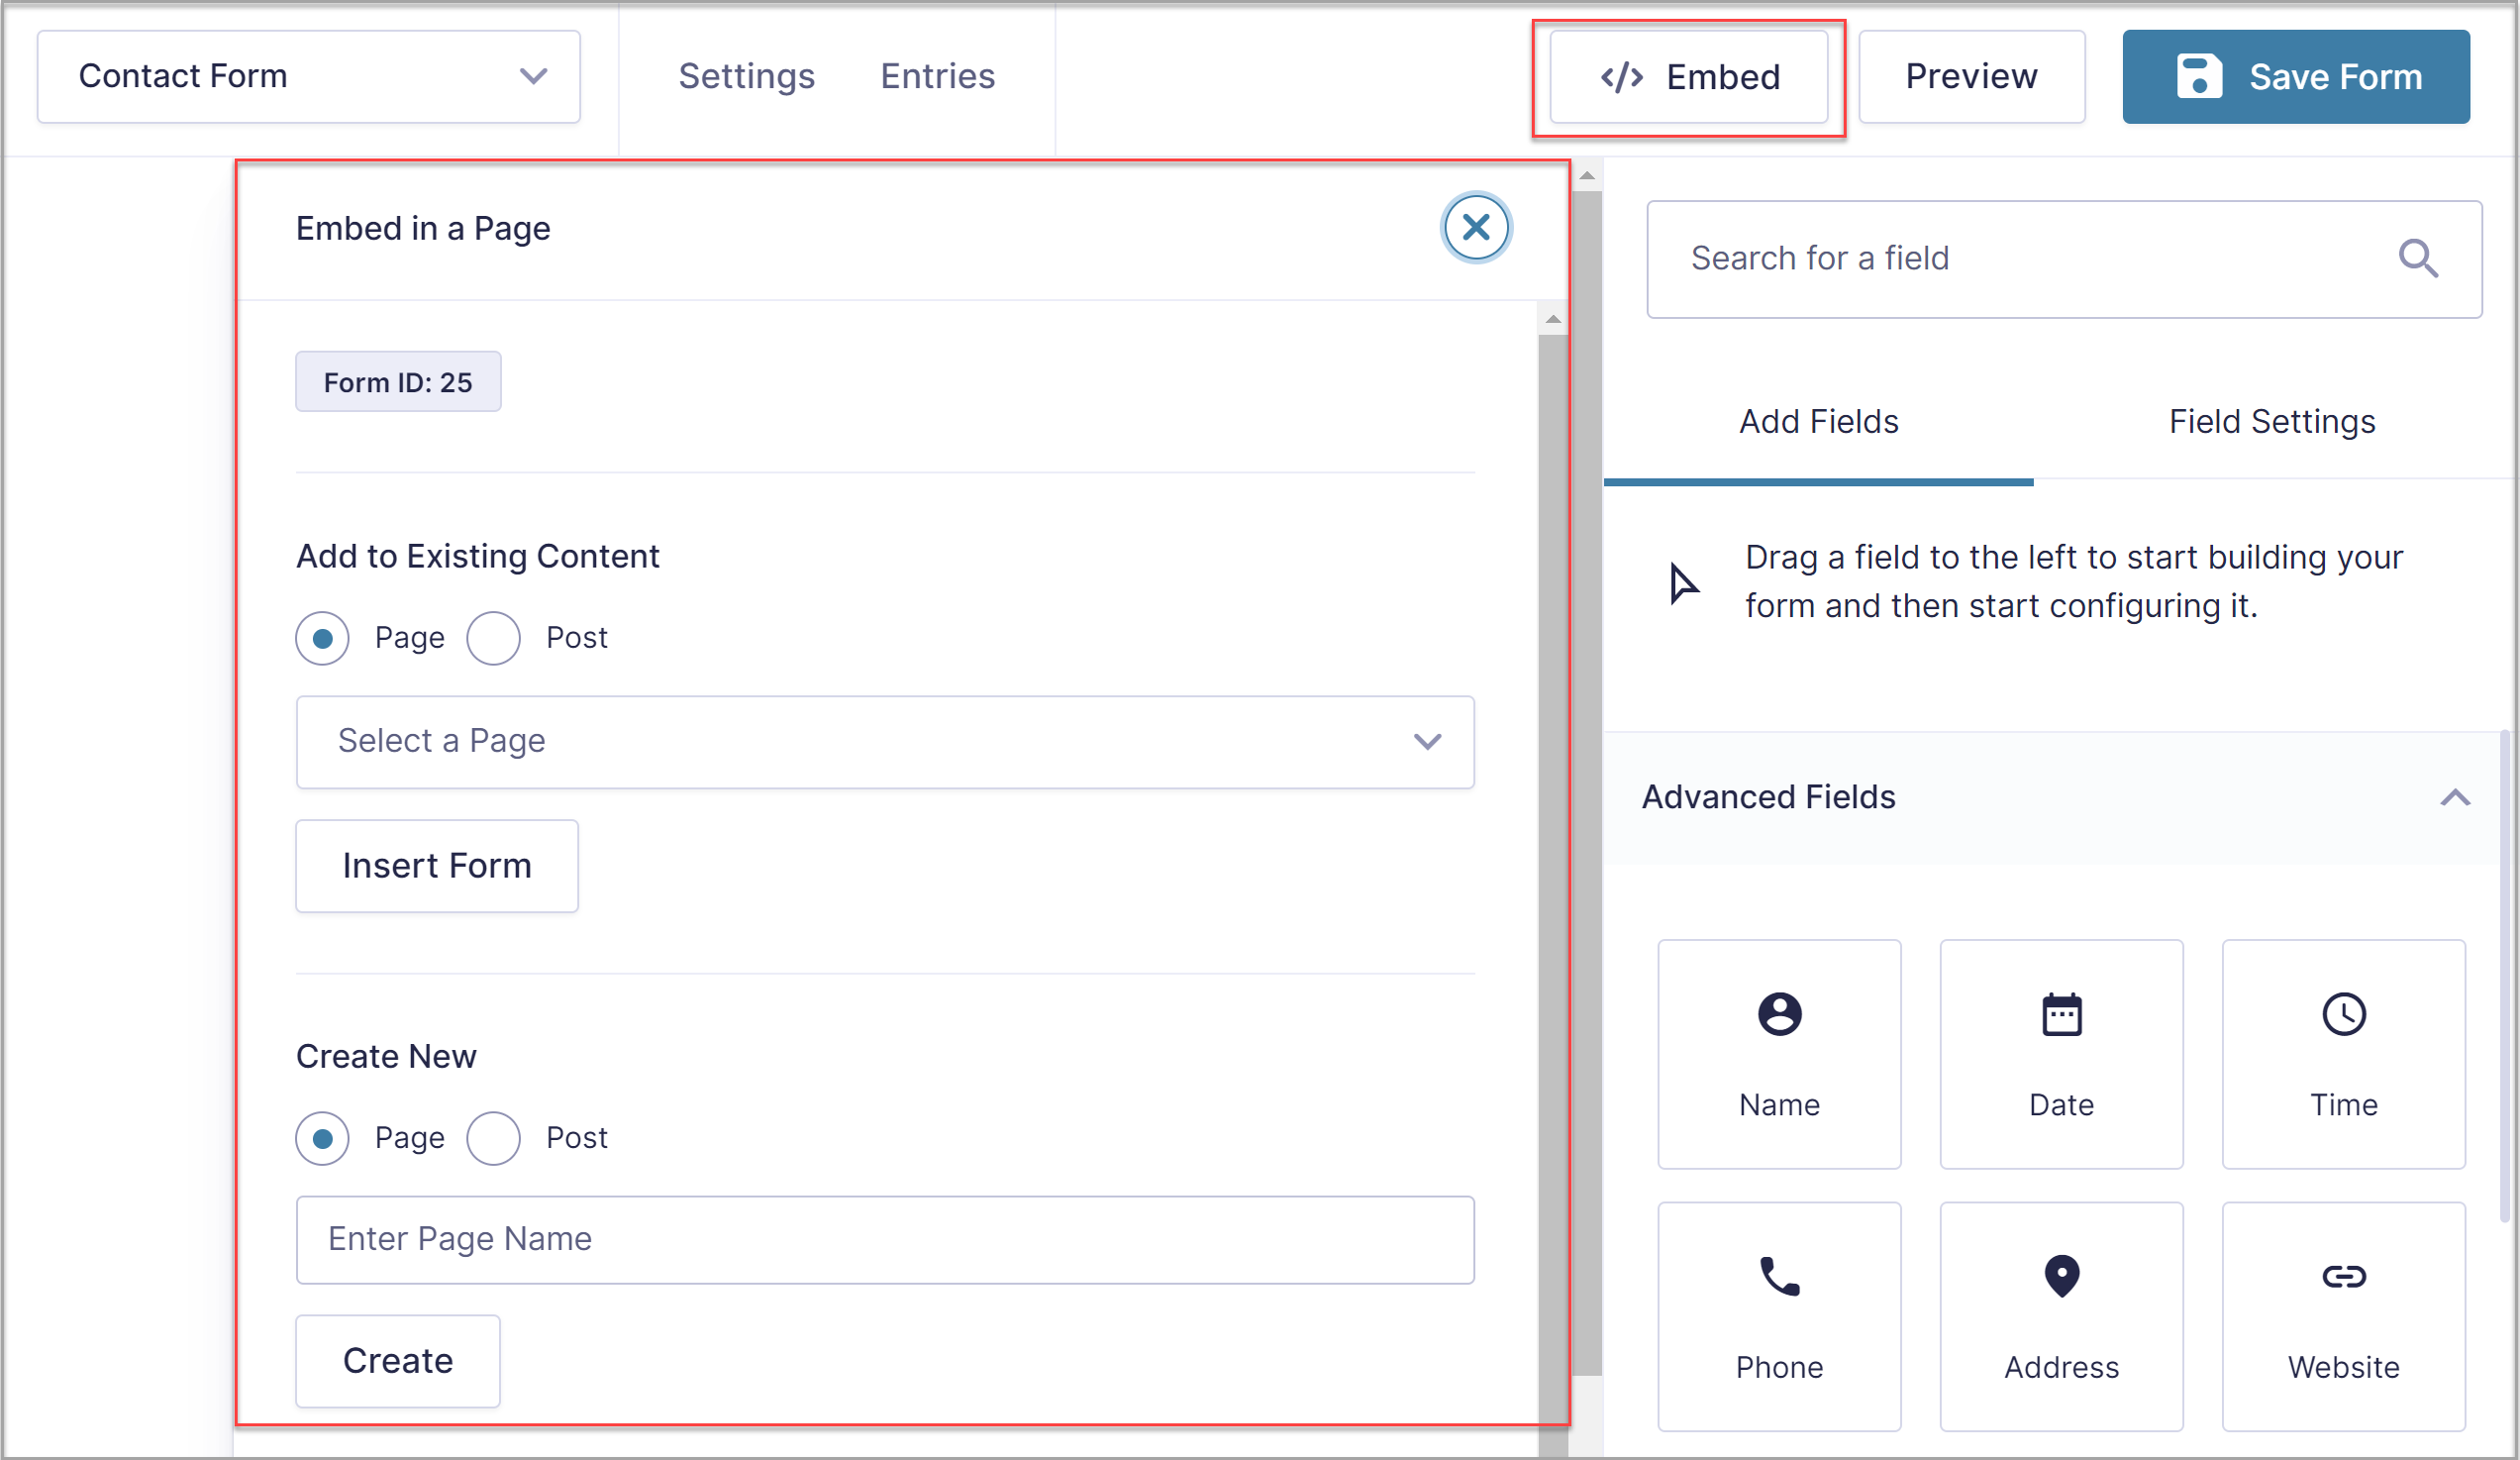
With Gravity Forms embedding a form into a WordPress post or page is just as easy as creating a form. Within the form editor simply click on Embed, which you will find in the top right corner of the screen.
Then, within the Embed Form flyout select the page or post where you would like to add your form. Alternatively, you can choose to create a new page or post.
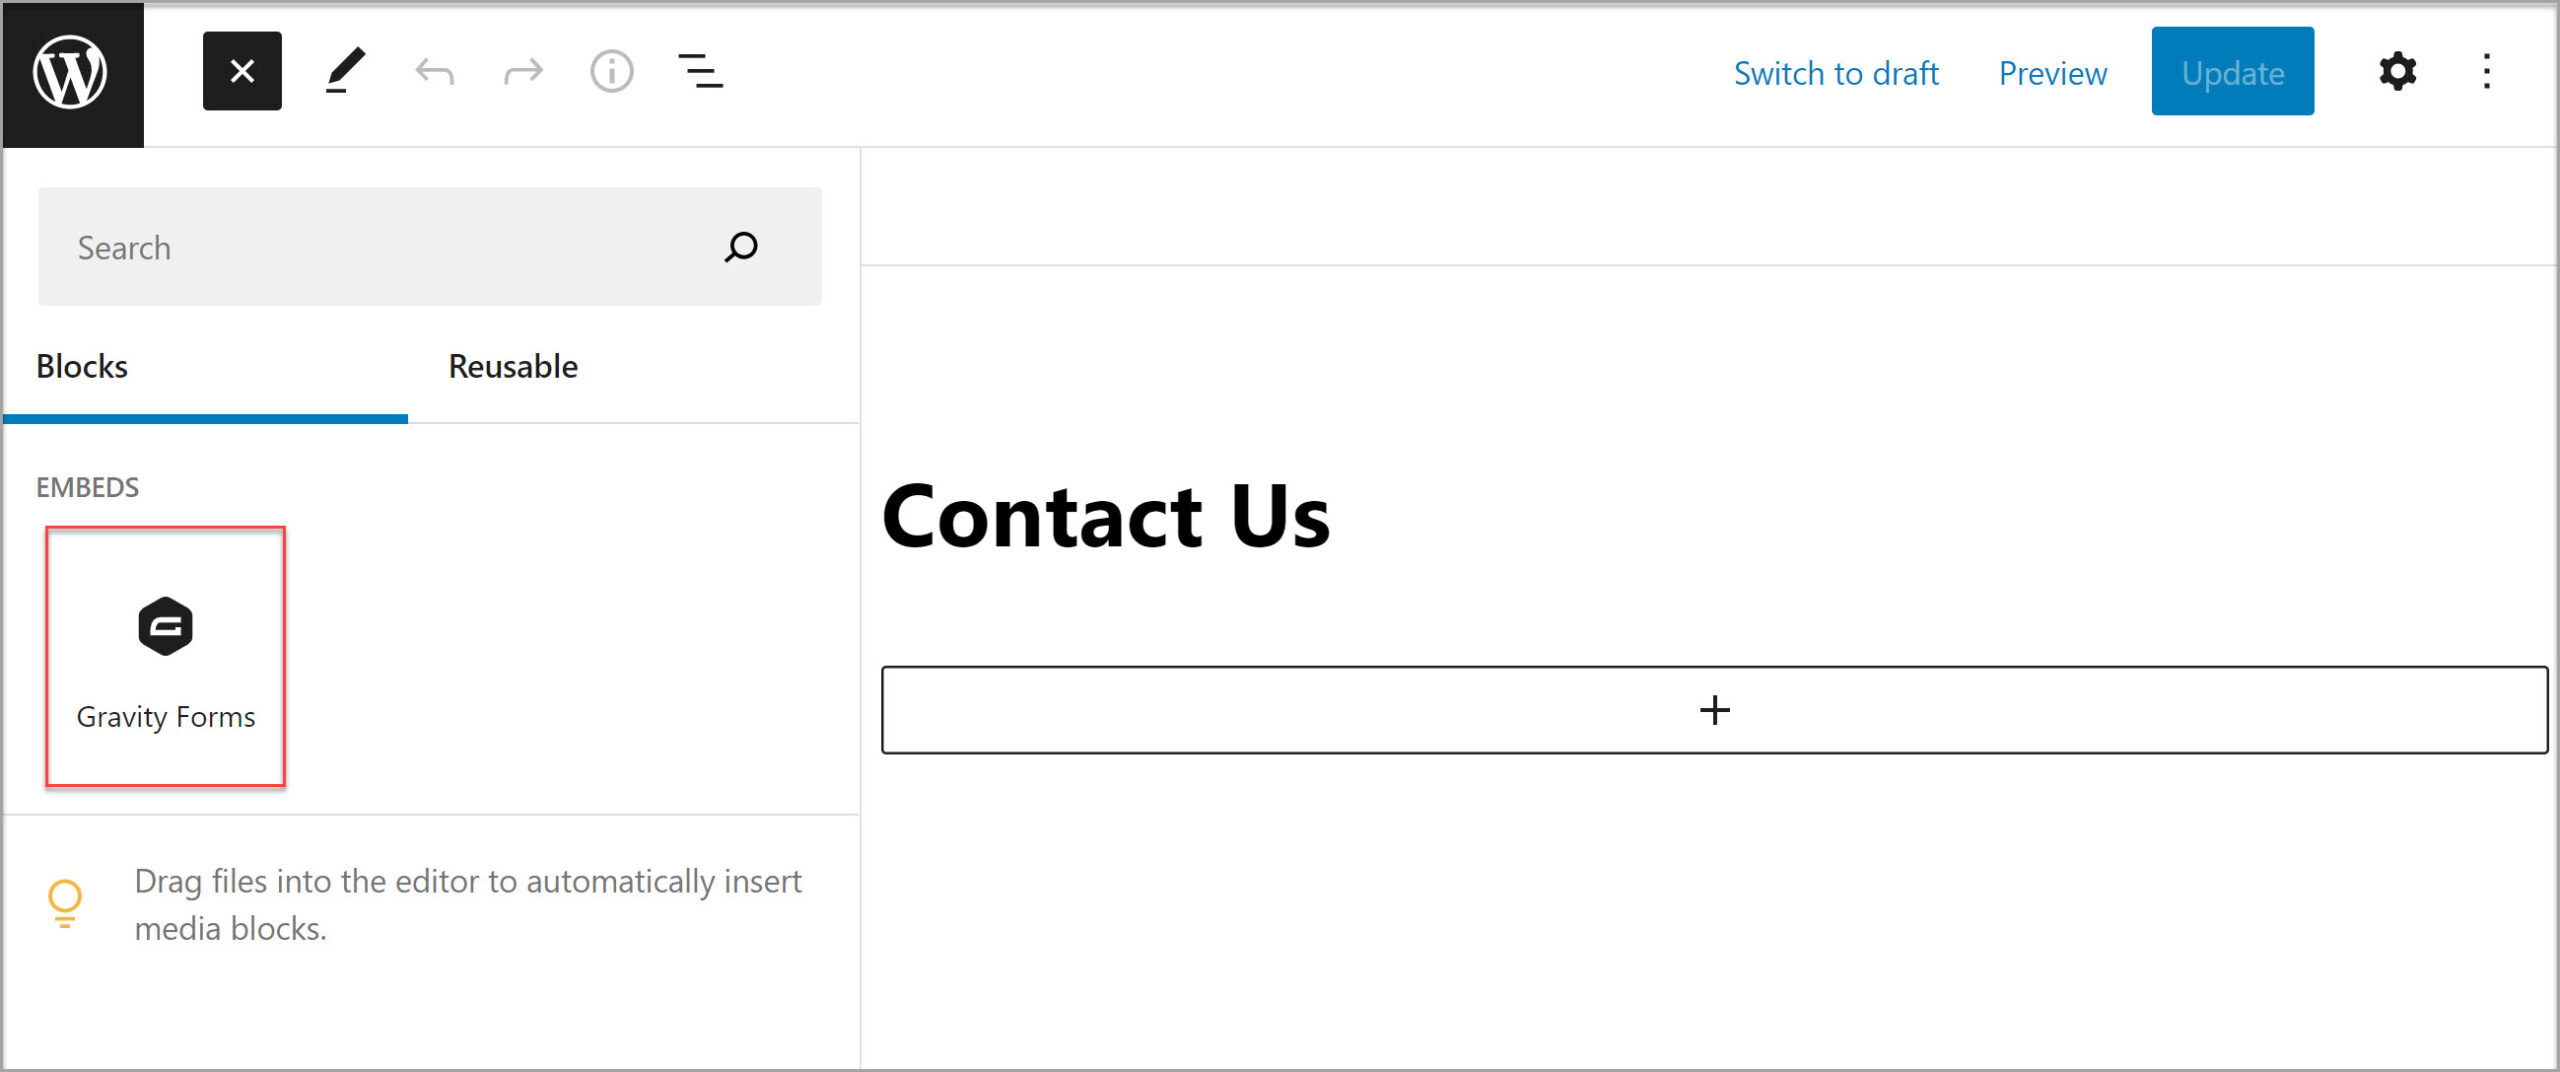
If you choose to embed your form in an existing page or post, you will find the Gravity Forms block highlighted under Embeds. Drag and drop the block, positioning it within the existing content where you deem appropriate.
If you choose to create a new page or post, you will find the form automatically embedded within the Block editor.
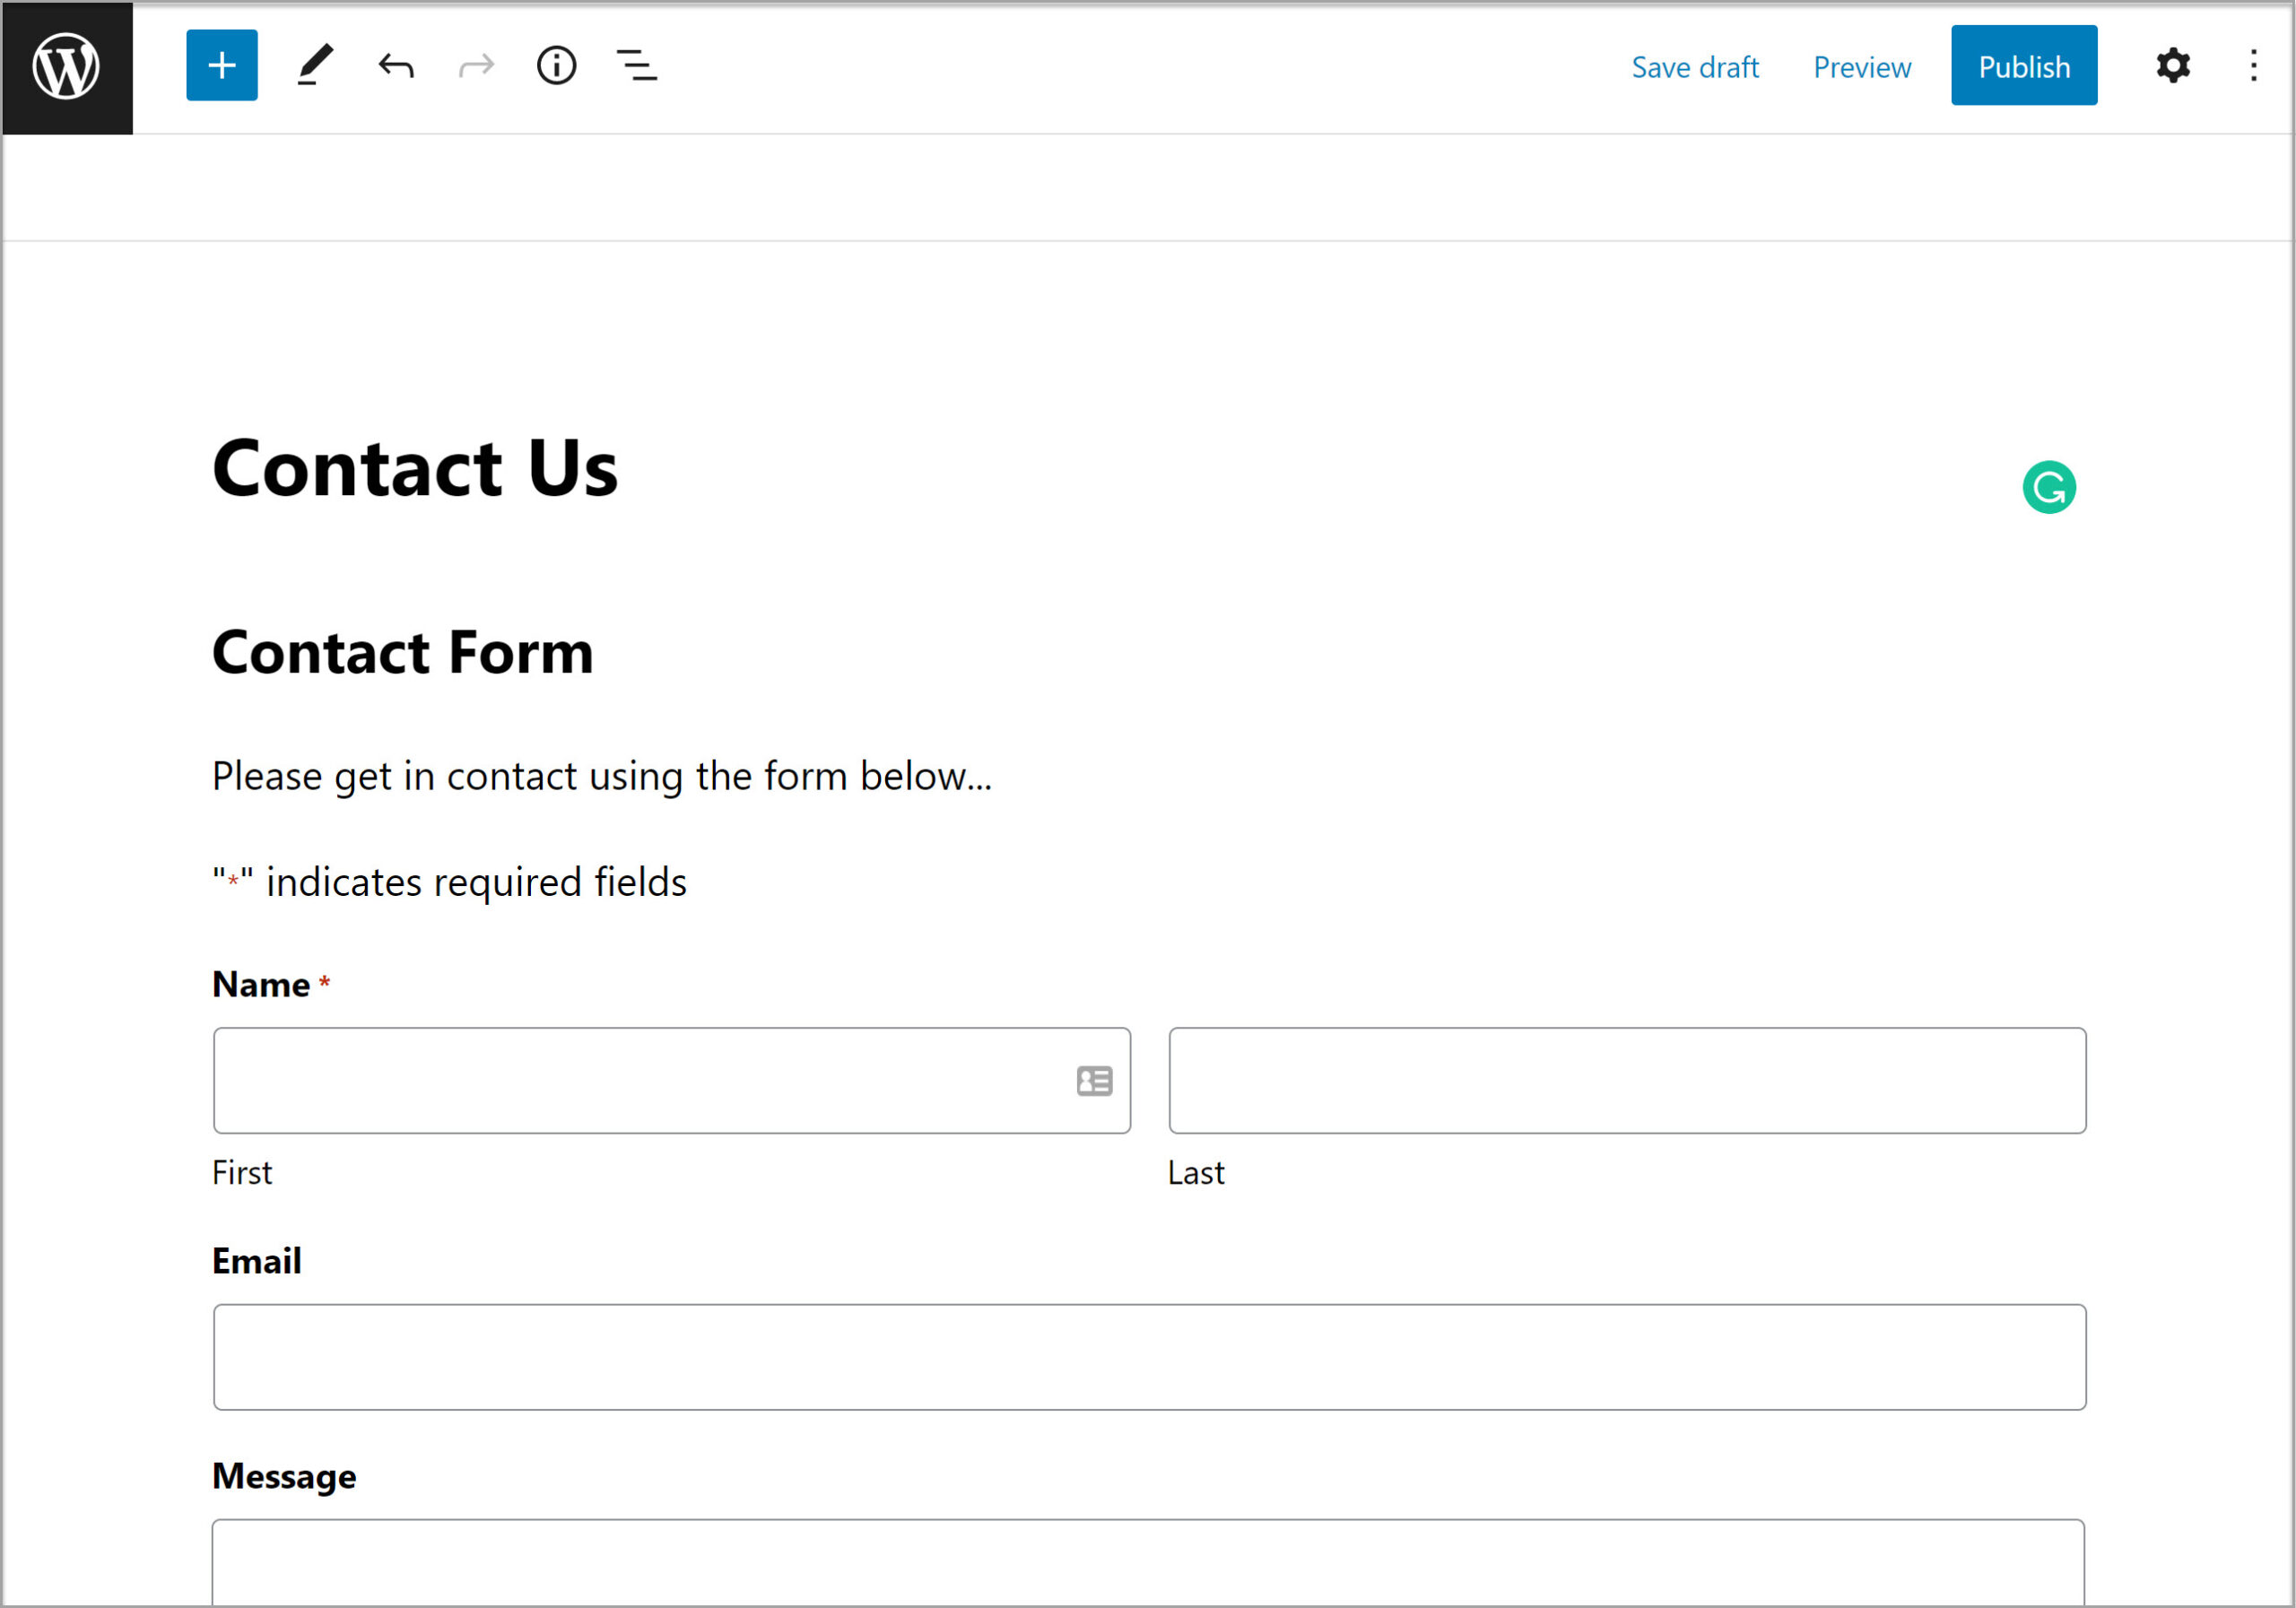
Once you’ve published the form on your site, your website’s visitors can start submitting that form.
For more information on how to embed a form, as well as other alternative methods, check out this article – How to Embed a Form in WordPress.
Create Your First Web Form Today!
Check out the Gravity Forms YouTube Business playlist for more information and top tips on how to get started with Gravity Forms and HubSpot.
And don’t forget, head on over to HubSpot to download the ebook – The Ultimate Guide to Web Forms – Grow Your Business with these 5 Essential Form Types – get even more information on the types of forms you need to grow your business.
Get started today and you’ll be enjoying the power of web forms in no time!


