Looking to create a WordPress contact form and send contacts to your HubSpot account?
With Gravity Forms and our HubSpot Add-On, you can easily collect and manage those all-important leads that your business relies upon. First create high-end contact forms that allow you to gather all relevant information from your visitors, then follow up with personalized and timely email campaigns from HubSpot.
In this article, we’ll discuss the many features that you can expect when you integrate the power of Gravity Forms and HubSpot, and how these tools combined can help you to upgrade your sales and marketing. We’ll also give you a run-through of how to get started with Gravity Forms, use a ready-made contact form template, and importantly, how to integrate your HubSpot account with any form on your site.
Let’s get started…
HubSpot: An Introduction

HubSpot is a powerful marketing platform that allows you to automate key business processes and manage client and customer data in one central location.
With HubSpot, you can easily organize and manage your email list as well as:
- Nurture potential leads through email marketing and follow up at the right time
- Keep track of all customer and client info to personalize follow up messages
- Track engagement and prospects through every stage of their customer journey
- See detailed stats for all your sales pipelines
- Manage customer information in one central inbox
- Integrate HubSpot with thousands of other apps and platforms through built-in and Zapier integrations
Thanks to all of these features, you can easily grow and nurture your customer database and increase your conversion rates.
Gravity Forms HubSpot Add-On
The Gravity Forms HubSpot Add-On gives you seamless integration of your forms with your HubSpot account. Once you activate and connect the add-on, you can send new form submissions directly to your HubSpot dashboard and keep track of your contacts.
Let’s take a look at the main features of the Gravity Forms HubSpot Add-On…
Create & Update Contact Profiles
Thanks to our add-on, a new contact will be created or an existing customer record updated whenever a visitor submits the form on your website.

You can then gain insight into people’s behavior on your site – what pages a contact has visited on your website and all the forms they submitted. This will help you to understand what each individual is interested in so you can tailor future communications, sending them more targeted emails.
Control the Data
One of the main features of the add-on is the ability to control exactly what form data gets sent to your HubSpot account. Not only that but you can also control what happens with that data once it’s added to your CRM.
For example, you can choose which contact data you want to collect and assign new contacts to members of your team in HubSpot. You can also use conditional logic to set conditions that allow you to only send information to your HubSpot account if those conditions have been met, ensuring only validated leads are added to your mailing list.
Automatically Trigger Email Sequences

Once someone submits a form on your website that’s connected to your HubSpot account, you can trigger an automated email sequence or a set of follow up emails. This makes it easy to continue nurturing your leads while they’re still engaged with your business.
Support for Custom Field Types
The HubSpot Add-On also allows you to map your form fields to any custom properties you’ve created within HubSpot.
You’ll find support for choice-based fields, including Ratio Buttons, Dropdown, and single and multiple Checkboxes, to name a few. You can map those fields directly to custom properties within HubSpot. Thanks to this, all the relevant information collected with your form will be sent and processed correctly within your HubSpot CRM.
For more information on which field types are supported for mapping to HubSpot custom properties, check out the Gravity Forms Documentation.
How to Create a HubSpot Contact Form
Now that you know what the HubSpot Add-On does, let’s take a look at how you can get started using it…
Step 1: Purchase and Install Gravity Forms
The first thing you’ll need to do is purchase a Gravity Forms license and install the plugin on your site. Gravity Forms offers four different licenses and the HubSpot Add-On is available with all. Simply choose the right license for you and then download and install Gravity Forms.
For step-by-step instructions on how to get started with our plugin, check out this video tutorial – How to Install Gravity Forms on Your WordPress Website.
Step 2: Create a New Form or Select a Template
The next step is to create a contact form that you’ll connect with your HubSpot account. You can create a form from scratch or you can speed up the process by using one of our premade form templates.
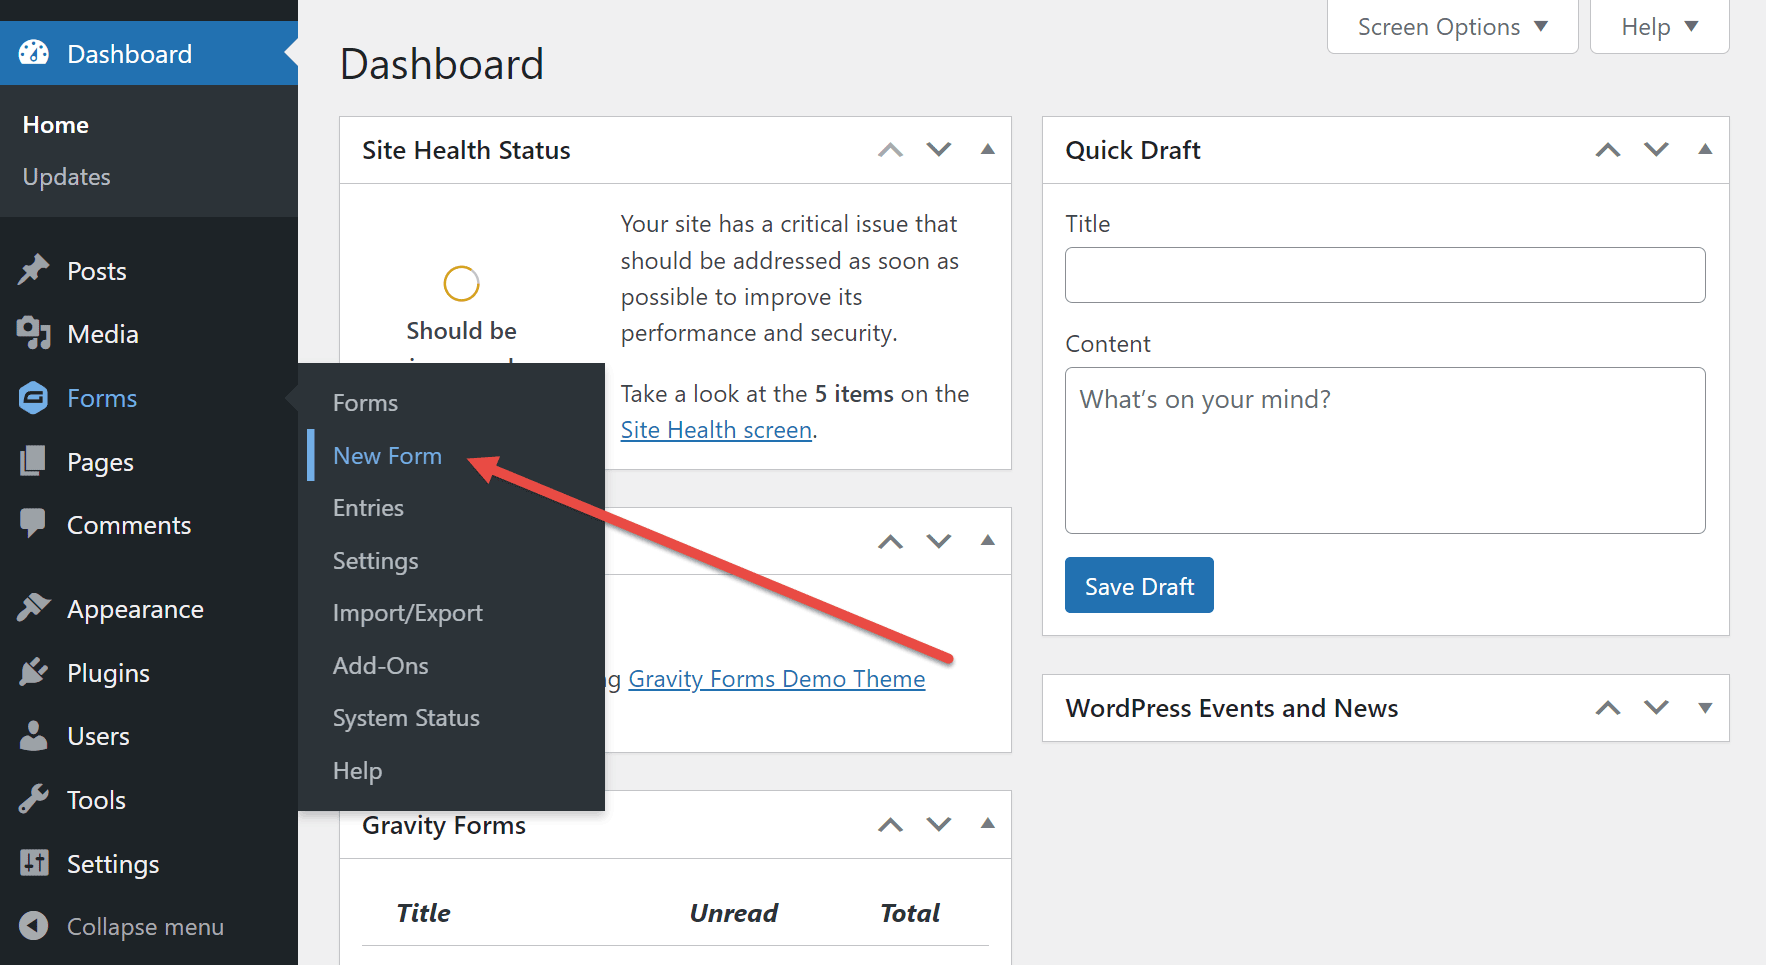
Whether you want to use a template or start from scratch, click the Forms > New Form sidebar menu item.
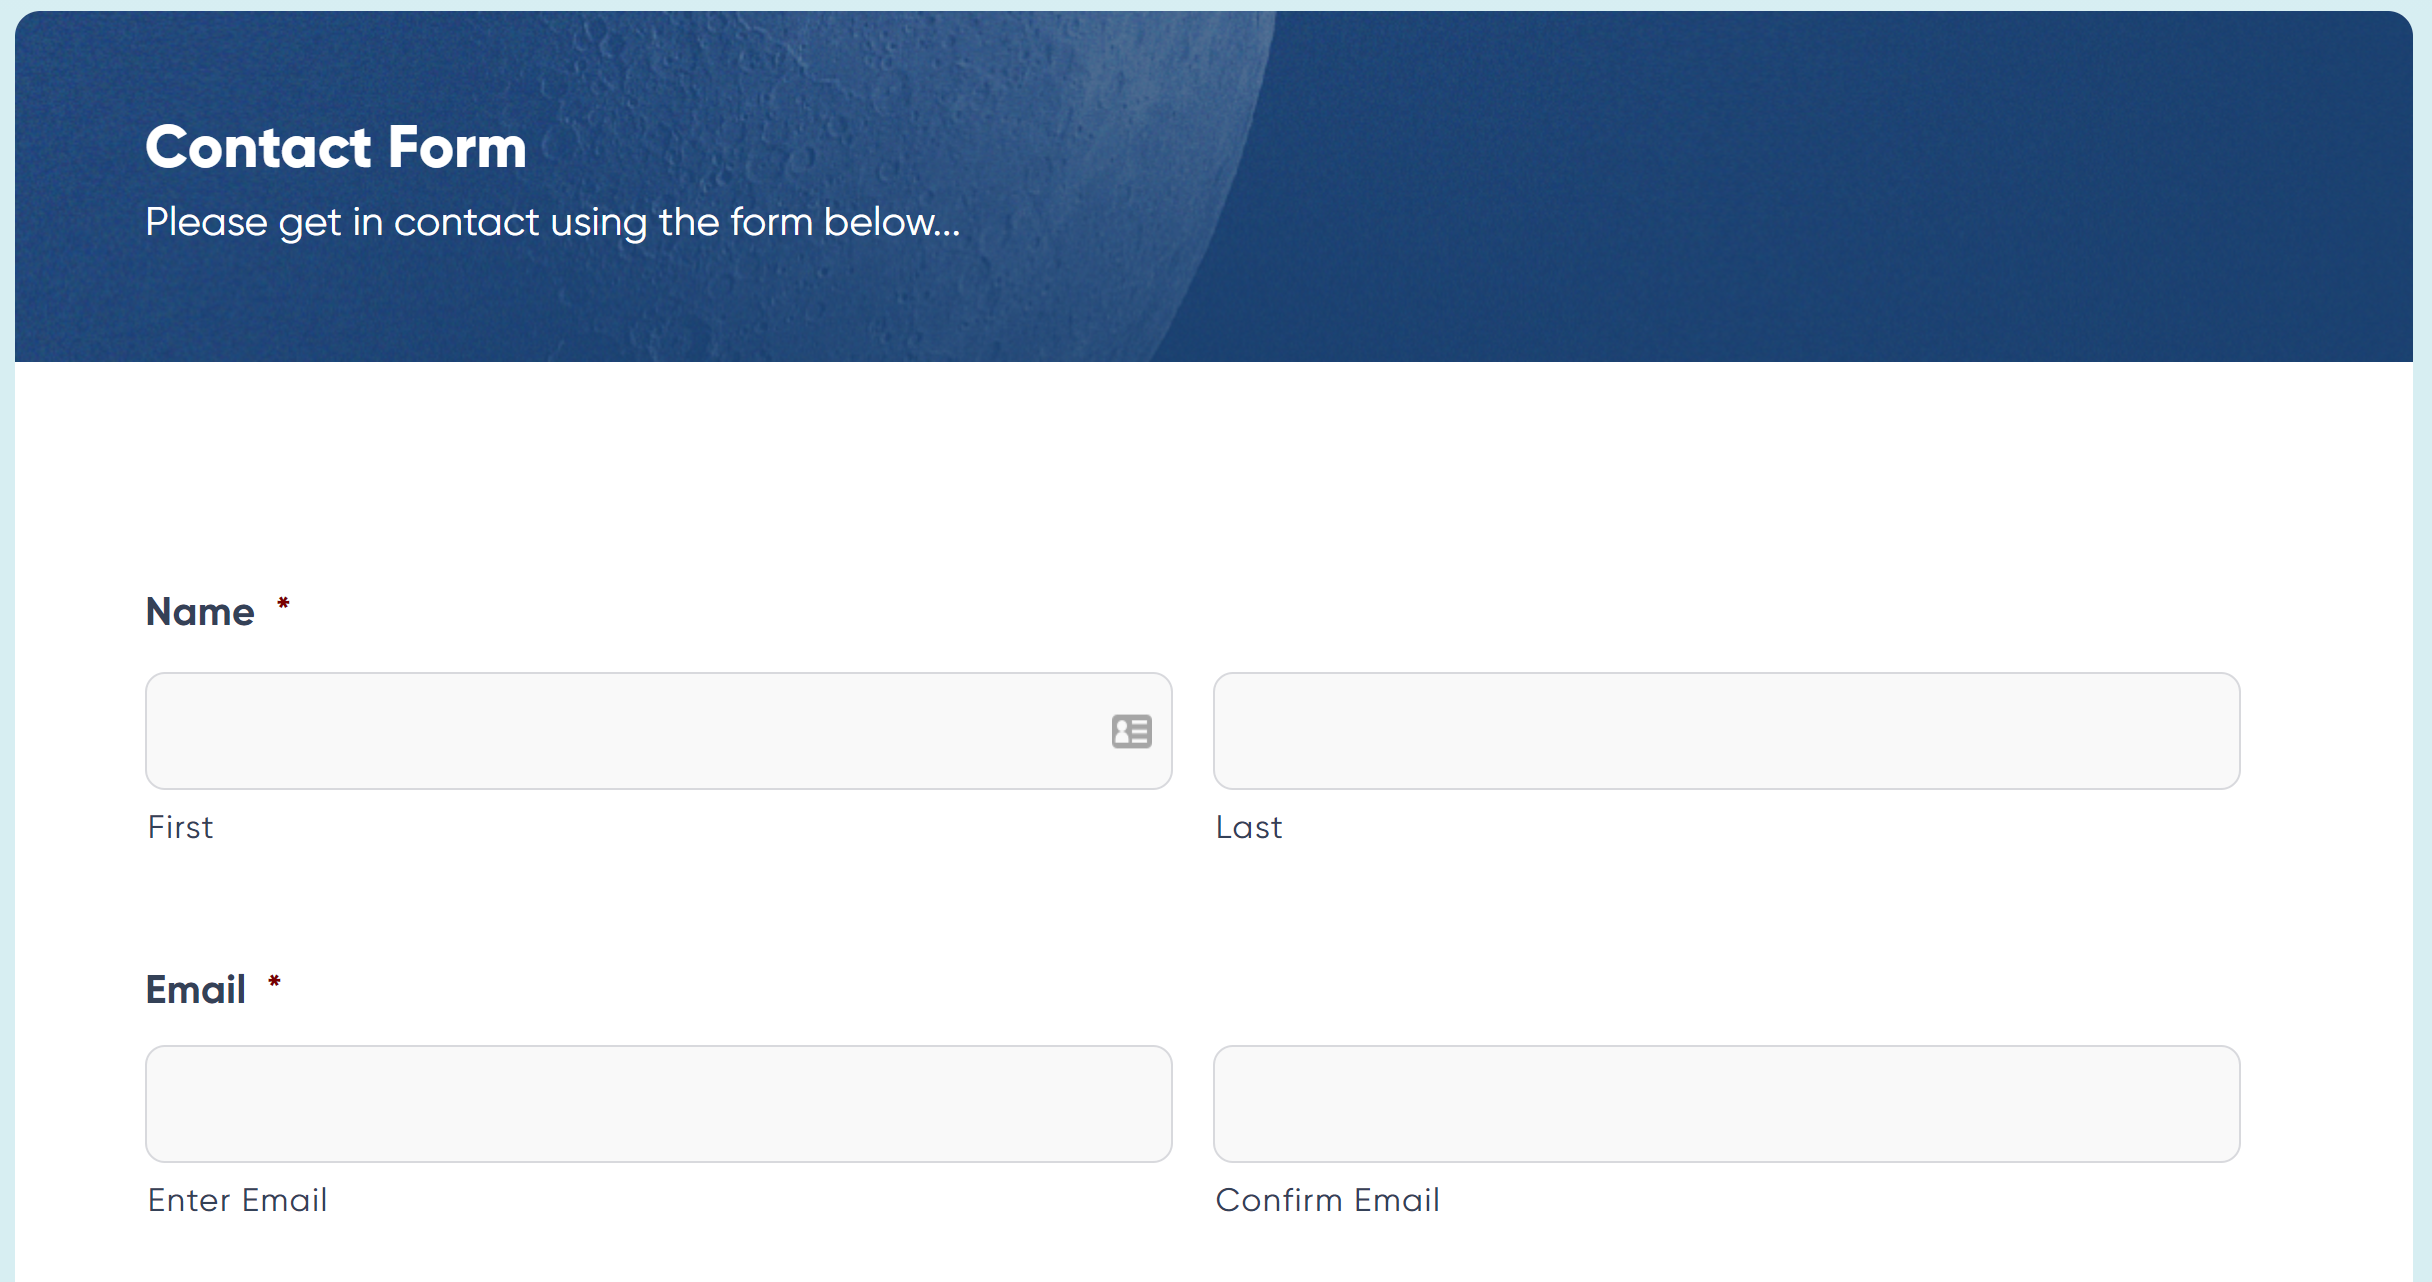
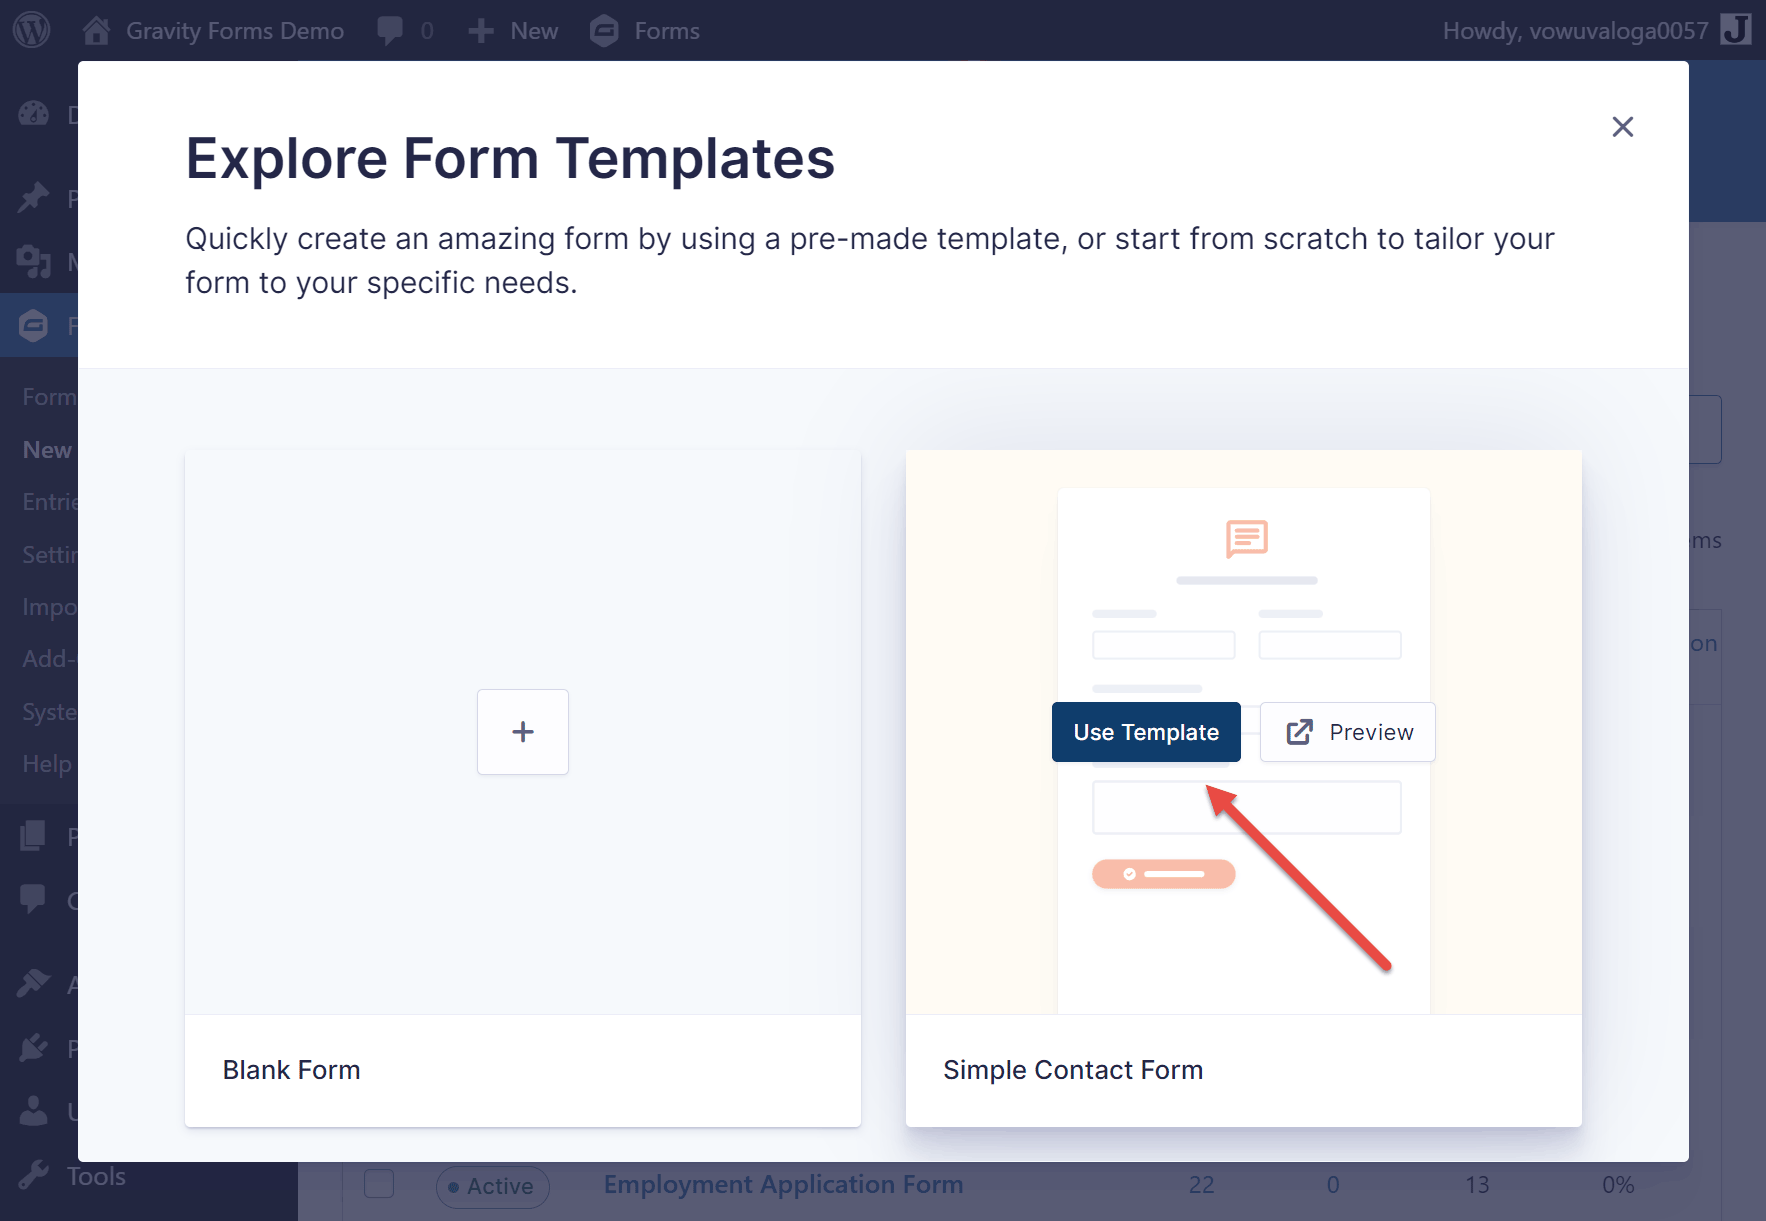
You can then choose the blank form option or select one of the ready-made templates. For this guide, we’ll use the Simple Contact Form template.
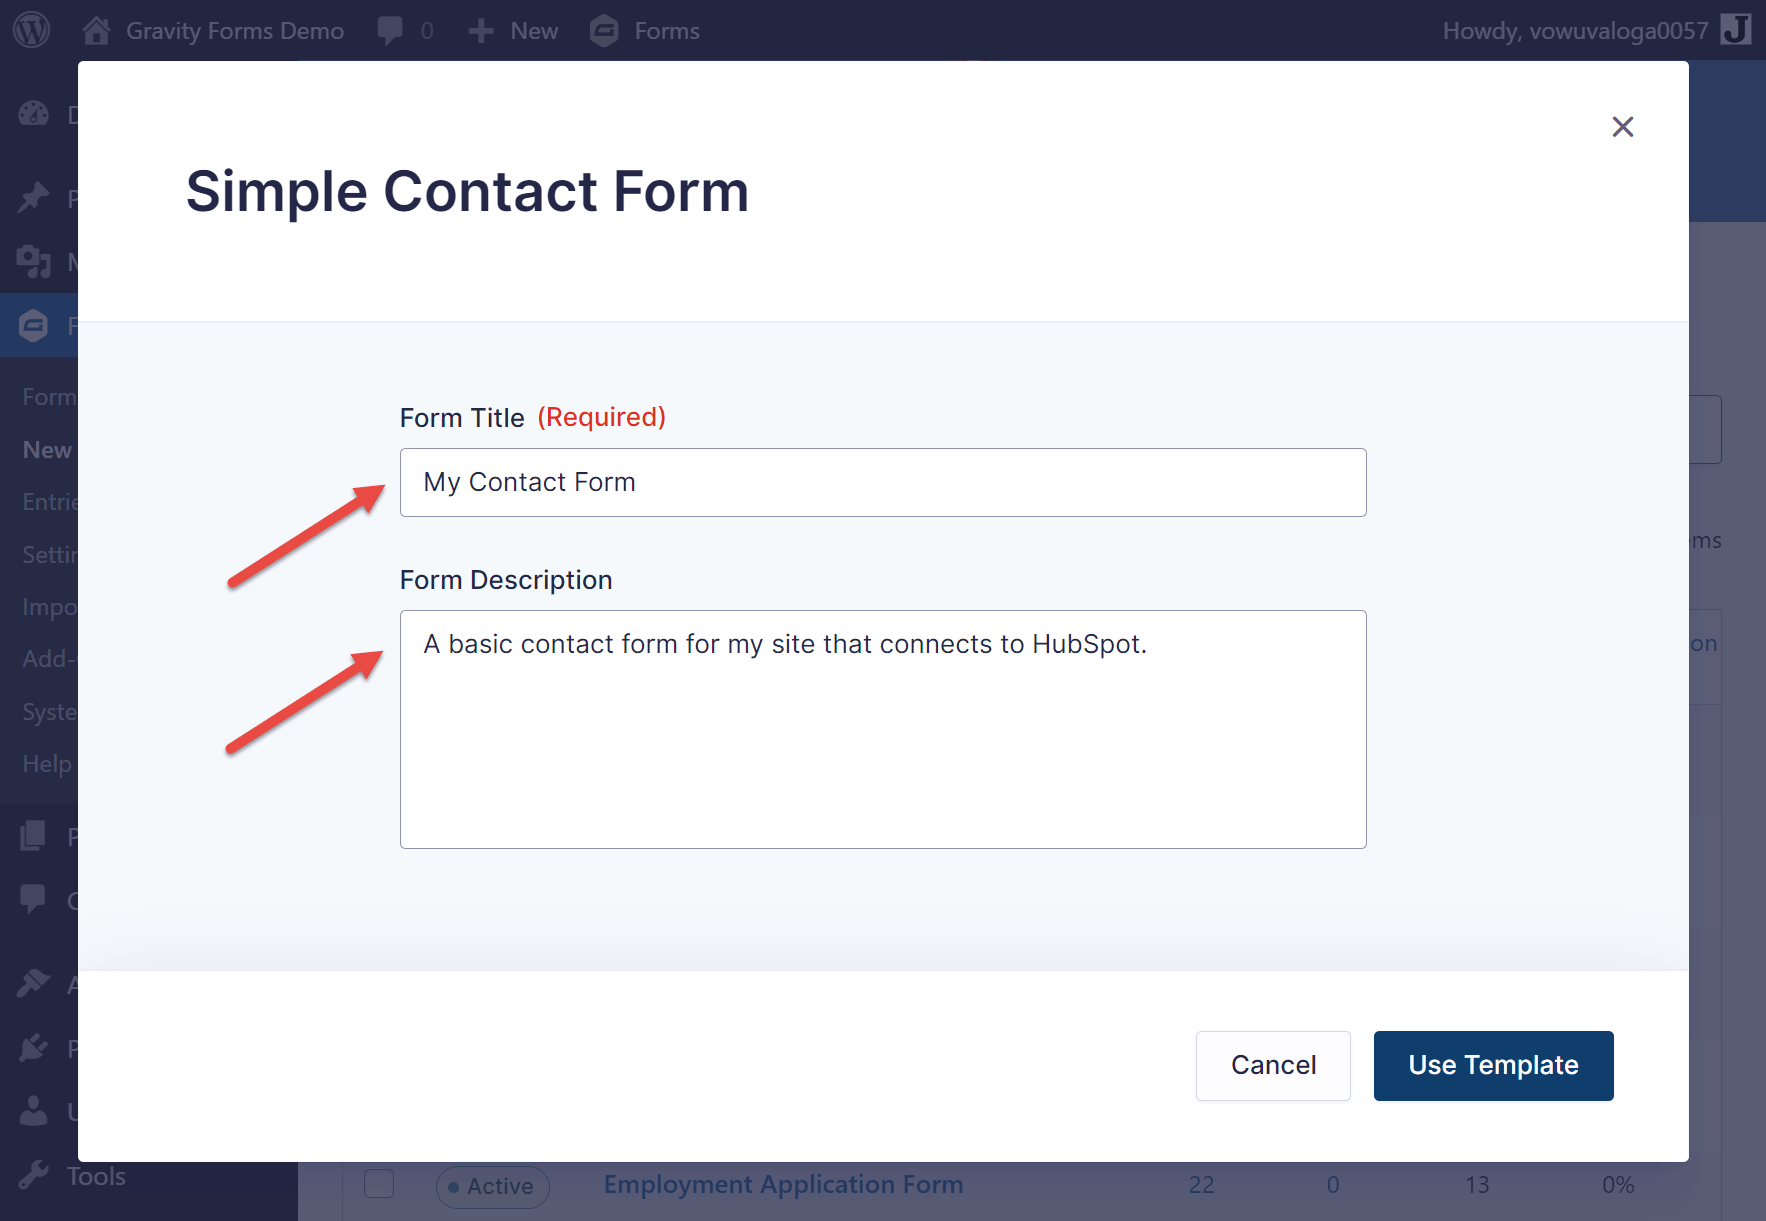
Locate the Simple Contact Form template in the library and move the cursor over it. Then click the Use Template button.
On the next screen, give the form a title, such as Contact Form, and add an optional description for your reference. Then, click the Use Template button.
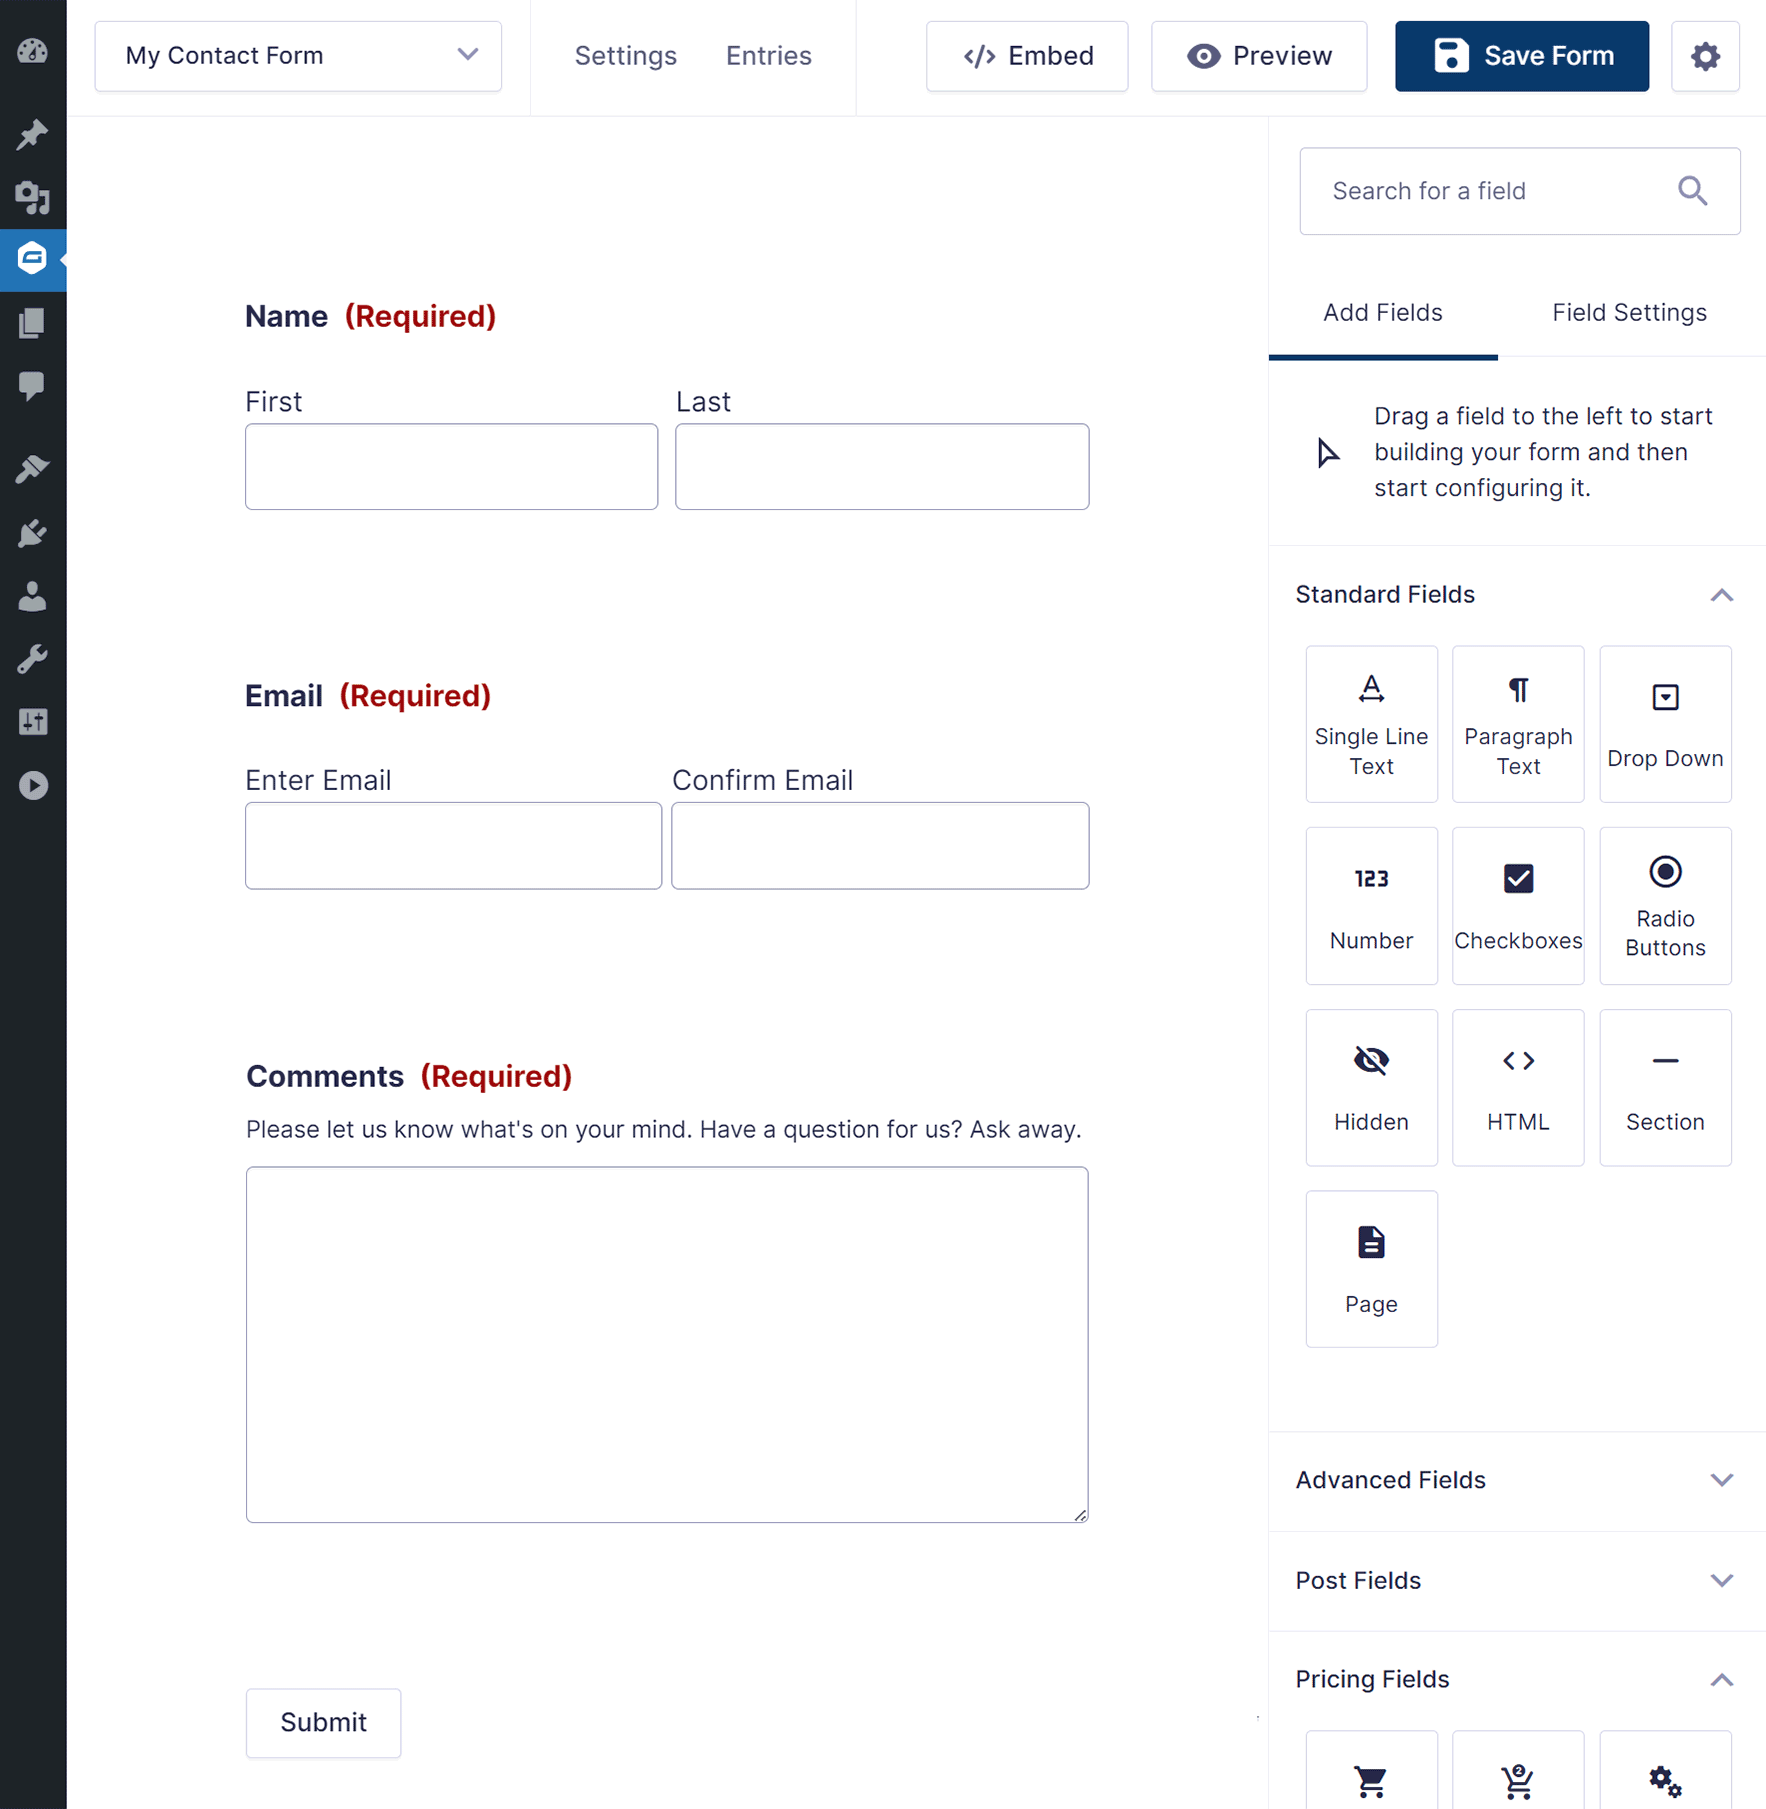
The template you selected will then be displayed in the form editor. You can now customize the form by editing its appearance and adding and removing fields.
For more details on creating a custom form for your site, check out this guide – How to Create a WordPress Contact Form.
Step 3: Install and Connect the HubSpot Add-On
Now that you have a form on your website, you need to install the HubSpot Add-On.
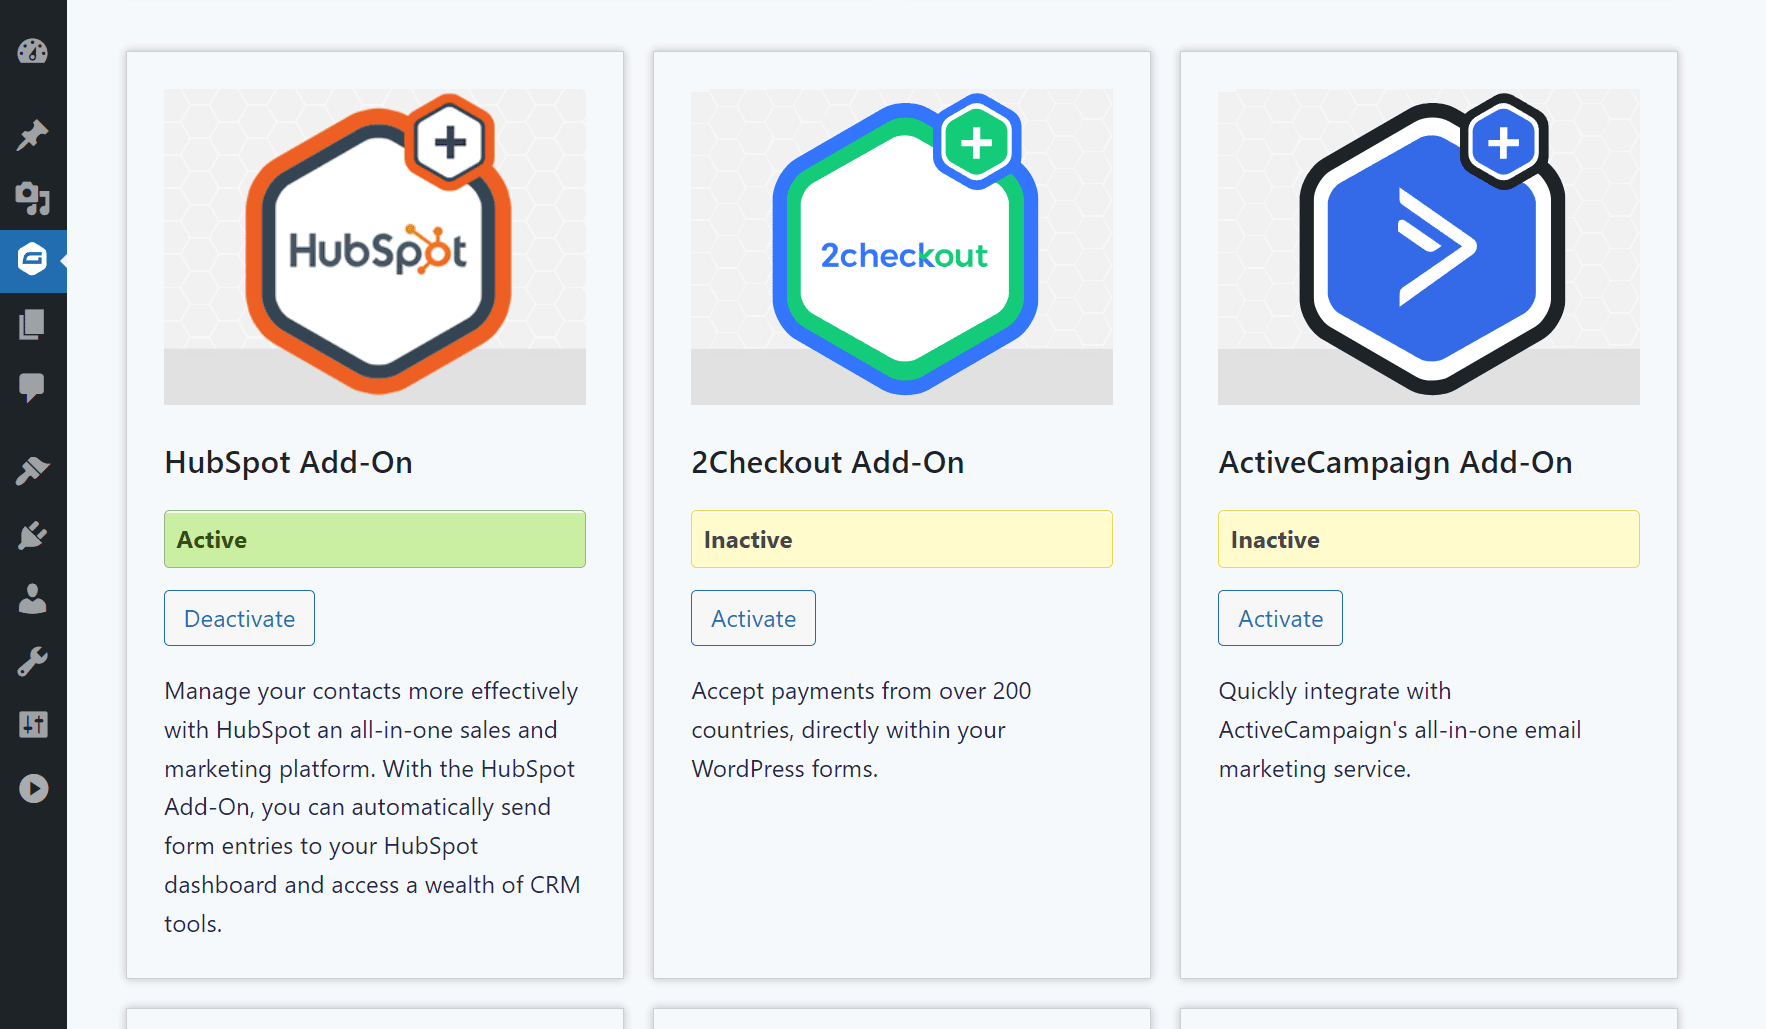
In your dashboard, go to Forms > Add-Ons and scroll down until you locate the HubSpot Add-On. Press Install and then Activate Plugin.
You’ll then need to connect your HubSpot account with your website. Go to Forms > Settings > HubSpot. Click the button to connect your HubSpot account.
Step 4: Configure the Form’s HubSpot Feed
The last step is to create a feed for the HubSpot Add-On which will send data collected on your website to your HubSpot account.
In your WordPress dashboard, go to Forms and select your contact form. Then, once you are within your contact form, hover over Settings and click on HubSpot. Click Add New to create a new feed.
As you can see, you can assign a form owner, map contact details, and even assign additional contact information using form fields.
Custom properties can be created within your HubSpot account by using the Create a Property option under the Actions > Property Settings area.
As mentioned before, you can map the following field types to custom properties within your HubSpot account:
- File Upload
- Single Line Text
- Multi-Line Text
- Number Field
- Date Picker
- Single On/Off Checkbox
- Checkboxes
- Radio Buttons
- Drop Down
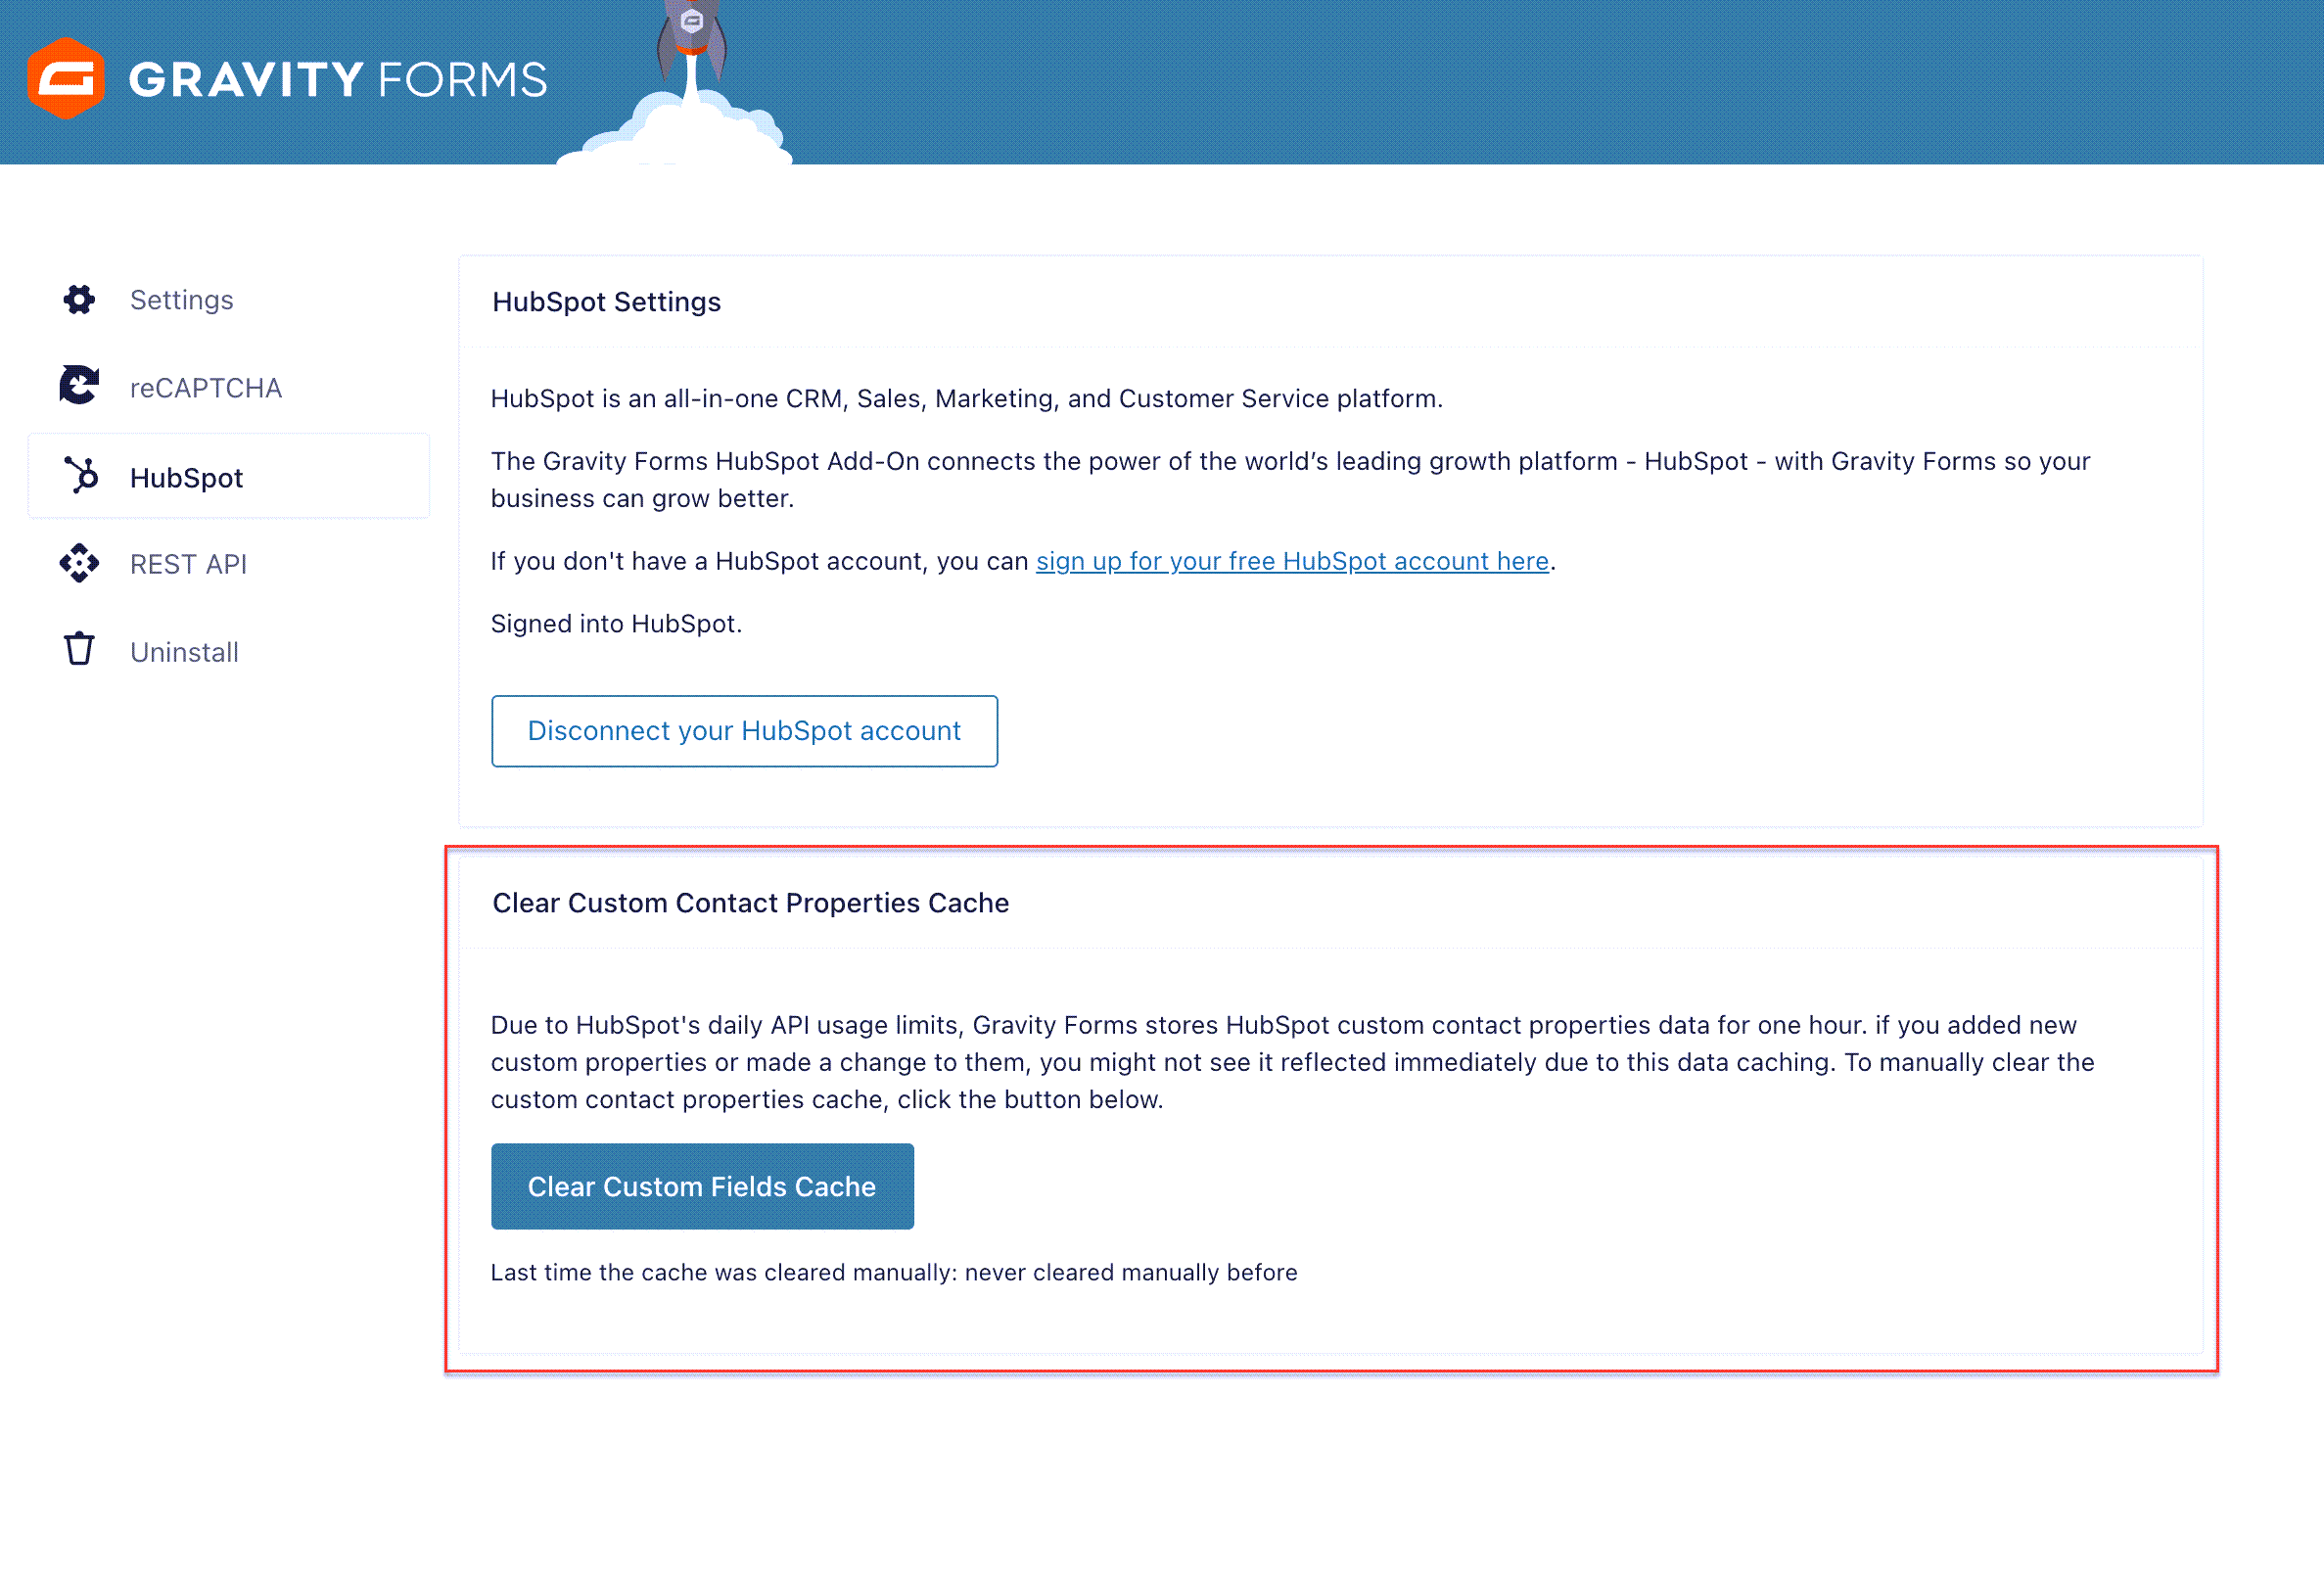
In case you’ve created a new property in HubSpot but it’s not visible when configuring the feed, you will need to clear the cache. The list of custom fields retrieved from HubSpot is cached for about an hour to stay within HubSpot API limits – this can lead to newly created HubSpot custom properties not being immediately visible within the configuration menus.
To clear the cache, go to Forms > Settings > HubSpot and click the Clear Custom Field Cache button.
Once refreshed, you should then be able to immediately see the supported fields in the HubSpot Feed dropdown. For more information on creating a HubSpot form feed, check out the Gravity Forms Documentation.
When you’re finished customizing your form’s HubSpot feed, your form is ready to be added to any page or a post on your website. For more in-depth information on how to do so, check out this article – How to Embed a Form in WordPress.
Ready To Create a Contact Form With Gravity Forms and the HubSpot Add-On?
If you want to learn more about HubSpot, the following resources will be helpful:
- Align your WordPress Agency with HubSpot to Increase Profitability
- This Month’s Featured Add-On: HubSpot
- Gravity Forms HubSpot Add-On Documentation
Still don’t have Gravity Forms or the HubSpot Add-On? If you’re on the fence about getting a Gravity Forms license, start by signing up for a free personalized demo of Gravity Forms.
Within the demo, you can build a form from scratch with the help of our intuitive, drag-and-drop form builder or customize one of our premade form templates. And while you’re at it, don’t forget to check out all the Gravity Forms Add-Ons, HubSpot included, to see how you can extend your forms even more.
Already sold on using Gravity Forms? Purchase our premium WordPress form plugin today!
Newsletter
If you want to keep up-to-date with what’s happening on the blog sign up for the Gravity Forms newsletter!
"*" indicates required fields