Need a CRM to manage and organize your relationships and interactions with leads and customers? Then look no further than HubSpot, an all-in-one marketing and sales platform, that can help support your business on every step of its journey.
Here at Gravity Forms, our HubSpot Add-On enables you to seamlessly integrate your forms with HubSpot, automatically sending new form data directly to your HubSpot dashboard. The HubSpot Add-On is available with all Gravity Forms licenses and connects to the free HubSpot CRM – making it a perfect choice for all businesses, whatever your size and budget.
In this article, we look in-depth at the features you can expect to access with the free version of HubSpot and discuss the functionality provided with the Gravity Forms HubSpot Add-On. We also walk through how to quickly integrate HubSpot with any form on your WordPress website.
Let’s get started…
HubSpot: An Introduction
HubSpot is a powerful marketing platform, which focuses on supporting the growth of businesses by automating processes and managing data, all in one central location. Ideal for marketing, sales, and customer service teams, as well as small business owners, HubSpot enables businesses to organize email lists, track engagement, nurture relationships, and much more, ultimately resulting in a boost in conversions.
With the free version of HubSpot you get access to its CRM – it’s customer relationship management tool – where you can store, manage, and track all lead and customer data (for up to 1,000 contacts).
However, HubSpot is so much more than just a database. Here are just a few of the additional tools you can expect on the free HubSpot plan…
- Email Marketing – Send personalized automated emails to different sections of your mailing list to help you achieve specific goals.
- Ad Management – Create segments from your HubSpot audiences, and track which ads are generating the most customers.
- Meeting Scheduling Tools – Schedule meetings with prospective clients from within your HubSpot account, making it easy to connect with clients and vice-versa.
- Live Chat – Chat 1-to-1 with visitors as they browse your site, interacting with them when they are most interested in your products or services.
- Conversational Bots – Answer questions, collect data, send leads to the right salesperson, and much more with automated conversational bots.
As you can see, the suite of tools offered on the HubSpot free plan is impressive. To find out more about HubSpot’s free and premium offerings, check out the pricing page.
Integrate Your Forms With HubSpot

As mentioned, the Gravity Forms HubSpot Add-On is available with all our Gravity Forms licenses, and enables you to integrate your forms directly with your free Hubspot account.
Let’s have a look at how integrating your forms with HubSpot can help support your business…
- Automatically Create and Update Contact Details – When a visitor completes a form on your website, a contact record is automatically created or updated within your HubSpot CRM with the most recent information.
- Control the Data – The HubSpot Add-On gives you control over the form entry data you send to HubSpot, as well as what happens to it when it arrives in the CRM. You can select which contact data you want to collect, assign new contacts to a specific HubSpot user, and even use conditional logic to only send form entries if a particular criteria has been met on form submission. This ensures your HubSpot dashboard is full of the right information about the right people!
- Create Custom Properties in HubSpot – The HubSpot Add-On also allows you to map your form fields to any custom properties you’ve created within HubSpot. You’ll find support for choice-based fields, including Ratio Buttons, Dropdown, and single and multiple Checkboxes, to name a few – you can map those fields directly to custom properties within HubSpot.
- Automatically Trigger Email Sequences – Automated email sequences or follow-up emails can be sent within minutes of a form being submitted on your website. This is a great way to continue engagement with your contacts while they are still thinking about your business.
- Find Out More About Your Contacts – In HubSpot you’ll be able to see what pages your contacts have visited on your website, what forms they filled out, and what they’re interested in. This will help to empower your sales and marketing teams, enabling them to have more tailored, personalized conversations with each person.
Ready to get started with HubSpot? Here’s how to get set up…
Step 1: Install the HubSpot Add-On
The first step to getting started with HubSpot is to integrate the HubSpot Add-On, which you will find within the Gravity Forms Add-On Browser. To do this, open your WordPress dashboard and select Forms > Add-Ons.
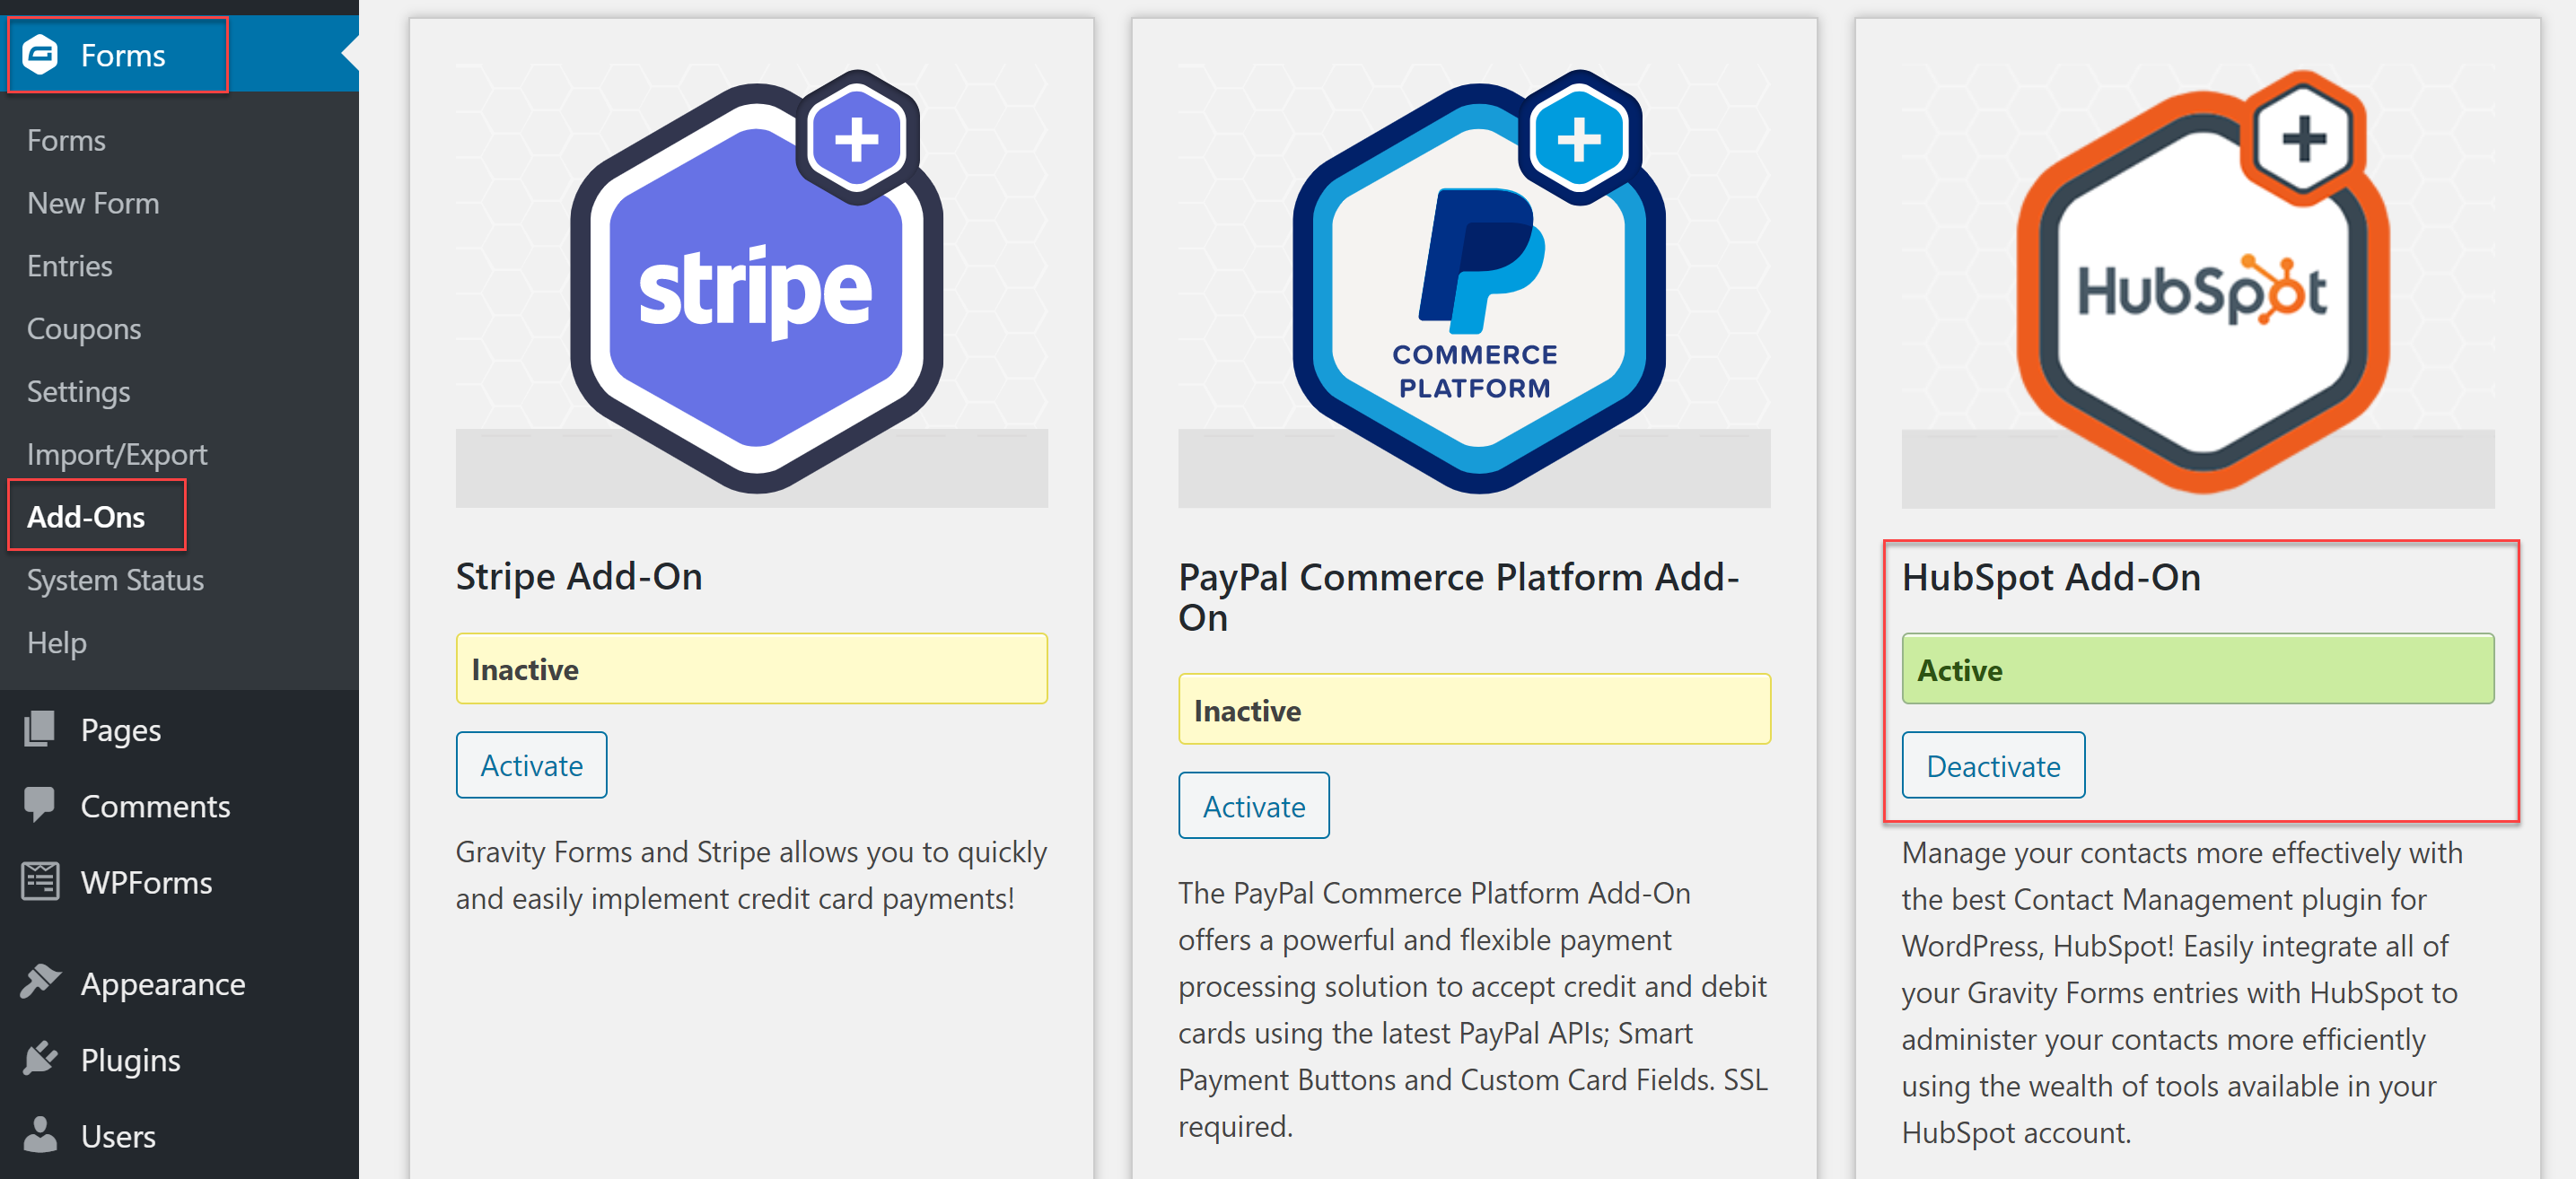
Scroll down through the Gravity Forms Add-On Browser until you find the HubSpot Add-On. Then select Install > Activate to install this add-on on your site.
Step 2: Sync Your Gravity Forms Account with HubSpot
Next, select Forms > Settings > HubSpot > Click Here to Connect Your HubSpot Account. (If you haven’t got a HubSpot account you will need to first create one).
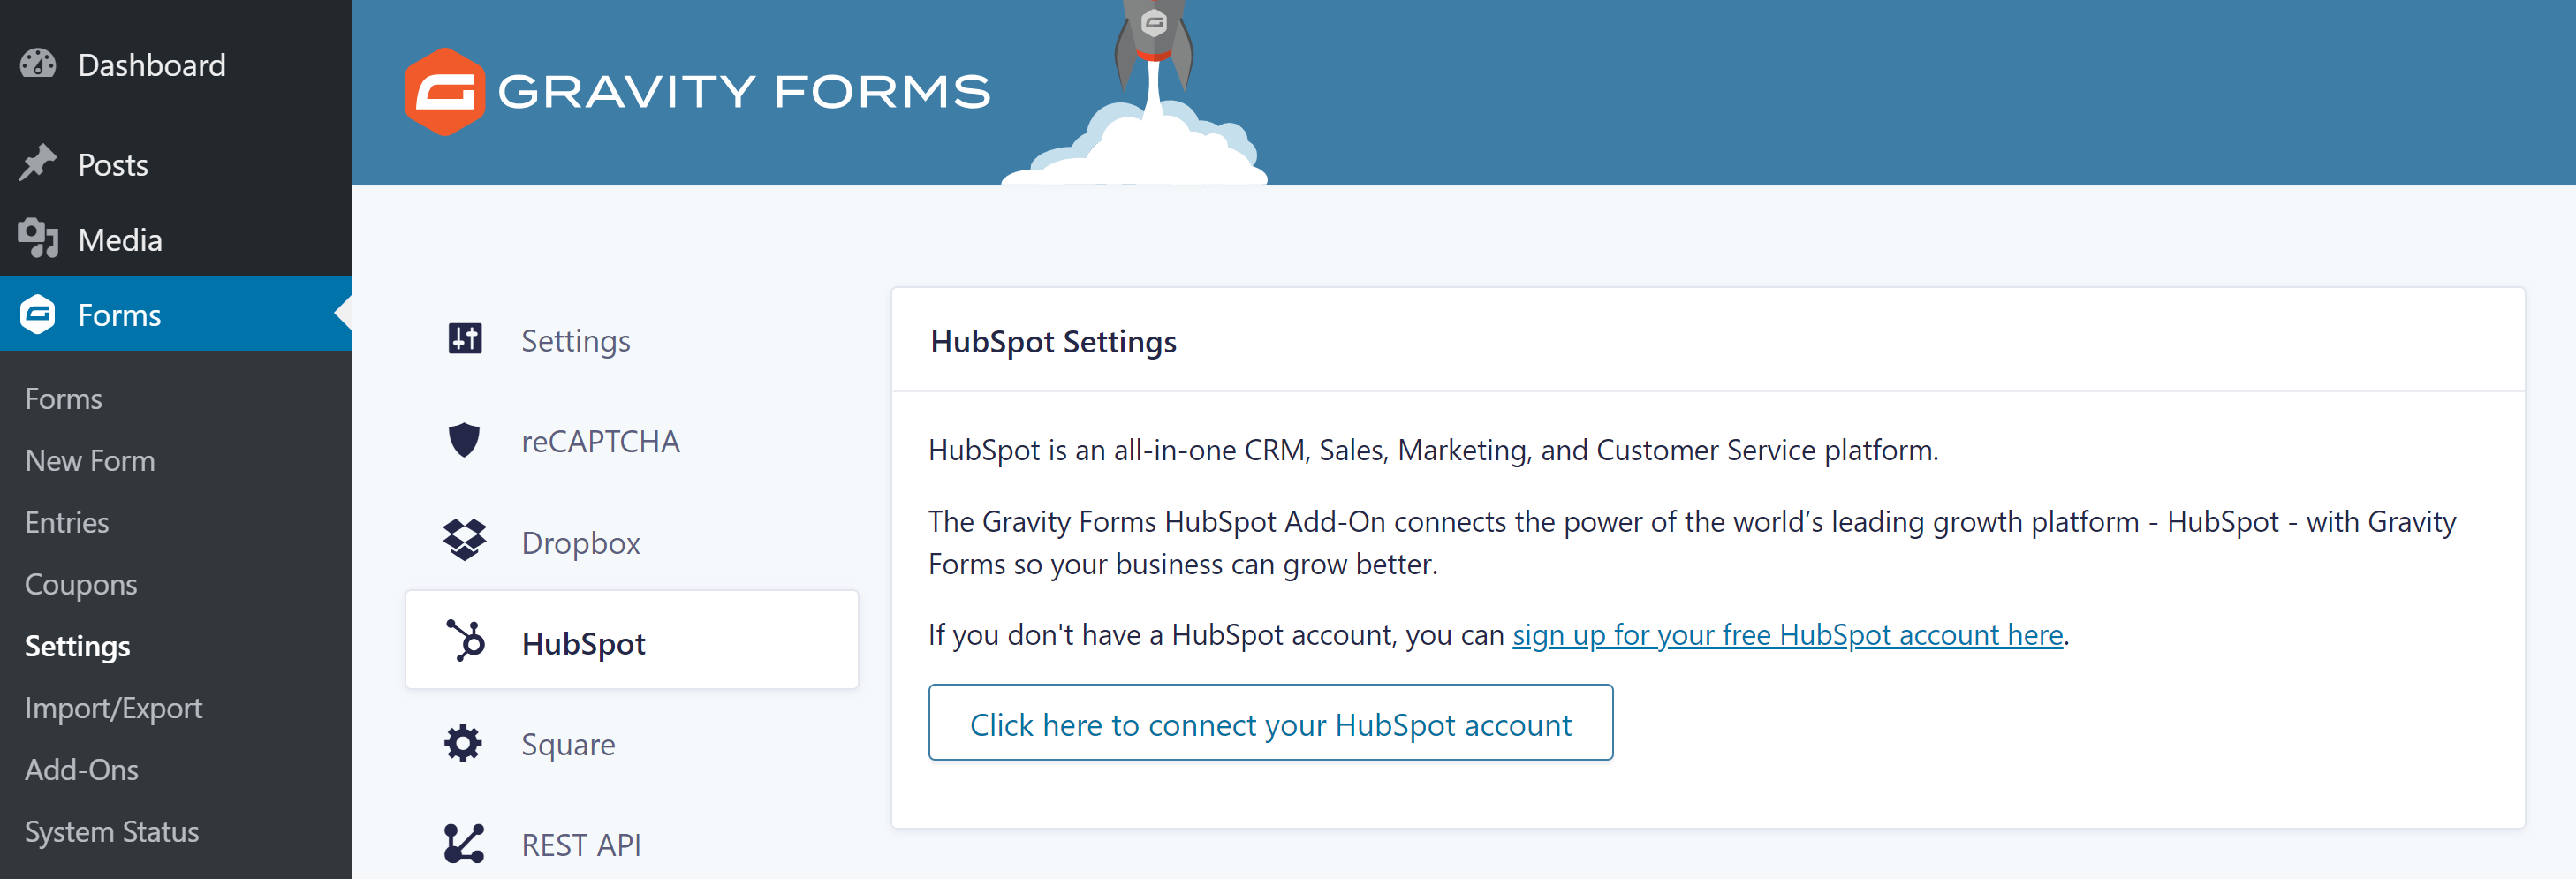
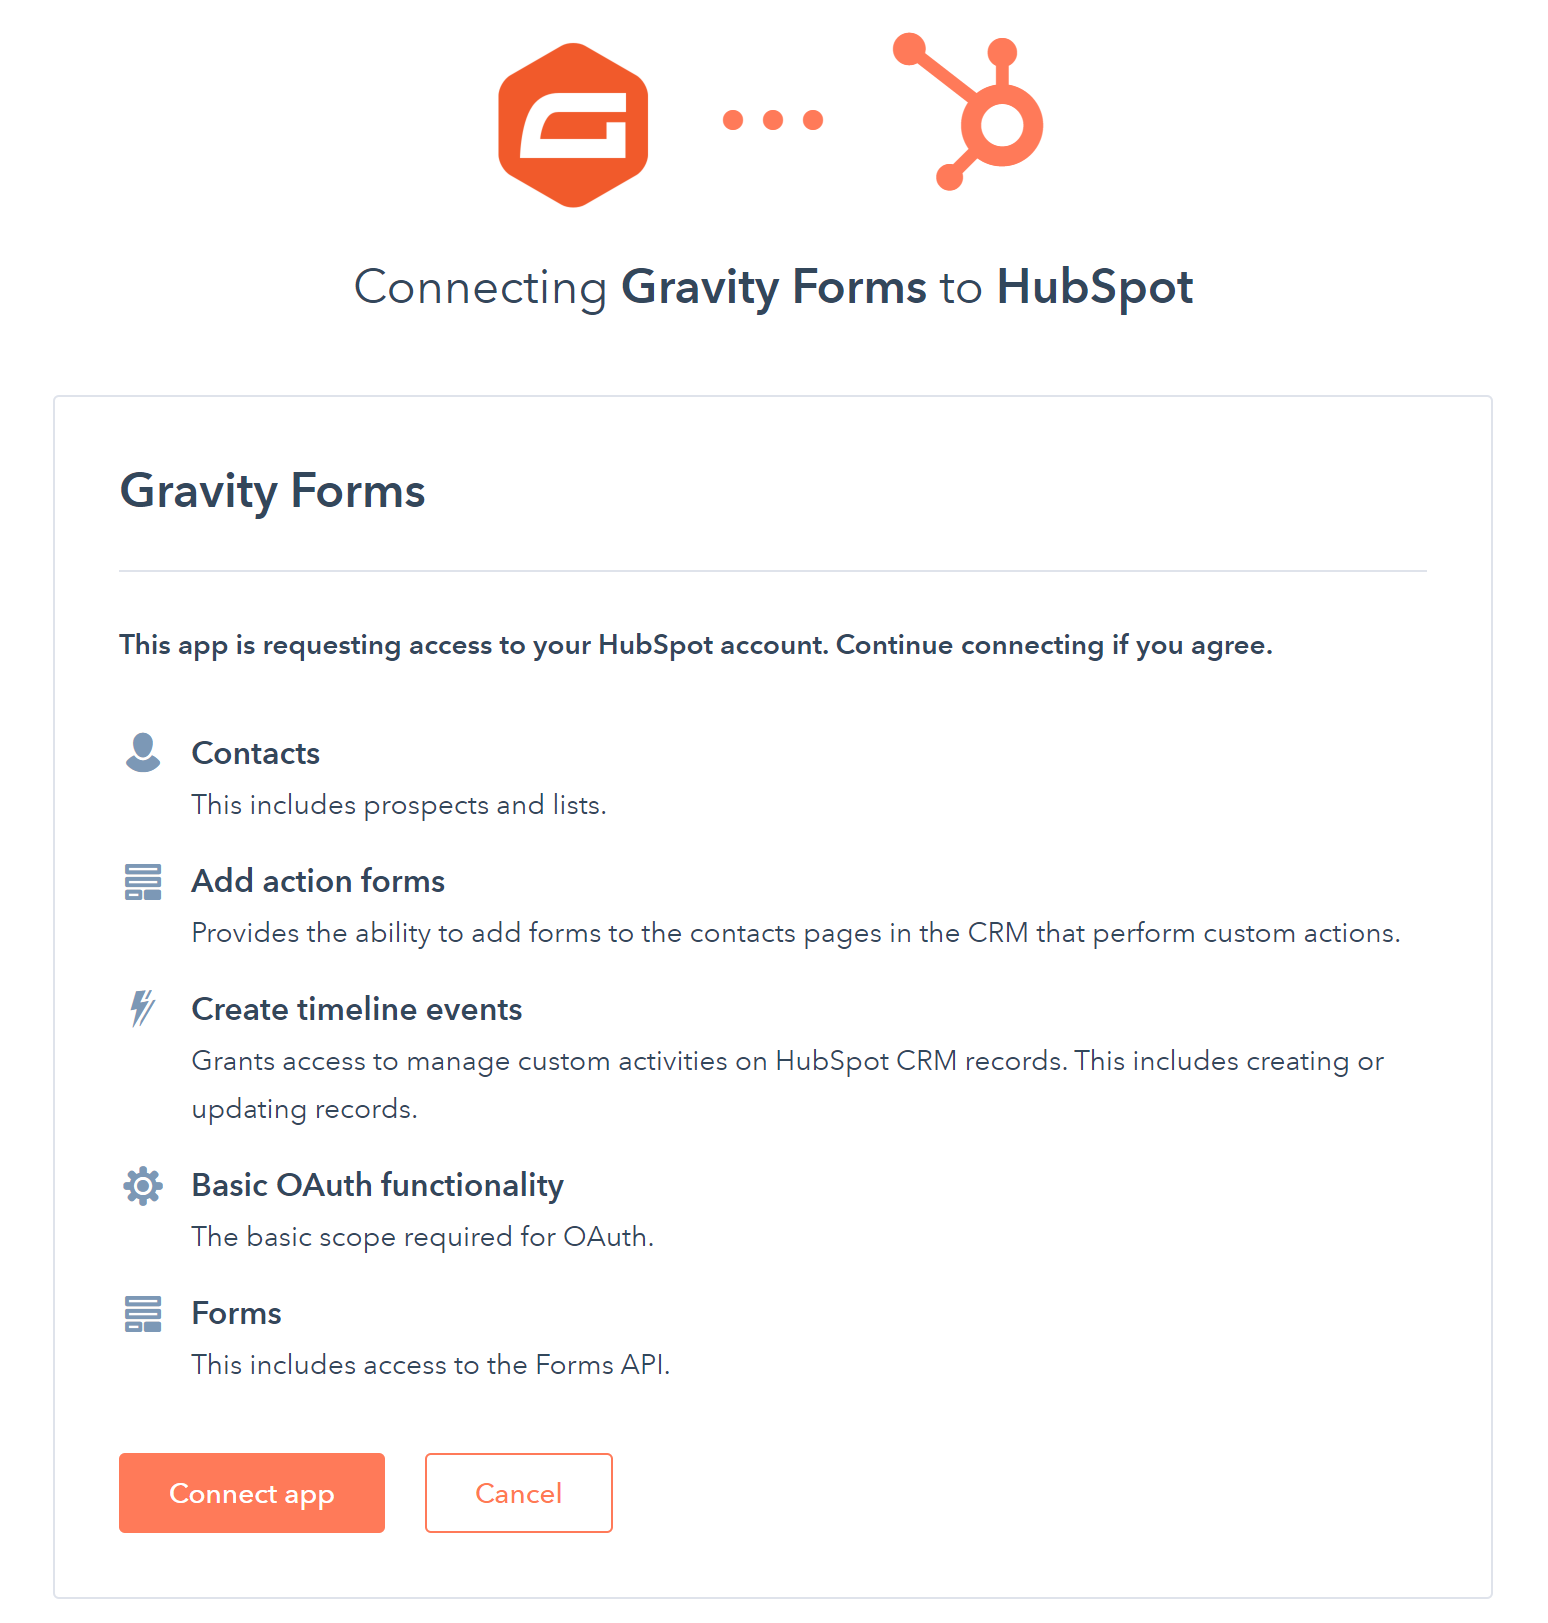
Then follow the instructions to connect your two accounts.
For more information on this process, check out the Gravity Forms documentation.
Step 3: Create a Form
Now that you’ve connected your WordPress website with your HubSpot account, you can publish a form that adds users to your email marketing list in HubSpot.
This could be any type of form, including a dedicated email list sign up form, a contact form, or an order form. Depending on the form type, you can automatically add users to your email list or give them the option of subscribing via a checkbox, when using a form on your site.
As Gravity Forms has a library of ready-made form templates, it’s quick and easy to add a new form to your site and then integrate it with your HubSpot email list.
To get started, click on Forms > New Form from the WordPress admin sidebar menu.
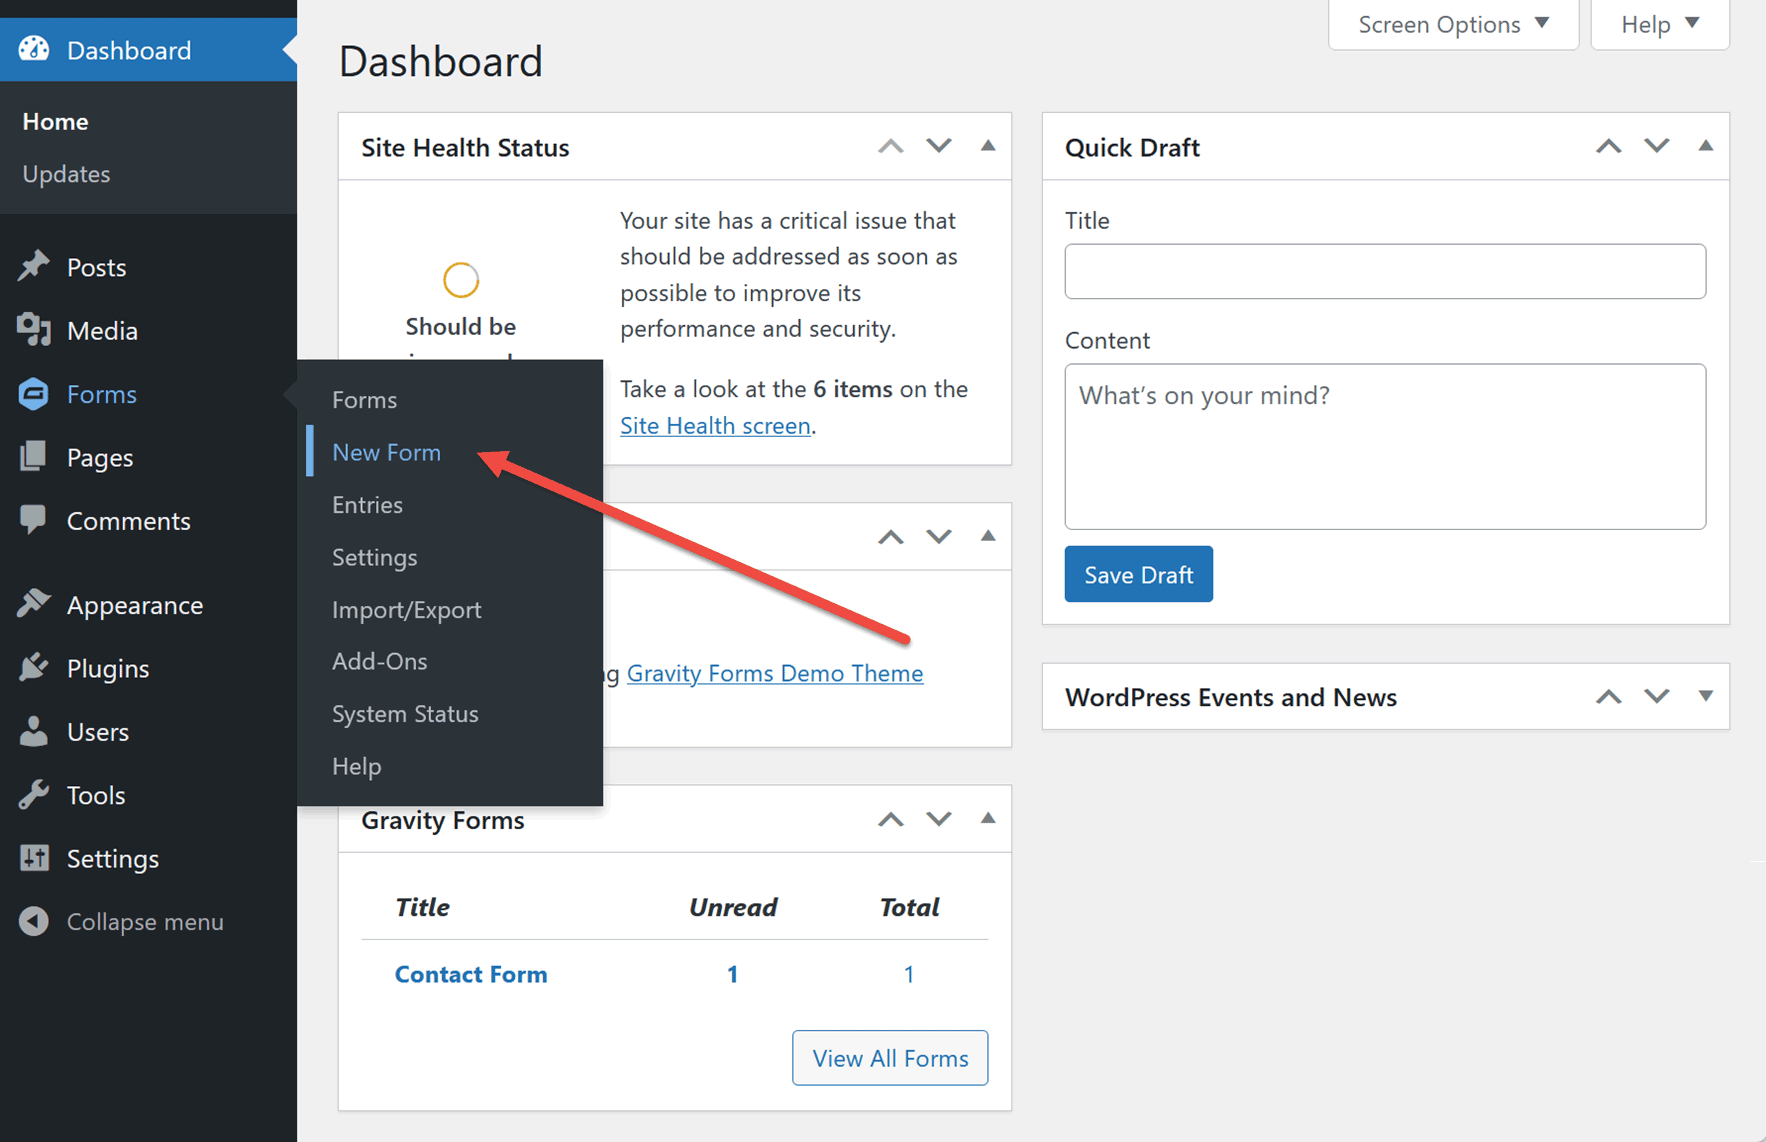
Either choose one of the ready-made templates or start with a blank form. For this example, we’ll use the Newsletter Signup Form.

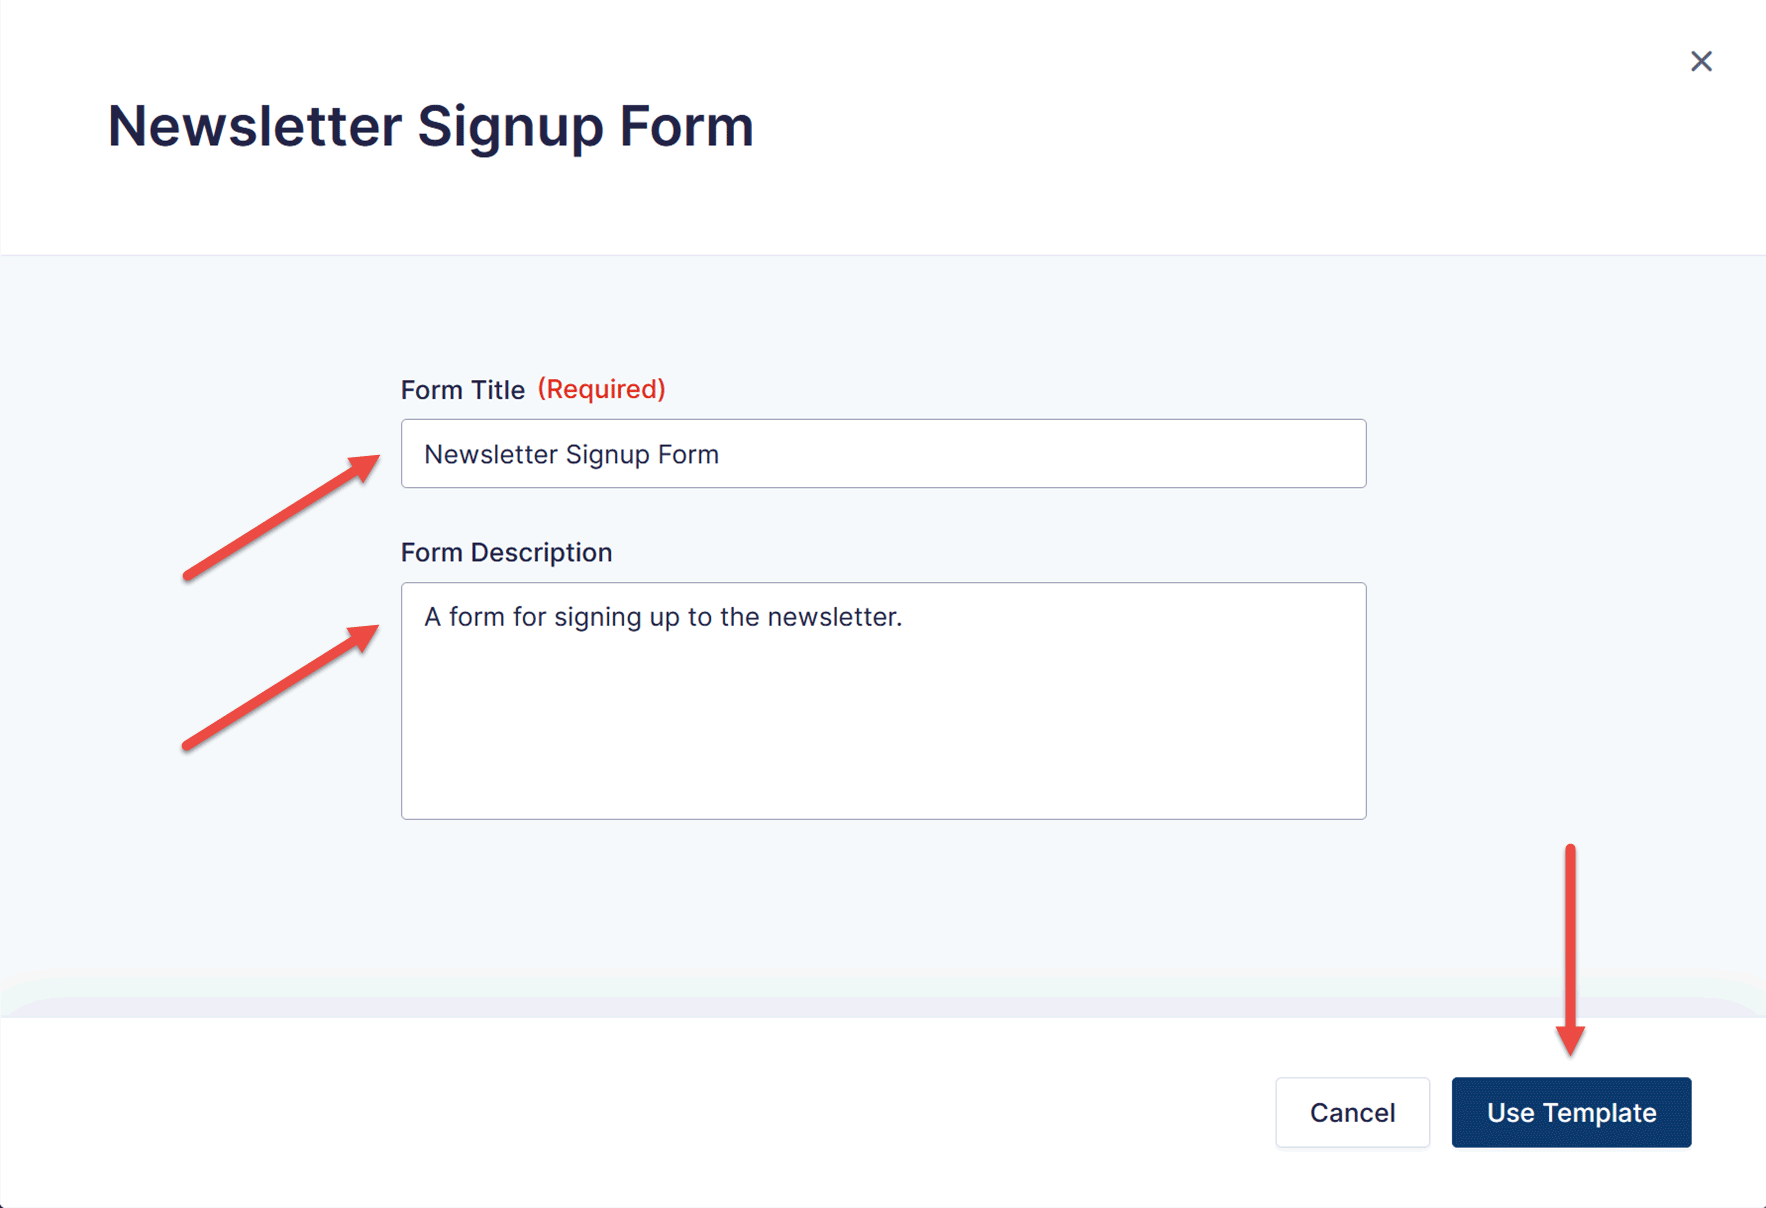
Now, give the form a title and a description. This will help you identify this form among the others on your site. Then, click the Use Template button.
The form editor will then open, displaying with the form ready for customization.
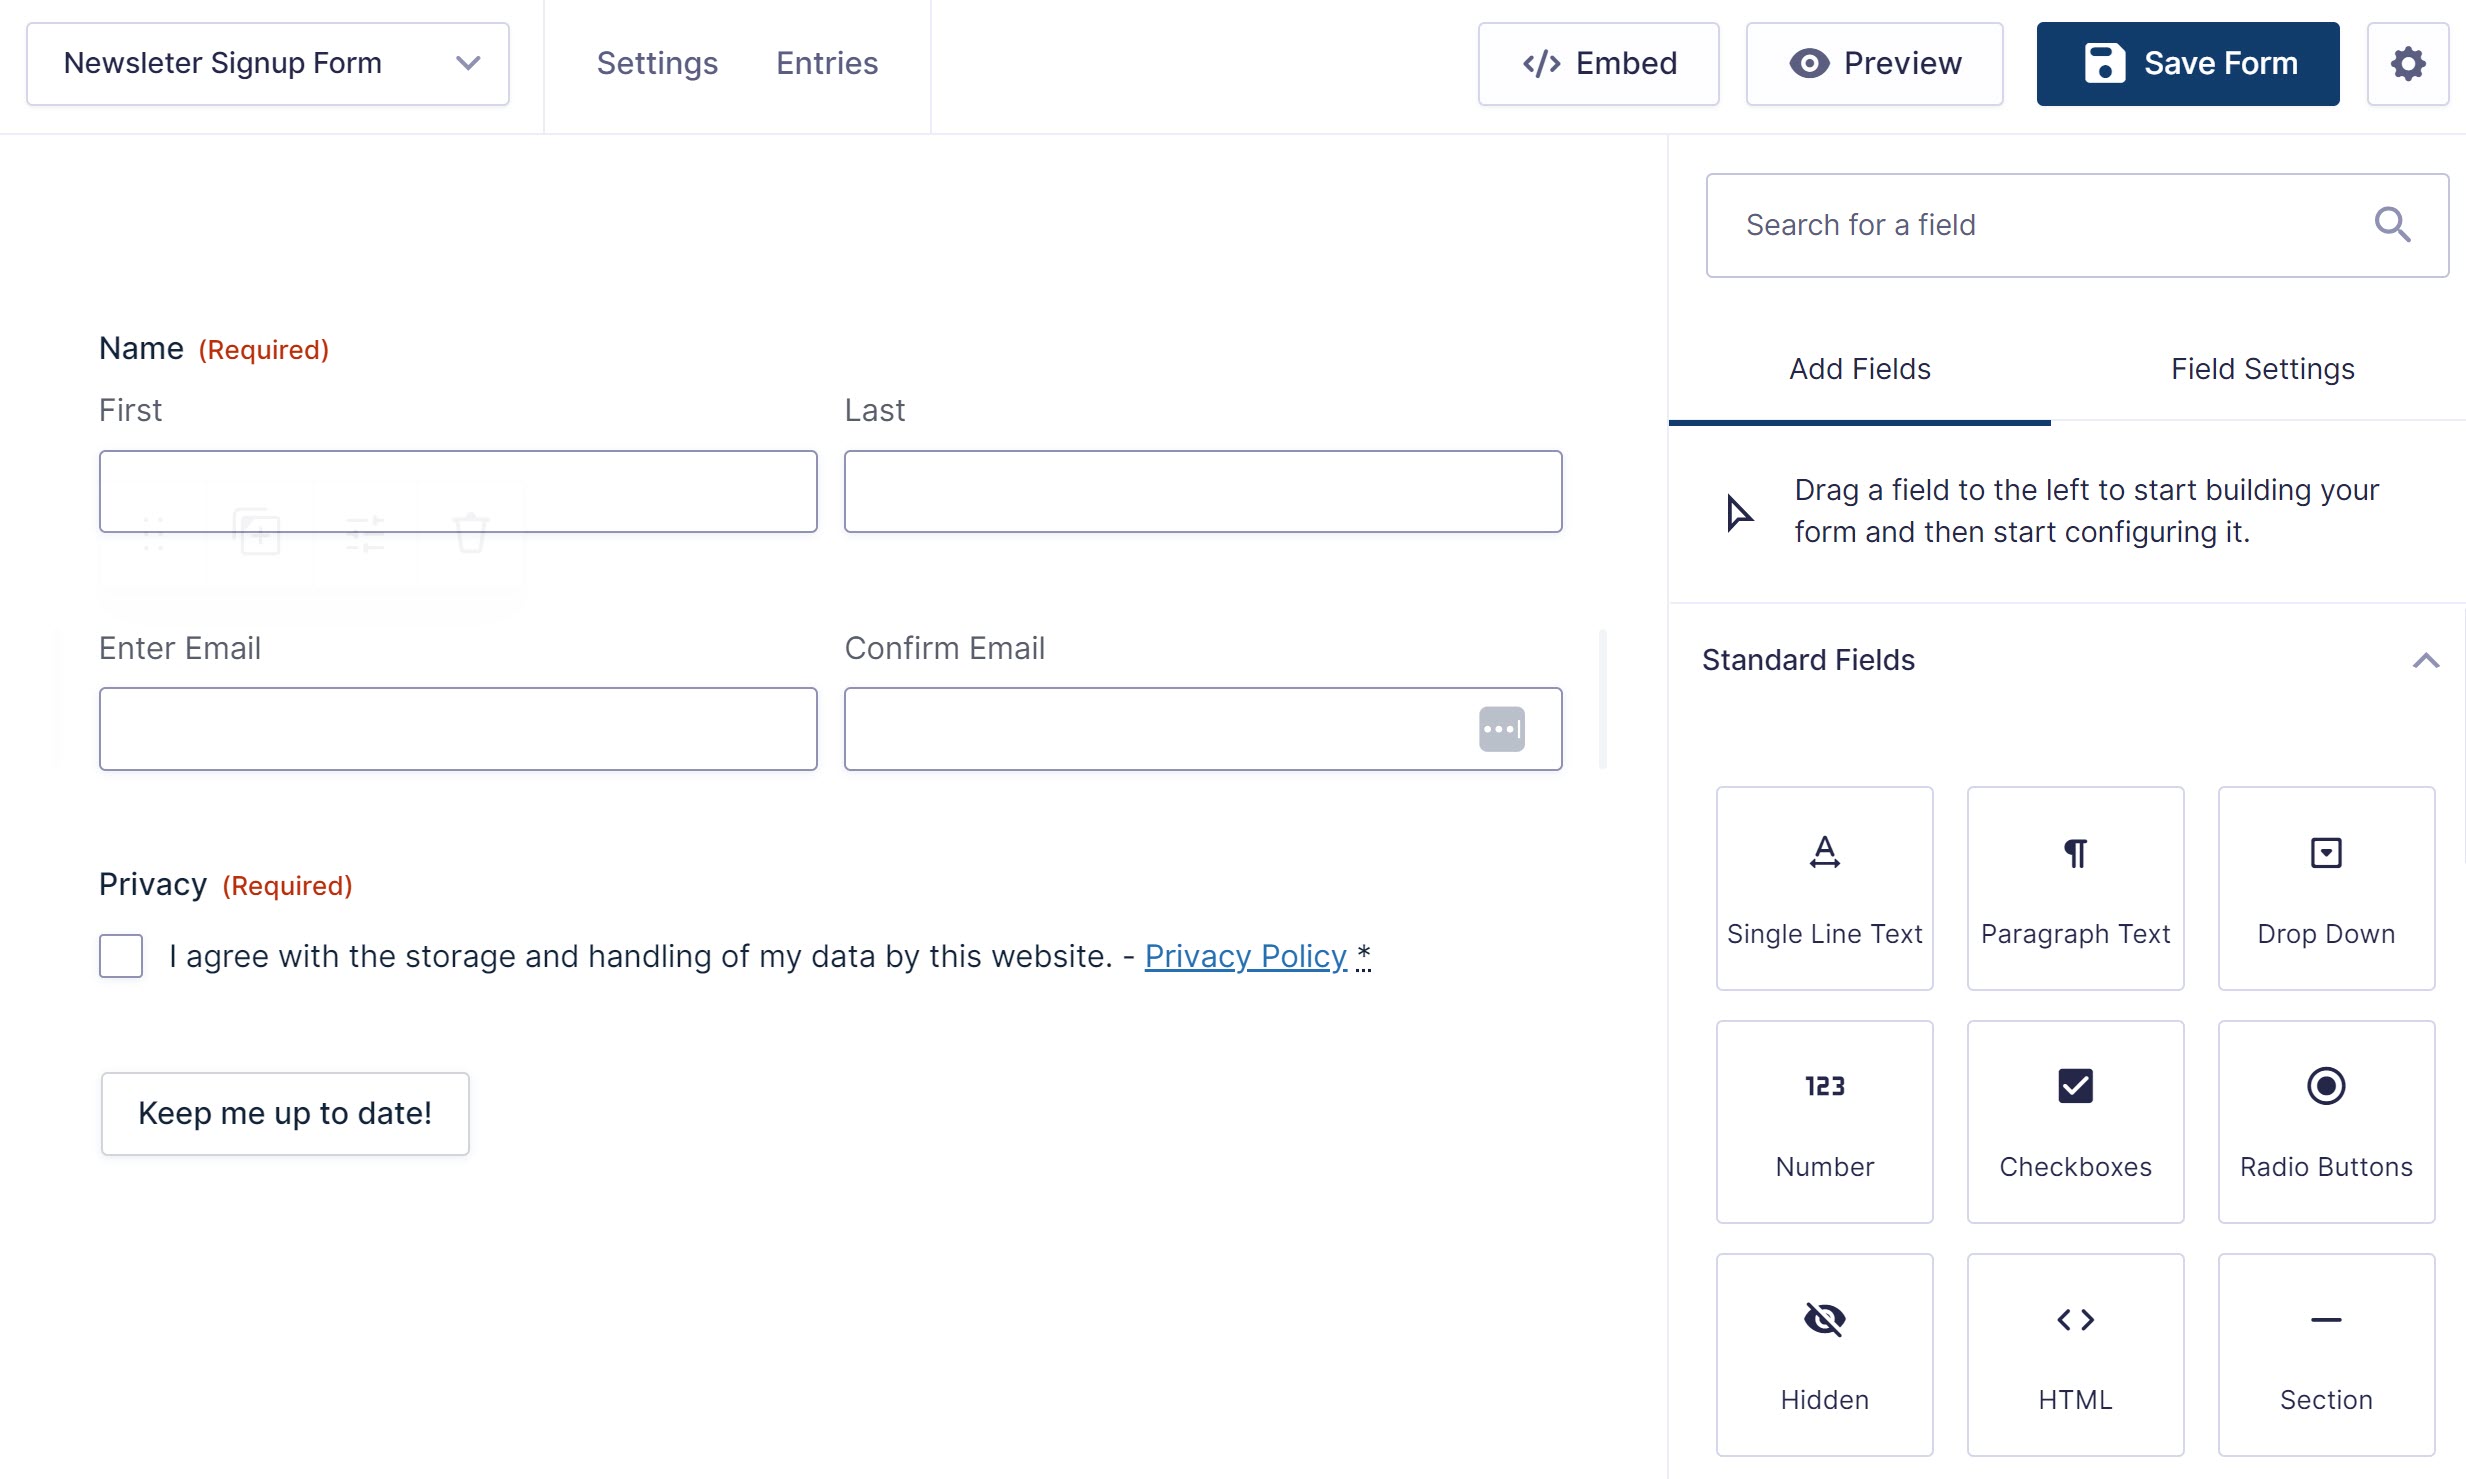
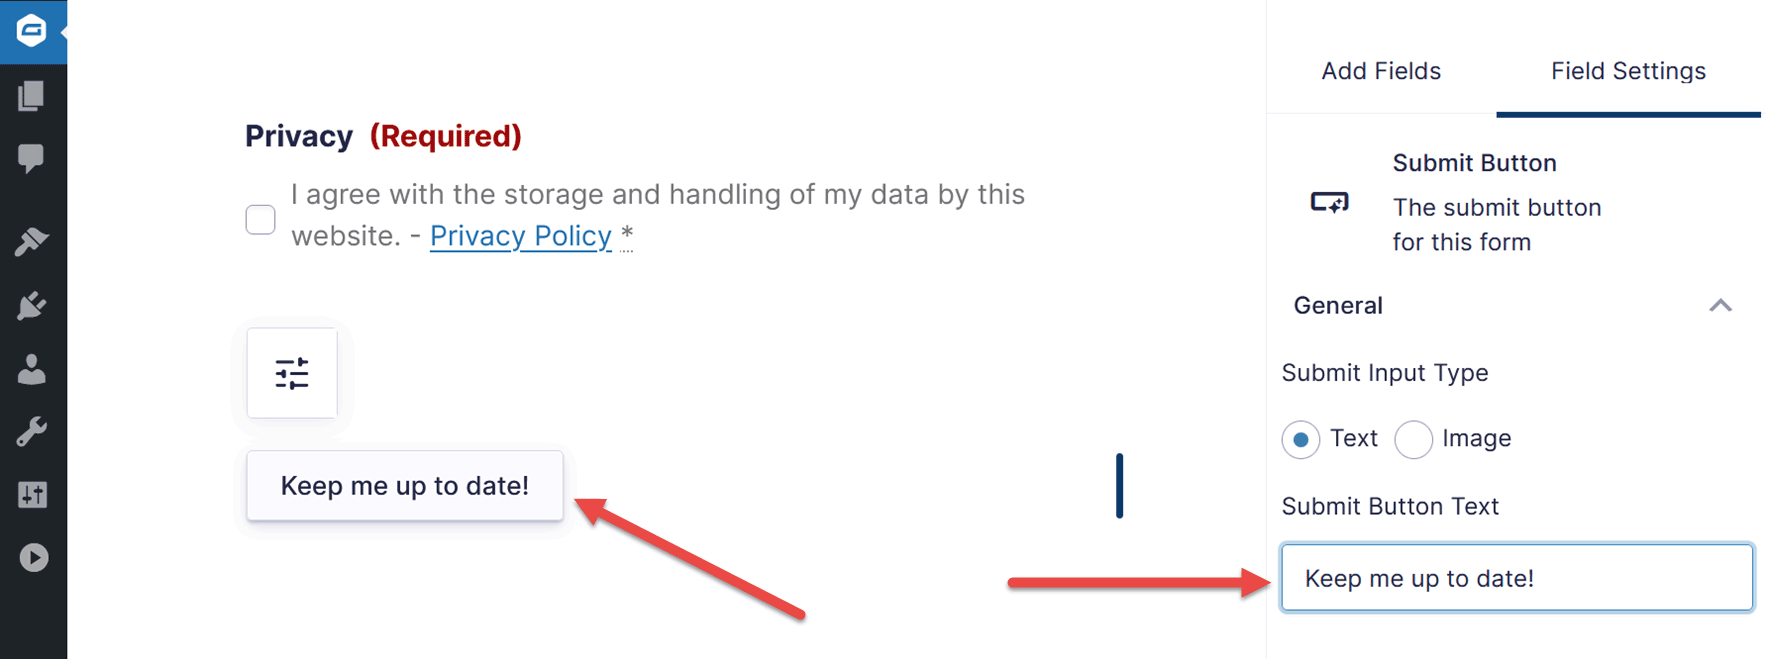
If necessary, you can edit the form by adding and removing fields and changing their position. You can also customize the submit button text by clicking on it and then editing the text via the sidebar panel.
If you want to customize the appearance of the form, you can do that once you’ve embedded it in a post or page — something we cover in the next step.
When you’re happy with the form, click the Save Form button in the top right area of the editor.

Step 4: Create a Form Feed
The next step is to create a form feed, connecting a specific form with HubSpot. To do this, you can either create a new form by following the previous step or select an existing one that you would like to integrate with HubSpot.
Once you’re in the form editor for the form you want to connect to HubSpot, click on Settings at the top of the screen and then click on HubSpot from the dropdown menu.
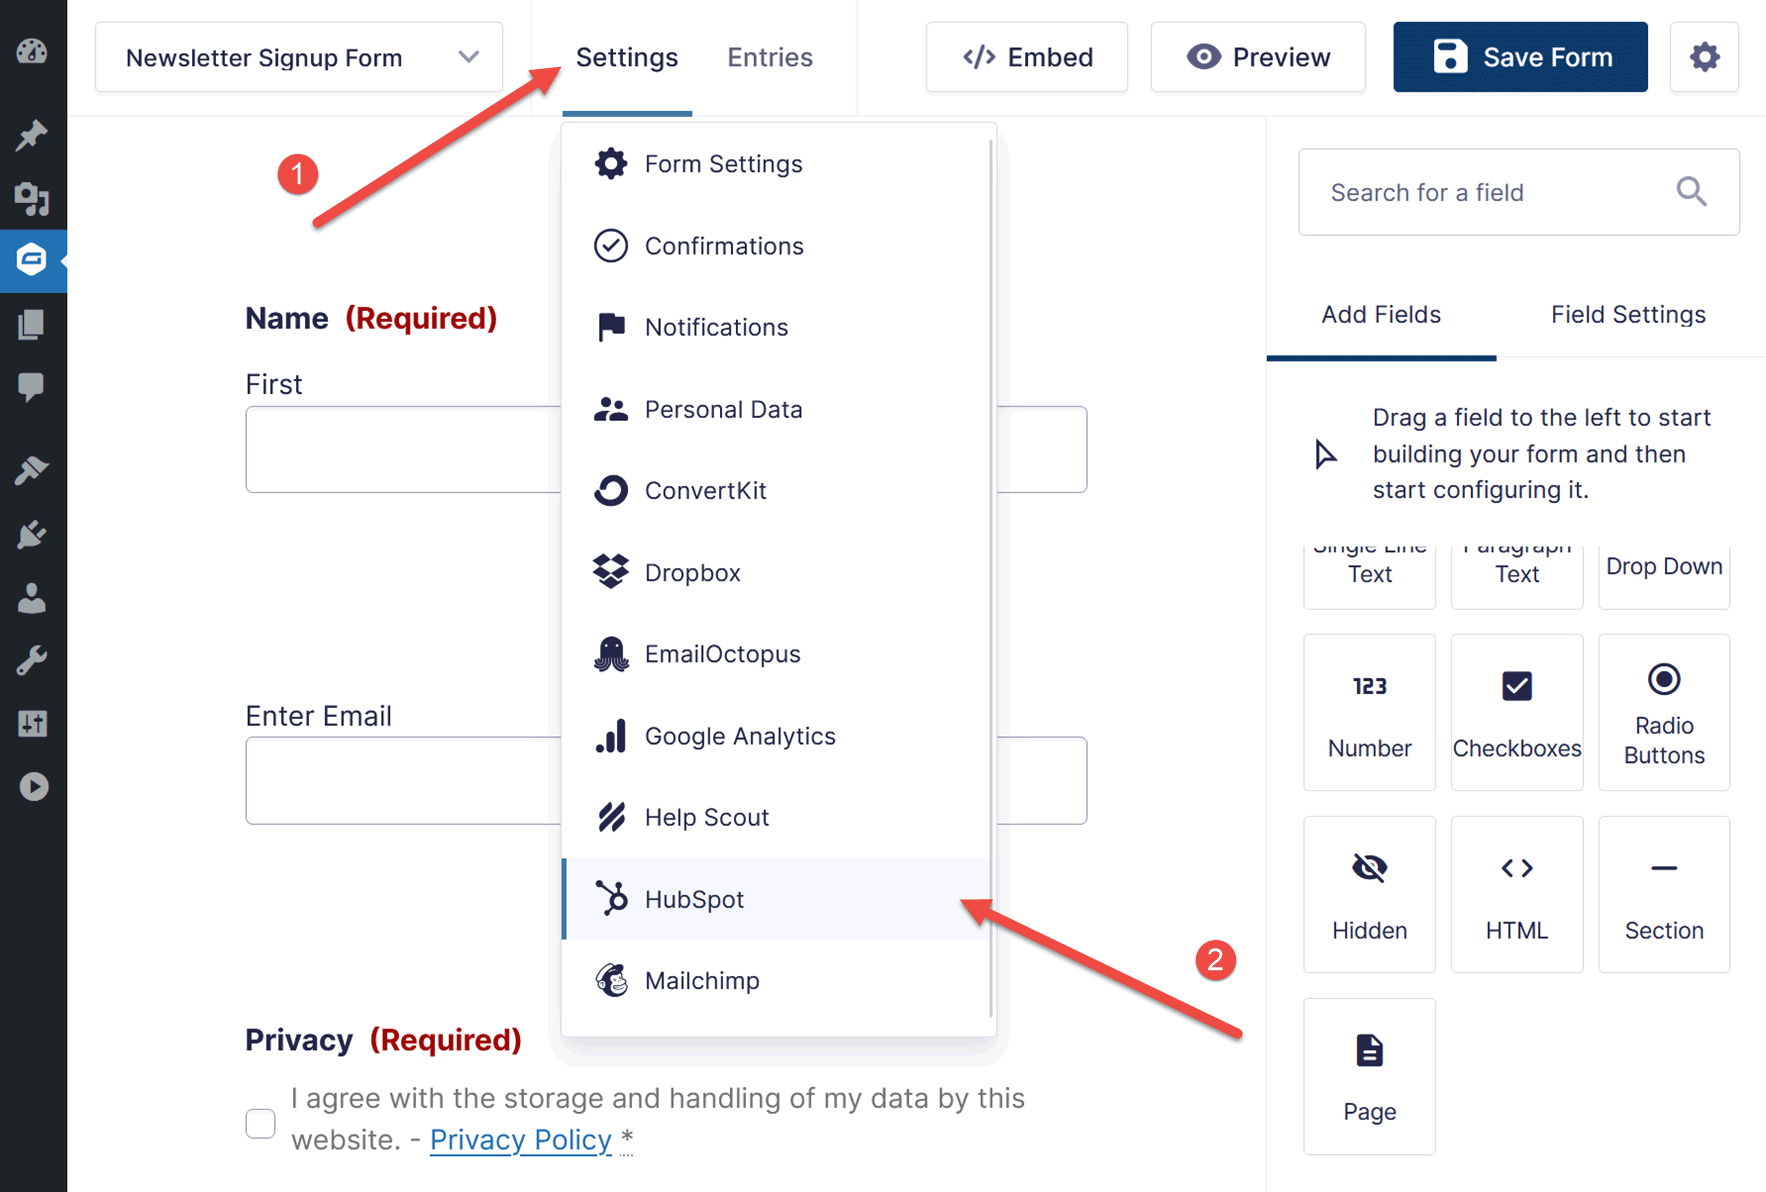
Next, click on Add New or create one! from the settings page.

When configuring your HubSpot form feed, there are a number of settings to consider. These include…
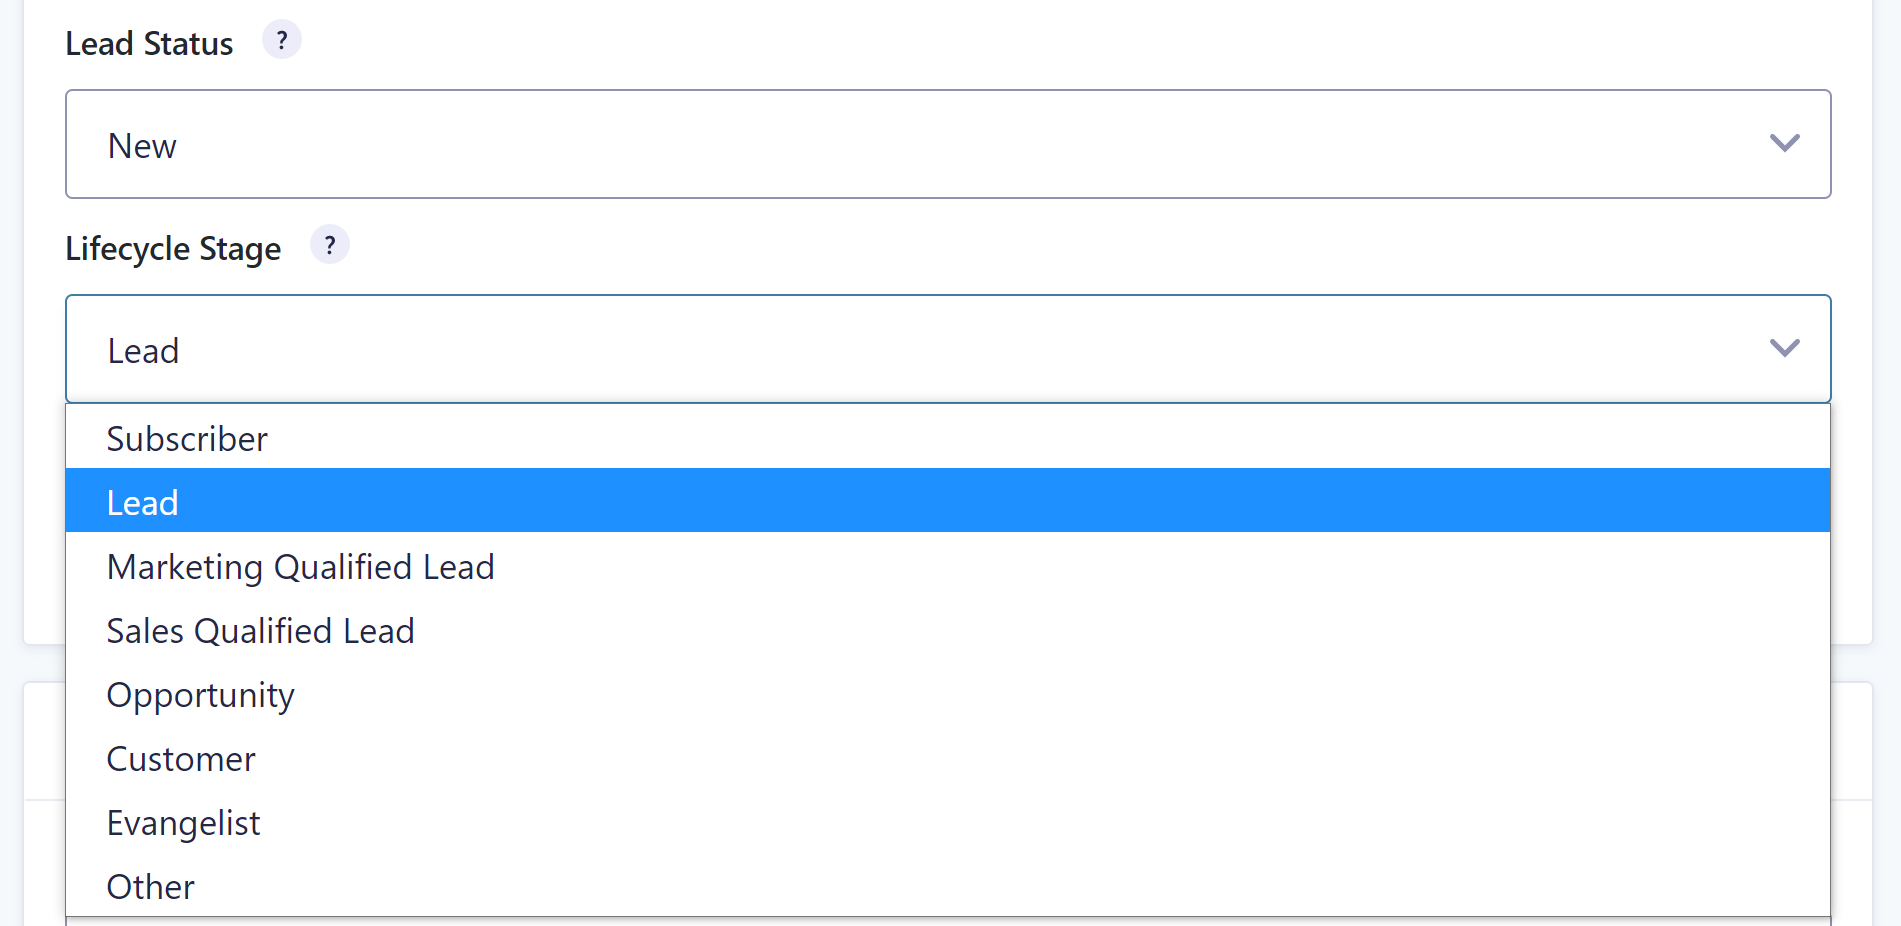
- Lead Status and Lifecycle Stage – Qualify each new lead and give them a lifecycle label so you can easily identify where every person is in your sales pipeline.
- Assign a Contact in HubSpot – Within the HubSpot form field, you can select to assign each new contact to a member of your team. Equally, you can use conditional logic to assign new contacts to different team members depending on the options they selected within the form. This is a great way to ensure that new leads reach the right people in your company.
- Map Contact Fields – This setting enables you to map your form contact fields to your HubSpot CRM fields. You can also add additional contact fields, depending on the information you want to collect – for example, phone number and address.
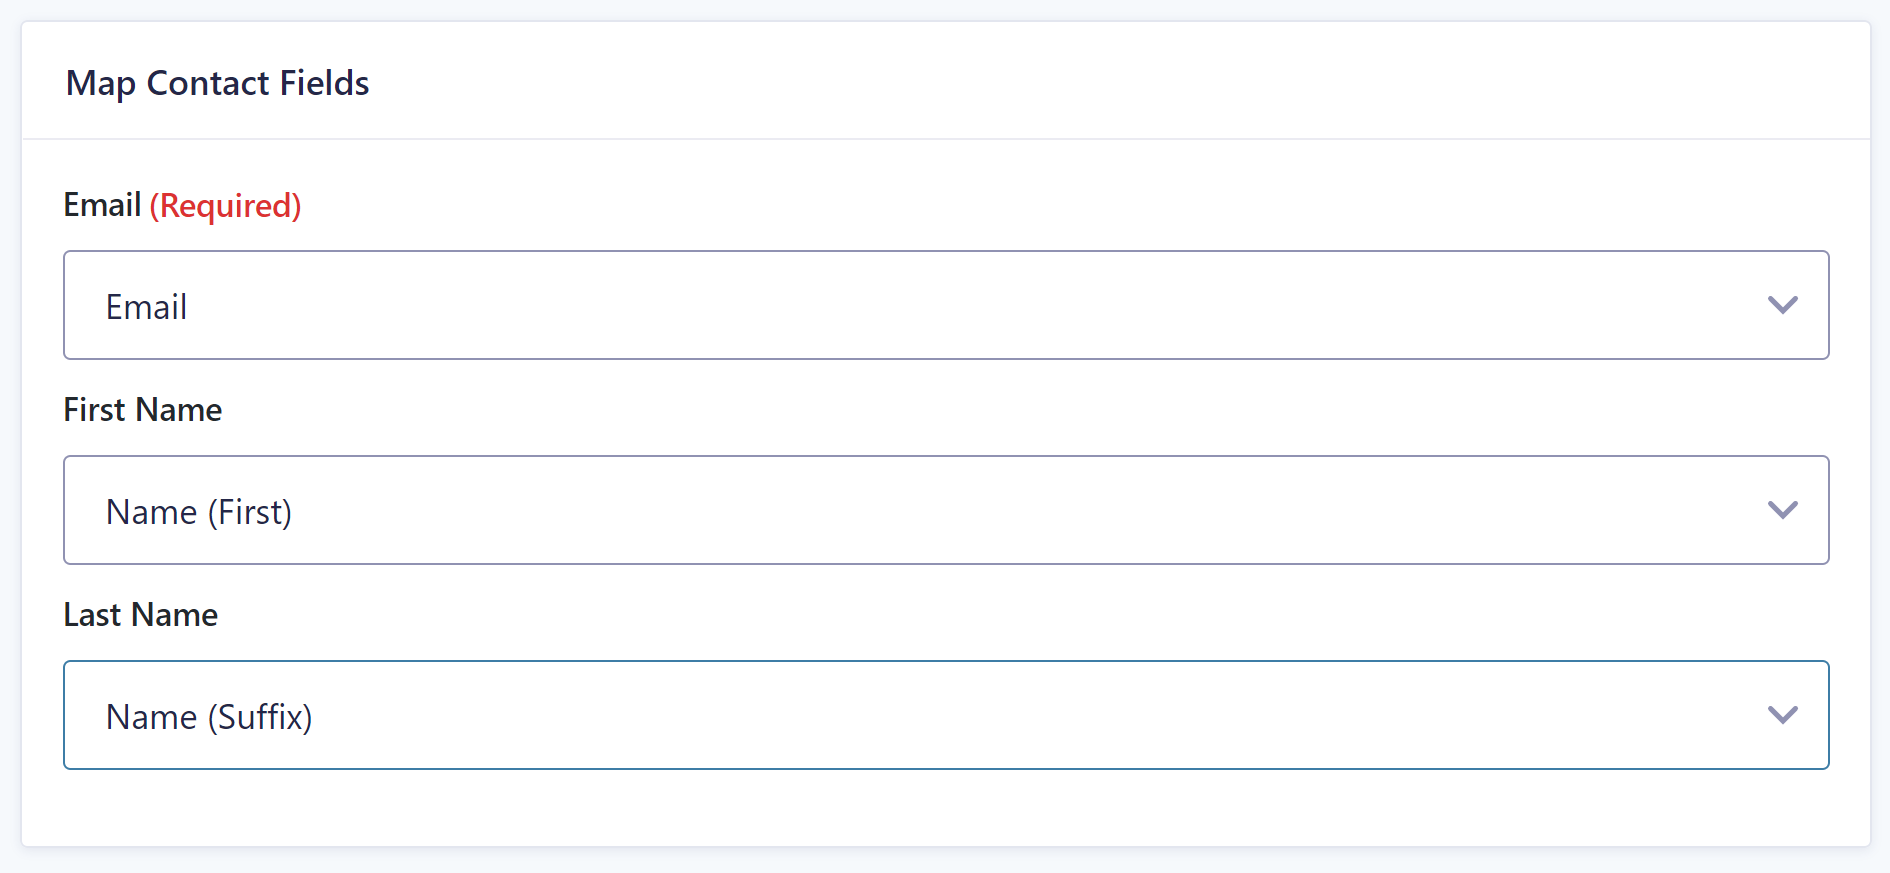
- Add Additional Contact Fields – Here you can map form fields to any custom properties you’ve created within HubSpot. Thanks to this, all the relevant information collected with your form can be sent and processed correctly within your HubSpot CRM.
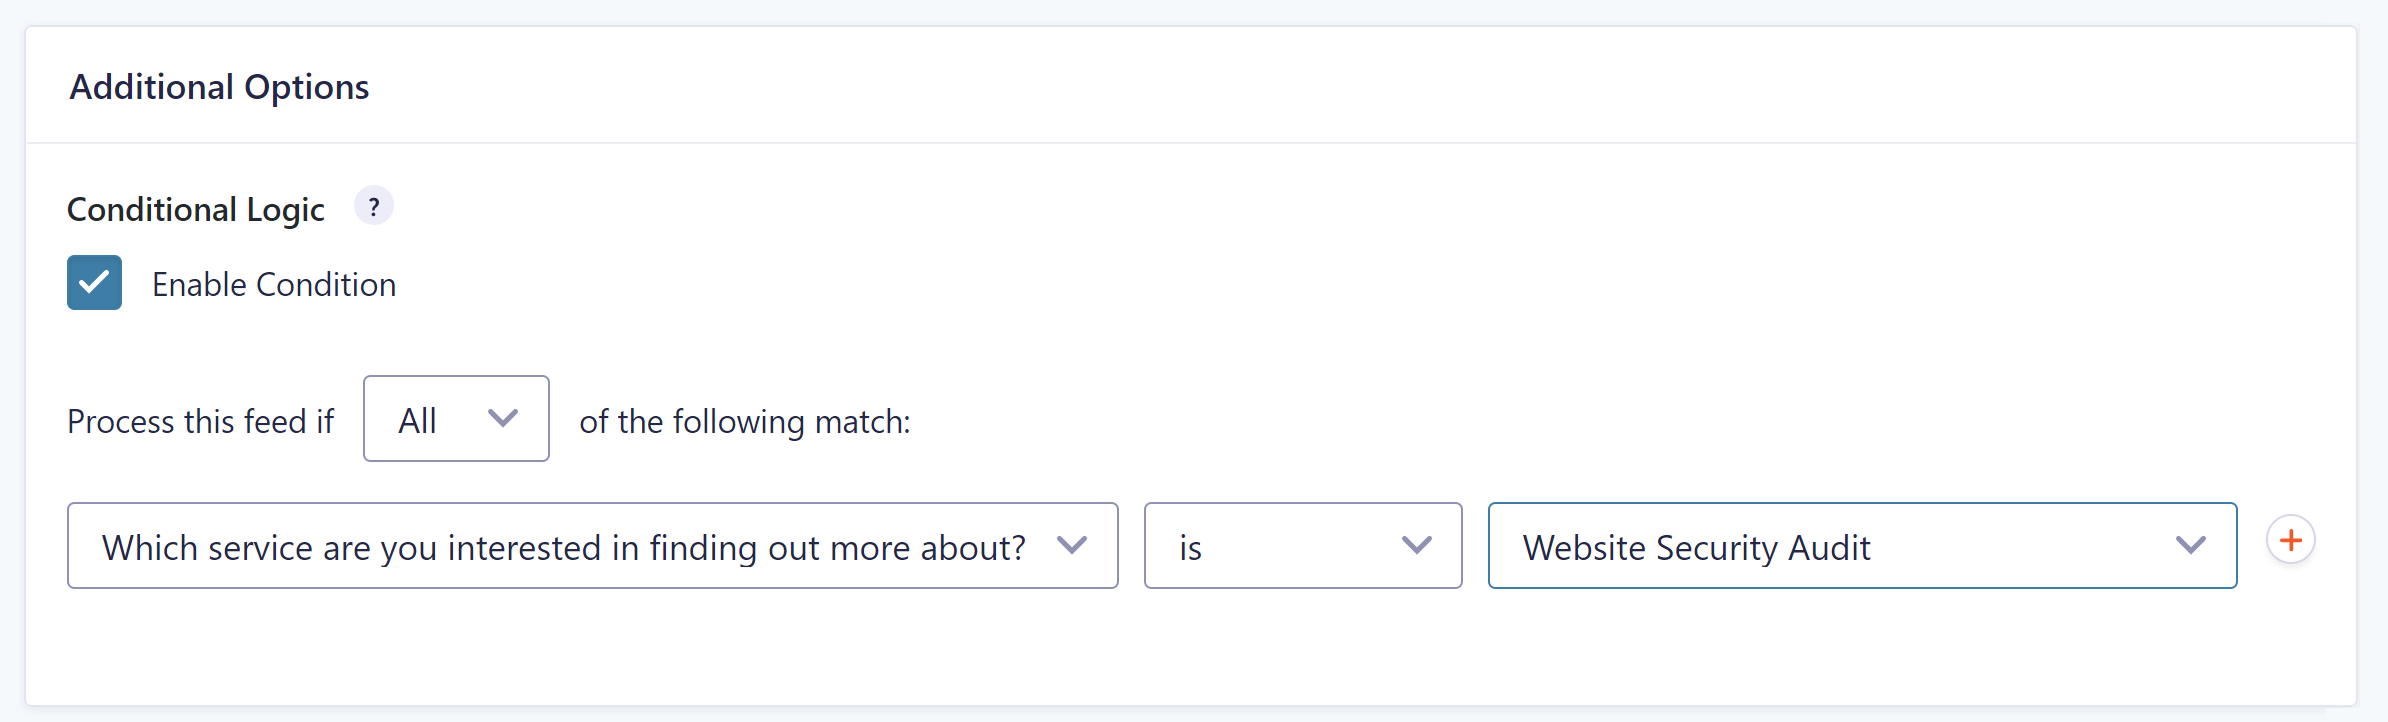
- Conditional Logic – The last option available is to enable conditional logic. By configuring this setting, you can determine that the form entry data is only sent to HubSpot if specific conditions are met. This will help to ensure that your HubSpot CRM contains only warm leads, helping you to concentrate your time and effort on people who are most likely to convert against your goals.
For more information on how to configure a HubSpot form field, have a read of this article in the docs.
Once you have completed these three steps, your form will be fully integrated with HubSpot.
For further details on using HubSpot – how to set up the CRM to work for your business and get started with email marketing – check out the extensive documentation within the HubSpot Knowledge Base.
Step 5: Publish the Form
Now that you’ve created a form and connected it to HubSpot via the feed, it’s time to embed it in a post or page so that your visitors can access it.
There are a few ways to embed a form in a post or page. One way is to return to the form editor by clicking Edit from the settings page.
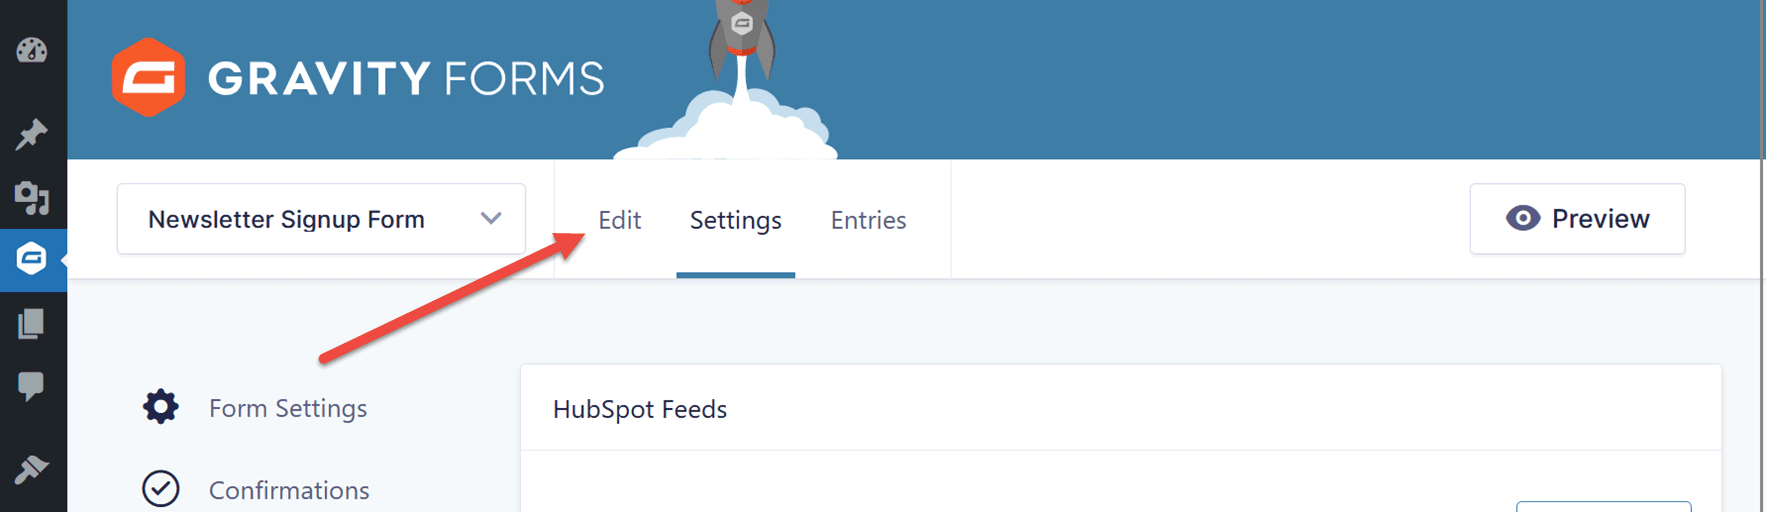
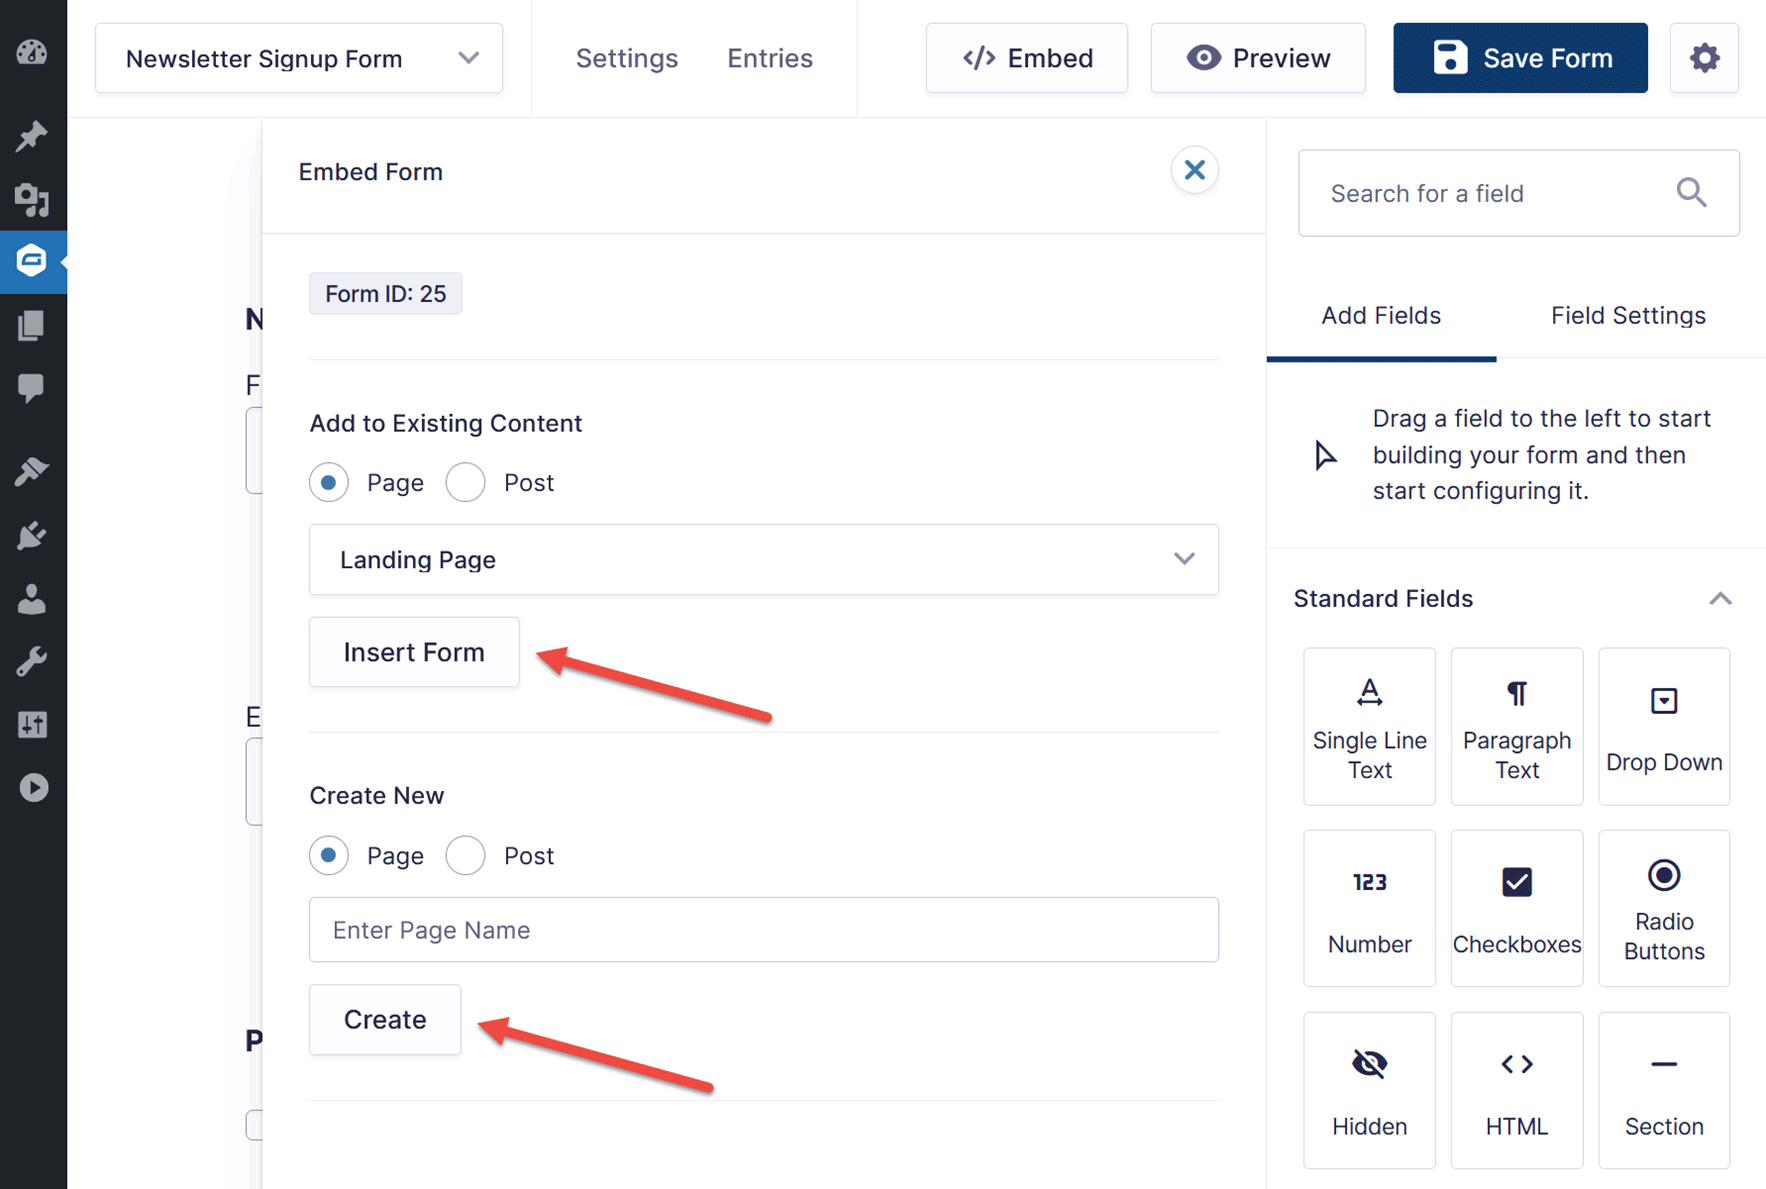
Then, from the form editor, click the Embed button at the top of the screen.

Now, you can choose to add the form to an existing post or page on your site or create a new post or page.
Depending on your preference, select either Page or Post for one of the two options — Add to Existing Content or Create New. Then, either choose an existing piece of content or enter a name for the new page or post.
Once form has been added to the new or exising page or post, you can style your form using a number of style options in the Form block.
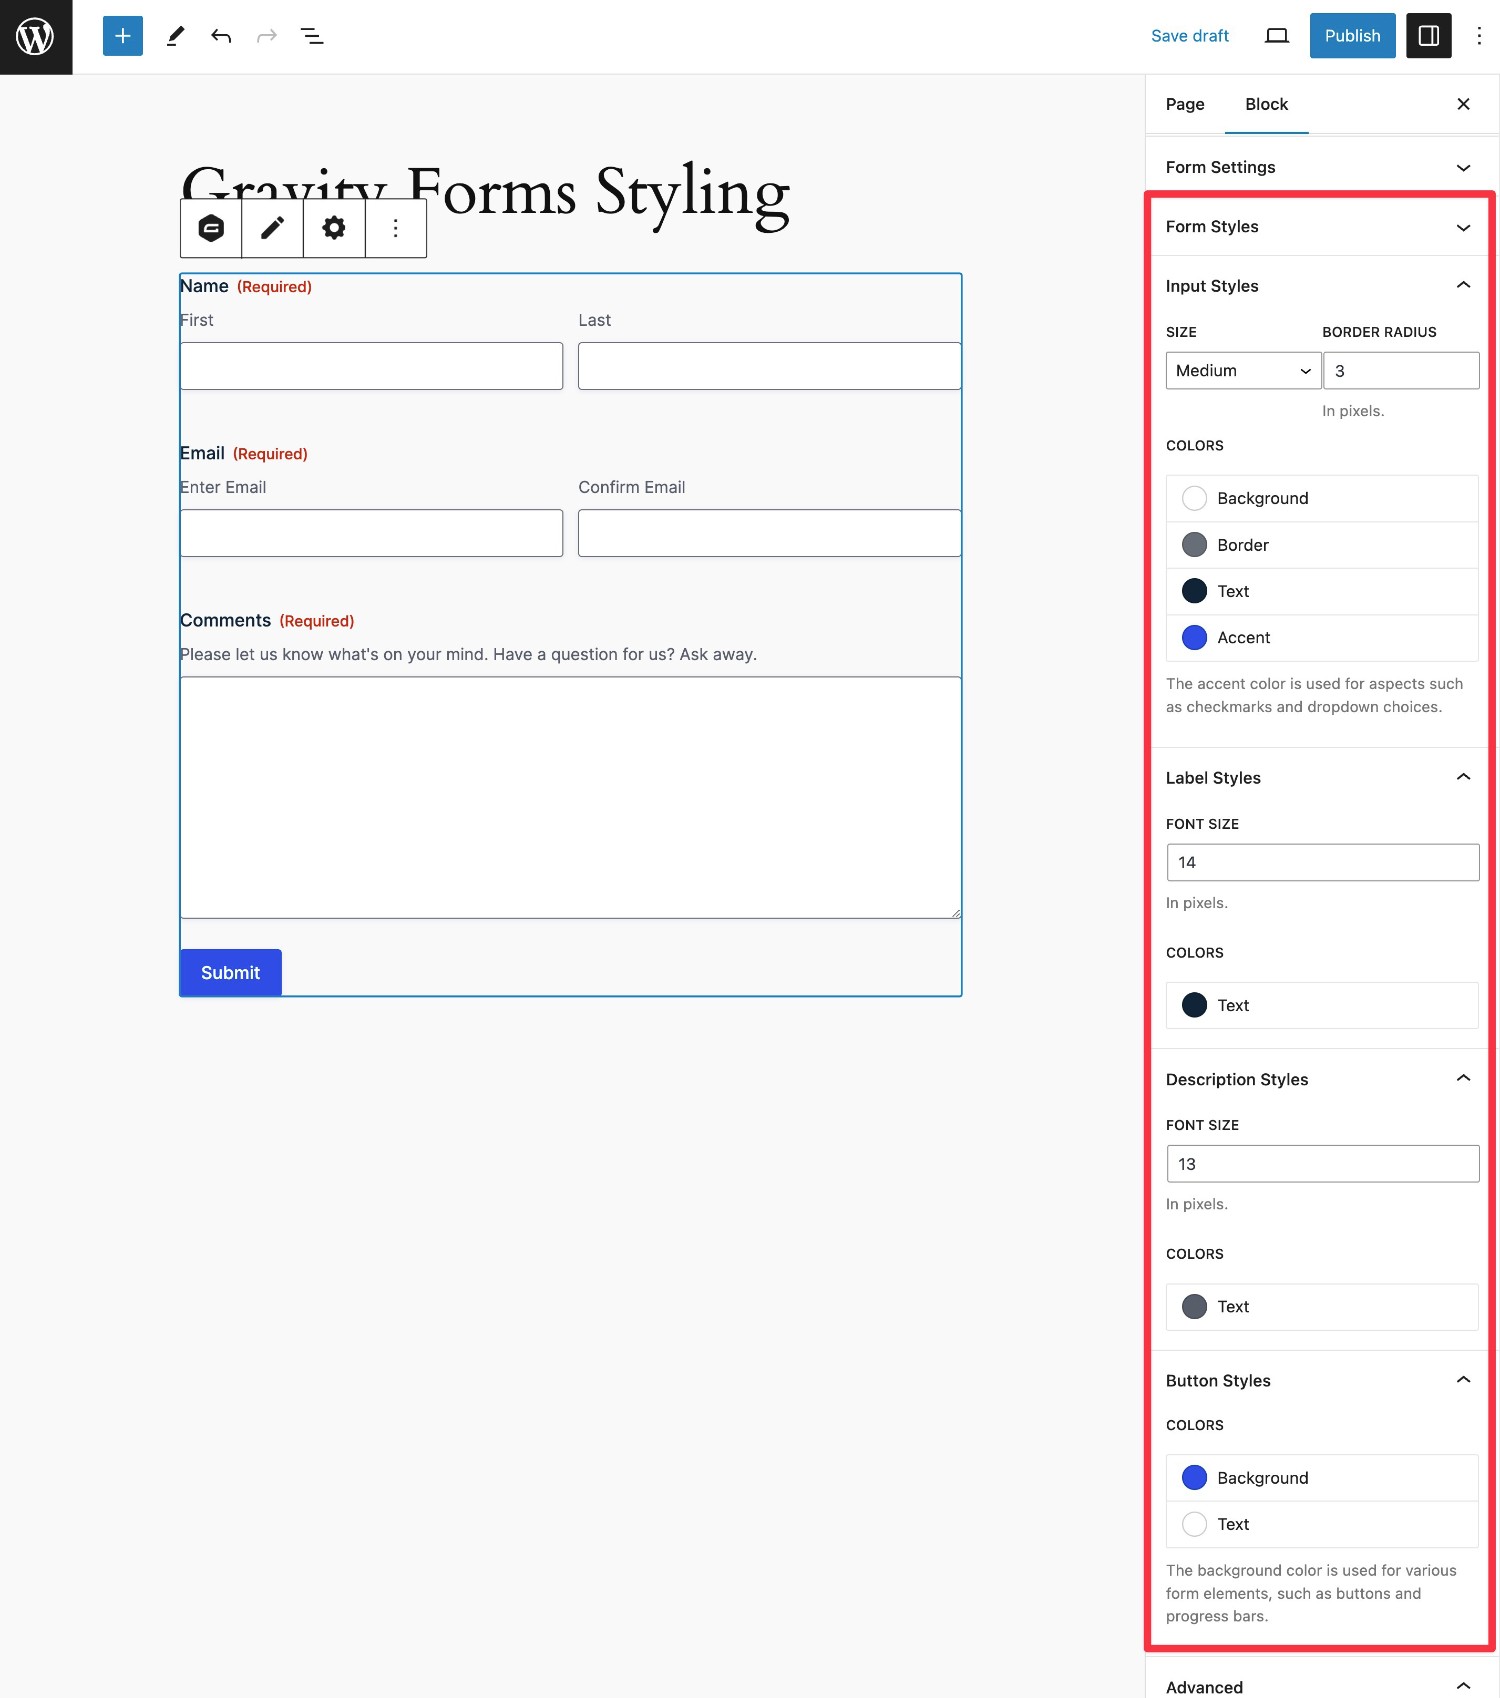
You can also use the core WordPress blocks to access additional styling, such as using the Group block to apply a custom background color to your form. Our full guide to Gravity Forms styling covers this in more detail.
Now everything should be ready to publish — don’t forget to test it to ensure that everything is working correctly.
Don’t Have Gravity Forms Yet?
If you don’t have Gravity Forms or the HubSpot Add-On, don’t worry. You can still test out everything in this article for free inside your own personalized Gravity Forms demo and see why Gravity Forms is the top choice for WordPress sites worldwide.
Already in love? Purchase our premium WordPress form plugin today!
Newsletter
If you want to keep up-to-date with what’s happening on the blog sign up for the Gravity Forms newsletter!
"*" indicates required fields