
Google Analytics is a powerful tool for tracking website traffic and user interactions, and can track many useful insights out-of-the-box. By just deploying your tracking code to your site and enabling enhanced measurement, you can track page views, scroll behavior, outbound link clicks, file downloads, and more.
If you want to get the most out of Google Analytics, though, you need to do some additional configuration. The Google Analytics Add-On from Gravity Forms enables you to track form submissions using GA4 and pass a wide variety of data from your form and from your users into GA4 in the form of custom parameters, but you may be curious about what to do with that data and how to use it once you’ve sent it to Google Analytics. This post will guide you through some ways to use the data generated by Gravity Forms in your reports and dashboards.
How form tracking has changed in GA4
For those using versions of the Google Analytics Add-On prior to version 2.0, you were likely already tracking for submissions using the Universal Analytics goals and conversions interface. Universal Analytics (UA) used a goals system, where goals were built based on the four parameters available at the time: Category, Action, Label, and Value. If an event came in and its combination of parameters matched what existed in a goal, that goal would be triggered and a conversion would be created.
Previous versions of the Google Analytics Add-On for Gravity Forms prior to 2.0 worked by letting users create goals and set feeds to use those goals on submission, thereby creating conversions.
In GA4, goals have gone away, and conversions work a bit differently, so users may need to take action to continue tracking their form submissions in a helpful way.
In GA4, events are no longer limited to those four predefined parameters. Each event can have up to 25 custom parameters that are sent along with it. Conversions have also changed. Now events can be manually set as conversions in your Google Analytics account based on their event names (but not on their parameters). All of this has resulted in some changes both in what data the Google Analytics Add-On will send to Google, and how that data will need to be reported on, but this gives users tremendous flexibility in the data they send and how to report on it.
Sending Data from Gravity Forms to Google Analytics 4
The first step in tracking your form submissions is to configure the Google Analytics Add-On and set up some feeds. If you’re using a previous version of the Google Analytics Add-On, you’ll need to make sure that you’ve updated to v2.0 and upgraded any existing feeds. Then, set up feeds for any new forms you want to track. You can set up feeds to track form submissions and pagination events to track form pagination. Each feed or pagination event can have up to 25 custom defined parameters.
Tracking Form Events and Conversions
With the removal of the goals interface, events now need to be manually marked as conversions. While a conversion in Universal Analytics could be based on a combination of the action, category, label, and value parameters, conversions are now based on the event name only, not on any combination of custom parameters. So if an event is marked as a conversion, a conversion will be generated any time an event with that name is processed.
To mark an event as a conversion, go to Admin > Events in your Google Analytics account and use the Mark as Conversion toggle to mark an event as a conversion.
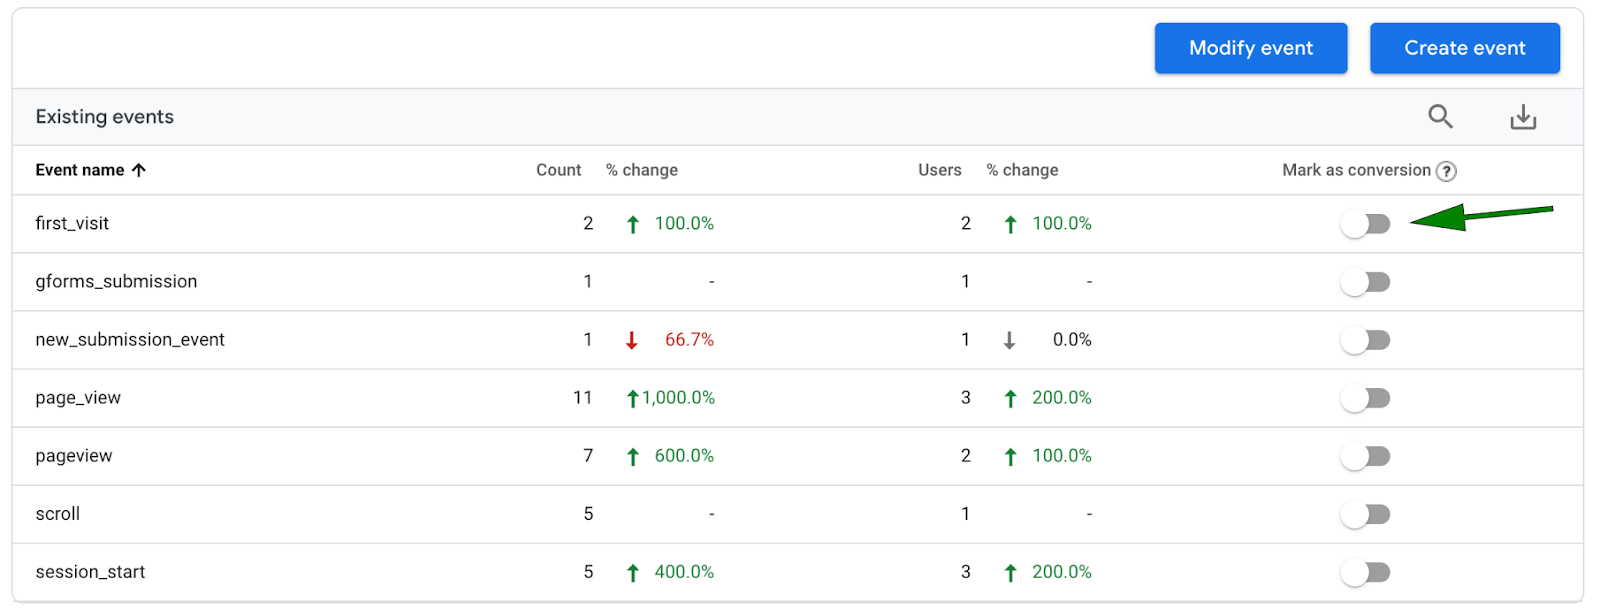
By default, when using the Google Measurement Protocol or Google Analytics connection methods in the Google Analytics Add-On, the event sent on form submission is called gforms_submission. If you only want to track conversions for a single form, or you want to track all form submissions as the same conversion, then simply marking the gforms_submission event as a conversion will meet your needs.
If you need to track separate conversions for each form or for specific forms, you’ll need to ensure that the events sent by those forms have unique names so they can be marked as separate conversions. There are two ways of doing this:
Filtering Event Names
The ‘gform_googleanalytics_submission_event_name’ filter is available in the Google Analytics Add-On to change the event name that the add-on sends to Google Analytics. If you want to change the event name for all forms, you can use the filter like this:
add_filter( 'gform_googleanalytics_submission_event_name', function( $name, $mode, $feed, $entry, $form ) {
return "new_submission_event";
}, 10,5 );
If you want to change the name for a particular form, you can use the $form parameter in the filter to target the form ID, or any other attribute of the form you’d like, as so:
add_filter( 'gform_googleanalytics_submission_event_name', function( $name, $mode, $feed, $entry, $form ) {
if ( $form['id'] === 38 ) {
return "form_38_submission_event";
}
}, 10,5 );
This approach allows you to set a separate event name for any number of forms so they can be individually tracked as conversions. There is no limit on the number of distinctly named events you can have in GA4.
You can do the same with pagination events using the ‘gform_googleanalytics_pagination_event_name’ filter.
You can also use the pagination event name filter to change the event name based on the source or target page, if you want different events for different form page, like so:
add_filter( 'gform_googleanalytics_pagination_event_name', function( $name, $mode, $form ) {
if ( $_POST['gform_source_page_number_38'] === "1" ) {
return "form_38_pagination_event_page_1";
} else {
return "form_38_pagination_event_another_page";
}
}, 10,3 );
Where 38 is your form ID. ‘gform_target_page_number_38’ would also be valid if you want to filter by the page number the user is navigating to, instead of the one they’re navigating from.
Using Google Tag Manager
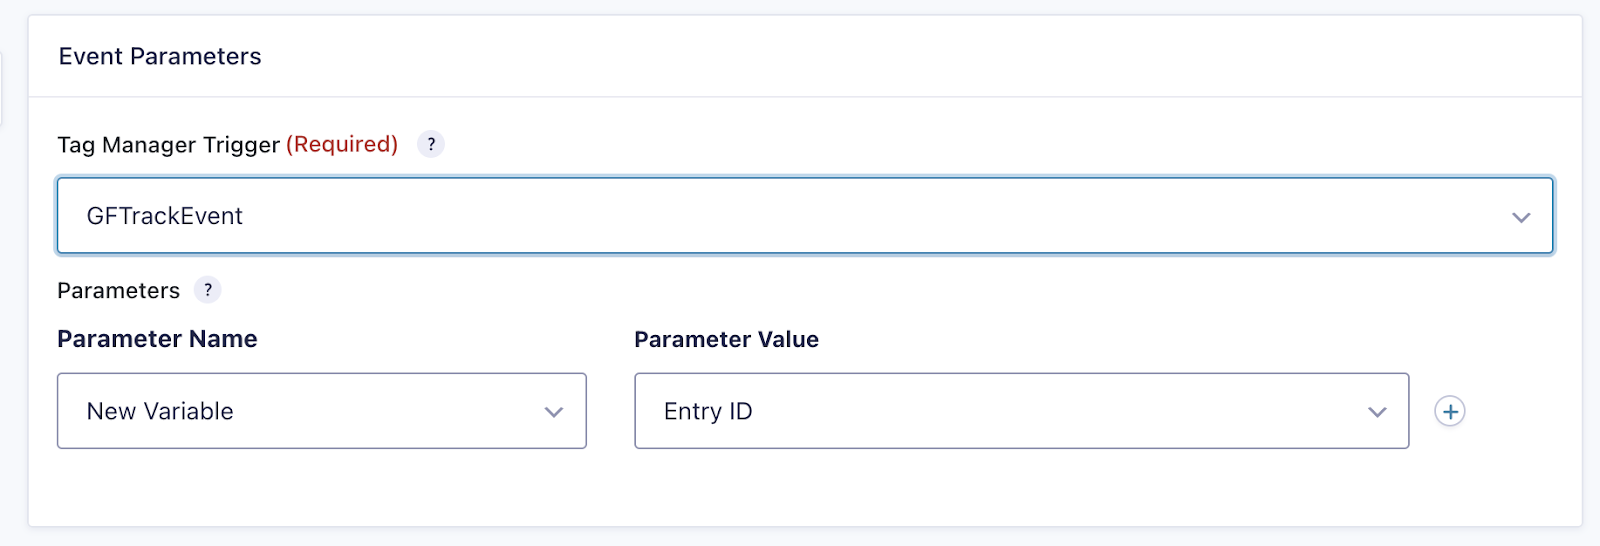
If you don’t want to use the filters, or you’re already using tag manager, you have another option. The Google Analytics Add-On doesn’t send event names directly to Tag Manager when you’re connected using the Google Tag Manager connection method. It instead fires a trigger that you select upon feed creation.
Here, for example, the selected trigger is GFTrackEvent. This is the default trigger the add-on will attempt to use since this is the event previous versions of the add-on would automatically create when attempting to automate the tag manager configuration, but this trigger can be any trigger you’ve created in Google Tag Manager.
Once your feed is configured, you’ll need to create a tag in Tag Manager that will fire based on your selected trigger. This Tag, will pass the event name to Google Analytics. For example, here is a tag that will fire on GFTrackEvent and will send an event with a name of gforms_submission to GA4:
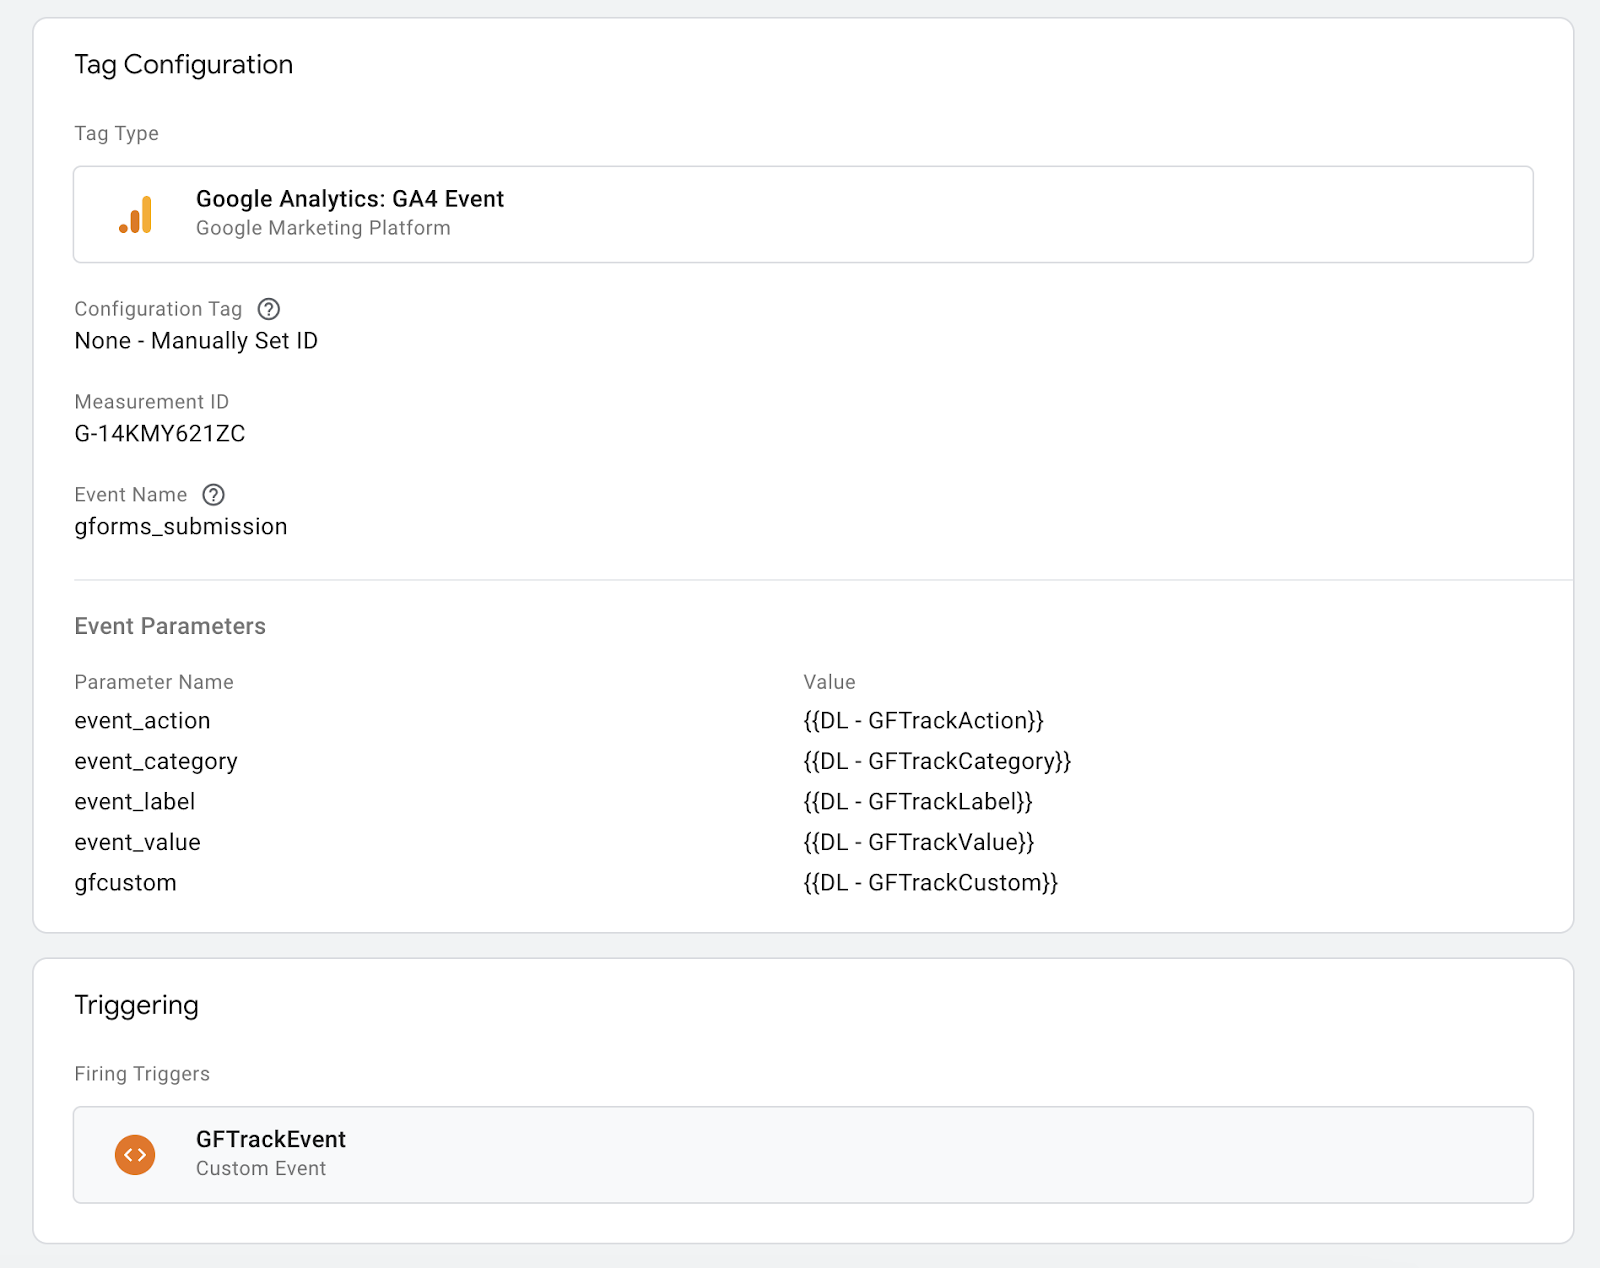
If you’re using Tag Manager, you can track each form as a different conversion by setting a separate trigger for each event and attaching a tag to that trigger with the event name you want to send.
It’s also possible to use a single trigger and conditional logic to have it conditionally trigger your tags. To do this, you could click on the firing trigger in the tag configuration, select “some custom events”, and build your conditions using available variables:
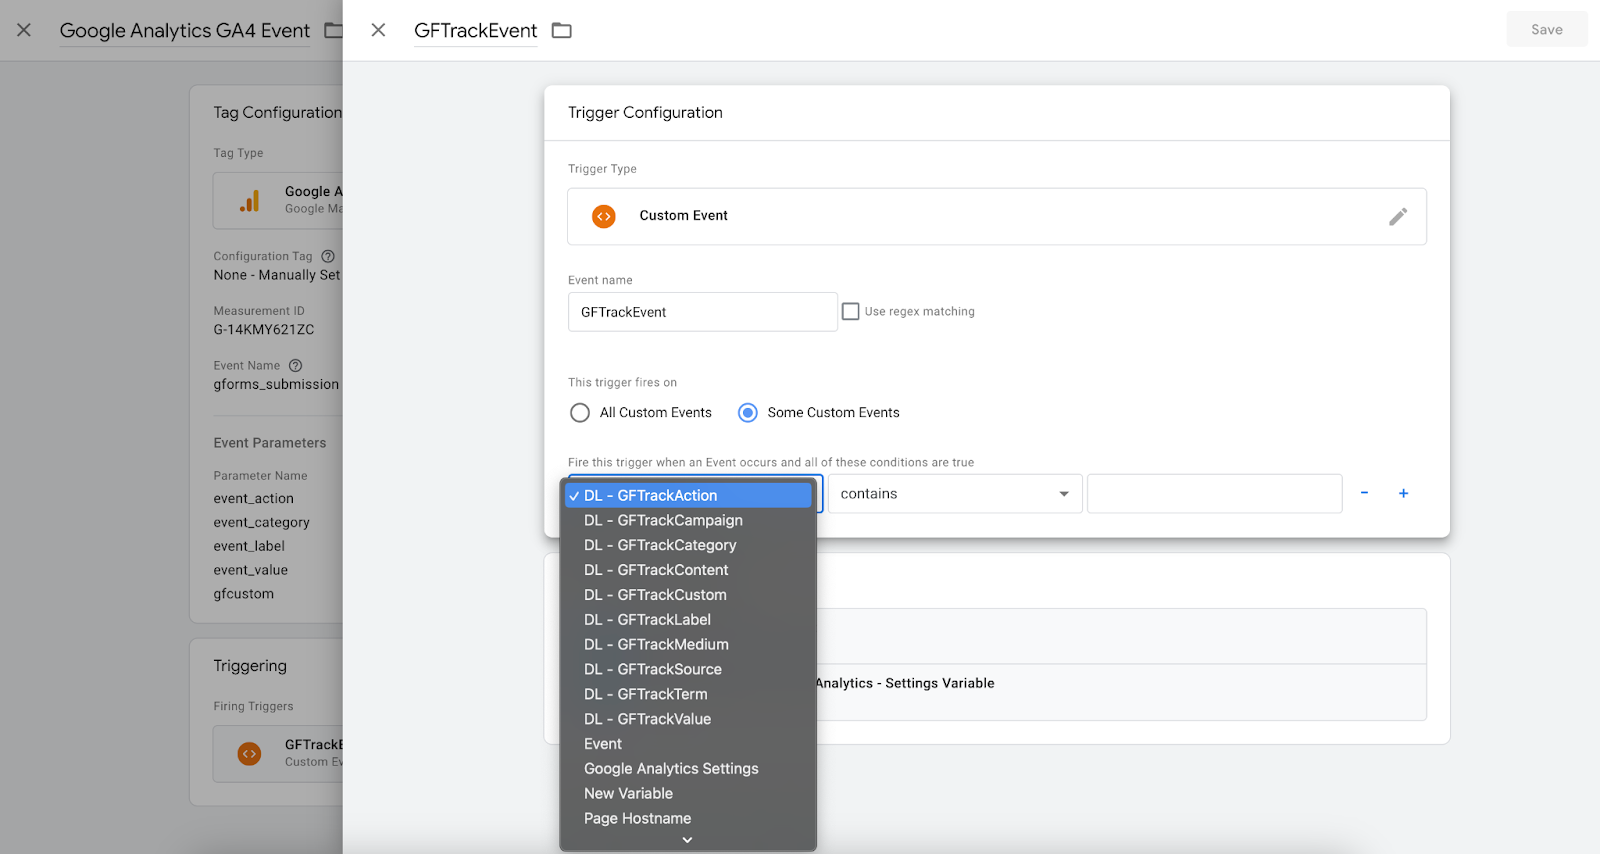
Then, each event name you send over can be separately marked as a conversion. If you’ve correctly mapped custom parameters to Datalayer variables in Tag Manager, you can use this method to send event names based on custom event parameters because those will be exposed in the available Datalayer variables to be used in conditional logic.
Reporting on Custom Parameters
When you’ve configured custom parameters to be sent with an event on form submission, you’ll see them come through in the Realtime Overview report in GA4. You’ll notice, however, that the custom parameters won’t be visible for older events in the Engagement > Events view. By default, these parameters are only visible in realtime view and in debug mode, which is a departure from Universal Analytics, where the category, label, action, and value were always available and attached to the event.
Since custom parameters can’t be used to trigger conversions (outside of the cases discussed above), you may wonder what their use is.
You can report on these in GA4, but to do so, you must first create Custom Dimensions from them. To do so, go to Admin > Custom Definitions in your GA4 dashboard. From there, click Create Custom Dimensions. You will see this screen to create a new custom dimension:
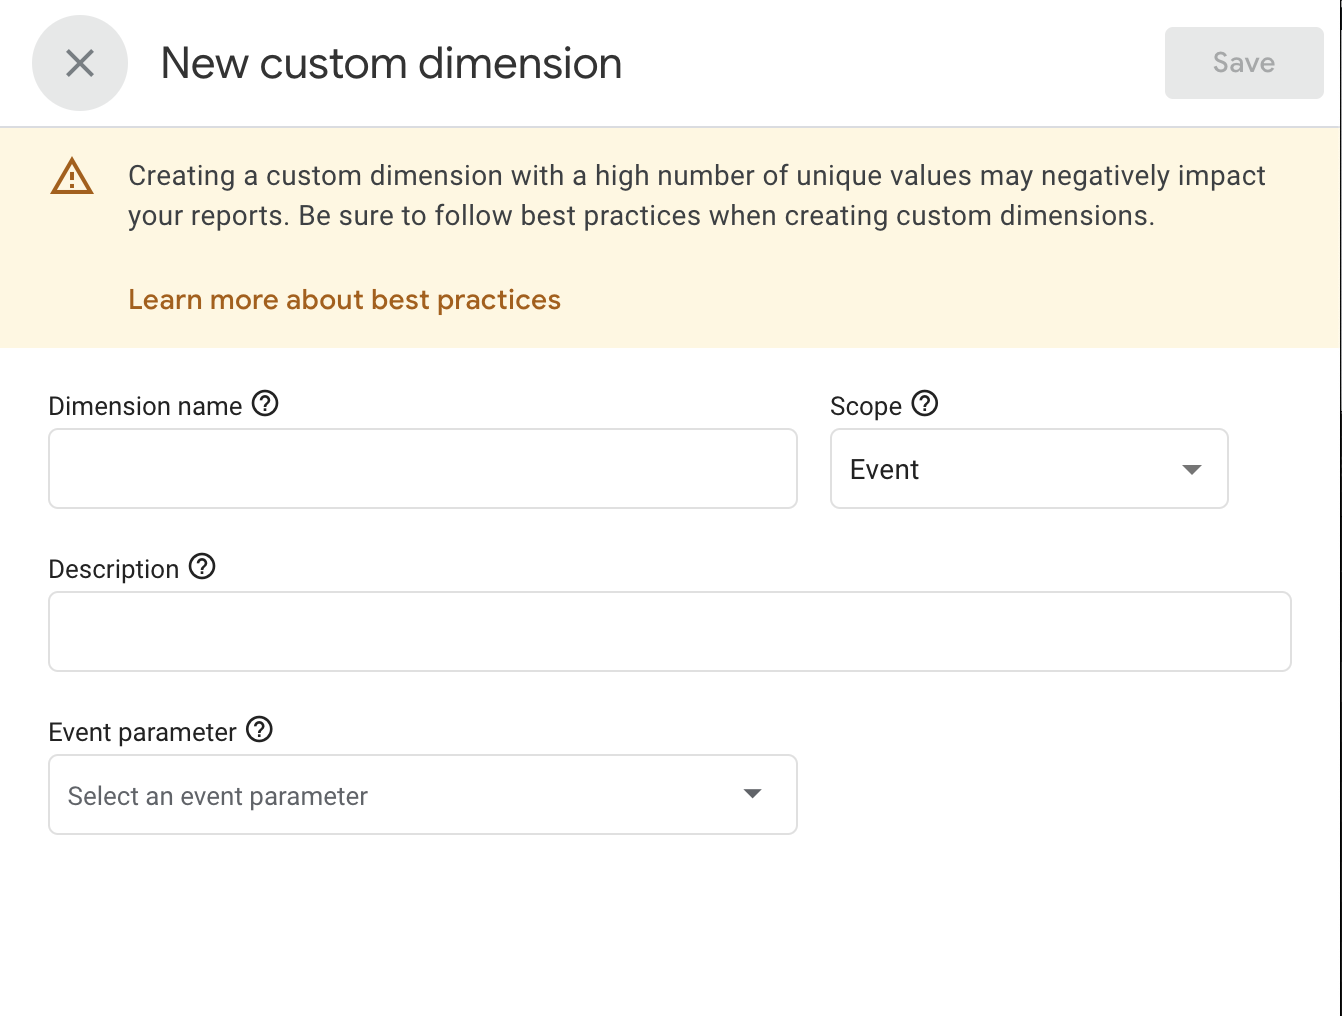
Dimension name can be anything you’d like. For events generated by the Google Analytics Add-On you’ll want to keep the scope as Event. For Event Parameter, select the name of the custom parameter you want to track. Custom parameters should be automatically added to the available values here if your GA4 account has already received events containing the custom parameter. If you haven’t received events containing the parameter, you’ll need to add it yourself.
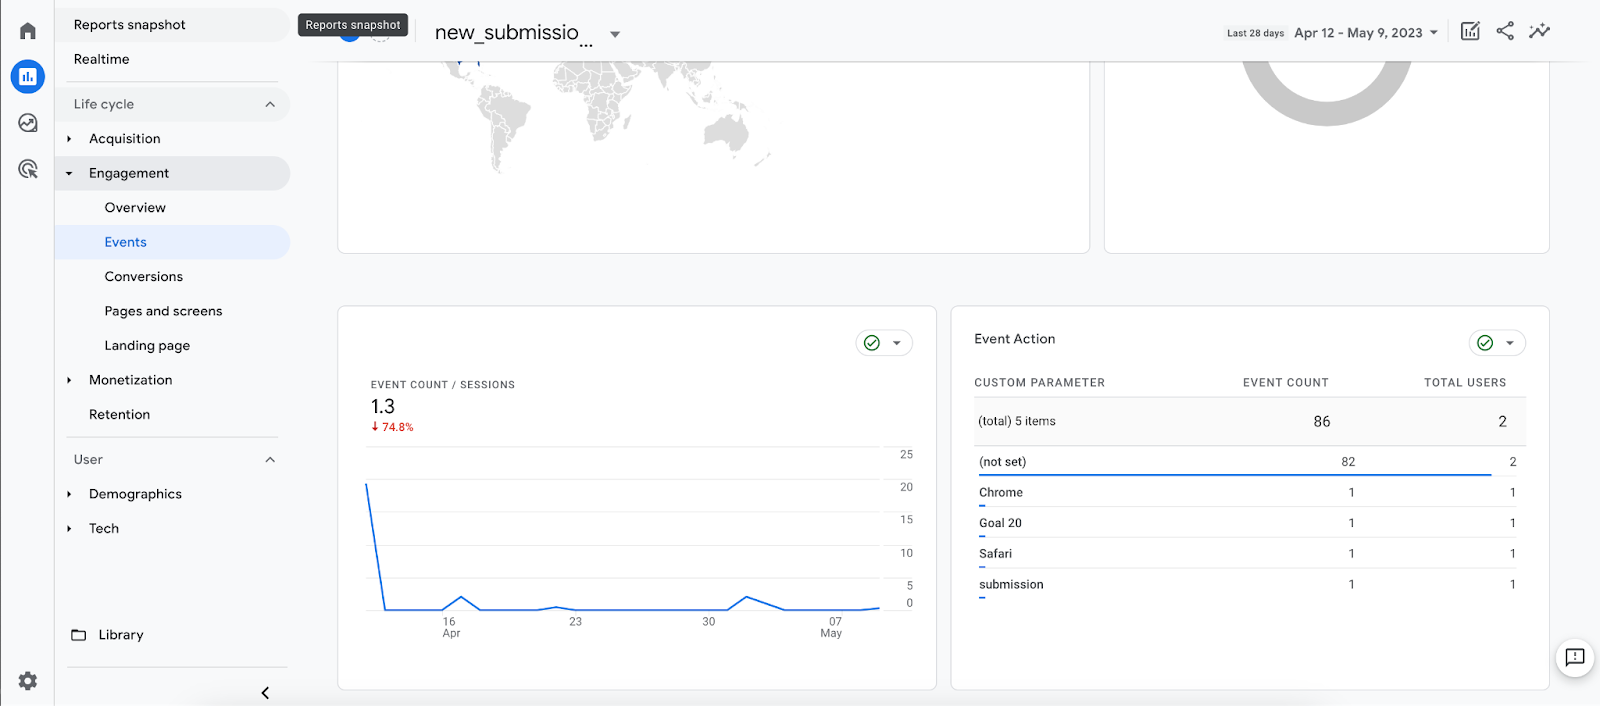
Once you’ve saved the custom dimension, you’re able to begin using it in reporting and it will show up in the event detail when you view the Engagement > Events view. You can see here, for example, that I can view Event Action when looking at older events, because I’ve created a custom dimension for that, but no other event custom parameters:
To use your new custom dimension in reporting, go to Reports > Library and either edit an existing report, or create a new report you’d like to add your dimension to. For example, if you want to report on your custom events, create a new report and select Create Detail Report, then select Events as the report type. Under Dimensions you’ll be able to see your custom dimension to include in the report. You can now use it however you want to suit your reporting needs.
You may also see that in addition to Custom dimensions you can also define Custom metrics. These are identical in their use cases, but are different in that they must be numeric and have associated units of measurement. You can still map custom parameters to them, but make sure your data is coming through in the correct format if you’re using metrics instead.
You can have up to 50 event-scoped custom dimensions and up to 50 event-scoped custom metrics. If you find yourself running low, you can delete existing dimensions and metrics to make room for new ones.
Conclusion
Google Analytics 4 is a powerful tool, but it does require a little bit of work on the user’s end to get the data it needs and to display it in a usable way. Hopefully the Gravity Forms Google Analytics Add-On and this article can help guide you on the right path. Using these tips, you can report on how your users use your forms with tremendous flexibility.
Any questions on how to set up the Google Analytics Add-On? Contact our Support team, they love to help!

If you want to keep up-to-date with what’s happening on the blog sign up for the Gravity Forms newsletter!
"*" indicates required fields