
Every business handles time off requests. Most of them handle it badly.
An employee emails their manager. The manager means to reply, then doesn’t. The employee follows up on Slack. Someone eventually says yes, nobody tells HR, and three weeks later two people from the same team are on vacation at the same time and nobody can find the message where anyone agreed to anything.
A time off request form fixes the first half of that problem. Approval routing fixes the rest. In this post, we’ll build both, and the division of labor is simple: Gravity Forms captures the request, and Gravity Flow handles everything that happens after submit. It routes the request to the right manager, chases them if they sit on it, and keeps HR and the employee in the loop automatically. No email chase, no spreadsheet, and a full record of every decision.
If you’re an agency or consultant, file this one away. “Can you add manager approvals?” is one of the most common asks a client brings to a WordPress build, and this is the pattern you’ll reach for every time.
Let’s get into it…
For agencies: your client brings the problem, you bring Gravity Flow
No client will ever ask you for a “time off workflow.” What they’ll do is mention, halfway through a call about something else, that vacation requests live in a spreadsheet, or that two people ended up off the same week and nobody knows who approved what. That throwaway comment is a project. Your client brings the problem; you bring Gravity Flow.
What you’ll deliver is the build below, on the site you already maintain: one routed approval step, an expiration, and a pair of notifications. An afternoon of settings screens, where the client expected a custom development quote.
A build like this also changes what the site is to your client. A brochure site only gets their attention when it’s time for a redesign, and that’s exactly when clients shop around. A site their whole team uses every week to request time off is part of how the business runs – clients keep paying for the things their business runs on.
Not an agency? Everything below works exactly the same when the “client” is your own company. Let’s get into it…
The problem with time off requests
The request itself is simple. It’s everything after the request that goes wrong:
- Requests get lost – An email or a hallway conversation isn’t a system. Things slip.
- Nobody has visibility -HR can’t see what’s pending, managers can’t see what’s already been approved for the rest of the team, and the employee is left wondering.
- There’s no record – When there’s a dispute about whether Friday was ever approved, the evidence is a half-remembered Slack thread.
Companies usually try to fix this with a shared spreadsheet, which just moves the chaos somewhere with cells. What they actually need is a workflow: a request goes in, it reaches the right person, a decision gets made, and everyone who needs to know finds out. That’s exactly what Gravity Flow adds to Gravity Forms.
What this workflow does
Here’s the finished system we’re building:
- An employee fills out the time off request form.
- Gravity Flow routes the request to their manager, based on the department they selected.
- The manager approves or rejects it from a link in their email. They never need to log in to the WordPress admin.
- If the manager sits on it too long, the request escalates automatically.
- On a decision, the employee gets notified, HR gets notified, and the whole thing is logged in the entry’s timeline.
Step 1 is Gravity Forms. Steps 2 through 5 are all Gravity Flow. The form is the easy part, so we’ll move through it quickly and spend our time where the value is: the workflow.
For agencies: where you’ll see this
Two clients you’ll recognize:
- The SMB running time off on a shared spreadsheet and a chain of “can I take Friday off?” emails. They don’t need HR software. They need this workflow on the site you already built them.
- The larger employer with multiple departments, where requests need to reach the right manager automatically and HR needs visibility across all of them without chasing anyone.
Same build, different scale. The routing rules in Step 3 are the only thing that changes.
What you’ll need
- Gravity Forms (any license) to build the request form
- Gravity Flow to add the approval workflow on top
Gravity Flow is a separate plugin that extends Gravity Forms. Install and activate both, and Flow adds a Workflow area to your WordPress admin and a Workflow tab to each form’s settings. That tab is where everything from Step 2 onwards happens.
Step 1: Build the time off request form (Gravity Forms)
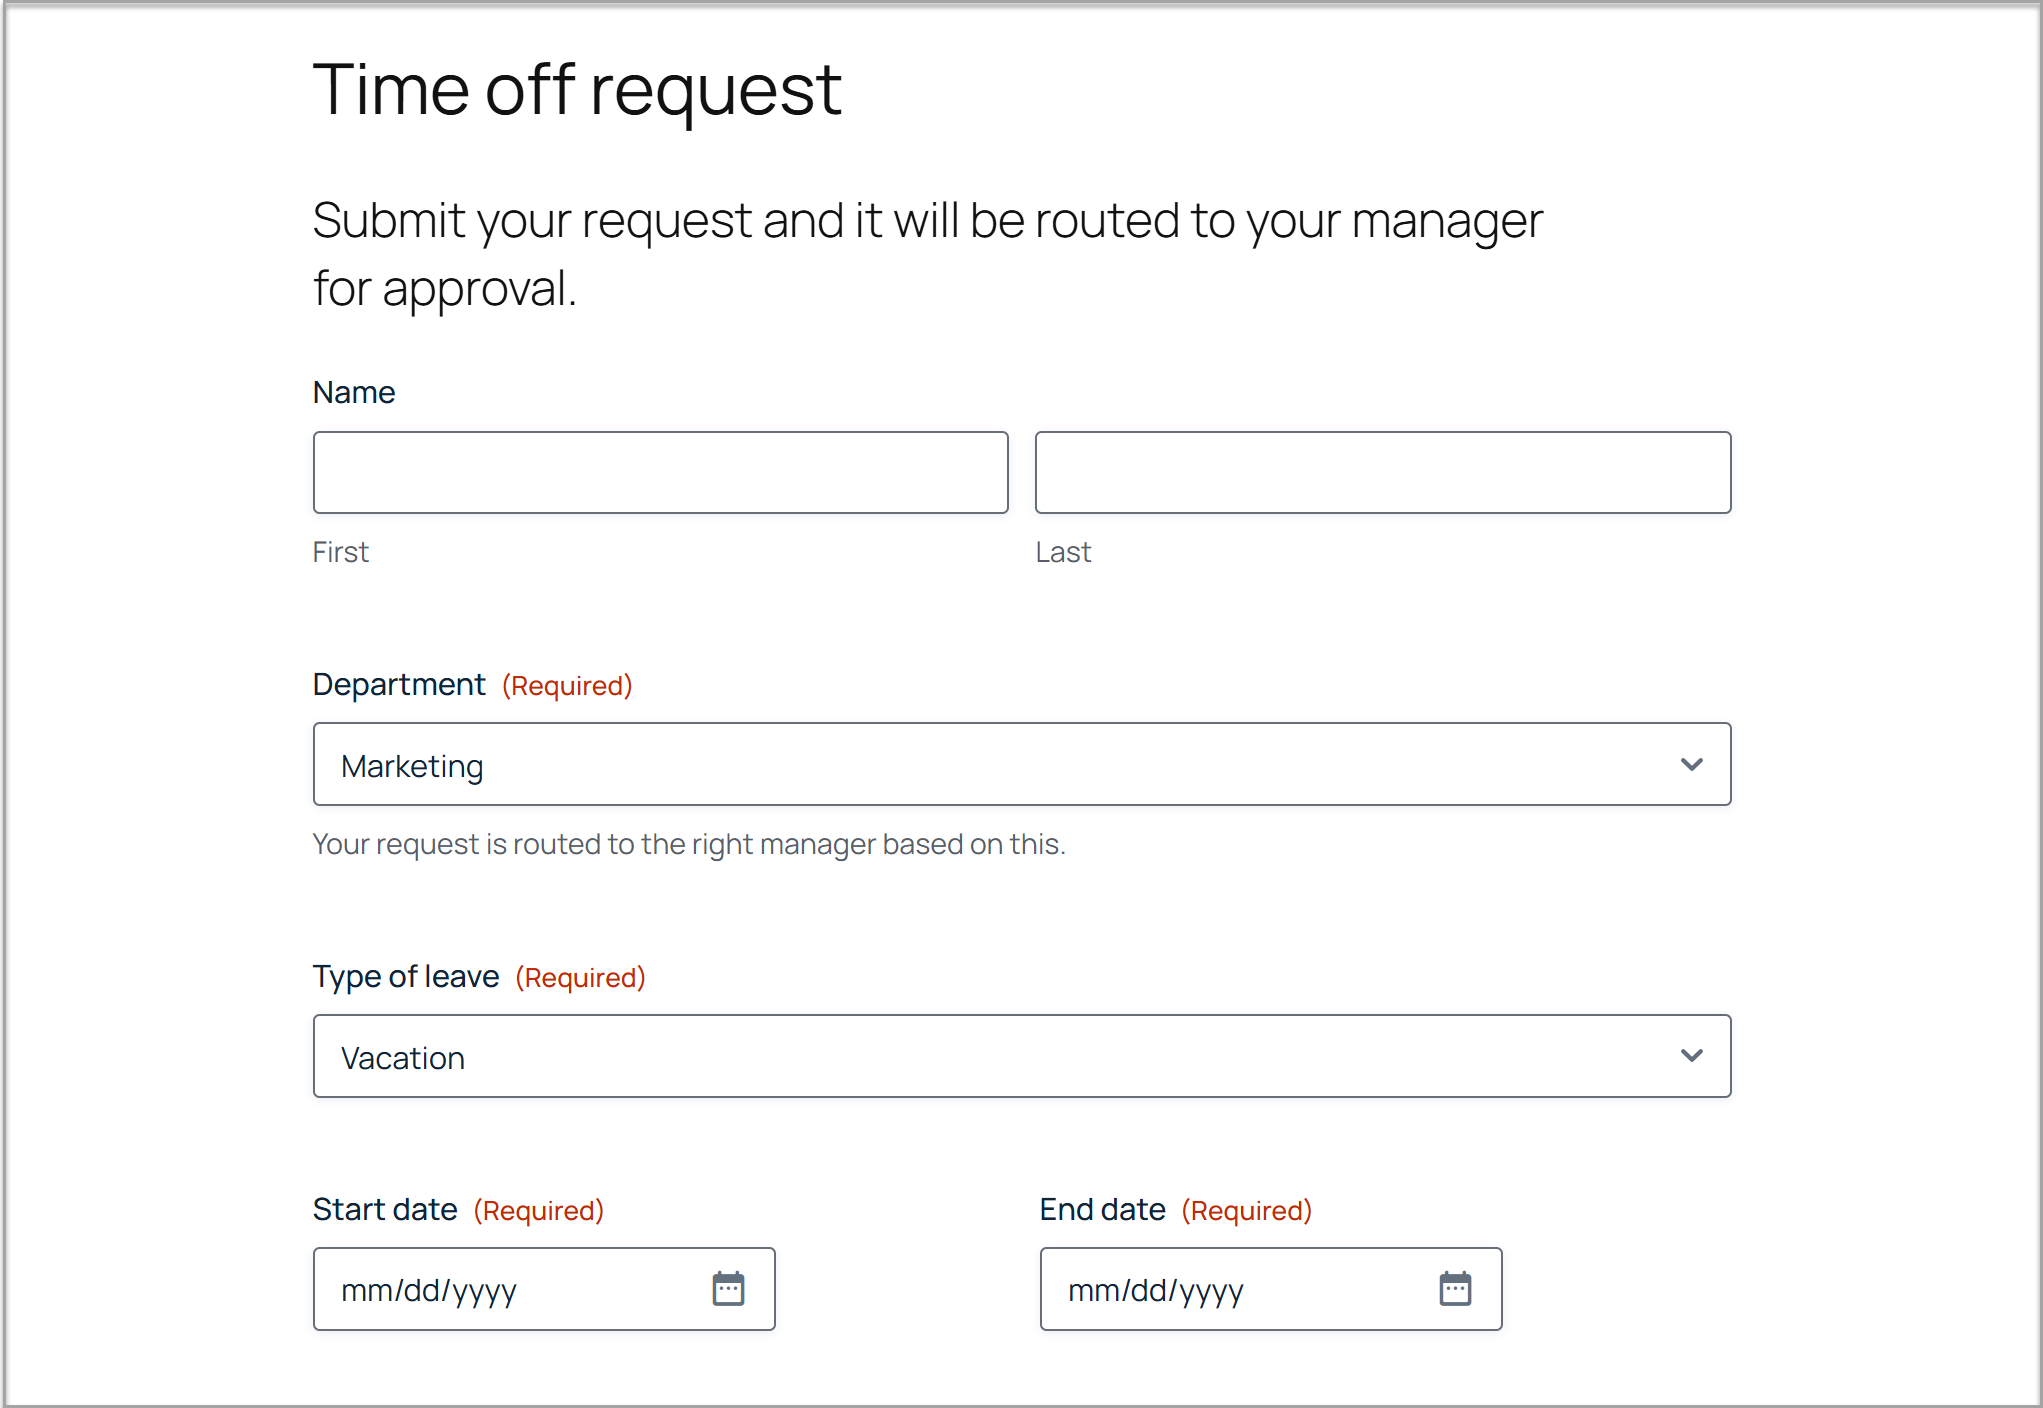
Create a new form with the fields your process needs. A solid starting set:
- Name (or skip it and require login, so the entry records the user automatically)
- Department (dropdown). This one matters most, because the workflow routes on it.
- Type of leave (dropdown: vacation, sick leave, personal day, and so on)
- Start and end dates (two Date fields)
- Notes (paragraph field, optional)
That’s genuinely all the form needs. If you’re new to building forms, our form creation documentation walks through it, and conditional logic can handle any refinements, like only showing a “details” field when someone selects sick leave.
Now for the part that turns a form into a system. From here on, everything we build lives in Gravity Flow.
Step 2: Add an Approval step (Gravity Flow)
Open the form’s settings, head to the Workflow tab (added by Gravity Flow), and add a new step. Set the step type to Approval and name it something obvious, like “Manager approval.”
An Approval step holds the entry until an assignee approves or rejects it. Approvers get an email with the request details and can make the decision straight from the notification, which matters more than it sounds. Managers who have to log in to approve things simply don’t.
Step 3: Route each request to the right manager
Here’s where the workflow earns its keep. In a five-person company, every request can go to the same person. Anywhere bigger, requests need to reach the right manager, and that’s what Gravity Flow’s conditional routing handles. If you know conditional logic in Gravity Forms, this is its workflow cousin: conditional logic decides which fields a submitter sees, routing decides which person the entry goes to.
In the Approval step’s assignee settings, choose Routing instead of a fixed user. Then build a rule per department:
- If Department is Marketing, assign to the Head of Marketing.
- If Department is Engineering, assign to the Engineering Lead.
- If Department is Support, assign to the Support Team Lead.
One form, one step, and every request lands with the person who can actually say yes. When the org chart changes, you update the routing rules in one place, not the form, not the notifications, nothing else.
Using Gravity Flow 3.1? There’s a second way to do this: the new Choice Routing step sends entries to entirely different steps based on a dropdown choice. Reach for it when departments need different workflows, not just different approvers. Here, the only thing that changes is who approves, so routing the assignee is the simpler build.
Agency note: this is the piece clients assume needs custom development. It’s a settings screen.
Step 4: Escalate stalled requests
A request sitting unanswered in a manager’s inbox is the old problem in new clothes, so set a deadline.
In the Approval step, enable Expiration and set a window that fits the business, say three business days. You choose what happens when it hits: send the entry to a different step, escalate to a senior manager or HR, or approve it by default if that matches the company’s policy. You can also schedule reminder emails to nudge the approver before the deadline lands.
Either way, no request stalls silently. The workflow does the chasing so the employee doesn’t have to.
Step 5: Close the loop
Add notification steps after the approval so a decision actually reaches everyone who needs it:
- On approval: notify the employee, and notify HR (or whoever maintains the time off calendar) so the record gets updated.
- On rejection: notify the employee with the manager’s note, so “no” comes with a reason.
Every one of these actions, from the routing decision to the final notification, is recorded in the entry’s timeline. When someone asks in August whether that week in June was ever approved, the answer is one click away, with a timestamp and a name on it.
Step 6: Test it
Submit a request for each department and check that:
- Each one routes to the correct manager
- The approval email arrives and the decision links work
- Approvals and rejections trigger the right notifications
- The timeline logged every step
Then let the expiration window lapse on a test entry to confirm the escalation fires. Five minutes of testing now saves an awkward conversation later.
Want to track vacation balances too?
There’s one thing this build doesn’t do: track how many days each employee has left. If that matters for your process, the Gravity Flow Vacation Requests extension handles it.
You assign a number of days to each employee, add a Vacation Days field to the form, and Gravity Flow works out the used and remaining balance automatically as requests get approved.
It’s included with the Gravity Flow Pro and Ultimate licenses, and you can buy it on its own if you’re on Core. To find out more, check out this tutorial- How to create a vacation request form and process.
From email chase to working system
That’s the whole build. An employee submits a request, the right manager gets it, a decision comes back in hours instead of days, and HR never has to ask “did anyone approve this?” again. Requests can’t get lost, because there’s nowhere for them to get lost to.
And because it’s all running on your own WordPress site, there’s no per-seat SaaS subscription, no data sitting in someone else’s system, and nothing your team has to learn beyond a form.
Already using Gravity Forms? You have half of this built. Gravity Flow adds the approval routing, escalations, and audit trail on top of the forms you already have. Check out Gravity Flow pricing to get started, or try a personalized demo to see a time off workflow in action.
Building for clients? This same pattern (form, routed approval, escalation, notifications) covers a huge share of the “can you automate this?” requests clients bring you. Keep an eye on the blog, because we’re covering more of them in this series, purchase orders up next.

Newsletter
If you want to keep up-to-date with what’s happening on the blog sign up for the Gravity Forms newsletter!
"*" indicates required fields