
If you’re a fan of using WP-CLI to manage your WordPress sites, the Gravity Forms CLI Add-On brings that same command-line functionality to Gravity Forms and the forms that you’ve created.
From the command line, you’ll be able to manage forms and form fields, notifications, and entries, while also accessing some other general maintenance and admin commands.
In this post, we’ll introduce you to the Gravity Forms CLI Add-On and what it offers. Then, we’ll show you how to get started with the add-on and how some of the commands work.
Note: The Gravity Forms CLI Add-On is part of Gravity Labs – our home for experimental add-ons. It’s free with your Gravity Forms license, but it’s experimental and outside our official support. Labs is also how we learn what our community wants to see in the product, so if you try it, let us know what you think.
Why use the Gravity Forms CLI Add-On?
The Gravity Forms CLI Add-On lets you manage Gravity Forms and related tasks from the command line via WP-CLI (WordPress Command Line Interface).
For developers, agencies, and power users who prefer working from a command line interface, the add-on can make it easier to perform various tasks related to your site’s forms.
It also opens up new ways to automate your forms and maintenance tasks. You can use CLI commands in scripts, deployment pipelines, or maintenance routines, which allows you to standardize operations for Gravity Forms across different environments.
For this post, we’ll assume that you already have at least a basic understanding of WP-CLI, as you need this knowledge to be able to effectively use the add-on. If you’re not familiar with WP-CLI yet, you’ll likely be happier working from inside the WordPress dashboard.
For fans of WP-CLI, here’s a summary of some of the tasks that you can perform from the command line using the add-on…
Form management
You get several options to manage your forms from the command line:
- create – create a new form with the specified title.
- delete – delete an existing form.
- duplicate – duplicate any existing form on your site.
- list – list all of the forms on your site.
- edit – launch system editor to edit the form configuration.
- export – export a form to a Gravity Forms export file.
- import – import a form from a Gravity Forms export file.
- get – return a form’s JSON.
- update – update a form.
Field management
You can also manage form fields within your overall forms:
- create – create a new field and add it to a form.
- delete – delete a field from a form.
- duplicate – duplicate a field.
- list – return a list of fields for a form.
- edit – launch system editor to edit the field configuration.
- get – return the JSON representation of a field.
- update – update an existing field.
Notification management
You also get several commands to manage a form’s notifications:
- create – create a new notification.
- delete – delete an existing notification.
- duplicate – duplicate an existing notification.
- list – list all notifications associated with a form.
- edit – launch system editor to edit the notification configuration.
- get – return the notification’s JSON.
- update – update an existing notification.
Entry management
In addition to working with form settings, you can also view and manage form entries from the command line:
- create – manually create a new entry, either using JSON or field-value pairs.
- delete – delete an entry in a form.
- duplicate – duplicate an entry.
- list – list all of a form’s entries.
- get – return a JSON representation of the entry.
- edit – launch system editor to edit the JSON representation of the entry.
- export – export a form’s entries.
- import – import entries to a form.
- update – update the entry.
You also get two commands to manage notifications associated with a specific entry:
- get – return all of the notifications for the selected entry.
- send – send the notifications for the selected entry.
Basic maintenance and troubleshooting
Finally, you also get some commands to perform basic maintenance tasks and troubleshooting:
- install – install the core Gravity Forms plugin or any of the official add-ons. For these commands, you need to either include your valid license key in the command or define the GF_LICENSE_KEY constant.
- update – update the core Gravity Forms plugin or official add-ons.
- version – check the installed version of the core plugin or any add-on.
- setup – run the database setup/upgrade. You can also force re-run the setup if needed.
- tool – access tools such as clearing transients, emptying trashed entries, verifying Gravity Forms files against checksums, and outputting the system report from Forms → System Status.
How to set up and use Gravity Forms CLI
Here’s a quick guide on how to get started with the Gravity Forms CLI Add-On.
As we mentioned earlier, we recommend having some general familiarity with WP-CLI and the command line before trying to use the add-on.
1. Install the Gravity Forms CLI Add-On
To get started, you need to install the Gravity Forms CLI Add-On on your site.
You have a few options for doing this:
- As a WP-CLI package (recommended)
- As a WordPress plugin
- Directly from GitHub
WP-CLI package
We recommend installing Gravity Forms CLI using the WP-CLI package:
wp package install gravityforms/gravityformscli
WordPress plugin
You can also install the add-on as a WordPress plugin.
You can do this by downloading the plugin from the Gravity Labs website and installing it like any other plugin.
GitHub
You can also install Gravity Forms CLI directly from GitHub:
wp package install https://github.com/gravityforms/gravityformscli.git
2. Manage Gravity Forms from the terminal
Once you’ve installed Gravity Forms CLI, you can start managing your forms from the command line.
We already covered a list of the commands that you can use above, but here’s just one quick example of how it might work.
Let’s say you want to create a new form. You could do so by running the following command:
wp gf form create [formname]
For example:
wp gf form create Contact
You’ll then see a success message that contains the ID of the created form.
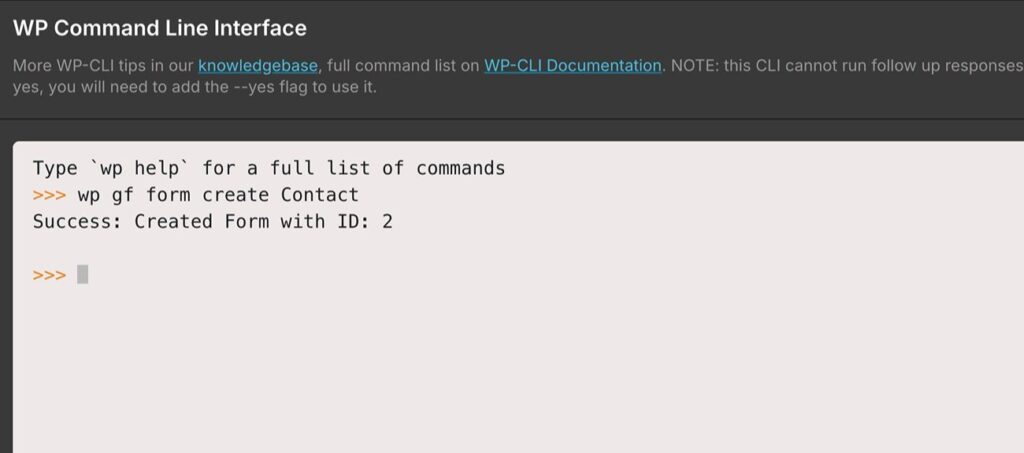
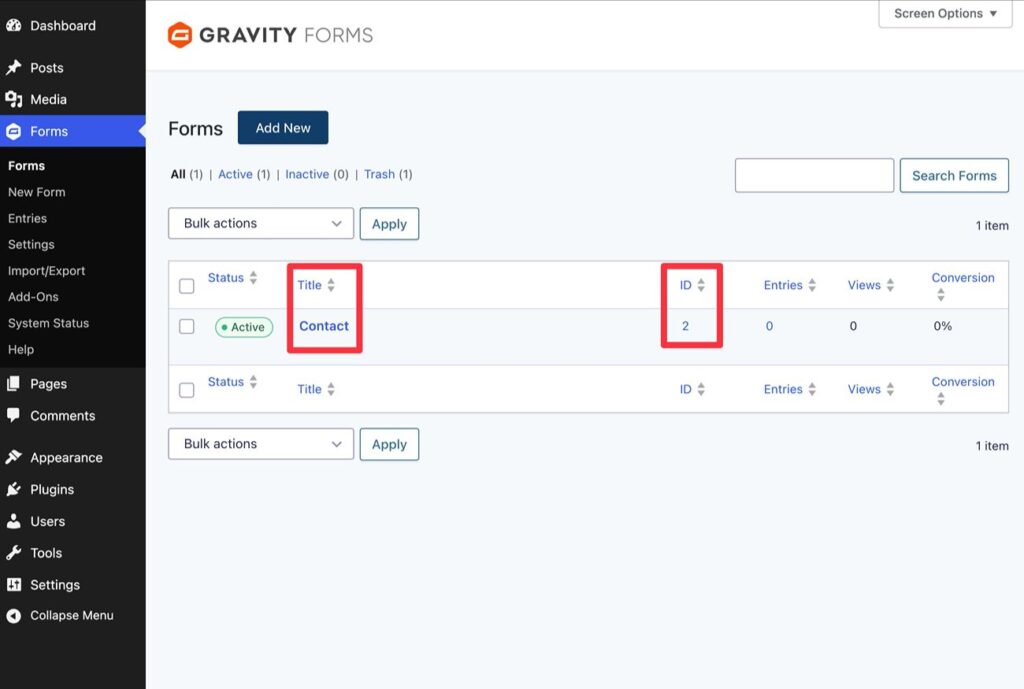
If you open your dashboard, you should see the form that you created:
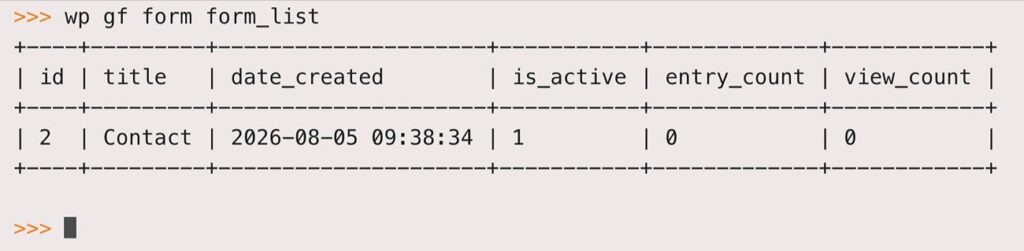
You can also view a list of all of your site’s forms from the command line by running this command:
wp gf form form_list
For more details about all of the available commands, you can consult the documentation here.
Try the Gravity Forms CLI Add-On today
The Gravity Forms CLI Add-On is available now in Gravity Labs. It’s free with any Gravity Forms license. As a Labs add-on, it’s experimental and sits outside our standard support – and your feedback helps shape what we build next. If you give it a try, we’d love to hear how it works for you.

Newsletter
If you want to keep up-to-date with what’s happening on the blog sign up for the Gravity Forms newsletter!
"*" indicates required fields