Video Tutorial
Accepting Payments via a Conversational Form

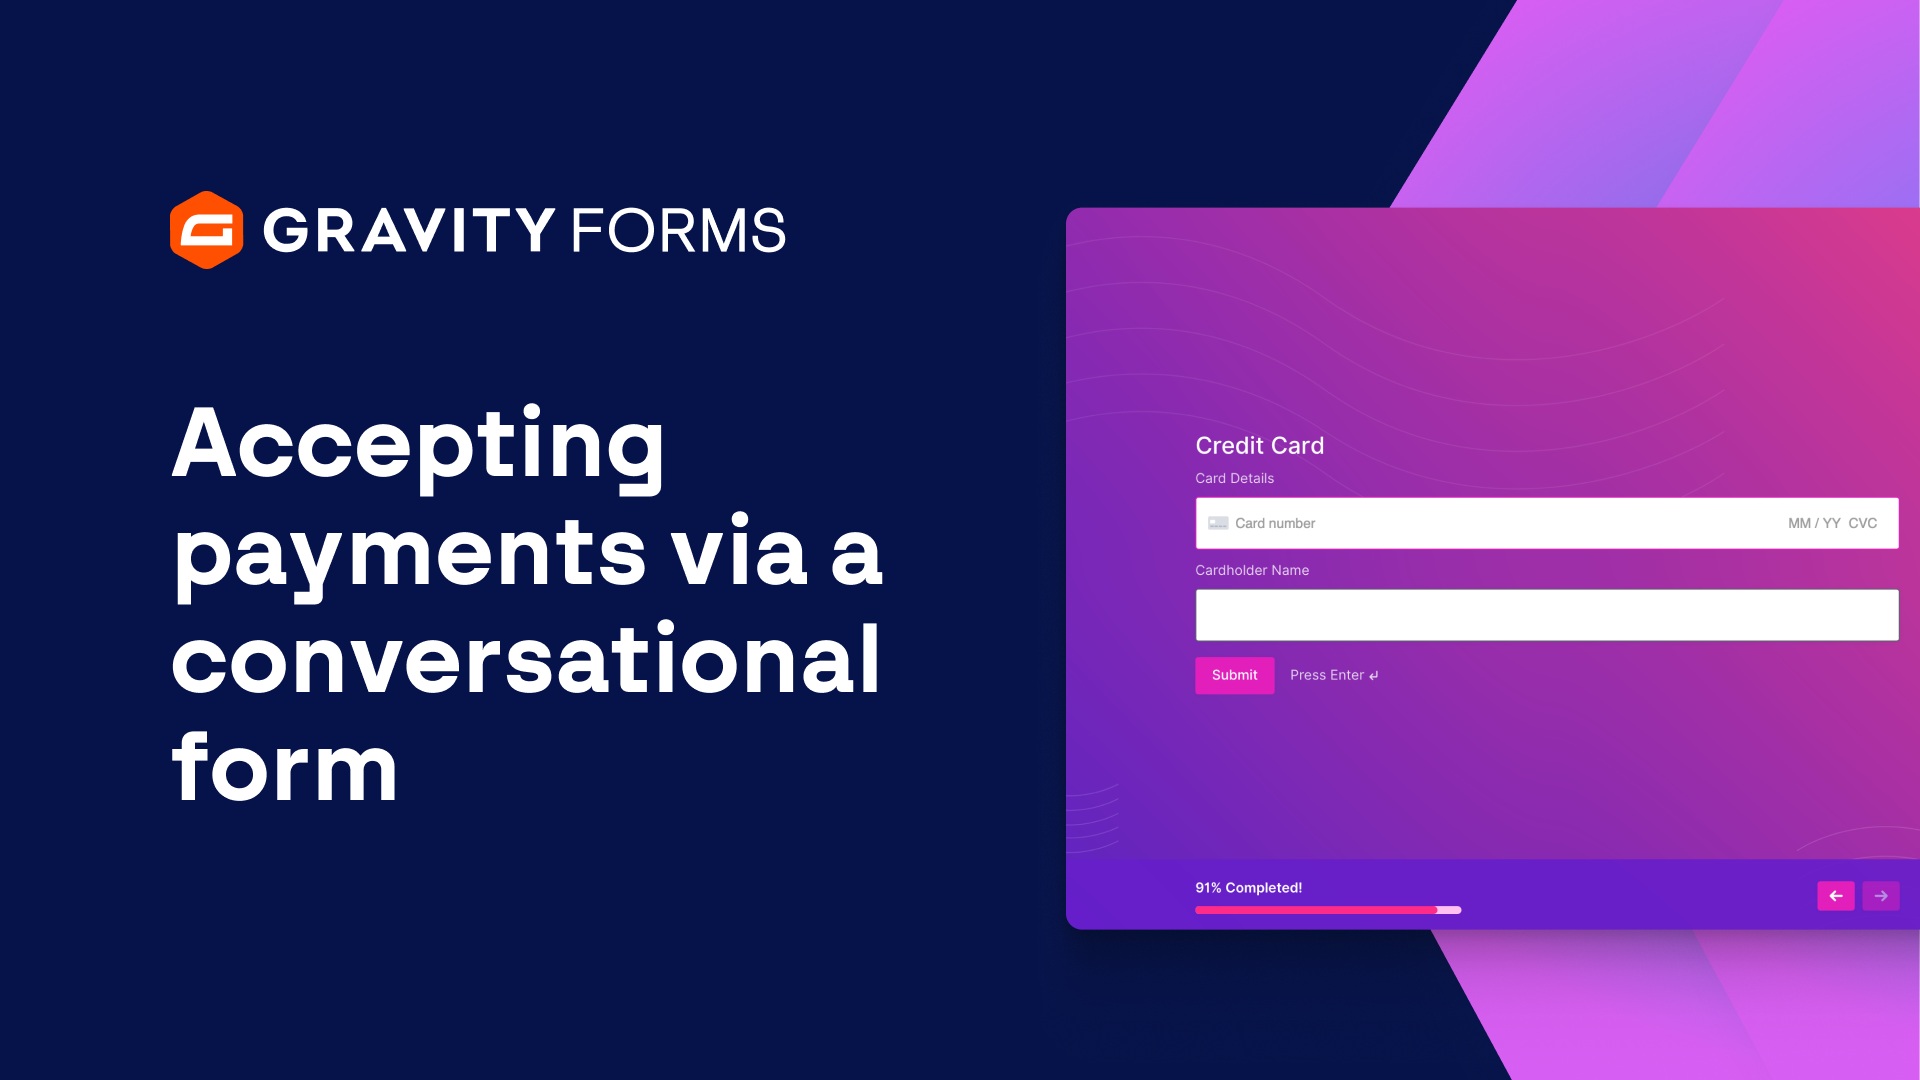
Gravity Forms makes it easy to accept payments via a conversational form on your WordPress website.
Creating a payment form in a conversational layout can help provide a more interactive and personalized experience for your customers.
Distraction free, the friendly style can help to increase engagement and boost completion rates.
In this video, we’ll take a look at how to use the Gravity Forms Stripe and Conversational Forms add-ons together to create a stylish, user friendly payment form.
I’m going to start by creating a new form.
For this example, I am going to create an Event Registration form that allows users to register for, and purchase tickets to, an event I will be hosting.
I’m going to offer the user three different ticket options: an early bird ticket for $10, a premium ticket for $20, and a VIP ticket for $30.
Next, I am going to add a Quantity field, so that the user can specify the amount of tickets they wish to purchase, and a Total field, so that the user can also see the total amount they will be charged before they enter their payment information.
At the bottom of my form, I am going to add the Stripe field and open the field settings.
I’m going to enable additional payment methods, then follow the on screen link to head to my Stripe dashboard and configure the payment methods I would like to use.
I am also going to enable Link, Stripe’s accelerated checkout option.
Link will automatically fill your user’s payment and shipping details for them at checkout, streamlining the checkout process and helping to improve conversions.
I’ll then save everything and head to the settings for this form.
First, I am going to go to the Stripe settings and set up a feed to configure the data that is sent from this form to Stripe.
Once I have my feed set up, I’m going to go to the Conversational Forms settings and enable a conversational page for this form, as well as set the permalink for which this form will reside.
While here, I will also customize the Form Design, Welcome Screen, Buttons, and Footer.
Once I save my settings, I can navigate to the permalink to see my conversational form in action.
The form looks beautiful and is a breeze to use thanks to the Conversational Forms Add-On.
Furthermore, checkout takes no time at all thanks to Stripe and Link.
For more guides and tutorials on all things Gravity Forms, be sure to check out our video library.
From everyone on the Gravity team, thank you for watching!
Summary
Gravity Forms and Stripe work together to let you easily accept payments via a conversational form on your WordPress website. Learn how to use the Stripe and Conversational Forms Add-Ons to accept payments in this video tutorial.