
 Are you looking into adding an appointment booking system to your WordPress website? With businesses and customers all over the globe shifting online, now is a great time to ensure your business has a strong digital presence—especially when it comes to booking your customers and clients.
In this Starter Guide, we’ll walk you through how to set up your very own appointment booking system on your WordPress website, using Gravity Forms and a new third-party community add-on for Gravity Forms: Simply Schedule Appointments.
We’ll also highlight why you might want to add an appointment booking system to your website, as well as who can benefit from this type of online scheduling (hint: any business that has a website).
Let’s jump in!
Why add an appointment booking system to your WordPress website?
Adding an appointment booking system to your WordPress website is a fantastic way to ensure your website visitors—whether they’re potential customers or existing clients—can easily schedule time with you.
Whether it’s for introduction calls, regular consultations, demos of your product/service, or just customer support, an appointment booking system removes the everyday hassle of back-and-forth over email or text—allowing your customers to quickly find which time works for you (and them) based on an availability calendar you control.
The best part of adding an appointment booking system, in our opinion, is that it provides a direct and always-available way for your website visitors to take the next step toward becoming a paying customer or client at the height of their interest in your product or service (they’re already on your website after all!). In plain English, it helps to capture more potential customers and drive more revenue for your business—24 hours per day, seven days per week.
Who can benefit from an appointment booking system on their WordPress website?
While nearly any business with a website can benefit from setting up an appointment booking system, there are a few specific businesses and websites that are known to get the most out of this type of online scheduling. In no specific order, they are:
- Agencies – Web development, design, marketing & advertising, and recruiting.
- Coaches & Trainers – Business, life, health, fitness, and spiritual.
- Professional Services – Legal services, medical services, and construction services.
- Event Services – Photography, weddings, and more!
What you’ll need to add an appointment booking system to your WordPress website
To add an appointment booking system to your WordPress website, you’ll just need Gravity Forms (Basic, Elite, or Pro) and Simply Schedule Appointments (Plus, Pro, or Business).
Once you have both plugins installed and activated, you’ll want to complete the Simply Schedule Appointments setup wizard, which will setup your first booking preferences and appointment type and have you 100% ready to go.
How to add an appointment booking system to your WordPress website
In this walkthrough, we’re going to create a new client intake form as if we’re a digital agency that builds websites.
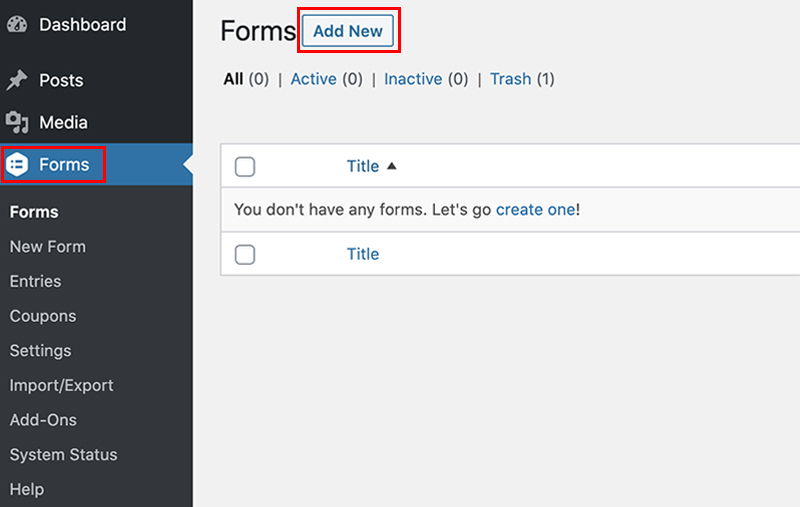
In your WP Admin Dashboard, find Forms and click Add New.
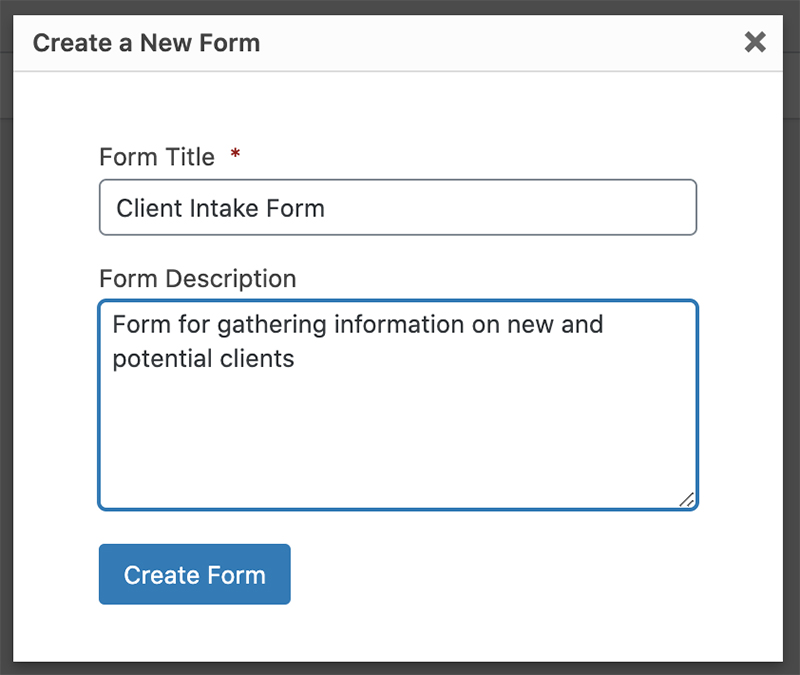
Give your new form a title and description.
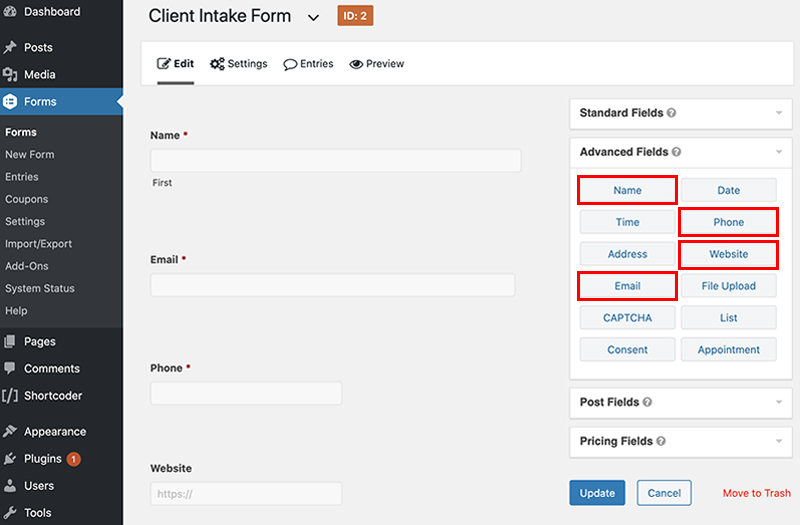
Once we’ve created our form, we’ll begin adding fields to collect contact and other information we’d like to gather from the client.
You can see below, we’ve selected the Advanced Fields and chosen to add the Name, Email, Phone, and Website fields (and have marked the first three fields as required).
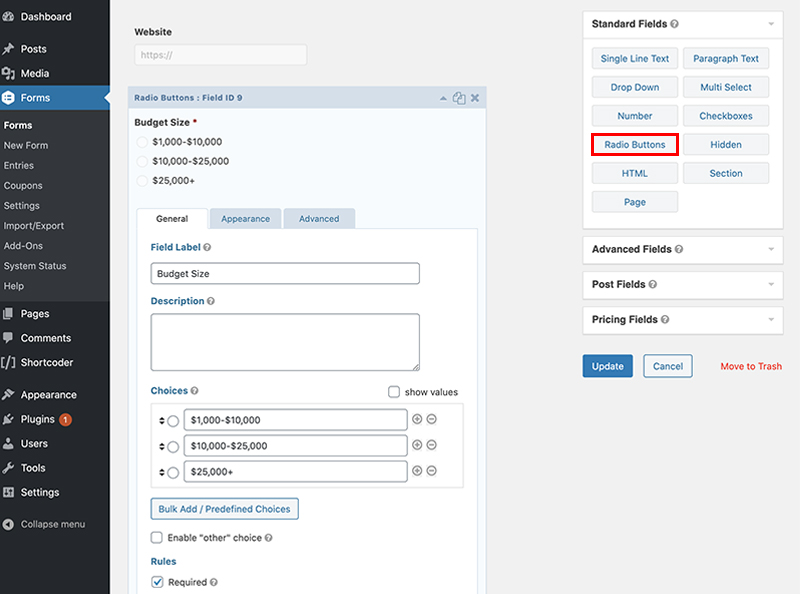
Next, we’ve gone back to Standard Fields and added a Radio Buttons field that allows the client to provide us with their budget range, and thus help us understand how to prioritize their business.
Now that we’ve added all the fields we need to capture the necessary new client information, we’ll add in our Appointments field to begin properly routing clients to the best-fit appointment types based on their budget size.
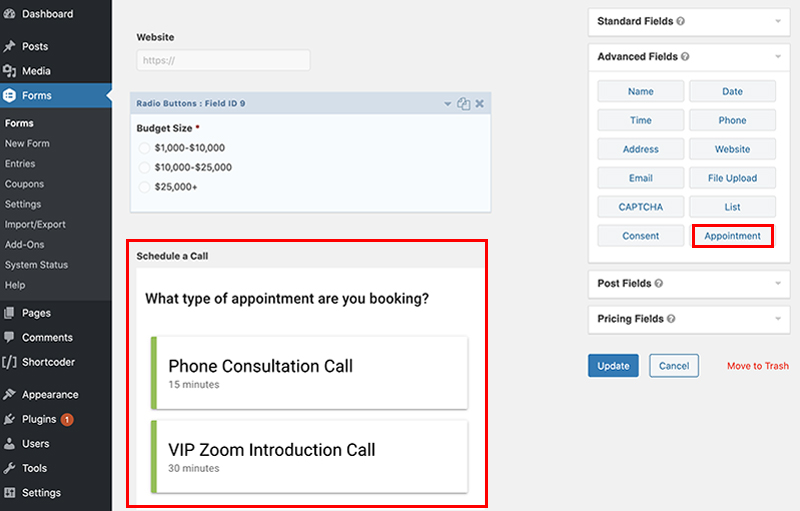
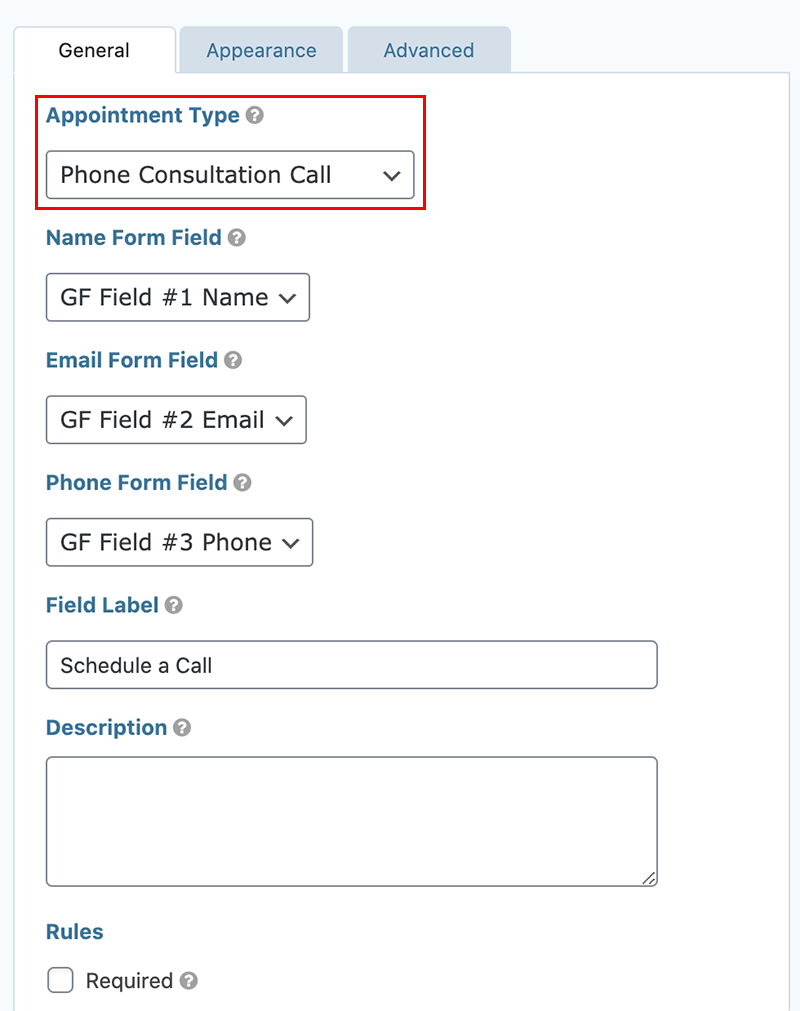
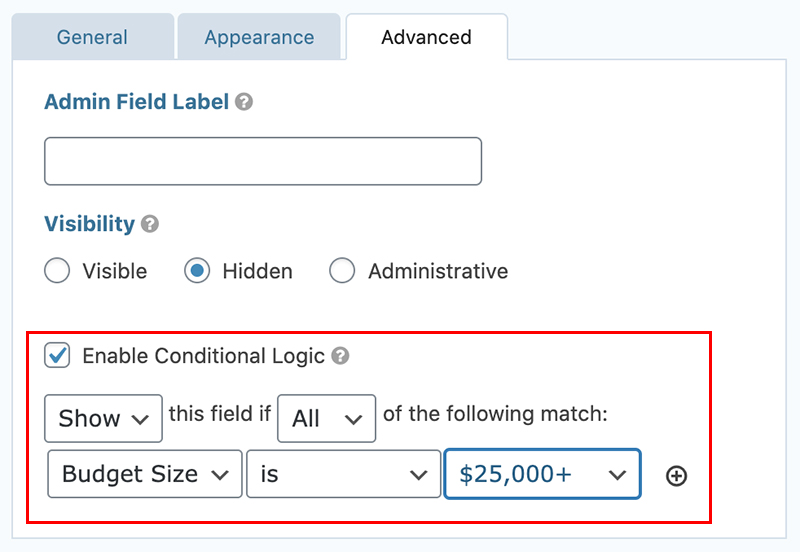
In the Appointment field’s General Settings, we’ll designate this field to display a single appointment type: Phone Consultation Call.
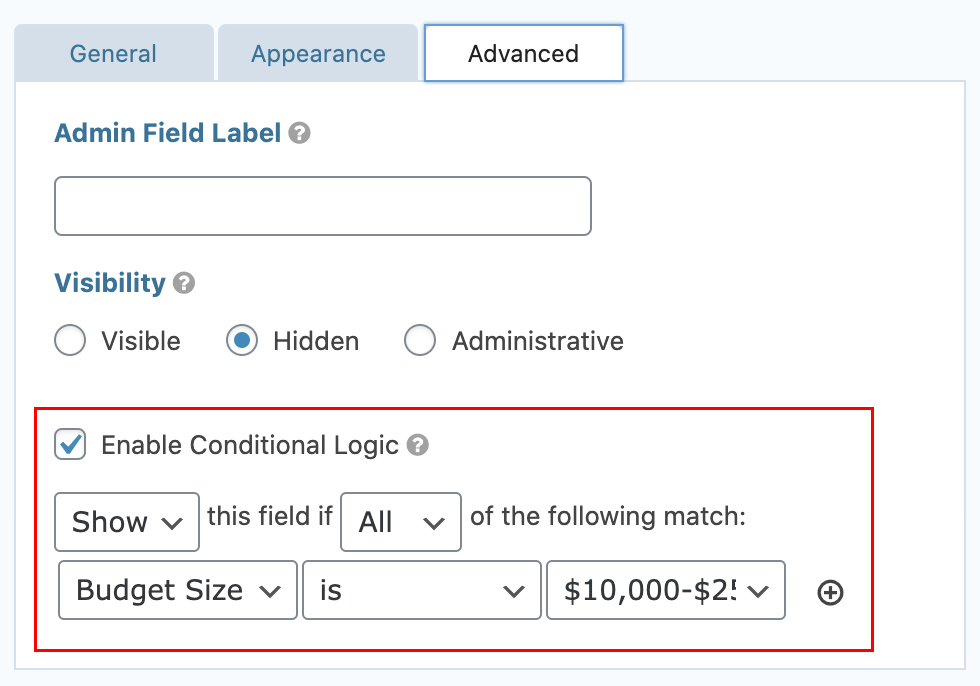
Under this field’s Advanced Settings, we’ll then Enable Conditional Logic so that this appointment type only appears and displays once the client has selected the medium-sized budget range ($10,000-$25,000).
Once we’ve set up the first Appointment, we’ll add a second Appointment field below it and duplicate the process—this time only displaying our VIP Zoom Introduction Call.
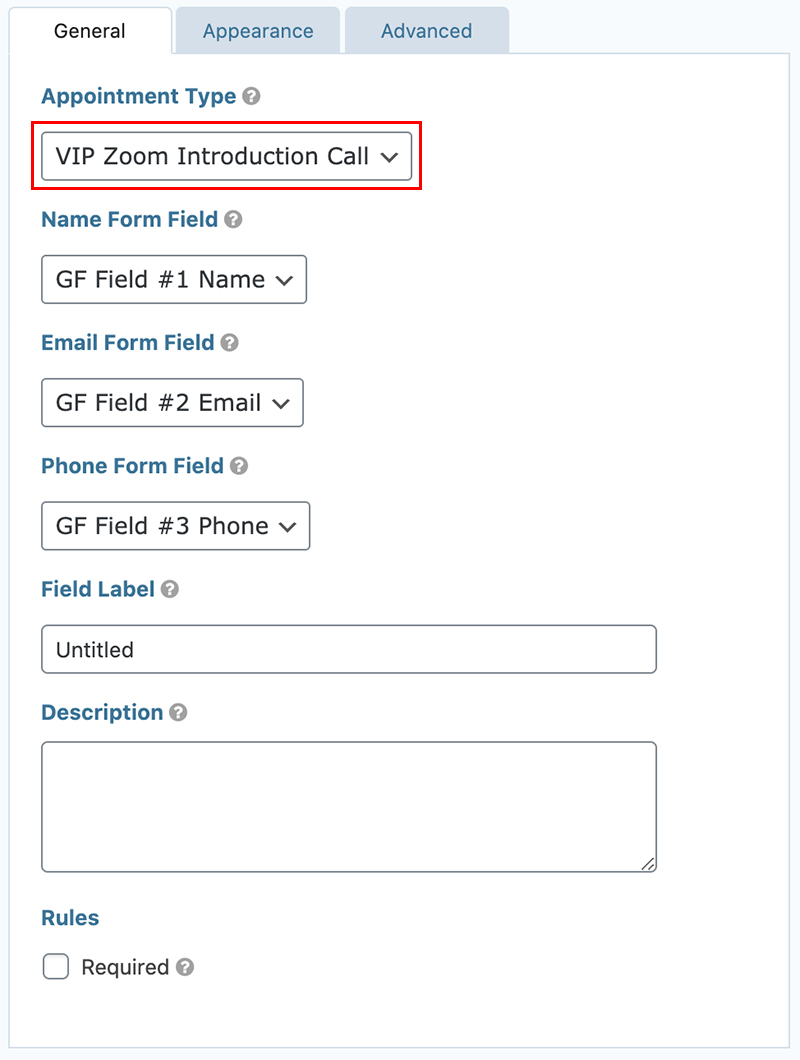
We’re also going to configure condition logic to only display this individual appointment type to our high-value potential clients ($25,000+).
And voila! We have an advanced client intake form that’s now ready to be displayed on our site and properly prioritize and book potential clients.
The only thing left to do is to display the form on our website. In this example, we create a new page for our client form, but you can insert it on any existing page—like at the bottom of your homepage or on your contact page—by using the Gravity Forms Gutenberg block (or shortcode) and selecting the proper form.
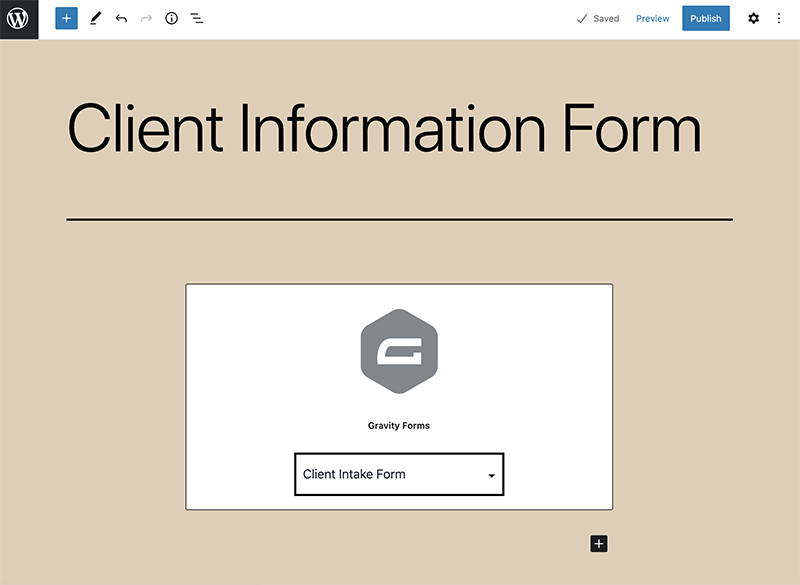
Then, we publish our page and test it out!
And there you have it! A powerful appointment booking system that will save time, remove back-and-forth emails, and really impress your clients (especially if they’re in the market for a nice looking website with an appointment booking system themselves)!
That’s a wrap!
We hope you’ve gotten some awesome value out of this walkthrough.
While we used a digital agency as an example, any type of business that’s hoping to do more business online stands to benefit from scheduling their customers through their website.
Ultimately, appointment booking systems are a fantastic way to manage you and your team’s availability, while also impressing.
Any questions on how to set up an appointment booking system on your WordPress website? Please ask away in the comments below…
About the Case Study Contributor:

Michael Kilcullen is the marketing + growth lead at Simply Schedule Appointments — a scheduling plugin used (and loved) by over 10,000+ WordPress users. When he’s not helping those users get the most out of their online appointment scheduling, he can be found surfing, bike-riding, or just generally enjoying the outdoors in his native Florida.
Newsletter
If you want to keep up-to-date with what’s happening on the blog sign up for the Gravity Forms newsletter!
"*" indicates required fields


