Written by the Editorial team at Uncanny Automator
Most contact forms do their job perfectly – they collect exactly the information you asked for. What happens next is where many websites leave value on the table. A submission lands in an inbox as a notification email, someone reads it (eventually), and someone forwards it to the right person (hopefully). Call it the “notification email and pray” approach.
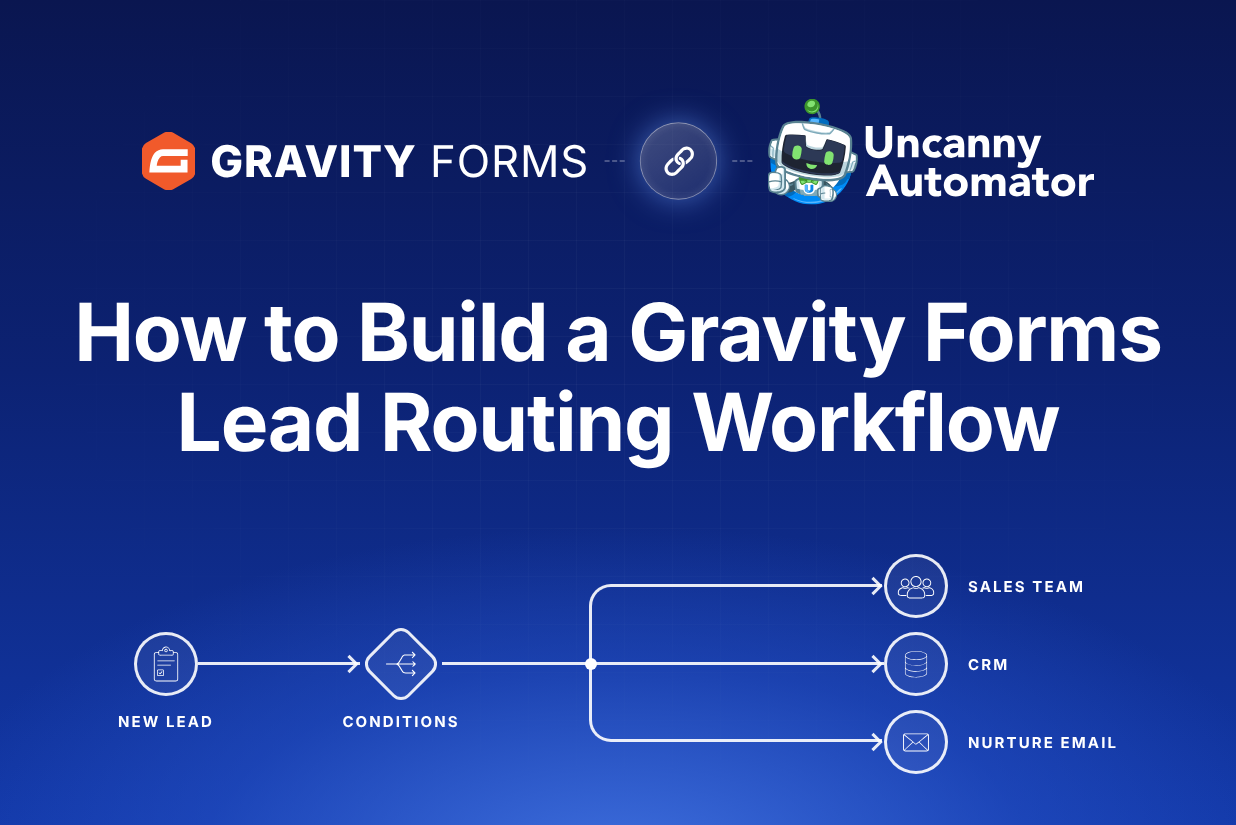
Lead routing fixes this. Instead of treating every form submission the same way, a lead routing workflow reads what the respondent told you and sends them to the right person, pipeline, or email sequence automatically.
In this tutorial, you’ll learn how to:
- Map out routing logic to build airtight, high-converting lead routing workflows.
- Route each lead automatically with Uncanny Automator, (we’ll use Drip and Discord as example destinations, but Automator has hundreds of app and plugin integrations to fit your tech stack).
No code required at any step.
Note: Uncanny Automator is a third-party solution. Gravity Forms does not offer support for this platform, nor is this article intended to be a Gravity Forms endorsement of this platform, its developers, or quality of support. As always, we recommend you extensively evaluate all solutions to ensure their suitability for your purpose.
What is lead routing (and why does it matter)?
Lead routing means sending the right lead to the right place based on their form submission. When someone fills out your form, the values they choose – a dropdown selection, a radio button, a budget range – determine what happens next.
A single notification email works well when every inquiry goes to the same person. As a business scales or diversifies, that model breaks down: different leads need different follow-up, and the longer a lead waits in a shared, undifferentiated inbox, the colder it gets.
Some real-world examples of routing logic:
- By company size – Freelancers get a self-serve onboarding sequence, while enterprise inquiries go straight to a senior account executive.
- By service interest – Leads interested in product A go to one pipeline, leads interested in product B go to another.
- By location or language – European leads route to the EU team, American leads route to the stateside rep.
- By budget range – high-budget projects trigger an immediate alert, smaller projects enter a nurture sequence.
The payoff is concrete: faster follow-up, less manual triage, and a better lead-to-customer conversion rate.
How lead routing works on WordPress – the two layers
A lead routing workflow on WordPress has two layers, and both need to be intentional.
Layer 1: The form (Gravity Forms)
The form captures the data that drives every routing decision. Field choice matters here.
Fields with a fixed set of options – drop down, radio buttons, and checkboxes fields for example – are ideal for routing because their values are predictable. Email and text fields are useful too, but even with an AI step for analysis, routing on free-form text is fragile.
Gravity Forms’ conditional logic, which shows or hides fields based on what the respondent has already selected, can help you segment your leads even more at the form level.
(Important distinction: you don’t need conditional logic in your form for lead routing to work – more on this below.)
Layer 2: The automation (Uncanny Automator)
Uncanny Automator translates form field values into actions across your other tools.
Automator works with recipes – automations that pair at least one trigger (a form is submitted) with one or more actions (add the subscriber to a Drip campaign, send a Discord message, create a task in Asana, and so on).
Automator extends Gravity Forms’ native integrations to include hundreds of apps and plugins.
The routing intelligence comes from Automator’s action filters, which let each action run only when specific criteria are met – for example, only when the What service are you looking for? field equals a specific value.
Routing breaks when the logic lives on only one side. A form without a routing field leaves the automation nothing to route on, while form-layer conditional logic alone can shape what you collect but can’t use that information to segment leads in your CRM or alert the right team member – that’s the automation layer’s job.
Map your routing logic before you build
Routing errors are much easier to prevent than to diagnose. Before building your form or your automations, design the workflow on paper (or in a spreadsheet).
Simple tables can help you organize and visualize your lead routing workflows; rows are your lead segments, and columns are the destinations or actions for each segment.
Here’s a worked example for a web design agency with a contact form that asks What service are you looking for?
| Segment | Form answer | Assigned to | Email automation (Drip) | Discord alert |
| A | I need a new website | Sales rep | Added to the new business campaign | #sales channel |
| B | I need ongoing support | Support lead | Added to the support onboarding campaign | #support channel |
| C | I’m not sure yet | Added to the nurture campaign | None |
Every row answers three questions: who owns this lead, what email sequence should they enter, and who needs to know right now?
Sketch your own matrix before proceeding – it becomes your checklist for both the form fields you need and the recipes you’ll build.
Building the form in Gravity Forms
With your lead routing matrix all mapped out, the form almost builds itself.
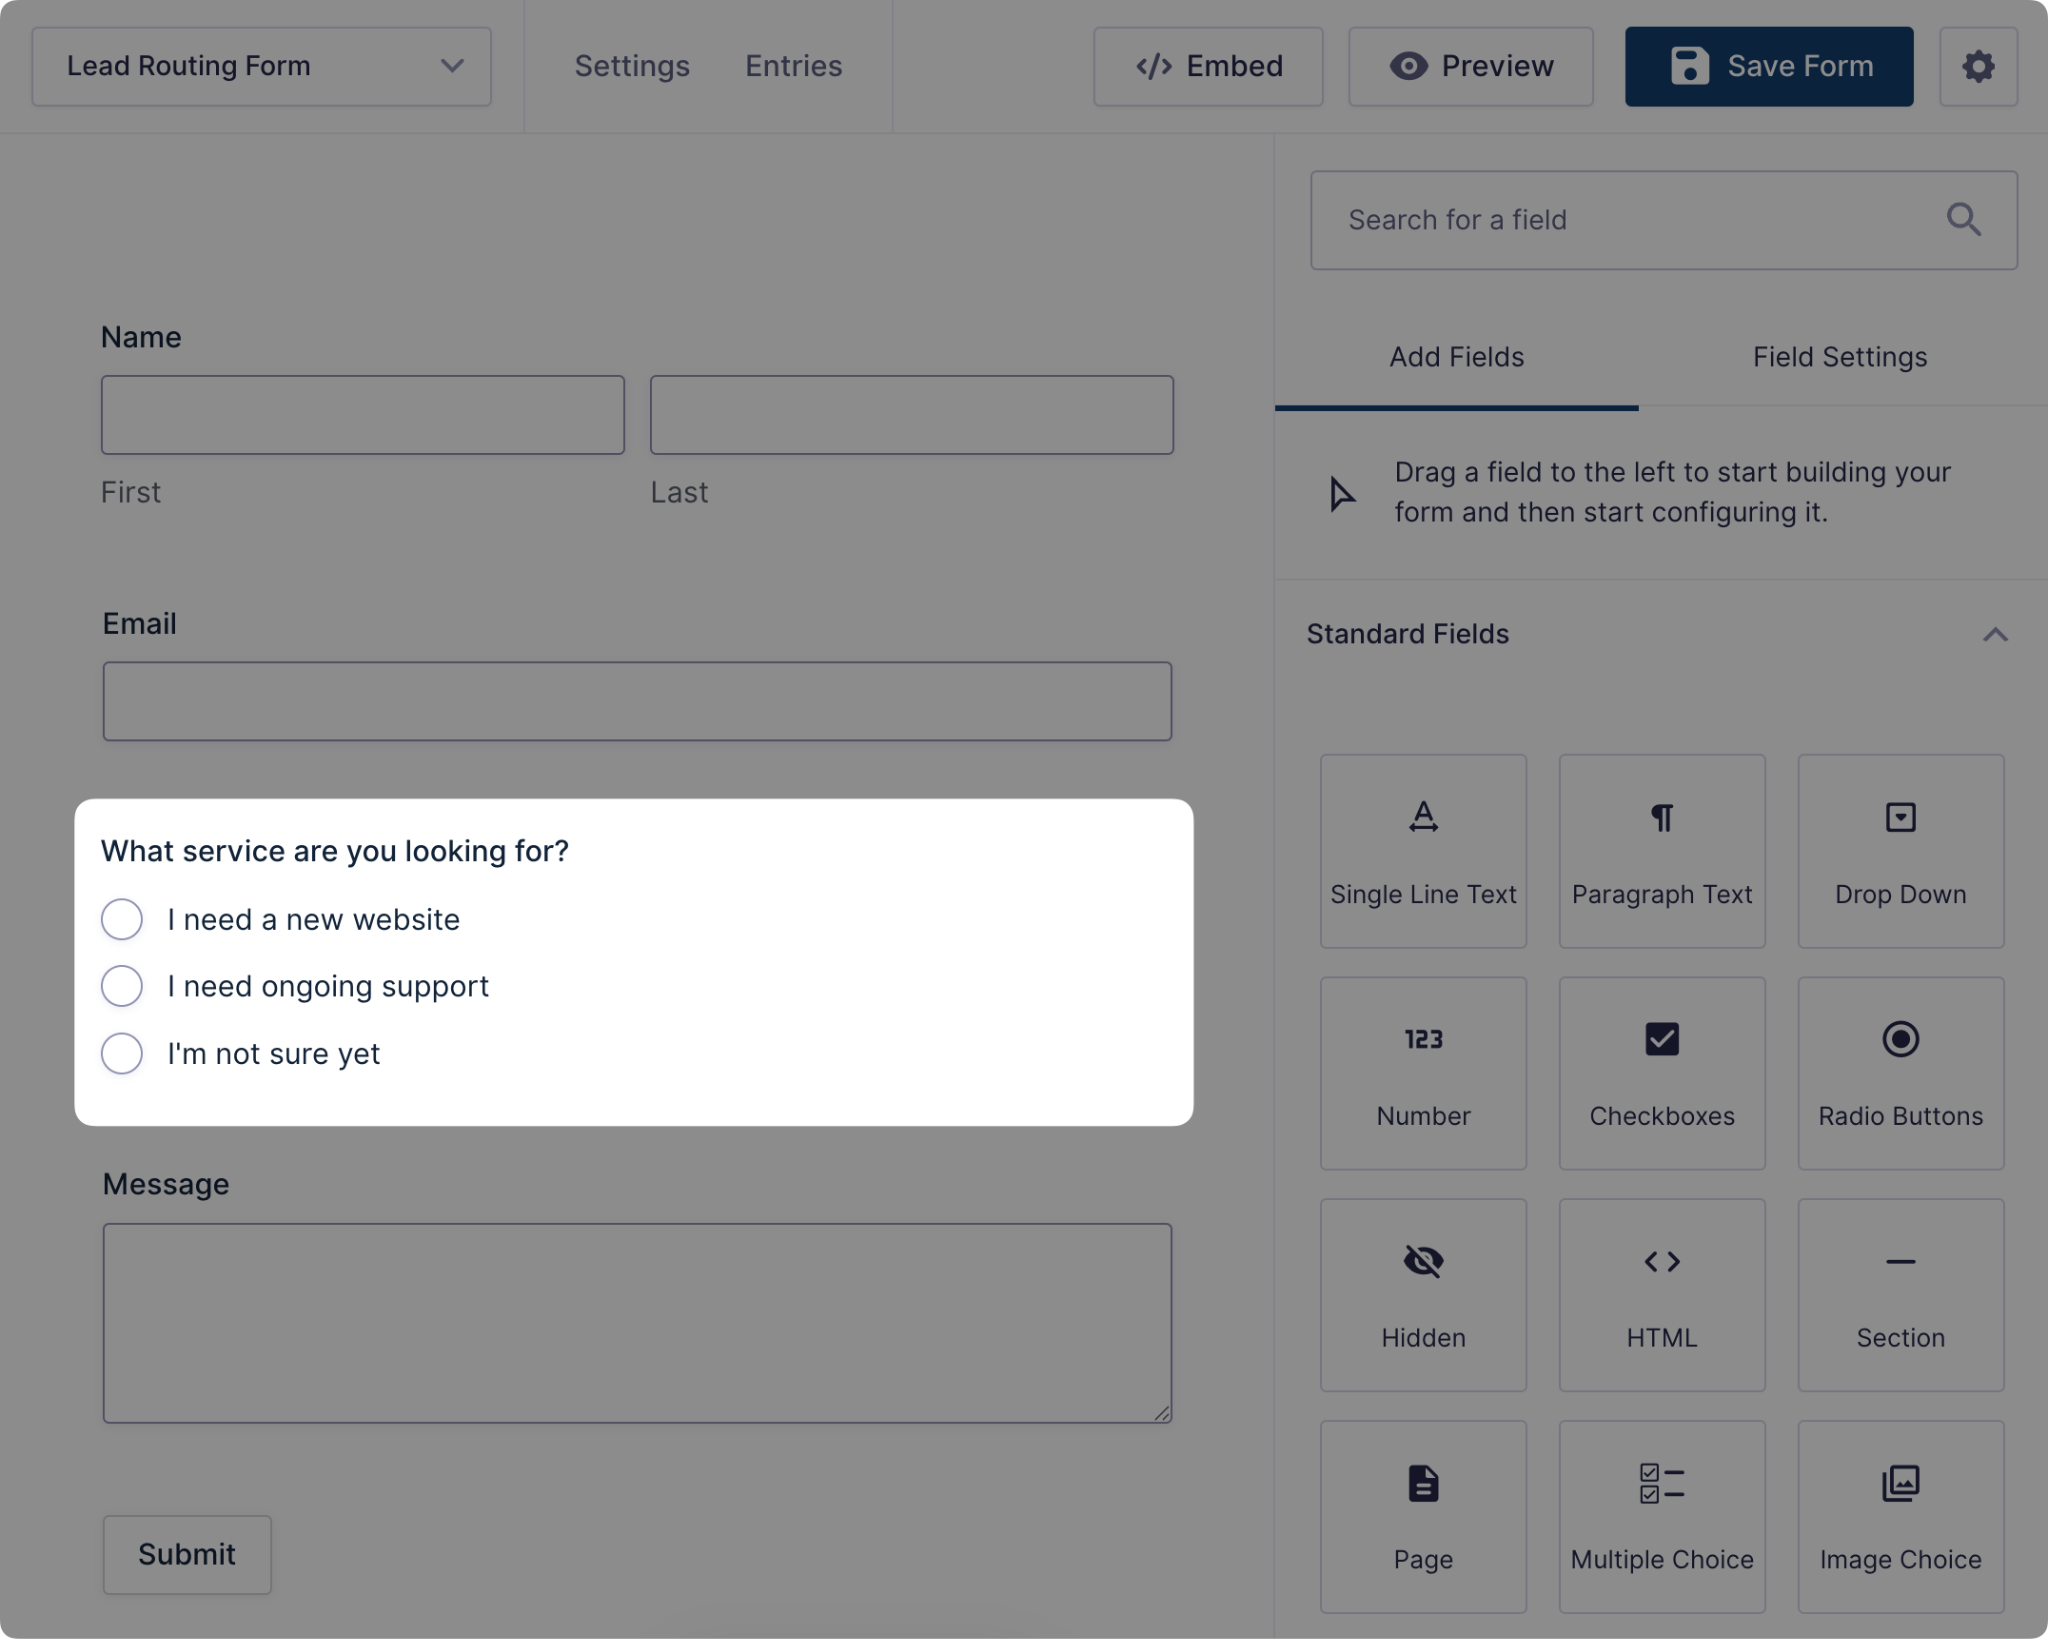
To create the form, log in to your WordPress dashboard and navigate to Forms > New Form. Add your standard contact fields (Name, Email, Message), then add the field that will drive routing.
For our agency example, that’s a Radio Buttons field labeled What service are you looking for? with three choices:
- I need a new website.
- I need ongoing support.
- I’m not sure yet.
A few tips for a form that routes accurately without scaring off respondents:
- Prefer fixed choices over free text for any field you’ll route on. “I need a new website” is routable; “Hi, we were thinking about maybe redoing our site” is not.
- Keep the routing question early and simple. One clear question usually beats five granular ones – you can always collect details later in the sales process.
- Use conditional logic to keep the form short. For example, enable conditional logic on a Budget range field so it only appears when a respondent selects I need a new website. Respondents only see fields relevant to them, and you still capture the data you need.
One important note: conditional logic is optional here. Uncanny Automator routes leads using the values of regular form fields – any field, on any form. If your form is three plain fields with no conditional logic at all, Automator can still read the submitted values and route accordingly.
When a site visitor submits the form, every field value becomes available to Automator as a token – a piece of dynamic data that represents the value the site visitor entered. Automator can read, evaluate, and pass along that value to other apps and plugins. That’s the handoff between the two layers.
Building the routing recipes in Uncanny Automator
Now for the automation layer. If you haven’t already, install Uncanny Automator and connect your Drip and Discord accounts from the Automator app integrations settings. Action filters are a feature of Automator Pro, which you’ll want for this tutorial.
A recipe pairs one trigger with any number of actions. We’ll build one recipe that handles all three segments from our routing matrix.
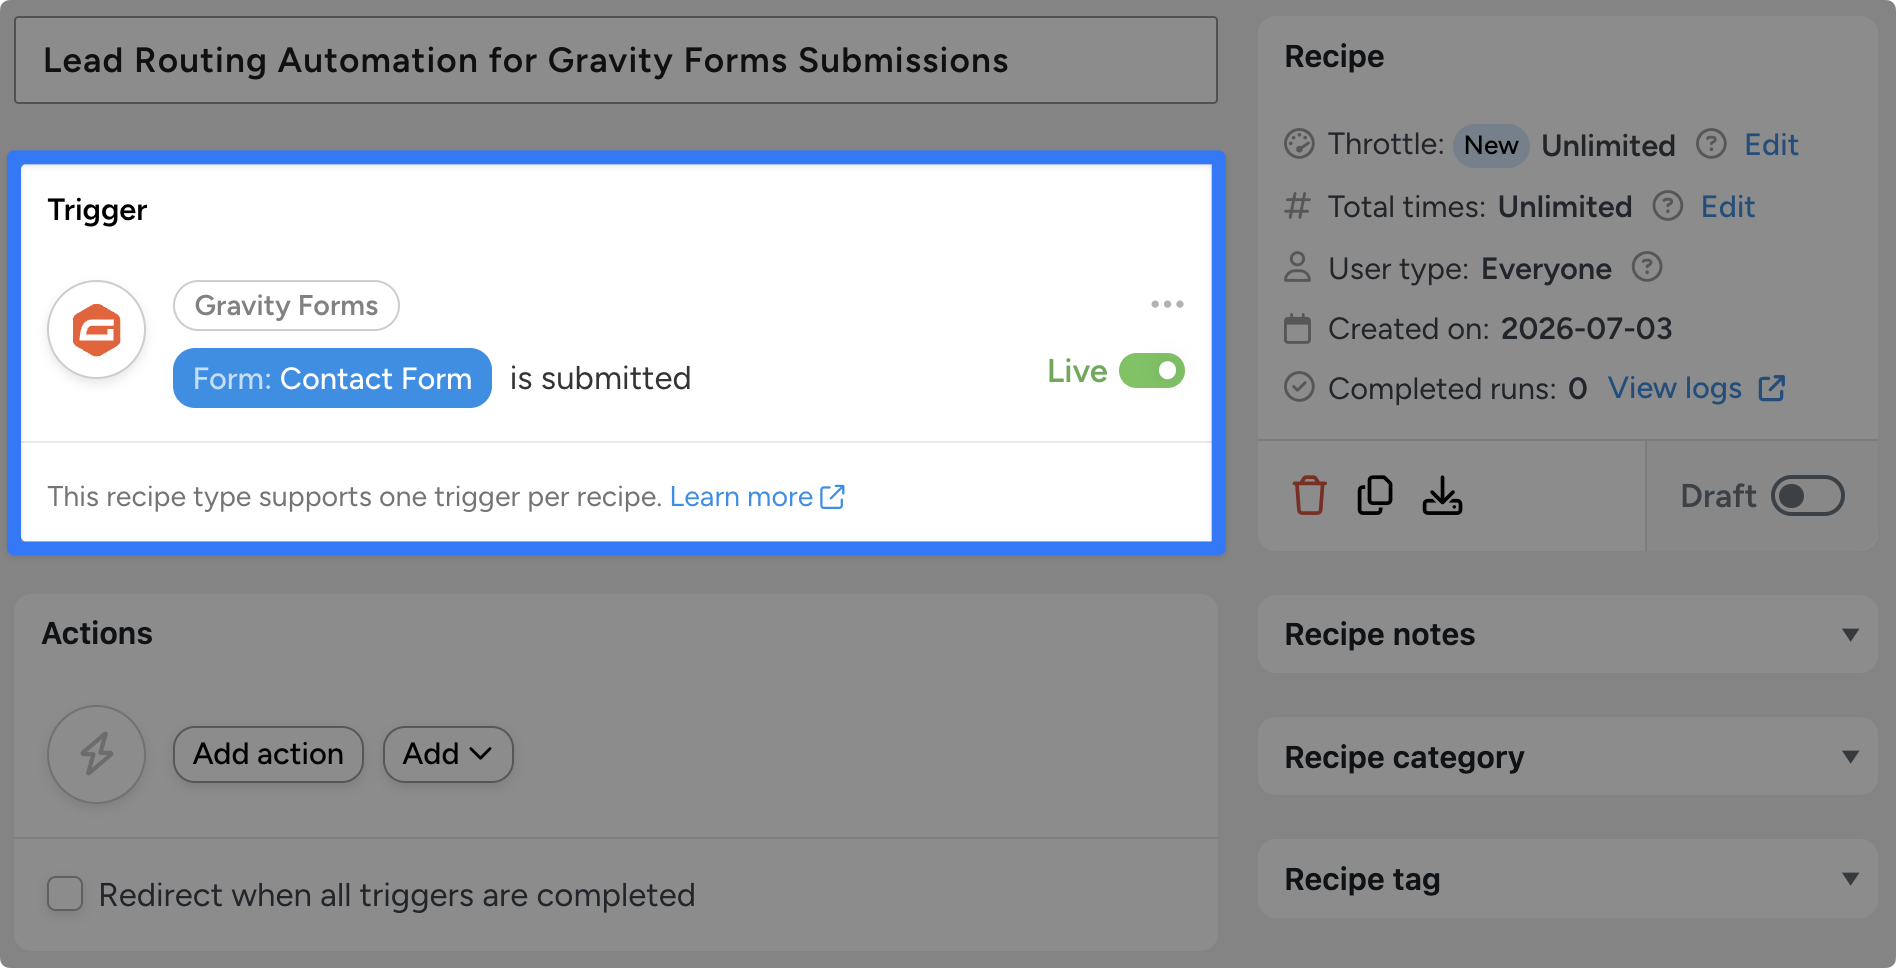
Set the trigger
- Go to Automator > Add new recipe in your WordPress dashboard.
- Since contact form respondents typically aren’t logged in, select Everyone as the recipe type.
- Select Gravity Forms as the integration, then select the trigger A form is submitted.
- Choose your contact form from the dropdown.
Add the actions with filters
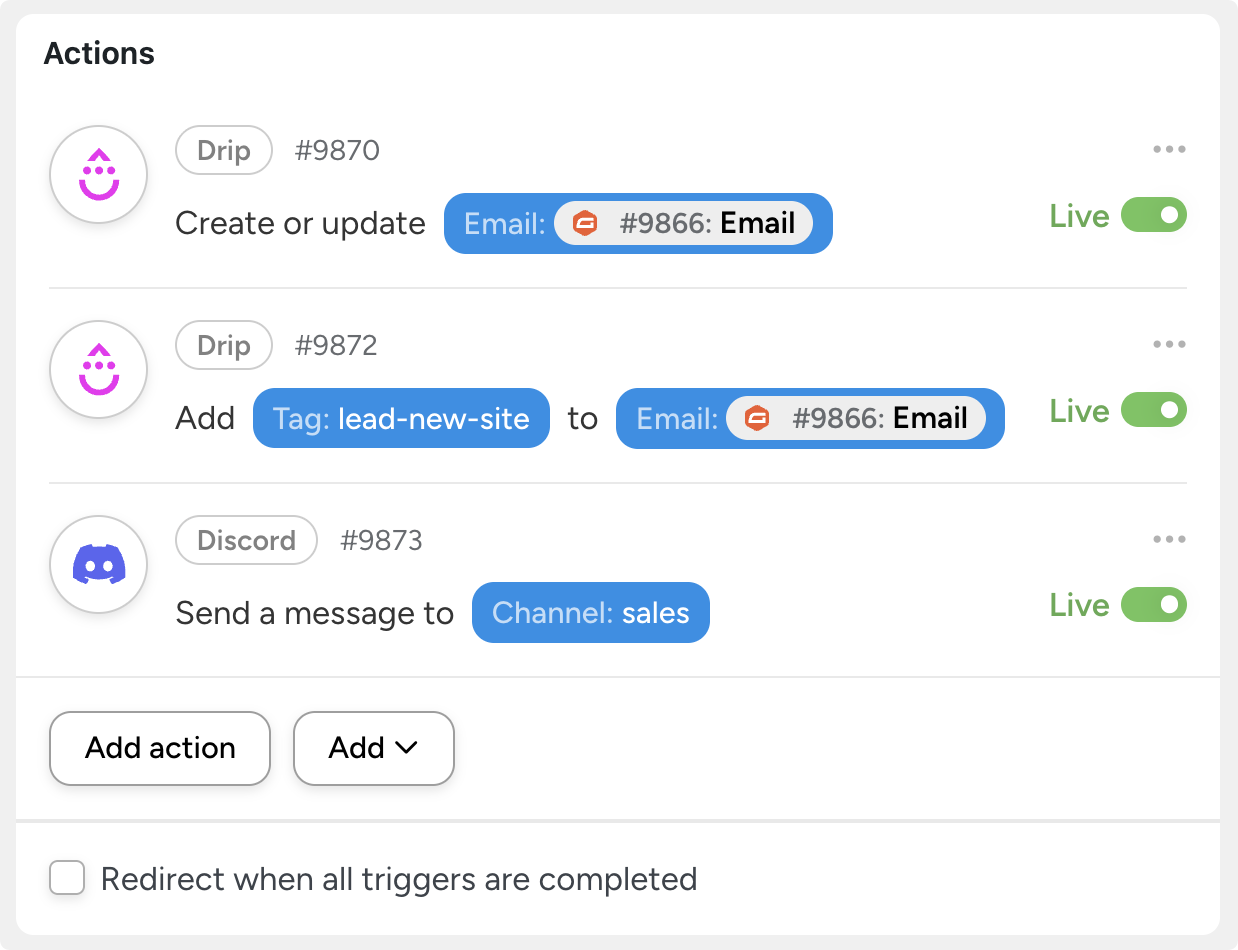
Next, add every action from your routing matrix, then use filters to control when each one runs. For Segment A (new website leads):
Add the Drip action Create or update a subscriber, mapping the form’s Email and Name tokens to the subscriber fields. (To use tokens, click on the Asterisk in a given field and use the search feature to locate your token.)
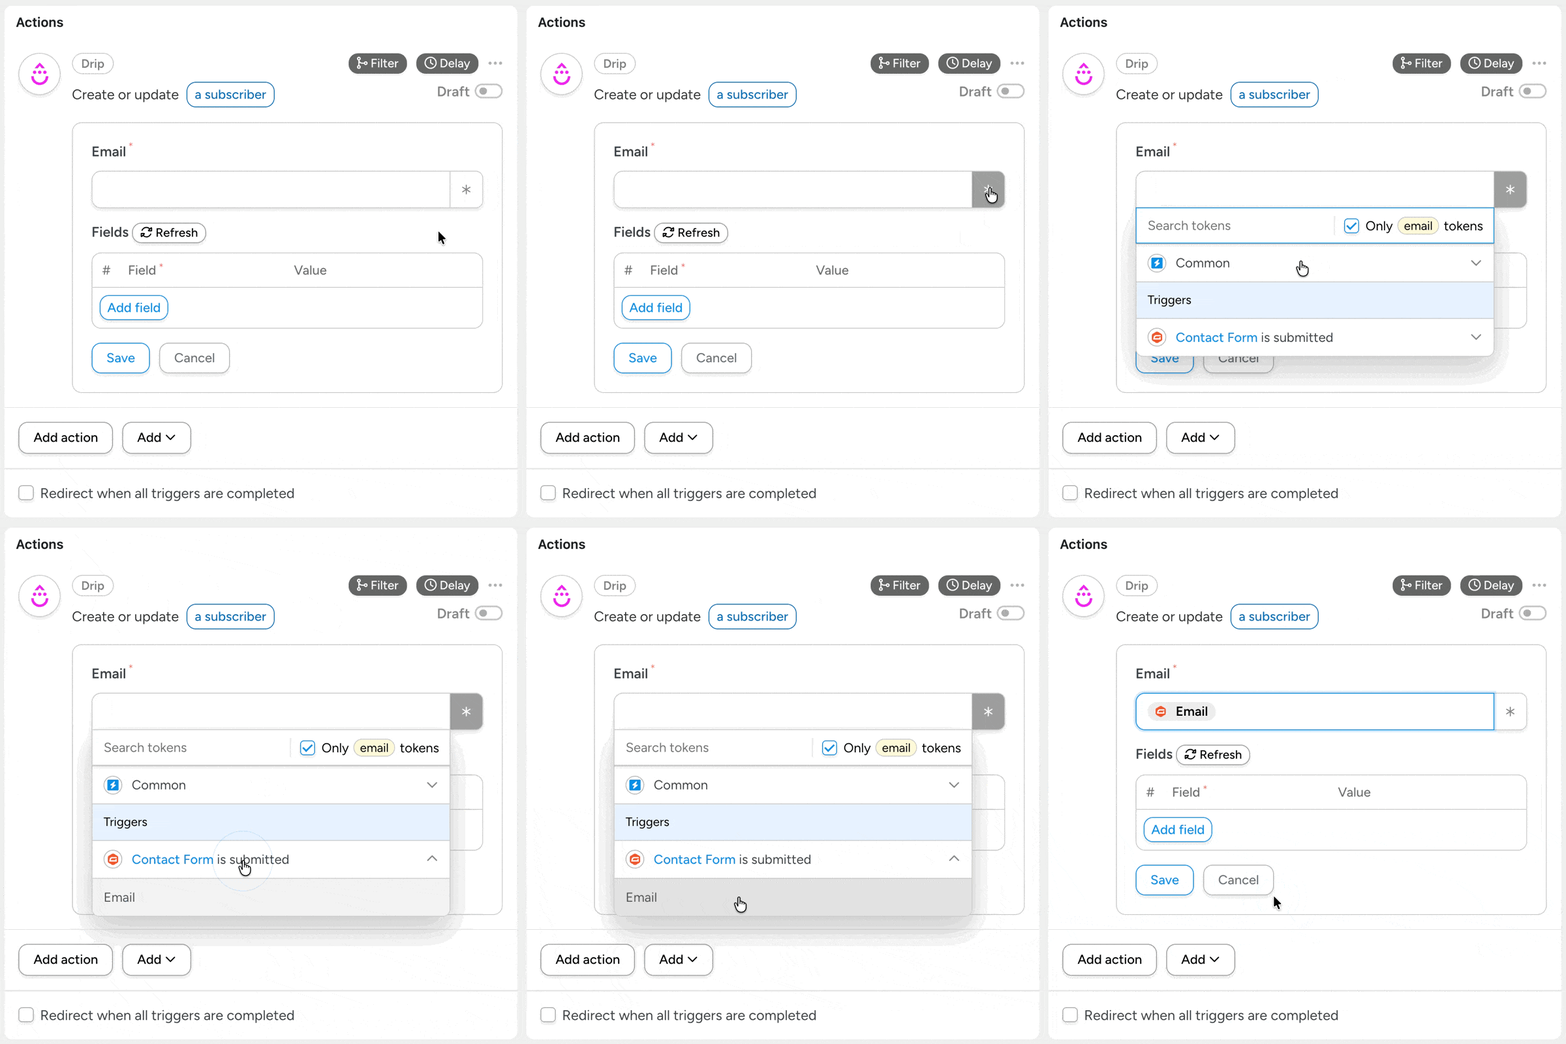
Add the Drip action Add a subscriber to a campaign or Add a tag to a subscriber, however, you choose to segment your leads, and select your new business campaign or the corresponding tag.
Add the Discord action Send a message to a channel, targeting your #sales channel, with a message that pulls in the lead’s name, email, and other relevant information from the form submission.
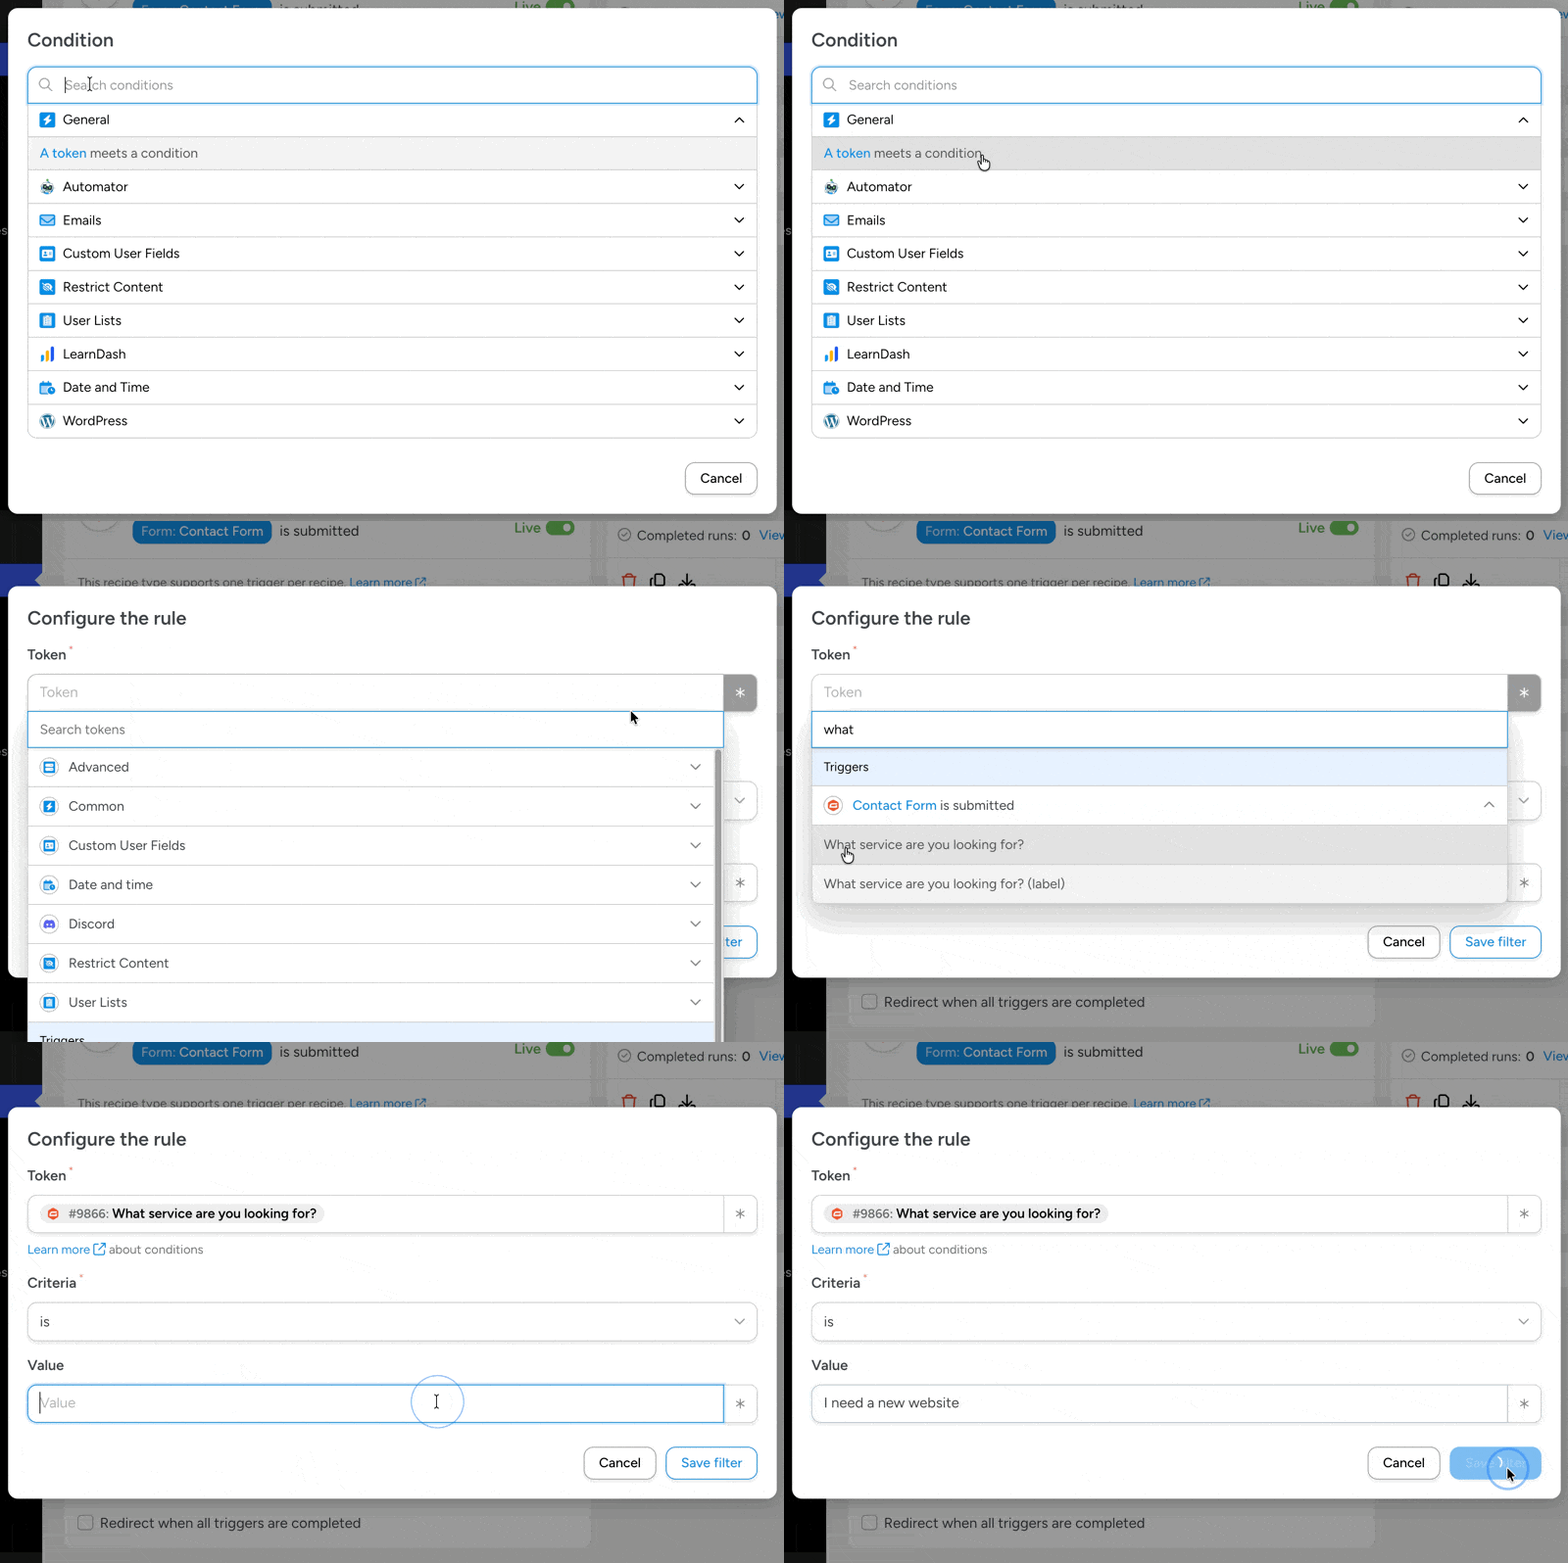
Now it’s time to add the lead routing logic: filters.
Hover over the first action and click Filter. In the modal that appears, select “A token meets a condition”. In the Token field, select “What service are you looking for?” or whichever field you are routing leads from.
Note: Do not select the token with “label” in parentheses – that’s just the name of the field, not the value the site visitor selected.
Finally, set the Value to “I need a new website” or whatever value you gave to your lead routing fields.
Drag and drop the other two actions into the filter pane. (Note: Actions in Uncanny Automator run in the order in which they are listed. Make sure that the action to create/update a contact or subscriber is first on the list.)
Repeat these steps for Segment B (same action types, pointed at the support campaign and #support channel, filtered on I need ongoing support) and Segment C (Drip nurture campaign only, no Discord action, filtered on I’m not sure yet).
Set the recipe to live, and your routing workflow is running.
One recipe or several?
If your lead routing is similar to mine, then you would end up with nine actions – three for each segment. But, as your list of actions and potential segments grows, so would the complexity of your recipe.
So, you might be asking, “When should I use filters, and when should I just make a new recipe?” Short answer: it all depends on the complexity of your workflows:
One recipe with filtered actions (what we built above) keeps everything in a single view and is ideal when segments share a trigger and the same general actions, keeping the logic simple.
Separate recipes per segment are easier to manage when each segment needs its own actions and delays. This approach also lets you switch one segment off without interfering with recipes pertaining to other segments.
A good rule of thumb: start with one recipe, and split a segment out once its action list stops fitting comfortably on one screen.
Testing and troubleshooting your routing workflow
Test every route before you trust the workflow with real leads – one test submission per row of your routing matrix:
Submit the form once for each segment, selecting a different routing answer each time.
Verify the destination for each submission: the subscriber appears in the right Drip campaign, and the alert arrives in the right Discord channel.
Check the logs under Automator > Logs, where recipe, trigger, and action logs show you exactly what fired, what didn’t, and why.
Watch out for these common routing mistakes:
- Routing on a field that allows multiple values: If What are you looking for? is a Checkboxes field, a respondent can select both I need a new website and I need ongoing support – and both sets of actions will fire. If your segments are meant to be mutually exclusive, use a Radio Buttons or Drop Down field instead.
- Filter values that don’t exactly match field values: A filter checks the submitted value precisely, so “I need a website” and “I need a new website” are different values. Copy choice values directly from the form editor when configuring filters.
- Forgetting the edge cases: What happens to a lead that doesn’t match any filter? Make sure every possible answer has a route and/or make lead routing fields mandatory for form submissions.
The cleanest way to handle edge cases is a catch-all: an action that adds unmatched leads to a manual review queue – a Drip campaign, a spreadsheet, or an email notification to a team lead. No lead should be able to fall through the workflow unnoticed.
Wrapping up
Lead routing is a two-layer problem. The form layer decides what data you capture – and Gravity Forms gives you the field types and conditional logic to capture it cleanly. The automation layer decides what happens to that data – and Uncanny Automator’s recipes and action filters turn each submission into the right follow-up, automatically.
The broader principle: your form data is only as useful as the workflows connected to it. A well-designed form feeding a well-designed routing workflow means every lead gets a fast, relevant response without anyone triaging an inbox.
Once your basic routing is live, natural next steps include:
- Multi-field routing – combining filters (for example, service interest and budget range) for finer-grained segments.
- Full CRM pipelines – routing leads into deal stages in your CRM, not just email campaigns.
- Lead scoring – using submission values to score leads and prioritize follow-up.
Ready to build your own workflow? Sketch your routing matrix, build the form, and let Uncanny Automator handle the rest.

Newsletter
If you want to keep up-to-date with what’s happening on the blog sign up for the Gravity Forms newsletter!
"*" indicates required fields