Gravity Flow 3.1 is here, and it makes branching your workflows simpler than ever.
The star of the show is the new Choice Routing step, which reads a dropdown or radio field and sends each entry to the right step automatically, with no conditional logic to build or maintain.
In this post we’ll take a closer look at what the new step does, why it’s such an improvement on the old way, and how to set it up on your own site.
Let’s dive in…
The problem Choice Routing solves
Gravity Flow has always been able to branch a workflow. The trouble was the amount of setup it took to get there.
Sending entries down different paths meant building conditional logic across your steps, then keeping it all in sync every time the form or workflow changed.
Plenty of customers created their own workarounds. One of our beta testers told us they’d spent years “faking” branching, using an empty conditional Notification step that sent nothing, with a Next Step that would route entries to the right place if the condition was met.
Clever? Absolutely. But fiddly to build, and easy to break.
The new Choice Routing step does away with all of that. One step, one Routes table, and every entry landing in the right place.
What you’ll find in the Choice Routing step
When an entry reaches a Choice Routing step, the routing happens automatically based on the choice the submitter made in a dropdown or radio field. The entry moves straight to the matching step, with no user interaction and no approvals to wait on.
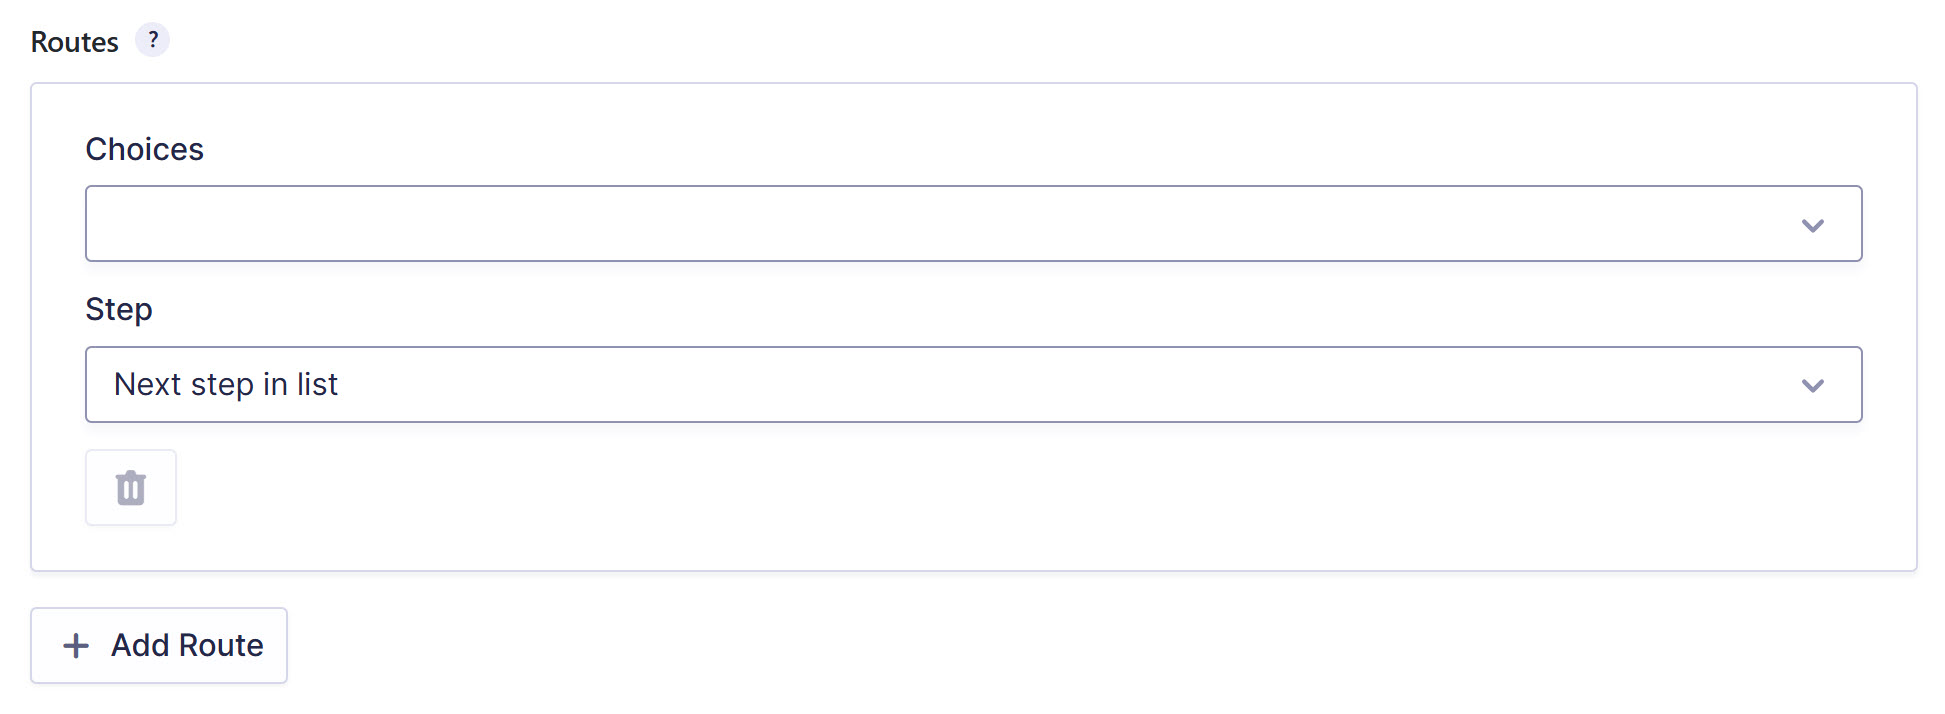
Here’s what makes Choice Routing so easy to work with:
- Create as many routes as you need – Each route can send a single choice, or several choices, to the same step.
- No overlap, ever – Each choice can only belong to one route, so your routing stays easy to maintain as the form evolves.
- A Default Step Route catches everything else – If an entry comes through with a choice that doesn’t match any route, it lands in your default route, so nothing falls through the cracks.
- Every decision is logged – Gravity Flow records each routing decision in the entry’s timeline, so you can always see which path an entry took, and why.
How to set up a Choice Routing step
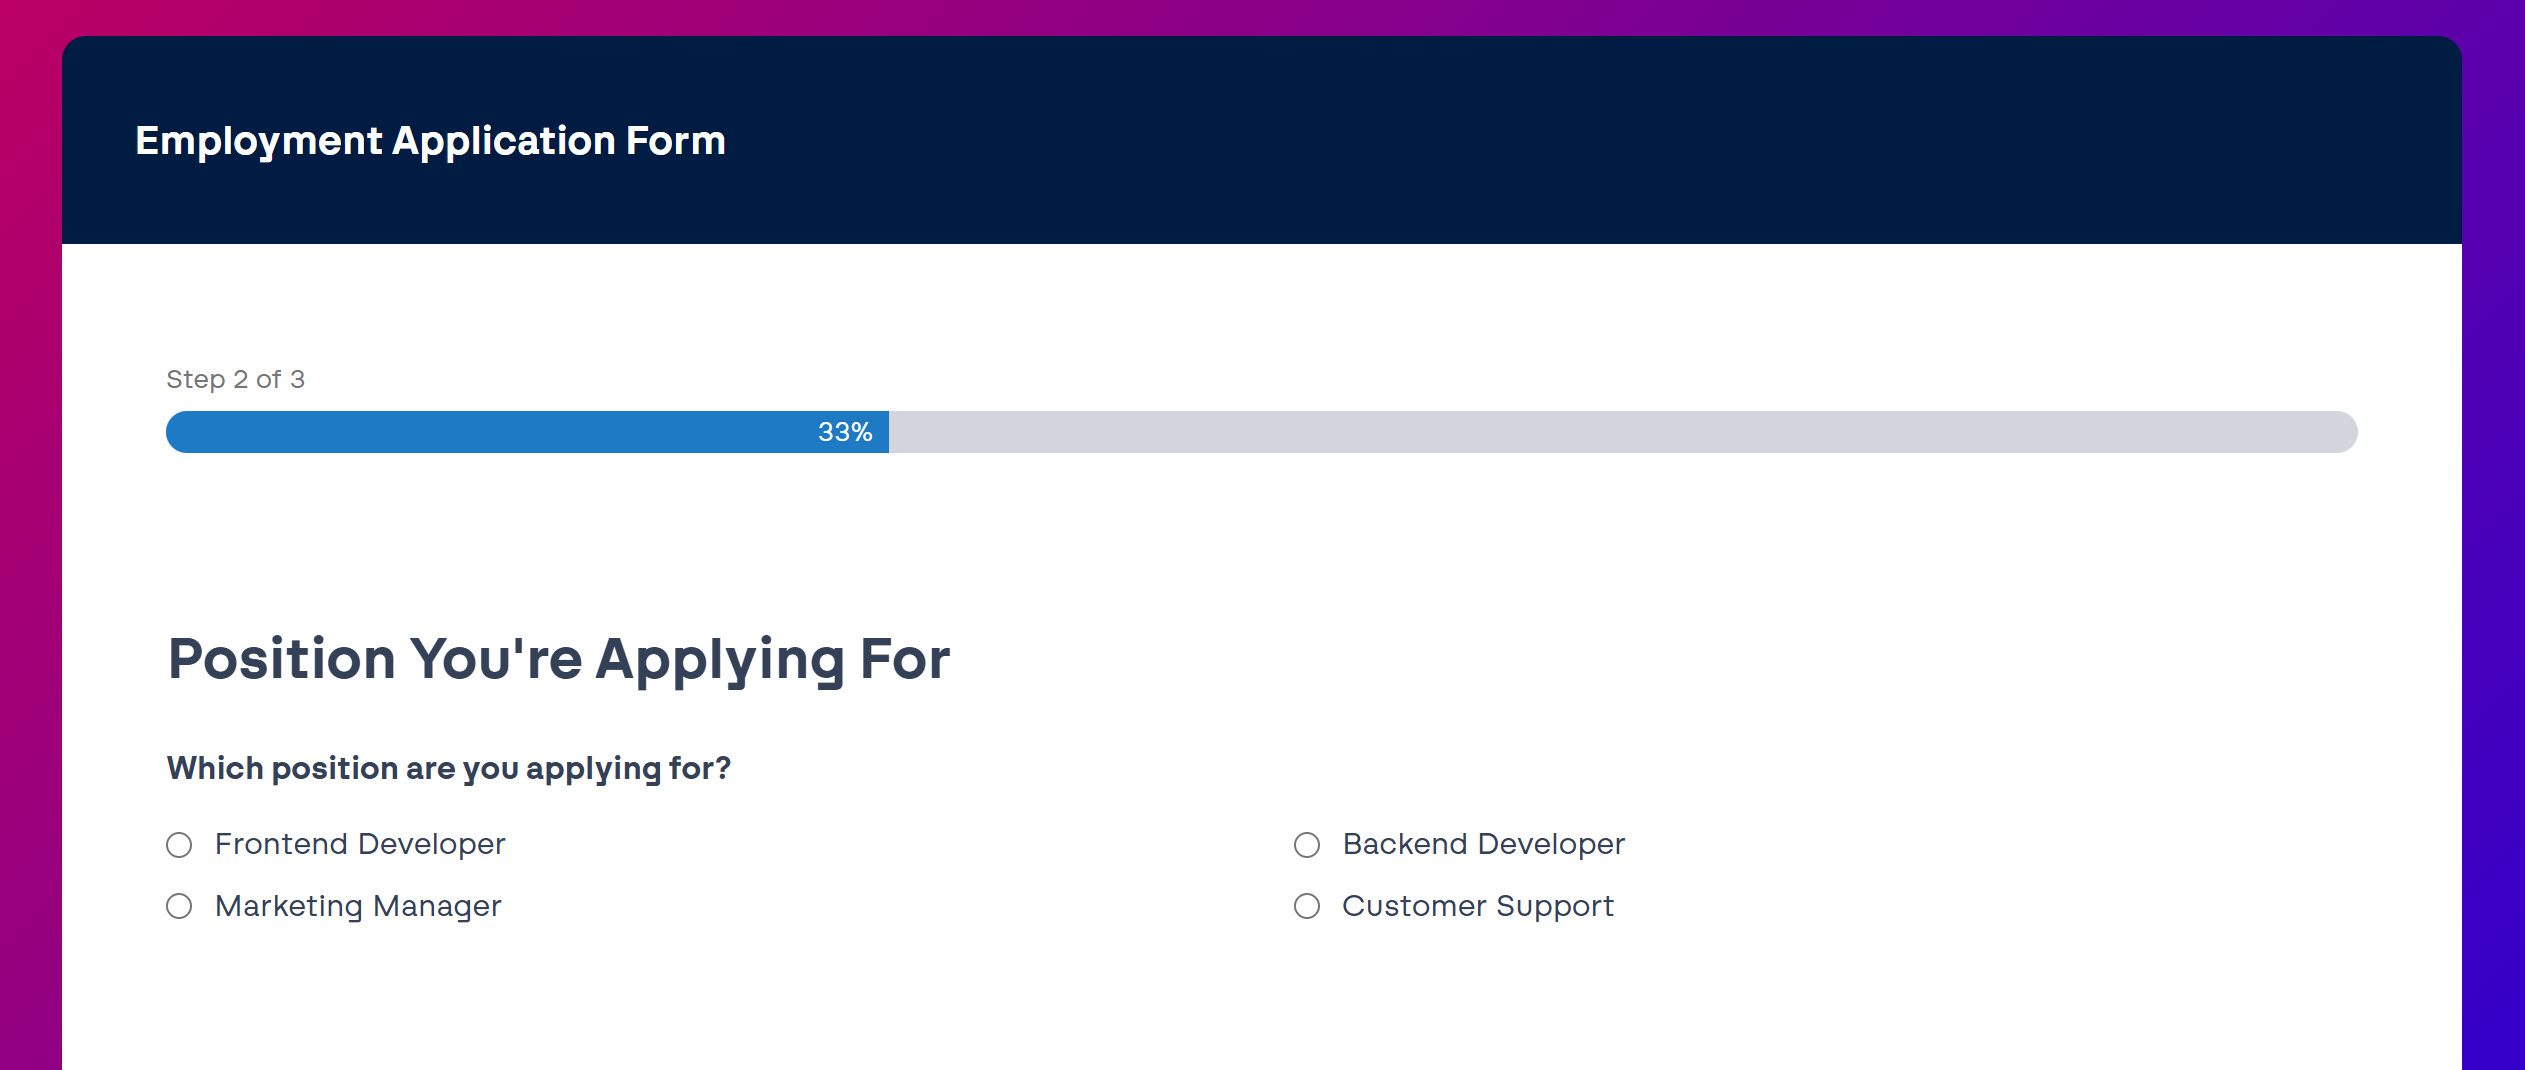
Time for a real-world example. Say you’re hiring across several teams, and every candidate applies through a single job application form. The form has a Position Applied For field, and each application needs to reach the right hiring manager for review. Here’s how you’d set that up…
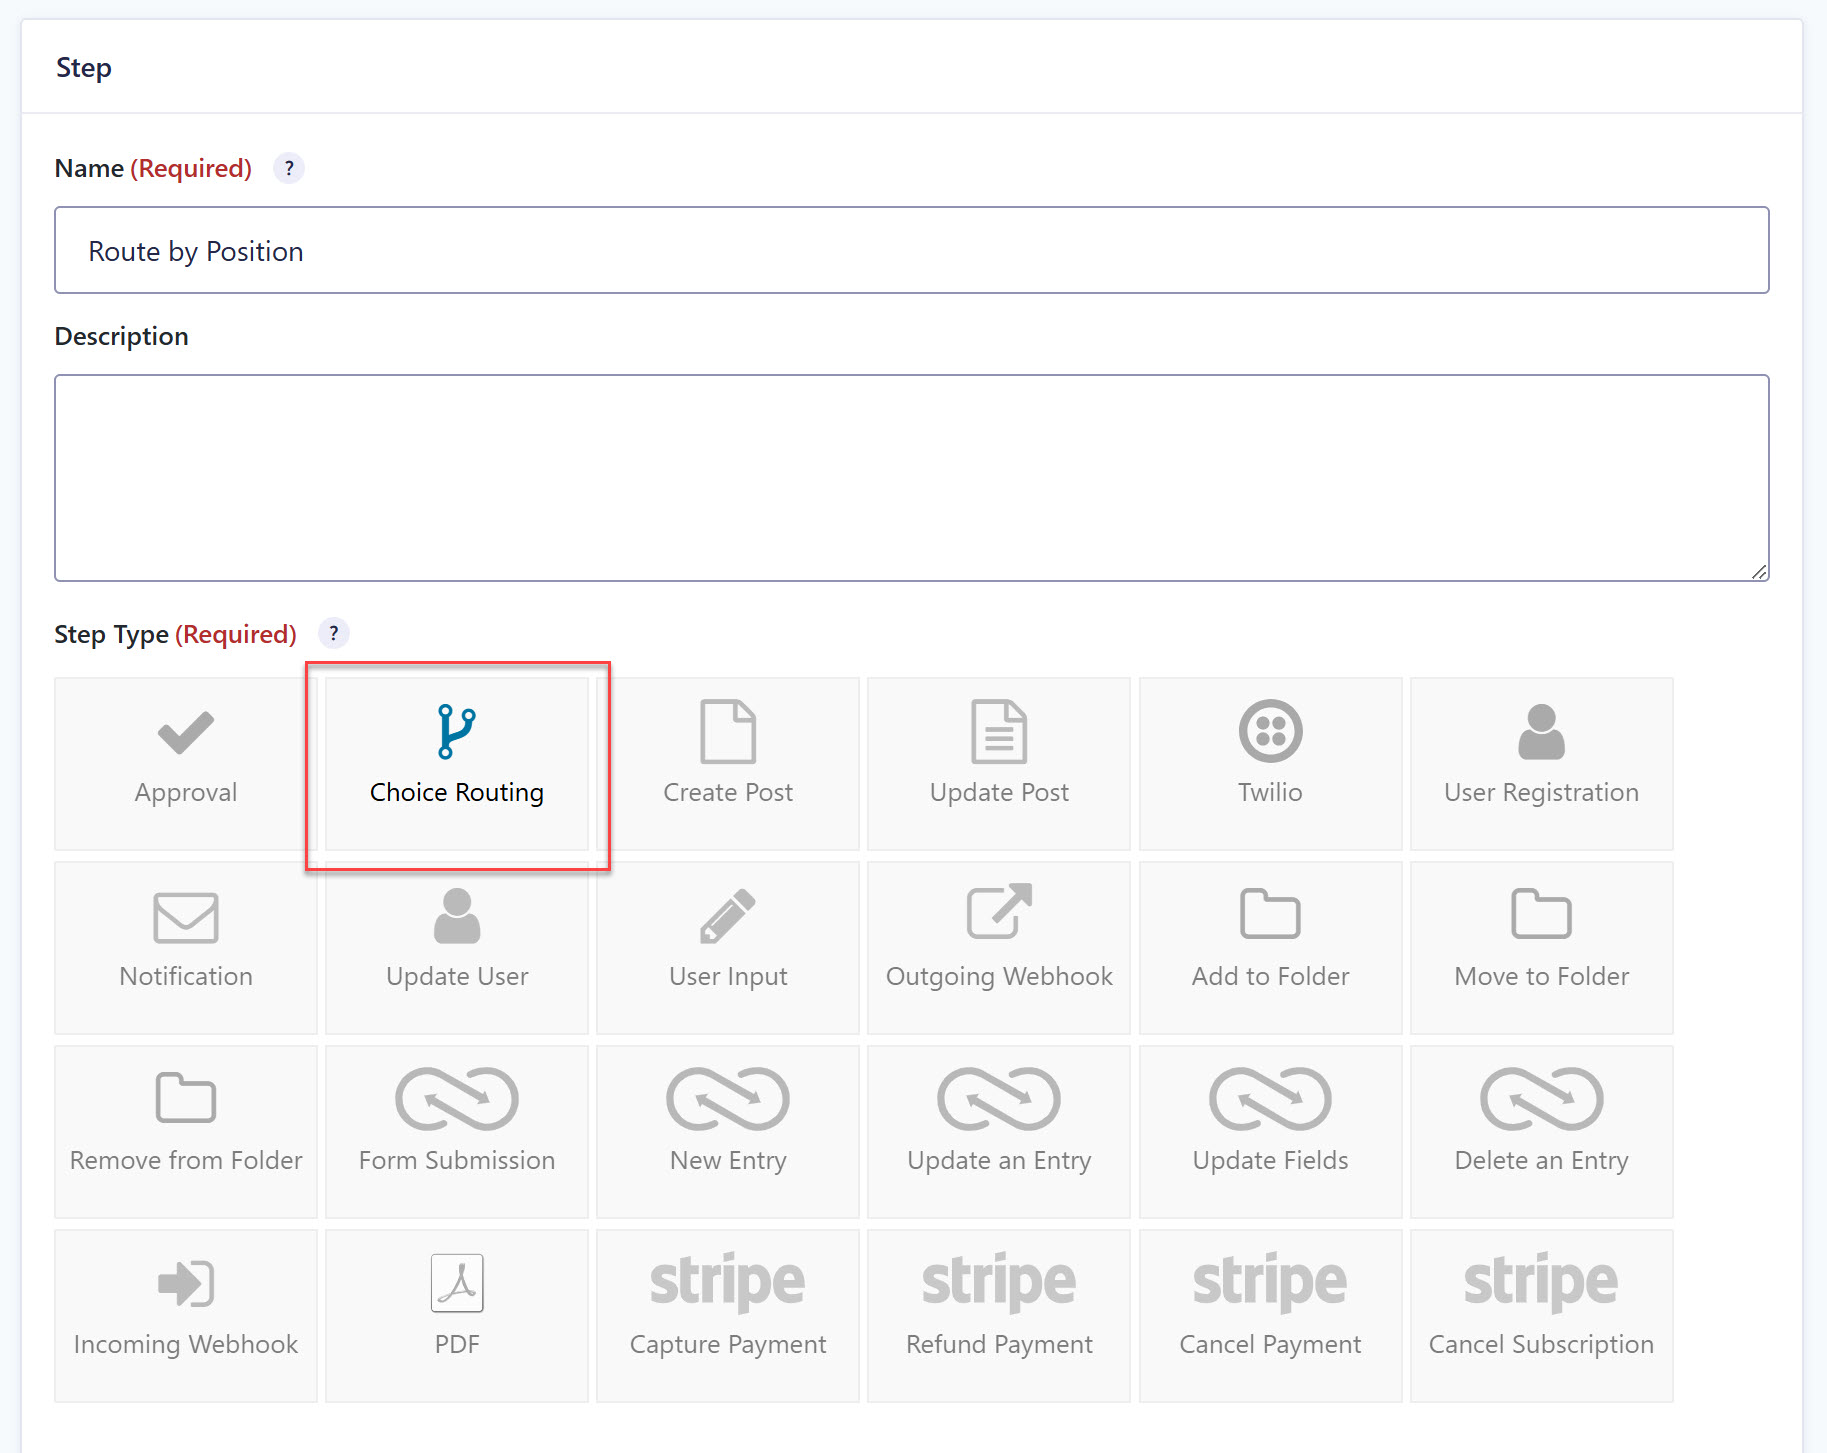
1. Add the step to your workflow – Open your workflow settings, add a new step, and give it a name (something like “Route by position”). Set the step type to Choice Routing.
2. Choose the field to route on – Pick the dropdown or radio field that holds the choices. In this case, that’s Position Applied For.
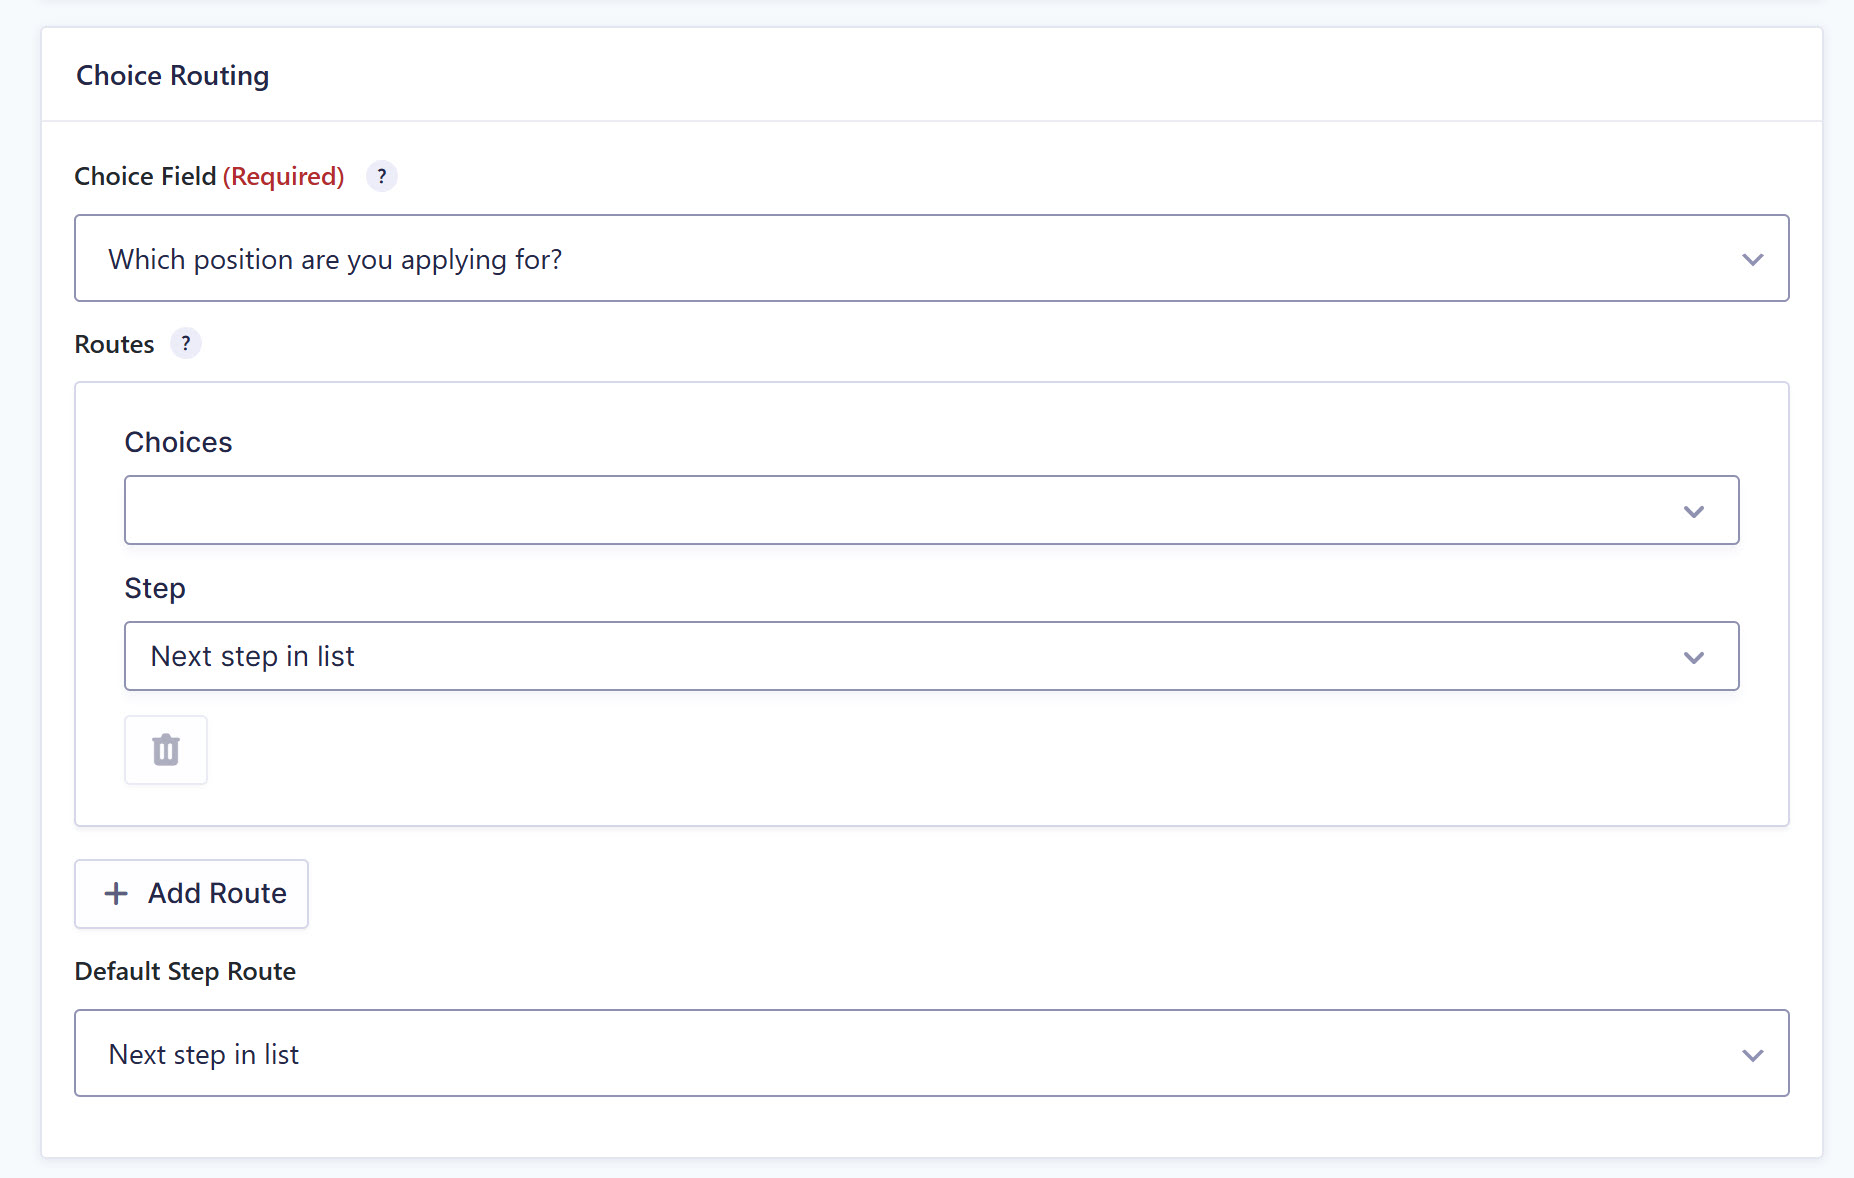
3. Build your routes – In the Routes table, each row maps one or more choices to a destination step. Our hiring workflow looks like this:
- Frontend Developer and Backend Developer applications head to the Engineering Lead’s approval step.
- Marketing Manager applications are sent to the Head of Marketing.
- Customer Support applications land with the Support Team Lead.
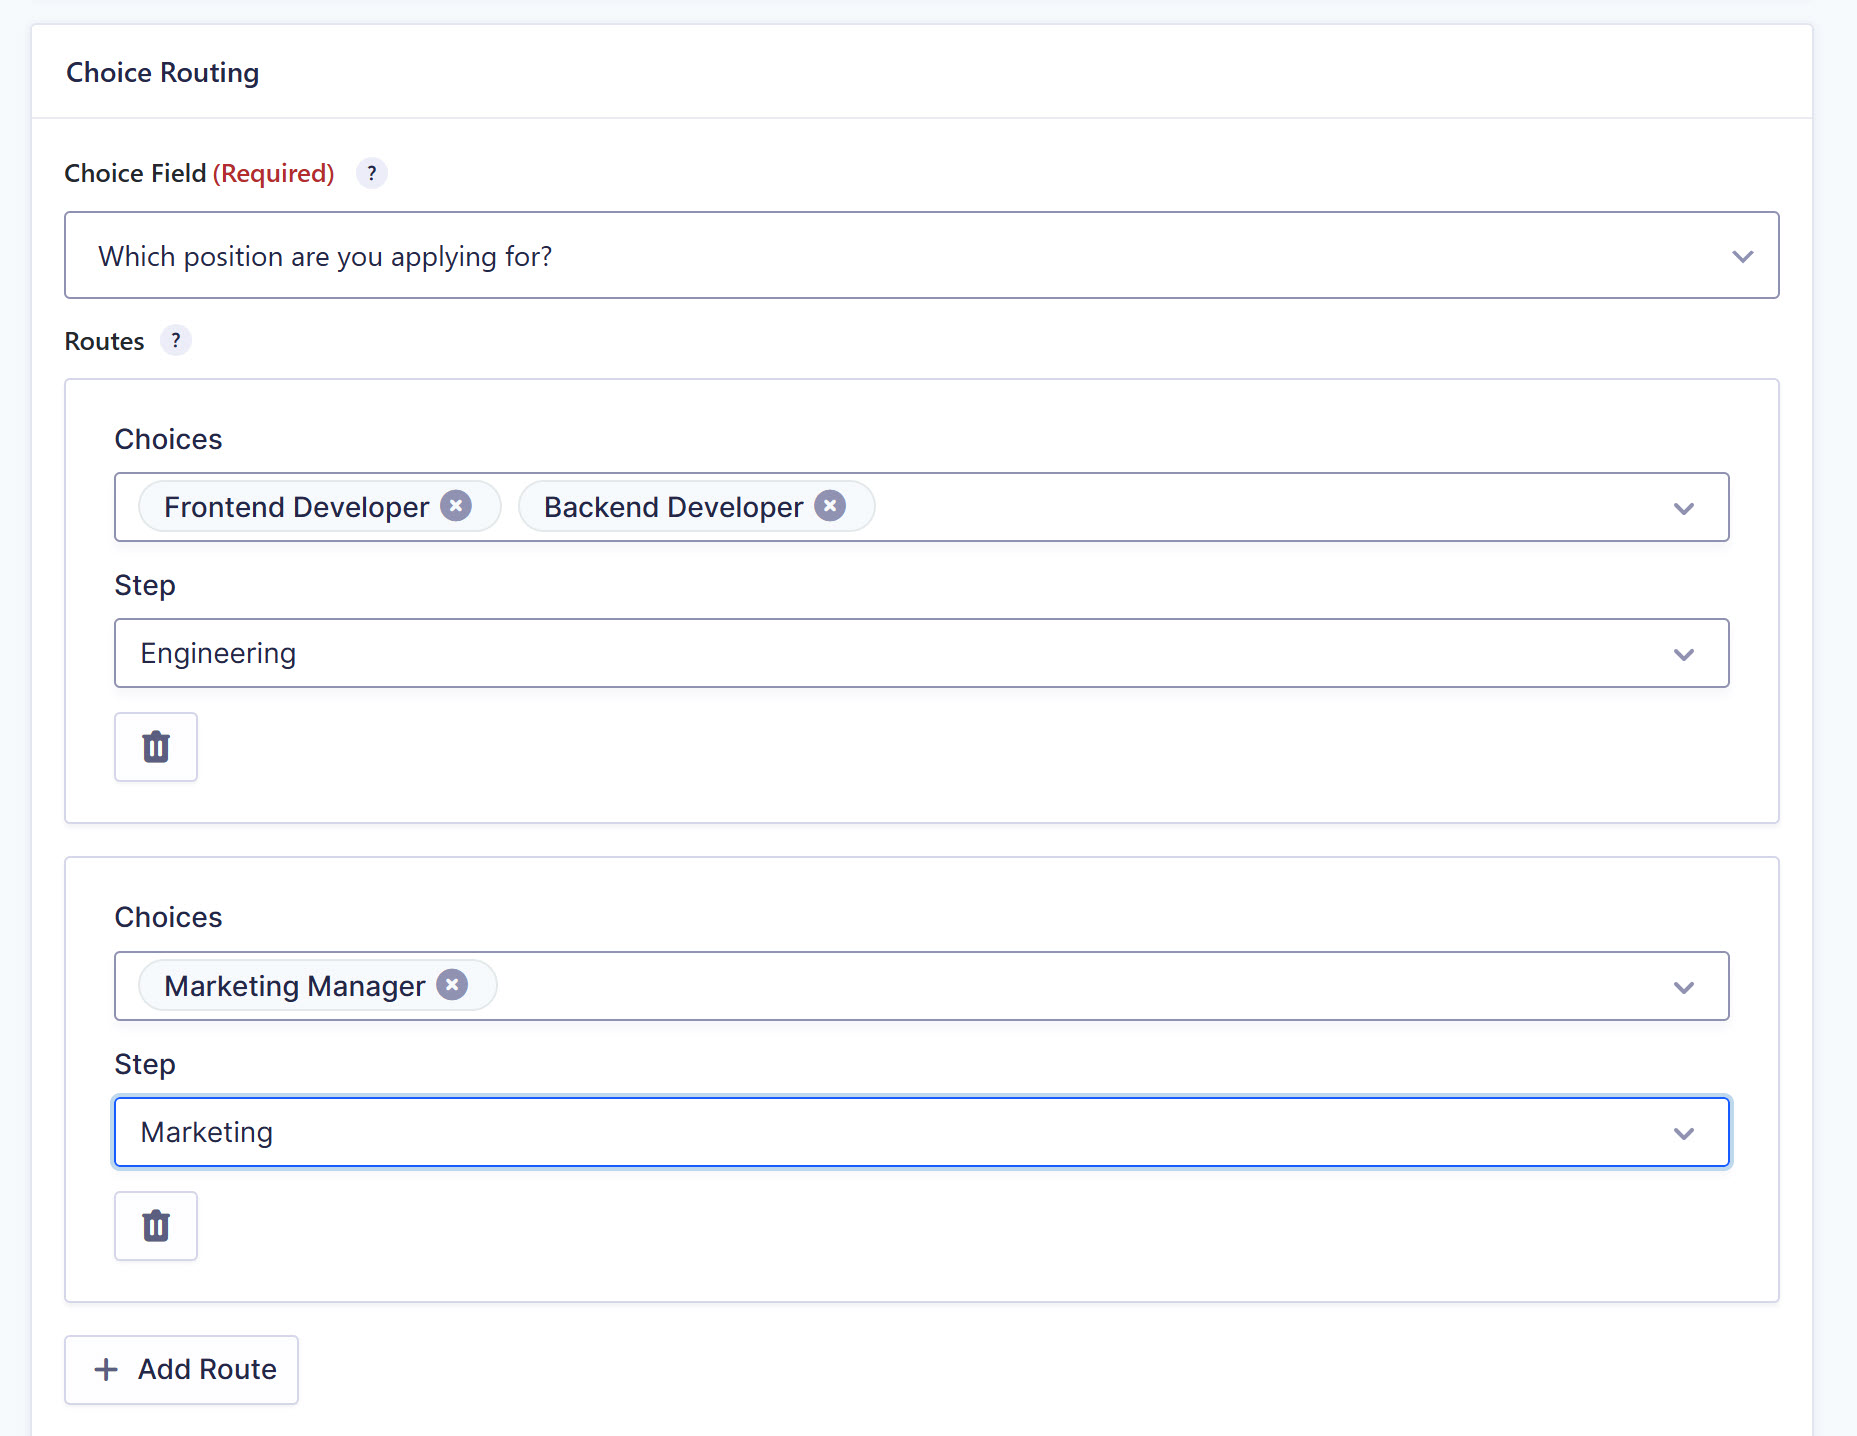
Notice that the two developer roles share a route. That’s the “one choice or several” flexibility in action.
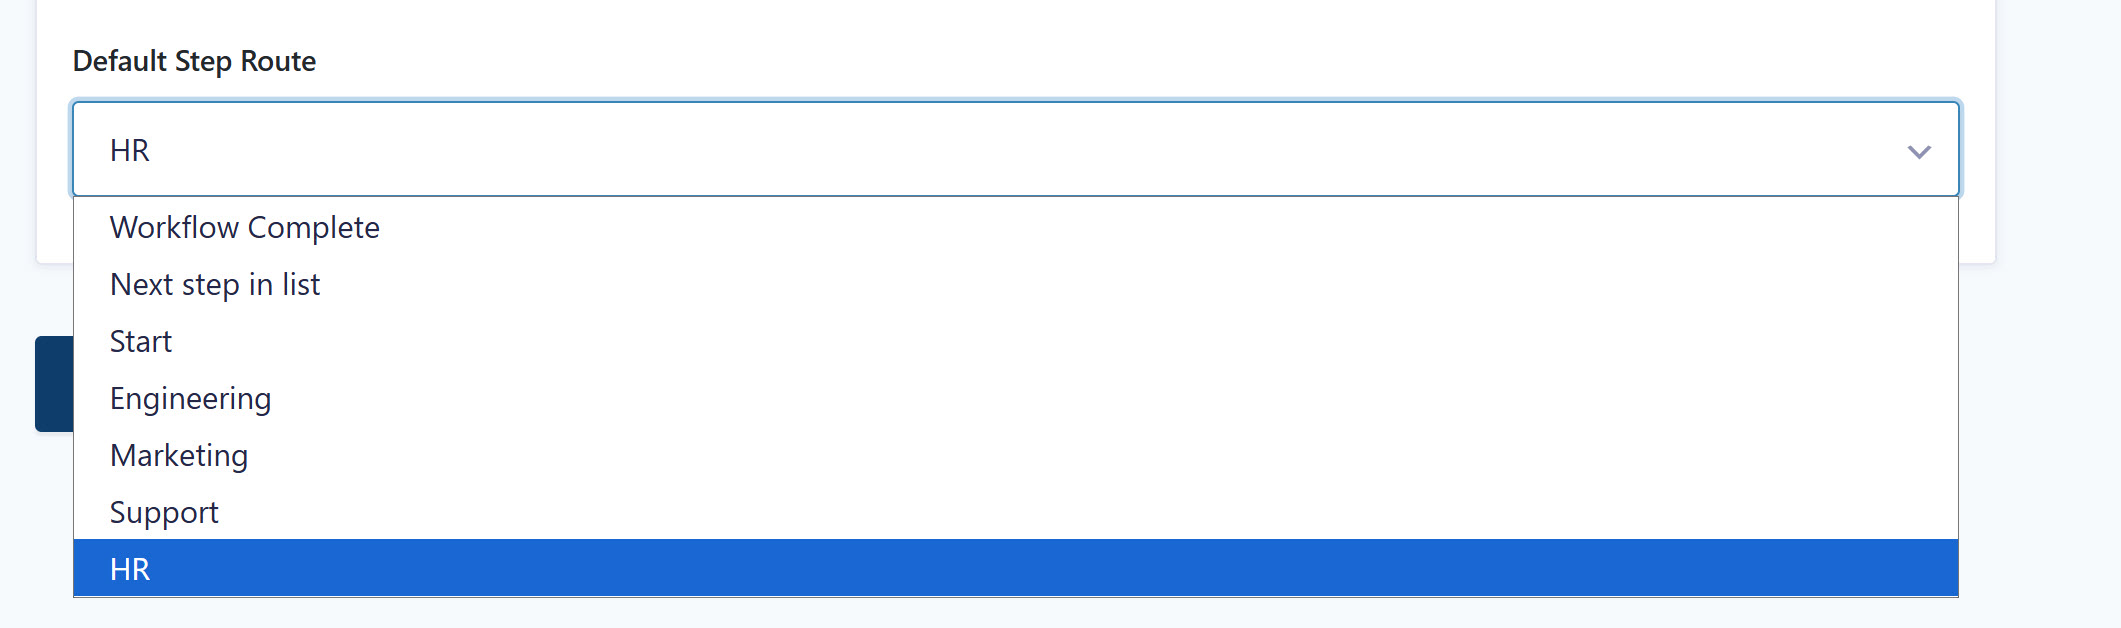
4. Set your Default Step Route – Point it at an HR review step. Now any application that doesn’t match a route, including positions you add down the line, ends up somewhere safe instead of stalling.
5. Save and test – Submit a test application, then open its timeline to check the routing decision was logged and the entry landed where you expected.
And that’s it! Better still, the workflow is just as easy to maintain as it was to build. When a new position opens up, you simply update the Routes table. If the new role belongs with an existing hiring manager, that’s the only change you’ll make. If it needs a brand new approval step, you set up that one step and leave everything else alone. No restructuring conditional logic across your whole workflow.
For more information on the Choice Routing step, check out the documentation.
Update to Gravity Flow 3.1
Gravity Flow 3.1 is available now to all customers with an active license.
If you have automatic updates enabled, you’re all set. If not, open your WordPress dashboard, head to your plugins page, and click to update to version 3.1. You can also download the latest version from within your Gravity Flow Account.
New to Gravity Flow? Head over to our pricing page to get started, or sign up for a personalized Gravity Flow 3.1 demo to see Choice Routing in action.
Further Flow 3.1 resources
For more information on Gravity Flow 3.1, check out these articles:
- Choice Routing step documentation
- Gravity Flow 3.1 release article
- Introducing Gravity Flow 3.1: Send to Step Bulk Actions
Any questions about the new Choice Routing Step or how to update to 3.1? Reach out to our Support team, they are always happy to help.

Newsletter
If you want to keep up-to-date with what’s happening on the blog sign up for the Gravity Forms newsletter!
"*" indicates required fields