For more information on using Google Workspace / Gmail with Gravity SMTP, check out our documentation.
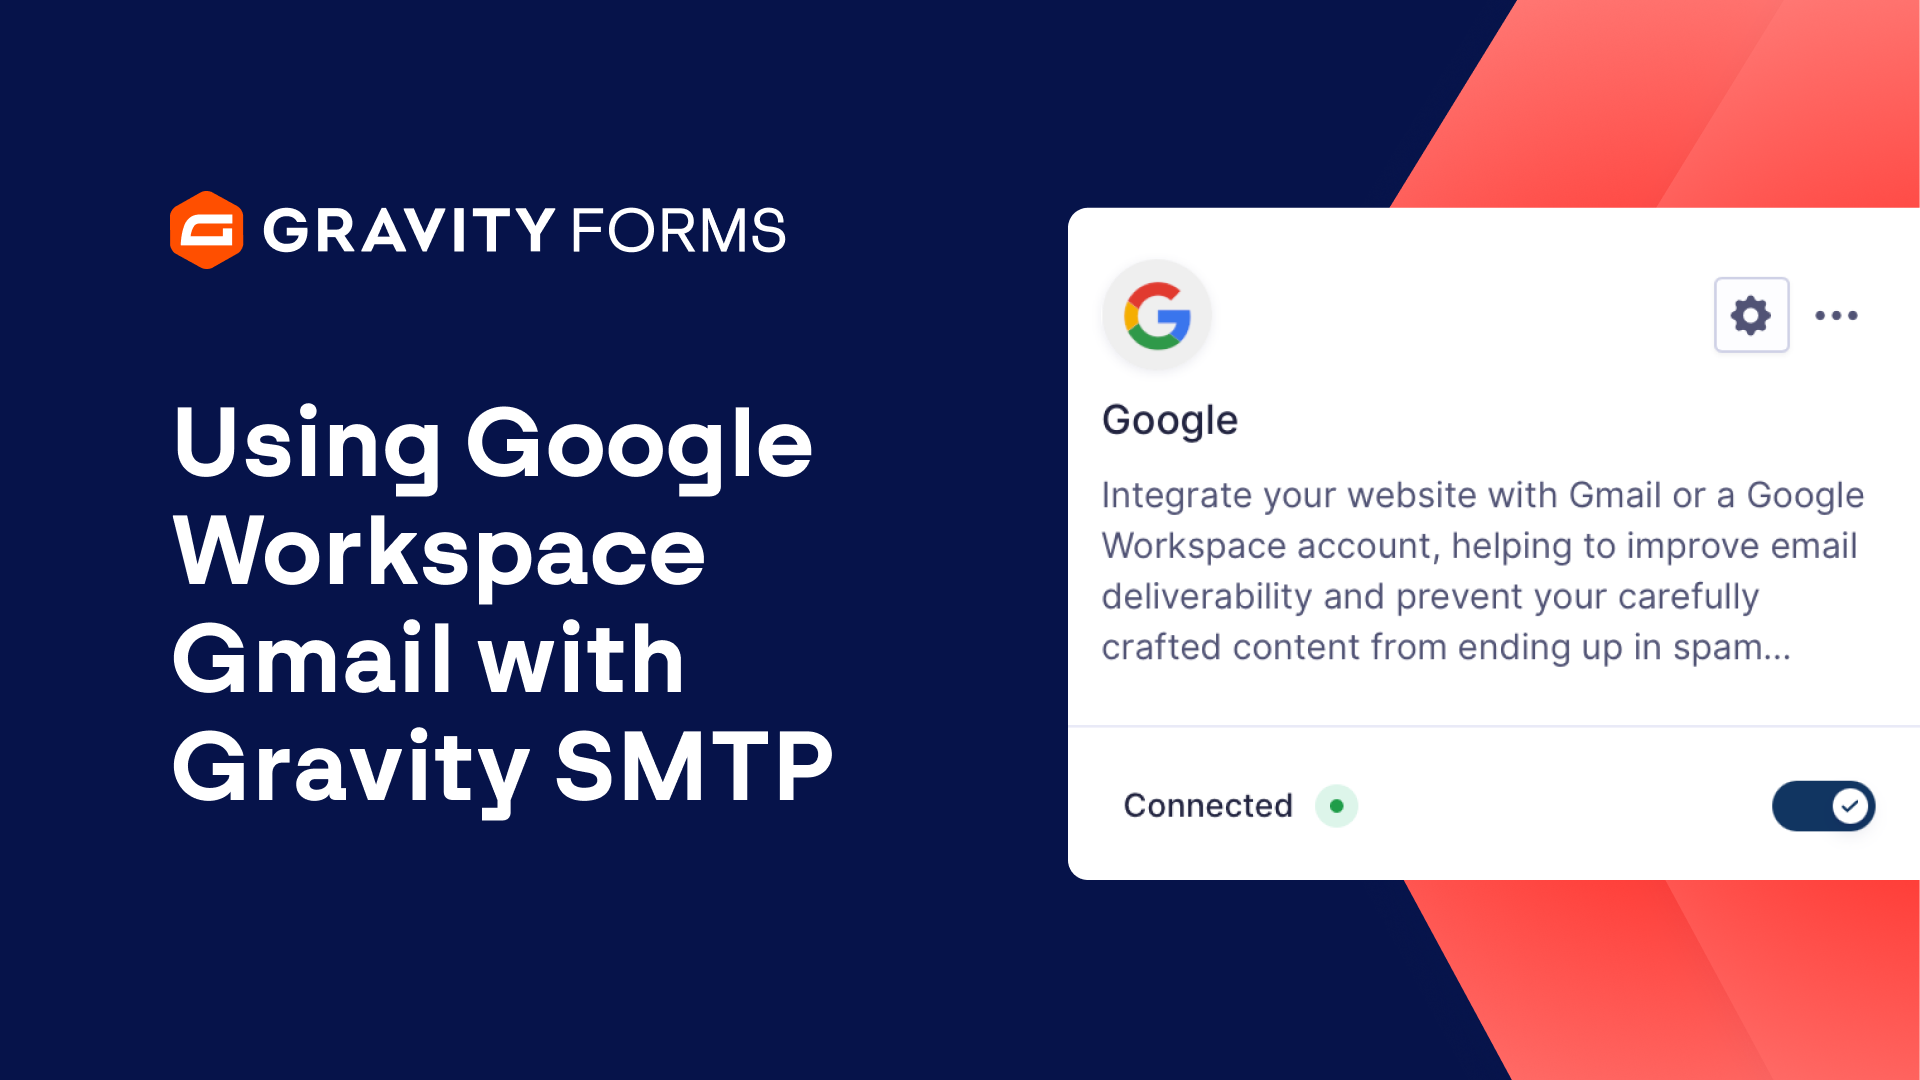
With Gravity SMTP 1.1, you can now integrate Gravity SMTP with Google / Gmail to send emails from your WordPress site.
In this video, we’ll take a look at everything you need to know to integrate Gravity SMTP with Google.
Please note that, to follow along with this video, you’ll need a Google Cloud Console account with the Billing Method configured and enabled, as well as Gravity SMTP installed on your site.
One other important thing to note is that Gmail accounts come with outgoing volume limitations and are not appropriate for website-critical email functions.
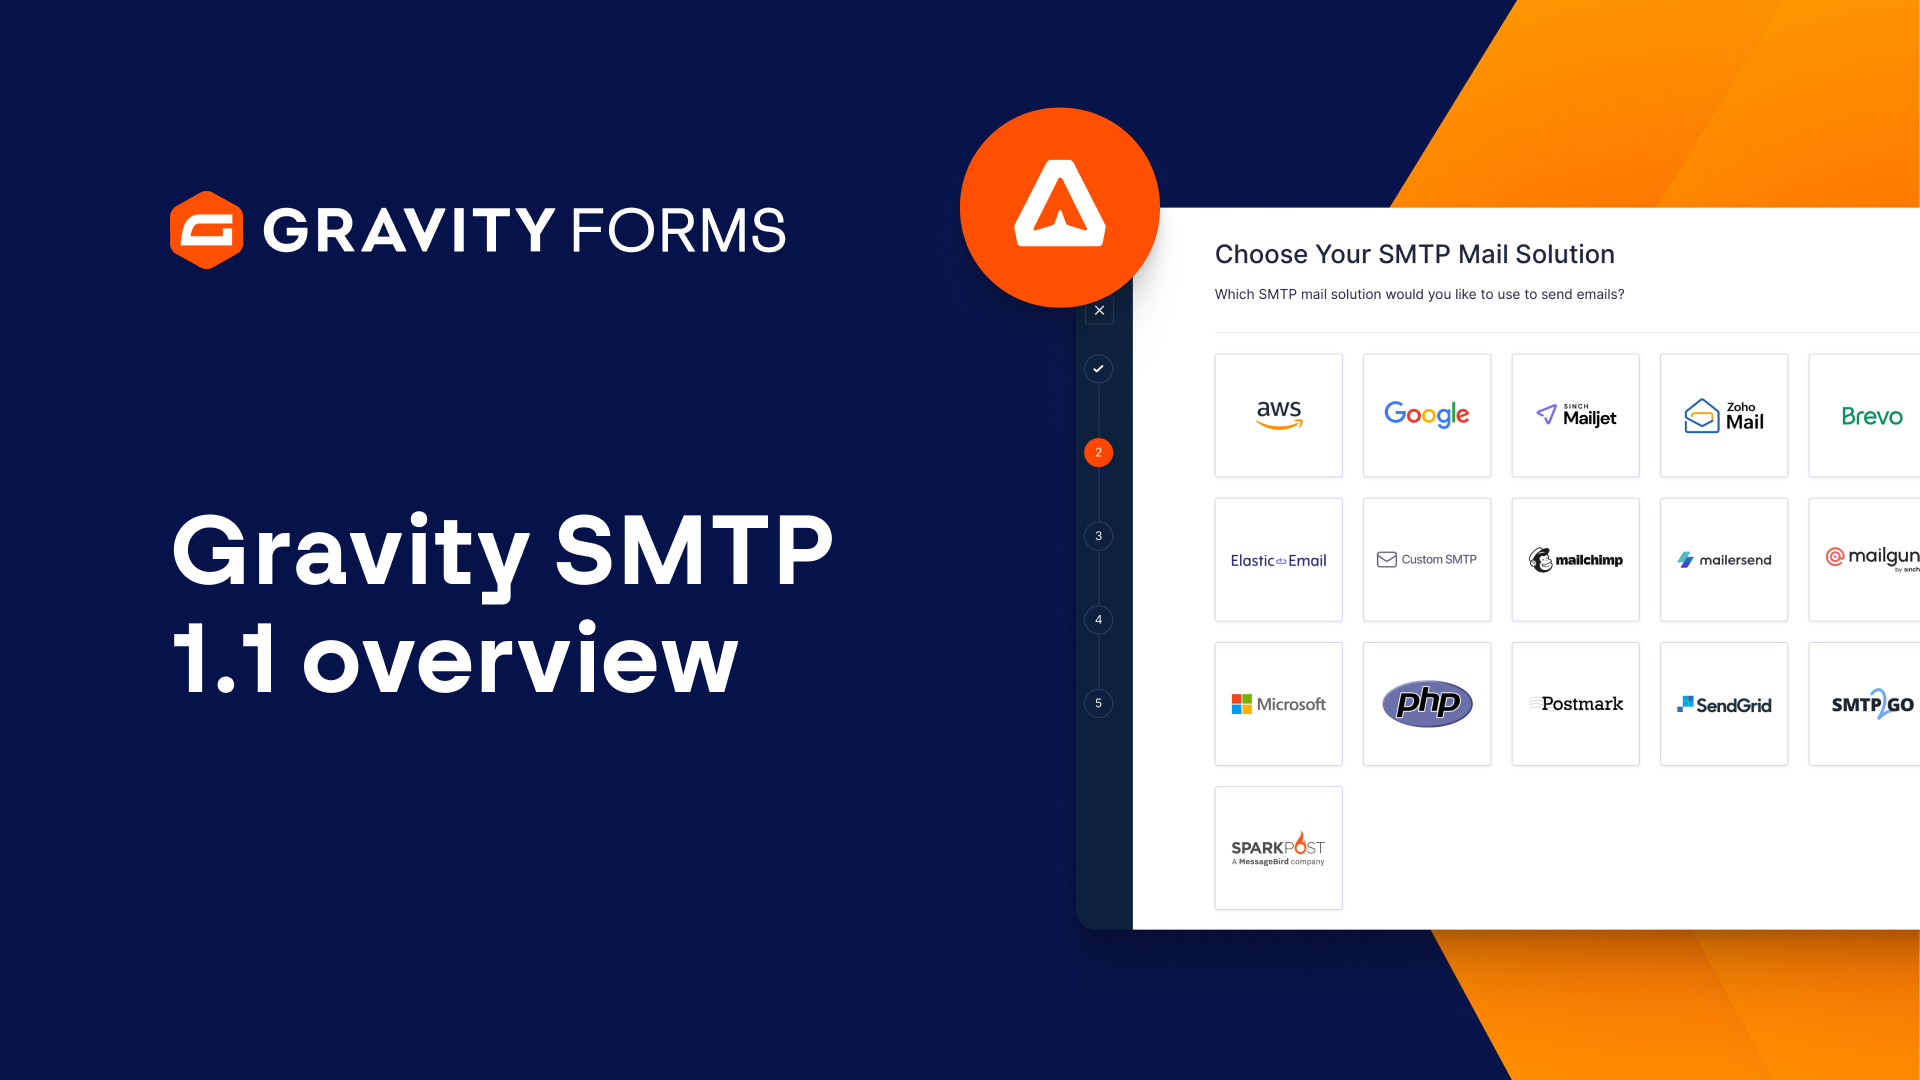
Instead, we recommend a service built specifically for transactional email sending, such as Brevo or Postmark, both of which are integrated with Gravity SMTP.
To get started, navigate to the Google Cloud Console. A link will be included in the video summary so you can easily access it.
Click on the project dropdown menu in the top navigation bar and create a new project.
Be sure to give it an appropriate name and ensure it is active by setting it as the Preferred Project from the dropdown menu.
Next, in the Google Cloud Console, navigate to the APIs & Services section and select ‘Library’.
Search for the Gmail API and select it from the search results.
Then, click the “Enable” button to activate the Gmail API for your project.
After you’ve enabled the Gmail API, navigate to the OAuth Consent Screen in the ‘APIs and Services’ section of the Cloud Console.
Set the user type to ‘External’, then click ‘Create’.
You’ll then need to give the app a name, as well as set the ‘User support email’ and developer email address.
Once those are set, select ‘Save and Continue’.
We’ll leave the ‘Scopes’ section and ‘Test users’ section as is, so select ‘Save and Continue’ on both pages.
Next, head to Credentials within the ‘APIs and Services’ section of the Cloud Console.
Click ‘Create Credentials’ and select ‘OAuth client ID’ from the dropdown.
Then, set the application type to ‘Web application’.
You have the option to change the name of the OAuth 2.0 client, but for this example, I am going to just use the default name.
You’ll next want to navigate to your WordPress dashboard and go to the Gravity SMTP Settings page and select ‘Integrations’.
From here, open the Google / Gmail settings and copy the ‘Authorized redirect URI’.
Head back to the Google Cloud Console and select ‘Add URI’, then paste the URI you just copied and click ‘Create’.
You’ll next be given a Client ID and Client secret.
Be sure to save these in a secure location, we will use them in just a second.
In the Cloud Console, navigate to the ‘OAuth Consent Screen’ within the ‘APIs and Services’ section, and select ‘Publish App’.
Select ‘Confirm’ when asked to push the app to production.
Next, go back to the Gravity SMTP Google / Gmail Settings within your WordPress dashboard and copy and paste your Client ID and Client Secret.
Then, under ‘Authorization’, use the link on screen to sign into your Google account with an email account that has been authorized to use your app.
Once you’ve authorized your Google account, choose whether or not you’d like to force a From Email or From Name, then save your changes.
You can then use the toggle to connect Gravity SMTP with Google.
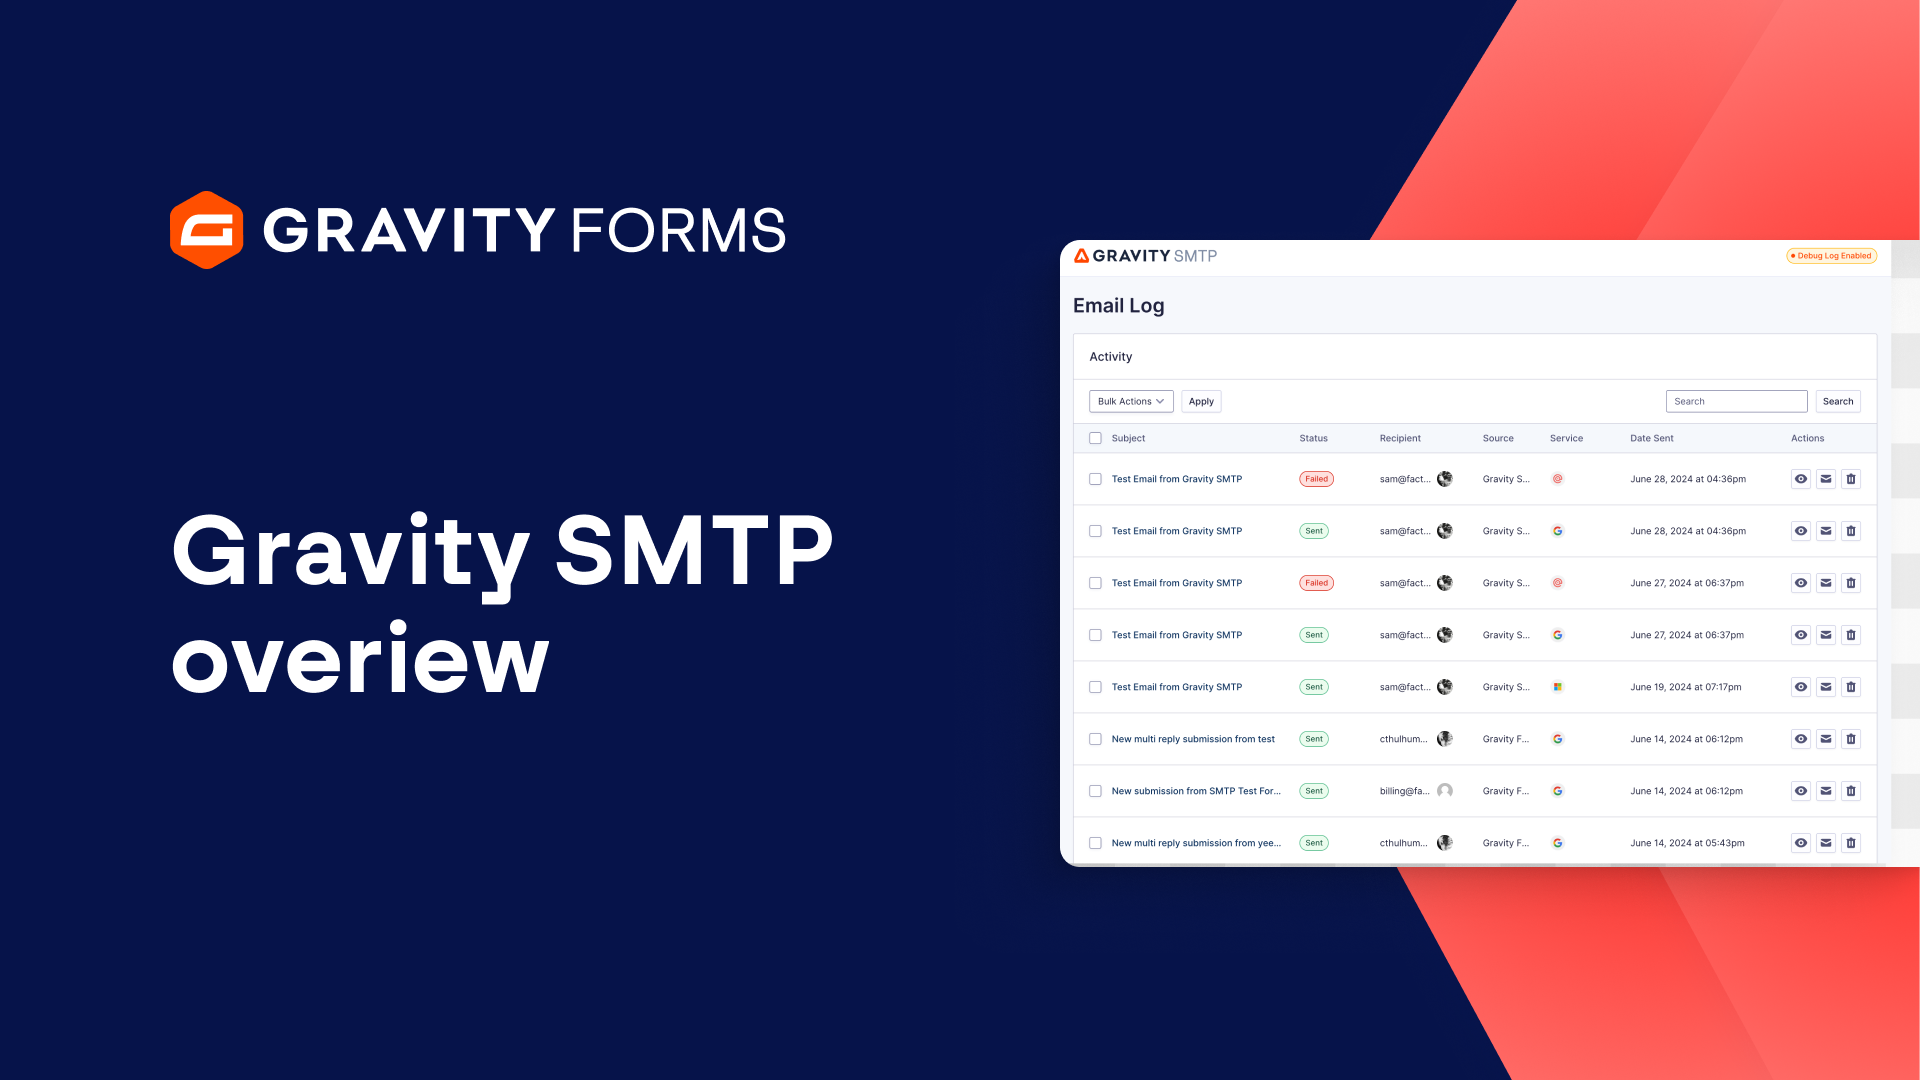
The final step is to send a test email and check your email log to verify that everything is working correctly.
For more guides and tutorials on everything Gravity SMTP, check out our video library.
From everyone on the Gravity team, thank you for watching!
Summary
With Gravity SMTP, you can integrate with Google / Gmail to send emails from your WordPress site. In this video, we’ll take a look at everything you need to know to integrate Gravity SMTP with Google.