Grow Your Mailing List with ConvertKit and Gravity Forms
For more information on using the ConvertKit Add-On, check out our documentation.
ConvertKit is a go-to email marketing tool for many small businesses, creators, and entrepreneurs.
And with Gravity Forms, you can automatically send new form data directly to your ConvertKit dashboard, helping you easily manage, track, and engage with your contacts.
Let’s take a look at how to get started with the Gravity Forms ConverKit Add-On.
First, install and activate the add-on from within the add-on browser.
Next, head to the Gravity Forms Settings page and select ConvertKit.
Follow the on screen instructions to locate and add your API key and API secret.
Save your settings, then create a form of your choice.
For this video, I’ll choose a newsletter signup form template so that the form has been created for us.
If needed, you can customize your form to your liking.
Once you’re happy with your form, navigate to this form’s settings and then select ConvertKit.
Here, you will be greeted by two tabs, one for Feed Settings and one for Form Settings.
Under the ‘Form Settings’ tab, you can opt to enable Creator Network Recommendations, which will display the Creator Network Recommendations modal on submission when the form is embedded using Ajax.
It’s worth noting that this is a feature only available with a premium ConvertKit plan.
For this video, I’m going to leave this setting toggled off.
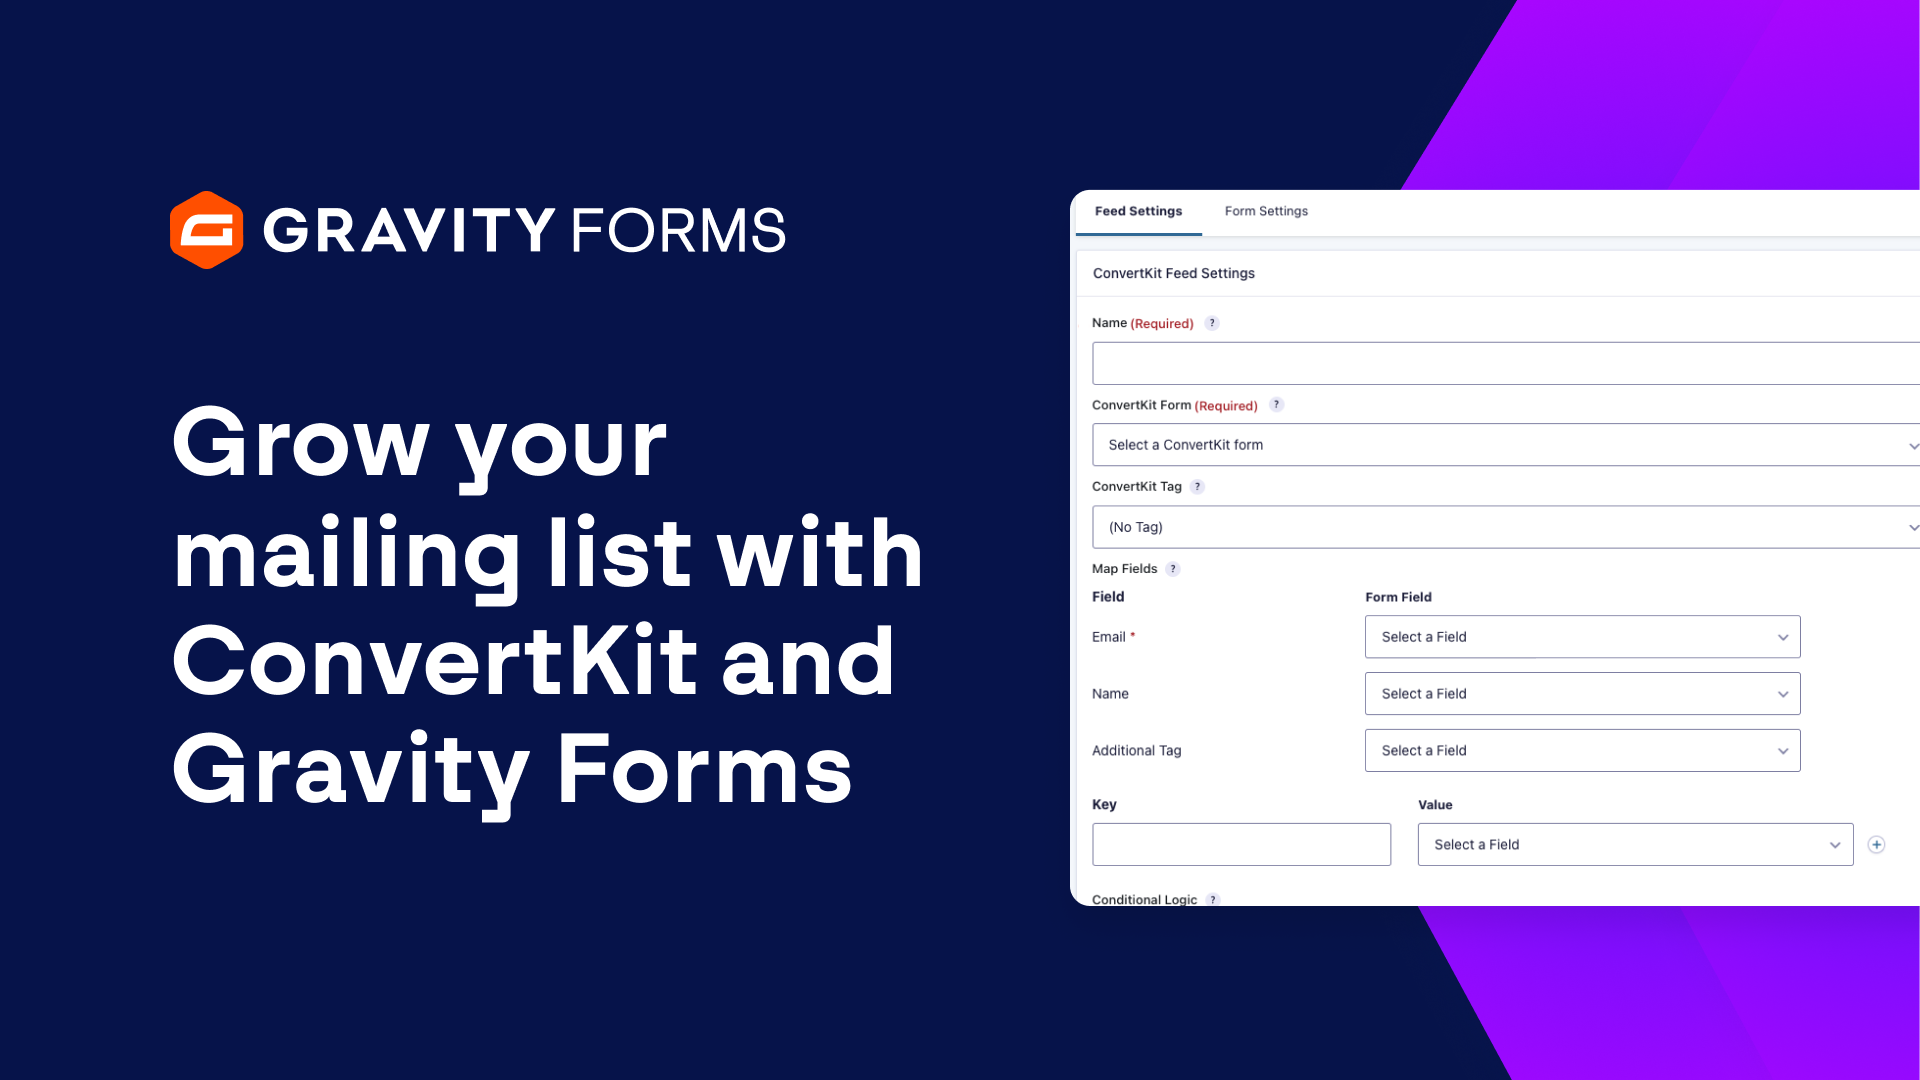
Under ‘Feed Settings’, you can select ‘Add New’ to create a feed for this form to specify the data that will be sent to your ConvertKit account upon form submission.
Give the feed a descriptive name, then select the ConvertKit Form to which you want to add to your contacts.
You can use the ConvertKit Tag option to add the tag that you would like to assign to contacts who fill out this form.
By attaching tags to your subscribers, you can keep them organized, helping to provide a tailored content experience.
Then, simply map your form fields with the corresponding ConvertKit fields.
It’s worth noting that, with Gravity Forms, every field on your form can be mapped directly to a custom field in ConvertKit, helping you to collect and manage the data you need.
You can also configure conditional logic to only process this feed if certain conditions are met.
Finally, save your settings and everything will be good to go.
You’re now ready to start growing your email marketing lists using Gravity Forms and ConvertKit.
Please note, if you’re already using ConvertKit’s free plugin for Gravity Forms, it’s easy to make the switch to our official ConvertKit Add-On!
Once you have installed and activated our add-on, it will automatically deactivate ConvertKit’s Add-On.
Additionally, all of your add-on settings and feeds will be transferred to our official add-on, so there will be no need to manually set up the new add-on, reconnect with ConvertKit, or recreate your feeds!
From everyone on the Gravity Forms team, thanks for watching!
Summary
ConvertKit is a go-to email marketing tool for many small businesses, creators, and entrepreneurs. Learn how to sync your forms with ConvertKit in this video tutorial.