Starter guide: How to add a digital consent form with signature to WordPress
If you need to collect legal consent from your customers/clients, creating a WordPress digital consent form can offer a lot of benefits over paper forms.
A digital consent form saves you time, creates a better experience for your customers/clients, simplifies recordkeeping, and leads to better accuracy for more complex forms.
With the Gravity Forms plugin and the official Signature Add-On, you can easily create your own digital consent form on WordPress. And with the new pre-made consent form template, it’s now even simpler to create your first form.
In this post, we’ll briefly cover some of the reasons and use cases for digital consent forms. Then, we’ll show you step-by-step how to create your own WordPress digital consent form using Gravity Forms, the Signature Add-On, and the Consent Form template.
We’ll also cover some useful enhancements, such as exporting forms as PDF documents, creating approval workflows, adding audit trails, and more.
Why use a digital consent form?
Using a digital consent form instead of a paper consent form has benefits for both your customers/clients and your own organization:
- Less wasted time – Sharing a link to a digital consent form is a lot easier than maintaining a stack of paper forms. You’ll also spend less time on all the tasks that happen after a person fills out the form.
- Better experience for customers/clients – Digital forms are easier to fill out than paper forms. A digital form also lets you provide more information and context, which can be useful for more complex forms.
- Easier recordkeeping – With a digital consent form, you’ll have a digital record of every single submission, which is a lot easier than trying to keep track of paper forms. If you do still need paper copies, you can easily export your digital consent submissions as a PDF for printing.
- Better accuracy – For more complex forms, digital consent forms can help you collect more accurate information than paper forms, thanks to features like form validation, required fields, preset answers, etc.
Example use cases for a digital consent form
There are a lot of different use cases in which this type of digital consent form can be helpful.
To give you some ideas, we’ll share some examples below. However, it’s important to note that this is by no means an exhaustive list – it’s just some ideas to get your creative juices flowing:
- Client agreements
- Participation waivers
- Non-disclosure agreements (NDA)
- Medical consent forms
- Photo/video release forms
- Parental consent forms
- Health and safety acknowledgement
- Treatment consent forms
- Data protection consent forms
- HR and employee onboarding
- Marketing and data privacy
How to create a WordPress digital consent form with signature
Now, we’ll get into the full step-by-step guide on how to create a WordPress digital consent form with signature.
To help you get up and running in the most efficient way, you can use Gravity Forms and its pre-built Consent Form template.
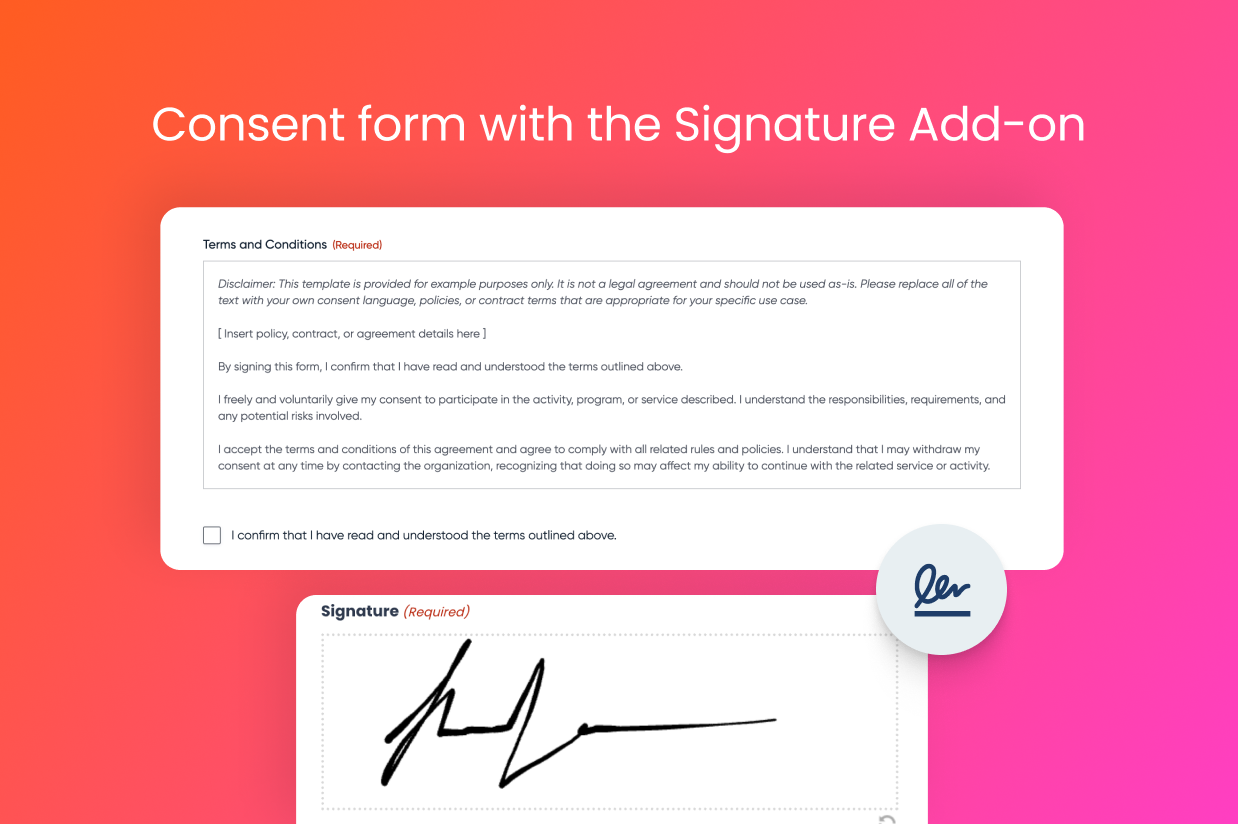
The Consent Form template already includes the essential form fields that you need for a digital consent form, including a legal signature field. All you need to do is import it, customize it to your unique situation, and then embed it on your site.
Below, we’ll cover every step in the process, including how to view signed documents once you’ve published your form.
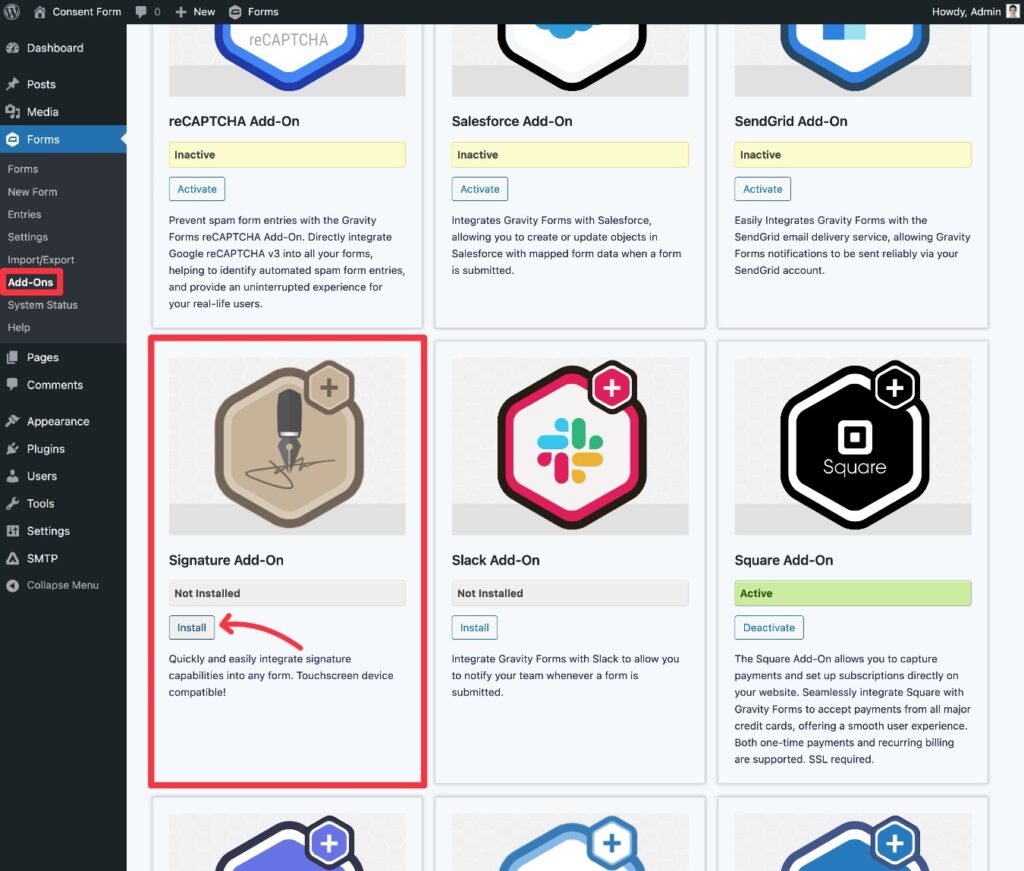
1. Install Gravity Forms and the Signature Add-On
To get started, you’ll need to install the core Gravity Forms plugin on your site, if you haven’t done so already. Alongside that, you’ll need to install the Signature Add-On at a minimum, as well as optional add-ons for any other features that are unique to your use case.
The Gravity Forms Signature Add-On is available on the Elite and Nonprofit licenses.
If you’re not holding one of those licenses yet, you can purchase a new license here or upgrade your existing license and only pay the prorated difference.
Once you’ve installed the core Gravity Forms plugin and added your license key, here’s how you can install the Signature Add-On:
- Open your WordPress dashboard.
- Go to Forms → Add-Ons in the dashboard sidebar.
- Find the Signature Add-On in the list of available add-ons.
- Click Install for the Signature Add-On.
- Once the installation finishes, click the Activate Plugin button to make the add-on live on your site.
2. Create a new form using the Consent Form template
Once you’ve activated at least the core plugin and the Signature Add-On, you can proceed with creating your digital consent form.
To get started, go to Forms → New Form.
While you can create your form from a blank canvas, we’re going to use the importable Signature Consent Form template to save time.
Find the Signature Consent Form template in the list of templates and select Use Template.
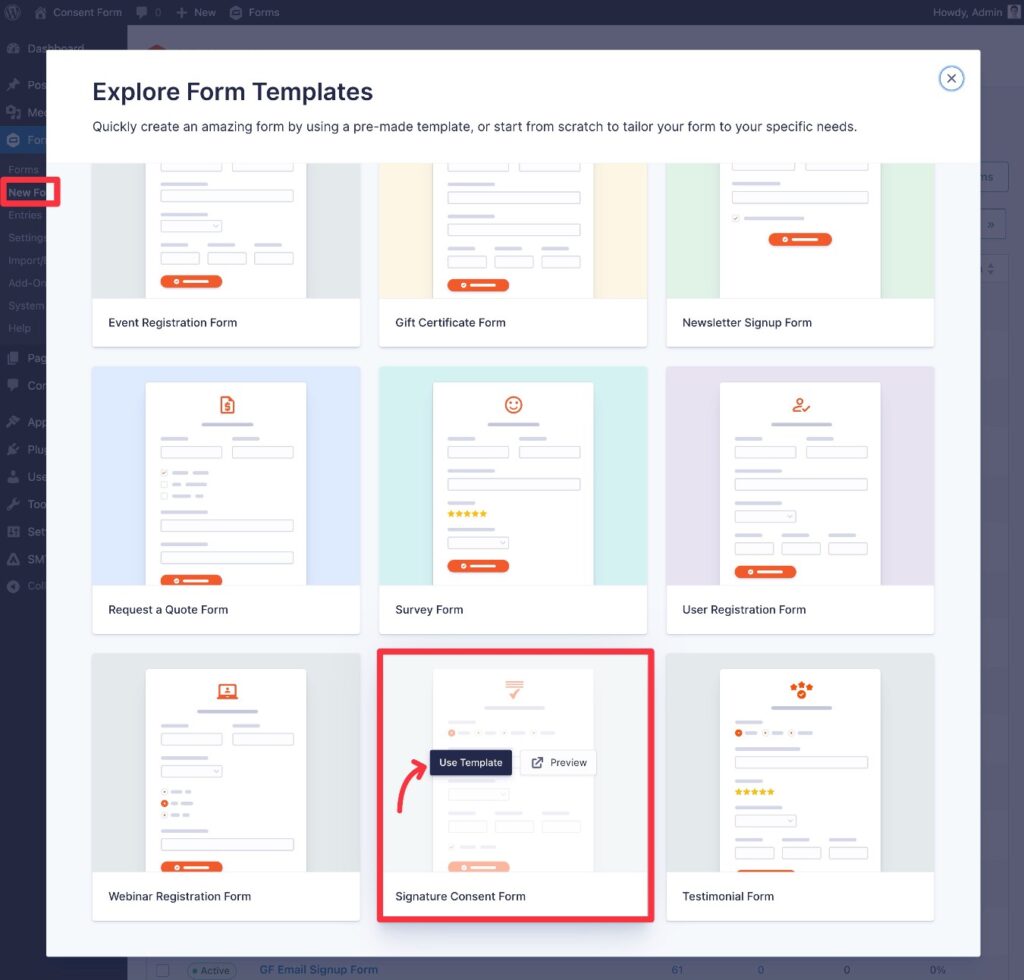
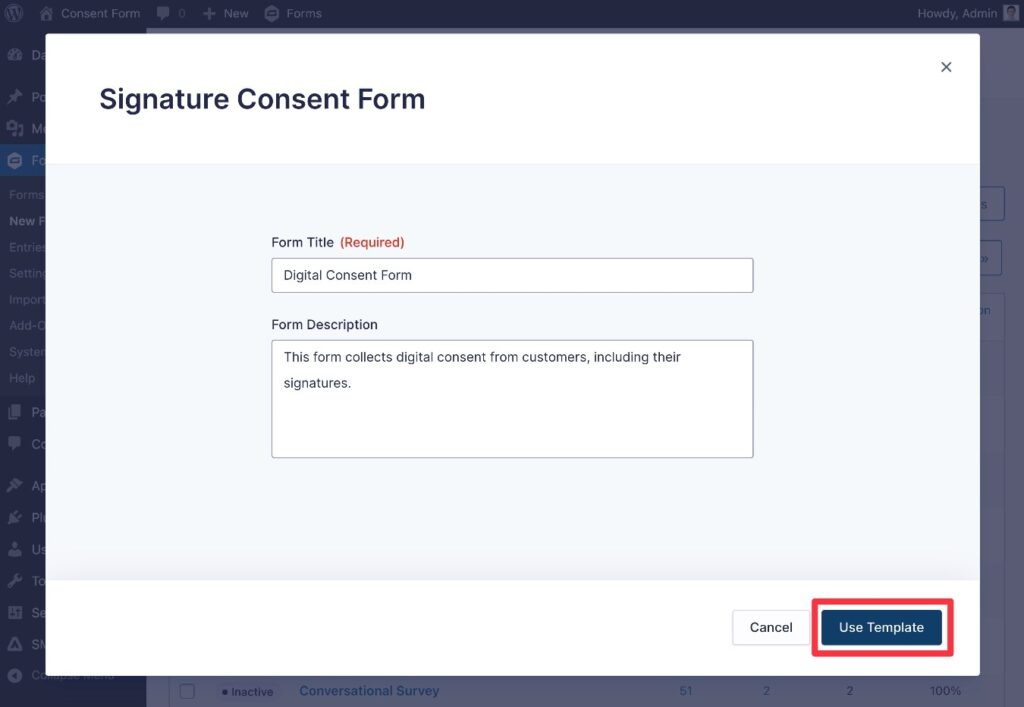
Give your form a title and an optional description. Then, click Use Template again.
Gravity Forms will now take you straight to the drag-and-drop form builder interface.
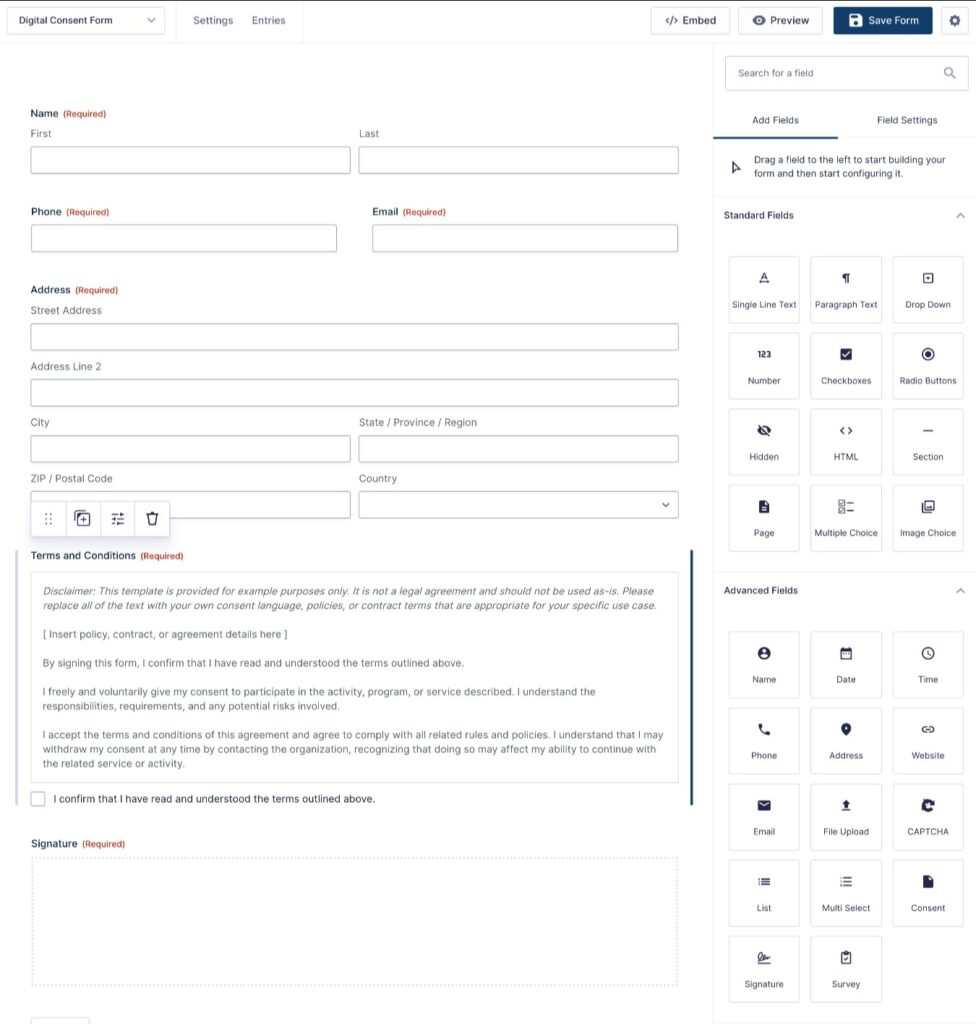
3. Customize your consent form as needed
Now that you’re in the form builder interface, you’re free to customize the consent form as needed.
The Signature Consent Form template already includes the essential fields that form the foundation of your consent form, including the following:
- Full name
- Phone
- Email address
- Physical address
- Terms and Conditions – you’ll want to customize this to your specific situation, as the default text is just a placeholder.
- Signature – this lets people sign using various methods, including support for touch-based devices.
At a minimum, you’ll need to customize the Terms and Conditions to your use case, as this contains the agreement that people are consenting to when they sign the form. The Terms and Conditions in the consent form template uses the Consent field, which has a very important benefit:
When a person submits the form, Gravity Forms will store the full text of the Consent field as part of the submission. This means that you won’t just have a record that the person “agreed”, but you also have the original text that they agreed to.
Even if you update the Terms and Conditions in the future, Gravity Forms will still have a record of what the text was at the time that the person submitted the form.
Beyond that, you might want to add other form fields or information, though doing so is 100% optional.
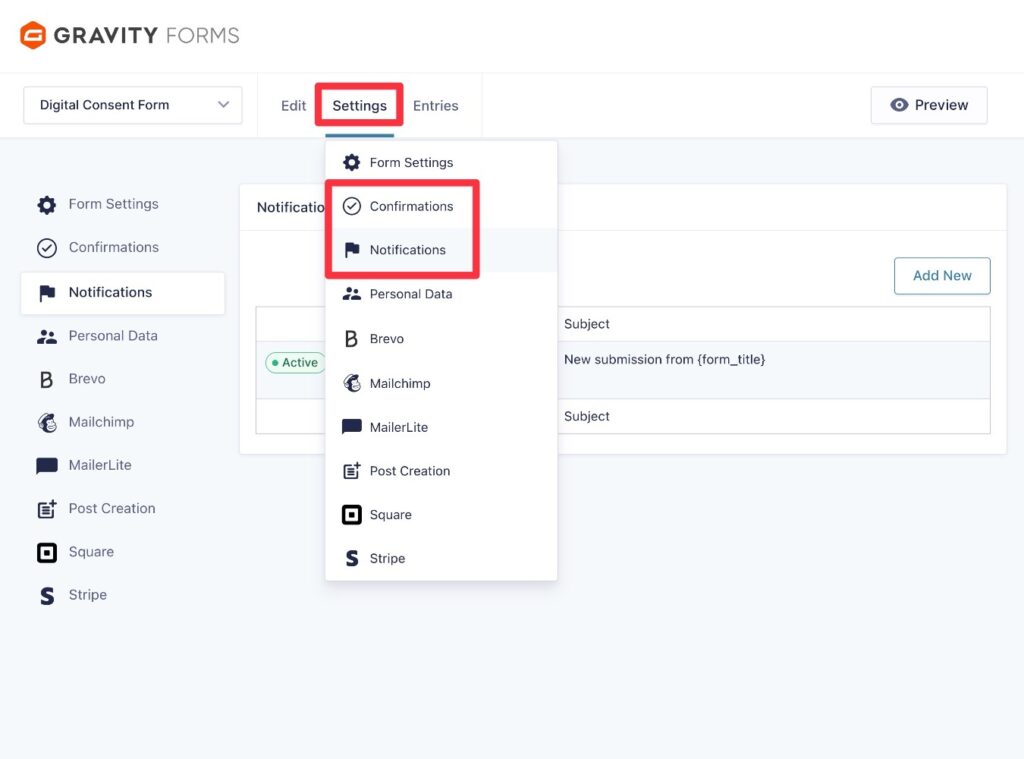
4. Set up confirmation messages and email notifications
Once you’re happy with the fields in your consent form, you should configure a few important backend settings:
- Confirmation – This lets you display a confirmation message after someone submits the consent form. Or, you could redirect them to another page that provides more information.
- Notifications – This lets you send one or more email notifications to anyone, including yourself, your administrators, the person who provided consent, etc.
To set these up, go to Settings → Confirmations or Settings → Notifications in the form builder interface.
5. Enhance your digital consent form with automations, PDFs, etc. (optional)
At this point, you have everything that you need for a digital consent form. All you need to do is embed it on your site, which we’ll cover in the next section.
However, one of the nice things about Gravity Forms is that you can also leverage other official and third-party add-ons to help you further extend your digital consent form.
For example, if there’s some type of administrative workflow or approval process based around your consent form, you could use the Gravity Flow plugin (owned by the same team behind Gravity Forms) to build business process workflows that automate those tasks.
Gravity Flow can also help with other tasks, such as automatically generating a PDF when someone submits the form. There are also third-party add-ons that give you more flexibility for working with PDFs, such as Gravity PDF or Fillable PDFs, both of which have been certified by the Gravity Forms team.
Or, you might want to save people’s data to your CRM as part of the consent process, potentially with a certain tag. Gravity Forms can integrate directly with most popular CRMs so that you can automate the entire process.
It’s not a requirement to set up any of these add-ons, and you can completely skip this step if you don’t need any additional functionality. However, it might be worth exploring all of the official Gravity Forms add-ons and certified Gravity Forms add-ons to see if there’s anything that might help make your consent form even more effective.
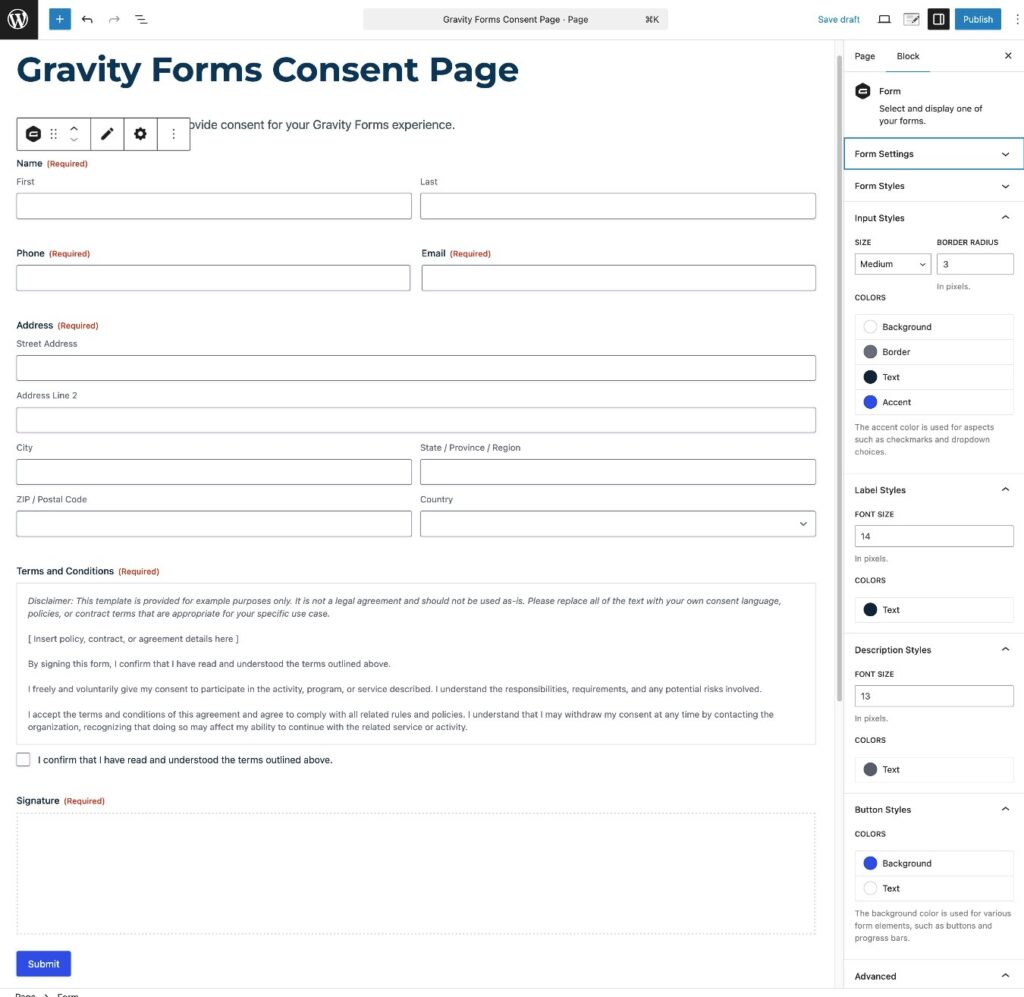
6. Embed and publish your form
Once you’re happy with the fields and settings of your consent form, the last step in the process is to embed the form somewhere on your site. You can do this using the Gravity Forms block, shortcode, or PHP function.
Depending on your use case, you could make this page public and easily accessible from the rest of your site. Or, if you’d rather only share the form with people via email, chat, or other direct communication methods, you could embed the form on an unlisted page.
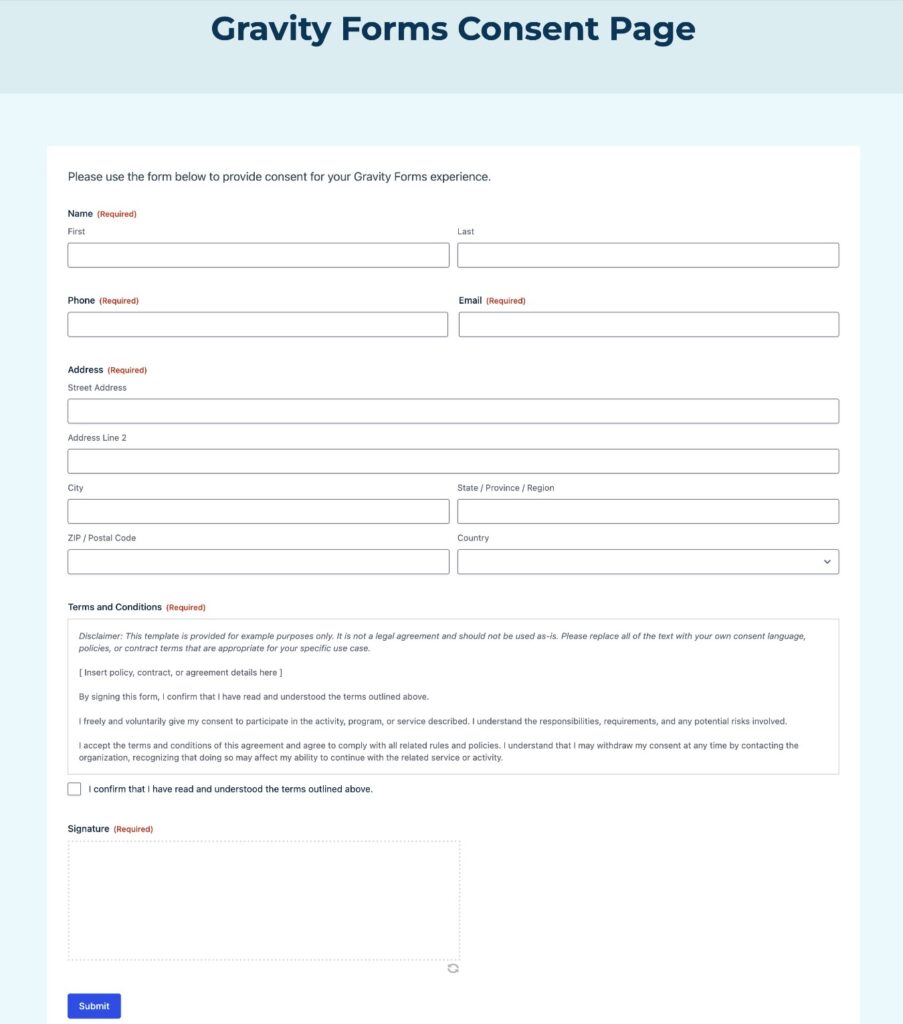
For this example, we’ll use the Gravity Forms block to embed the form on a public page. With the block, you can also style your consent form directly from the editor using code-free options.
After publishing the page, your customers/users will be able to start providing digital consent.
How to view consent submissions/signatures
Once you start collecting consent/signatures from people, you’ll be able to view each submission in the Gravity Forms entries dashboard.
Go to Forms → Entries in your WordPress dashboard. Then, select your digital consent form using the drop-down in the top-left corner of the interface.
You’ll see a list of all the people who have provided consent.
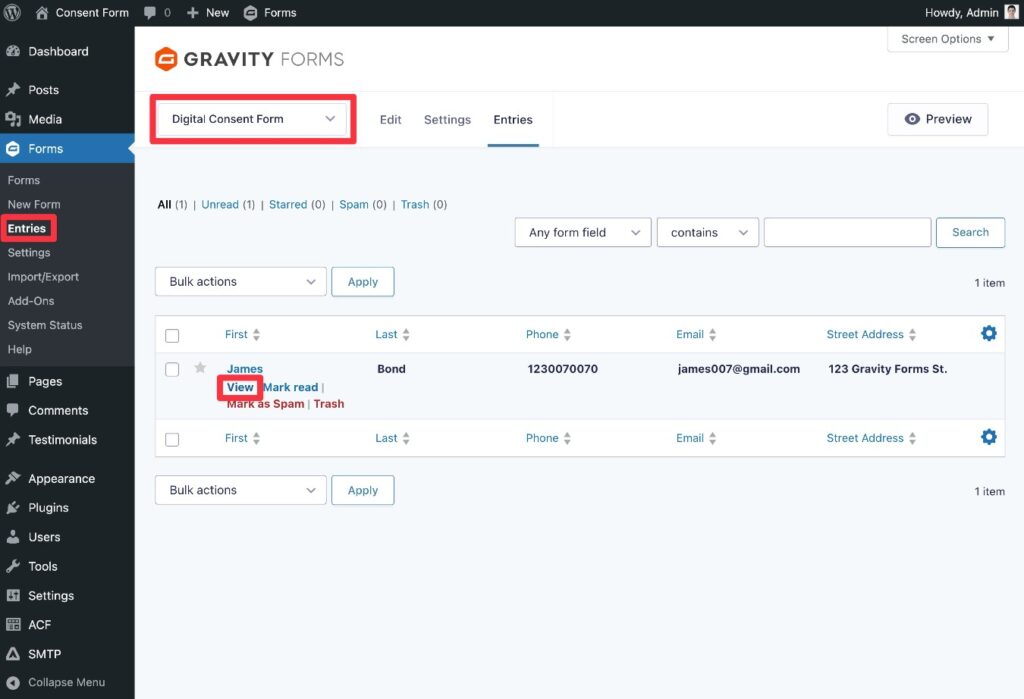
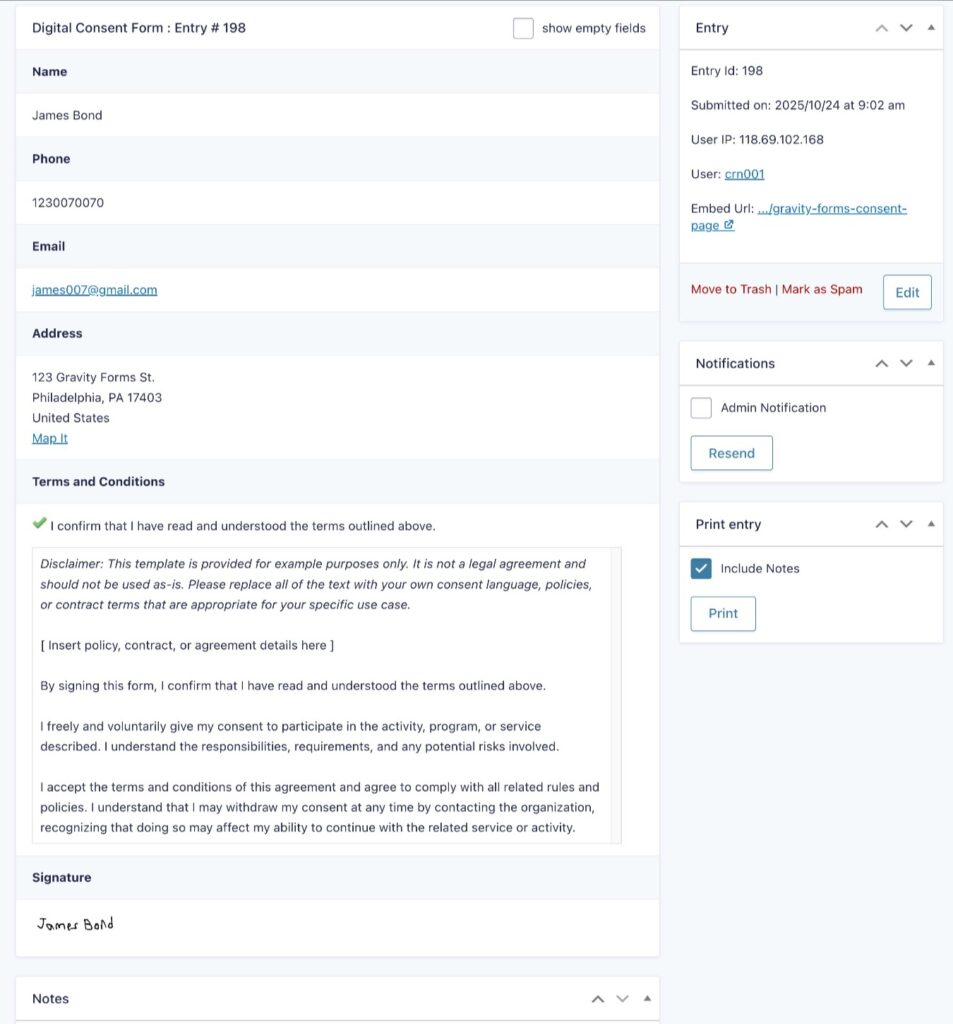
You can also hover over a specific entry and click View to see more information, including the user’s signature and the full text of the Terms and Conditions at the time that the person submitted the consent form.
If you have additional compliance needs, you can also consider installing Gravity Forms add-ons, as we mentioned earlier.
Here are a few common scenarios and how you could implement them:
- Generate a downloadable PDF record of each consent submission – You could do this using add-ons like Gravity Flow, Fillable PDFs, or Gravity PDF, all of which come from Gravity Forms Certified Developers (or from the Gravity Forms team itself, in the case of Gravity Flow).
- Require administrator approval – If you want to have someone manually approve each consent submission, you could build simple or complex approval workflows using Gravity Flow.
- Automate consent export/storage – If you want to automatically export consent submissions in certain formats on a specific schedule, you could use a certified add-on like Entry Automation from CosmicGiant.
A few notes on legal compliance (HIPAA, etc.)
It’s important to note that your business might face additional regulatory compliance rules, depending on your jurisdiction and the purpose of your form.
For example, if you’re in the USA and you’re collecting some type of medical consent, you might need to comply with HIPAA.
You can create HIPAA-compliant forms with Gravity Forms, but it generally requires extra add-ons to make sure that you’re processing and securing data in a way that complies with HIPAA. This is because you have full ownership and control over your data when you use Gravity Forms.
Because you’re the one processing and storing data, you’ll need to make sure you’re doing so in a way that complies with HIPAA (or any other relevant regulations). You can explore third-party add-ons like HIPAA Forms and Gravity Forms Encrypted Fields for some ways to potentially accomplish this. Our documentation article on HIPAA and Gravity Forms covers the topic in more detail.
If you need more robust legal compliance features in general, you can also consider the Legal Signing add-on from CosmicGiant (previously ForGravity). This is a third-party Gravity Forms add-on, but CosmicGiant is a trustworthy Gravity Forms Certified Developer.
CosmicGiant’s Legal Signing add-on offers even more robust legal signing features, including its own legal signature field, detailed audit trails for compliance and record keeping, fillable PDFs, and more.
Create your online consent form today
With a digital consent form, you can create a more user-friendly way for your customers to provide consent without sacrificing legal protections. You can also simplify your recordkeeping by creating a digital record of each consent submission.
With Gravity Forms and the official Signature Add-On, you can easily collect digital signatures using a person’s mouse or touchscreen device. With the new Consent Form template, you can quickly get up and running without needing to build your form from scratch.
Finally, the huge library of official and community add-ons for Gravity Forms gives you even more options for enhancing your consent form, such as exporting submissions as PDFs for hardcopy recordkeeping, building automated approval or business process workflows, and more.
The Gravity Forms Signature Add-On is available on the Gravity Forms Elite and Nonprofit licenses.
If you’re already holding one of those licenses, follow this guide to create your first WordPress digital consent form.
If you’re not holding one of those licenses yet, you can purchase a new license here or upgrade your existing license and only pay the prorated difference.
If you want to try the Consent Form template before you buy, you can also create a free, fully functional demo site.

If you want to keep up-to-date with what’s happening on the blog sign up for the Gravity Forms newsletter!