
Podcast monetization is a tricky subject. Platforms like Patreon are a well-established way to generate an income from podcasting but these tools come with trade-offs like fees, limited customization options, and lack of control.
For creators who want a more direct, self-hosted solution, monetizing your podcast right from your WordPress site is a great alternative. This can take the form of listener donations, merch sales, bonus content, and even affiliate marketing.
In this guide, we’ll discuss the importance of monetization for podcasts, different strategies you can implement, and how WordPress and Gravity Forms can help you do so. After that, we’ll give you a concrete example and show you how to set up a donation form using Stripe.
Why monetization matters
Producing a podcast takes time, energy, and can often be expensive. Equipment, renting a studio, editing, hosting, and promotion all cost money. Monetizing your podcast helps cover these costs and rewards you – the creator – for the value you provide to your audience.
Earning an income can make it easier to release episodes consistently and improve production quality over time. Monetizing your podcast can also reduce reliance on ads or sponsorships and give you more freedom and control over your content.
Even small-scale monetization efforts, such as accepting one-time donations, can make an impact. In addition, listeners who support the show financially often feel more invested and engaged in the community.
Monetization Strategies for Podcasters
Podcast monetization isn’t a one-size-fits-all thing. Different strategies may work better than others depending on your audience size, engagement level, and production capacity. Here are some common approaches:
- Listener donations – Accept one-time or recurring financial support directly from people listening to your podcast. Ideal for independent creators with a loyal audience.
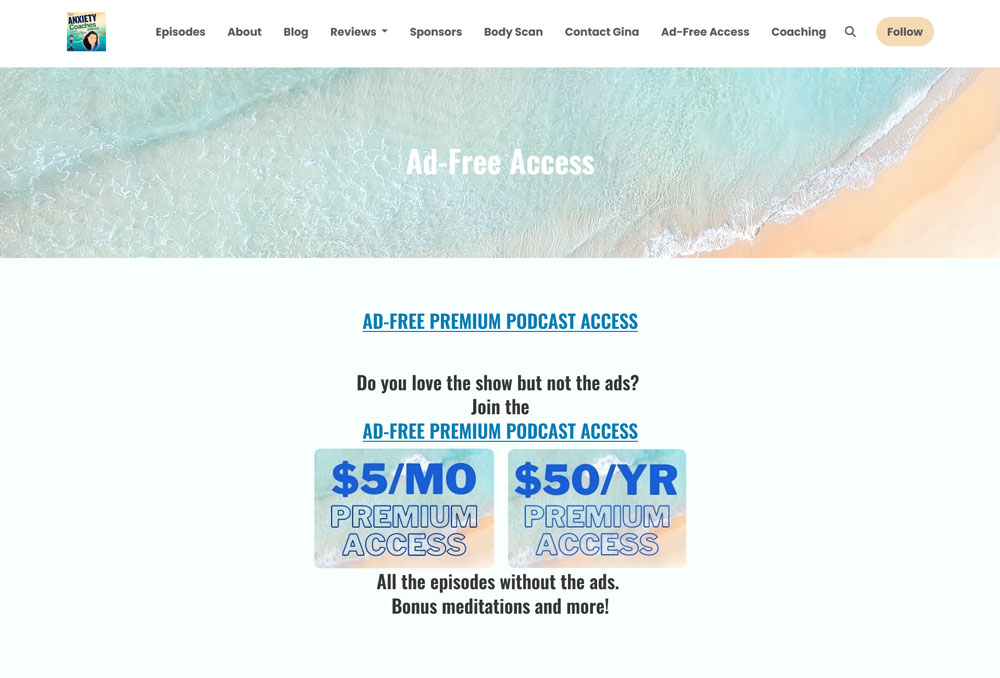
- Exclusive content – If you have the time to create extra content, you could offer bonus material such as early access, behind-the-scenes episodes, or members-only shows in exchange for payment.
- Merch sales – Sell branded items like shirts, mugs, or stickers to fans via an online store or payment form. A great fit for shows with strong branding or visual appeal.
- Sponsorships – Partner with companies to include ads or mentions within your episodes for an agreed fee. This works well for podcasts with a niche focus or large, consistent listenership.
- Affiliate marketing – Promote third-party products or services and earn a commission for each sale or referral made through your unique links. This approach can be useful for creators who already recommend tools or products, so your content naturally lends itself to product tie-ins.
- Paid subscriptions or memberships – Charge listeners for ongoing access to premium perks like Q&As, newsletters, or exclusive content. Again, it takes time to create the extra value.
- Live events or workshops – Host ticketed virtual or in-person gatherings such as meetups or seminars. This is suitable for creators with highly engaged audiences who want to connect in real life..
Of course, you don’t need to use every strategy. Combining one or two that fit your strengths and audience can help diversify your income and make monetization feel more natural.
Why use WordPress and Gravity Forms?
If you are looking to monetize your podcast, using WordPress and Gravity Forms is a great idea and here’s why:
- Full control over your content – WordPress gives you ownership over your podcast website and content instead of relying on the rules and limitations of external platforms. Plus, all of the supporter data from your form entries stays with you.
- Built-in podcasting tools – You can easily embed episodes on your site, manage feeds, and create a professional listening experience.
- Extensive customization options – The WordPress ecosystem offers thousands of themes and plugins. This makes it easy to build a website that reflects your brand and has all the features you want.
- Enhanced SEO capabilities – Plugins like Yoast SEO can help you optimize your episode pages, show notes, and blog content so your podcast is easier to discover.
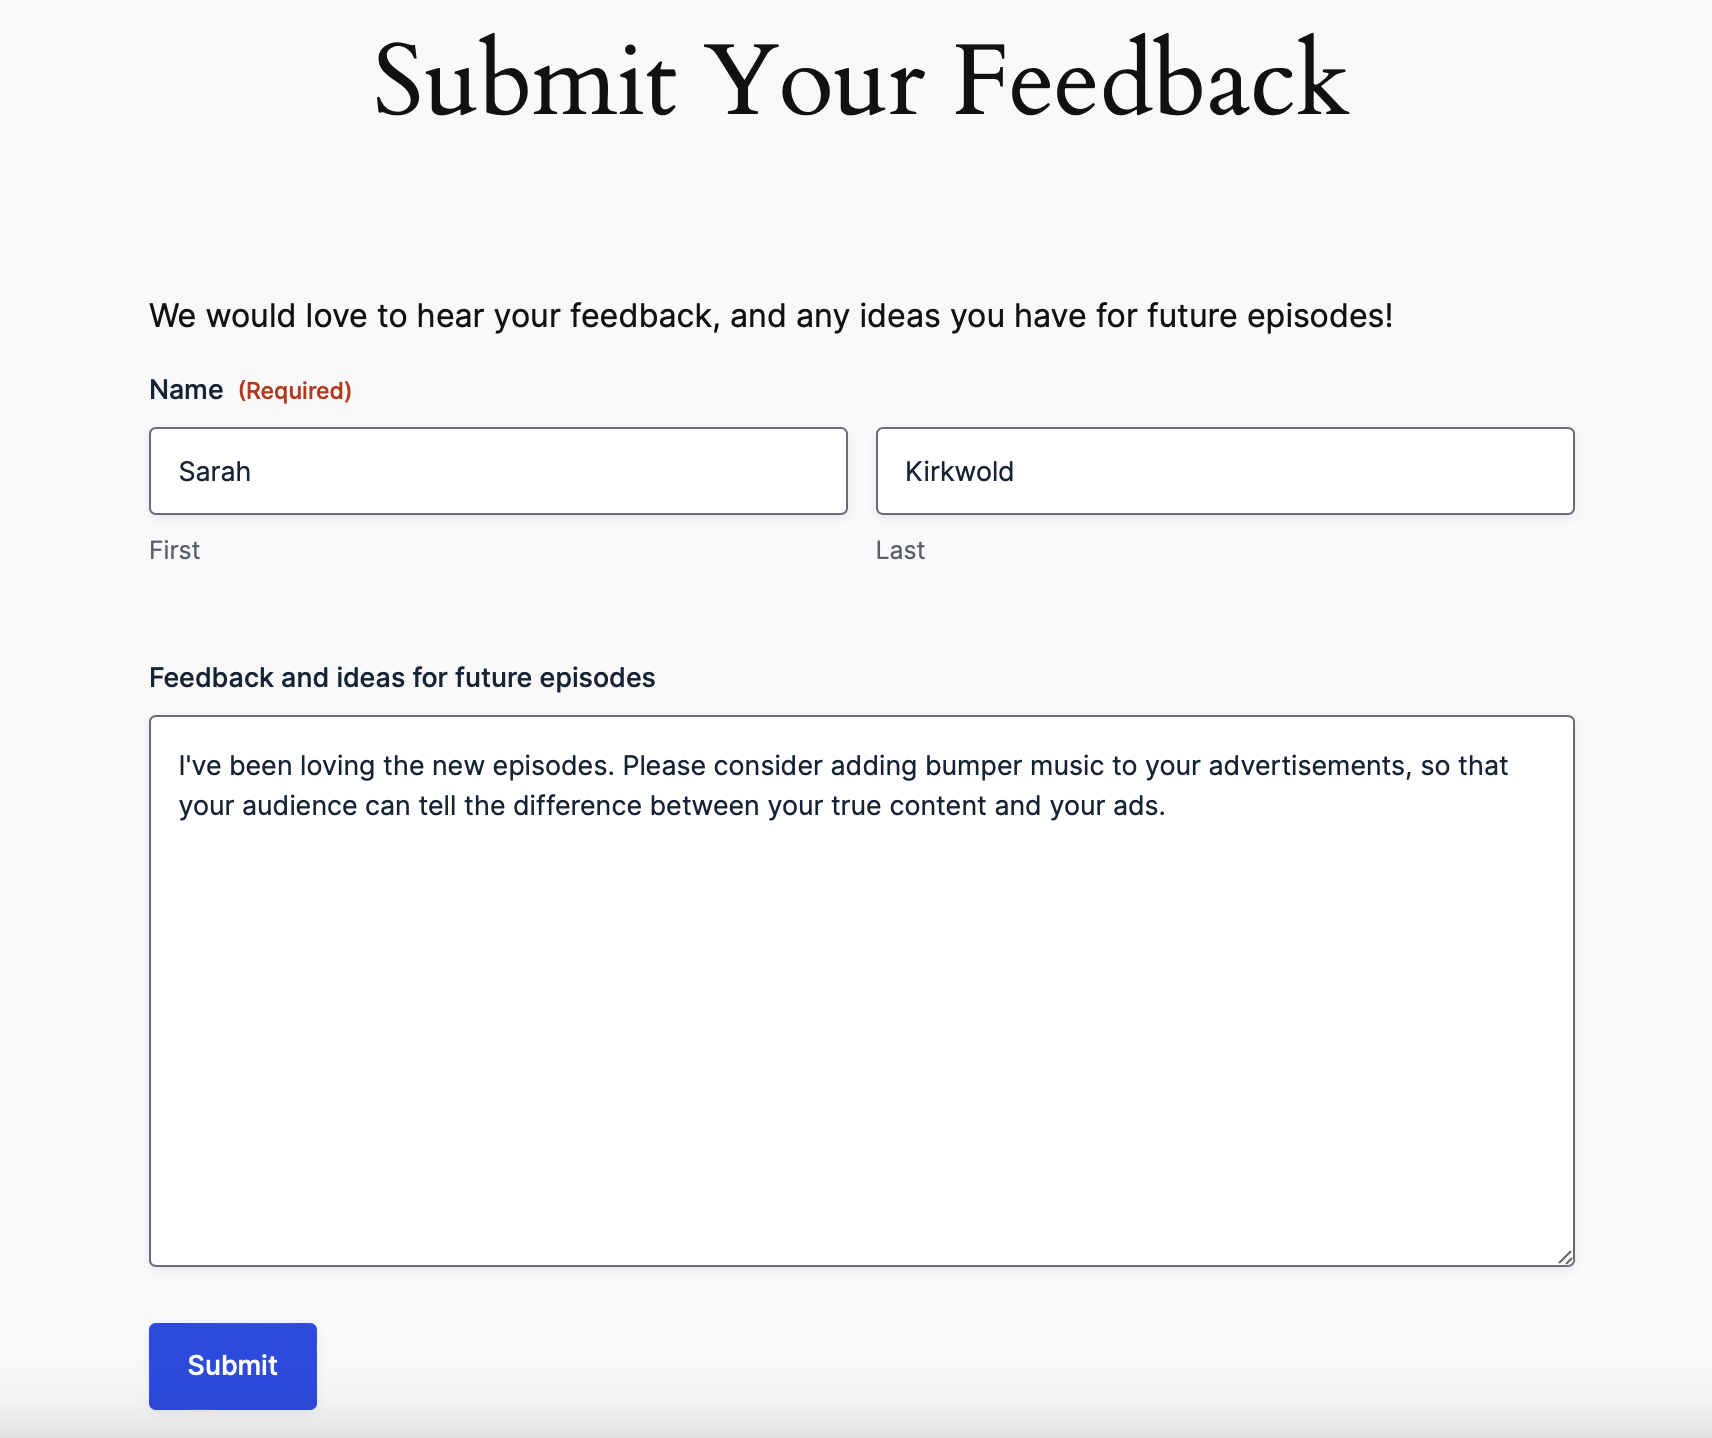
- Automated form workflows – Use forms to collect listener feedback, accept guest applications, manage event RSVPs, grow your e-mail list, and more. Automate common admin tasks like email notifications directly from your site.
- No revenue sharing – Unlike platforms like Patreon, you keep 100% of the money you earn when using your own site. You only pay processing fees to your payment provider.
- Flexible monetization – Gravity Forms supports one-time and recurring payments, custom payment amounts, and even tiered contribution levels.
Gravity Forms also comes with several license plans so you can pick the one that’s most appropriate for your needs.
How to create a podcast donation form with Gravity Forms and Stripe
To give you a better idea how podcast monetization can work, we will walk you through creating a form to collect listener donations on your site, both one-time and recurring.
To follow along, you need a WordPress site with the Gravity Forms main plugin installed (instructions here). We’ll use the Stripe Add-On, which is available on the Pro, Elite, and Nonprofit license plans (you can update your license and only pay the difference). You’ll also need a Stripe account, which you can create on the Stripe website.
If you don’t have a Gravity Forms license yet, you can also create a free demo site and try the process there.
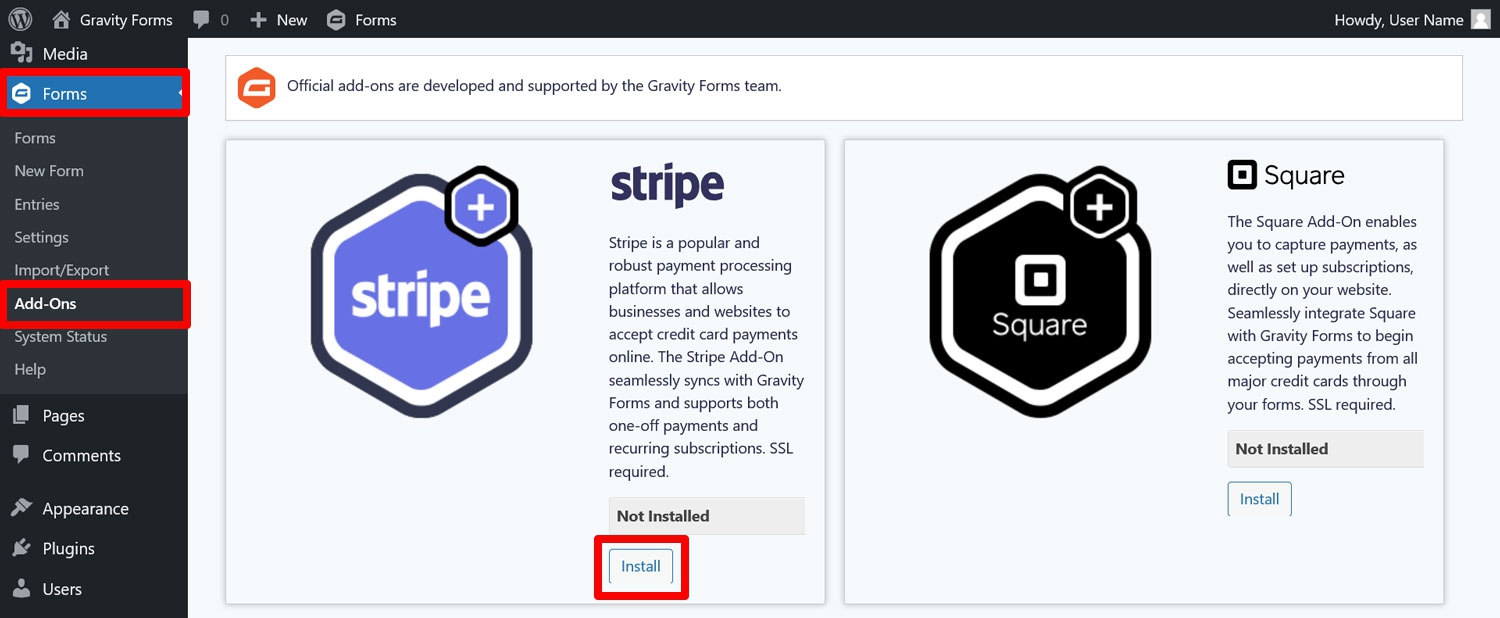
1. Install the Stripe Add-On
As a first step, navigate to Forms → Add-Ons. Locate the Stripe Add-On in the list and click Install, then activate it once the installation is complete.
2. Connect to Stripe
Next up, go to Forms → Settings → Stripe. Here, first set Mode to Test. That way, you can try out your setup without exchanging real money. After that, click Connect with Stripe.
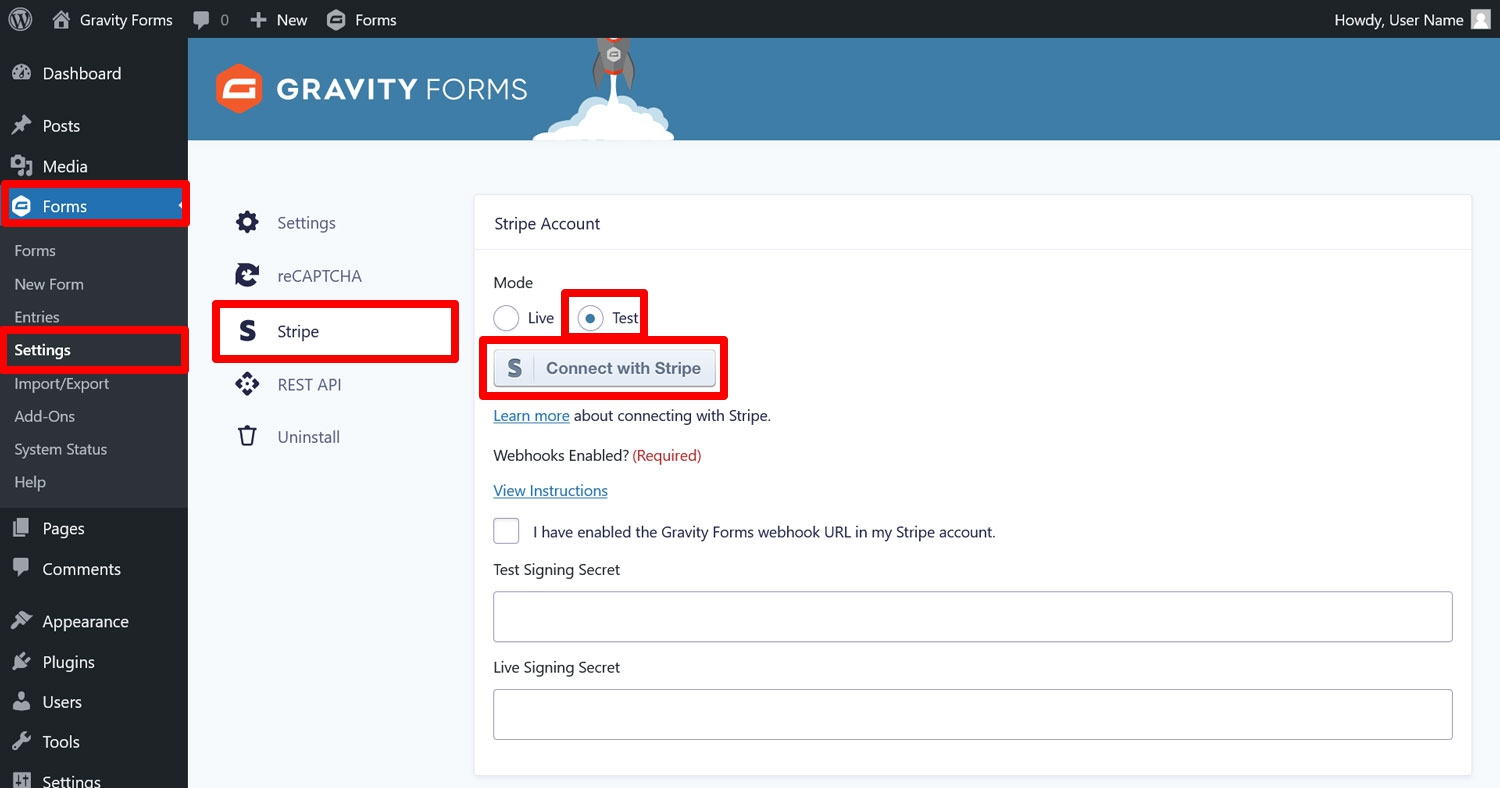
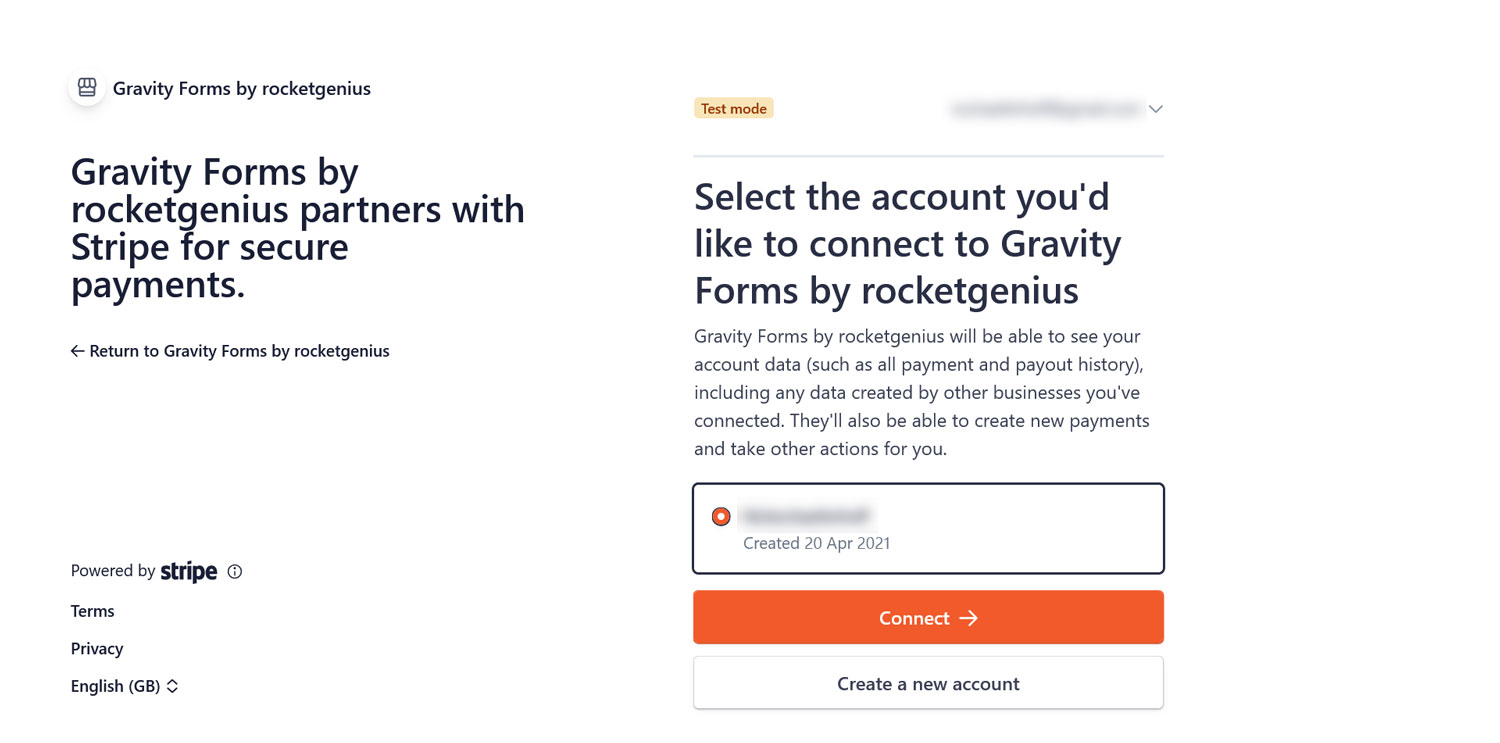
You’ll be redirected to the Stripe website to log in to Stripe, pick the account you want to use, and authorize Gravity Forms to access it.
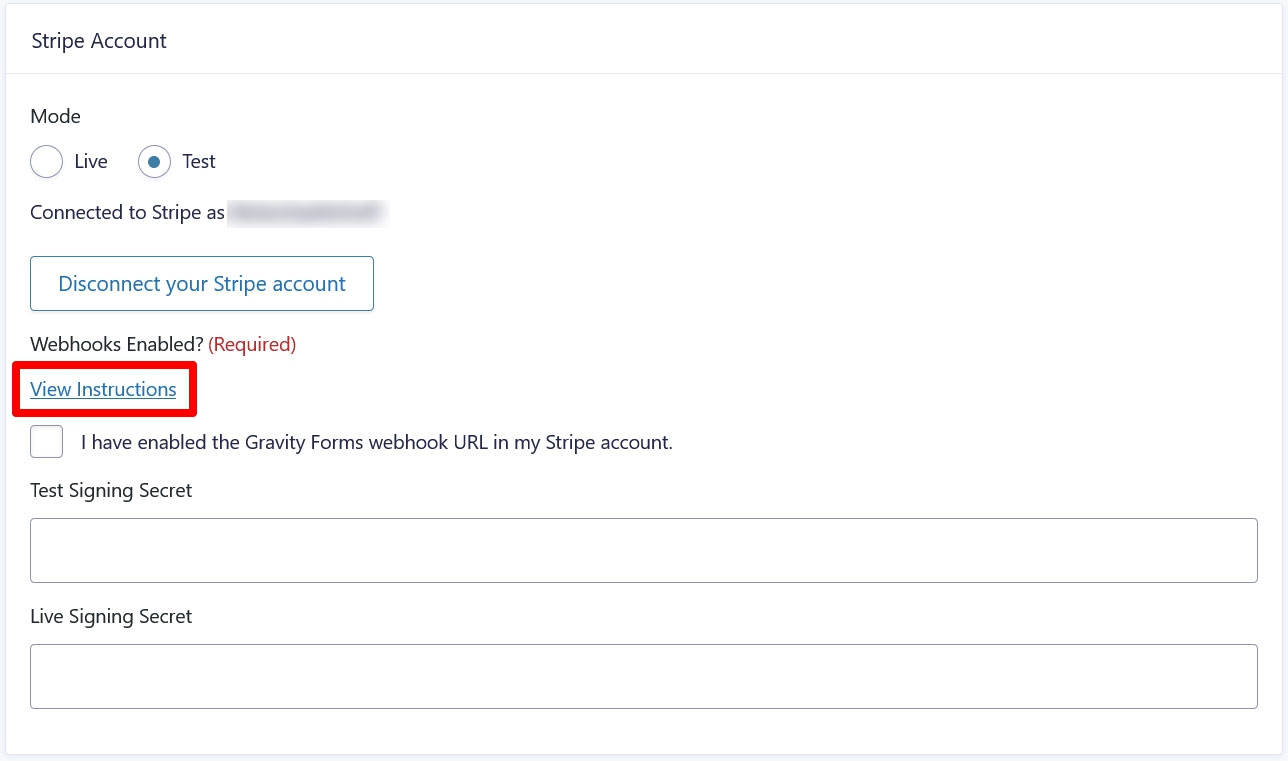
You’ll then automatically return to your WordPress dashboard. The next step here is to add a Gravity Forms webhook to your Stripe account. You find instructions for that and the URL to use under View Instructions.
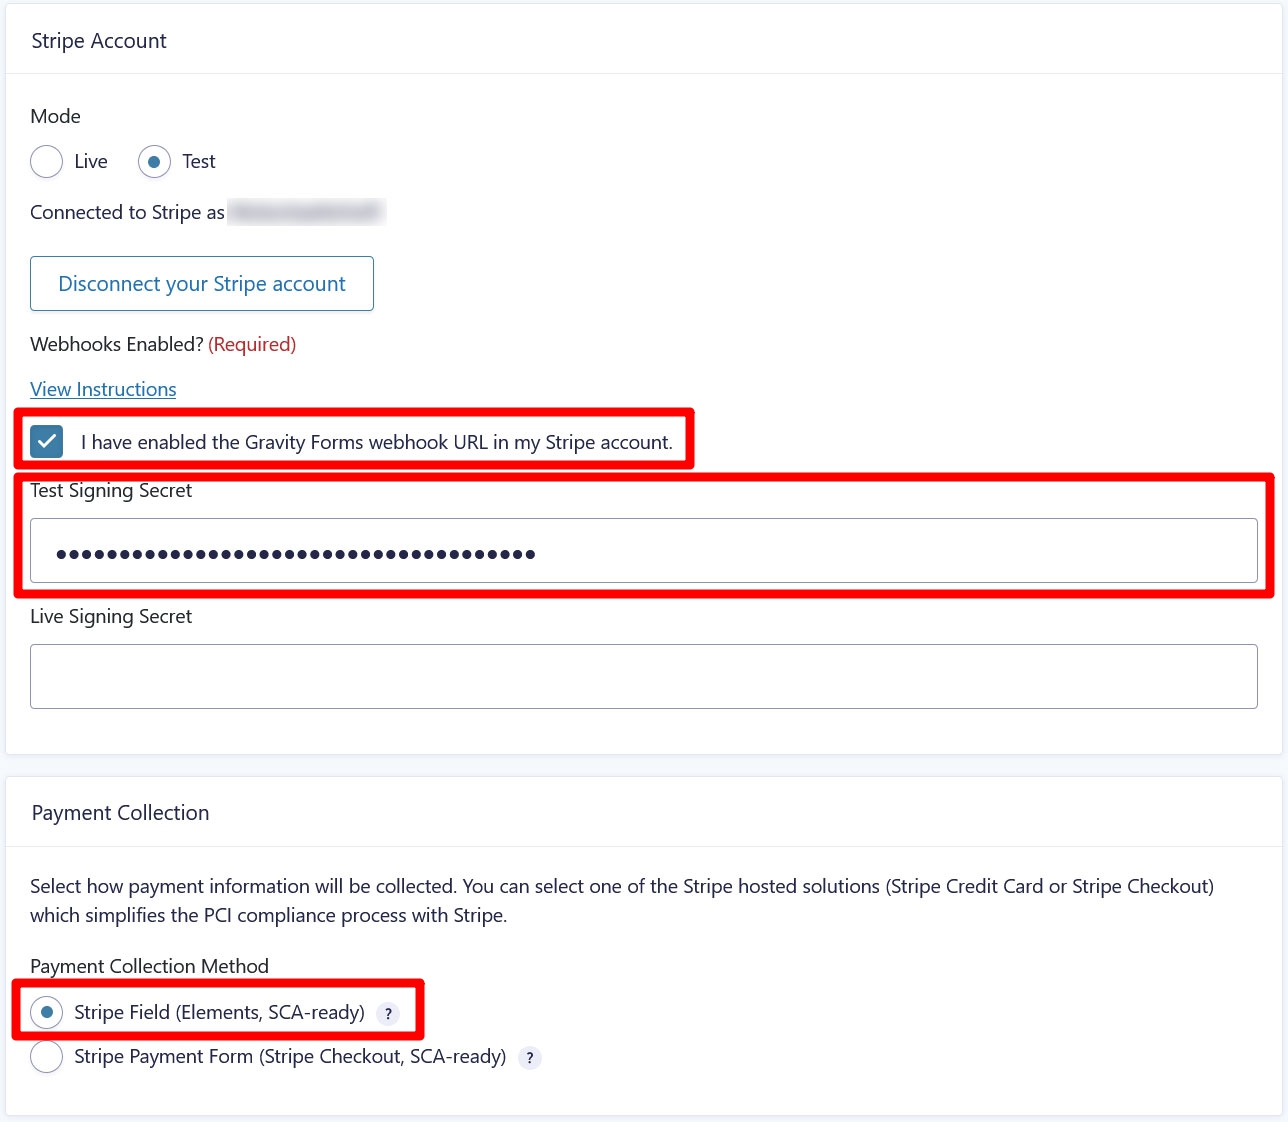
Next, check the I have enabled the Gravity Forms webhook URL in my Stripe account box, and paste the test signing secret in the respective field. Leave Payment Collection as Stripe Field and save the settings at the bottom when you are done.
For more detailed instructions, check our Gravity Forms and Stripe guide.
Now that Stripe and Gravity Forms have been connected, it’s time to create a form.
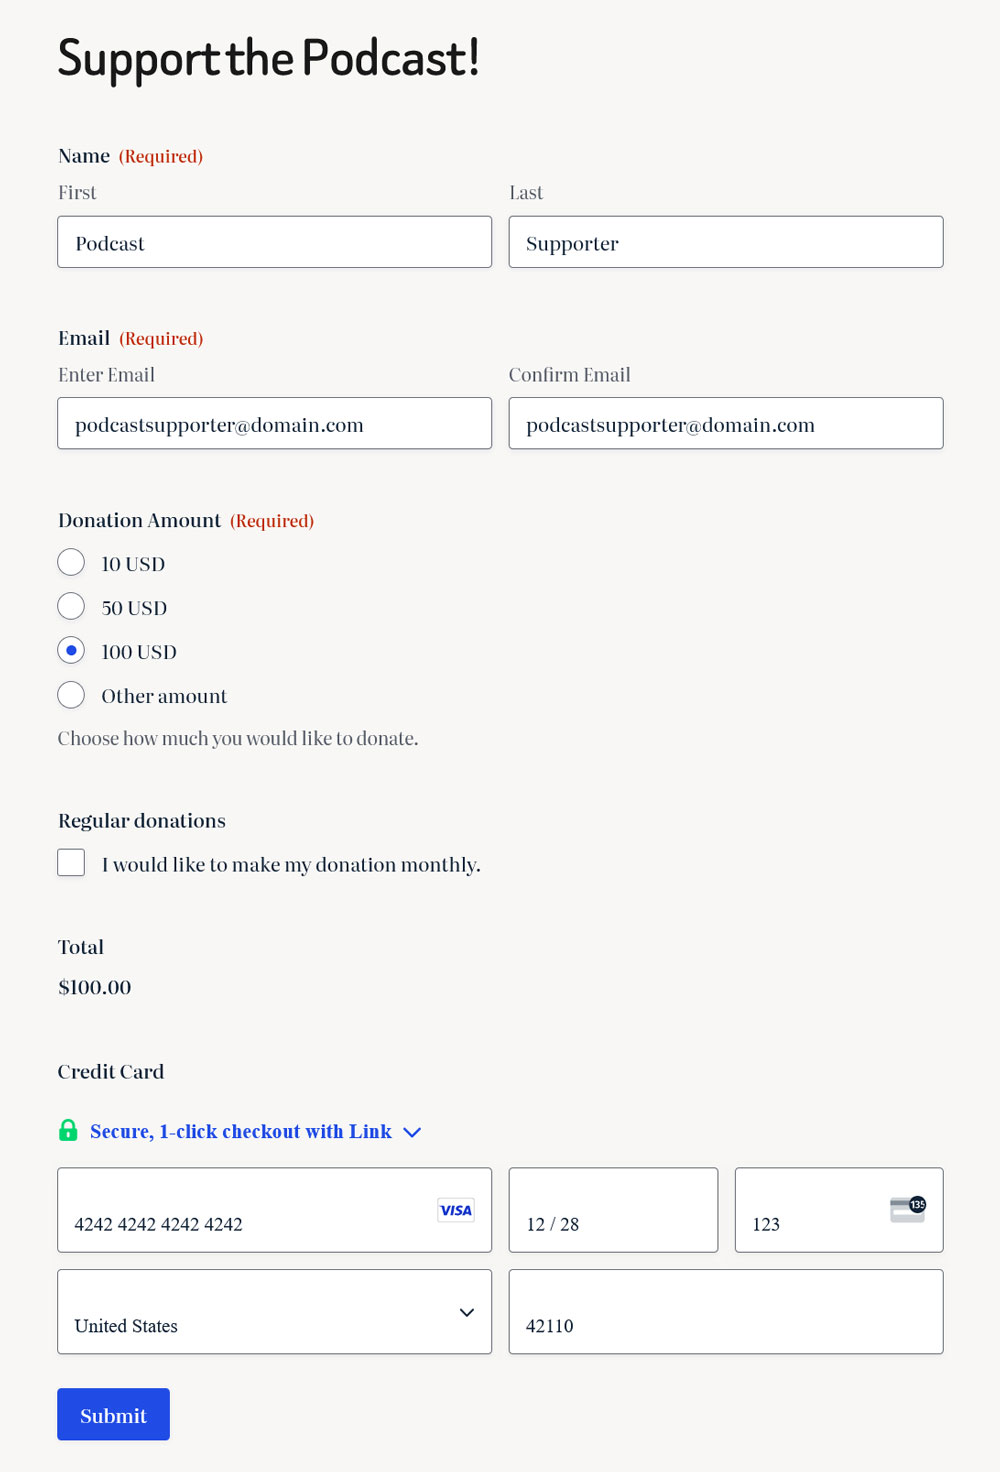
3. Create your form
To create your donation form, click on Forms → New Form.

This opens up the Gravity Forms template library with form blueprints for different use cases. Hover over the donation form template and click Use Template.
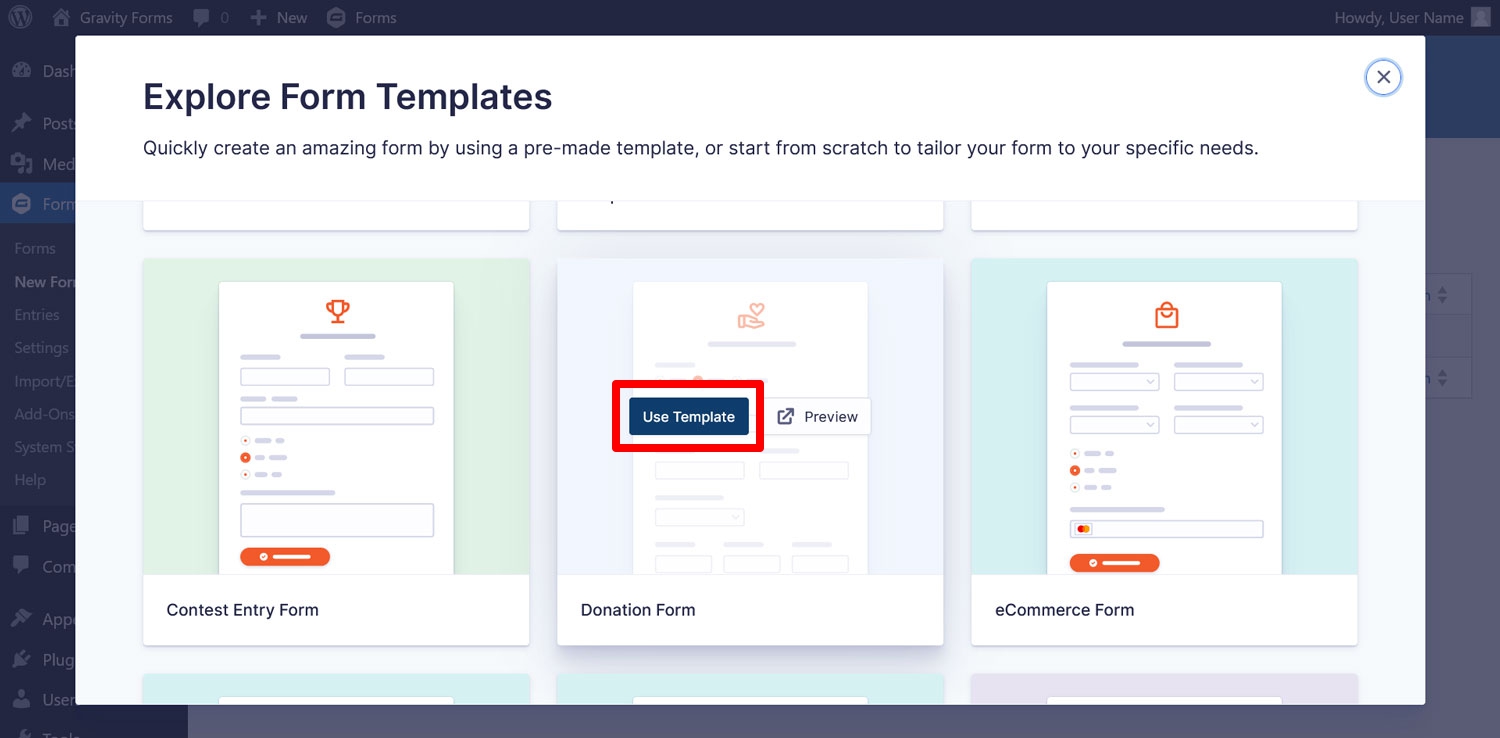
Name your form in the next step, then continue to arrive in the Gravity Forms drag-and-drop editor.
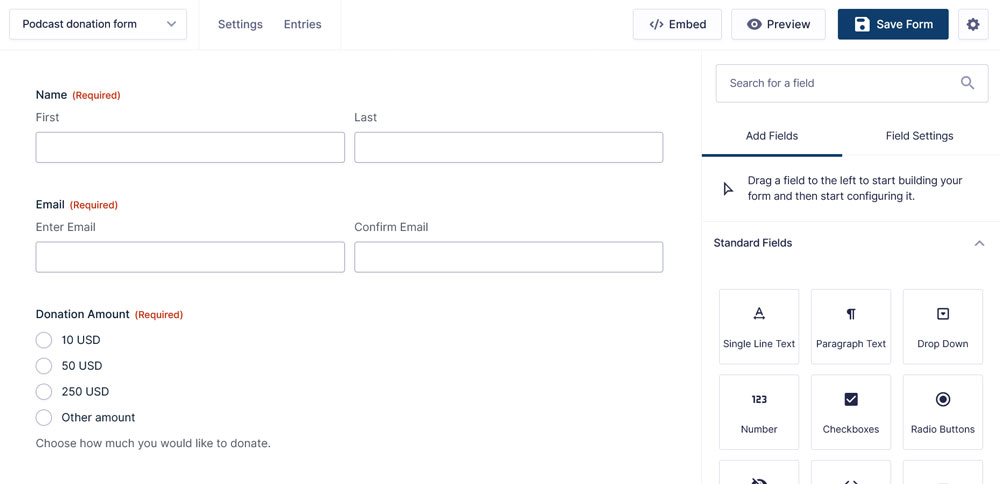
Because we are using a template, it already contains form fields for:
- Name
- Donation amount
- Amount total
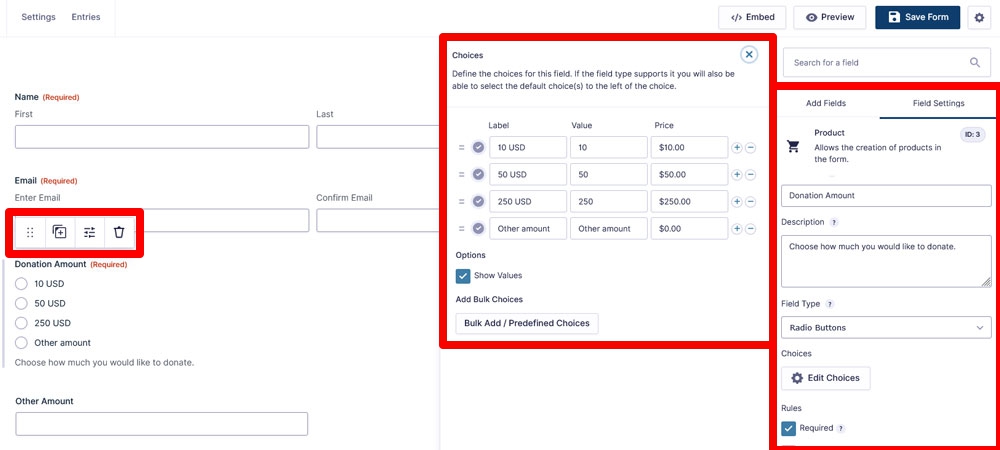
4. Customize your form
The template is a great start but you can also customize it to your needs.
For one, you can modify existing form fields by clicking on them, then using the top toolbar to move, duplicate, and delete them. This also opens up form field settings in the right sidebar where you can modify field labels, switch certain parts of fields on and off, and much more like adjusting the default donation amounts.
The right sidebar also lets you add more form fields. In this case, we will insert a Checkboxes field to allow donors to make their donation repeating monthly.
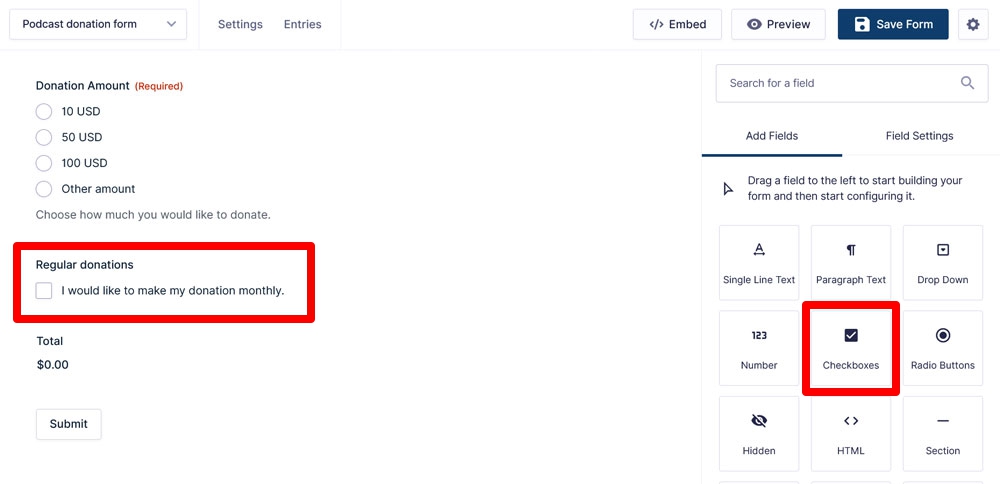
After that, you need to add the Stripe field at the end.
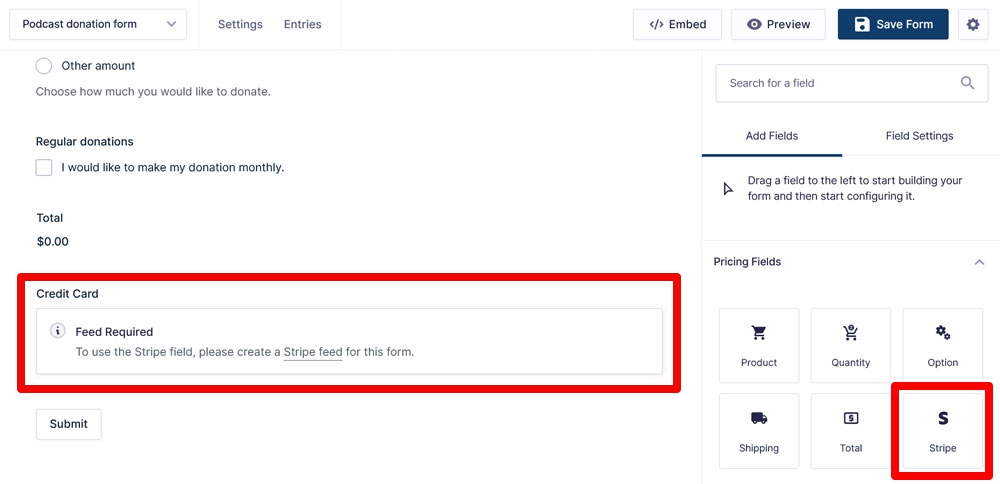
This replaces your normal Submit button and makes sure donations actually get processed.
That’s enough for this example. Make any other changes you need and, once satisfied, click Save Form in the upper right corner.
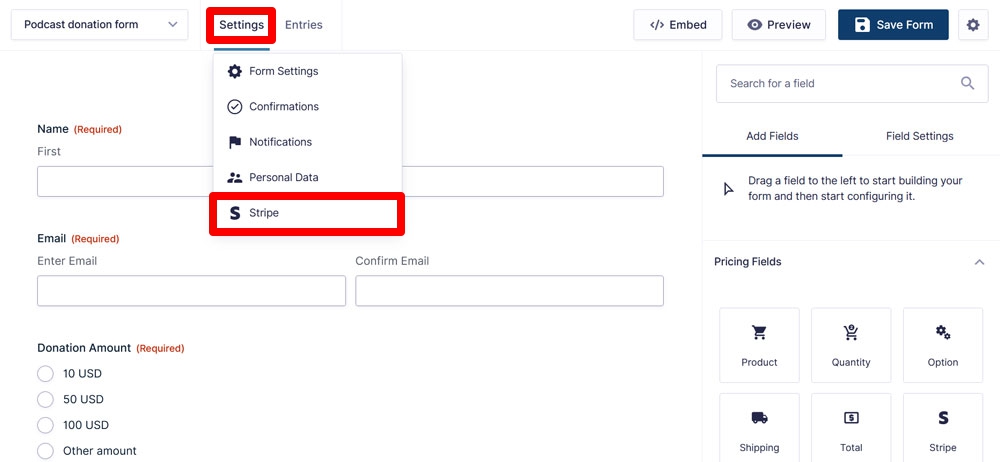
5. Set up Stripe feeds
A Gravity Forms “feed” configures the scenarios that should happen after your form has been submitted. In this case, we want form submissions to be passed on to our payment provider.
Since there are two scenarios that should pass form submissions to Stripe, we need to create two feeds: one for single donations and one for recurring donations.
To do this, go to Settings → Stripe in the form editor.
In the next screen, click Add New.
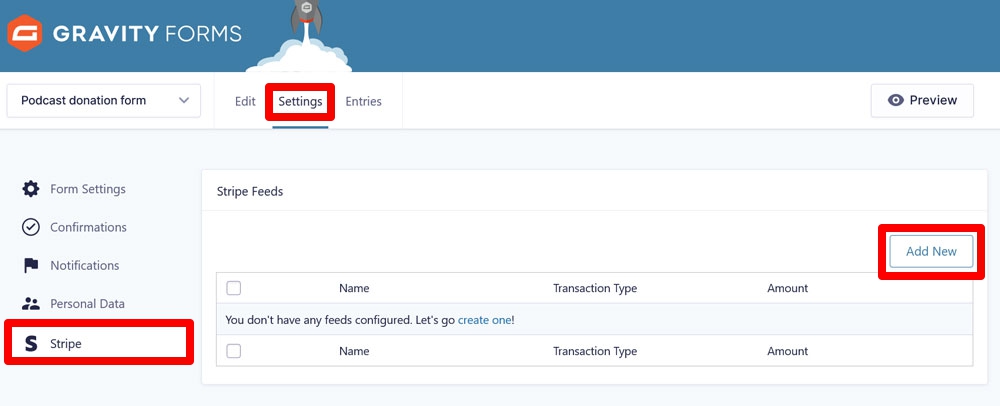
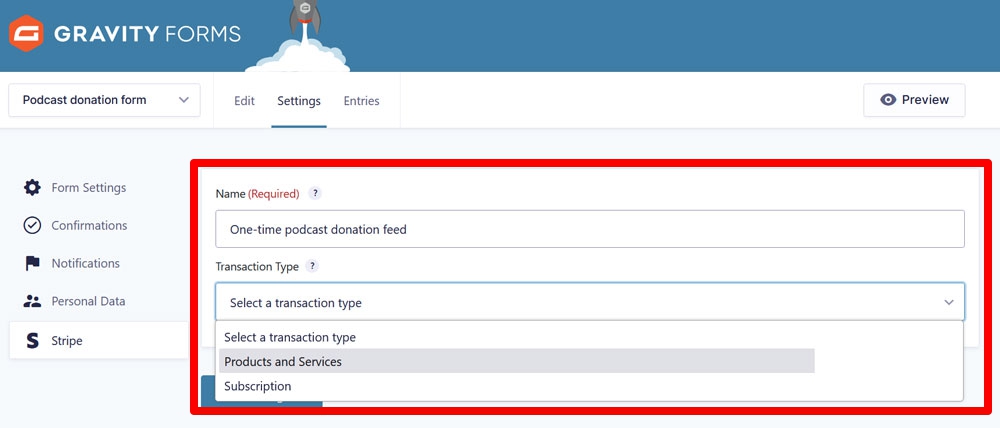
Then, give your feed a name. Since we are creating two, choose names that let you easily distinguish between them. Then, select the Transaction Type:
- Use Product and Services for one-time donations.
- Use Subscription for recurring donations.
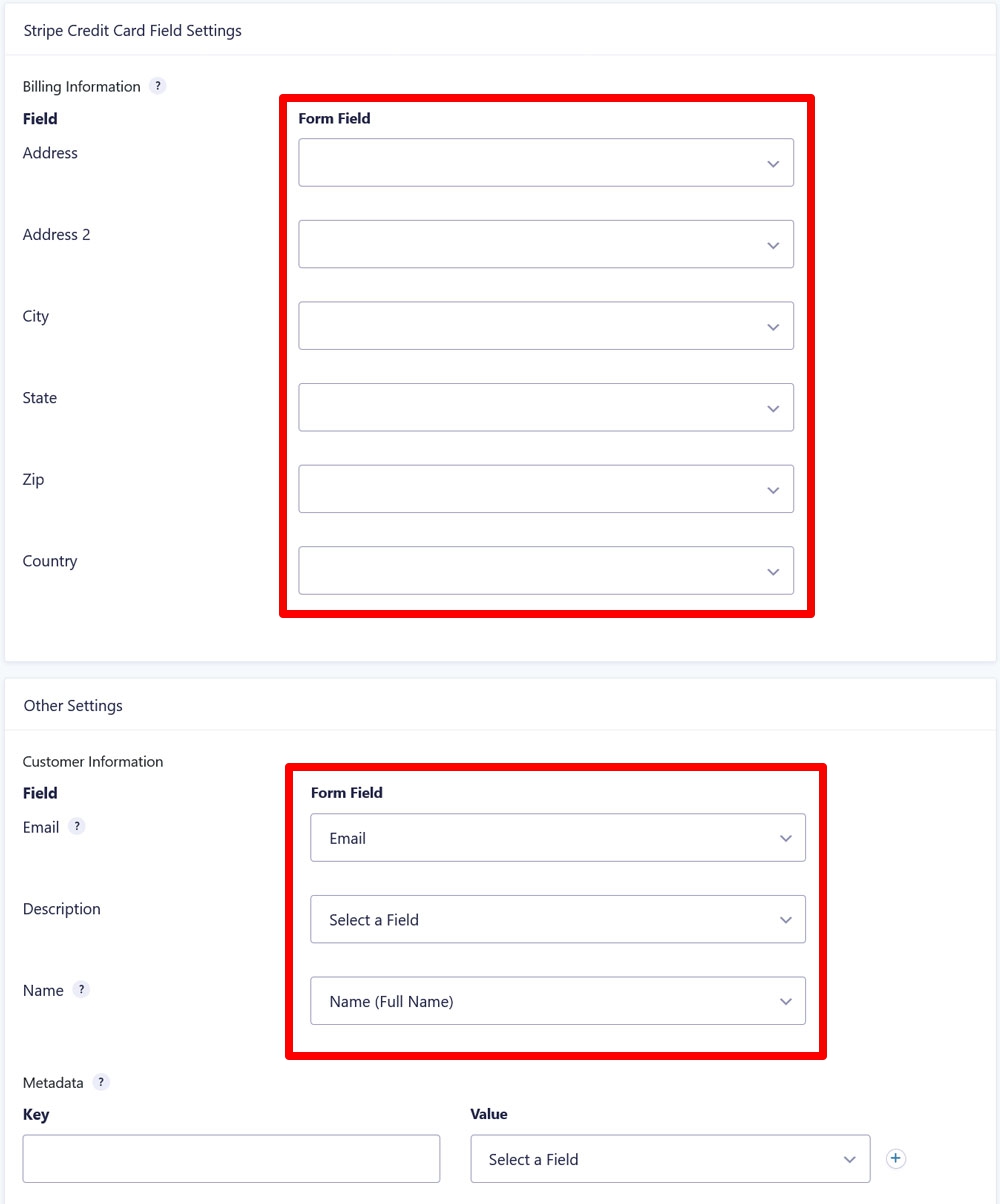
Under Stripe Credit Card Field Settings and Other Settings → Customer Information, map your form fields to the corresponding Stripe fields.
The options here will depend on the information you plan to collect with your podcast donation form. You might also be subject to certain regulations when it comes to providing donation receipts, so make sure to inform yourself.
For one-time donations, make sure to choose Form Total for Payment Amount, if it isn’t already selected.

If you are setting up a recurring donation, also have a panel for Subscription Settings.
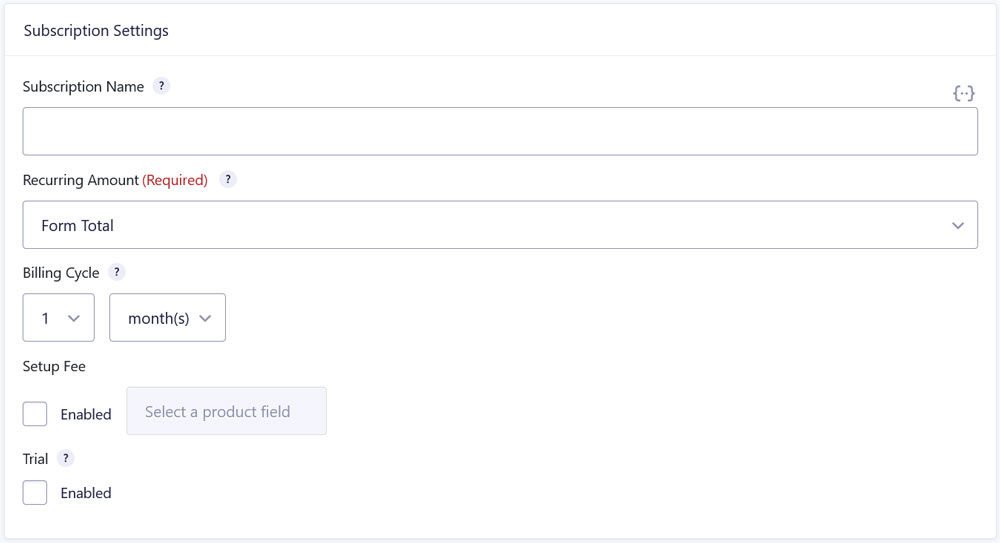
Optionally enter a name (this will also appear on the payment form), then select Form Total for the Recurring Amount, and set the billing cycle. Since the form is set up for monthly donations, make sure the settings reflect that.
For more information on the other available settings, visit our documentation.
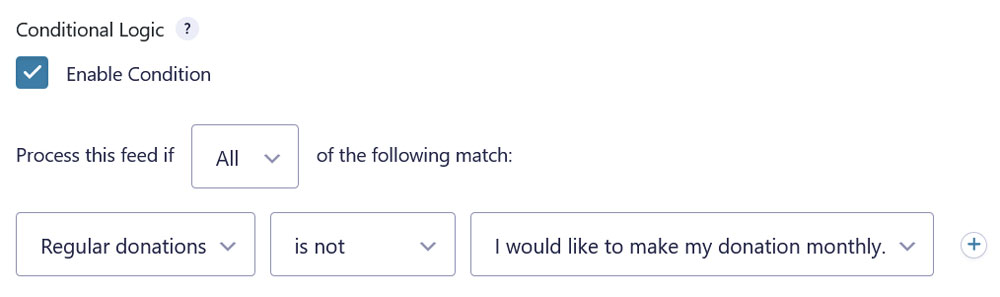
6. Enable conditional logic
Since we are creating two feeds for two different use cases, be sure to check the Enable Condition box on each of your feeds.
Then, set the condition that each feed should only be processed when the corresponding donation type is selected on the form.
Click Save Settings to activate each feed.
7. Embed and test
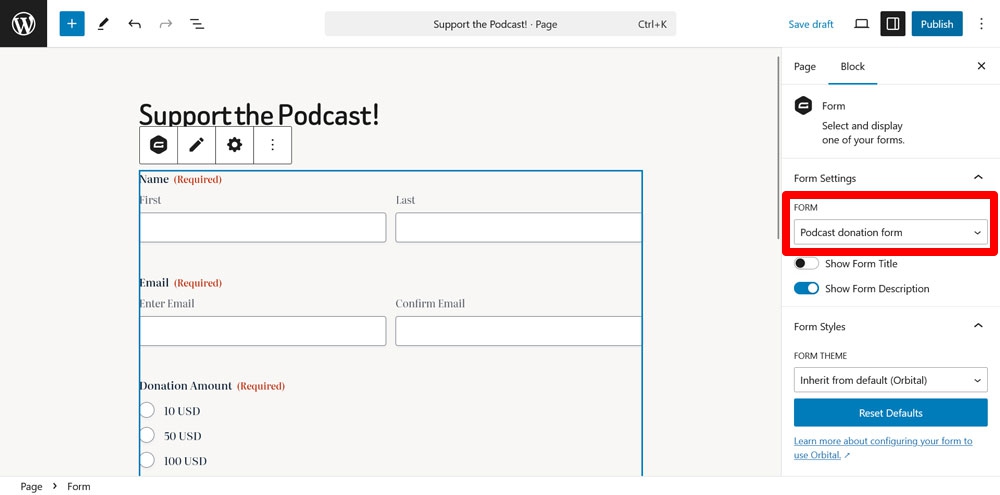
Now it’s time to get your finished form onto your site. You can embed it on any page using the Gravity Forms block or shortcode.
But first, it’s a good idea to test it. The easiest way to do that is to preview the page by clicking the small laptop icon, then Preview in new tab. Fill out your form with example information, then submit it. Use the Stripe sandbox credit card numbers to test the payment functionality.
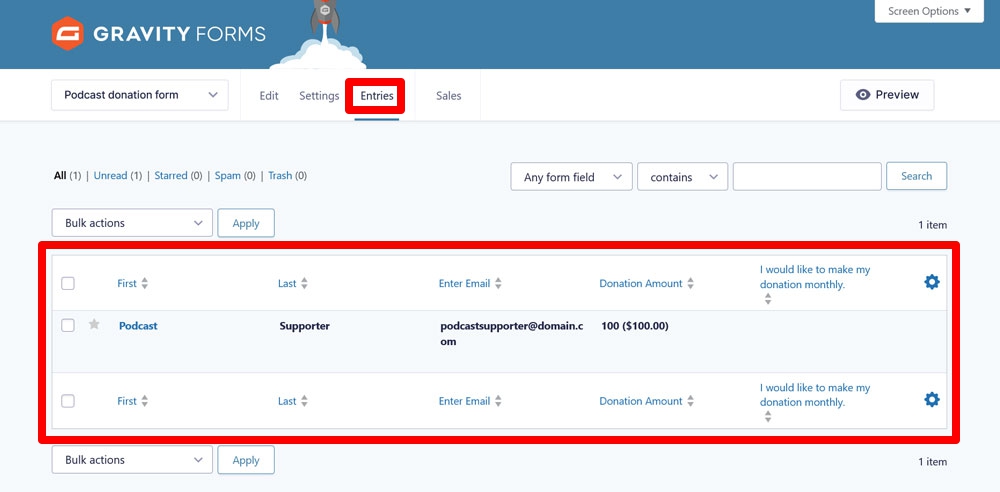
The submitted donation should show up in your form’s Entries list.
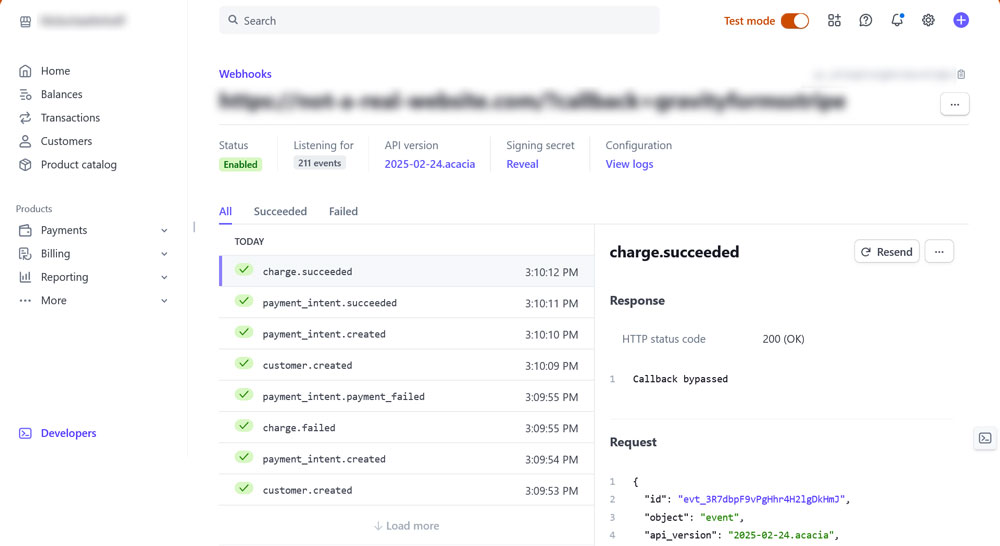
You should also see it in the Stripe Developer dashboard.
If that is the case, click Publish to make the donation form available on your podcast website.
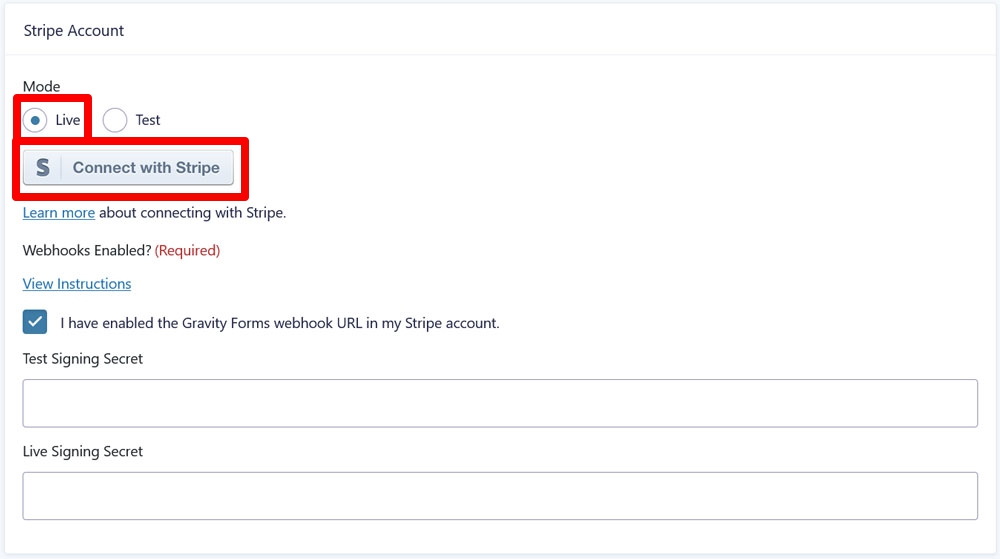
8. Switch to live mode
There is one more essential step. In order to start accepting real payments, you need to switch the Stripe from test to live mode. Here’s how to do that:
- Head on over to Forms → Settings → Stripe.
- Change the mode to Live.
- Click Connect with Stripe and follow the same steps as before.
- Click Save Settings when done.
Finally, to make your form experience even better, look into customizing your form confirmations and notifications.
Best practices for promoting your podcast monetization strategies
Your monetization only works if people are aware of it. Here are a few best practices to keep in mind when promoting the ways your listeners can support you and your show:
- Mention donation options in your episodes – Briefly remind listeners during your intro or outro where they can support the show. Try something like “Visit mywebsite.com/donate to support the podcast.” You can do the same in your email newsletter.
- Link prominently on your website – Add donation links to your main navigation, episode pages, and show notes so supporters can find them easily. Callouts and banners are also an option.
- Explain the impact – Let your audience know how their support helps (e.g., covering hosting costs, improving production, or keeping the podcast ad-free).
- Be consistent, not pushy – Mention support options regularly but naturally.
- Show gratitude – Let your listeners know you appreciate their contribution. Personalized shout outs are great, but even a simple, “Thank you” can be meaningful.
Podcast monetization doesn’t have to be complicated
Earning an income from your podcast doesn’t have to mean sacrificing your creative freedom or handing over a cut to middlemen.
By using WordPress and Gravity Forms, you’re not just setting up a donation page – you’re building a flexible, sustainable, solution that reflects your brand and values.
This setup lets you deliver a seamless experience for your listeners while turning their support into a reliable revenue stream. Support your passion, empower your podcast, keep your independence, and grow your community – on your terms.
Ready to get started? Get your Gravity Forms license today or upgrade an existing license to create your own Stripe-powered podcast donation form.
Newsletter
If you want to keep up-to-date with what’s happening on the blog sign up for the Gravity Forms newsletter!
"*" indicates required fields


