Understanding the needs of your customers, how they interact with your products, or what they think about the service you provide, is crucial if you want to move your business forward in the right direction. But, often getting relevant and useful feedback from your customers can be a difficult task.
Creating a customer satisfaction survey can be an effective way to engage with your customers and collect the information you need to improve your products or services. Sending out a timely survey, especially one that includes an incentive, can result in gathering key insights from customers and clients that you can then use to inform future decision-making.
In this article, we look at the benefits of using the Gravity Forms Survey Add-On to create a customer satisfaction survey, how to get started using our free survey template, and share further survey resources.
Let’s jump in…
Gravity Forms Survey Add-On

With the Gravity Forms Survey Add-On, you can create a customer satisfaction survey to your exact requirements and add it to any page on your site. One of our most popular add-ons, the Survey Add-On, enables you to interact with your customers and collect and analyze the important data you need.
Here are a few of the top features Survey has to offer…
Survey Field Types
After installing the Survey Add-On, you will find a Survey field added to the form editor – within this Survey field, there are eight Survey field types from which you can create your questions.
Survey field types include…
- Likert Scale – Customers can choose an answer from a scale of options.
- Rank – Customers can drag and drop options to rank them in their preferred order.
- Rating – Customers can select a star rating.
- Checkboxes – Customers can pick multiple options.
- Dropdown – Customers can select from a number of dropdown options.
- Paragraph Text – Customers can input multiple lines of text.
All survey field types are fully customizable, enabling you to create custom surveys appropriate to your survey goals and audience.
Integration with Gravity Forms’ Built-In Features
Not only does the Survey Add-On take the time and effort out of survey creation, but combined with the built-in features that Gravity Forms provides, you will also be able to quickly add powerful enhancements to your survey.
- Conditional Logic – Create smart surveys with conditional logic, showing relevant questions based on a customer’s previous answers, and ensuring you collect detailed and relevant information.
- Multi-Page Form Layouts – Split your customer satisfaction survey up into manageable chunks using the multi-page form layout feature – by giving the appearance of a shorter survey you will find completion rates increase significantly.
- After Form Submission – Gravity Forms provides advanced ‘after form submission’ functionality. Display a confirmation message, redirect a customer to a new page once they’ve submitted the form, or send a notification email thanking them for completing the survey and potentially sharing a thank you gift card, discount code, or other redeemed incentive.
- Further Integrations – Gravity Forms integrates with numerous third-party applications and services making it easy to sync your survey with a marketing provider or CRM like Mailchimp or HubSpot. Equally you can connect your survey with Zapier, enabling you to send your survey data to countless other platforms.
Survey Results
You can analyze a survey’s results right within your WordPress dashboard. Gravity Forms breaks down the results so you can gain clear insight into how your users have responded to each question. You can also view individual surveys as well as filter results, enabling you to gain an in-depth understanding of how your audience interacts and thinks about your products and/or services.
How to Create a Customer Satisfaction Survey
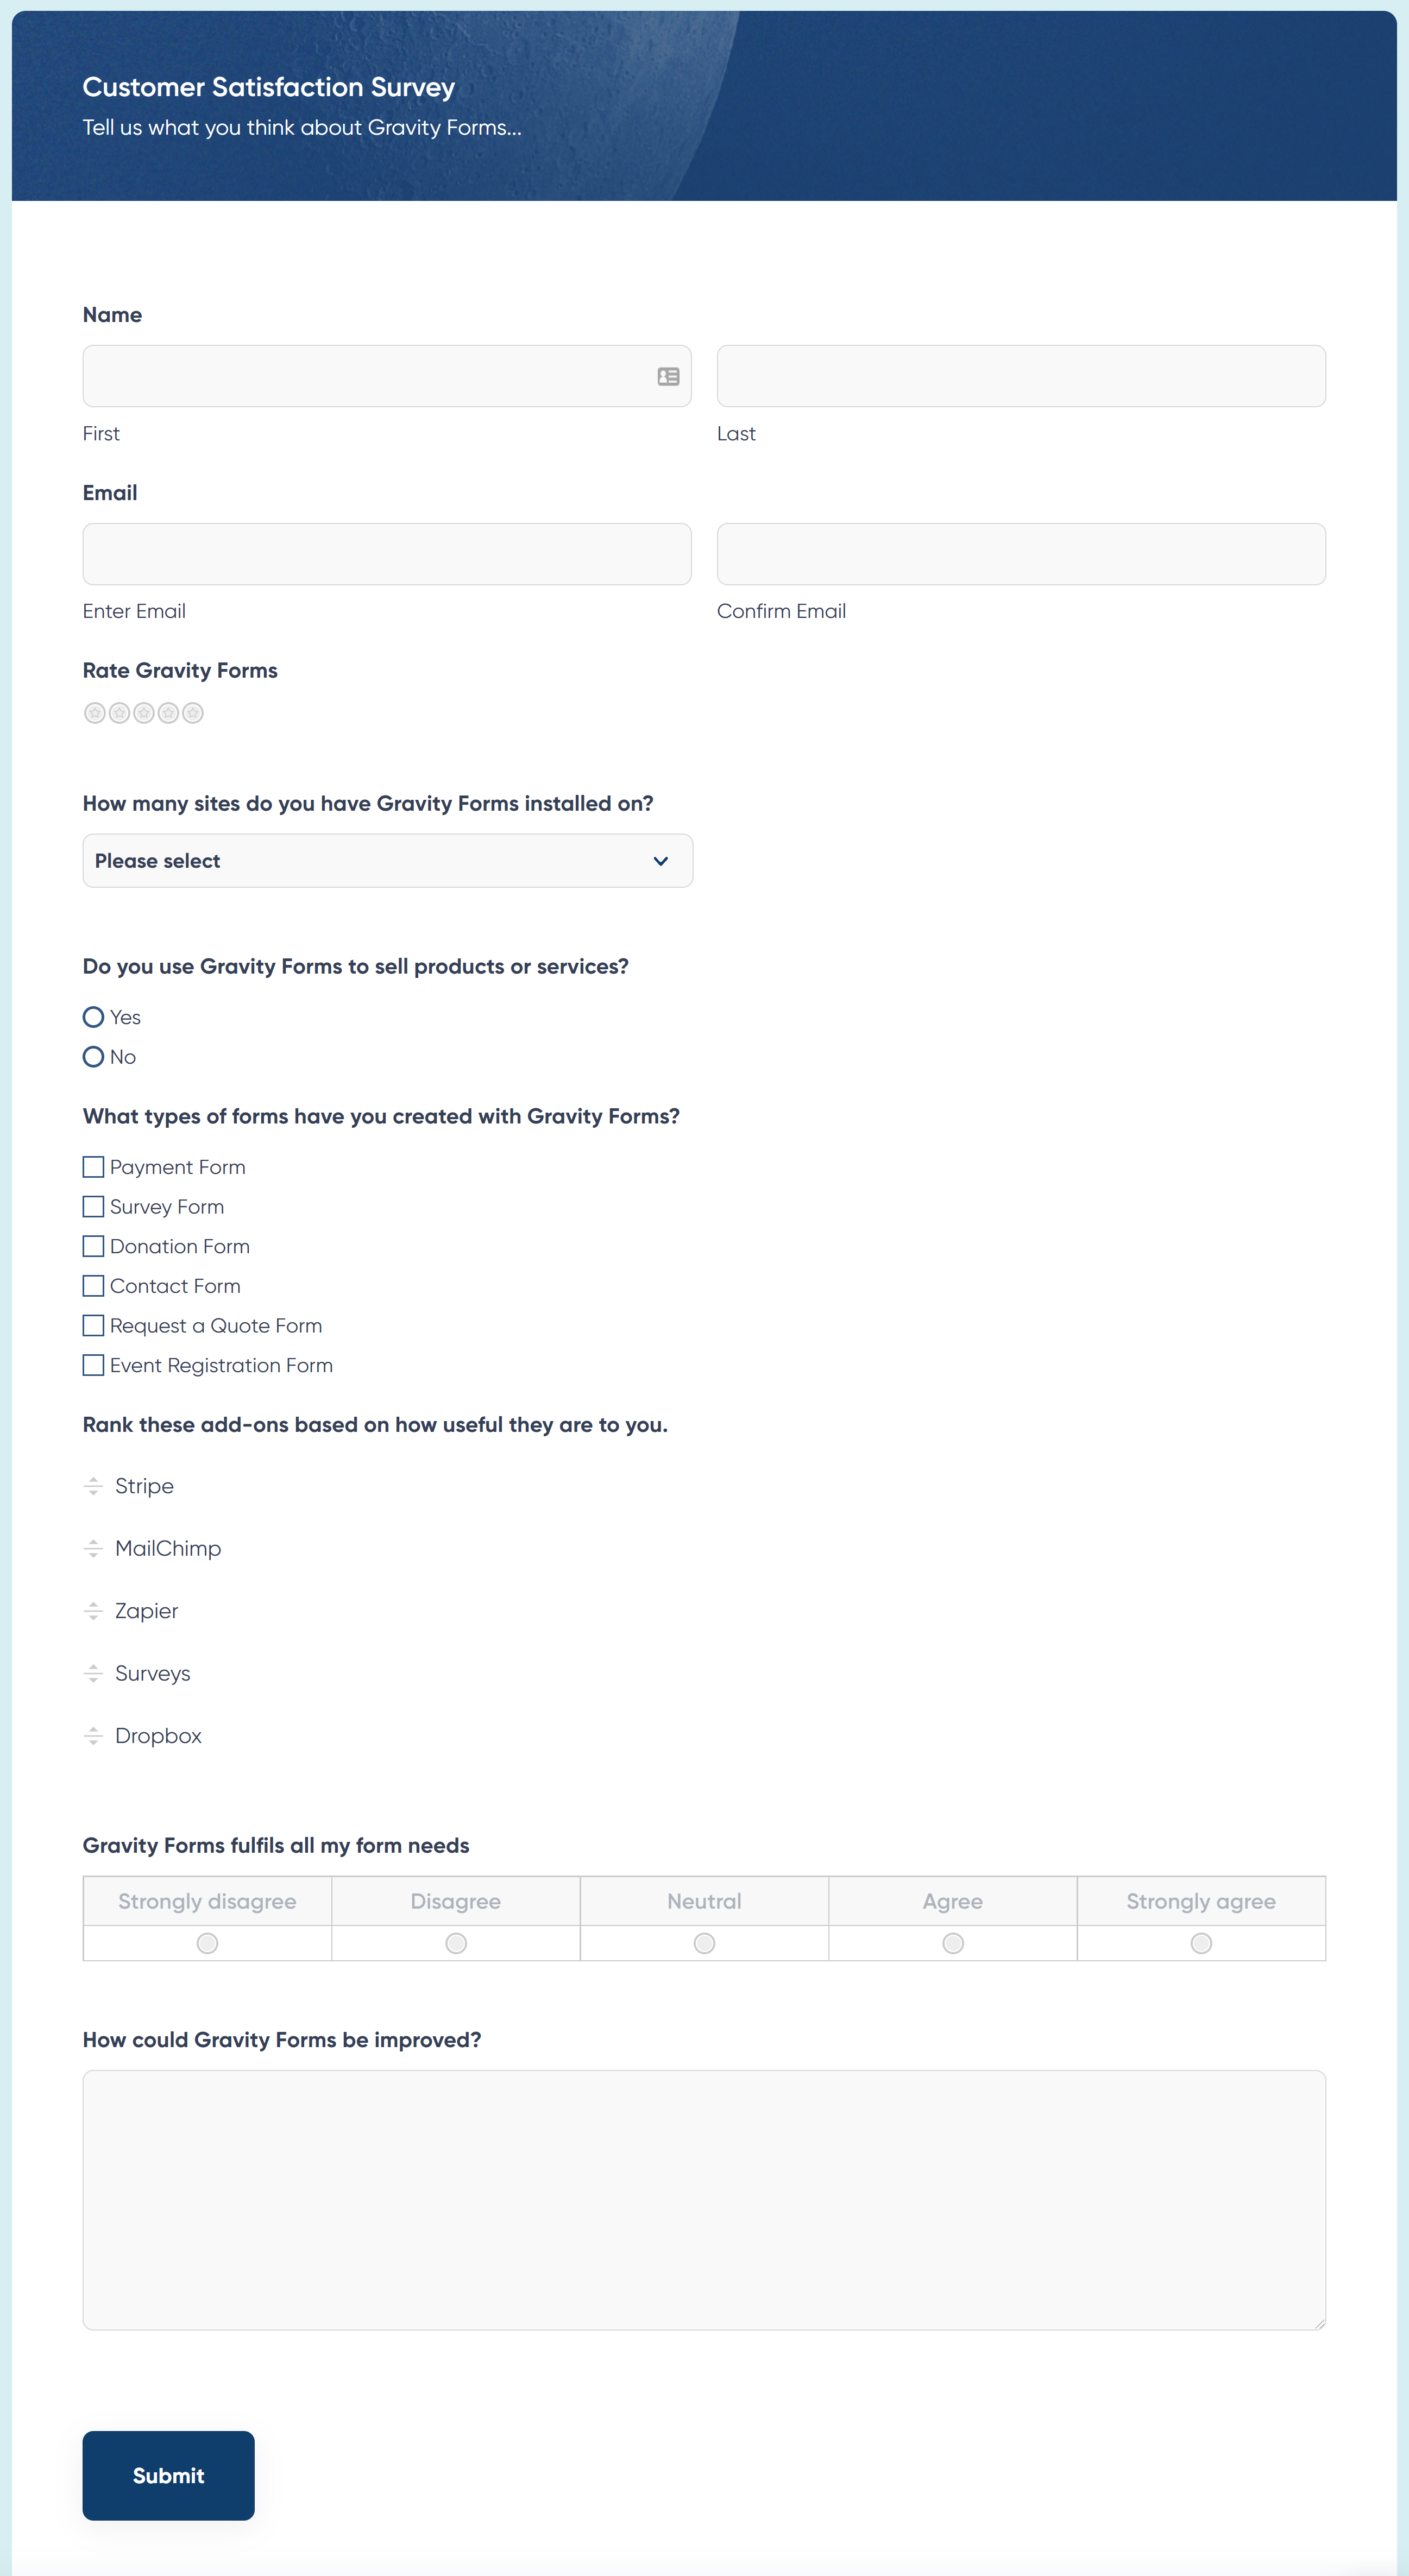
Setting up a customer satisfaction survey only takes a few steps, especially when using our free Survey template. Let’s take a look…
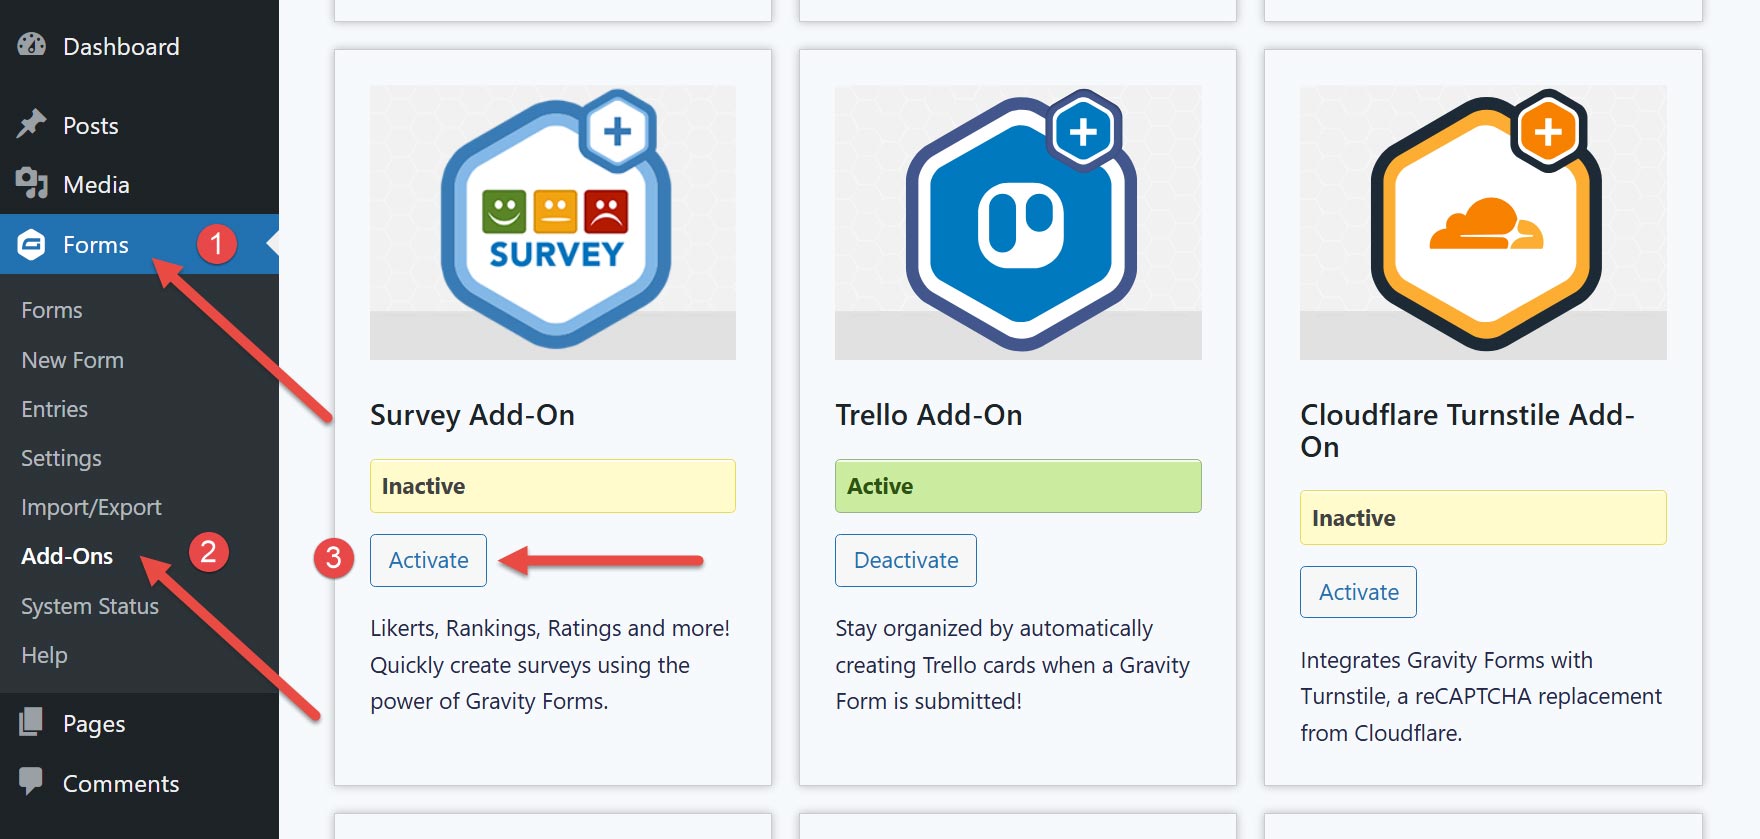
Step 1: Install The Survey Add-On
To get started, you first need to install the Survey Add-On. To do so, within your WordPress dashboard, select Forms > Add-Ons from the left-hand menu. Then scroll down the add-on page to the Survey Add-On and click on Activate.
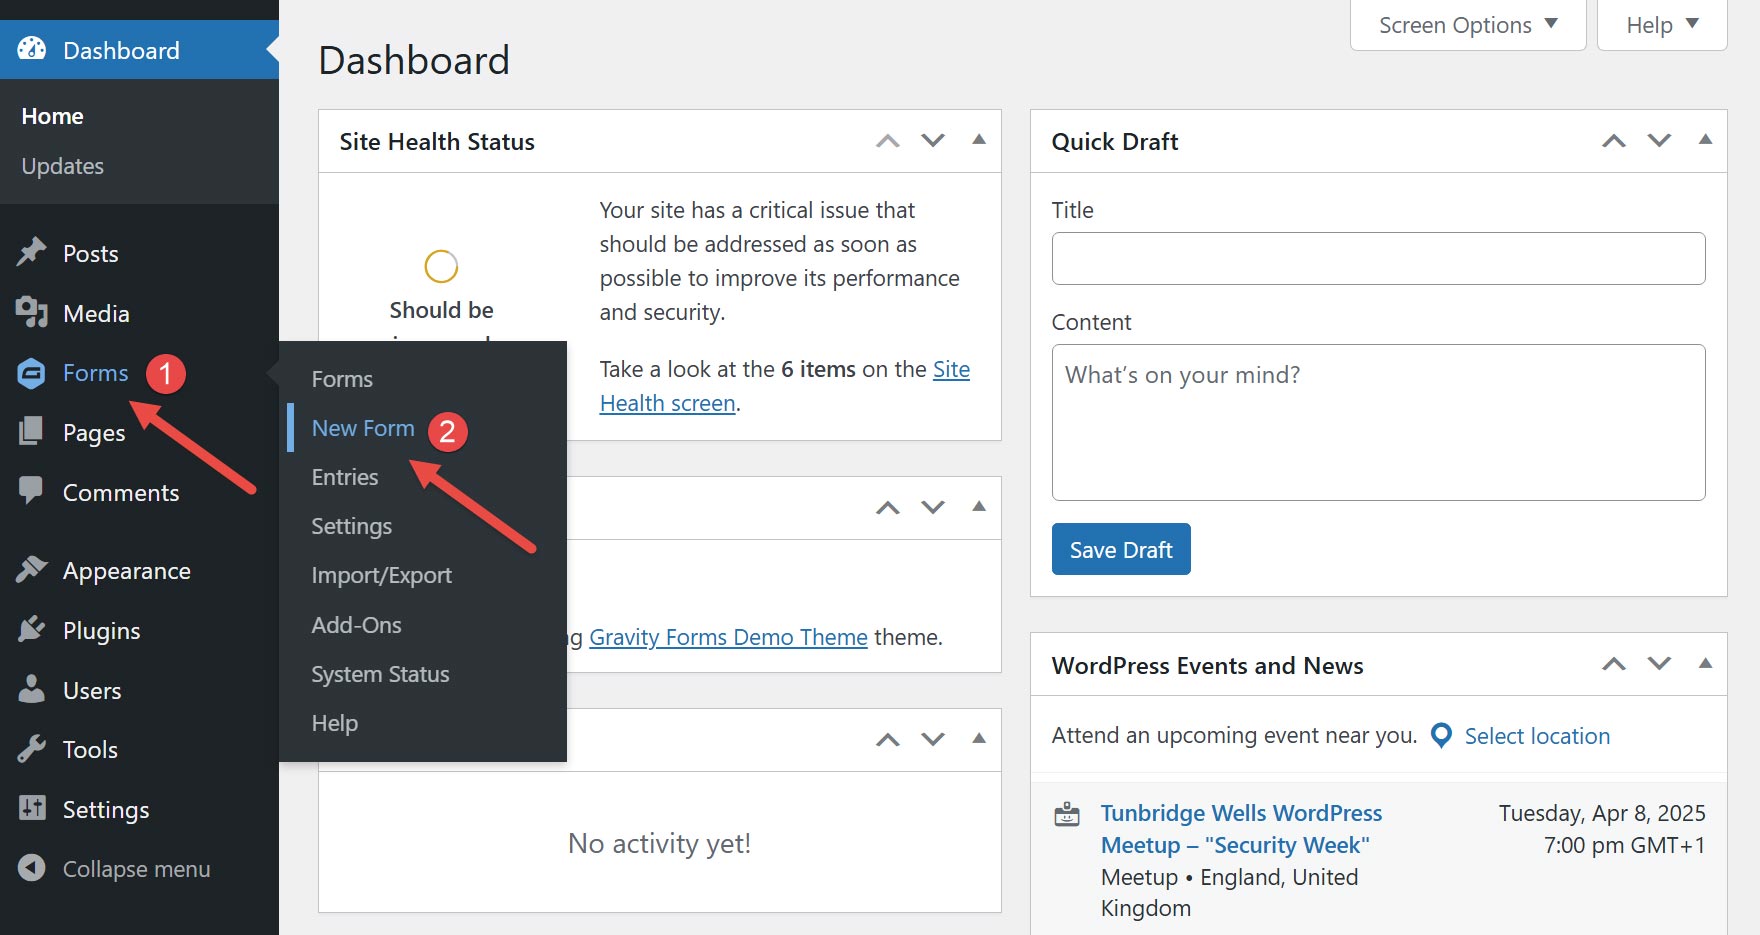
Step 2: Create a New Form Using the Survey Form Template
Next, click Forms > New Form from the left-hand menu.
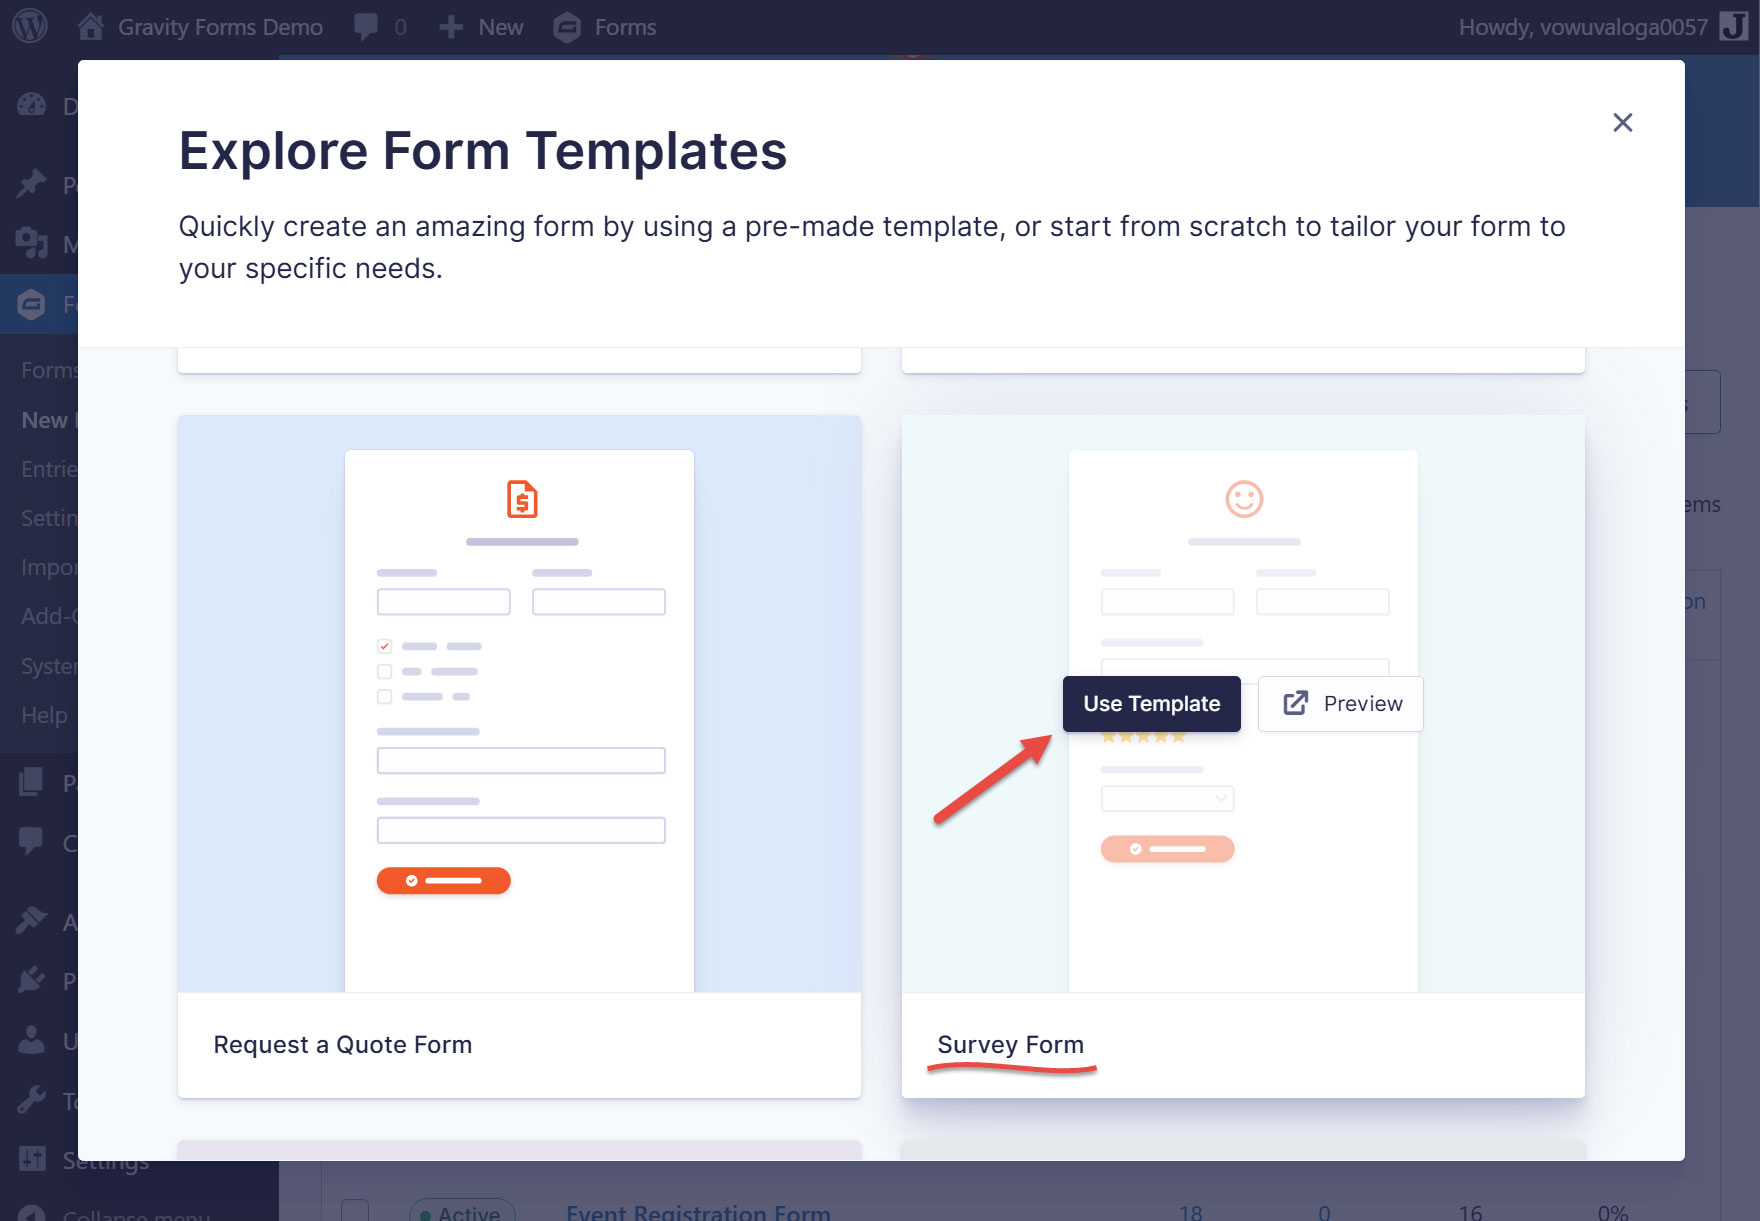
Once the template library is displayed, locate the Survey Form option and click Use Template.
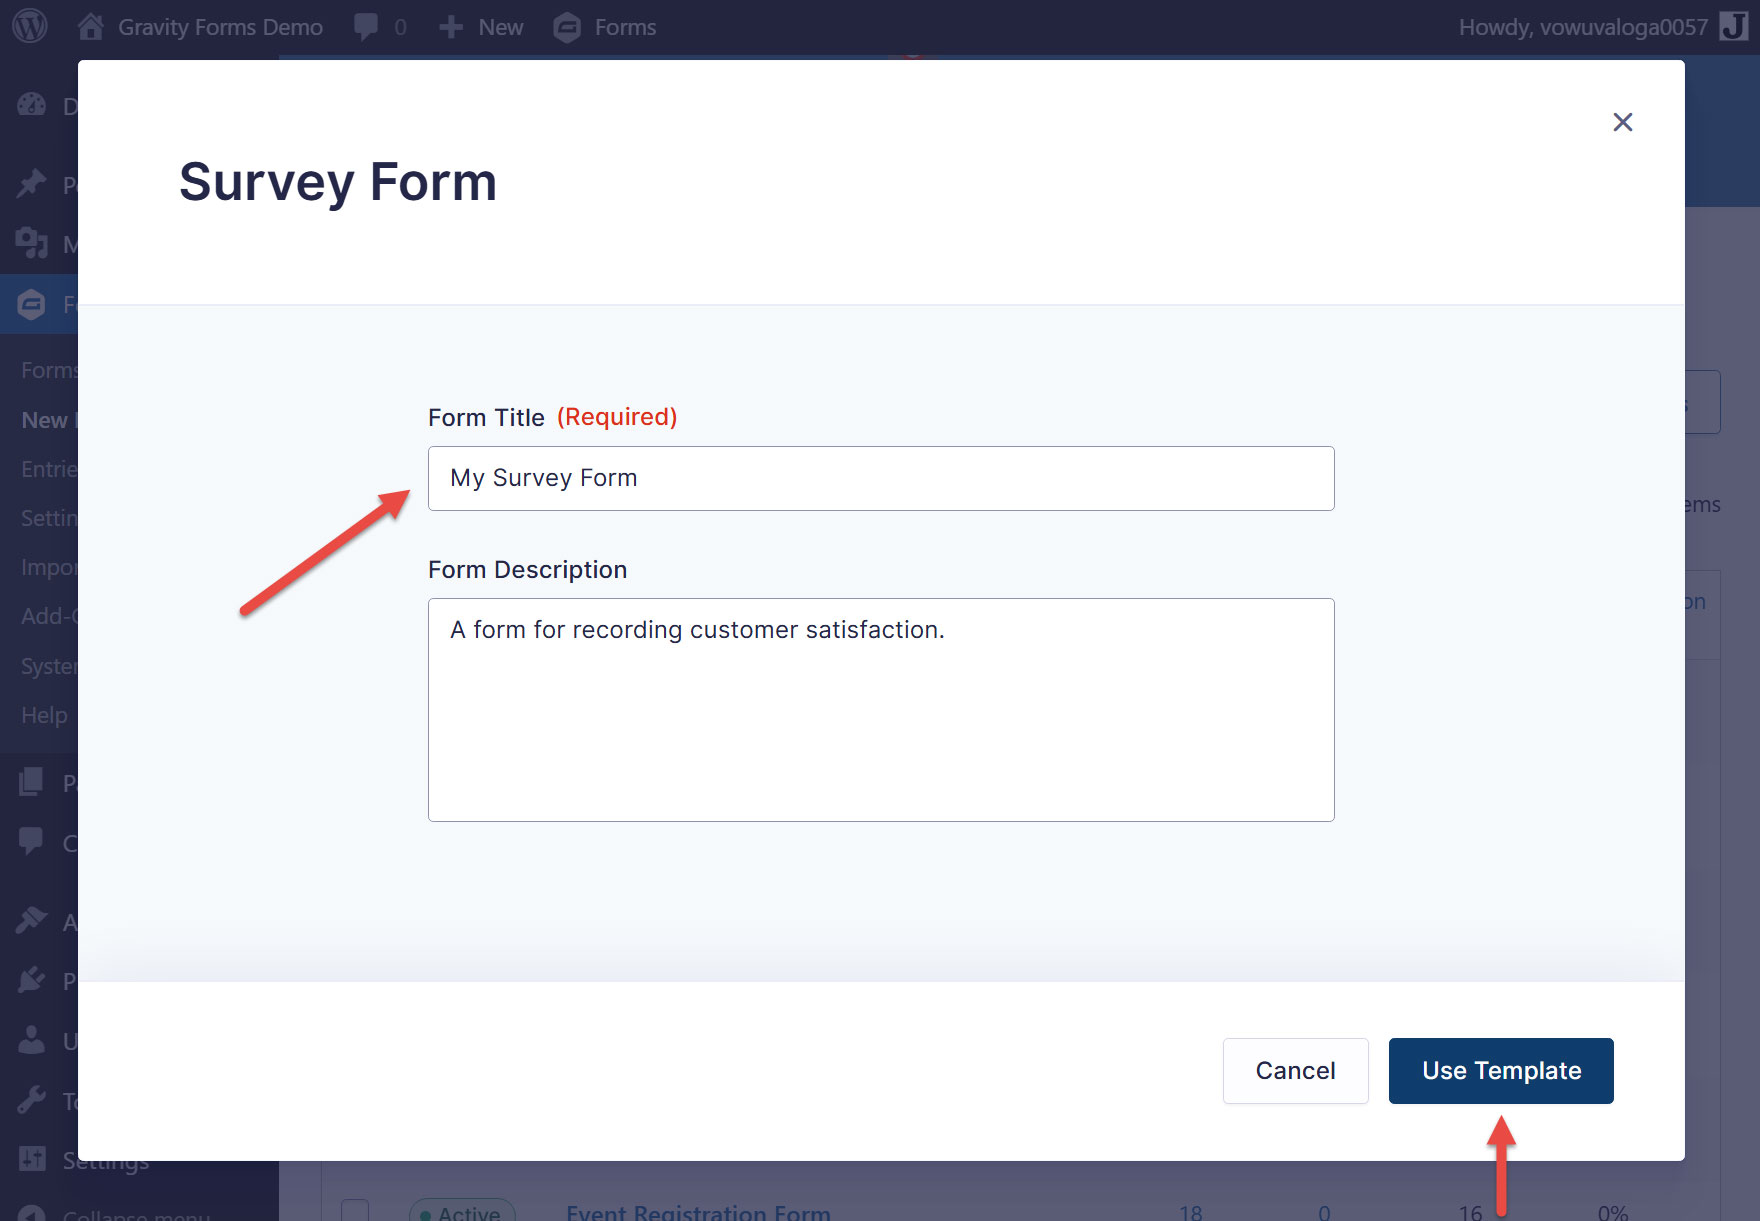
On the next screen, give the form a name and optional description. Then click the Use Template button.
The template will then be displayed in the Gravity Forms form editor. From there, you can customize the survey to match your needs. Add more Survey fields, delete the ones you don’t want to use, change the survey field types, and create your questions.
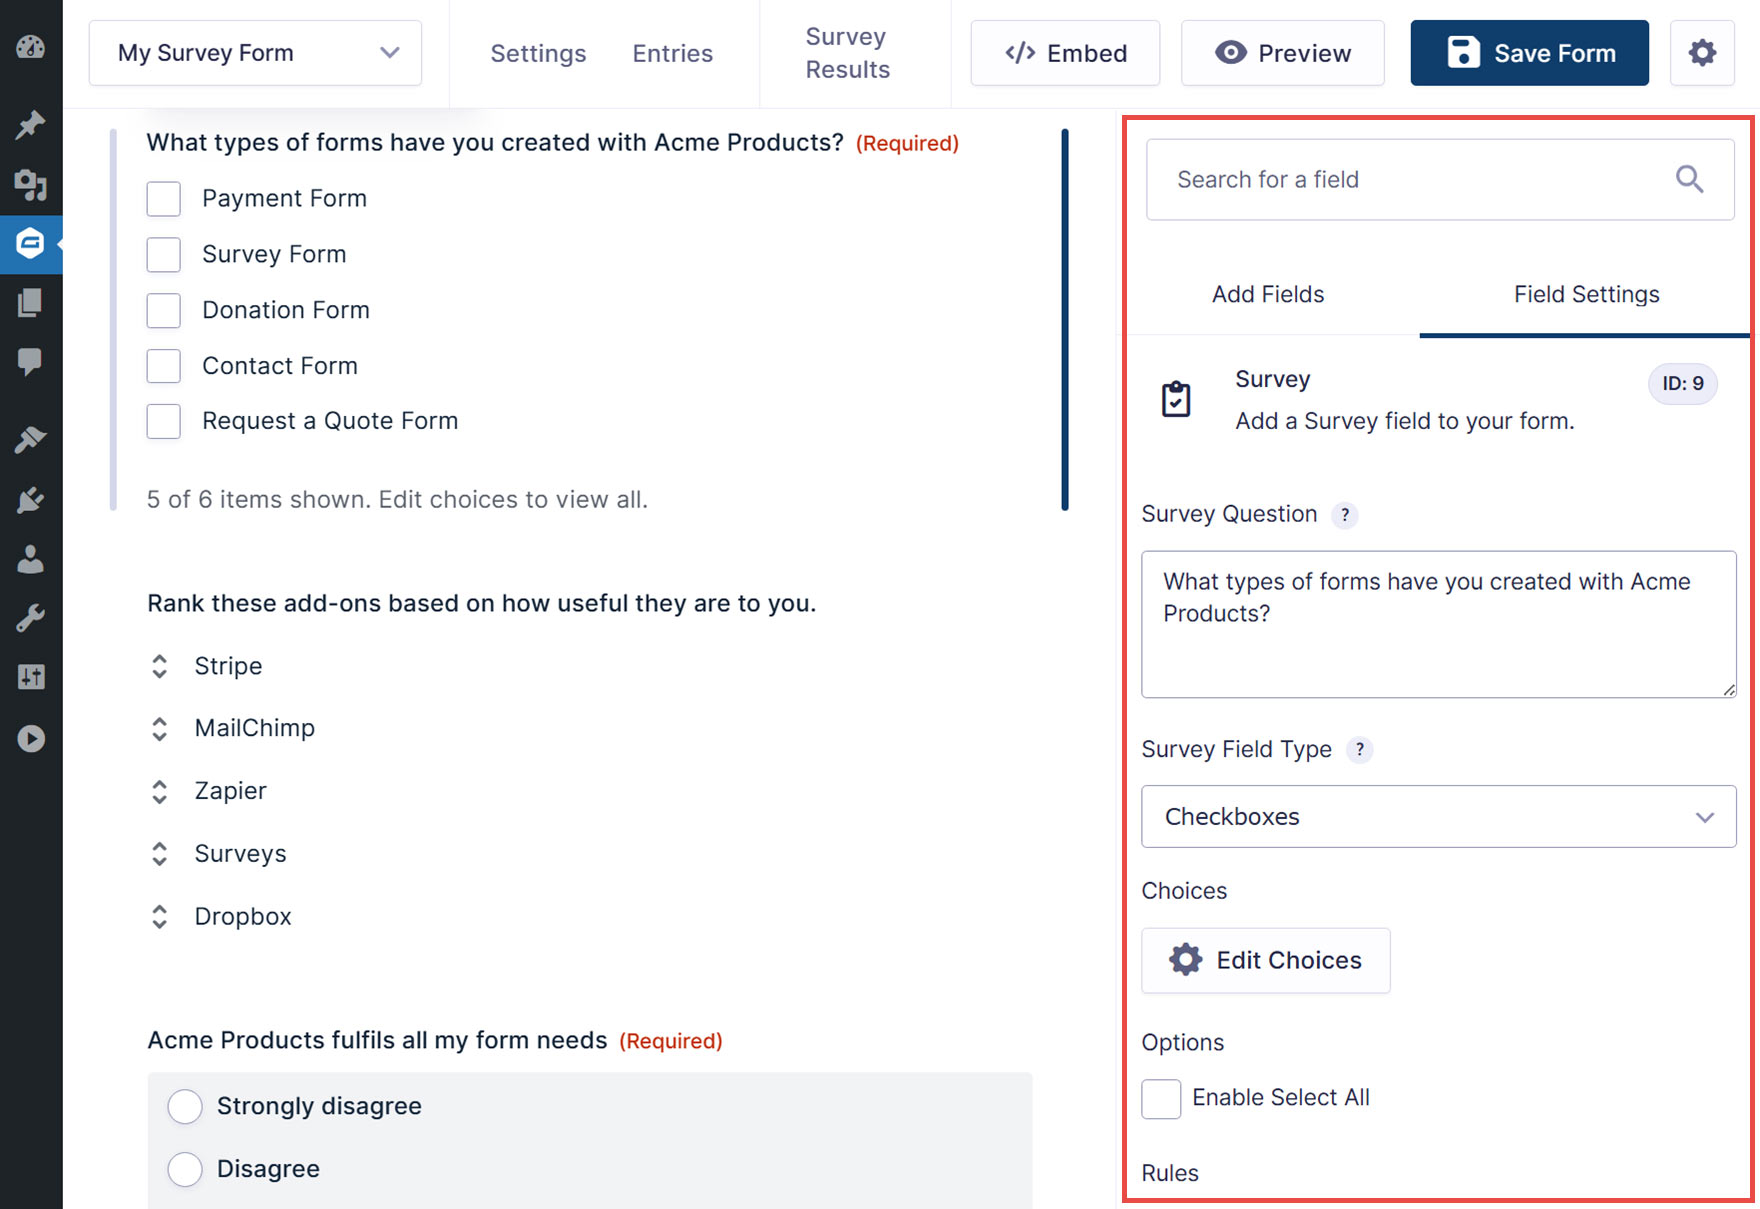
If your survey is lengthy, we recommend that you create a multi-page form using the Page field to help improve the user experience. Within the form editor, you can also use conditional logic to show and hide fields based on user inputs to other fields.
Gravity Forms displays a confirmation message to form users after a form has been completed, which you can customize. The plugin will also send email notifications to the form user and site owner by default, but these can be customized, too. As discussed earlier, you can sync your survey form with other add-ons, such as Mailchimp, HubSpot, or Zapier, to name just a few.
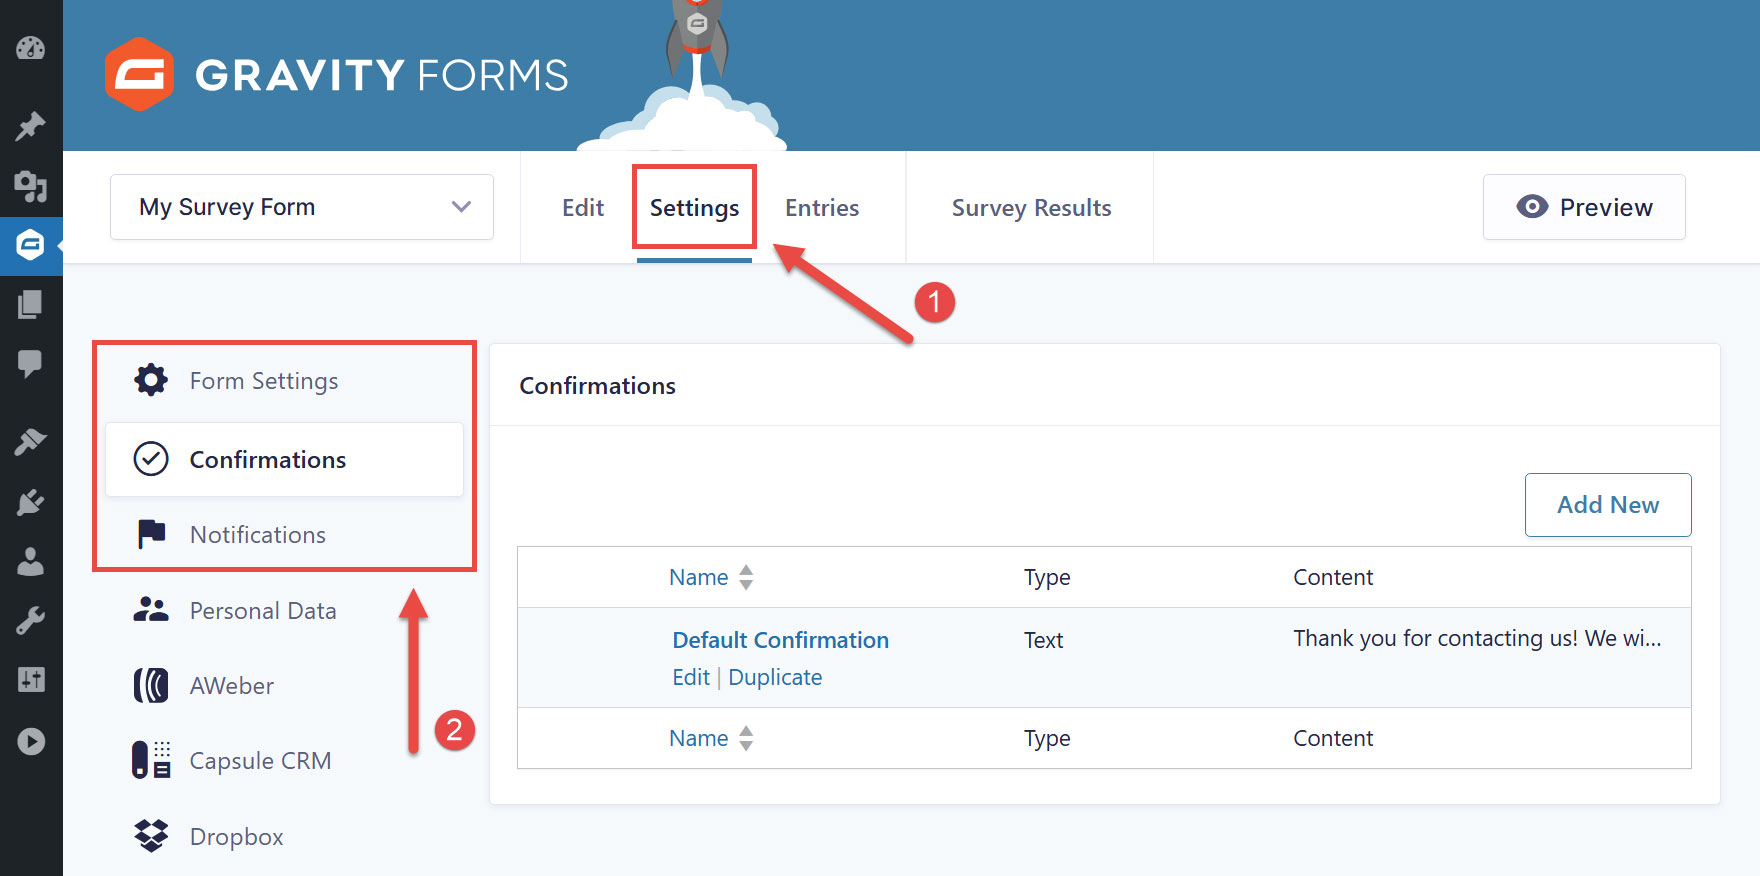
Once you have finished configuring the form settings, click Edit to return to the form editor. Then, click Preview to check the form, and then click Save Form when you are happy!
Step 3: Embed your Survey in a Web Page
The last step is to embed your survey on a page of your WordPress website. If you’re using the now default WordPress block editor, you can use the Gravity Forms block to add the survey to a page or post.
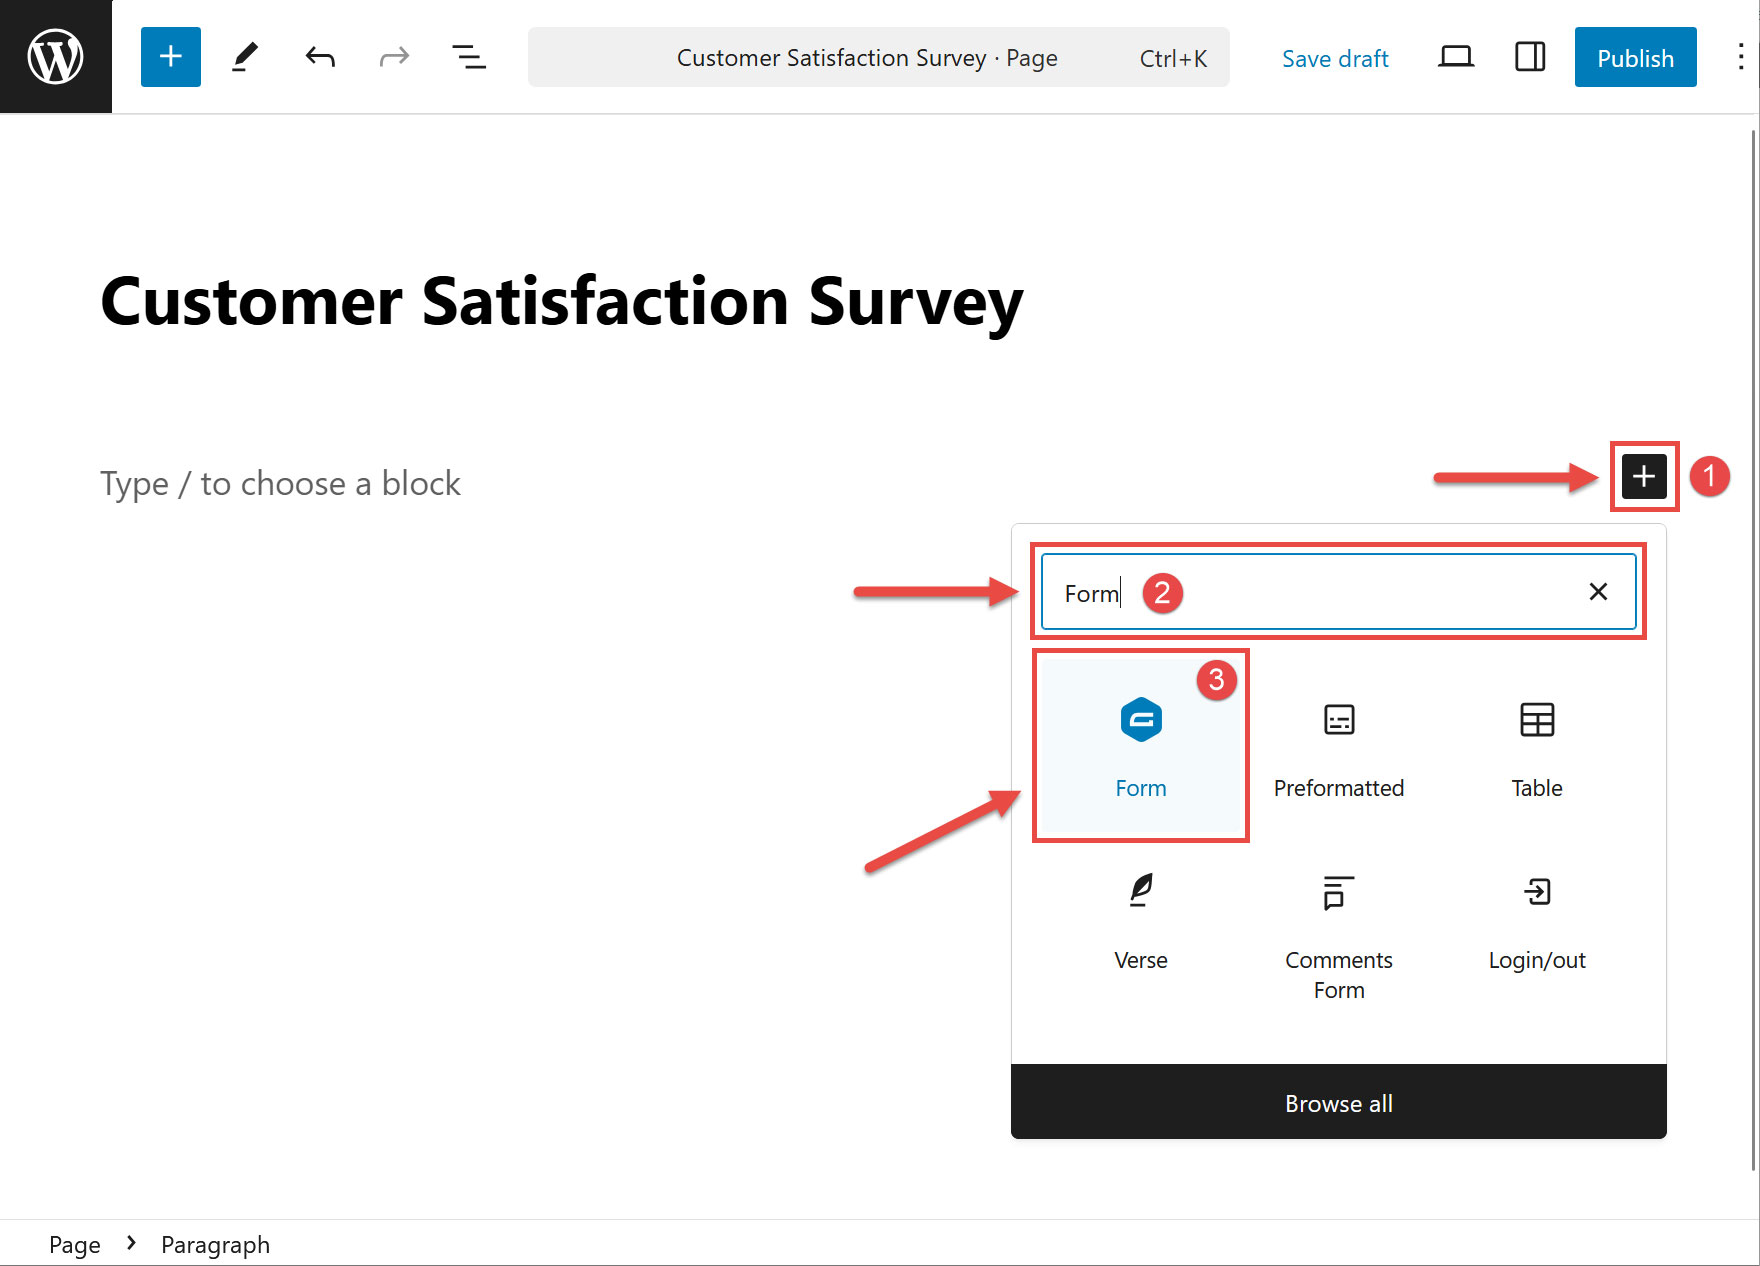
To do so, navigate to the page where you want to add the survey or create a new page (Pages > Add New Page). Then, within the page editor, click the Plus sign and search for Form. Then, click on Form. This will insert the Gravity Forms block.
Lastly, select the customer satisfaction survey form you just created from the drop-down menu. This will insert the survey form into the page.
If you’re not using the block editor, you can still embed your survey in a page using the Classic editor. To do so, view the instructions in the Gravity Forms documentation. You can also embed a form into a post or page directly from the Gravity Forms form editor.
Further Resources
Want to learn more about creating an effective survey with the Gravity Forms Survey Add-On? These resources can help…
- How to Improve Your Survey Form Response Rate
- This Month’s Feature Add-On… Survey.
- Gravity Forms Survey Add-On Documentation
Don’t Have Gravity Forms Yet?
If you don’t have Gravity Forms or the Survey Add-On, don’t worry. You can still test out everything in this article for free inside your own personalized Gravity Forms demo and see why Gravity Forms is the top choice for WordPress sites worldwide.
Already in love? Purchase our premium WordPress form plugin today!
Newsletter
If you want to keep up-to-date with what’s happening on the blog sign up for the Gravity Forms newsletter!
"*" indicates required fields