Want to create a restaurant order form for your business so that customers can place online orders for takeout and/or delivery?
Creating an online order form for your restaurant is a great way to make it easier for people to place their orders (and boost your sales as a consequence).
In this post, you’ll learn step-by-step how to create your own custom restaurant order form using Gravity Forms and WordPress – no technical knowledge needed.
You can customize all of the form fields that appear, add pictures of your menu items, accept online payments, and lots more.
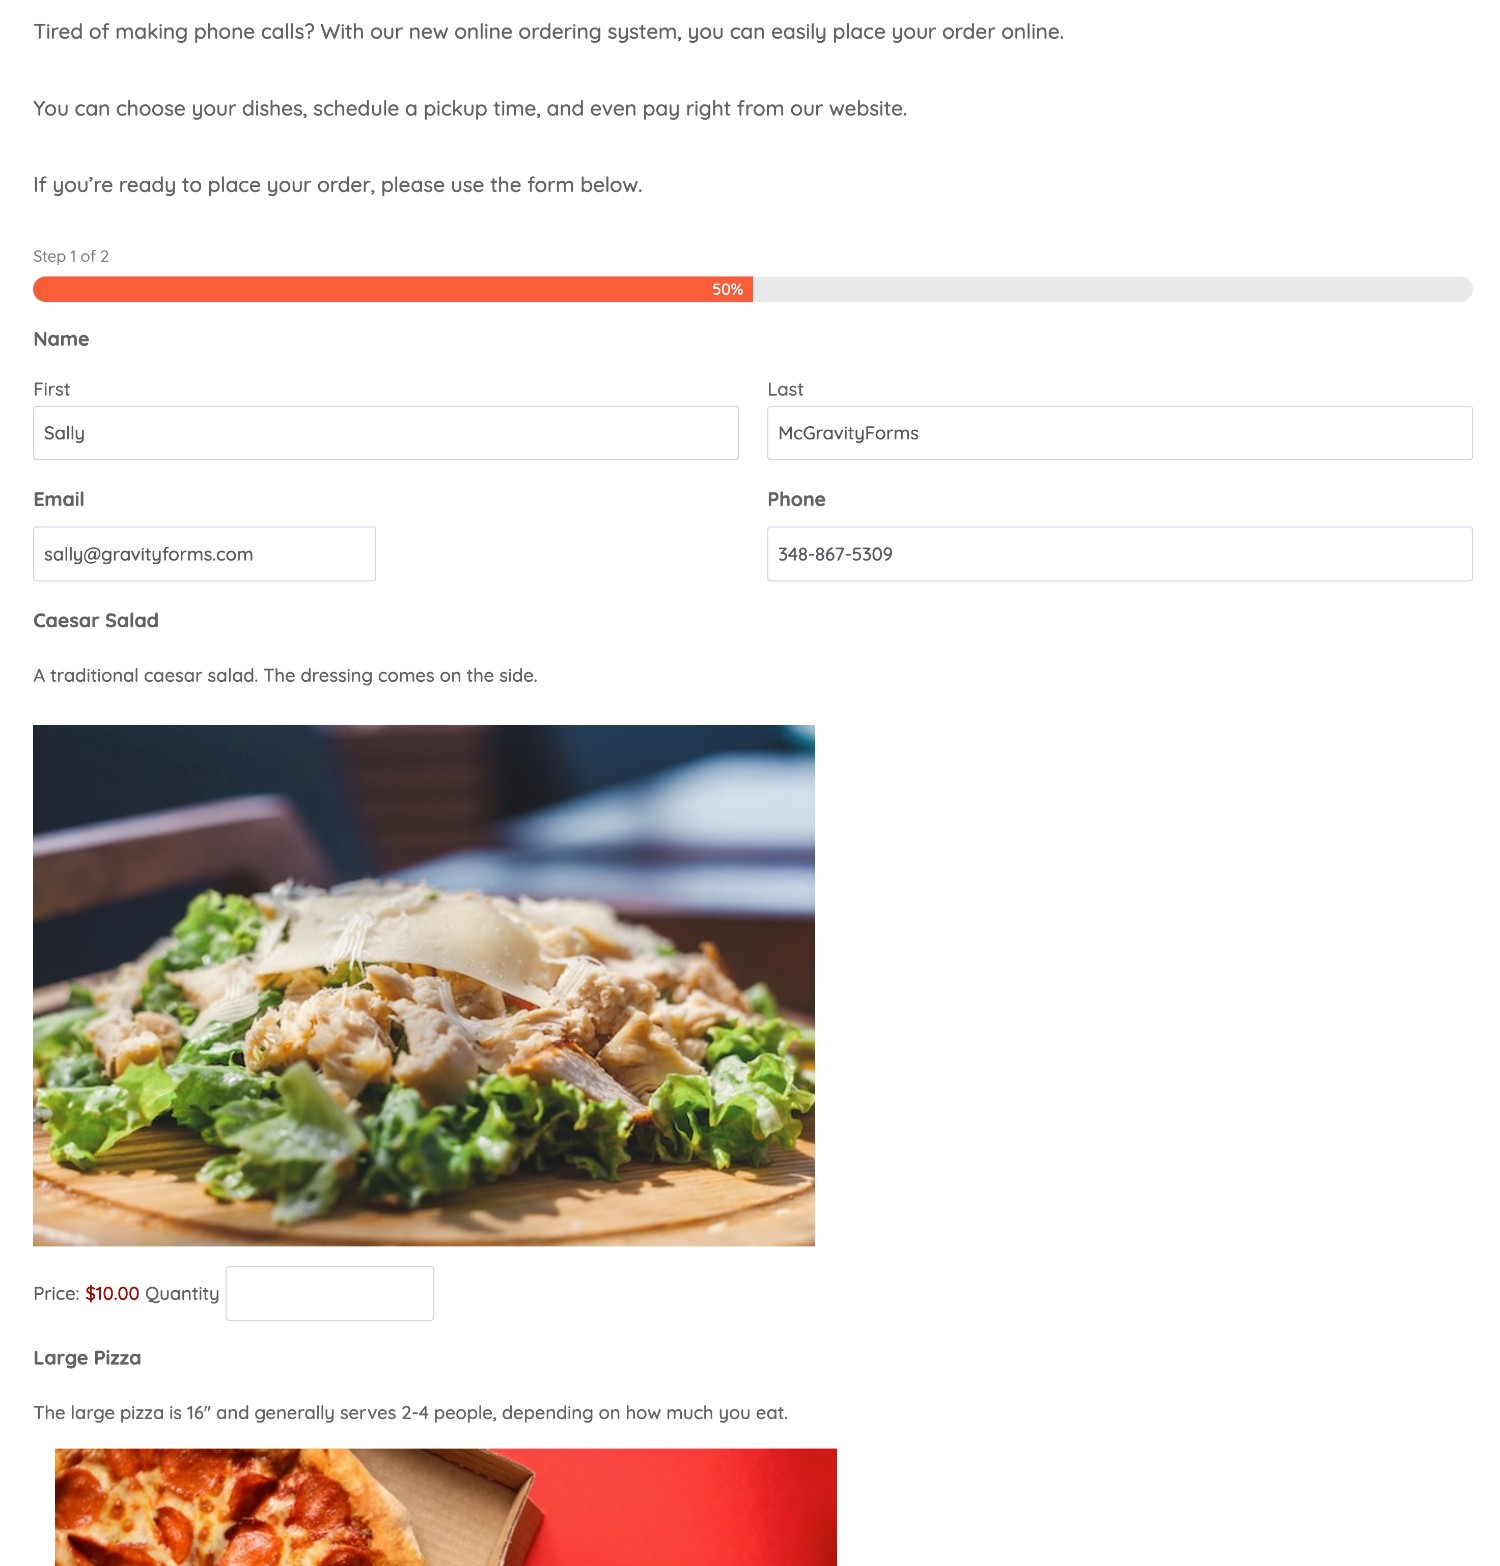
Here’s a small example of what part of your form might look like – but again, you’re free to customize all of this using a drag-and-drop editor:
Ready to learn how to build your own custom online restaurant order form? Let’s jump in!
WordPress and Gravity Forms for Your Restaurant Order Form
When it comes to creating a restaurant order form, Gravity Forms and WordPress offer the best approach when it comes to balancing ease of use, flexibility, control, and cost-effectiveness.
You can use WordPress to create the underlying website for your restaurant. Then, you can add the Gravity Forms plugin to create a fully custom restaurant ordering form, including processing online payments.
Here are some of the main reasons why Gravity Forms works well for a restaurant order form:
- Non-technical + drag-and-drop builder – you don’t need any special technical knowledge to set up your restaurant order form using the drag-and-drop builder.
- Fully customize your forms – you can fully customize your forms to control how much information to collect and display your menu in an optimal way.
- Accept online payments – you can easily let your customers pay online using well-known payment processors like Square, Stripe, PayPal, and more.
- Add important restaurant features – you can add other important features like a pickup/delivery time selector, SMS notifications when an order is ready/out for delivery, and more.
- Integrate with other tools – you can integrate with other tools that your restaurant is using such as email marketing services, CRMs, fulfillment tools, and more.
- Create unlimited forms – in addition to creating unlimited restaurant order form templates, you can also build other forms that your restaurant needs such as contact forms, newsletter signup forms, and more.
Additionally, Gravity Forms and WordPress offer a great restaurant order form solution regardless of where you’re at with your restaurant’s online presence:
- New restaurant just starting up – if you’re just setting up your restaurant’s online presence, Gravity Forms can help you get started on the right track, while also letting you set up the other forms that your business might need.
- Existing restaurant looking to sell online – if you’ve already set up a WordPress site for your restaurant but you don’t have online ordering functionality, Gravity Forms offers an easy way to add that to your site.
- Existing restaurant that wants to improve its digital experience – if you’re already selling online but you feel limited by your current restaurant ordering system, Gravity Forms can offer a more flexible way to build a system that works for your specific restaurant.
How to Create a Restaurant Order Form on WordPress
Now that you have some background on Gravity Forms, let’s get into the more actionable part of this post where we show you step-by-step how to create your first restaurant order form.
If you’d rather test out this tutorial before setting up a live ordering form, you can also create a fully functioning Gravity Forms demo site to follow along with this tutorial in a sandbox environment.
Once you’ve learned how Gravity Forms works, you can purchase a Gravity Forms license to set up a live restaurant ordering form on your own website.
Let’s get into the tutorial…
1. Create Your WordPress Site and Install Gravity Forms
If you don’t have a WordPress site for your restaurant yet, the first step in the process is to create your site.
You can create your WordPress site by purchasing web hosting and installing the WordPress software. Once you have a working WordPress site, make sure to also install the Gravity Forms plugin on your site.
If you don’t have a Gravity Forms license yet, we recommend purchasing at least the Pro license if you want to accept online payments.
2. Create a New Form
Once you’ve installed Gravity Forms on your WordPress site, you’re ready to jump into creating your restaurant order form.
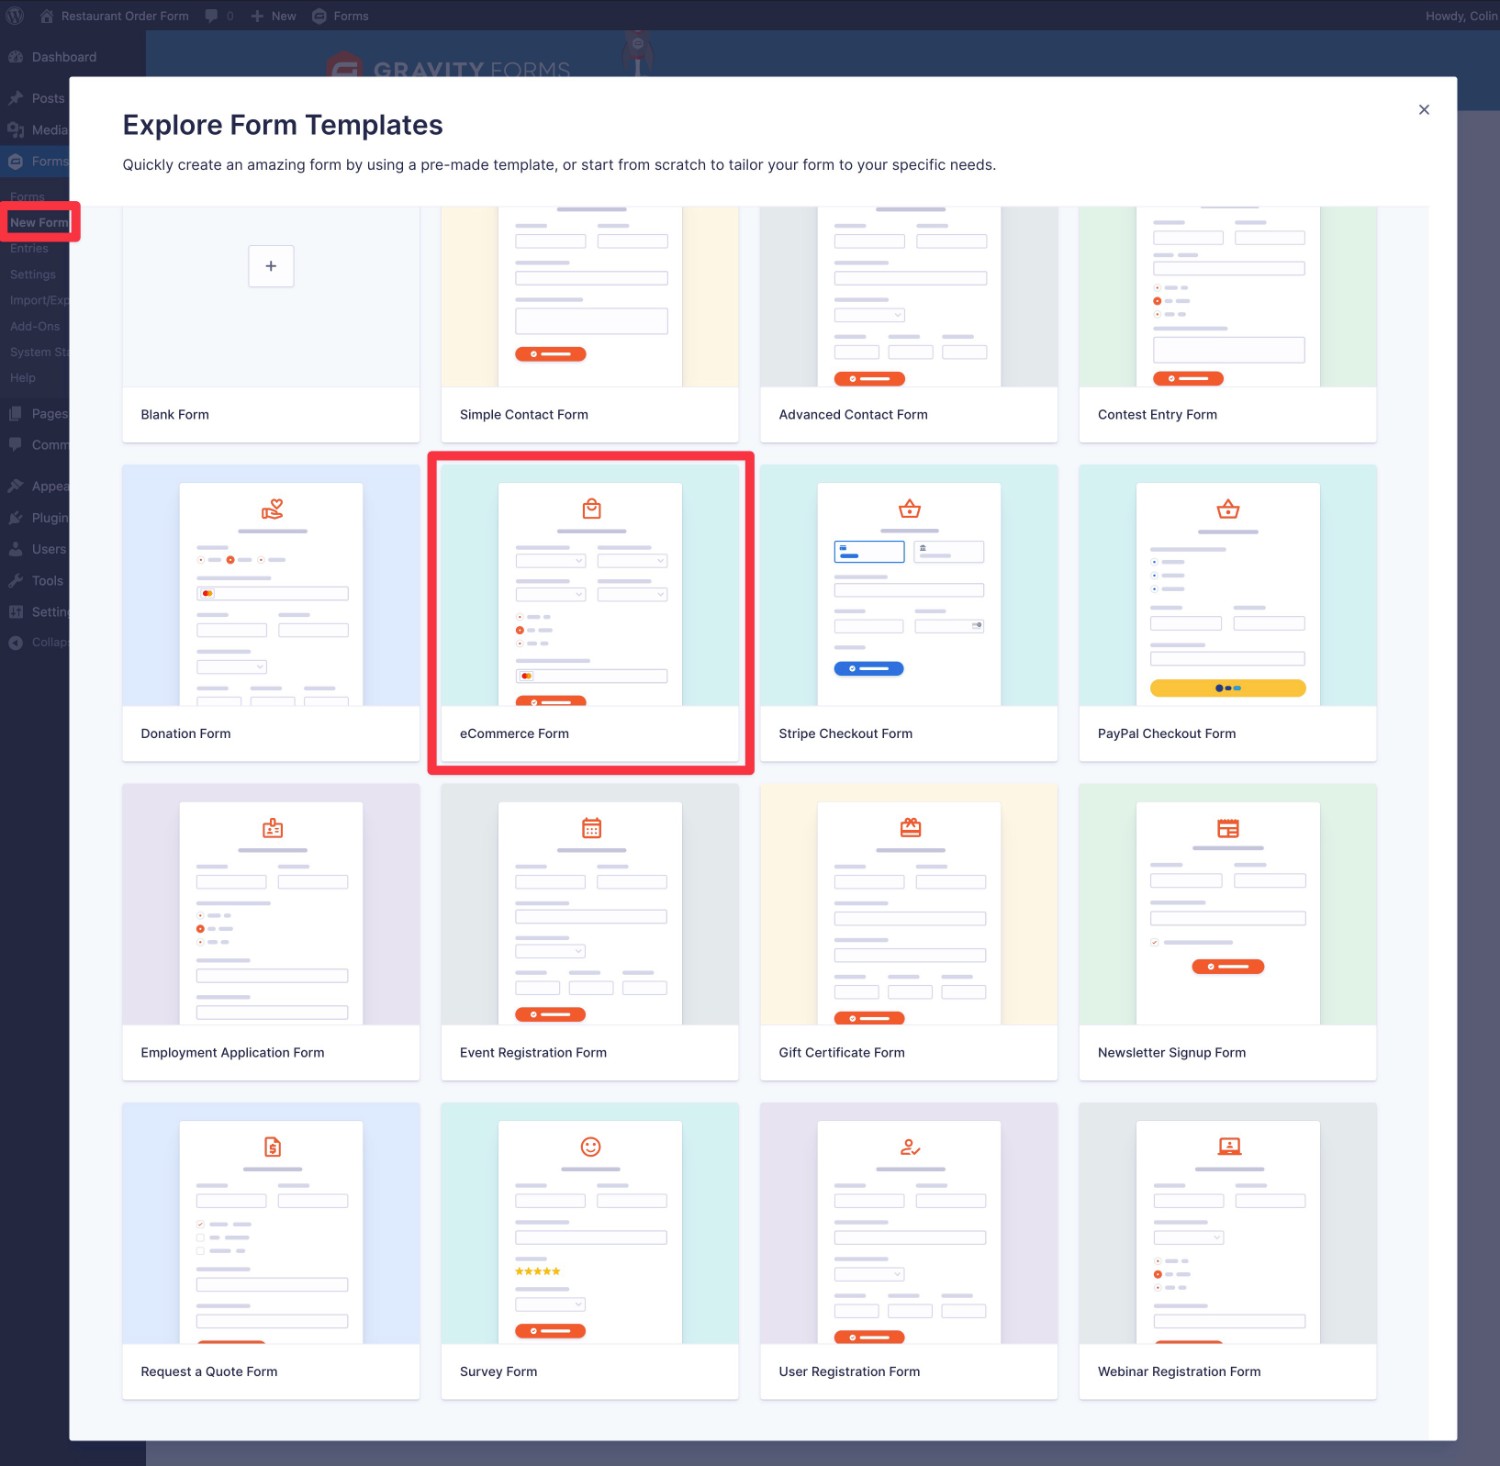
To begin, go to Forms → New Form in your WordPress dashboard.
You’ll then see a bunch of pre-made form templates that you can use as your form’s base, as well as a blank option.
While Gravity Forms doesn’t have a dedicated restaurant order form template, you can use the eCommerce Form template as a starting point to save some time.
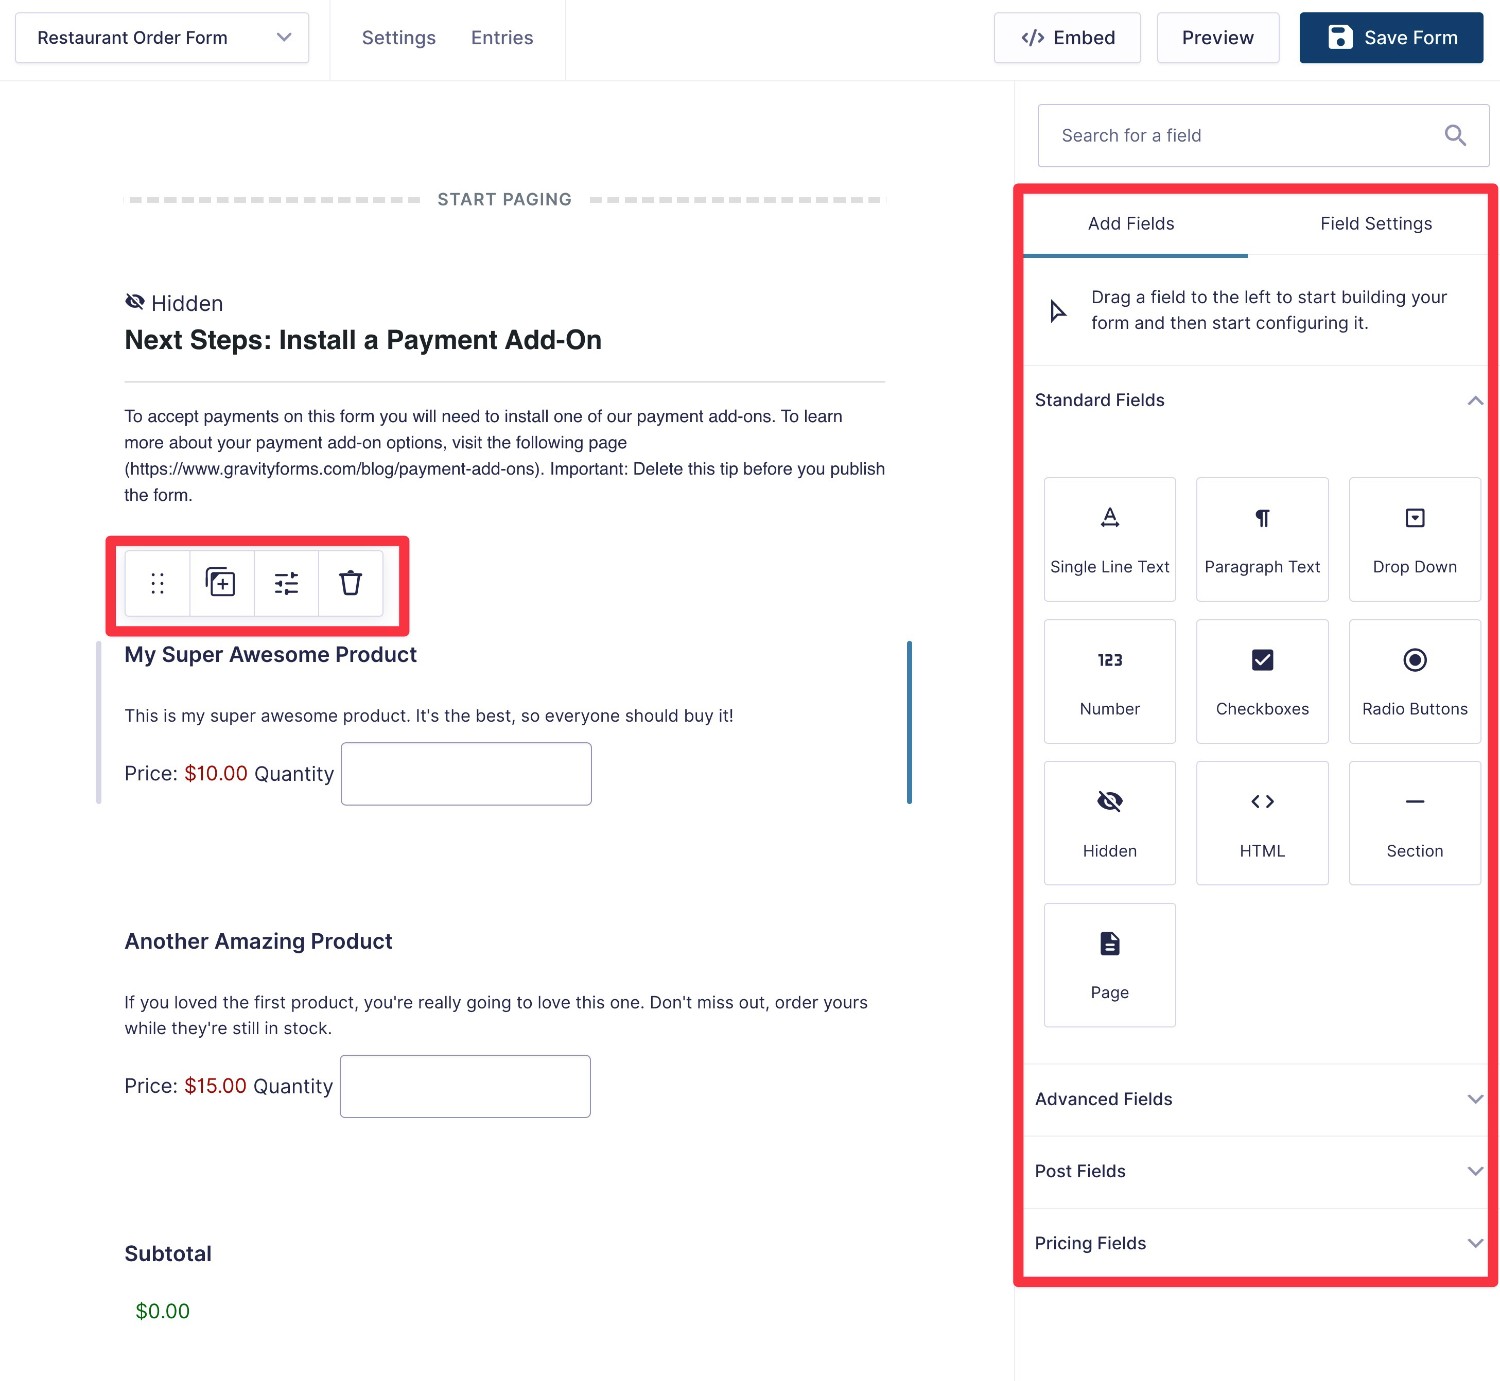
You’ll then be in the drag-and-drop form builder. Here are some things that you can do:
- Add new form fields by dragging them over from the sidebar on the right.
- Delete existing form fields by hovering over them and clicking the trash icon in the toolbar (you might want to delete some unnecessary fields if you used a template).
- Edit a field’s settings by hovering over it and clicking the settings option in the toolbar.
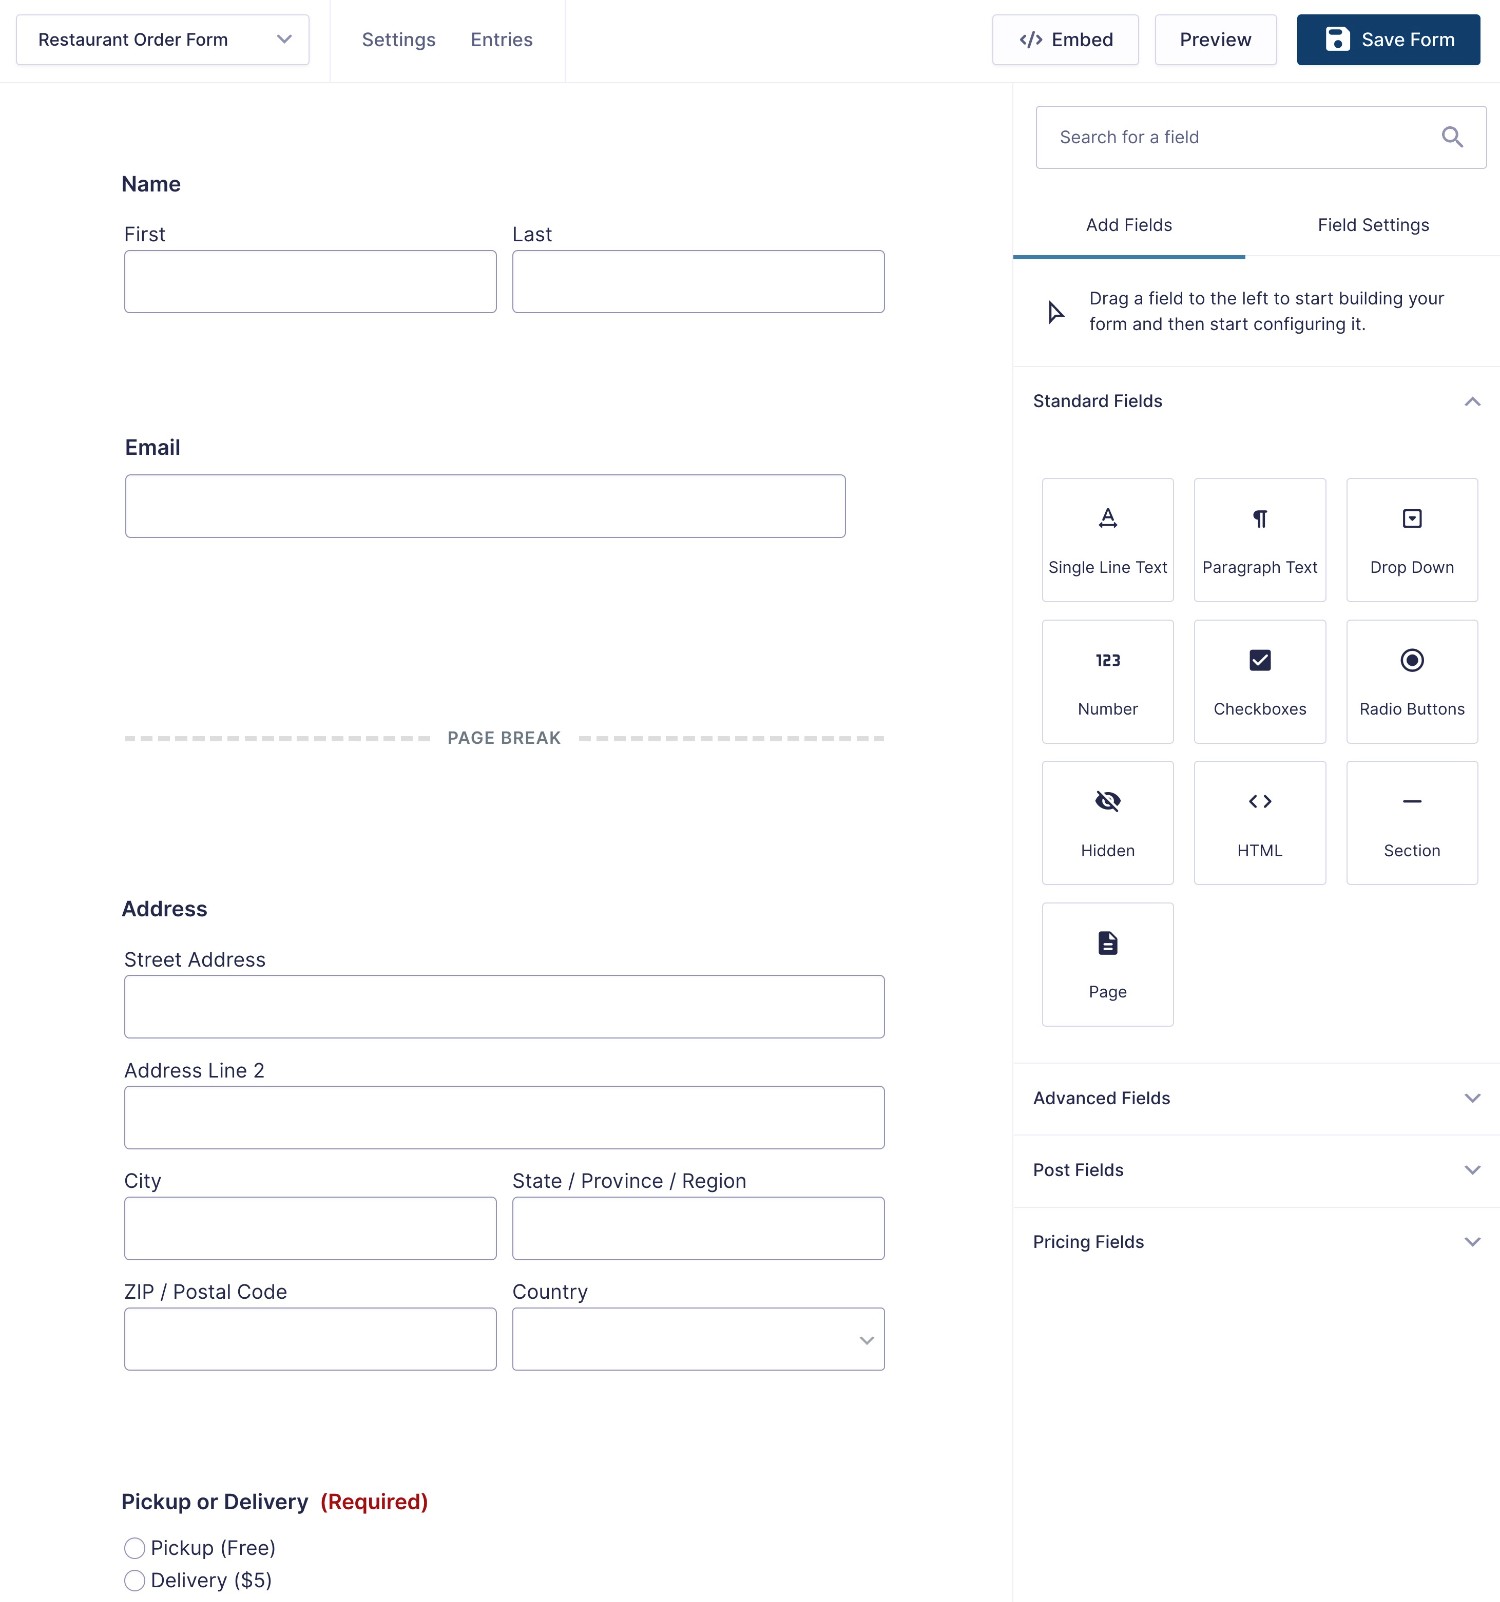
Add Personal Information Fields
To start, you’ll probably want to collect basic personal information from your customer, such as their name, email address, and phone number. If you offer food delivery, you’ll also need the customer’s address.
Beyond that, you’re free to collect any custom information that you need.
Add Your Menu Items
In addition to collecting basic information about your customer, you’ll also need to get their order details.
To add your food menu to the form, you can use product fields. This will let you accurately calculate the total price for the order, including accepting online payments.
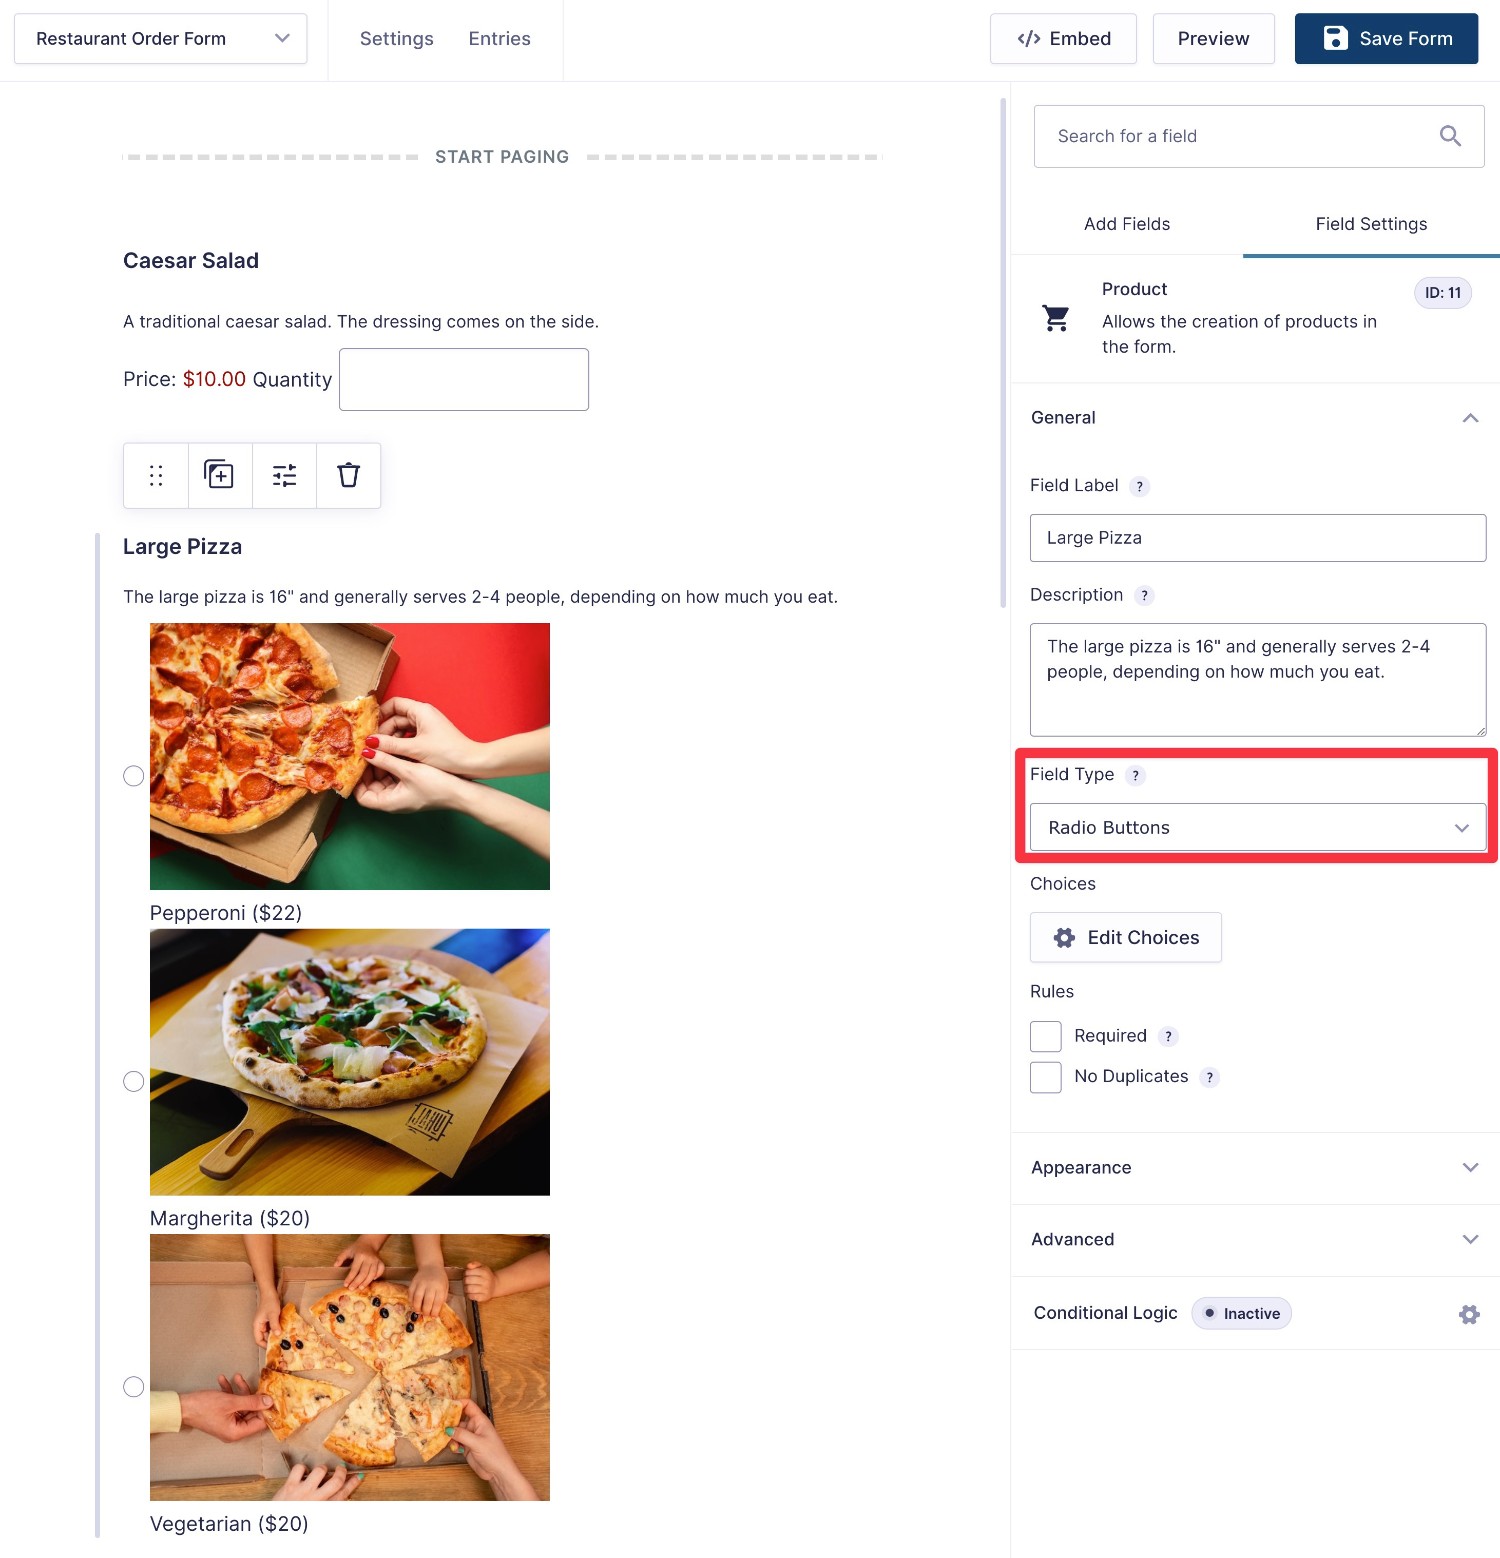
You can add separate product fields for each dish. Or, you can display multiple options in a single field using drop-downs or radio buttons. You can adjust the Field Type option in the product field settings to choose these different layouts.
For menu items, you might also want to include images of the food as part of the menu. To achieve this, you can add some simple custom CSS as shown in this article or use a third-party add-on like Gravity Forms Image Choices.
Here’s what it might look like for a single product field (Caesar Salad) and a radio button product with multiple options (Large Pizza).
The single product field also has an image, it’s just not visible in the backend editor.
If you want to let people customize their food orders, you can also show additional options using conditional logic.
For example, if a user chooses the “Build Your Own Salad” option, you could show new product fields using conditional logic. You can also add order notes fields using a similar approach.
Add Other Fields As Needed
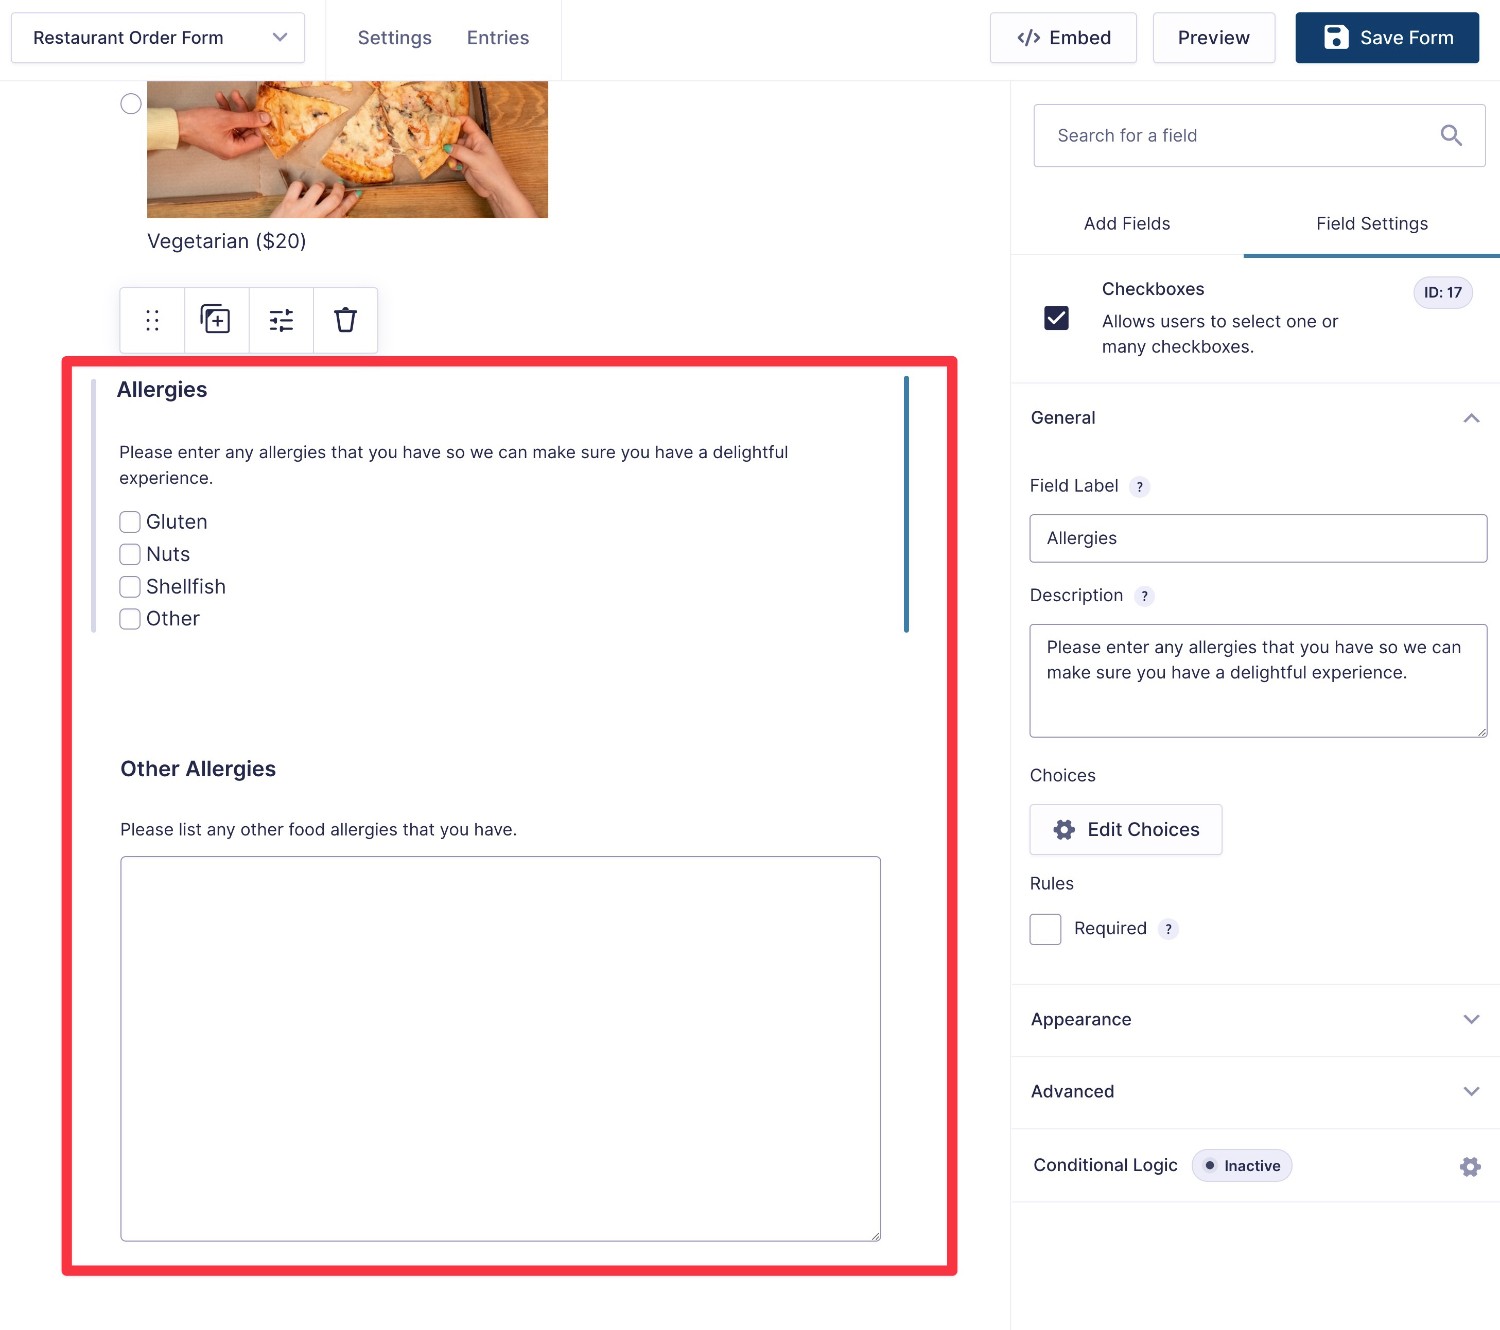
Beyond what we’ve covered, you might want to add some other fields to further customize your restaurant order form template.
For example, you might add a field that lets people note any allergies. You could list some common options and then add an “Other” option using conditional logic to let people enter their own allergies.
Over the next steps, we’ll talk about some other ways to extend your restaurant takeout form, such as accepting online payments and adding an option for pickup times.
3. Set Up Your Payment Provider (If You Want to Accept Online Payments)
This next step is optional…
However, if you want to accept online payments on your restaurant order form, you’ll need to set up a payment provider such as Square, Stripe, or PayPal to do so.
Accepting online payments can ensure you have the money before you start prepping the food and it can also be more convenient for your customers.
To add payment processing functionality to your form, you’ll first want to install the add-on for that provider. Gravity Forms supports six different payment processors, and you can access most of these add-ons on the Gravity Forms Pro license.
We’re going to use Square for this example because there’s a good chance your restaurant could already be using Square for in-person payments. However, the same basic principles will apply to the other payment processors that Gravity Forms supports.
Connect to Square
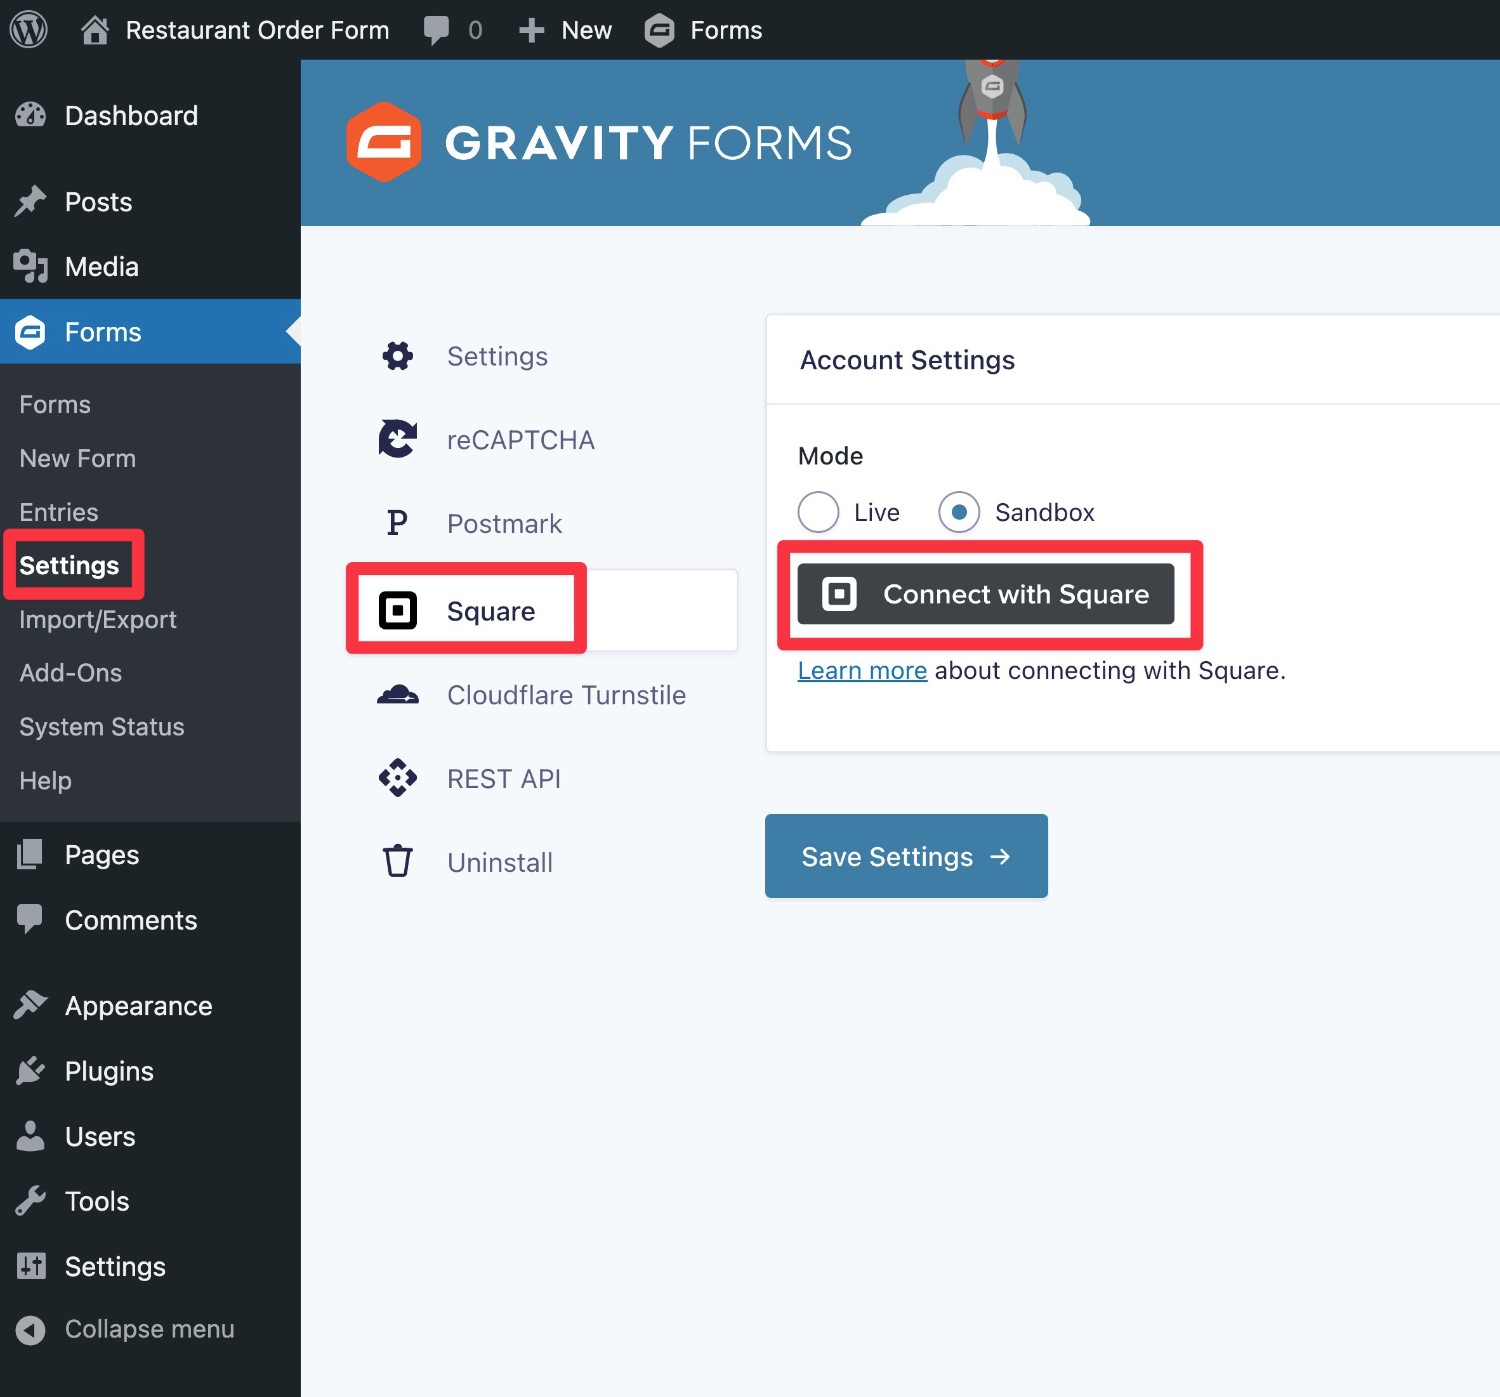
To get started:
- Register for a free Square account if you don’t already have one.
- Install the Gravity Forms Square Add-On (instructions here).
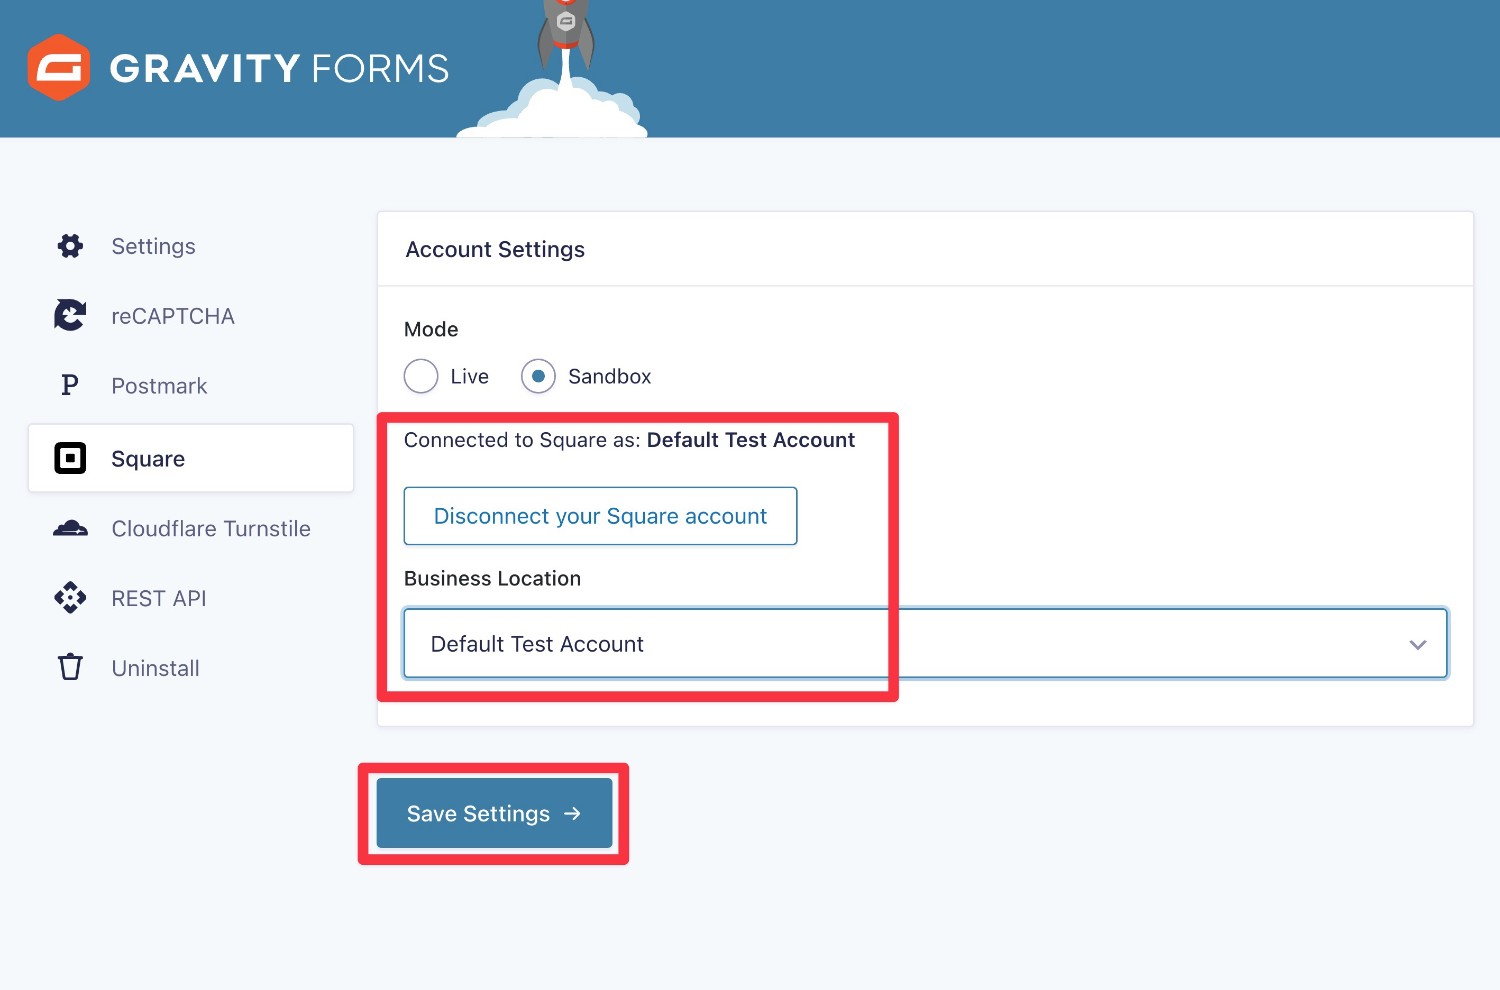
- Go to Forms → Settings → Square.
- Click the Connect with Square button to connect your account. You can start in Sandbox mode to test things, but make sure to enable Live mode when you want to accept real payments.
Once you connect, you can choose your Square account (if you have multiple). Usually, you can just leave it as the default. Then, click Save Settings.
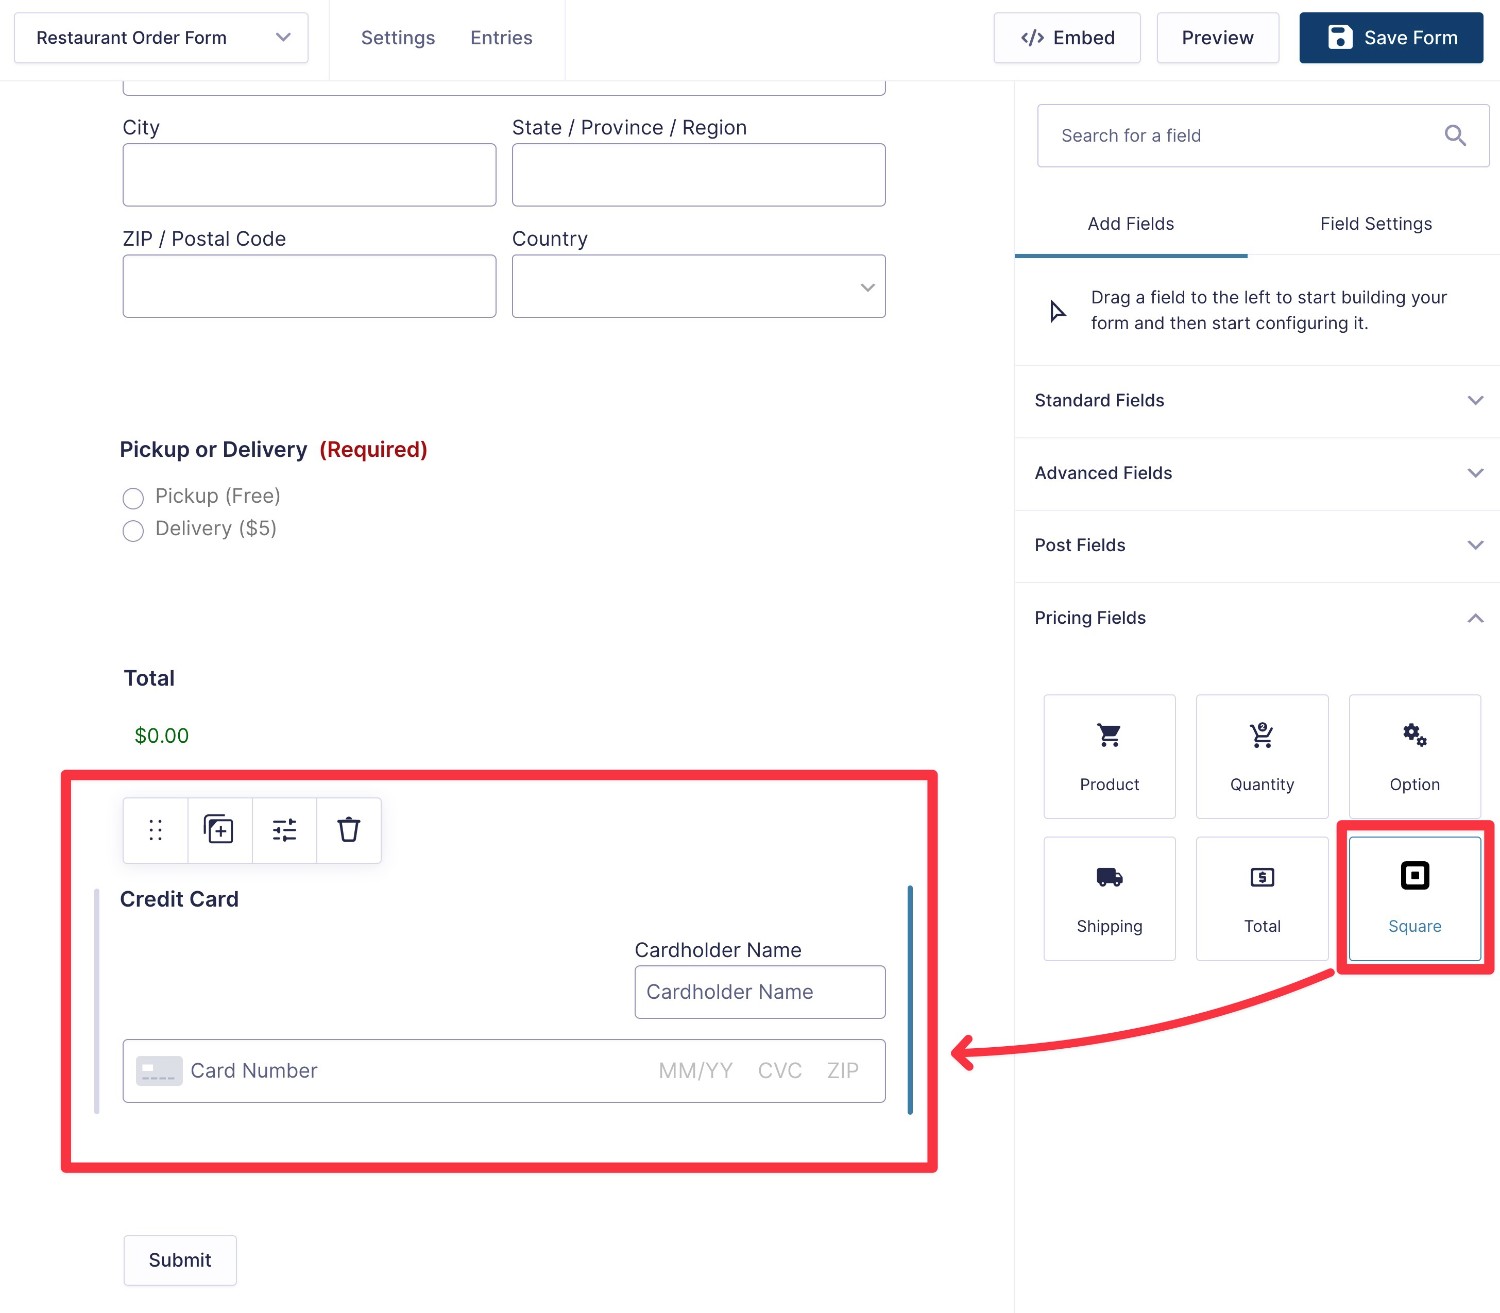
Add a Square Field
Once you’ve connected to Square, go back to the form editor for your restaurant order form.
Then, add the Square field where you want your customers to enter their credit card information (usually at the bottom of the form).
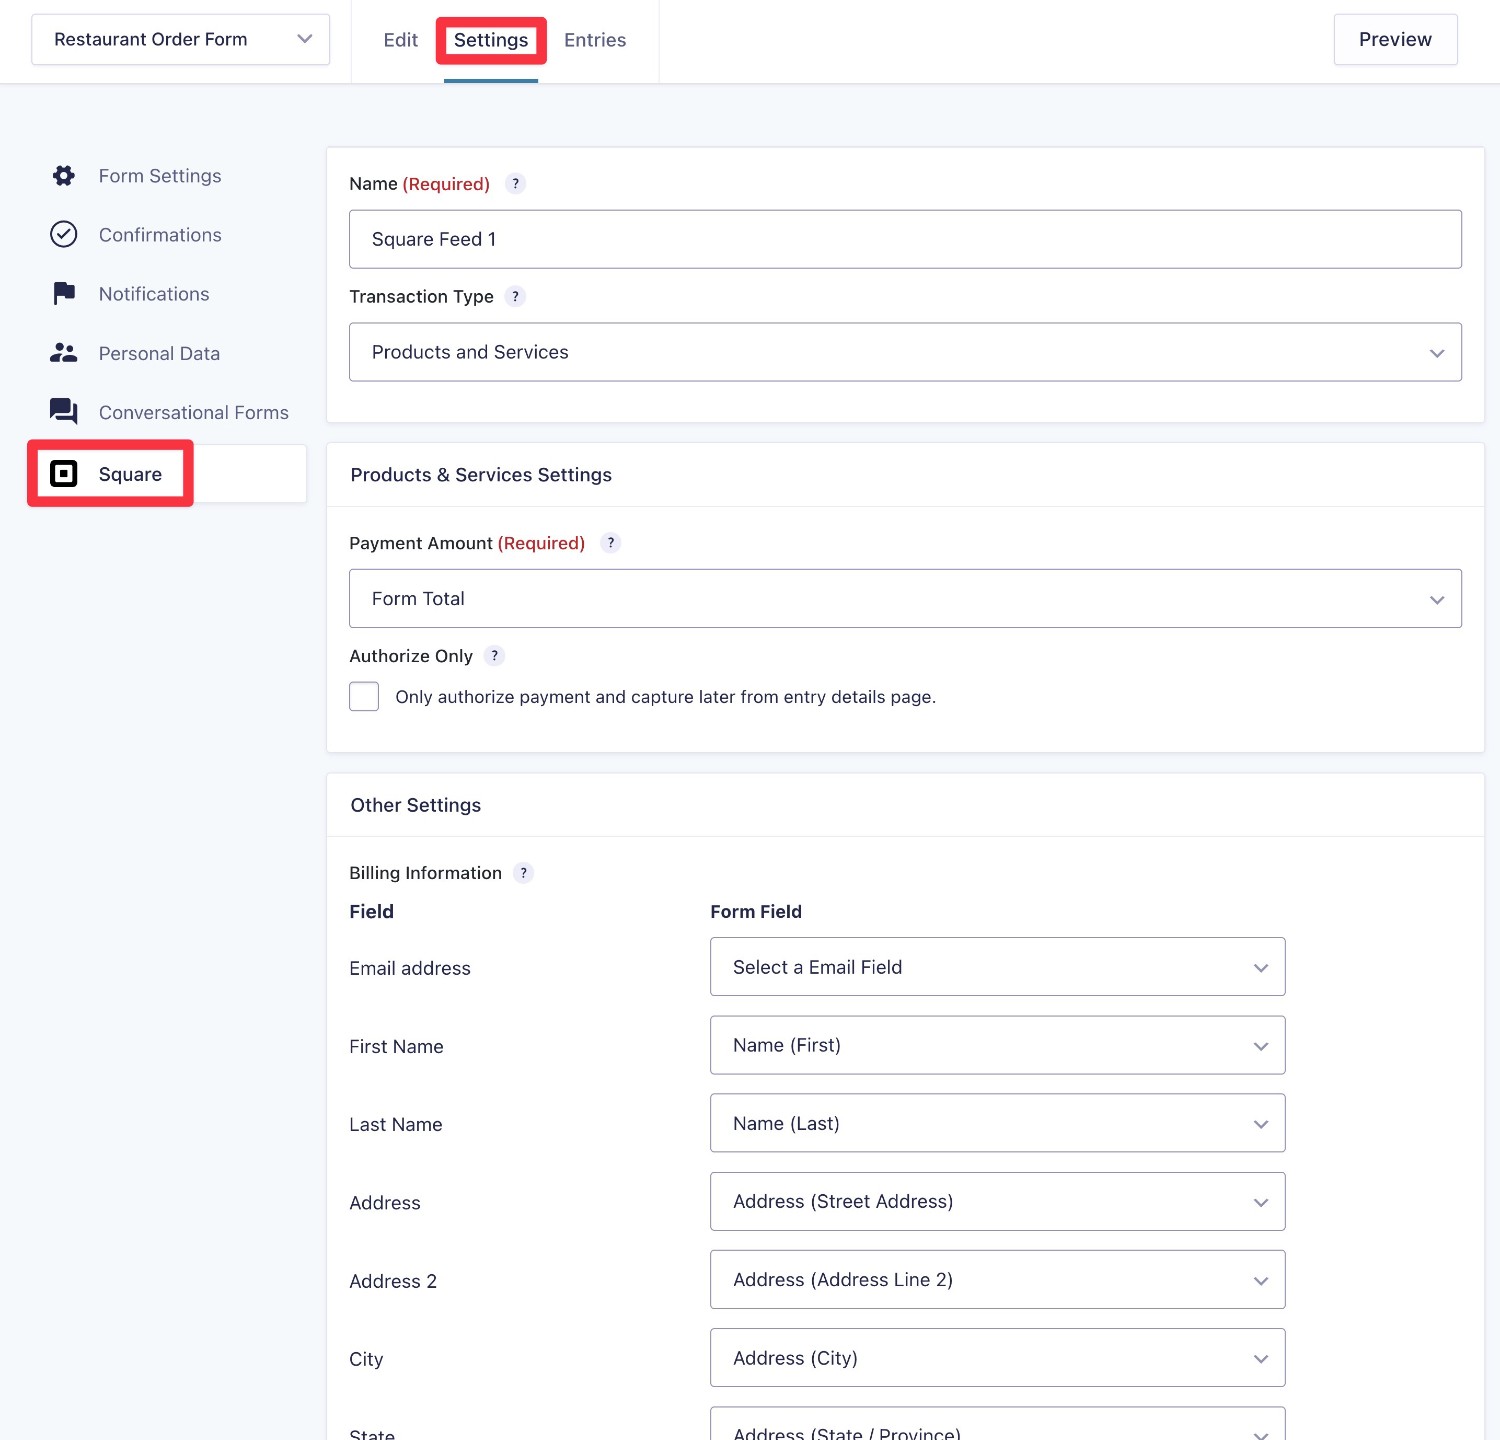
Set Up a Square Feed
To finish things out, go to Settings → Square and create a “feed” for Square. Essentially, this tells your form how to process payments via Square.
For more details on how this works, check out the full Square payment feed documentation.
4. Enhance Your Restaurant Order Form As Needed (Including Integrations)
One of the great things about Gravity Forms versus some other restaurant form solutions is that Gravity Forms gives you tons of options to add functionality to your form and/or integrate your form with other services that your restaurant might be using.
Let’s go through a few examples…
Integrate Your Restaurant Order Form With Other Services
Your restaurant might be using other services to stay in touch with your customers and manage your business processes.
For example, you might have an email newsletter where you send people information about your latest promotions, menu changes, events, and so on.
With official and third-party add-ons, you can easily integrate Gravity Forms with these services – browse all of the add-ons here.
Or, if you can’t find a dedicated add-on, Gravity Forms also supports Zapier so that you can connect to any one of the thousands of apps that Zapier supports.
Add New Functionality
Beyond setting up integrations, you can also use official and/or third-party add-ons to extend your restaurant order form with new functionality.
For example, if you allow customers to pick up their orders, you could use the third-party Gravity Perks Add-On to add curbside pickup scheduling to your form. We cover this functionality in our post about Gravity Perks.
Another potentially useful feature is to set up SMS/text message notifications. For example, you could send the customer a text message to let them know that their order has been received and is being prepared.
You can set this up using the official Gravity Forms Twilio Add-On – we have a whole article on how to send WordPress SMS form notifications.
If you want to build more advanced workflows, you could add Gravity Flow to the mix, which is another plugin from the Gravity team.
With Gravity Flow, you could send multiple text messages at different points in the process. For example, you could send one text message to confirm the order and another text message when the food is ready for pickup/delivery.
Overall, we encourage you to browse the full library of official and third-party Gravity Forms Add-Ons – you’ll find some really cool ways to enhance your restaurant order form.
5. Embed Your Restaurant Order Form
Once you’re happy with your restaurant order form, the last step is to embed the form on your site so that your hungry visitors can start ordering some food.
You can embed your form using either the Gravity Forms block or the Gravity Forms shortcode:
- Create a new page for your form (Pages → Add New). Or, you can edit an existing page.
- Add the Gravity Forms block.
- Choose your restaurant order form from the block’s settings.
- Add any other content around your form as needed.
- Publish or Update the page to make your form live.

6. Create Additional Restaurant Order Forms (or Other Types of Forms)
Another nice thing about Gravity Forms is that it lets you create unlimited forms and it also supports lots of other form types beyond a restaurant order form.
First off, this lets you create multiple order forms for different use cases. For example, you could have one order form for lunch and a separate order form for dinner. Or, you could create a separate form for larger catering orders.
Beyond that, you can also use Gravity Forms to create non-ordering forms that your restaurant might need, such as a contact form, a newsletter signup form, and more.
Create Your Restaurant Order Form Today
With Gravity Forms, you can create a restaurant order form that matches your restaurant’s unique needs.
You can add as many menu items as needed and process online payments using services like Square or PayPal.
To make your ordering experience more user-friendly, you can add other helpful options like pickup/delivery scheduling, text message alerts, and more.
You’re also free to integrate with other tools that you’re using, such as connecting to your email newsletter system.
If you’re ready to get started, purchase your Gravity Forms license today. We recommend the Pro or Elite license if you want to accept online payments.
Or, if you’d like to test this functionality before you make your purchase, you can create a free Gravity Forms demo site to access all of the functionality from this tutorial in your own private test environment.
Square Promotion – Free Processing
Gravity Forms and Square have teamed up to offer an exclusive promotion for new Square customers — enjoy free processing fees for up to 180 days!
Here’s how it works:
- Free Payment Processing – Get $5,000 in credit card transactions processed for free within your first 180 days. After that, standard Square fees apply.
- $20 Off Square Hardware – Receive a $20 discount on Square hardware once you sign up.
To take advantage of this promotion, simply sign up for a Square account using this link and start processing payments with no extra fees.

If you want to keep up-to-date with what’s happening on the blog sign up for the Gravity Forms newsletter!
"*" indicates required fields