Gravity Forms to Microsoft Excel: Export your entries using Zapier

Are you looking for an easy way to send your form entries from Gravity Forms to Microsoft Excel? If so, this is exactly the right tutorial for you.
In this post, we will show you how you can collect, send, and manage information from your web forms in Excel spreadsheets using Gravity Forms and Zapier. You’ll first learn about the benefits of using Gravity Forms and Microsoft’s popular program together. After that, we’ll cover how the Gravity Forms Zapier Add-On can help you easily connect the two.
Follow along and you’ll end up with an active connection between Gravity Forms and Microsoft Excel, and all the benefits that includes.
It is important to note that to use this integration, your Excel workbook must be stored in OneDrive for Business, SharePoint site, or Group Drive.
Why use Gravity Forms and Excel together?
As a first step, let’s talk about the reasons for connecting your web forms with a spreadsheet program. What does Excel allow you to do with your contact and subscriber information?
- Search – If you are looking for particular data sets or information, it’s much easier to find it if you have everything all in one place.
- Sort and filter – Excel can help you better analyze your data, really drill down into it, and easily compare different data points.
- Visualize – You are able to create graphs and charts to process your data in a clearer way.
- Share – Spreadsheets make it easy to share information with people in your organization or other stakeholders. They are easily viewable, without needing to give access to your WordPress website, a marketing dashboard, or similar. That way, you can regularly distribute key reports among departments.
In short, moving your form data over to Excel allows you to take advantage of all the things a spreadsheet program offers for processing large amounts of information. While an email marketing program might do this, too, Excel gives you a lot more control and ownership.
Introducing Zapier and the Gravity Forms Zapier Add-On

Gravity Forms comes with a number of official integrations that allow it to work seamlessly with many third-party apps and services. To further extend the reach and possibilities, we also created the Gravity Forms Zapier Add-On, which is one of our most popular extensions.
As the name suggests, it allows you to integrate your web forms with Zapier, a platform that’s able to connect over 7,000 web apps and services to each other using so-called “zaps”. They allow you to share data between different applications and automate workflows.
For example, you can use it to receive a Slack message whenever a Google Sheet file is updated, automatically share your Instagram photos on LinkedIn, or, in the case of this article, save form submissions from Gravity Forms to Excel. The possibilities are really endless, just have a look at the full list of Zapier-supported apps.
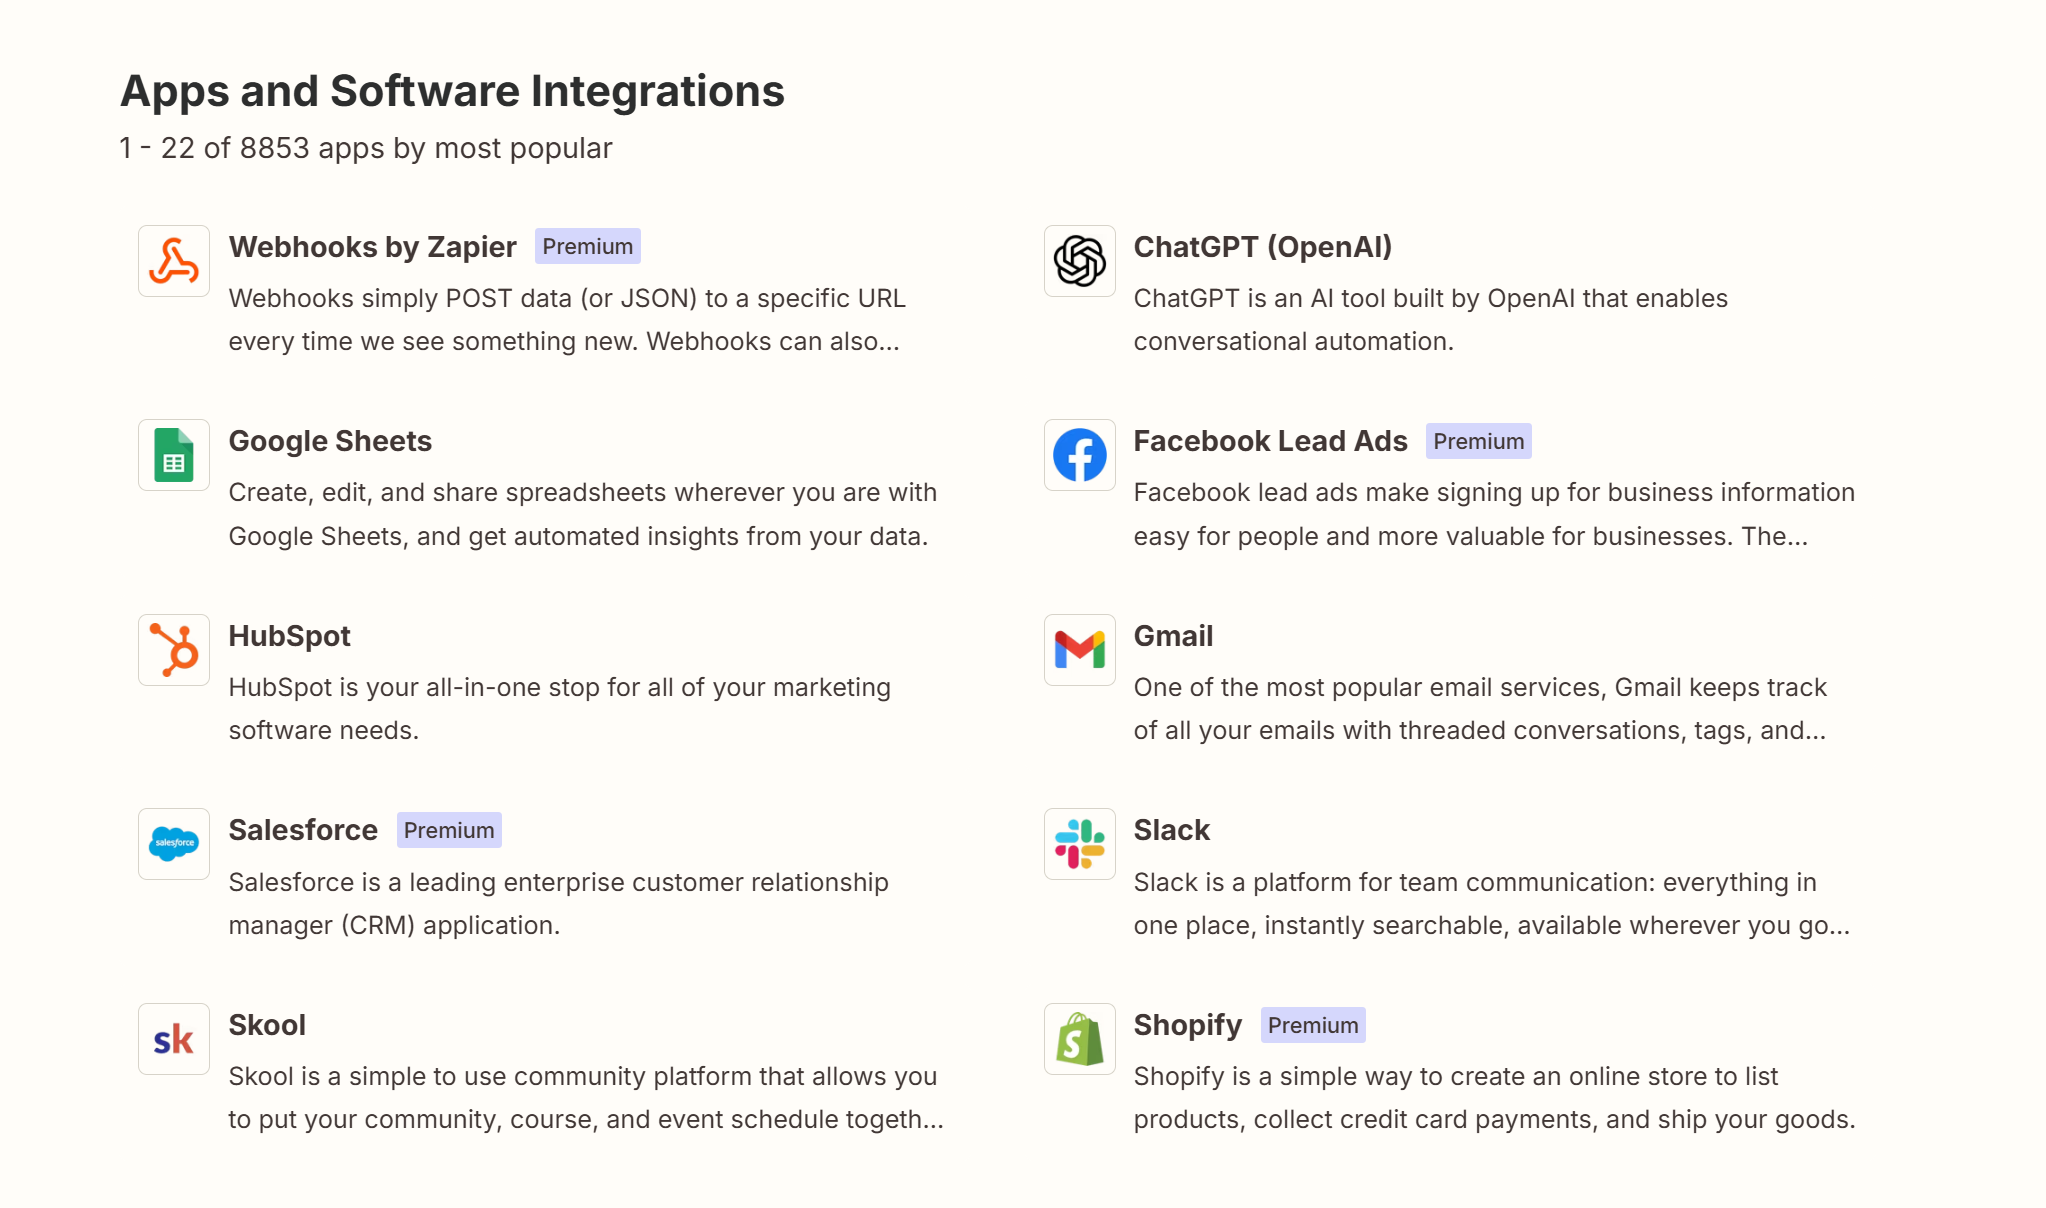
The cool thing is that Zapier offers a lot of pre-built zaps for popular functionality. We will take advantage of that below. Besides Excel, we have also covered other use cases for the Zapier Add-On, such as connecting Gravity Forms to Google Sheets, Pipedrive, and Brevo.
In order to take advantage of the Zapier Add-On, you require a Gravity Forms Pro or Elite license. It is also available with a Nonprofit license. After that, you only need to understand how to use it. We are getting to that now!
How to connect Gravity Forms to Excel using the Zapier Add-On
If you are ready to start collecting your Gravity Forms submissions in an Excel spreadsheet, here’s how to set it up. For the following tutorial, we’ll assume you already have Gravity Forms installed on your WordPress website.
1. Sign up to Excel
In order to use Excel for this purpose, you need an active subscription – you can get that over on the Microsoft website.
However, it is important to note that to use this integration, your Excel workbook must be stored in OneDrive for Business, SharePoint site, or Group Drive.
You need to have a Microsoft account to sign up. If you don’t, don’t worry, you can create one during the process. Once you have gone through this, you should land on the Excel online interface.
Be sure to note down your login information, you will need it soon.
2. Get a Zapier Account
Similarly, if you want to use Zapier with the Gravity Forms Add-On, you need an account for that as well. Simply head on over to the Zapier homepage and click on one of the many calls to action.
After that, use your email address, Google, Facebook, or Microsoft account to sign up.

The free account is enough for what we are trying to do here for the moment.
3. Install and configure the Zapier Add-On
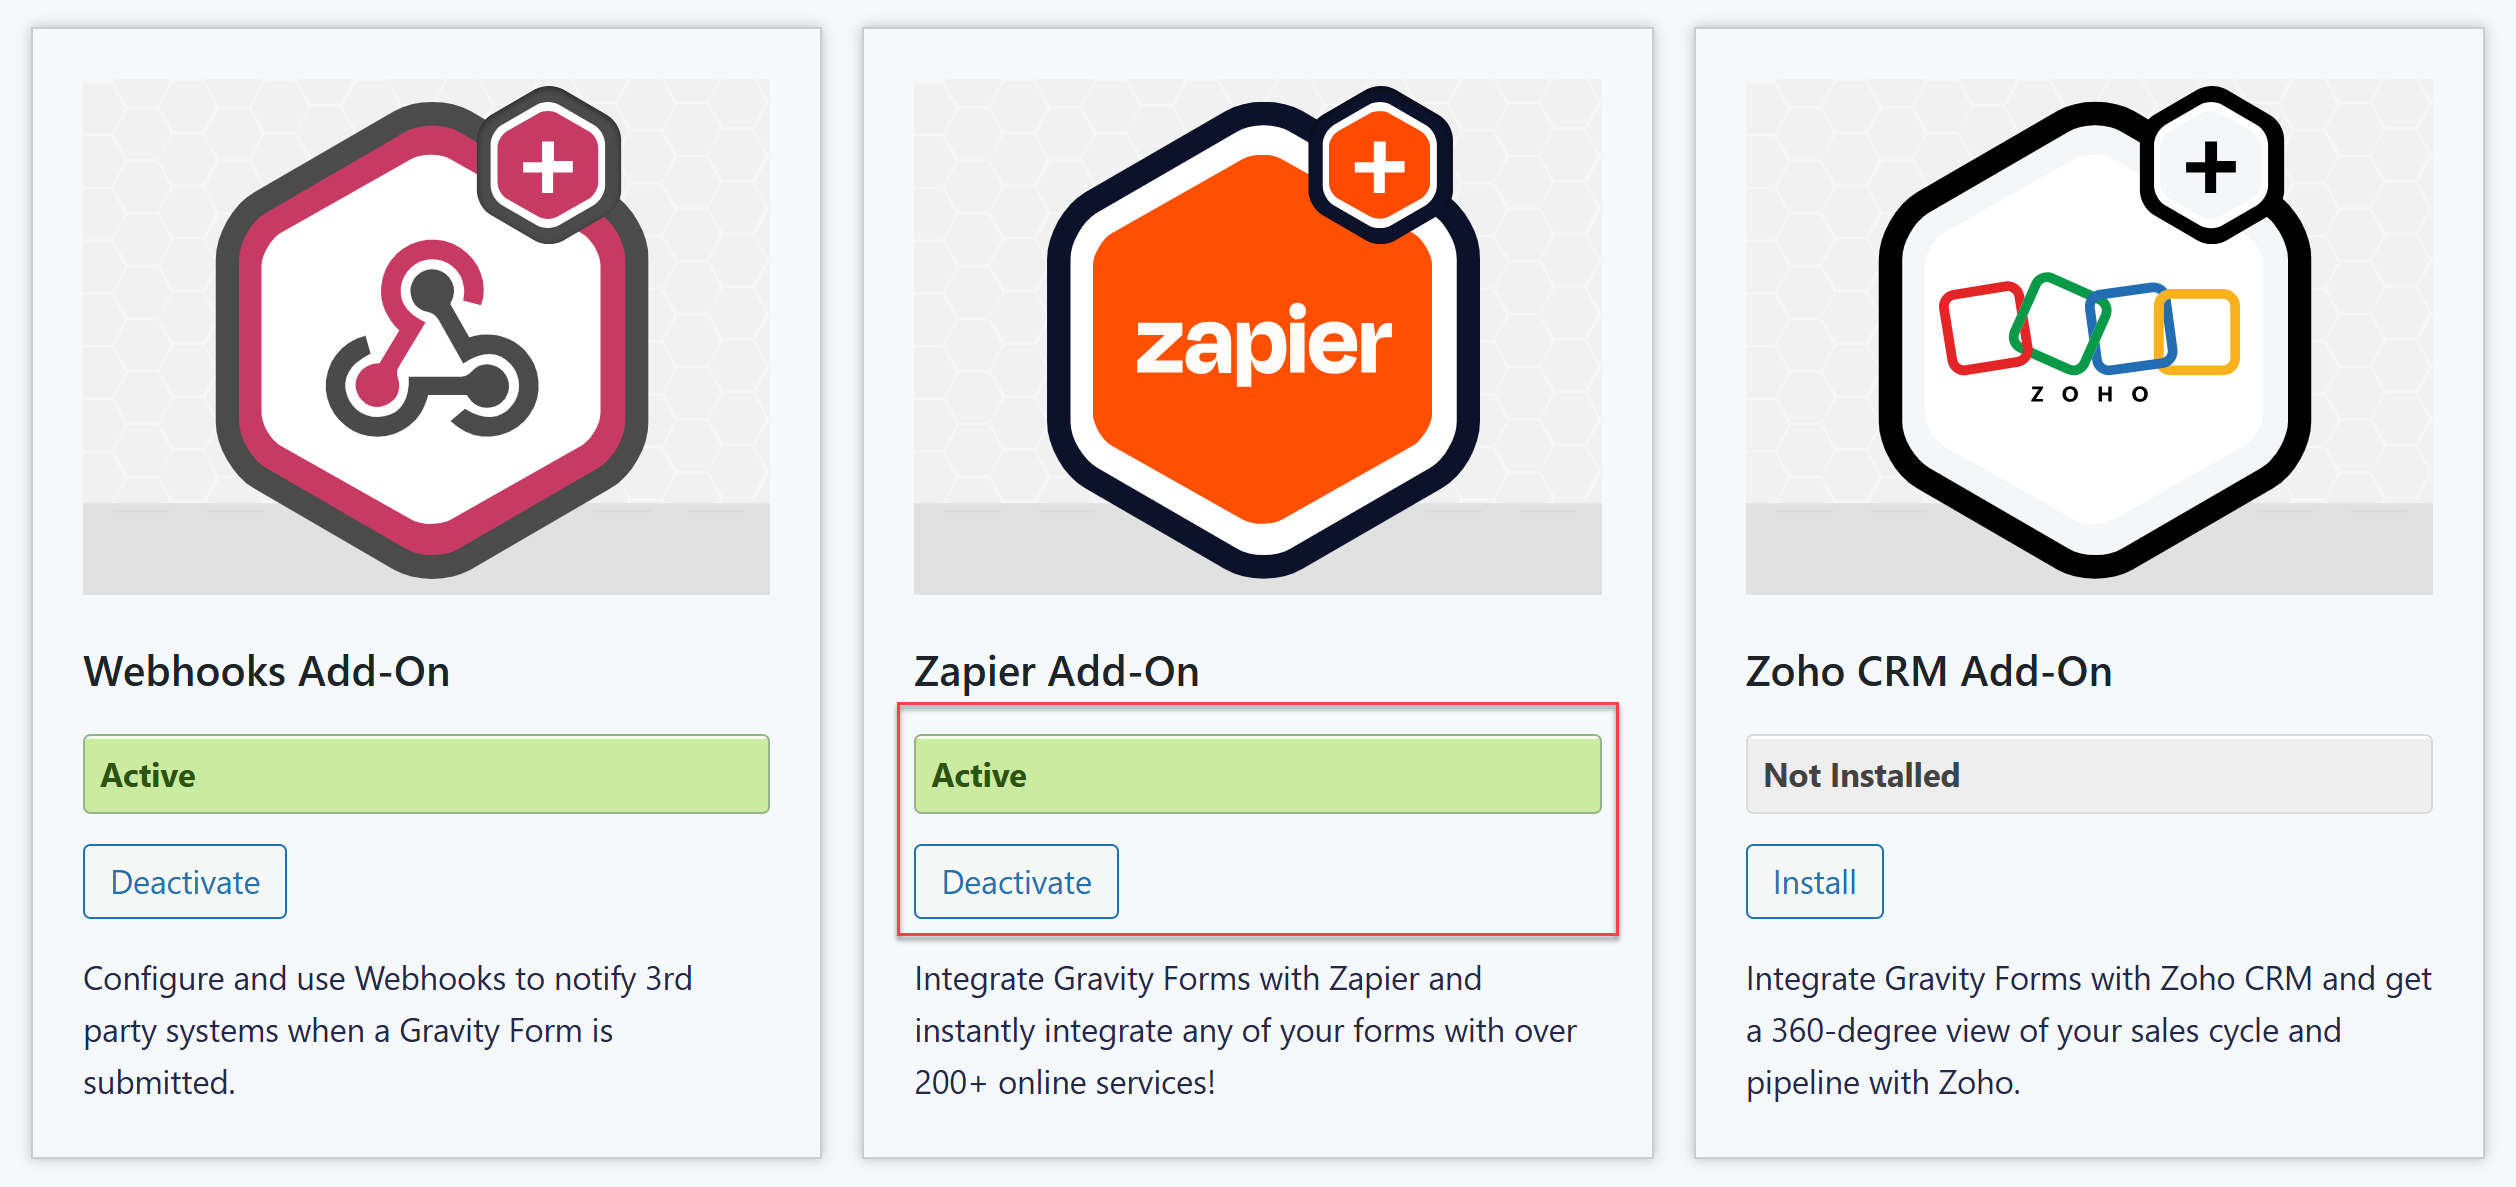
In this step, we will install the Gravity Forms Zapier Add-On. This happens under Forms → Add-Ons in your WordPress dashboard. Scroll down to find the add-on in the list and click Install → Active.
After this, navigate to Forms → Settings → REST API where you can create an API key – you’ll use this to connect to Zapier.
Under REST API Settings, check the box to enable the API and click on Add Key under Authentication (API version 2).
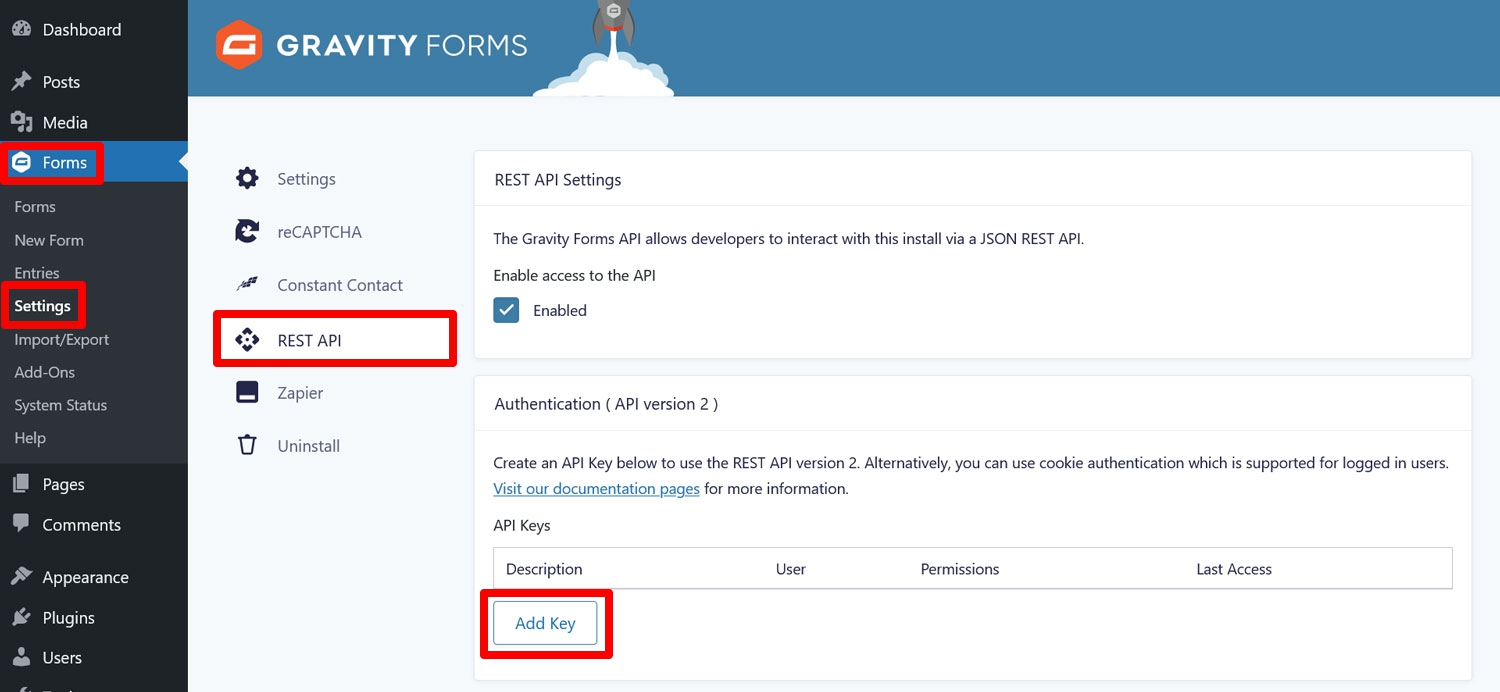
It’s important that you select the correct version number, so pay attention to it. A pop-up will appear. Fill it out as follows:
- Description: Include a description so that you know what your different API keys are for.
- User: Select a user who has the permission level to view and edit entries.
- Permissions: Here, choose Read/Write from the drop-down menu.
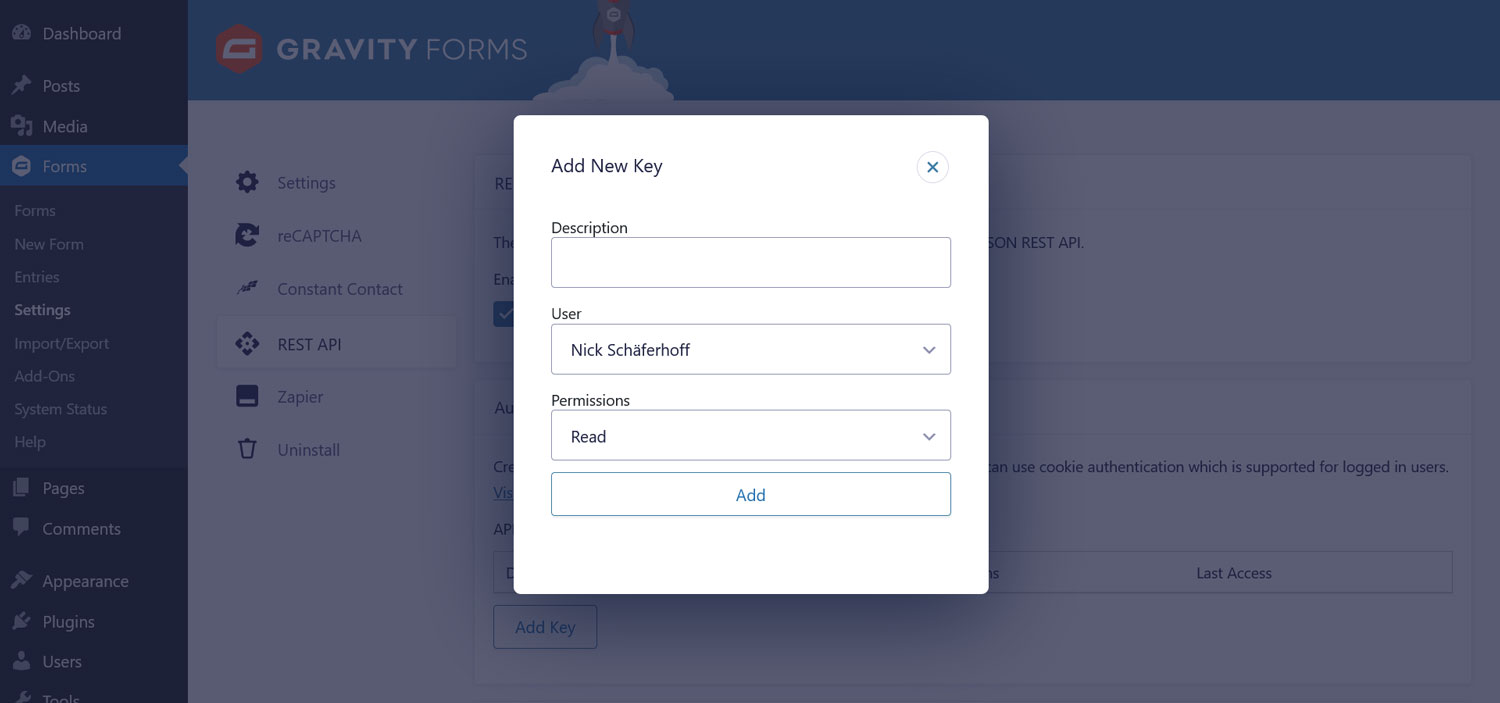
Once you have filled everything in successfully, click the Add button. Doing so will show your consumer key and consumer secret.
Copy and store those somewhere safe. This is the only time you will see them. Then, close the pop-up and save the settings by clicking Update.
4. Create a form
Since our goal is to send data entries from Gravity Forms over to Excel, we first need a way of capturing said data. For that, we need a form.
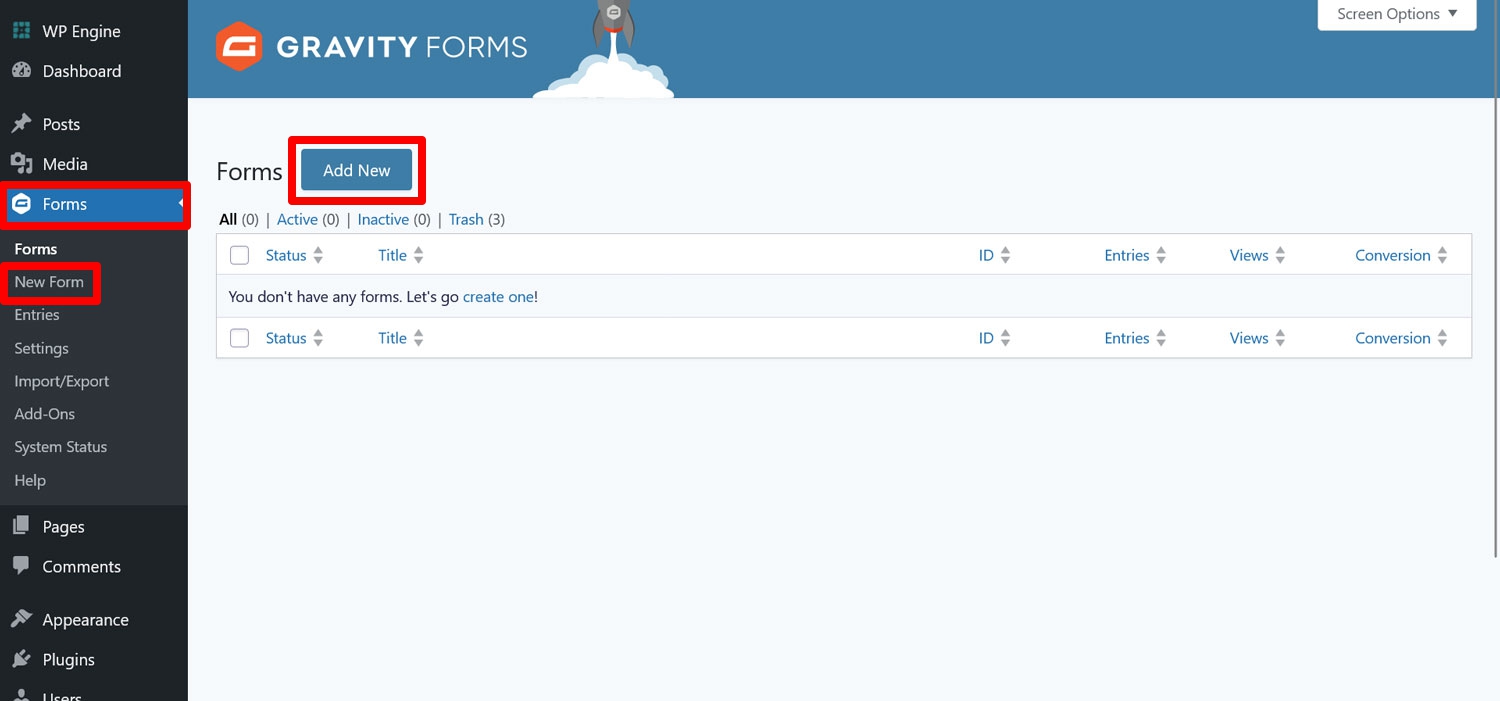
In this case, this will be an email subscriber form with some extra information. If you don’t have a form you want to use for that purpose yet, log in to your WordPress website and go to Forms → New Form.
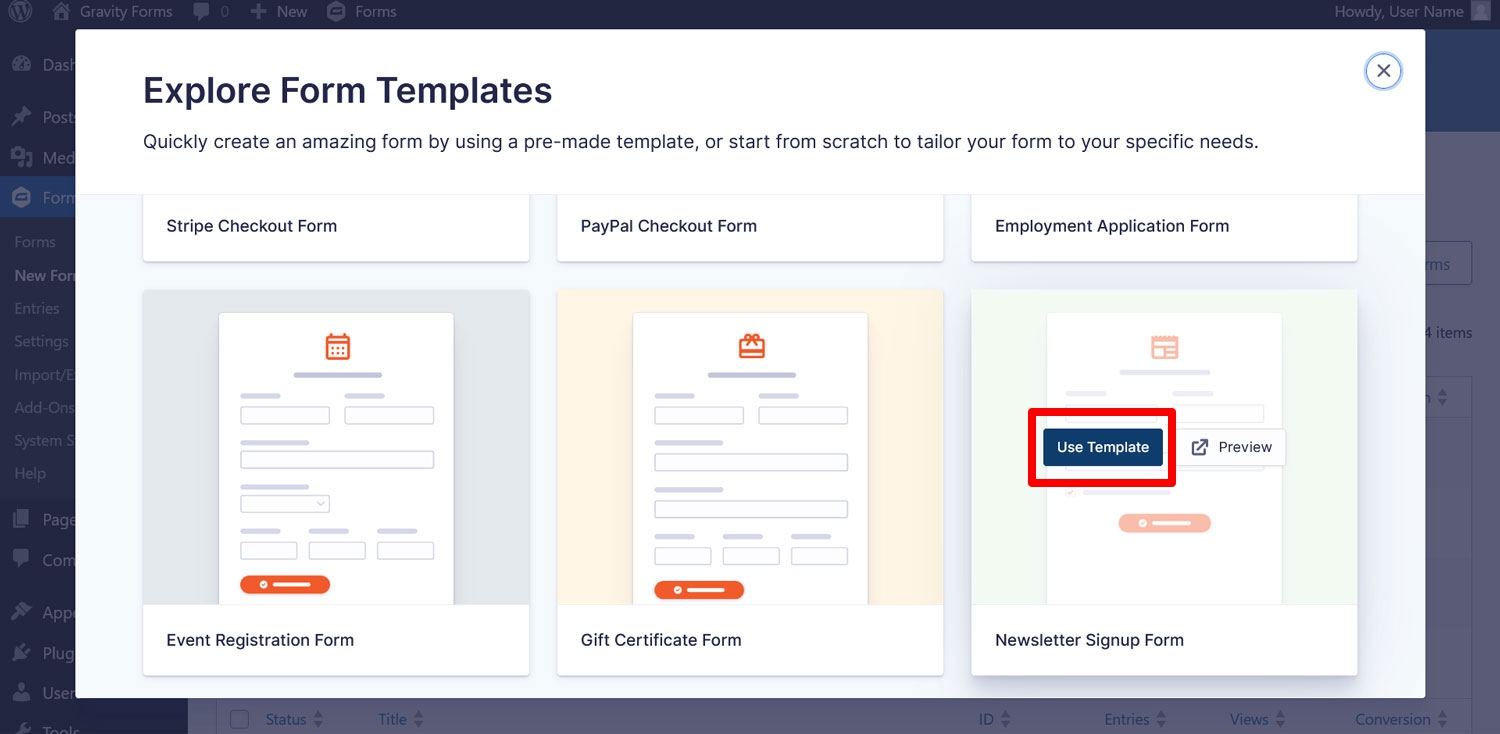
On the following screen, you can either select a blank form or speed up the process by using a template. For example, we will be taking advantage of the Newsletter Signup Form template. Hover over it and click Use Template, then enter a name for the form, and click Use Template again.
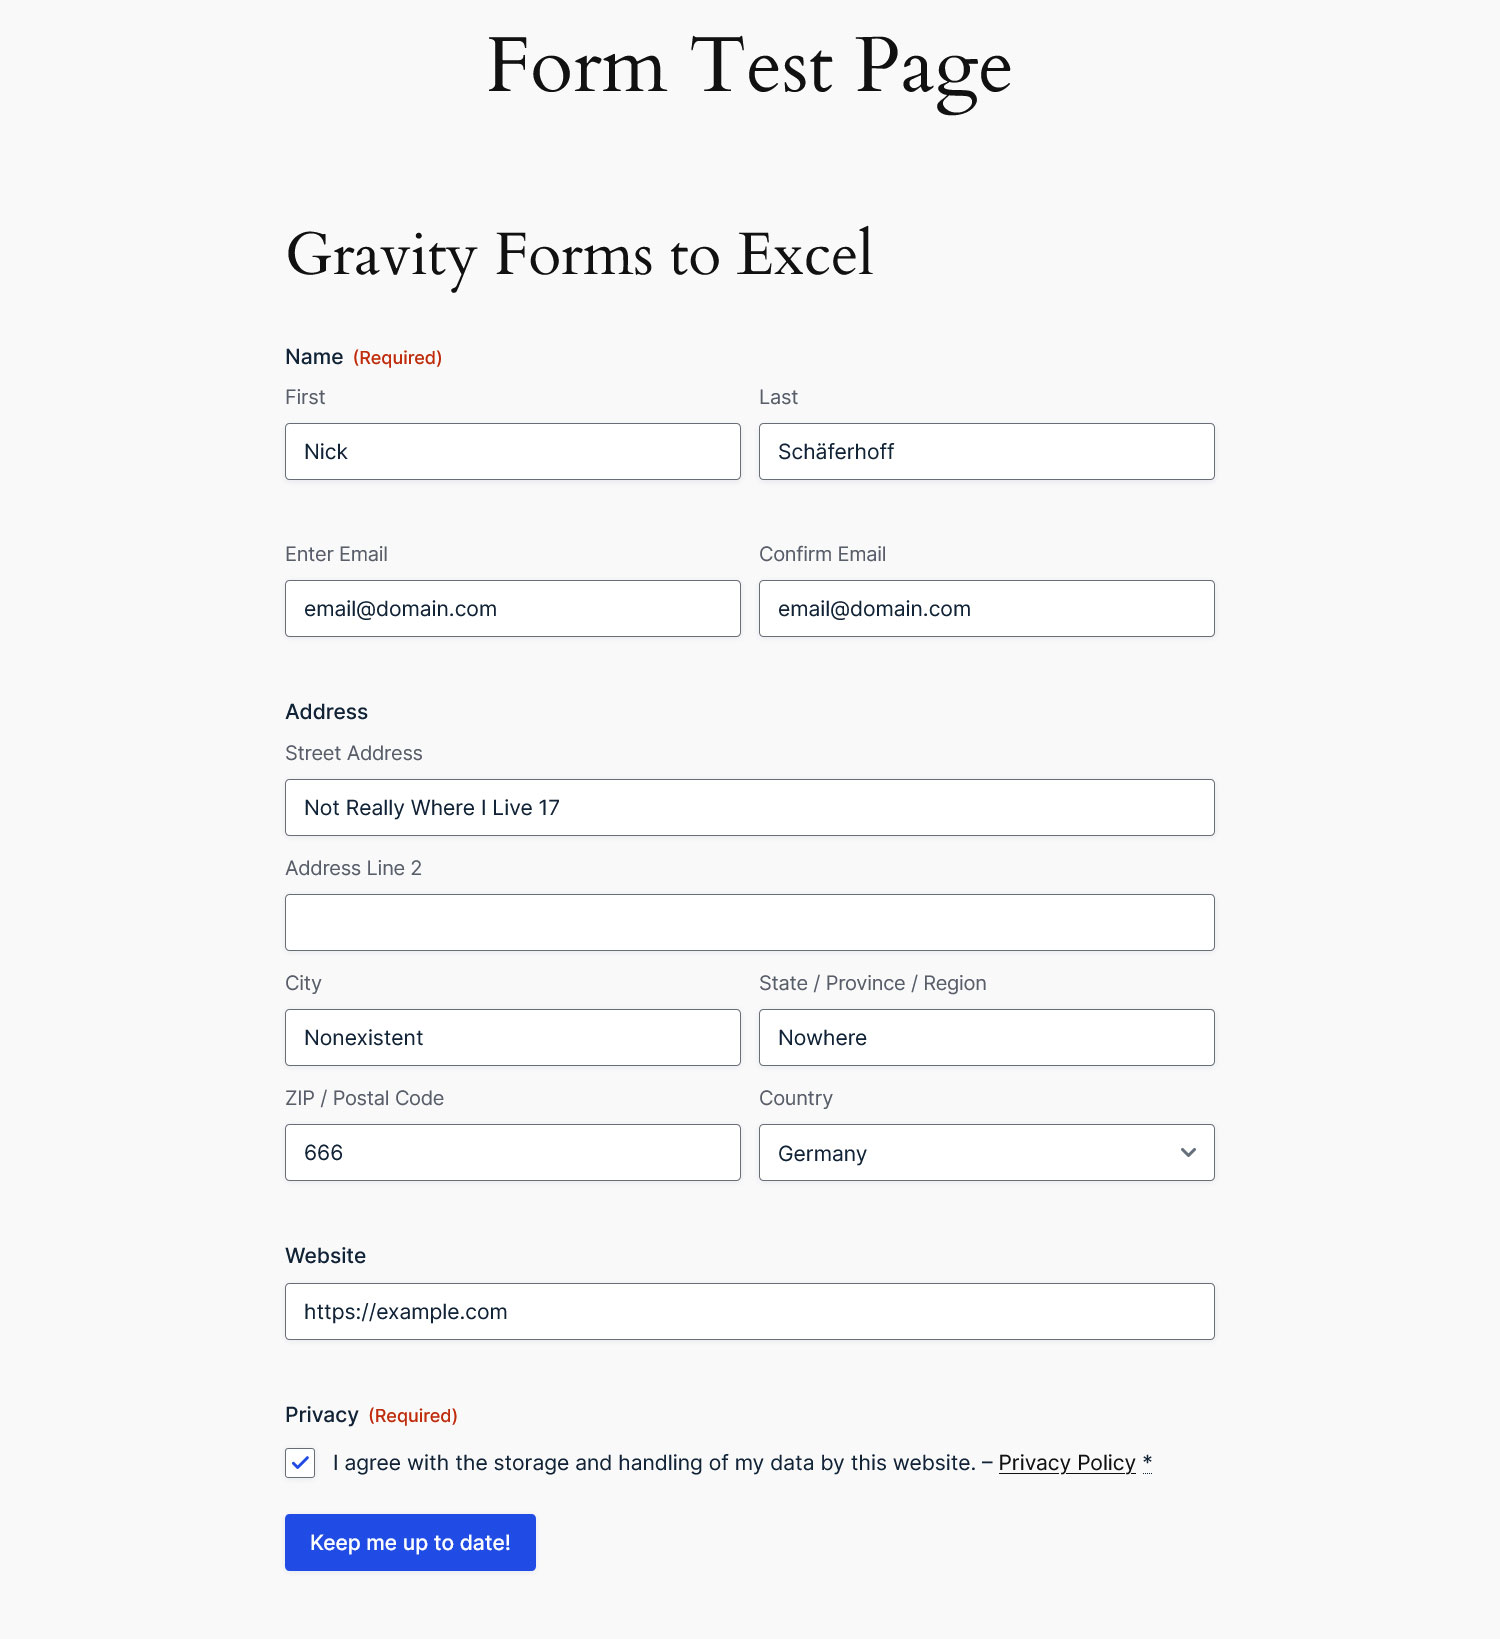
This lands you in the form editor. The template should have all the necessary fields, such as first and last name, email, email confirmation, and a consent field.
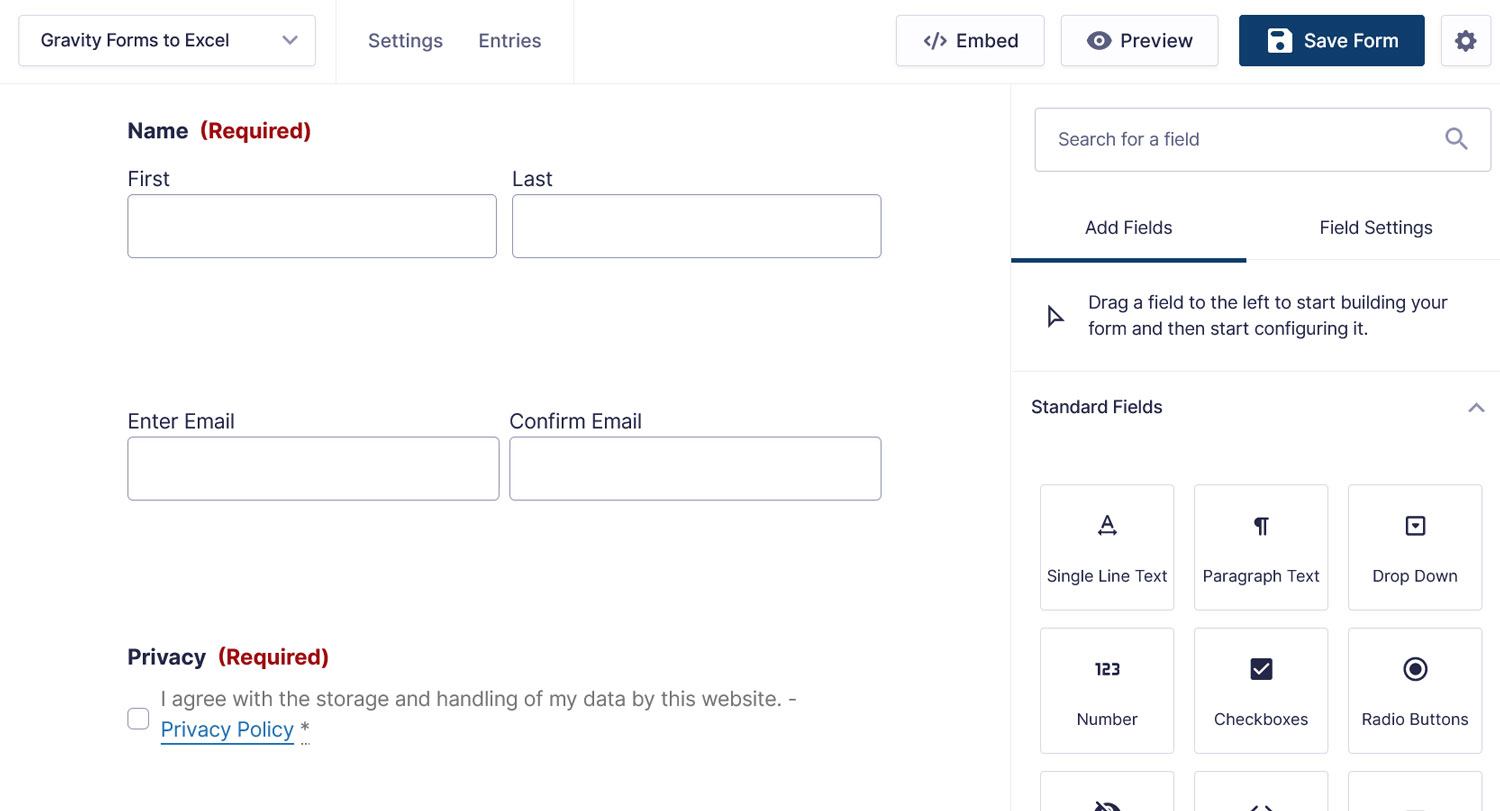
This should be enough for most purposes, however, in this case we want to know a little more about our subscribers so we have more meaningful data to sift through. Therefore, we will also add an Address and Website field to the form.

If you need any other information, be sure to customize the form for your own needs. Then embed your form on any page or post on your website and hit Publish.
5. Prepare Your Excel spreadsheet
In order for Zapier to recognize your data and save it in the right location of your Excel spreadsheet, the sheet needs to be set up in a specific way. Therefore, it makes sense to do this after you have created your form and know what information you want to collect. So, navigate back to your Excel account for this purpose.
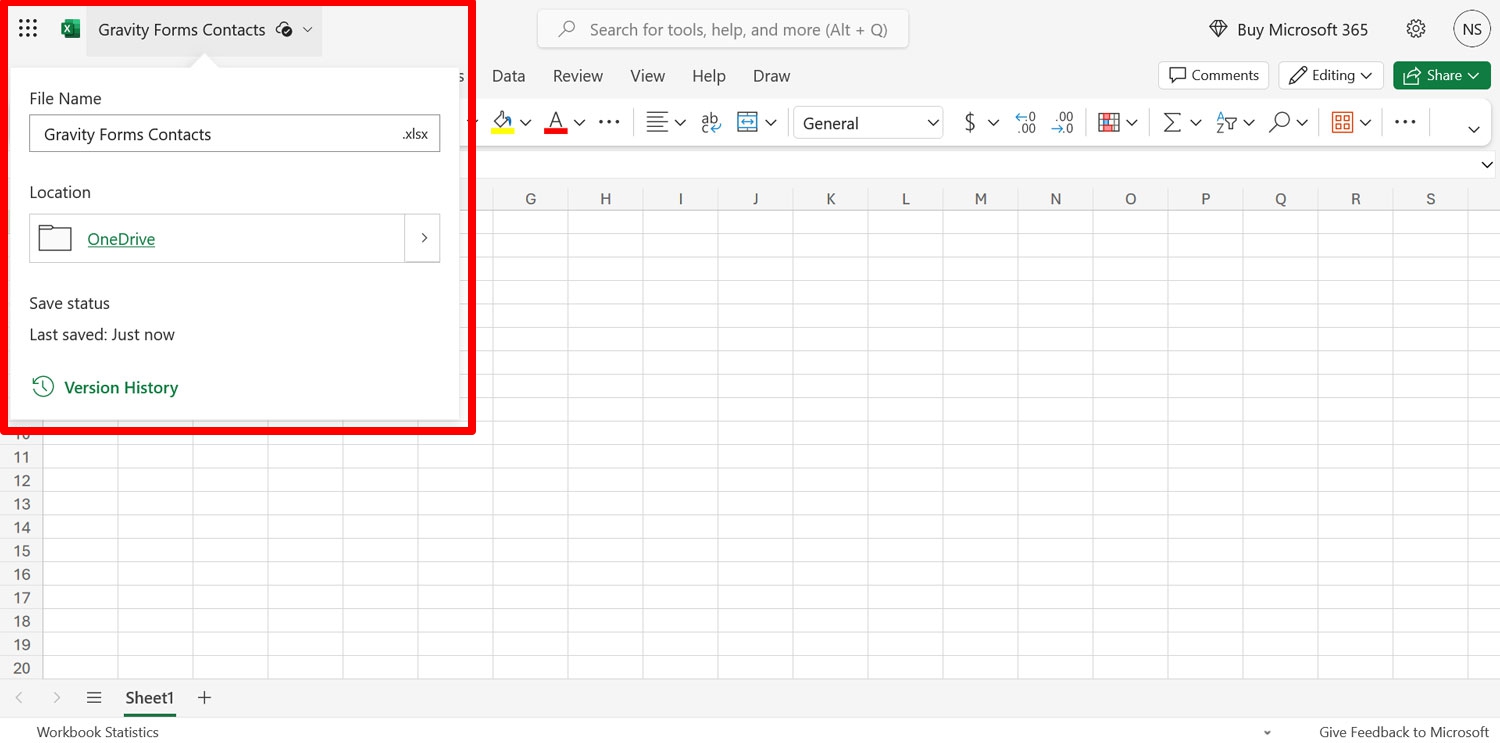
The first step here is to create a file in which will save your web form contacts. For that, click on Blank Workbook under Create new.
Once inside the spreadsheet, give it a name in the upper left corner, and choose a location and a subfolder (we’ve chosen OneDrive and a Documents subfolder – you’ll need to remember this for later).
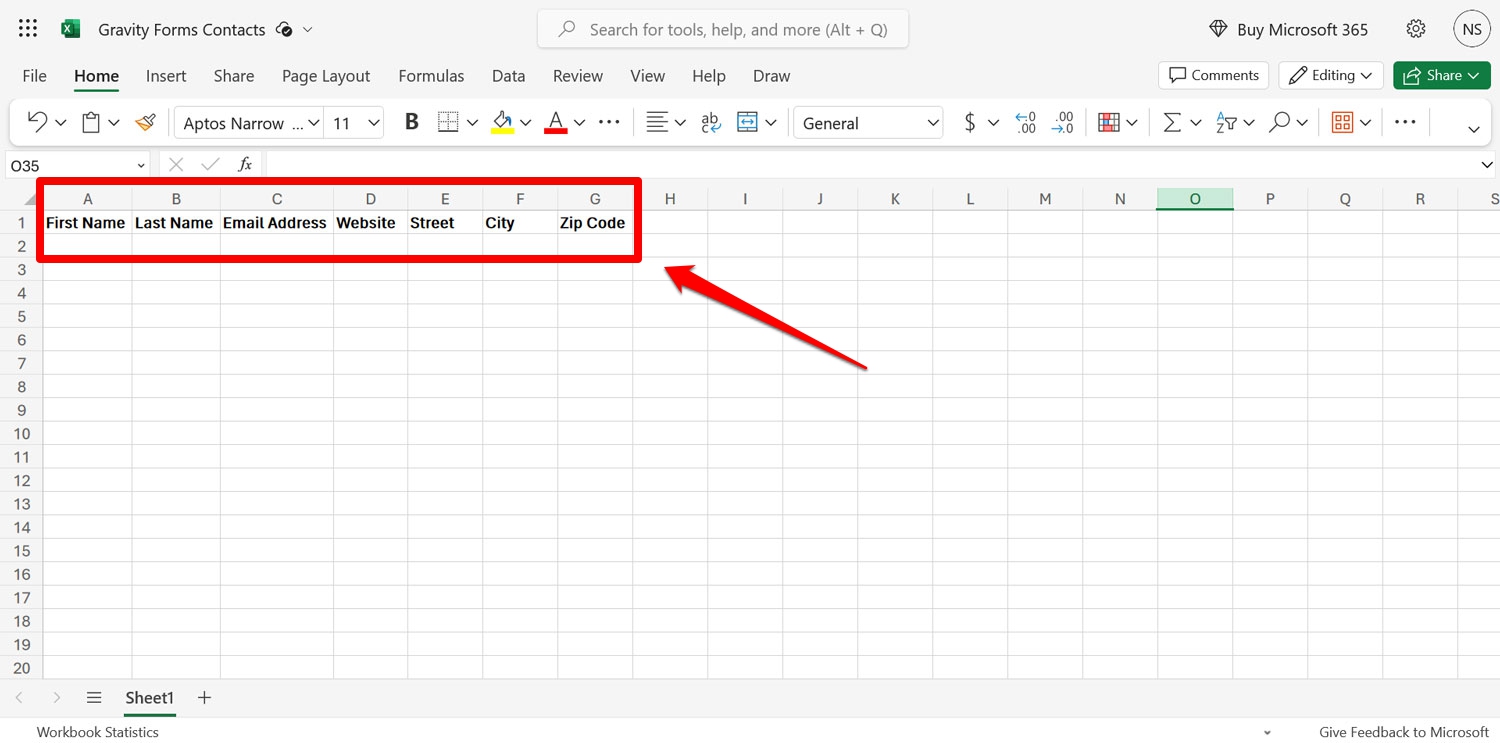
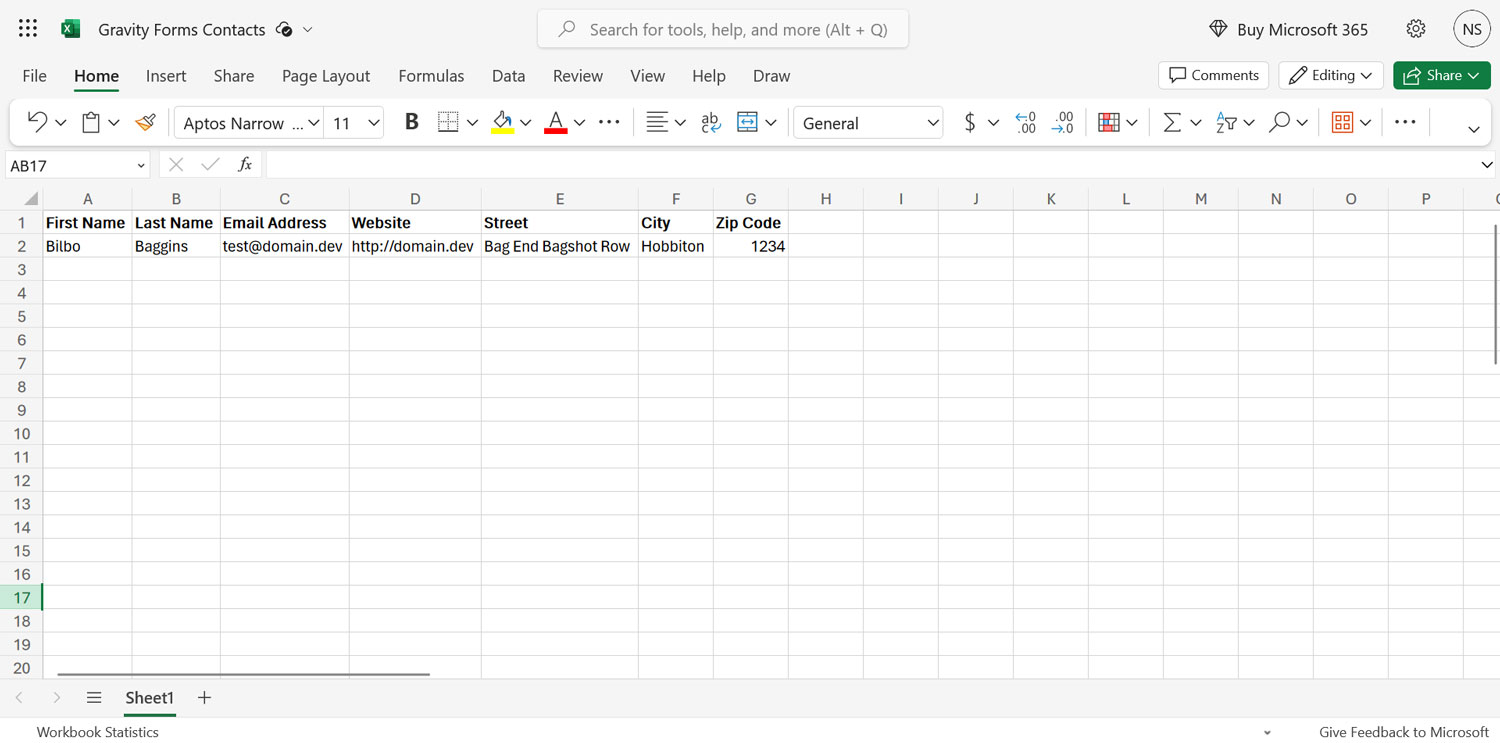
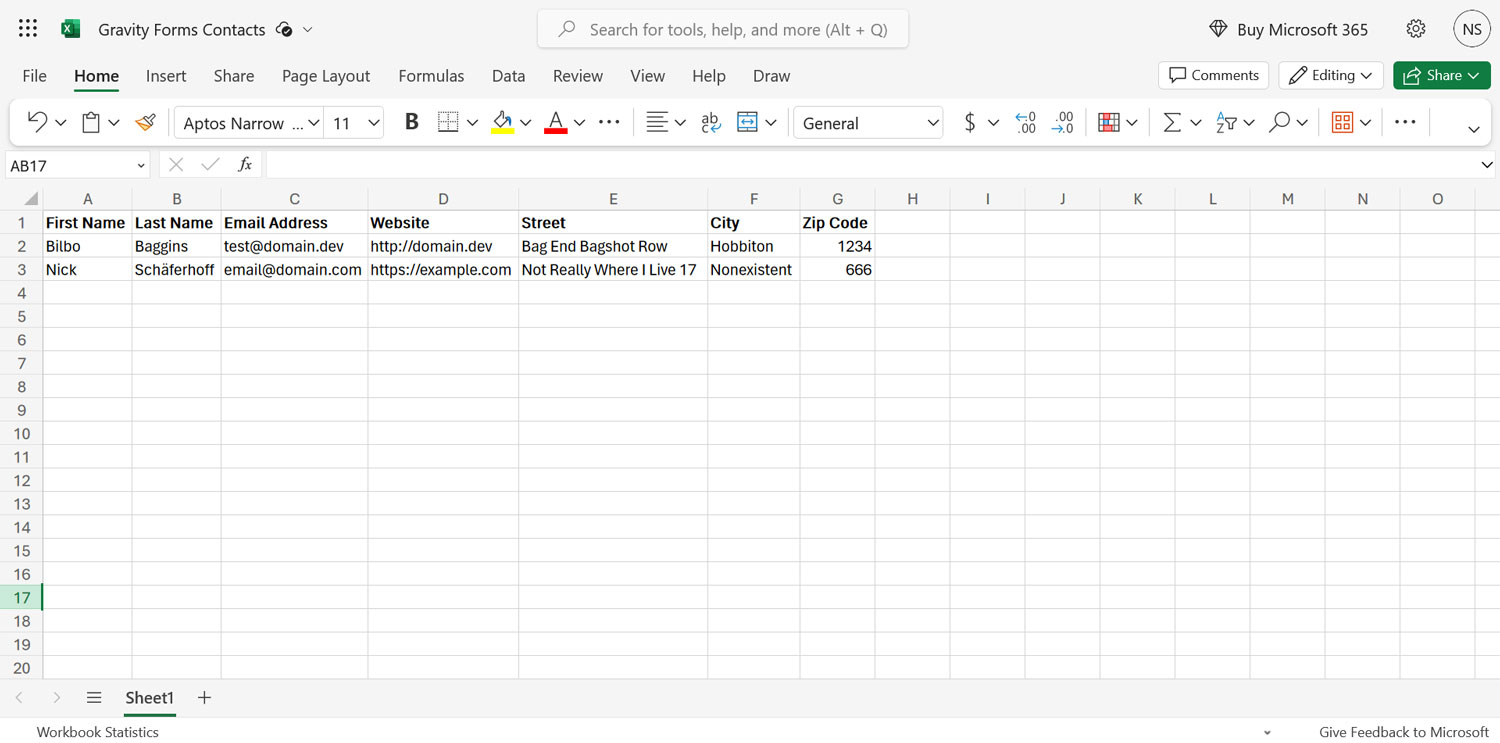
Now comes the important part: you need to label your columns with the information you want to collect from your web forms in the first row of the spreadsheet. This will allow you to assign the subscriber data to the right place in Zapier later. So, do that now. Here’s what it looks like on our end:
6. Create a Zap
From here on out, the rest of the steps will happen on the Zapier website.
We will now create a zap. Thankfully, as mentioned, there are pre-built ones, including for Gravity Forms. You can find them on the Integrations page.
If you want to only see automations for particular counterparts, such as Excel, you can do so using the search functionality. This will land you on the integrations page for Gravity Forms and Excel, including their pre-built templates.
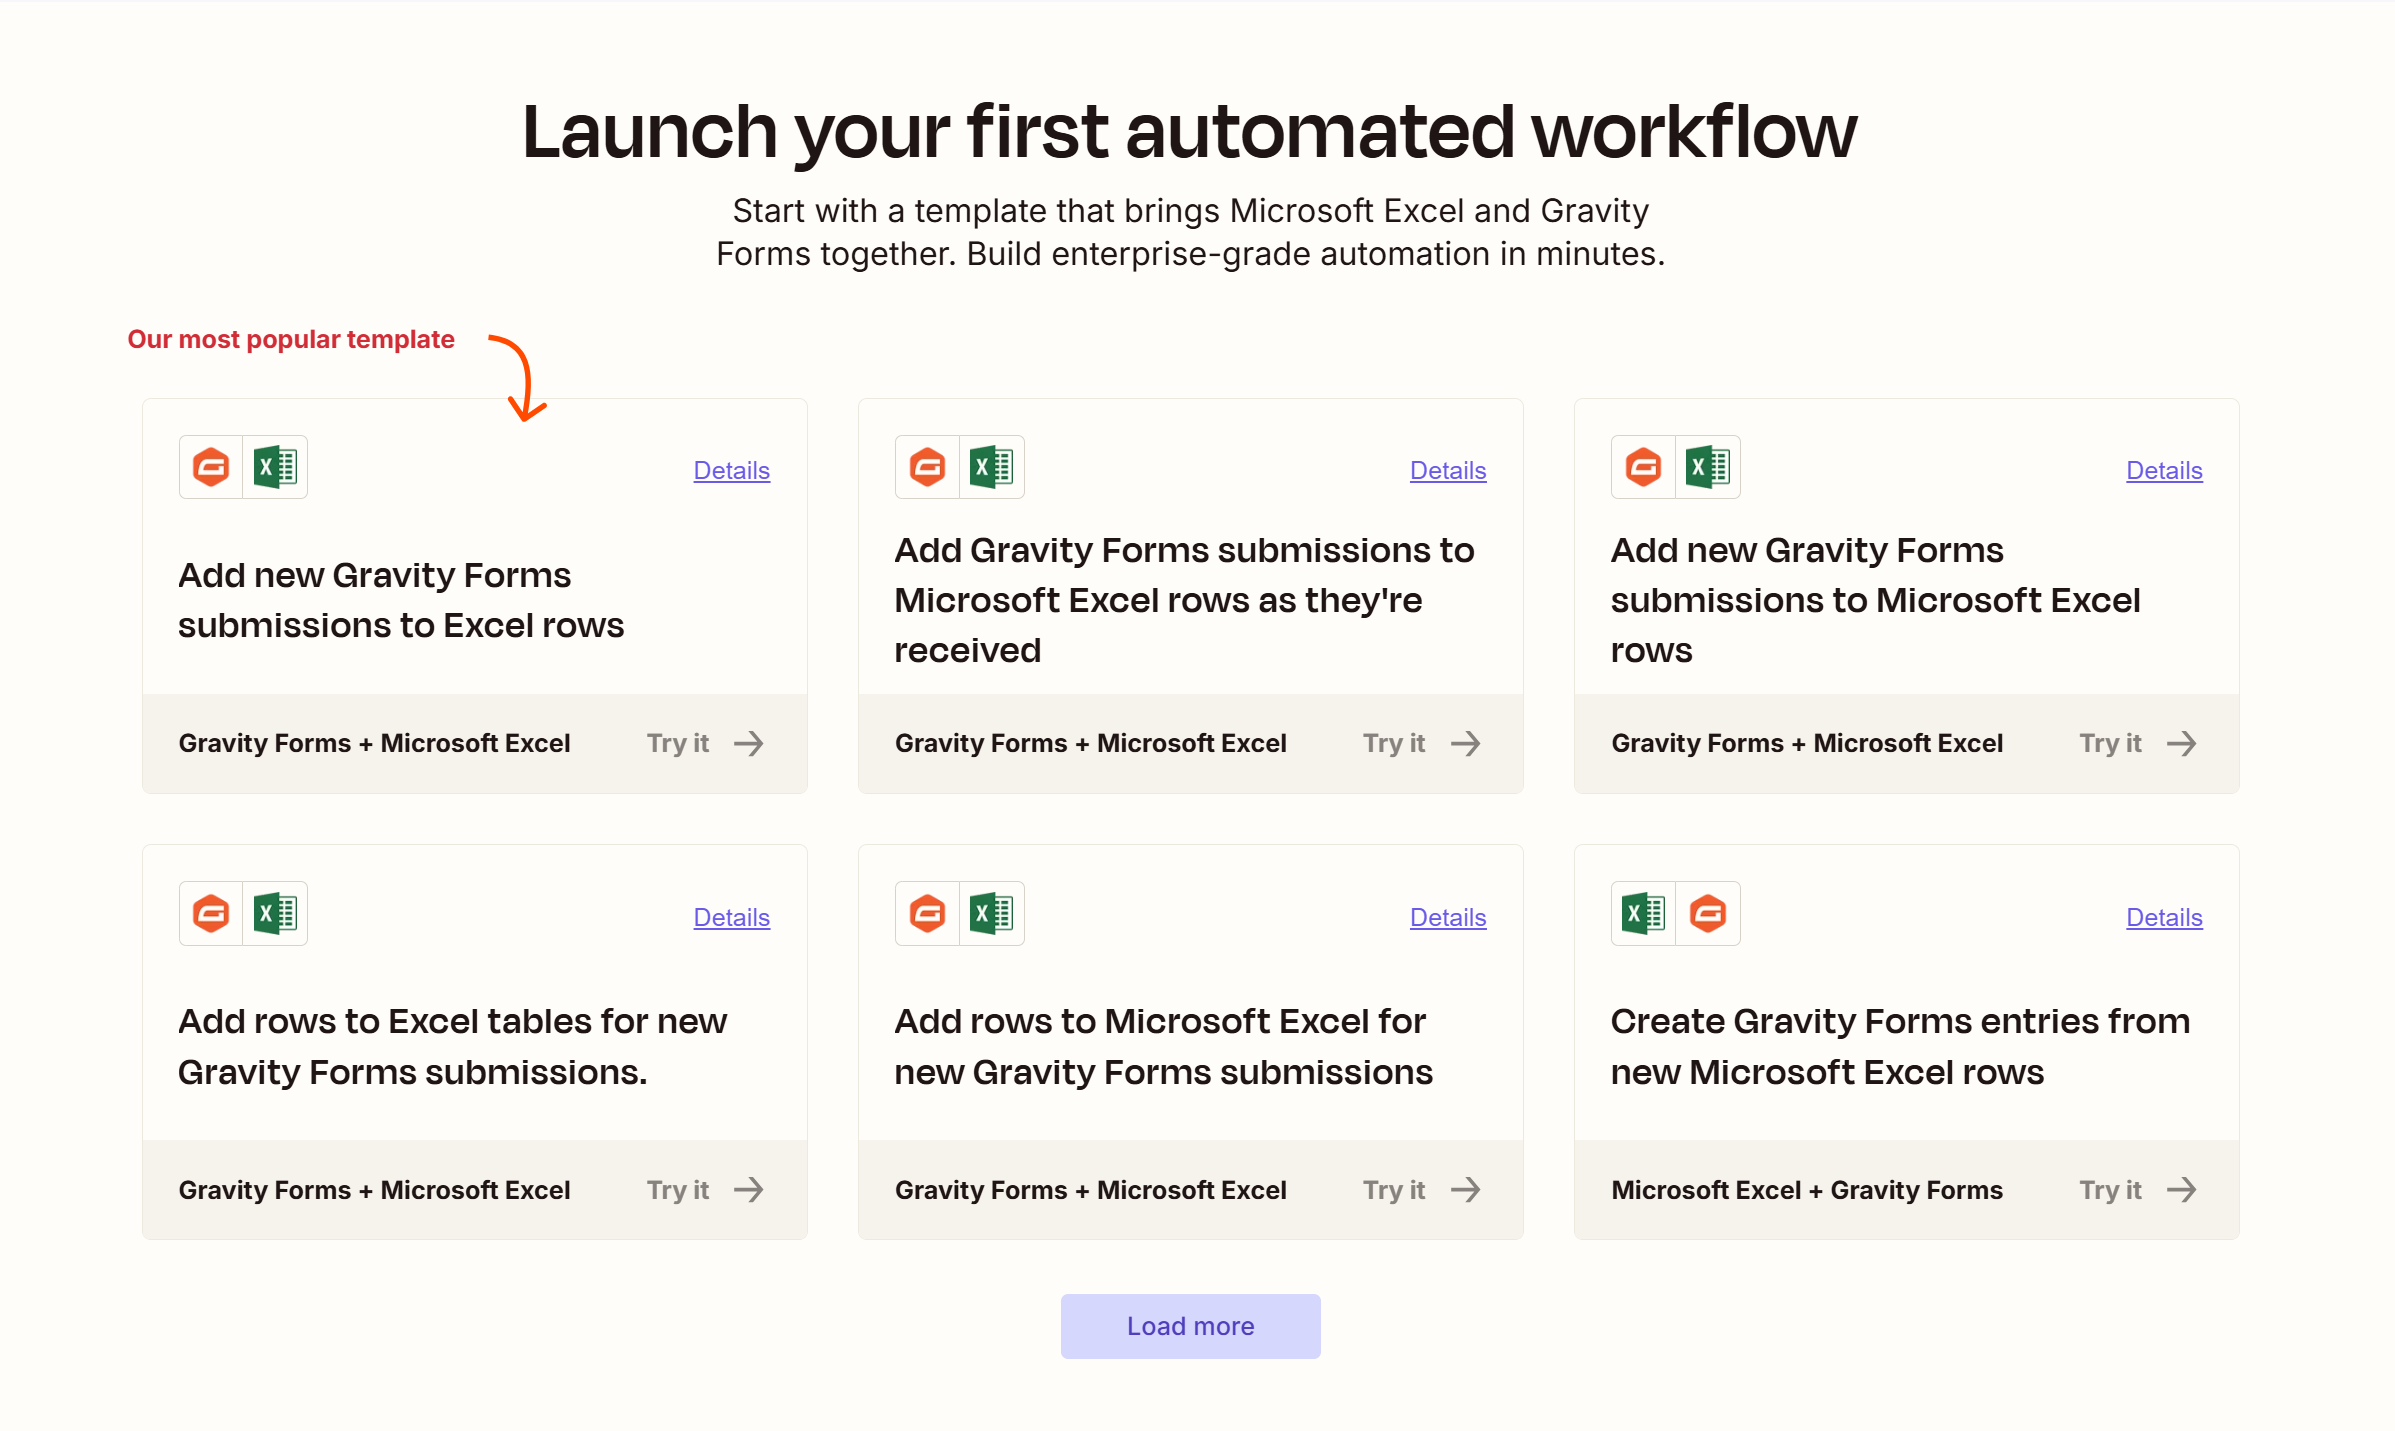
Zaps always consist of a trigger and an action. In our case, the trigger we want to use is a form submission, and the resulting action is adding a new row in Excel. As you can see in the screenshot above, that is also the most popular existing zap. Click on Try it to start setting it up.
7. Connect to Gravity Forms
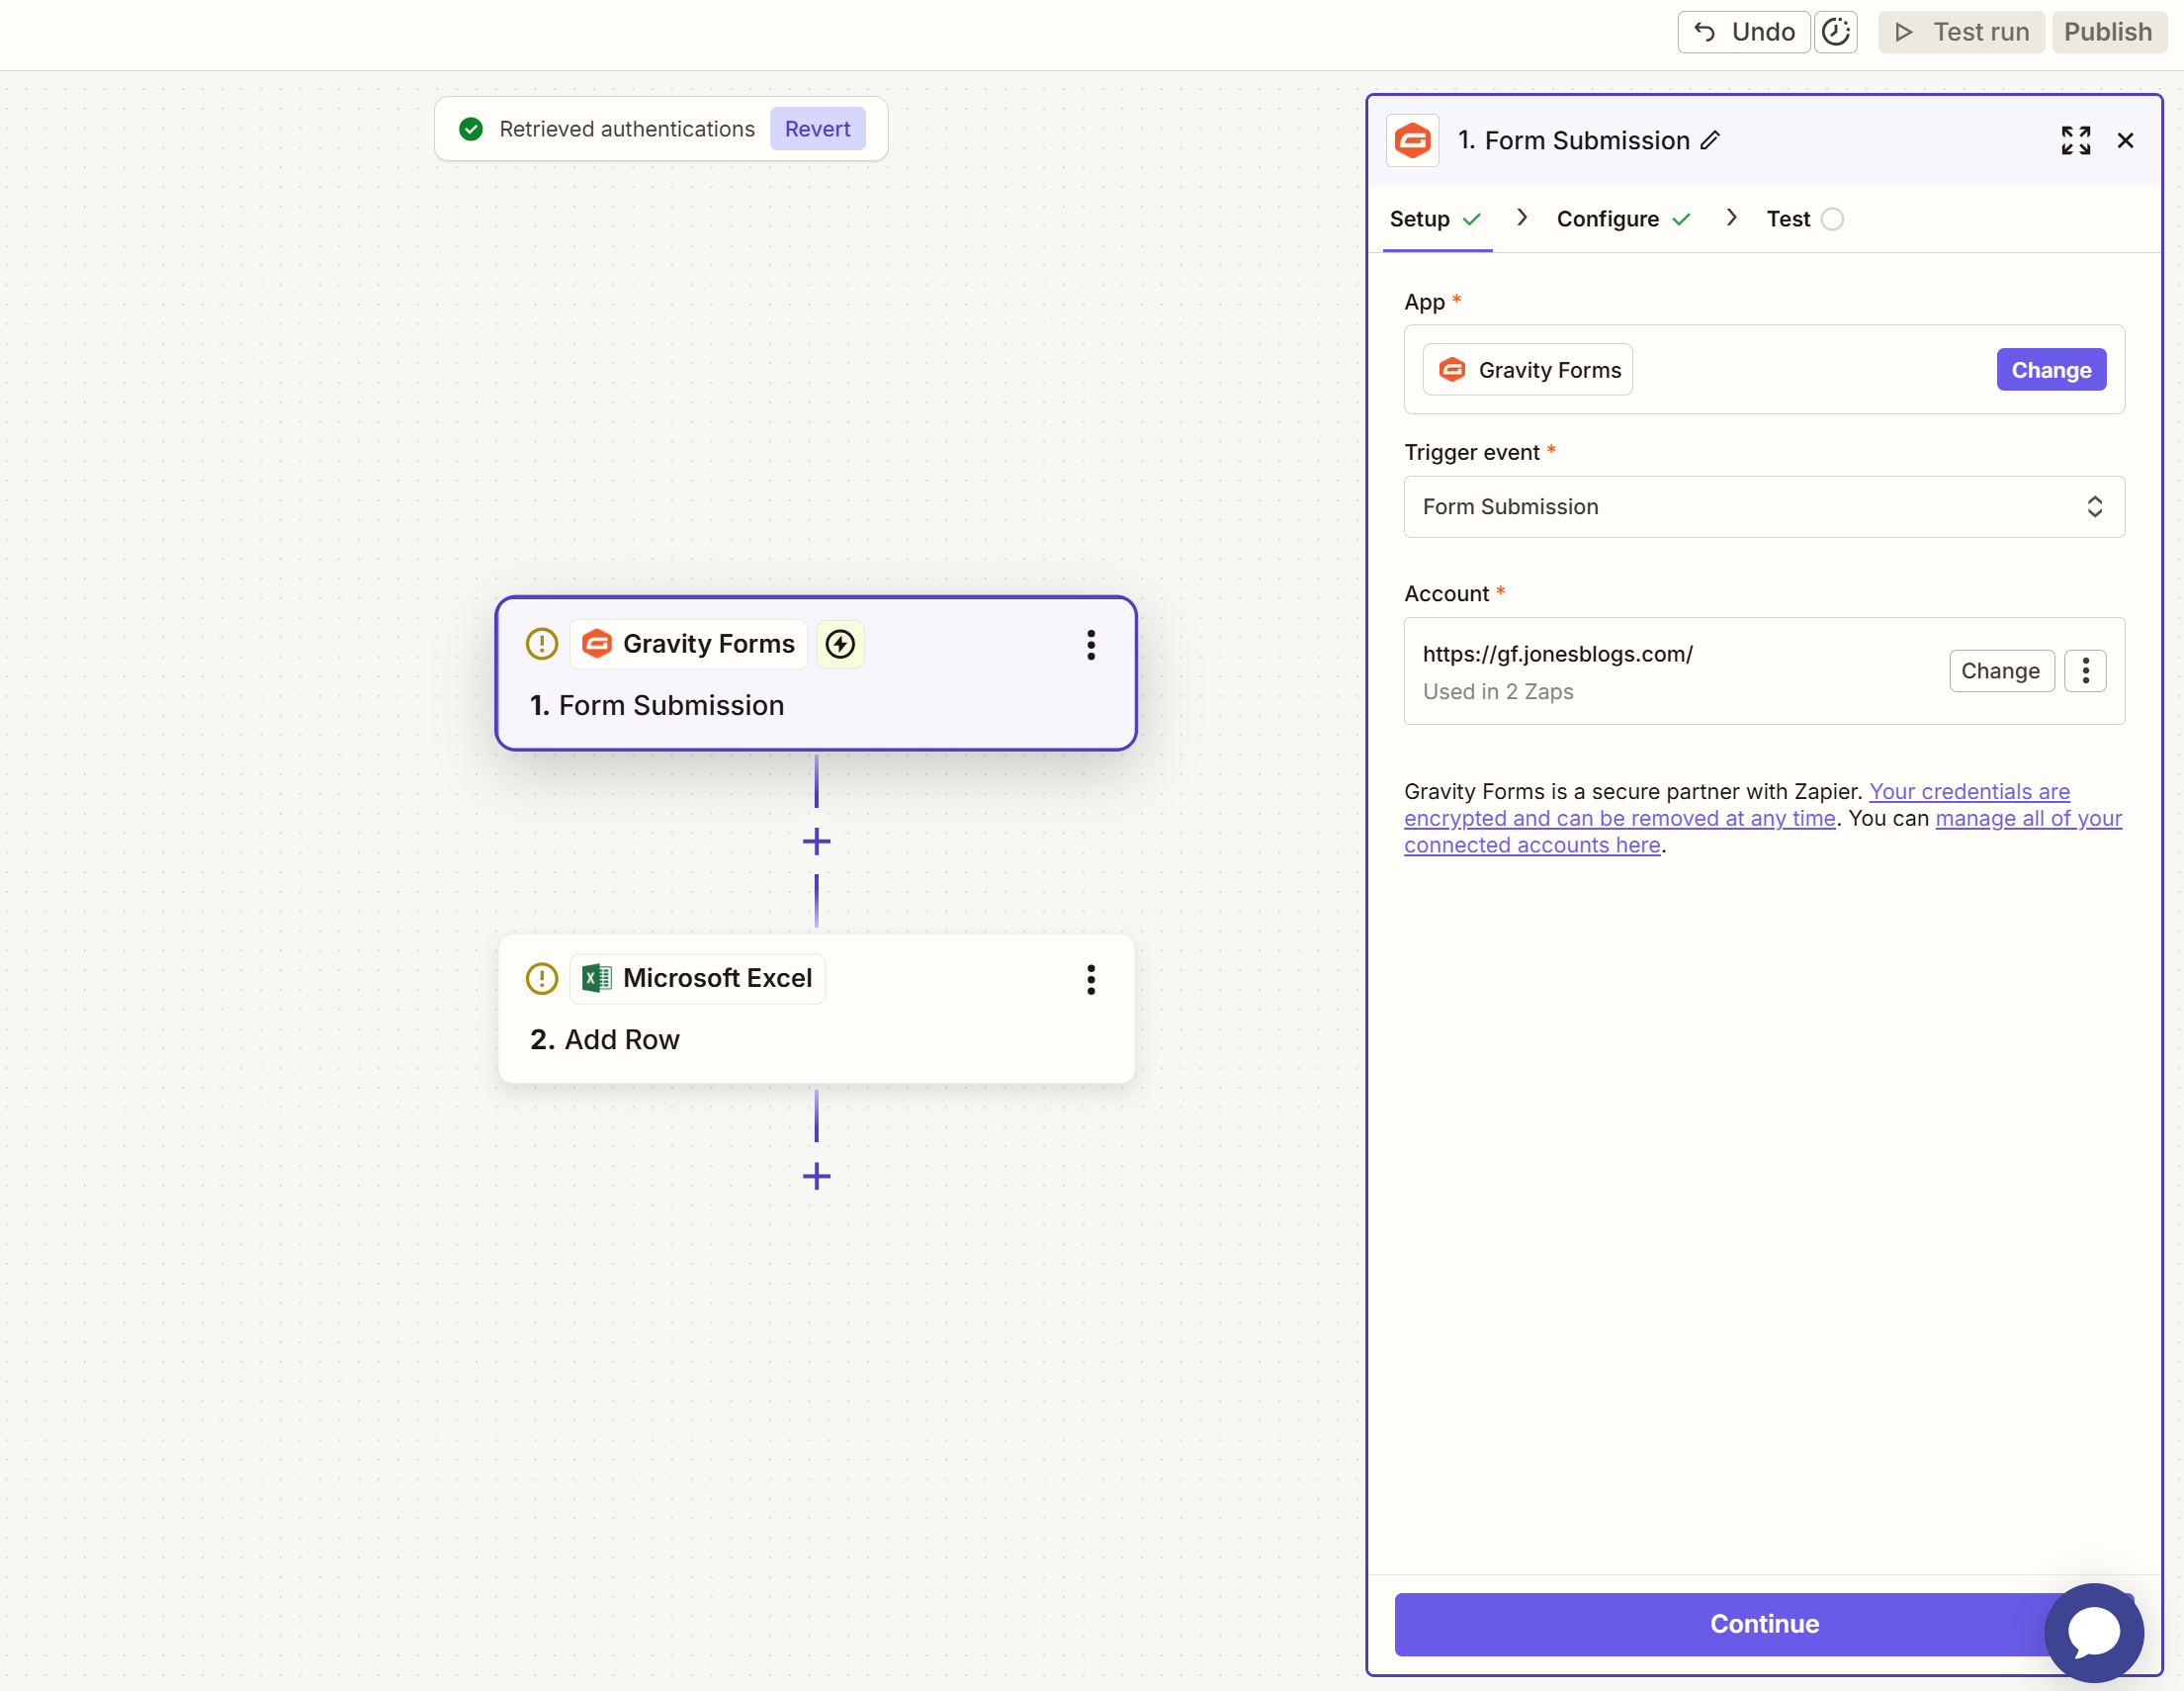
In the next screen, first name your zap. You’ll see Zapier will have pre-populated the App and Trigger Event based on the pre-built Zap you selected.
If this is the first time connecting Gravity Forms to Zapier, you will also need to Connect a New Account.
This will open up a new window where you first need to authenticate yourself. Enter your site URL and the Consumer Key and Consumer Secret you created earlier.
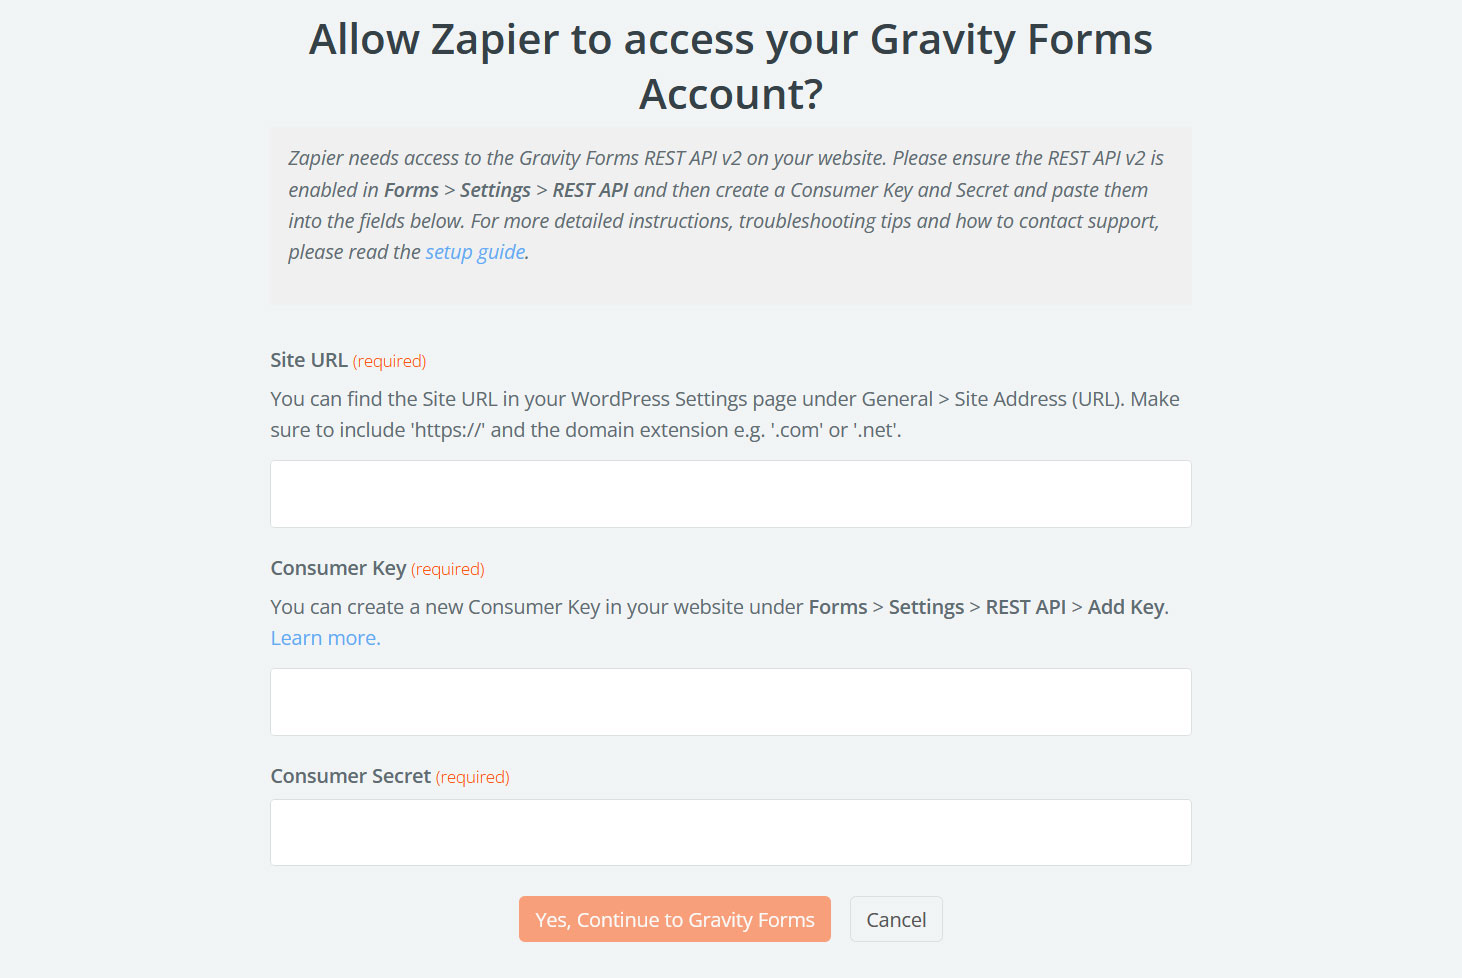
When done, click Yes, Continue to Gravity Forms. After that, that part of the connection should be visible and you can move on to the next step by clicking Continue.
Under Configure, you will need to choose the web form you want to use as the trigger, such as the one we created earlier.
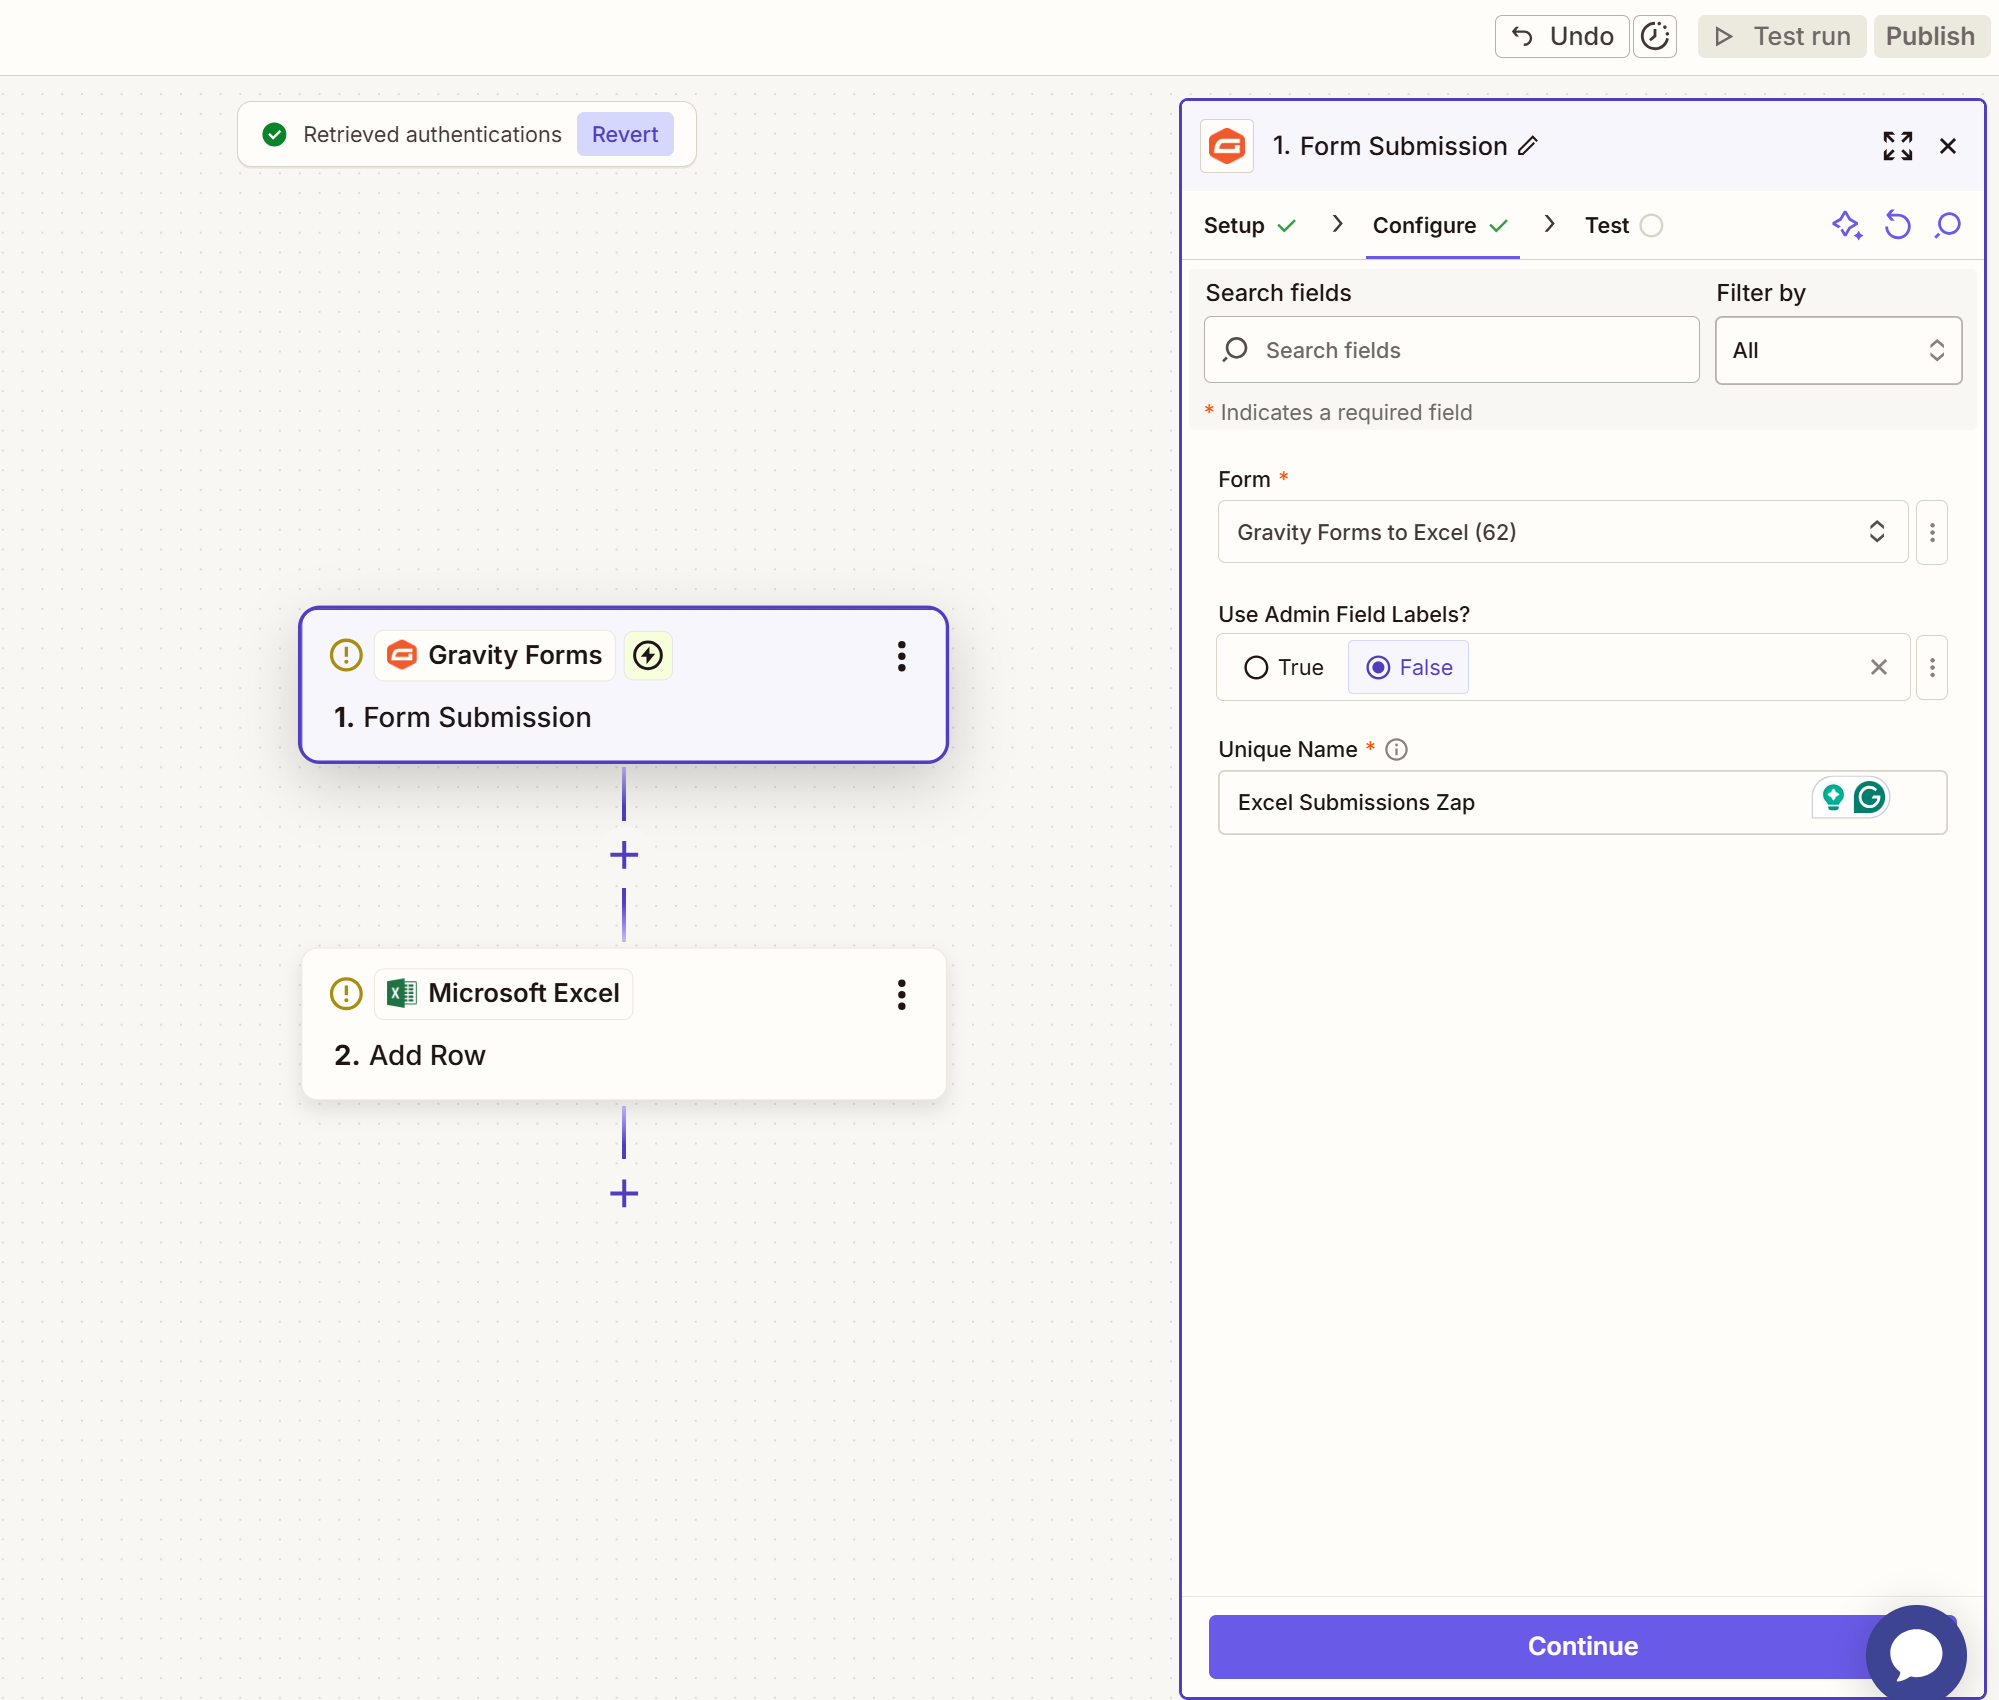
The Use Admin Field Labels? section only matters if you added Admin Labels. If that’s not the case, set it to False.
The last setting is Unique Name. It requires you to input a descriptor for this particular Zap and form. Gravity Forms will use it for handling the data (i.e. creating a feed). For that reason, it needs to be one of a kind and not be used for any other purpose.
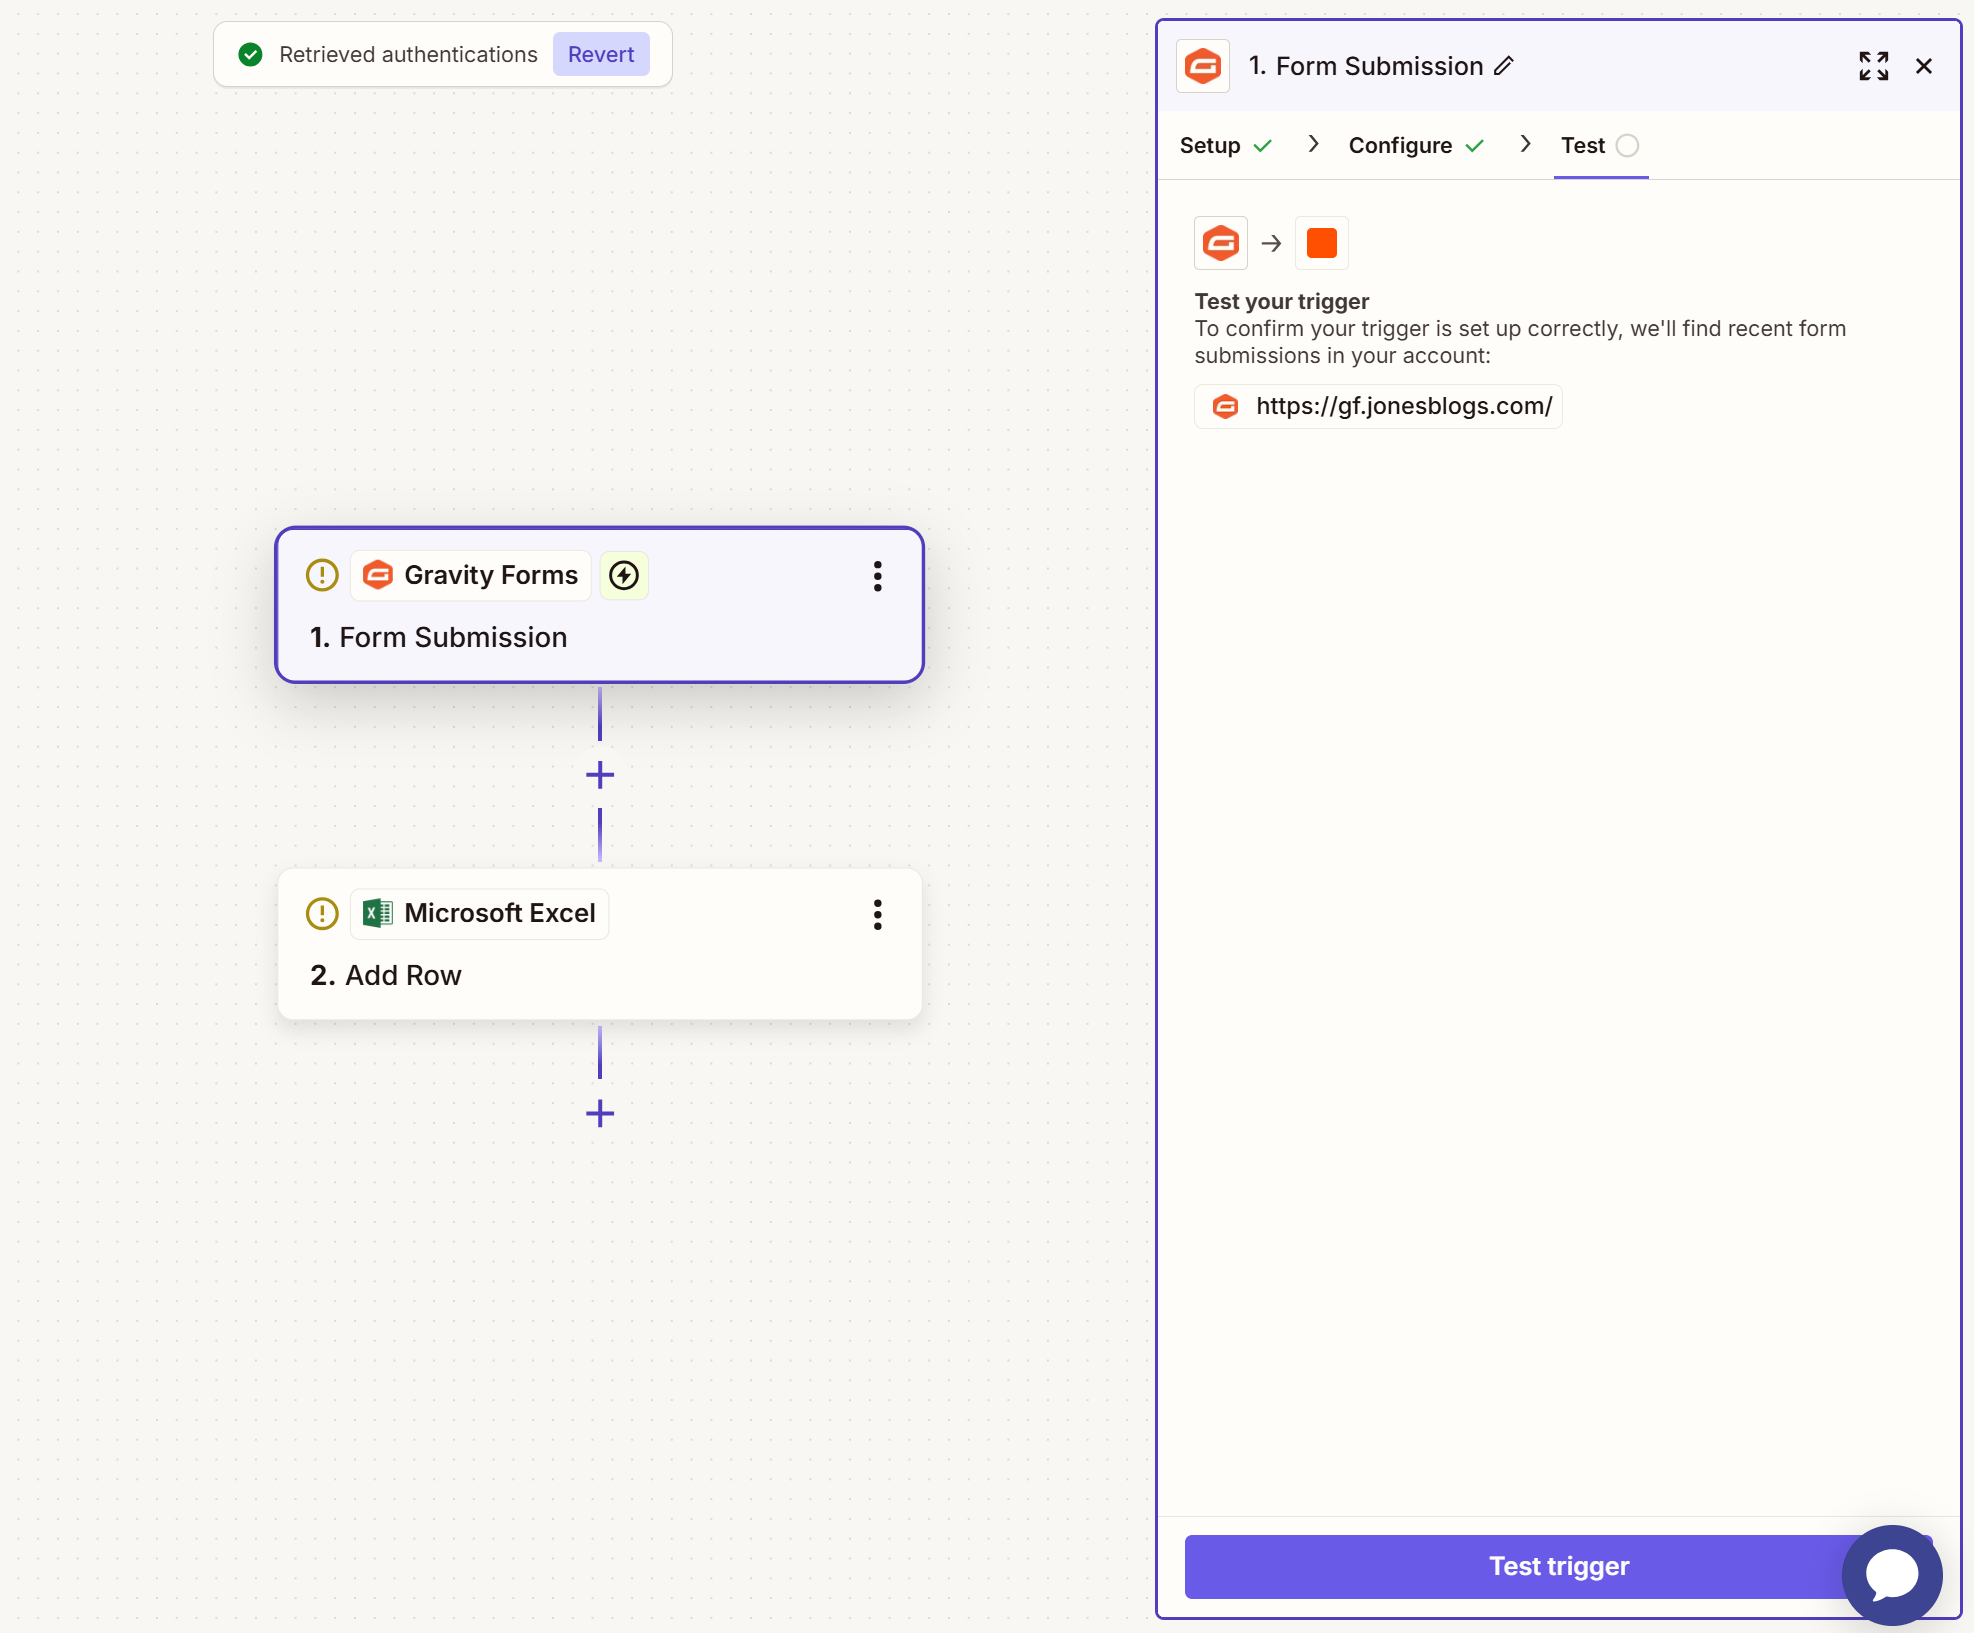
Once you have finished, click on Continue again. You are then asked to Test the Trigger.
You should end up with a viewable example submission record. Click Continue with Selected Record.
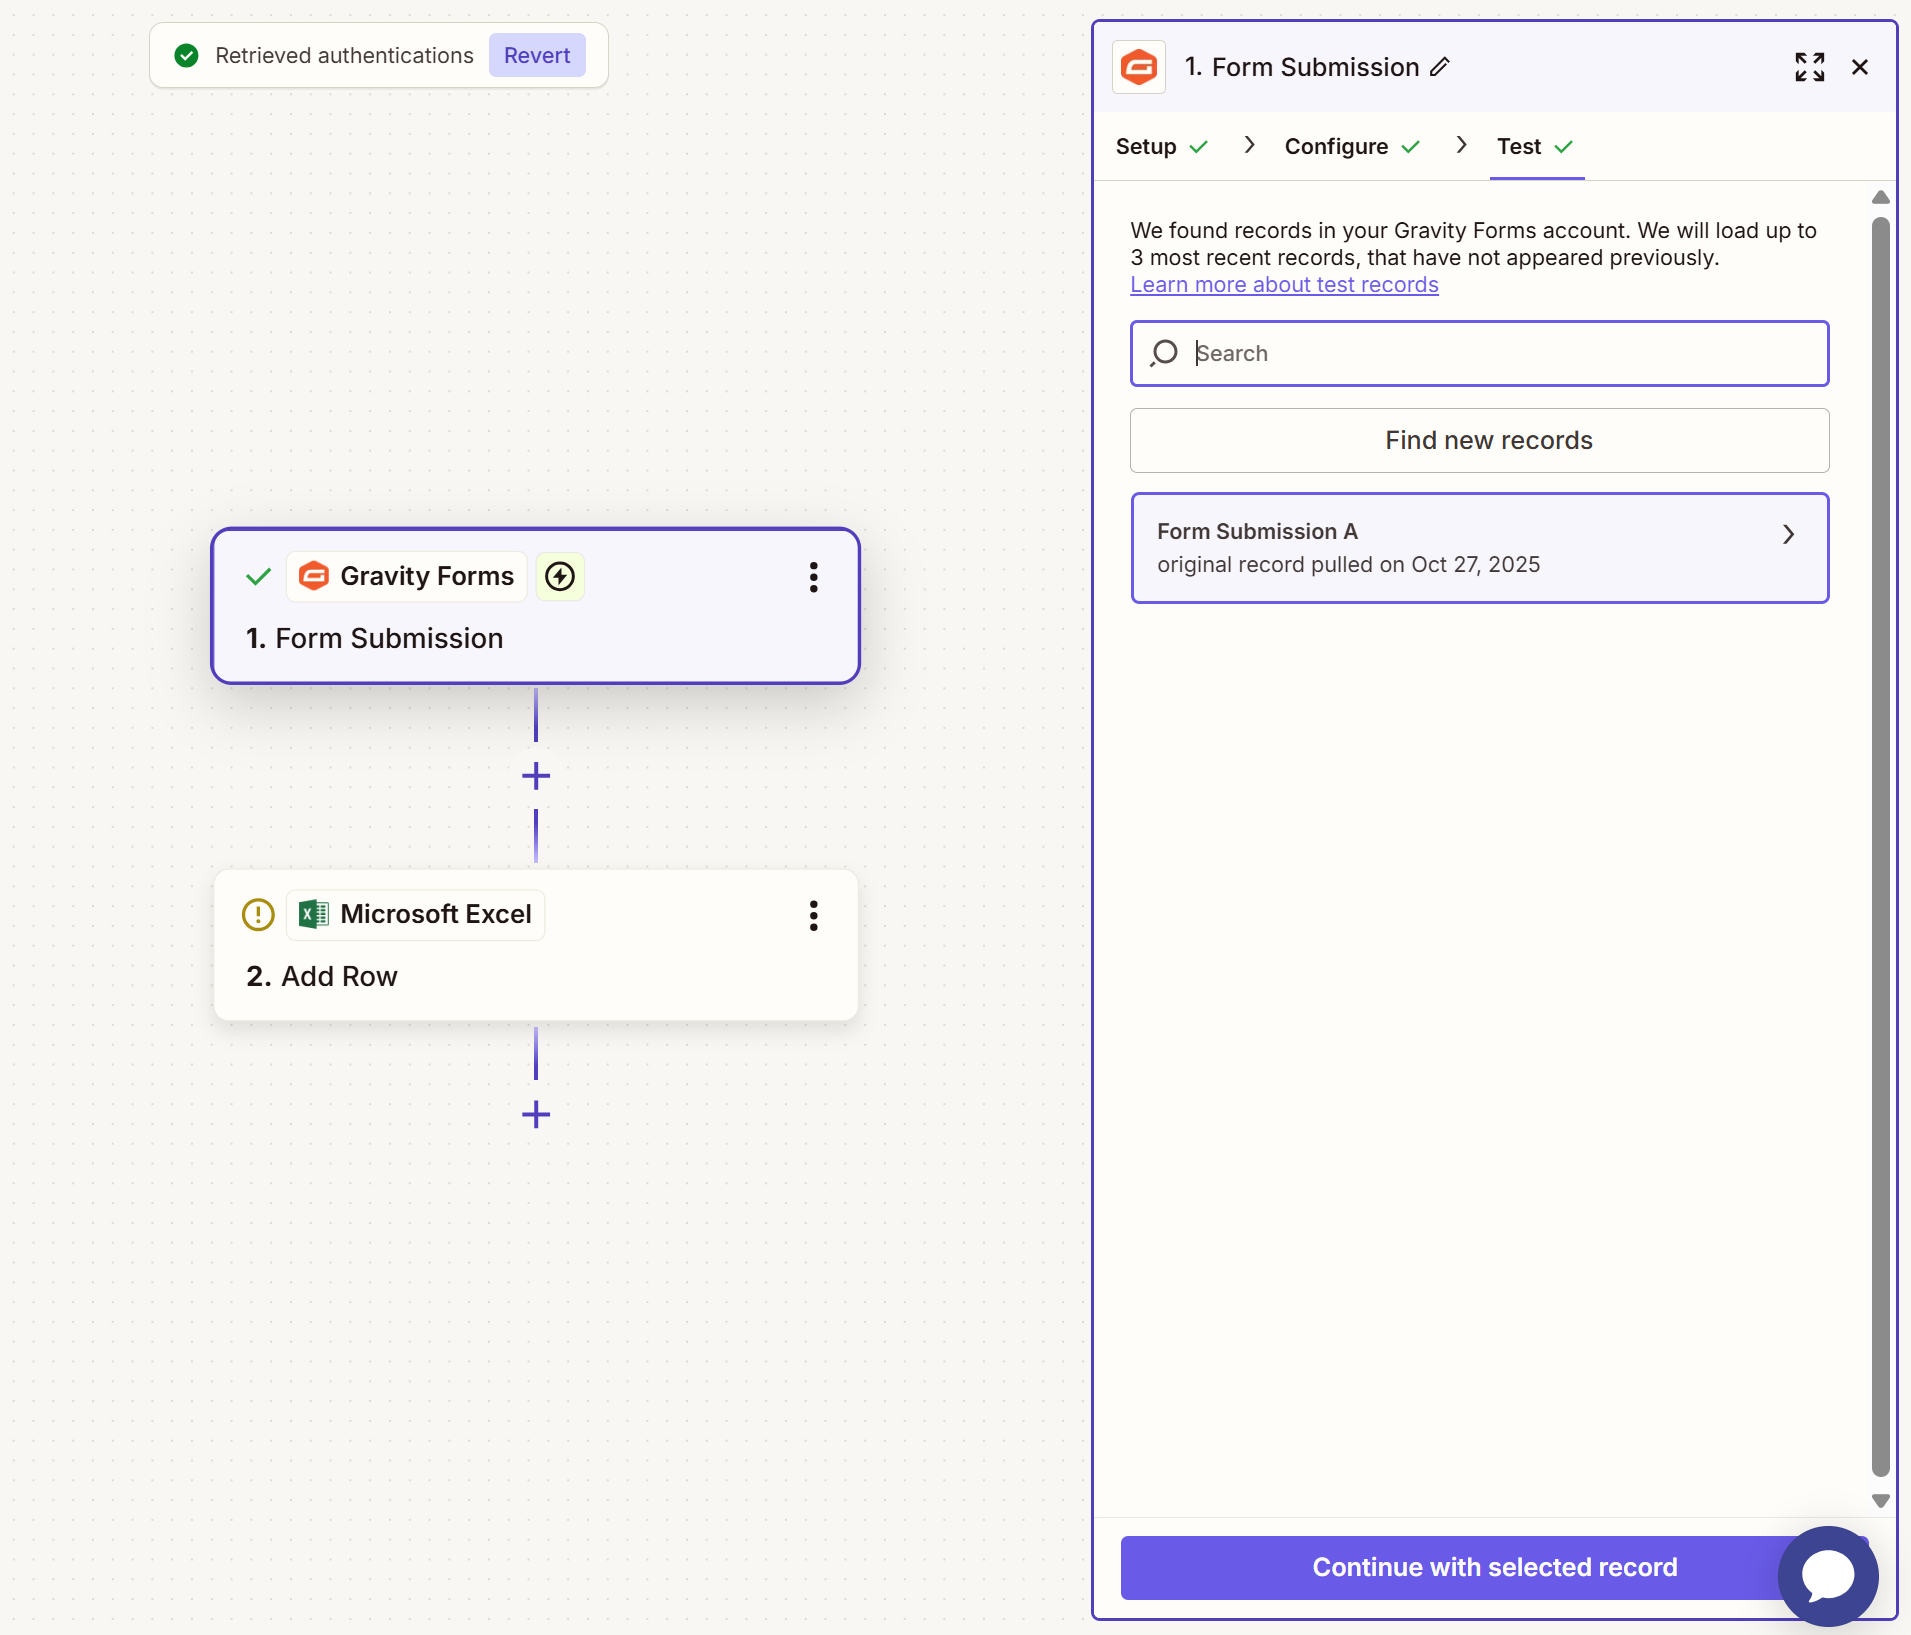
If all works as intended, Zapier will move on to the next step.
8. Establish a connection to Excel
It is now time to deal with the other side of the equation, which is Excel. Again, the Zap you selected will pre-populate the App and Action Event, but it’s here you’ll need to connect Zapier with your Microsoft Excel Account.
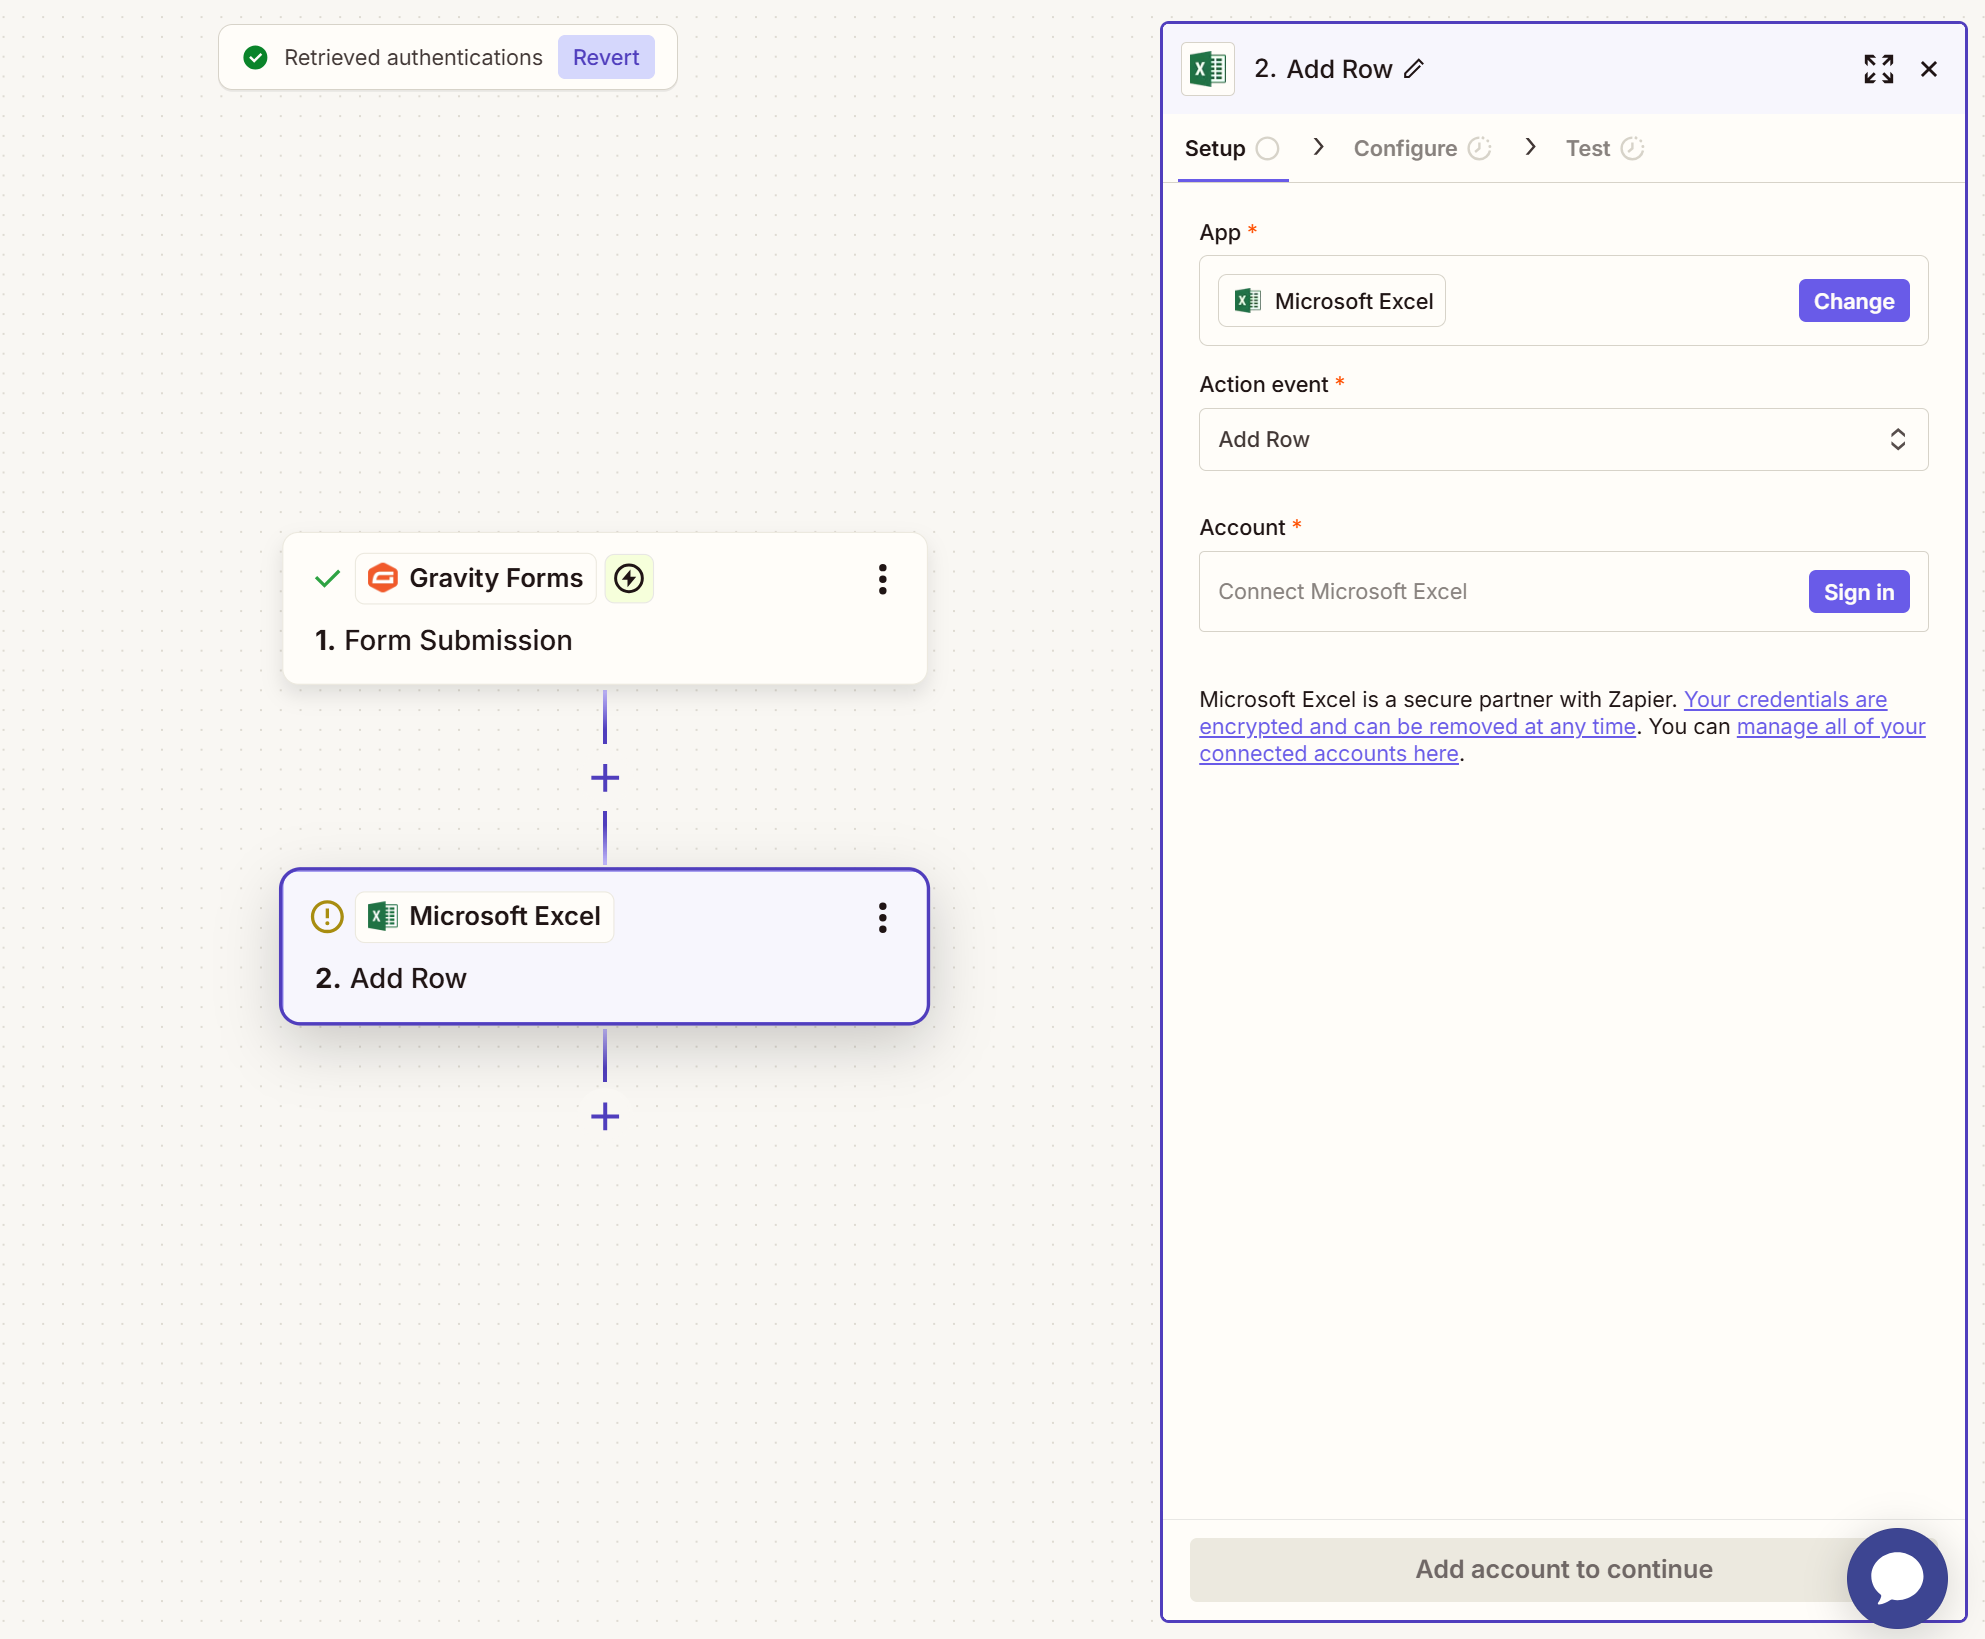
When you click the Sign in button, it opens up a new window in which you need to log in to your Microsoft account.
Once that is done and your accounts are connected, click Continue again.
9. Configure your spreadsheet and test the connection
In the next step, you will need to select the spreadsheet where you want to save the subscriber information that we created earlier.
- Storage source – We’ve left this as OneDrive.
- Folder – Choose the subfolder where you put your spreadsheet, in our case Documents.
- Workbook – Once you have completed the above choices, you should be able to pick your spreadsheet by name from this menu.
- Worksheet — The final step is to choose the worksheet inside the spreadsheet where you want to save your incoming data. In this case that’s simply Sheet1.
When you select your worksheet, it should open up a few more fields that correspond to the column headings we created earlier in Excel.
When you click into one of them, it allows you to assign form data to each. That way, you can map your subscriber’s first name to the first name column, their email address to the email address column, etc.
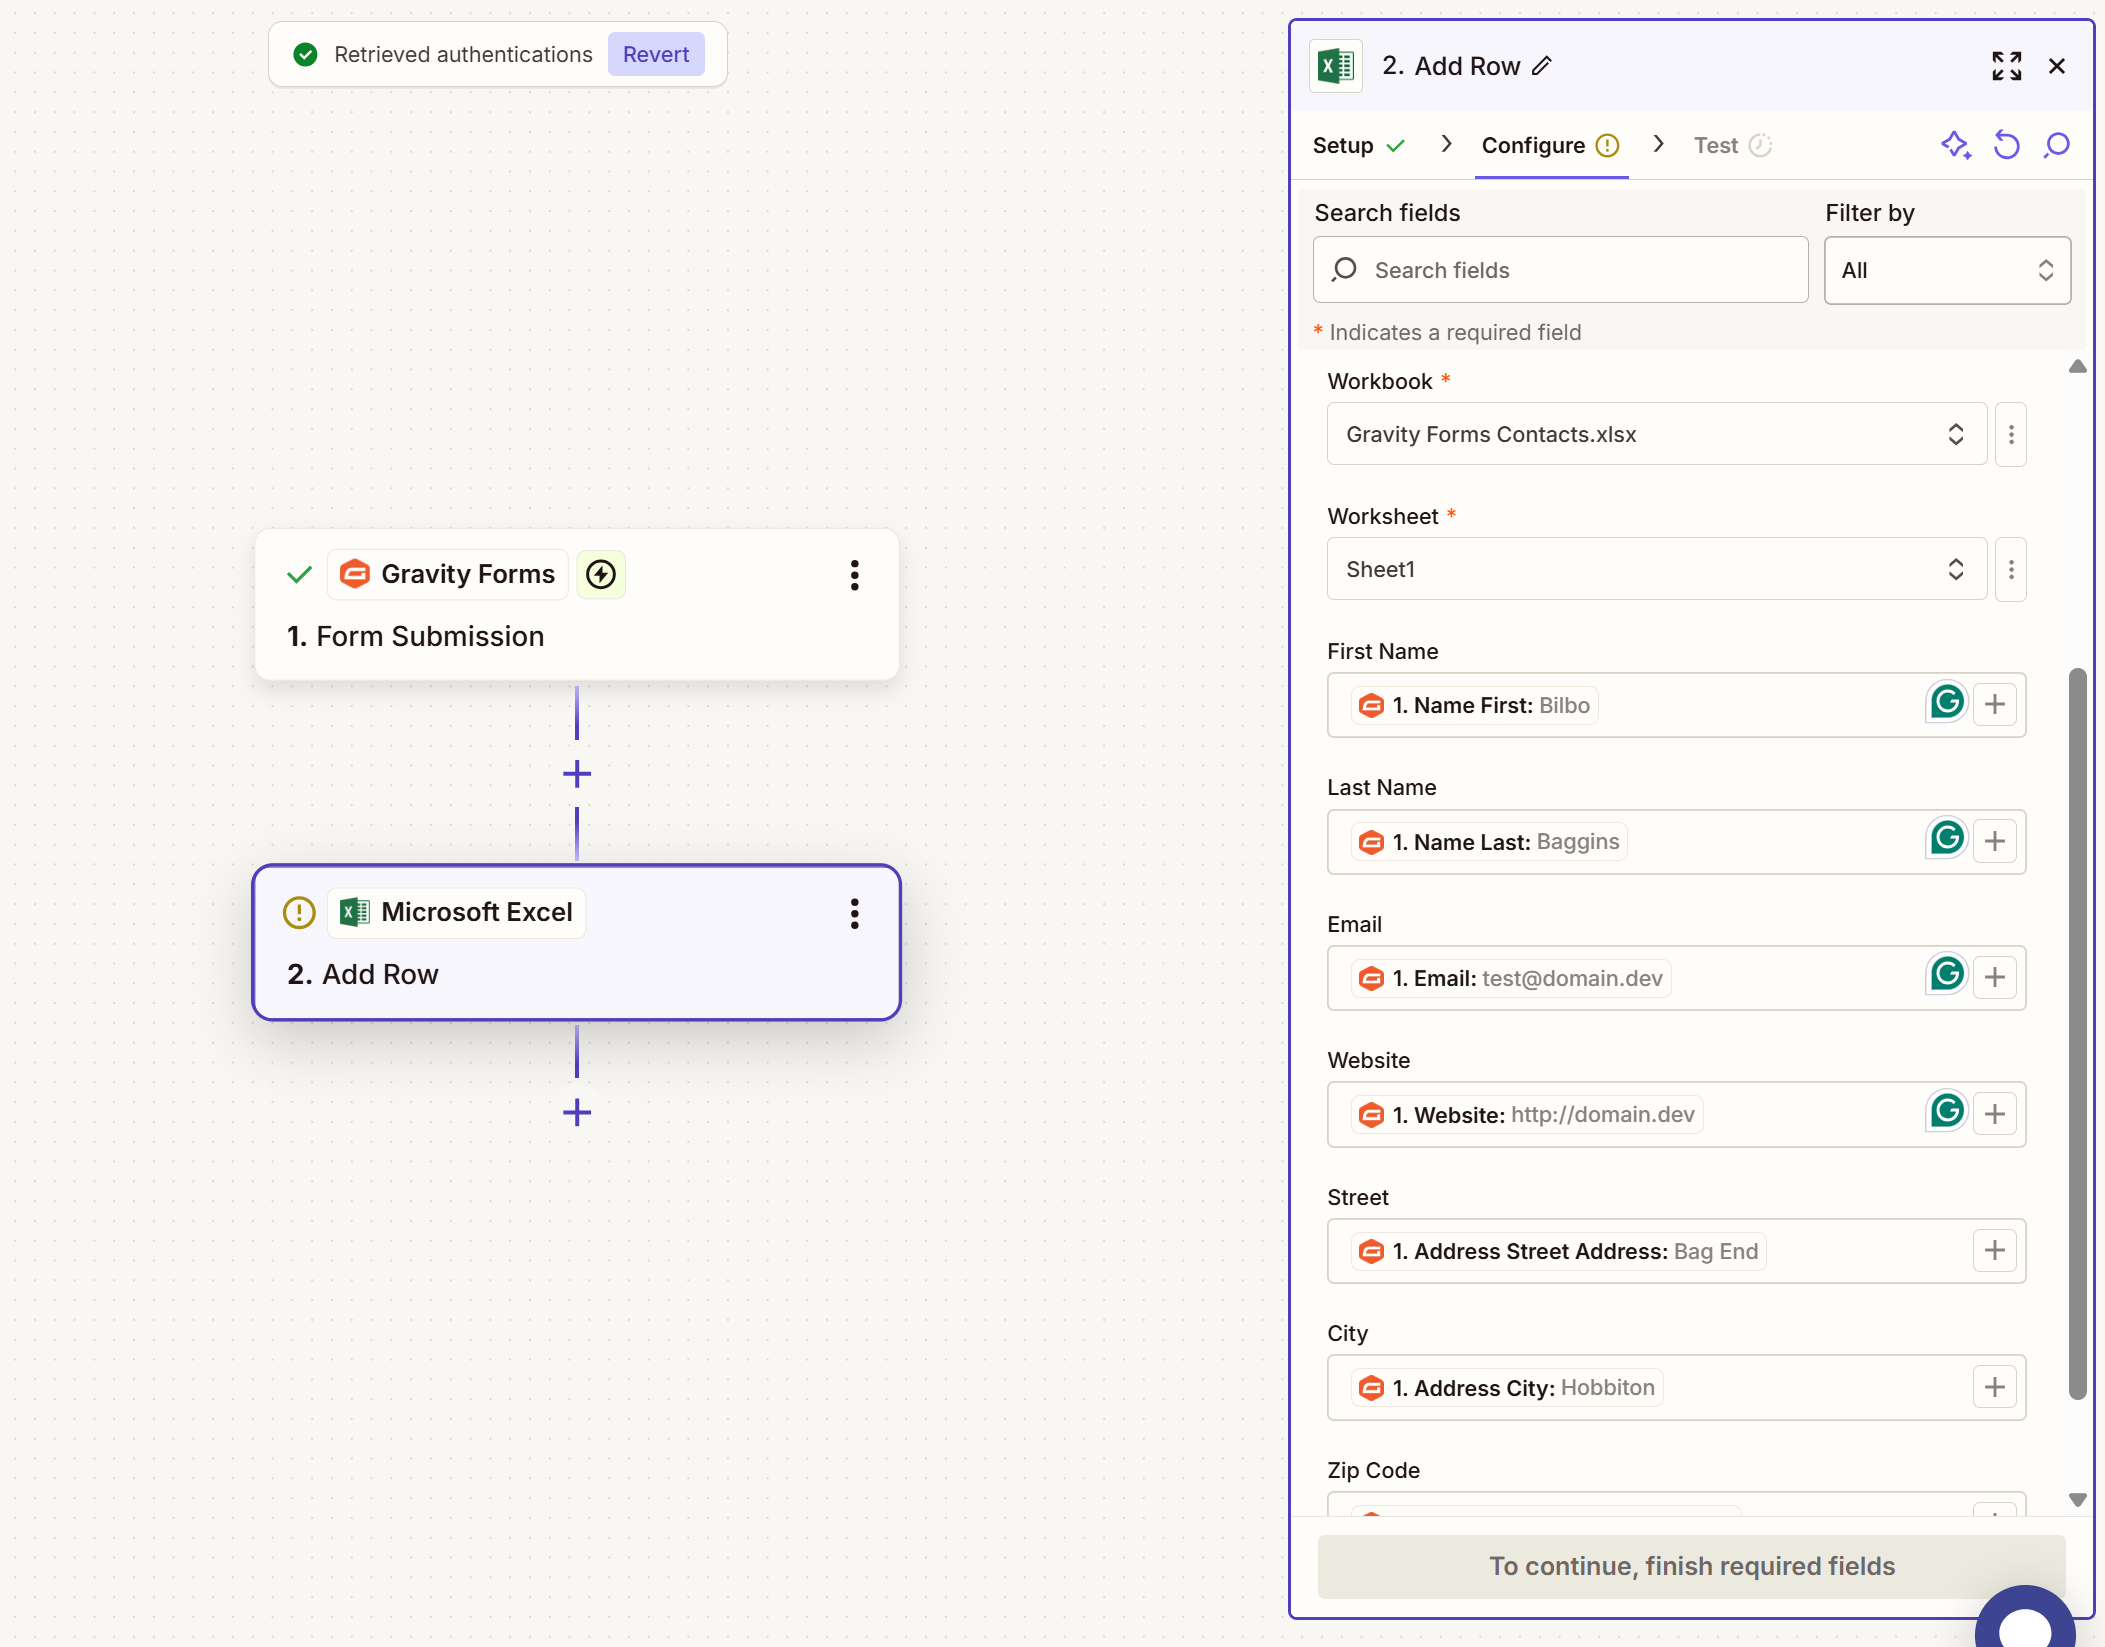
Click Continue when you are done.
The final step is to test the setup. For that, click the Test Step button to send your sample data to the Excel sheet.
If everything goes well, you should see it in your spreadsheet.
If that is the case, click Publish to activate your Zap.
10. Run a test on Your WordPress site
The final step in this tutorial is to do a live test with your actual web form.
With everything configured correctly, it should arrive in your Excel spreadsheet as well.
In addition, you should see the submission in your form settings under Entries.

Congratulations, you are now ready to send form entries from Gravity Forms to Excel!
Move Gravity Forms submissions to Excel? No problem!
Zapier is an impressive piece of software that makes it easy to connect all sorts of applications and services with each other. Its versatility is the reason we created the Gravity Forms Zapier Add-On. It not only makes connecting Gravity Forms to Microsoft Excel easier than ever but offers so many more possibilities.
By moving your form submissions to a spreadsheet, you make it easier to filter, analyze, share, and use your subscriber information for your marketing efforts. At the same time, you benefit from Gravity Forms’ powerful form-building features including the ability to filter data beforehand with conditional logic. Basically, it’s a win-win-win situation!
If you want to take advantage of this functionality, as mentioned, you need a Gravity Forms Pro, Elite, or Nonprofit license. You can also upgrade your existing license and only pay the prorated rate.
Or if you don’t yet have Gravity Forms, check out our free demo to see all that it has to offer.