Gravity Forms is an excellent tool for collecting email addresses and other customer data. But it’s not just about collection—it’s also about what you do with that data. Typically, you’d want to move form entries to a solution like an email marketing provider or CRM.
This is where Brevo, formerly known as SendinBlue, comes into play. Brevo is a popular software solution to build contact lists and engage your audience through various channels.
If you’re looking to integrate Gravity Forms and Brevo, look no further. We’ll discuss the benefits of combining these two tools, explain how you can use Zapier as a middleman via the Gravity Forms Zapier Add-On, and provide step-by-step instructions on how to make it happen.
Benefits of Using Gravity Forms and Brevo Together
Brevo is primarily known as an email marketing platform. It offers a multitude of features to build an email list and engage your subscribers with high-quality email content. Some of its notable features include:
- Drag-and-drop email editor with a free template library
- High deliverability to ensure your emails reach their destination
- List segmentation and personalization for targeted messaging
- Automation features to send emails at the right time
- Unlimited contacts (pricing is based on email sending volume)
- Analytics to gauge what resonates best with your subscribers
In addition to email marketing, Brevo offers services like SMS and WhatsApp marketing, live chat, Facebook Ads, cross-channel campaigns, landing pages, and much more. However, in this article, our focus is on the email aspect and specifically on connecting Brevo with Gravity Forms to grow your email list.
The combination of Gravity Forms’ ability to create and embed forms anywhere on your site, along with Brevo’s powerful email marketing features, is a great match. Plus, the connection is easy to establish, thanks to Zapier.
Understanding Zapier and the Gravity Forms Zapier Add-On
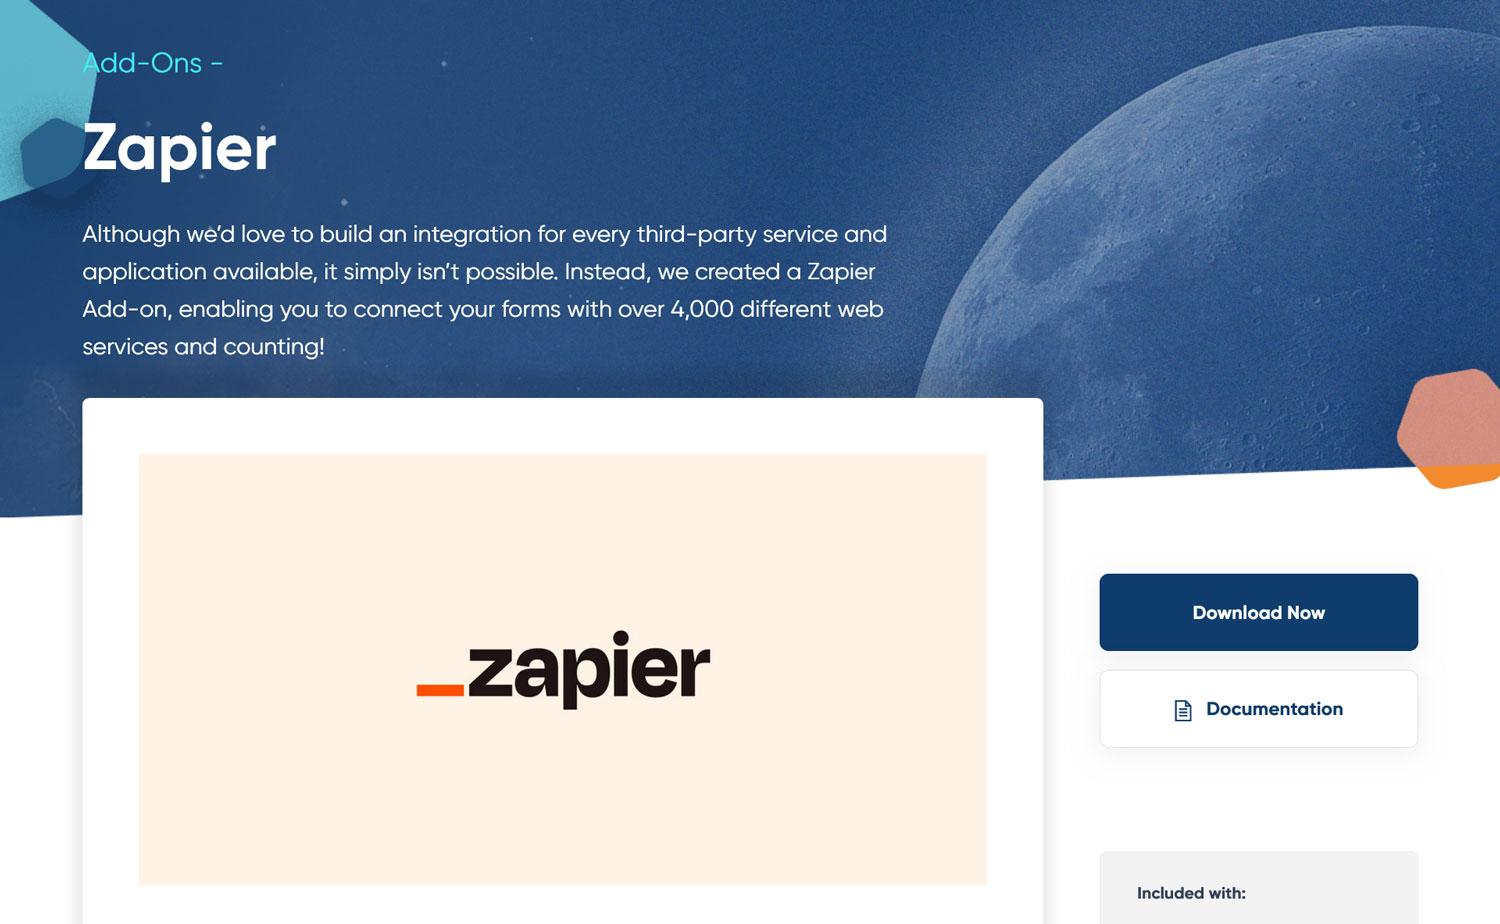
Gravity Forms boasts numerous integrations to work seamlessly with a variety of third-party platforms and services. To extend its capabilities to virtually any service, the Gravity Forms Zapier Add-On was created.
In case you are not familiar wit it, Zapier is an impressive platform that helps users automate workflows by connecting different apps and services, allowing them to share data.
There are almost 7,000 web apps you can cross-connect with so-called “zaps”, such as:
- Google Sheets, Docs, Drive, Gmail, and more
- Social platforms like Facebook, Pinterest, LinkedIn, Instagram
- Asana, Trello, and other project management software
- CRMs like Zendesk and Salesforce
- Accounting tools like Freshbooks or Xoho
Gravity Forms and Brevo are also among those options (you can find the full list on the Zapier website).
In order to send form entries to Zapier and beyond, you need the Gravity Forms Zapier Add-On. It is one of our most popular extensions and unlocks endless possibilities to work with the information you collect through forms, automate workflows, and more. There are many pre-built zaps that make it easy to set up from the Zapier dashboard, as you’ll see below.
We also have other use case examples such as working with Google Sheets and Pipedrive.
The Zapier Add-On is available with Gravity Forms Pro and Elite licenses.
How to Connect Gravity Forms and Brevo Using Zapier
Now that we’ve covered the preliminaries, let’s dive into how you can establish a connection between Gravity Forms and Brevo via the Zapier Add-On. Note that it’s a prerequisite to an HTTPS connection, so ensure your website has one.
1. Sign Up to Brevo and Create an Email List
The first step involves signing up for Brevo. You can do this by visiting the Brevo homepage and clicking on one of the Sign Up Free buttons.
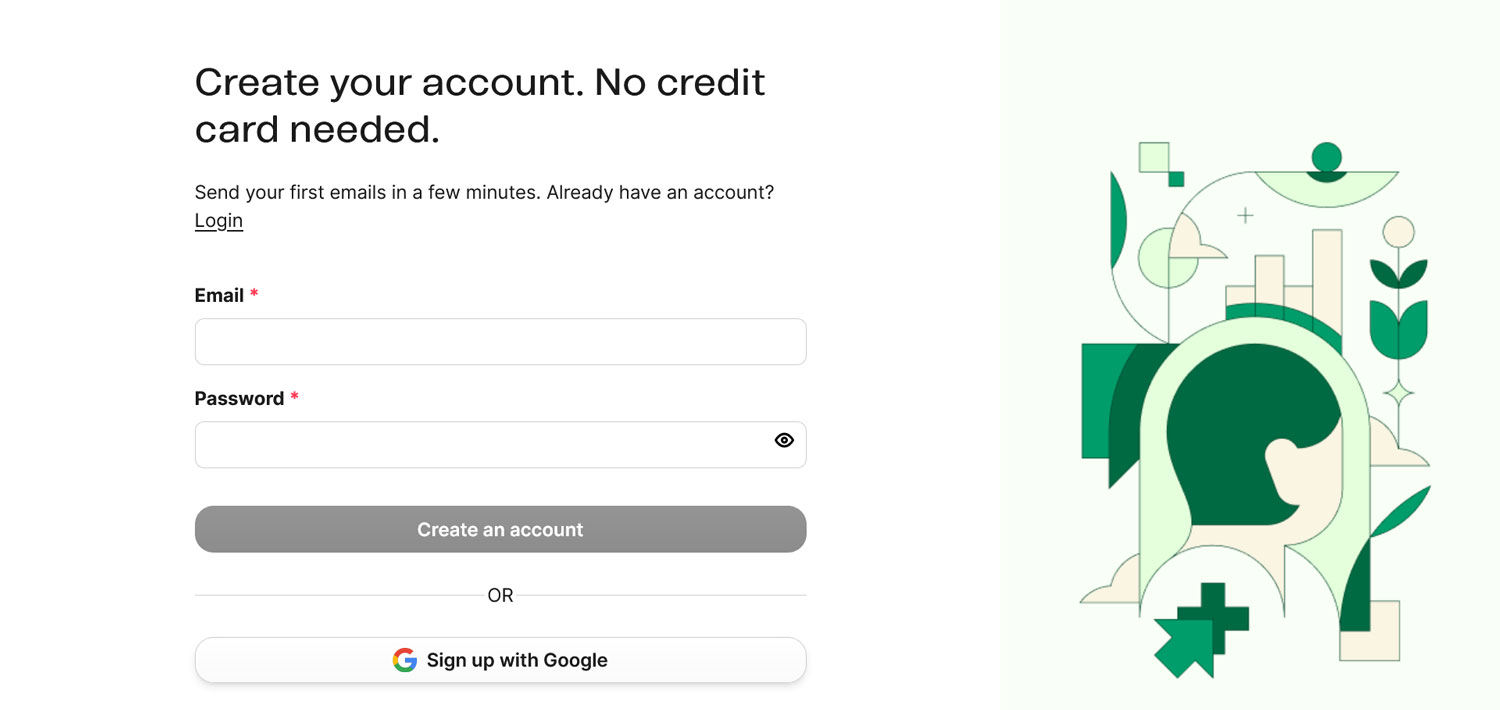
Next, use your email address or Google/Apple credentials to create an account. Follow the steps to complete the process. When you get to the license selection, you can go with the free plan for now.

Once you’re on the dashboard, your next task is to create an email list. This way, you already have something to connect your Gravity Forms forms with down the line. So, while you are here, click on Contacts → Lists to get to the respective menu.
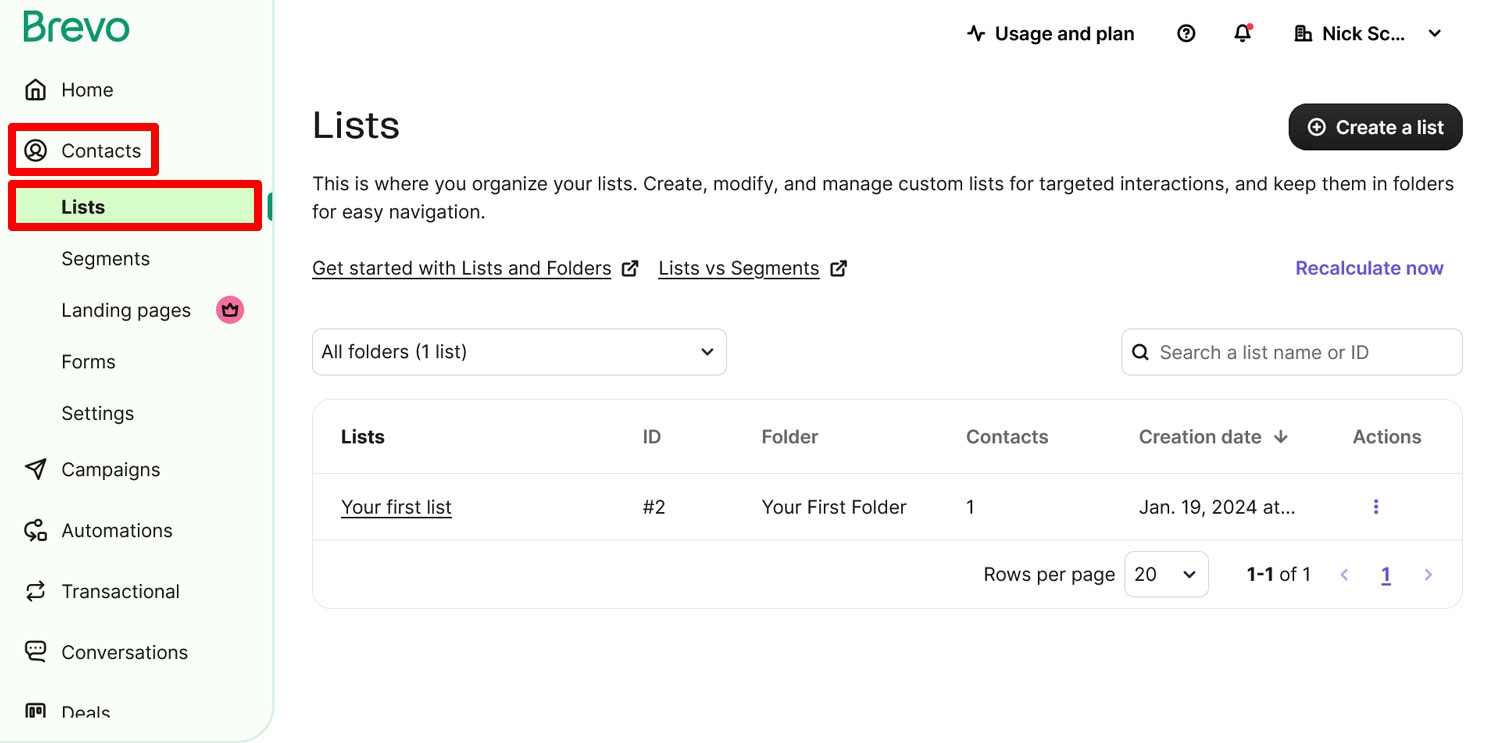
The first thing you want to do here is create a new folder. In Brevo, contacts are arranged in folders and lists. Folders are for broader categories, like different businesses you’re building email lists for. Lists, one the other hand, classify contacts within those categories, e.g. contacts for different products you are selling. You can find more information on this in the Brevo Help Center.
To create a folder, click on the dropdown menu that says All folders, then select Create a new folder.
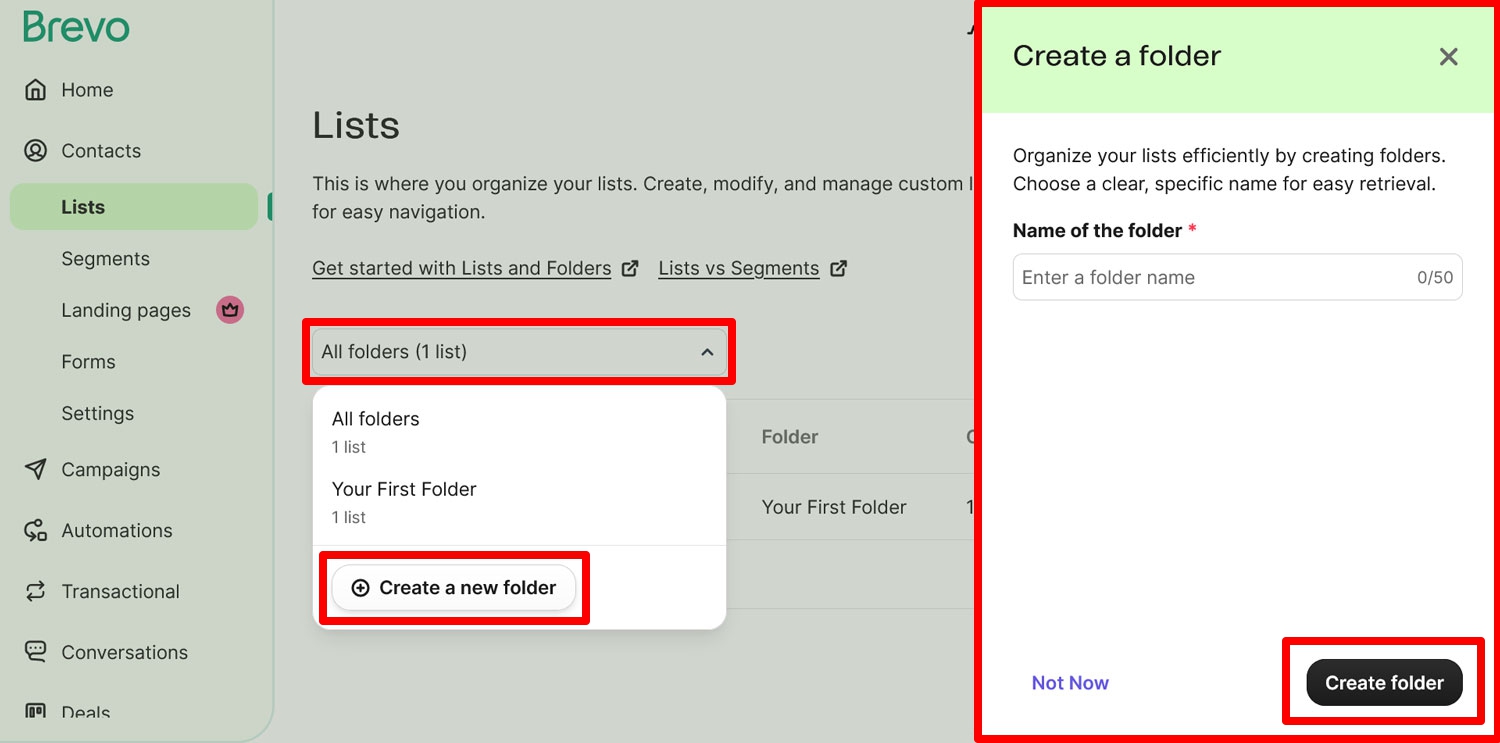
Give it a relevant name and click Create folder. Then, click on Create a list in the upper right corner.
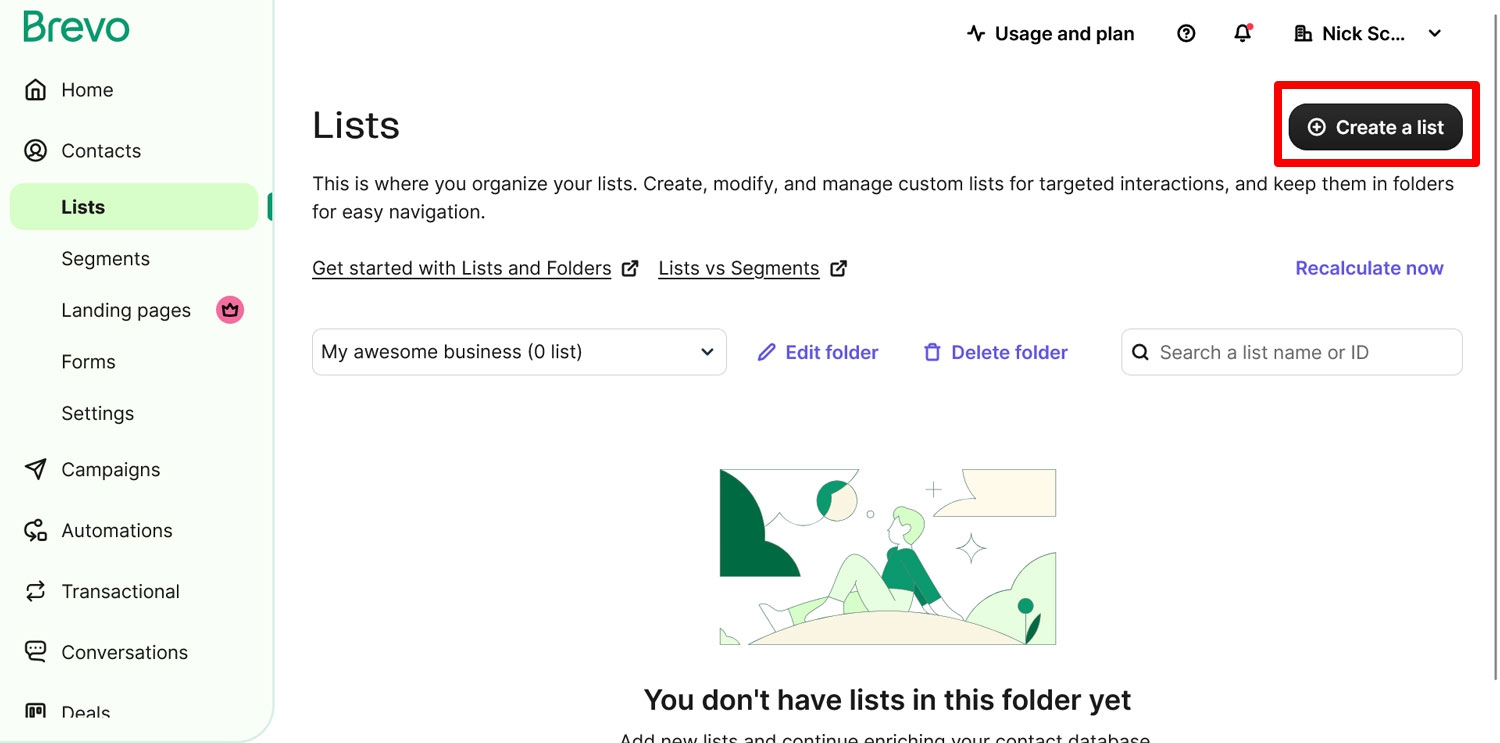
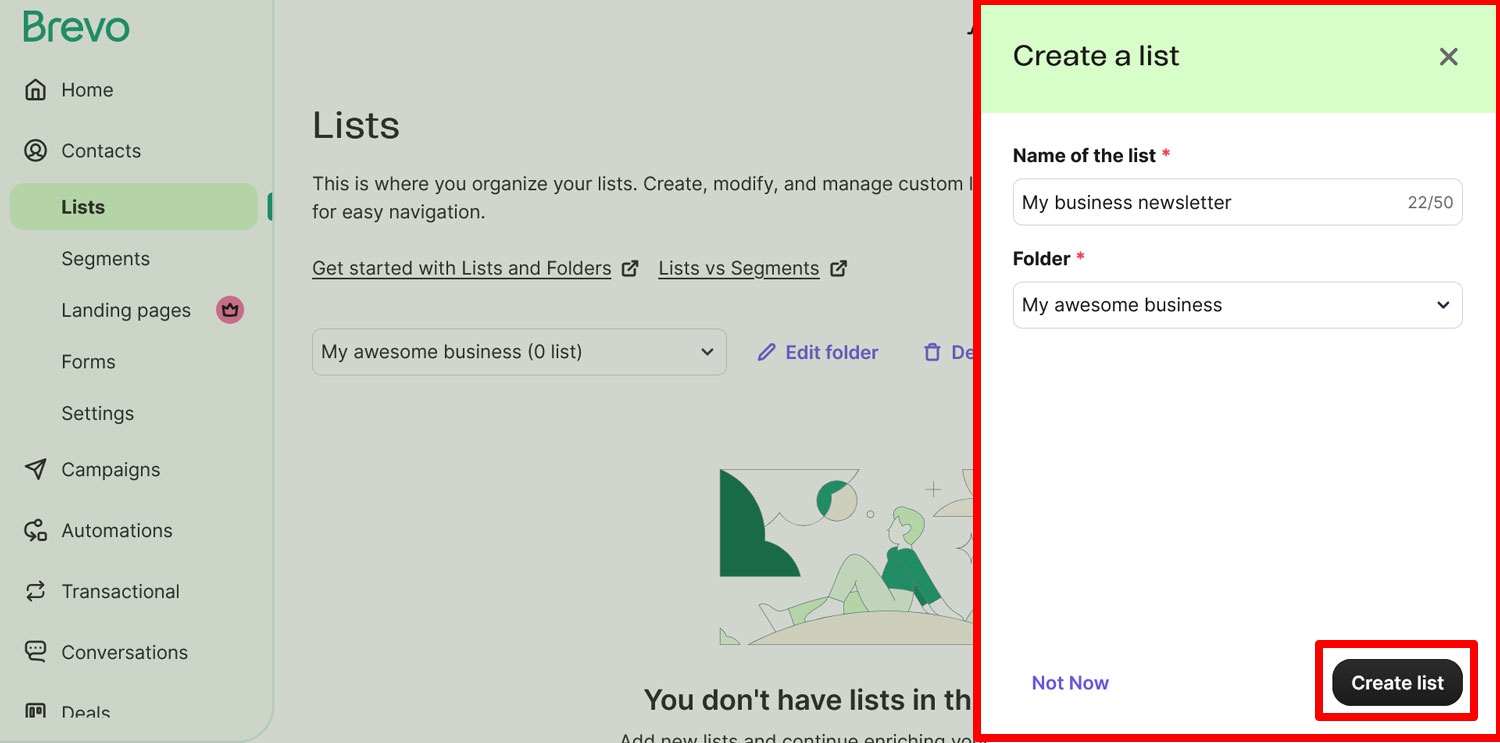
Give your list a name, choose the appropriate folder, and hit Create list.
Alternatively, you can edit and rename the existing example lists that Brevo creates, or skip this step if you already have an existing Brevo account with your own contact lists.
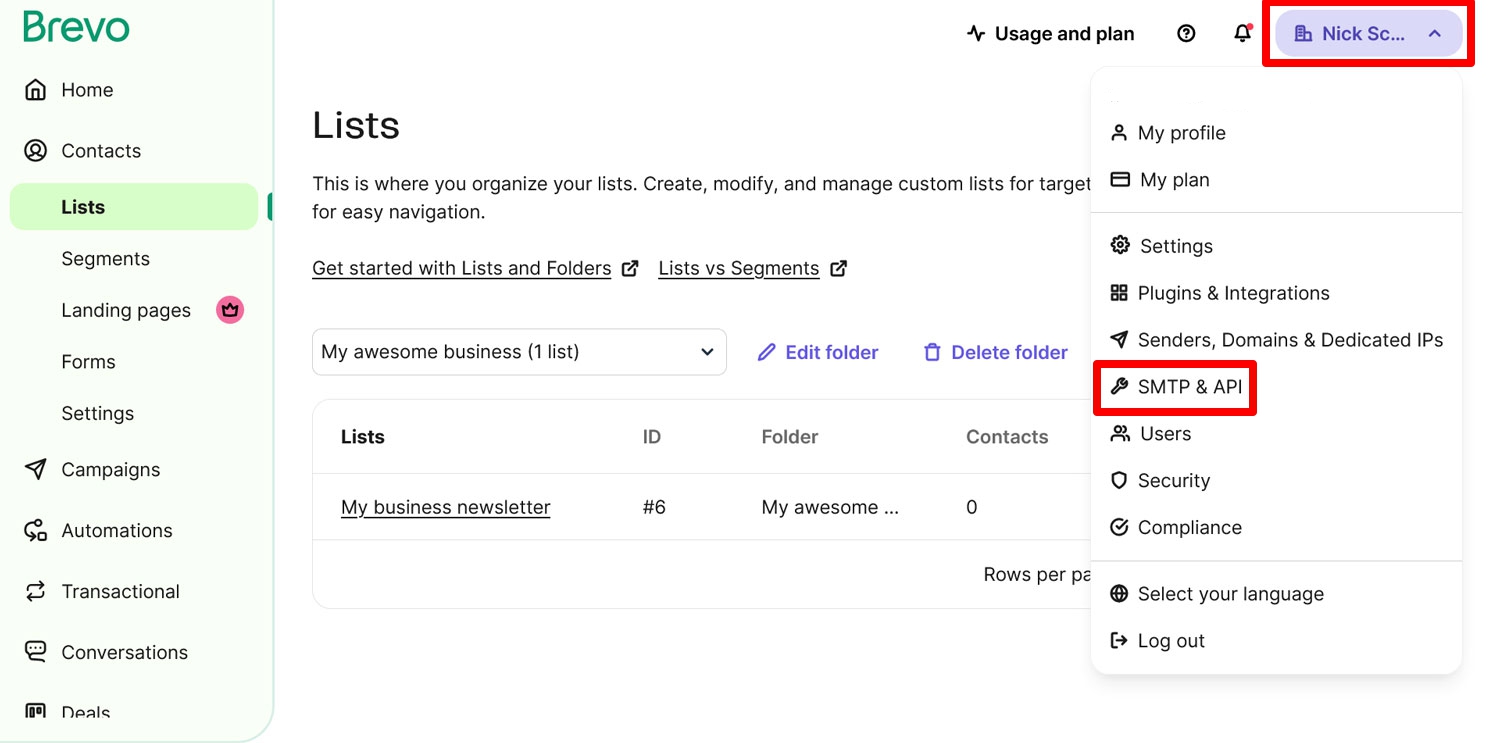
2. Set Up a Brevo API
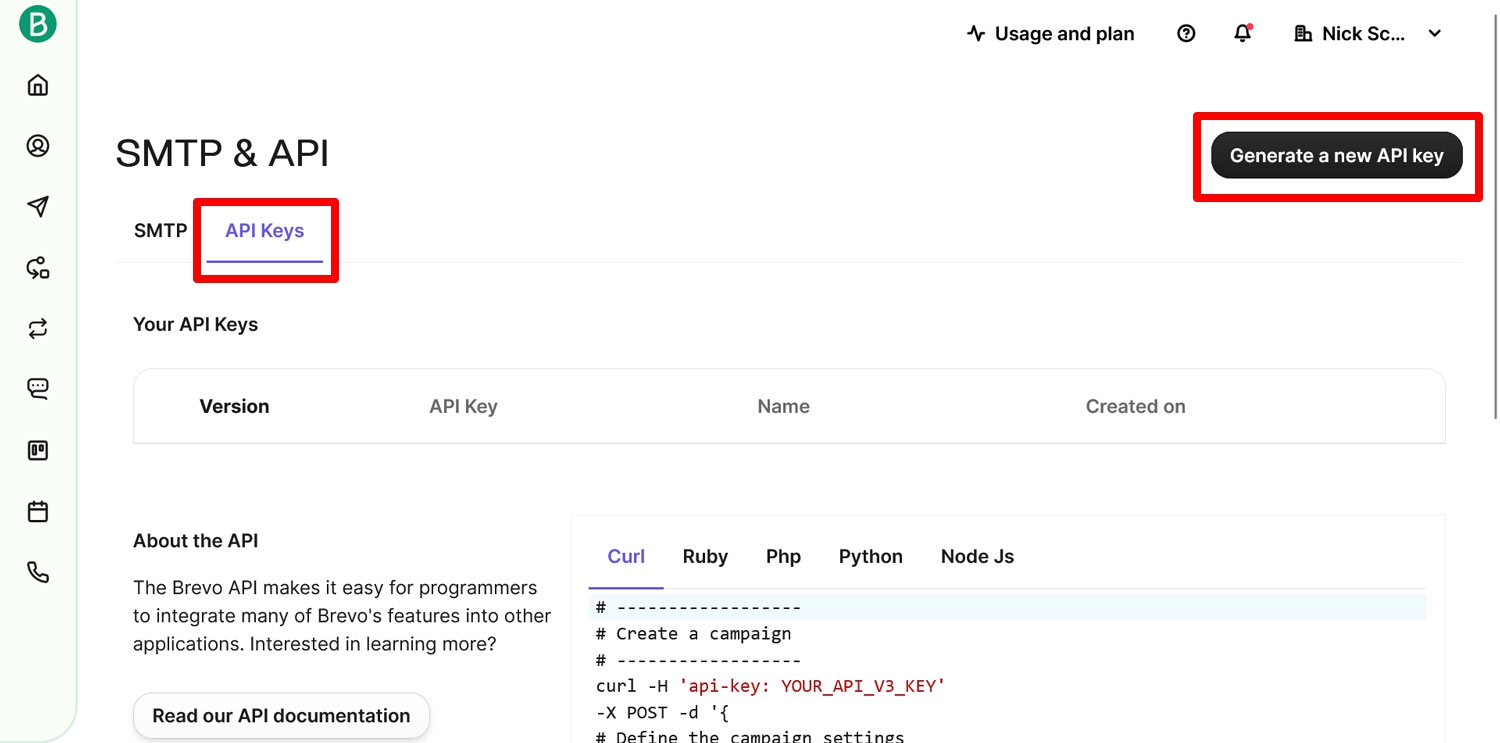
The final step in your Brevo account is to set up an API key, which you’ll need to connect to Zapier. You find this option under SMTP & API in your Brevo dashboard under your name in the upper right corner.
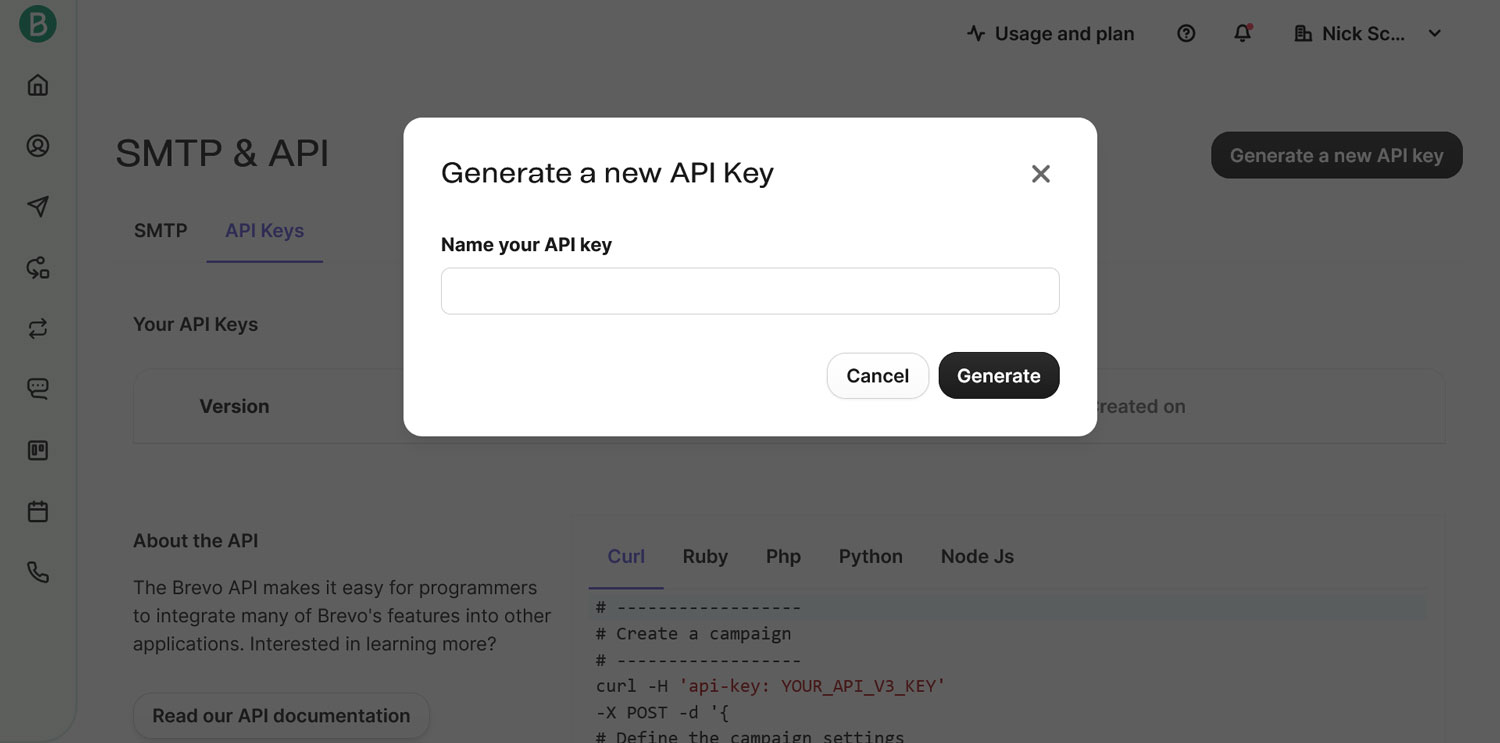
Go to the API Keys tab and click Generate a new API key.
Enter a name for your API key so you can recognize it later.
When you continue, Brevo will display your API key.

Copy this key and keep it somewhere safe, as you’ll need it soon and Brevo won’t show it again after you close the window.
3. Get Your Zapier Account
Naturally, to use Zapier for integrating your forms with Brevo (or any other purpose), you’ll need a Zapier account. Create one by visiting the Zapier homepage and using one of the many options available.
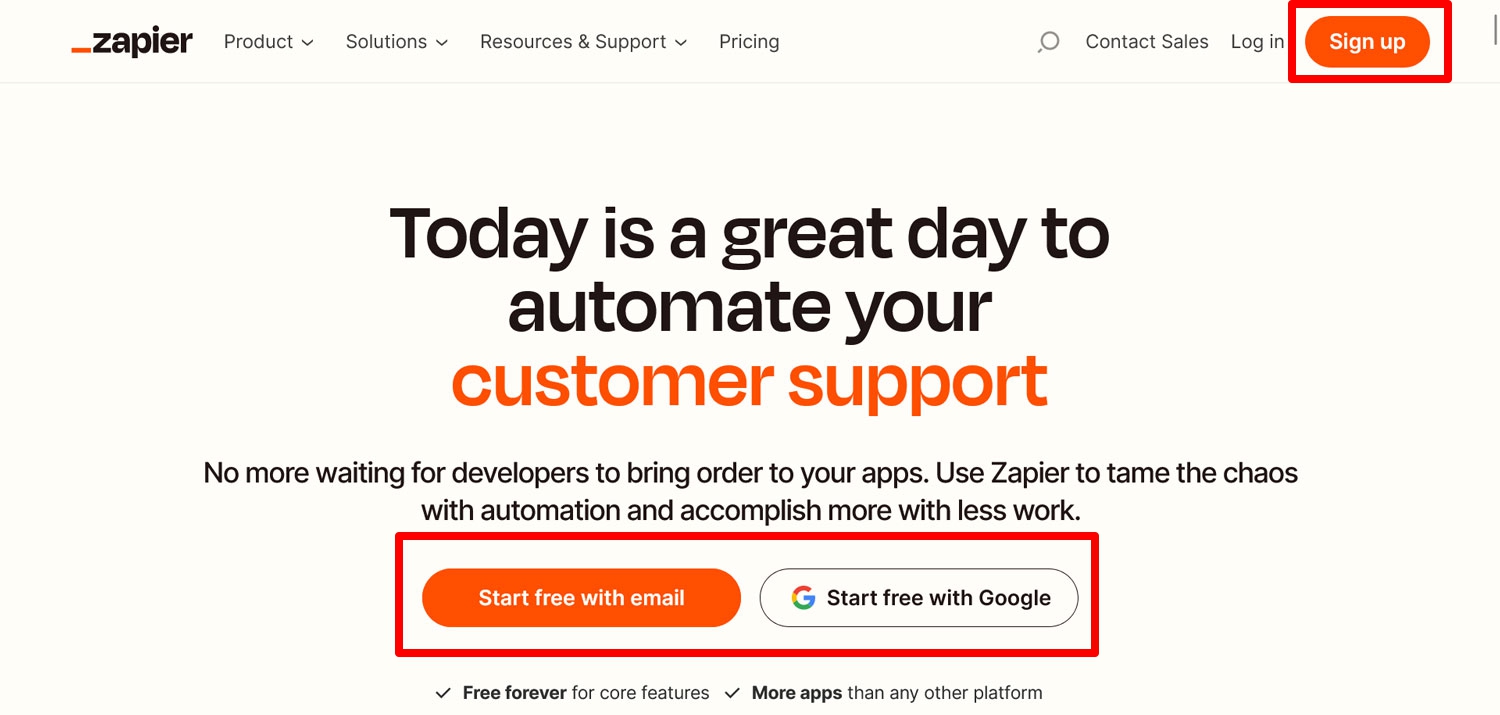
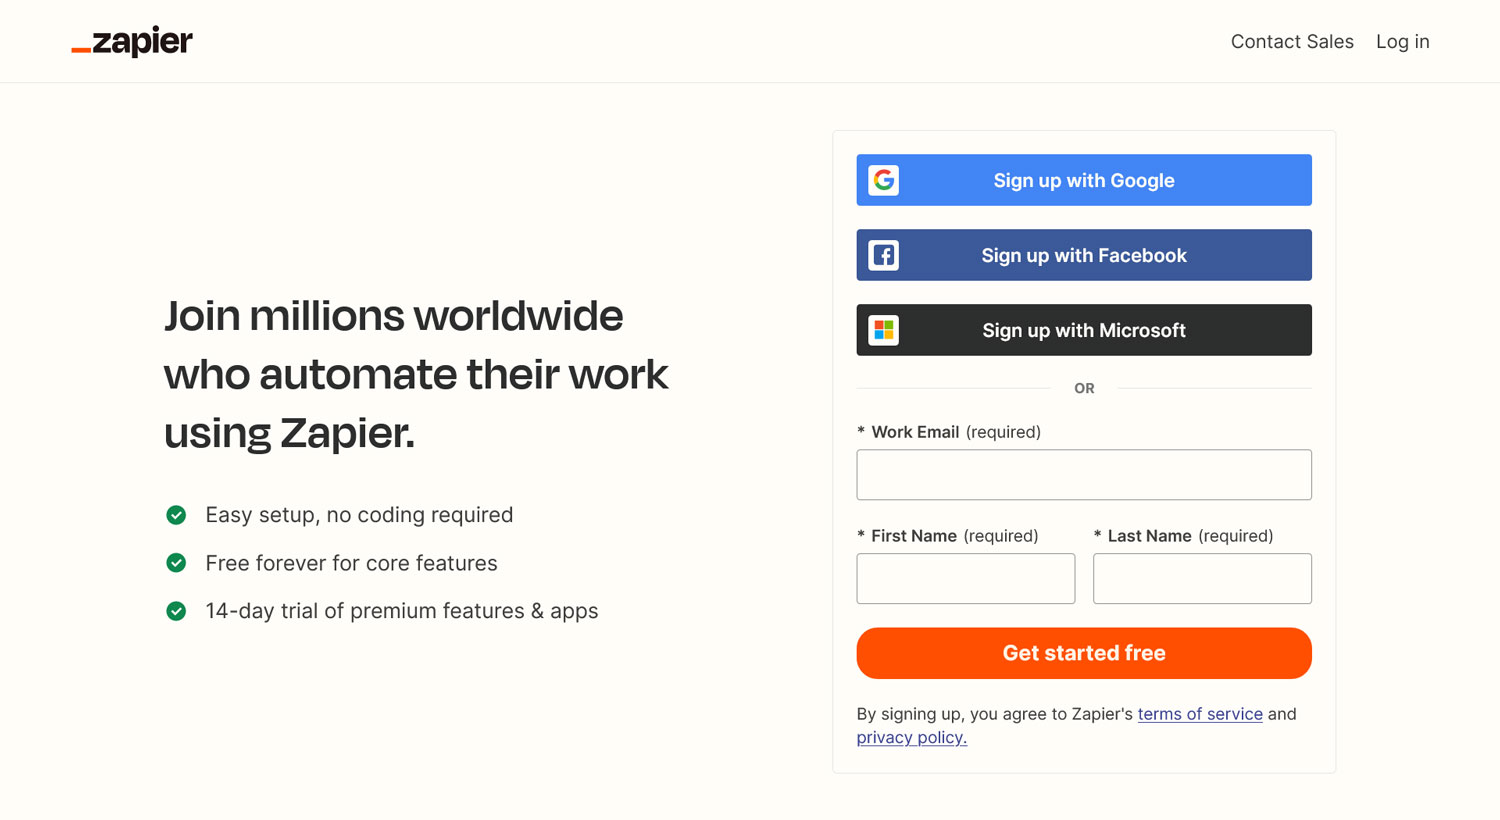
You can sign up with an email address or with your Facebook, Google, or Microsoft account.
The free account is sufficient for testing purposes, but if you plan on heavy usage, consider their paid plans.
Once this is set, it’s time to turn to your WordPress website.
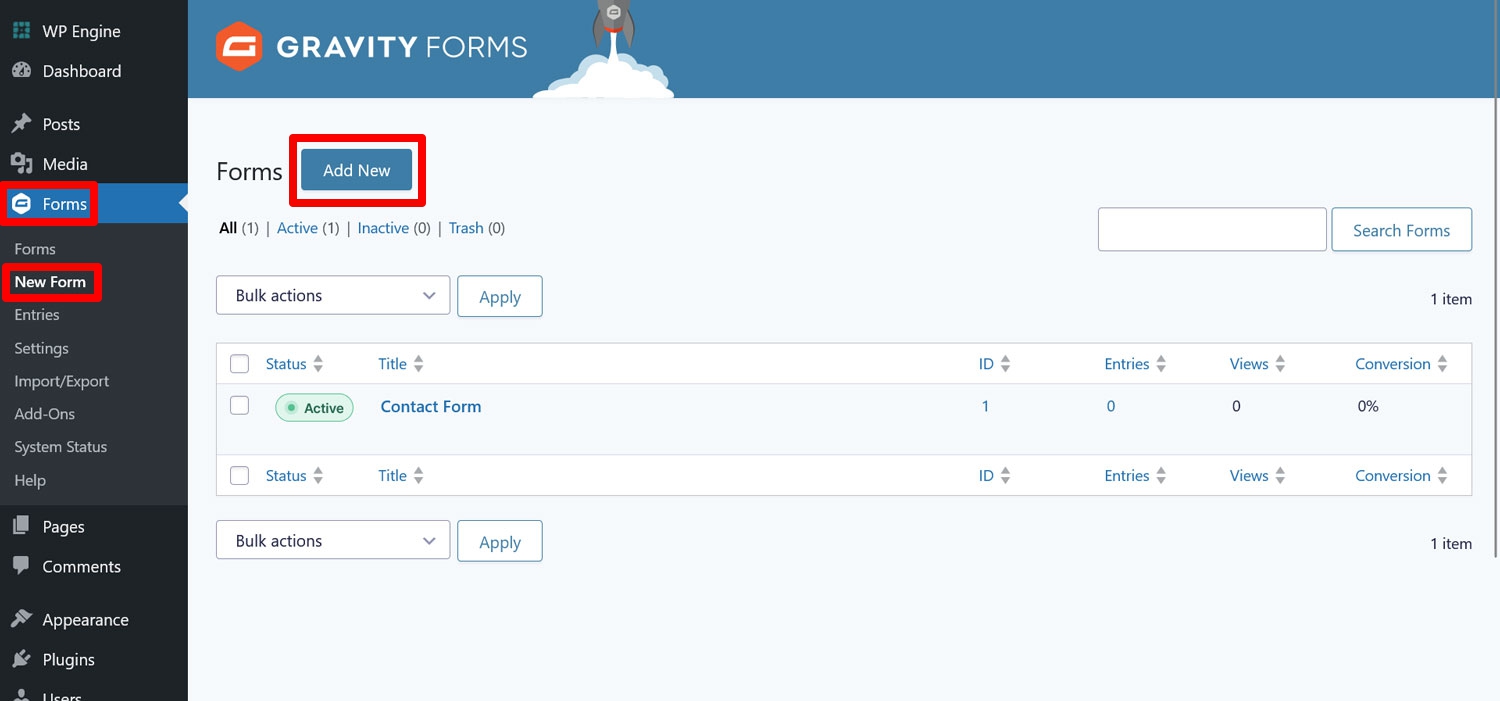
4. Create a Form
Our goal is to connect a Gravity Forms form with Brevo so that form submissions are added as subscribers to your email marketing service. If you don’t have an email sign-up form on your website, now is the time to create one. Use an existing template or start from scratch by clicking on Forms → New Form.
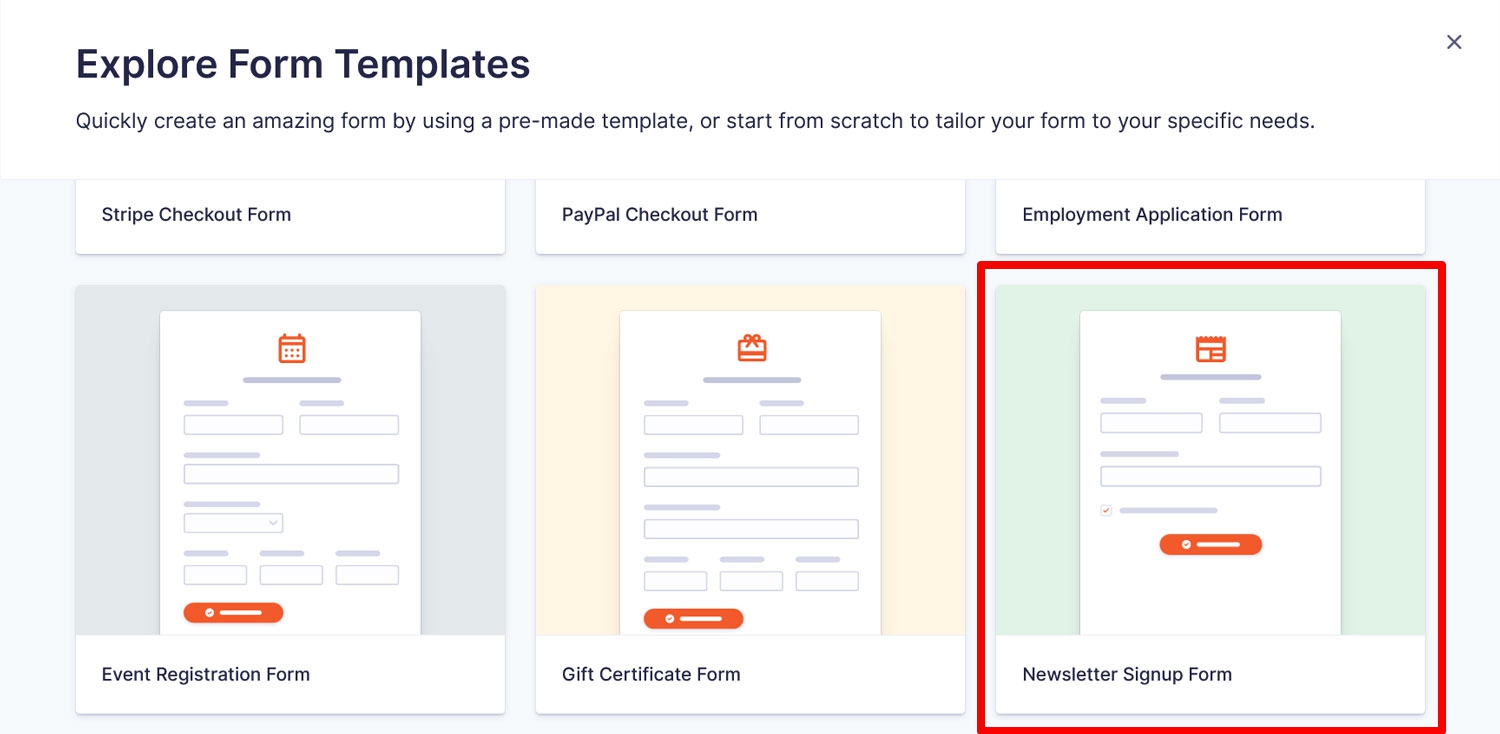
In the popup, pick a blank form or, as we will do, select the Newsletter Signup Form template.
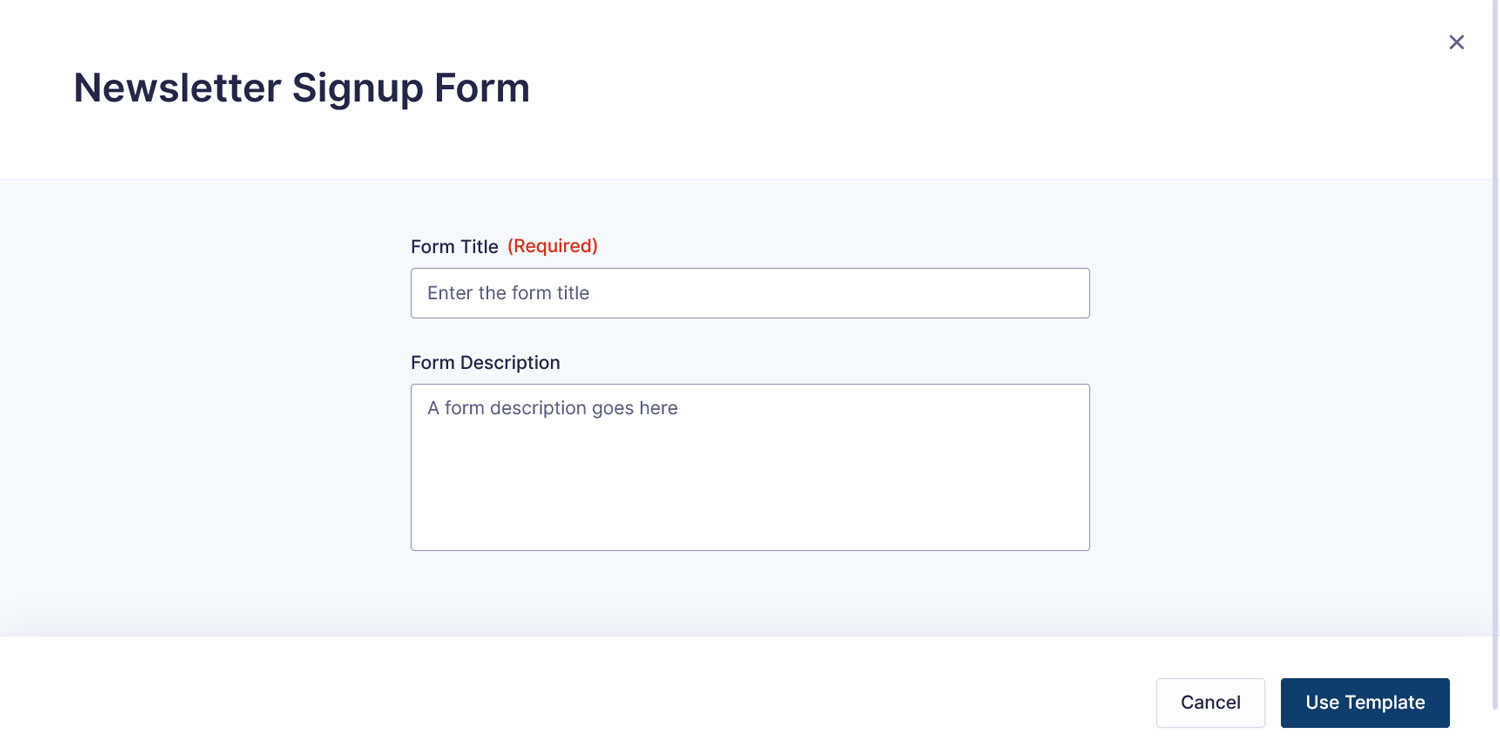
Enter a form name and click on Use Template.
The form should have all the necessary fields: first and last name, email, email confirmation, and a consent field.
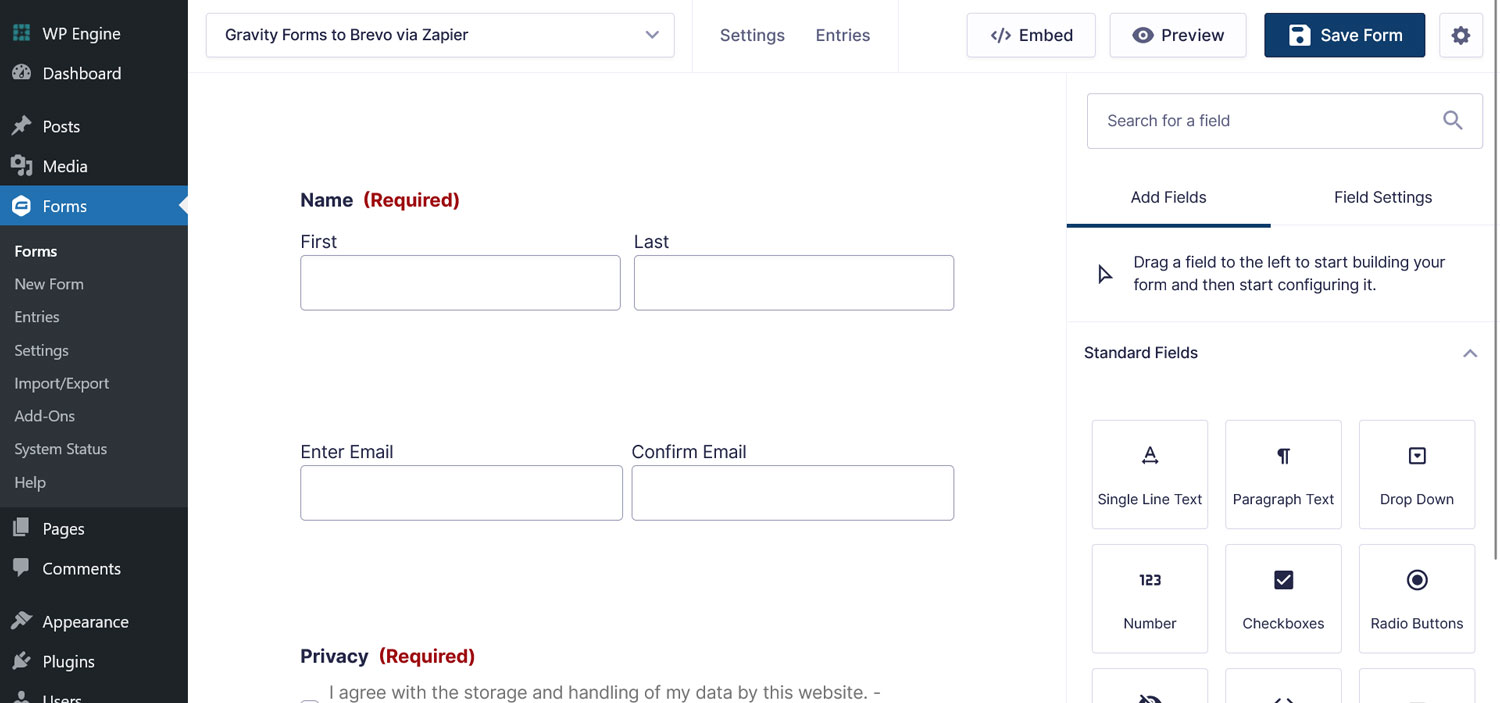
Customize as necessary (not least, remove the tip at the top to connect it to an email marketing provider, way ahead of you buddy) and save the form. You can embed your form via the Form block or the Gravity Forms shortcode, but this isn’t strictly necessary to set up the connection to Brevo via Zapier.
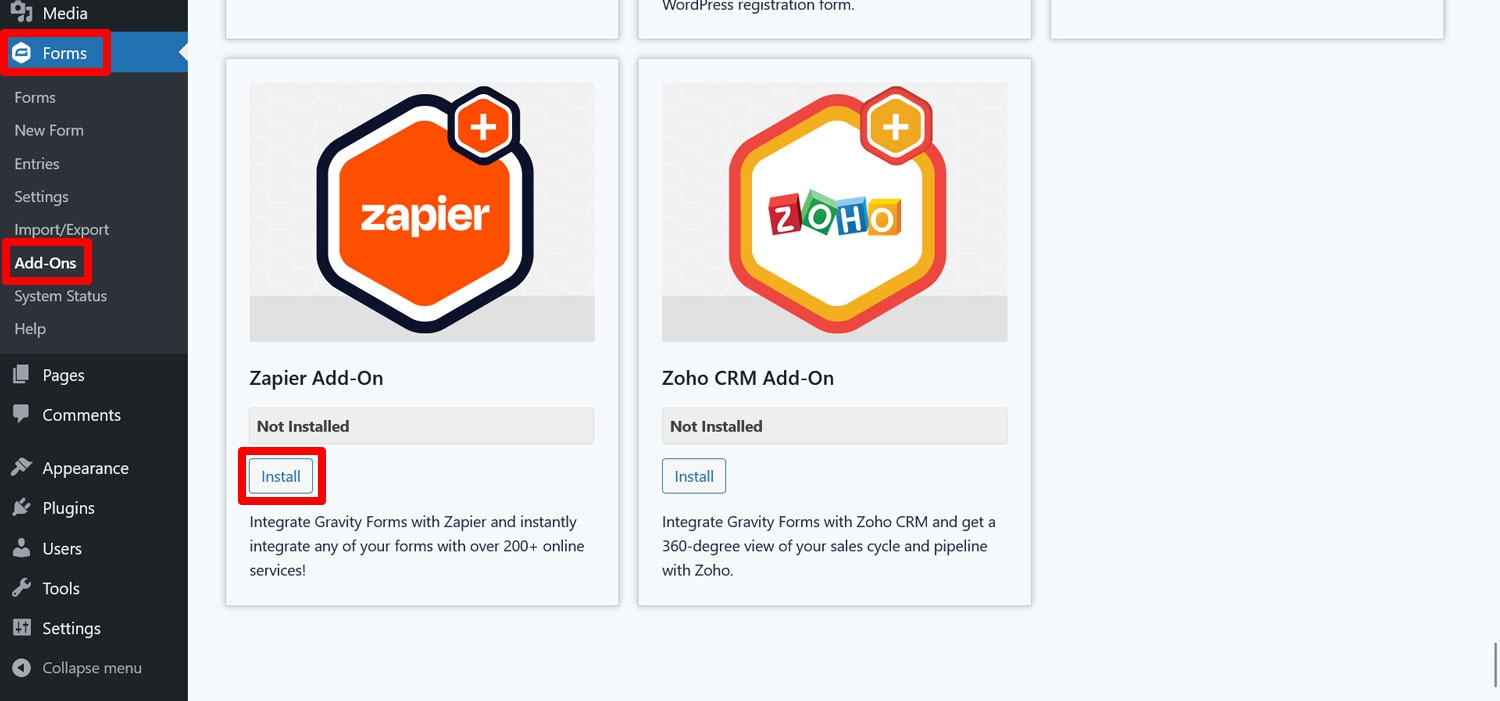
5. Install and Configure the Zapier Add-On
Now it’s time to install the Gravity Forms Zapier Add-On. Go to Forms → Add-ons in your WordPress dashboard, find the add-on and click on Install.
Once the installation is complete, make sure to also activate the add-on. Next, you need to create an API key for the Gravity Forms REST API. You can find instructions for this in the Zapier Add-On settings (Forms → Settings → Zapier, click on View Instructions).
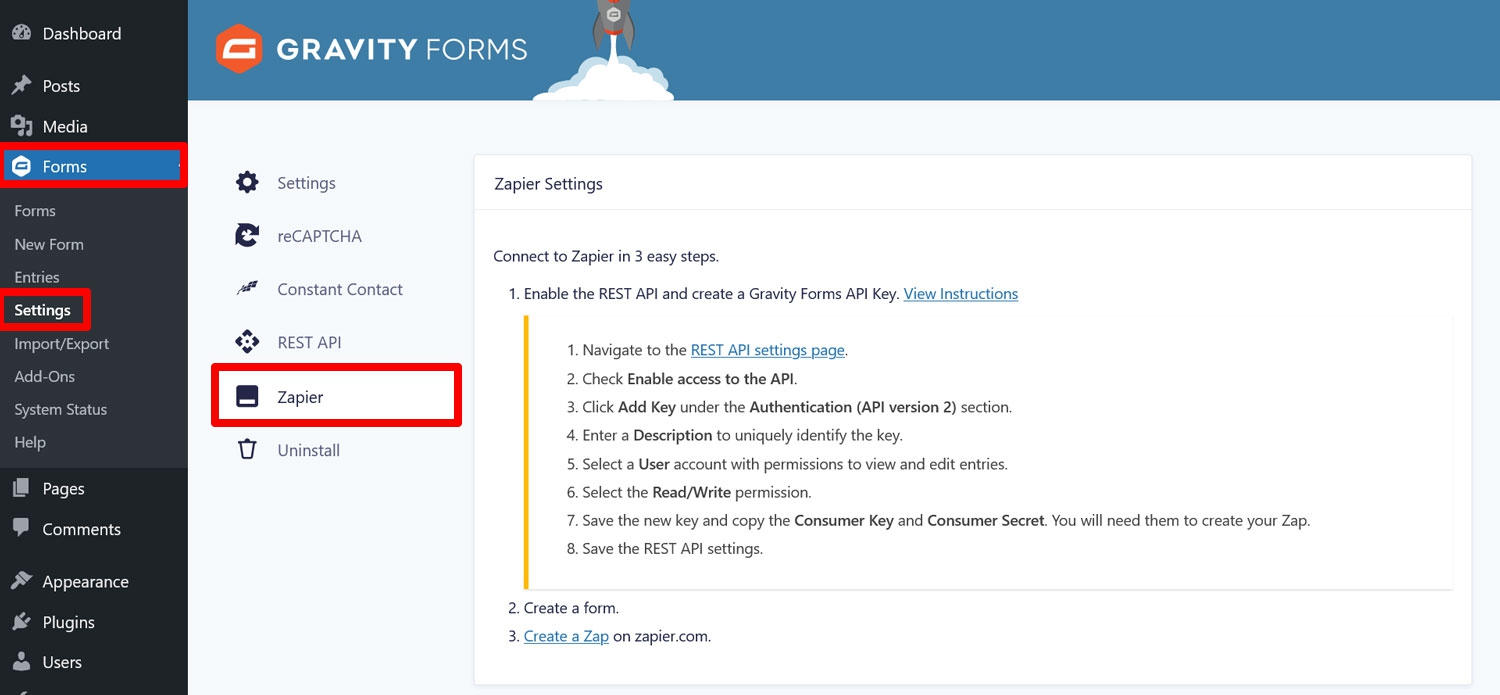
However, we are also going to go over it here. Go to the REST API settings page, either by clicking the link in the instructions or via REST API in the settings menu on the left. Once there, check the box to enable the API, then click on Add Key under Authentication (API version 2).
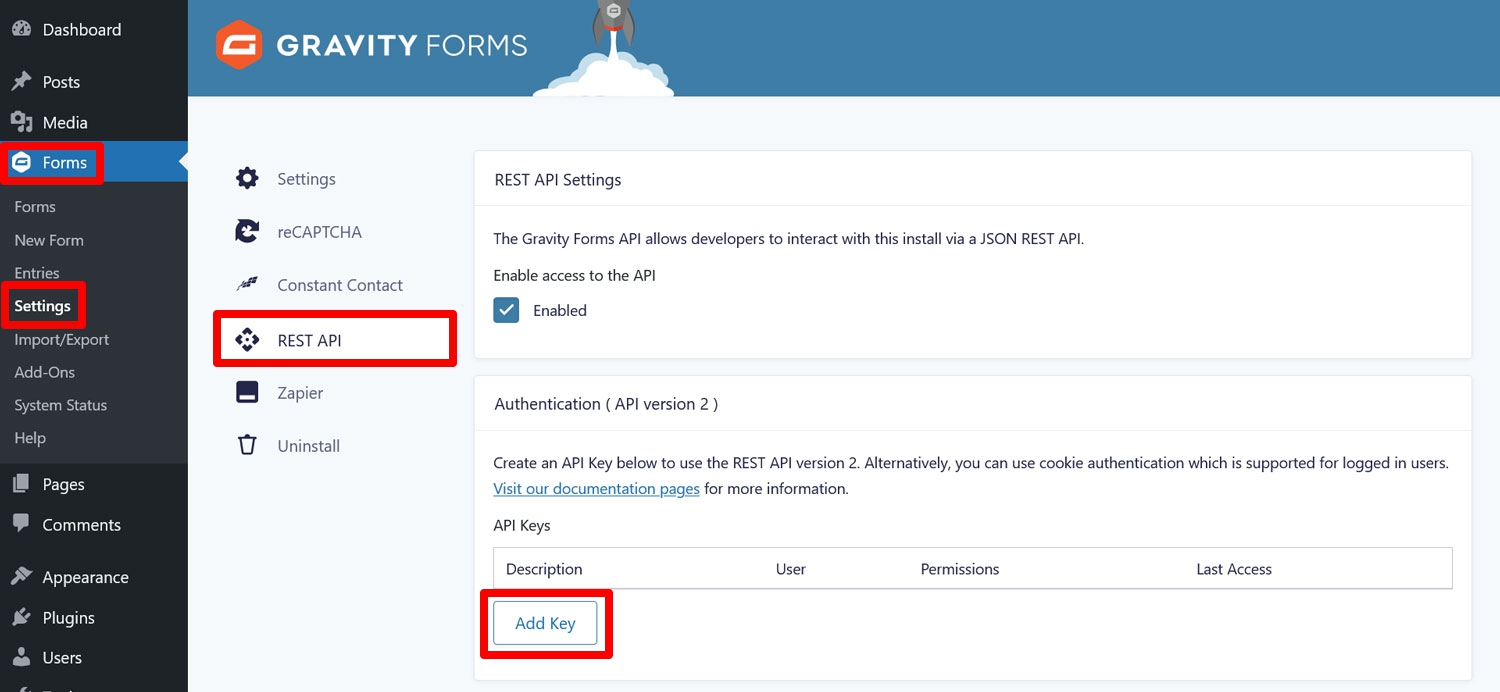
The version number is important, so be sure to select the right one. In the pop-up that appears, fill out the information as follows:
- Description: Provide a description to be able to distinguish between different API keys.
- User: Select a user with the permission level to view and edit entries.
- Permissions: Choose Read/Write from the drop-down menu.
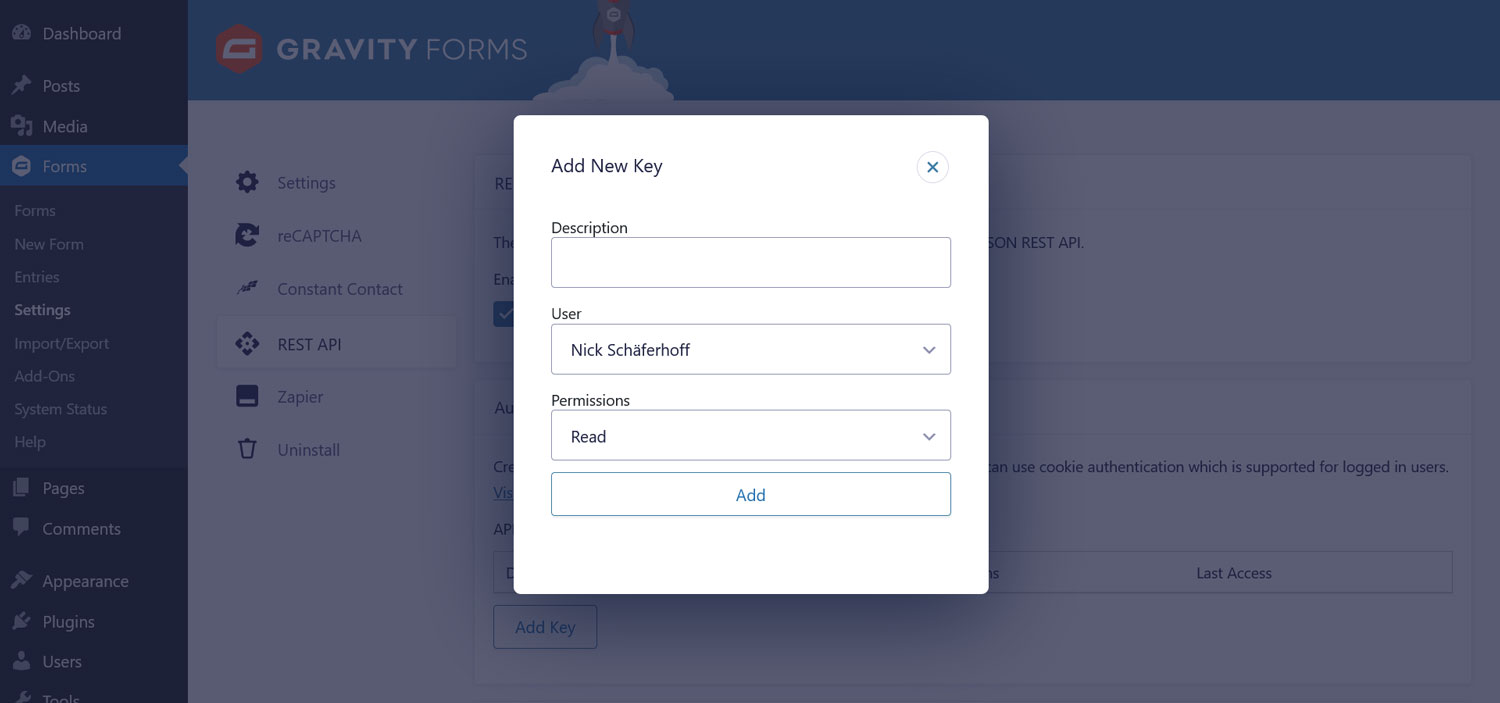
Once finished, click the Add button. This will reveal your consumer key and consumer secret.
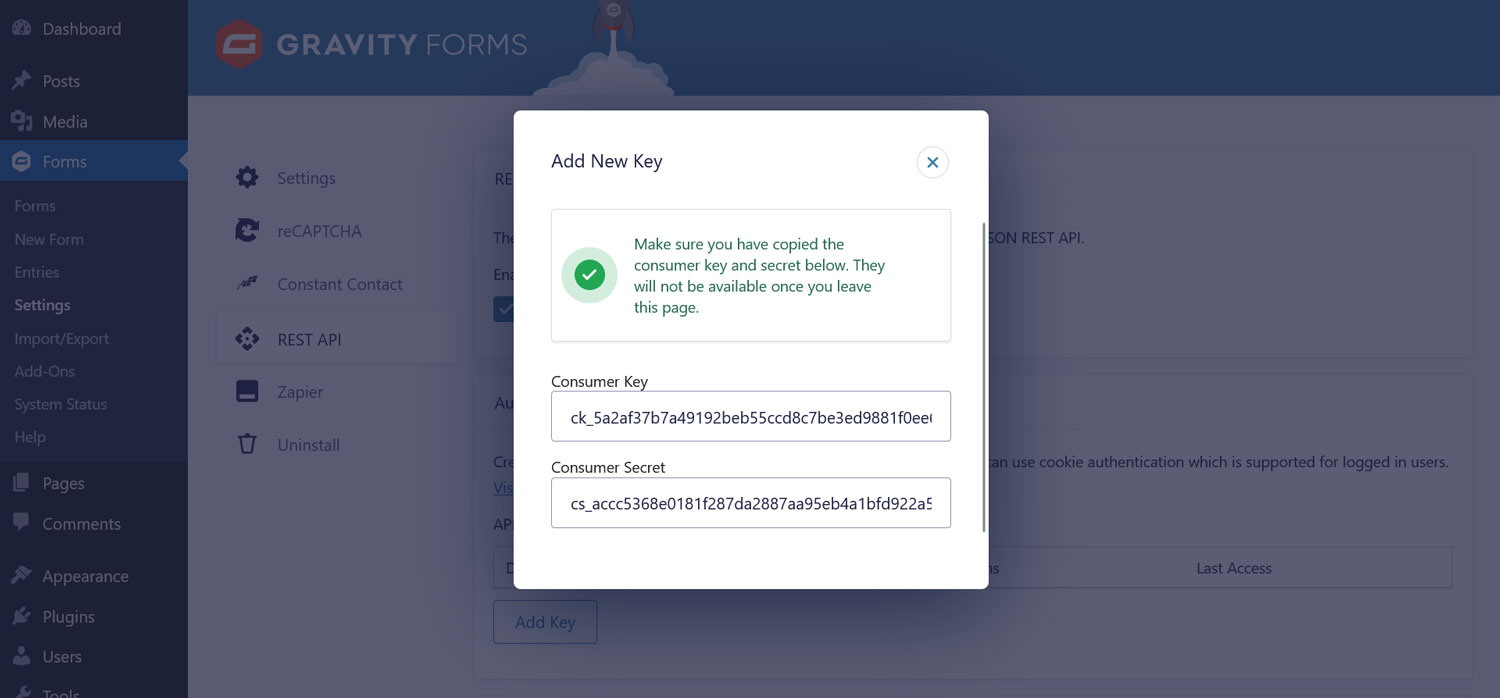
Make sure to copy and store those somewhere safe since this is the only time you will see them once you close this window. Close the pop-up and save the settings by clicking Update.
6. Create a Zap
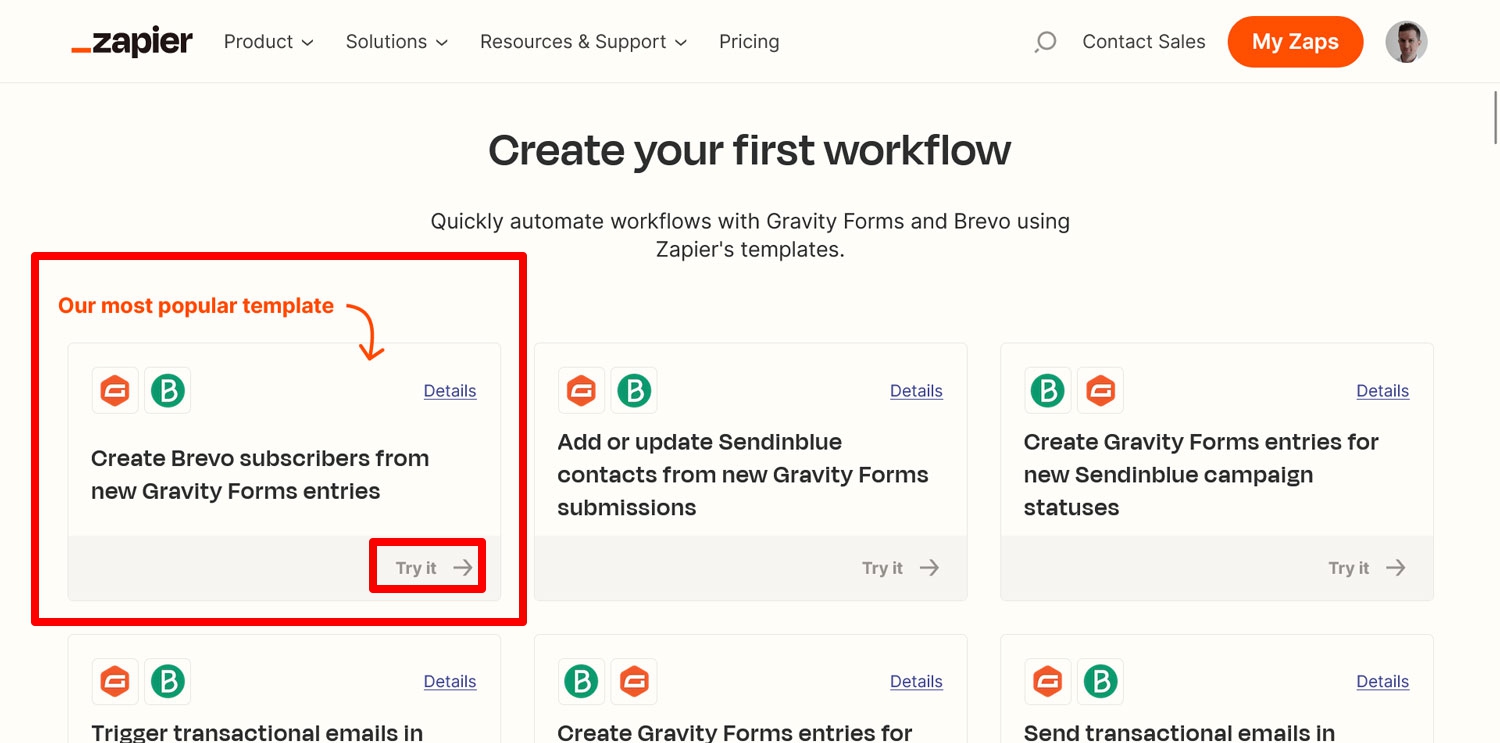
Now, it’s time to create a Zap, which is what Zapier calls its automations. You can use pre-built Zaps or create one from scratch. If you want to see every Zap that’s already available for Gravity Forms, check out the Integrations page.
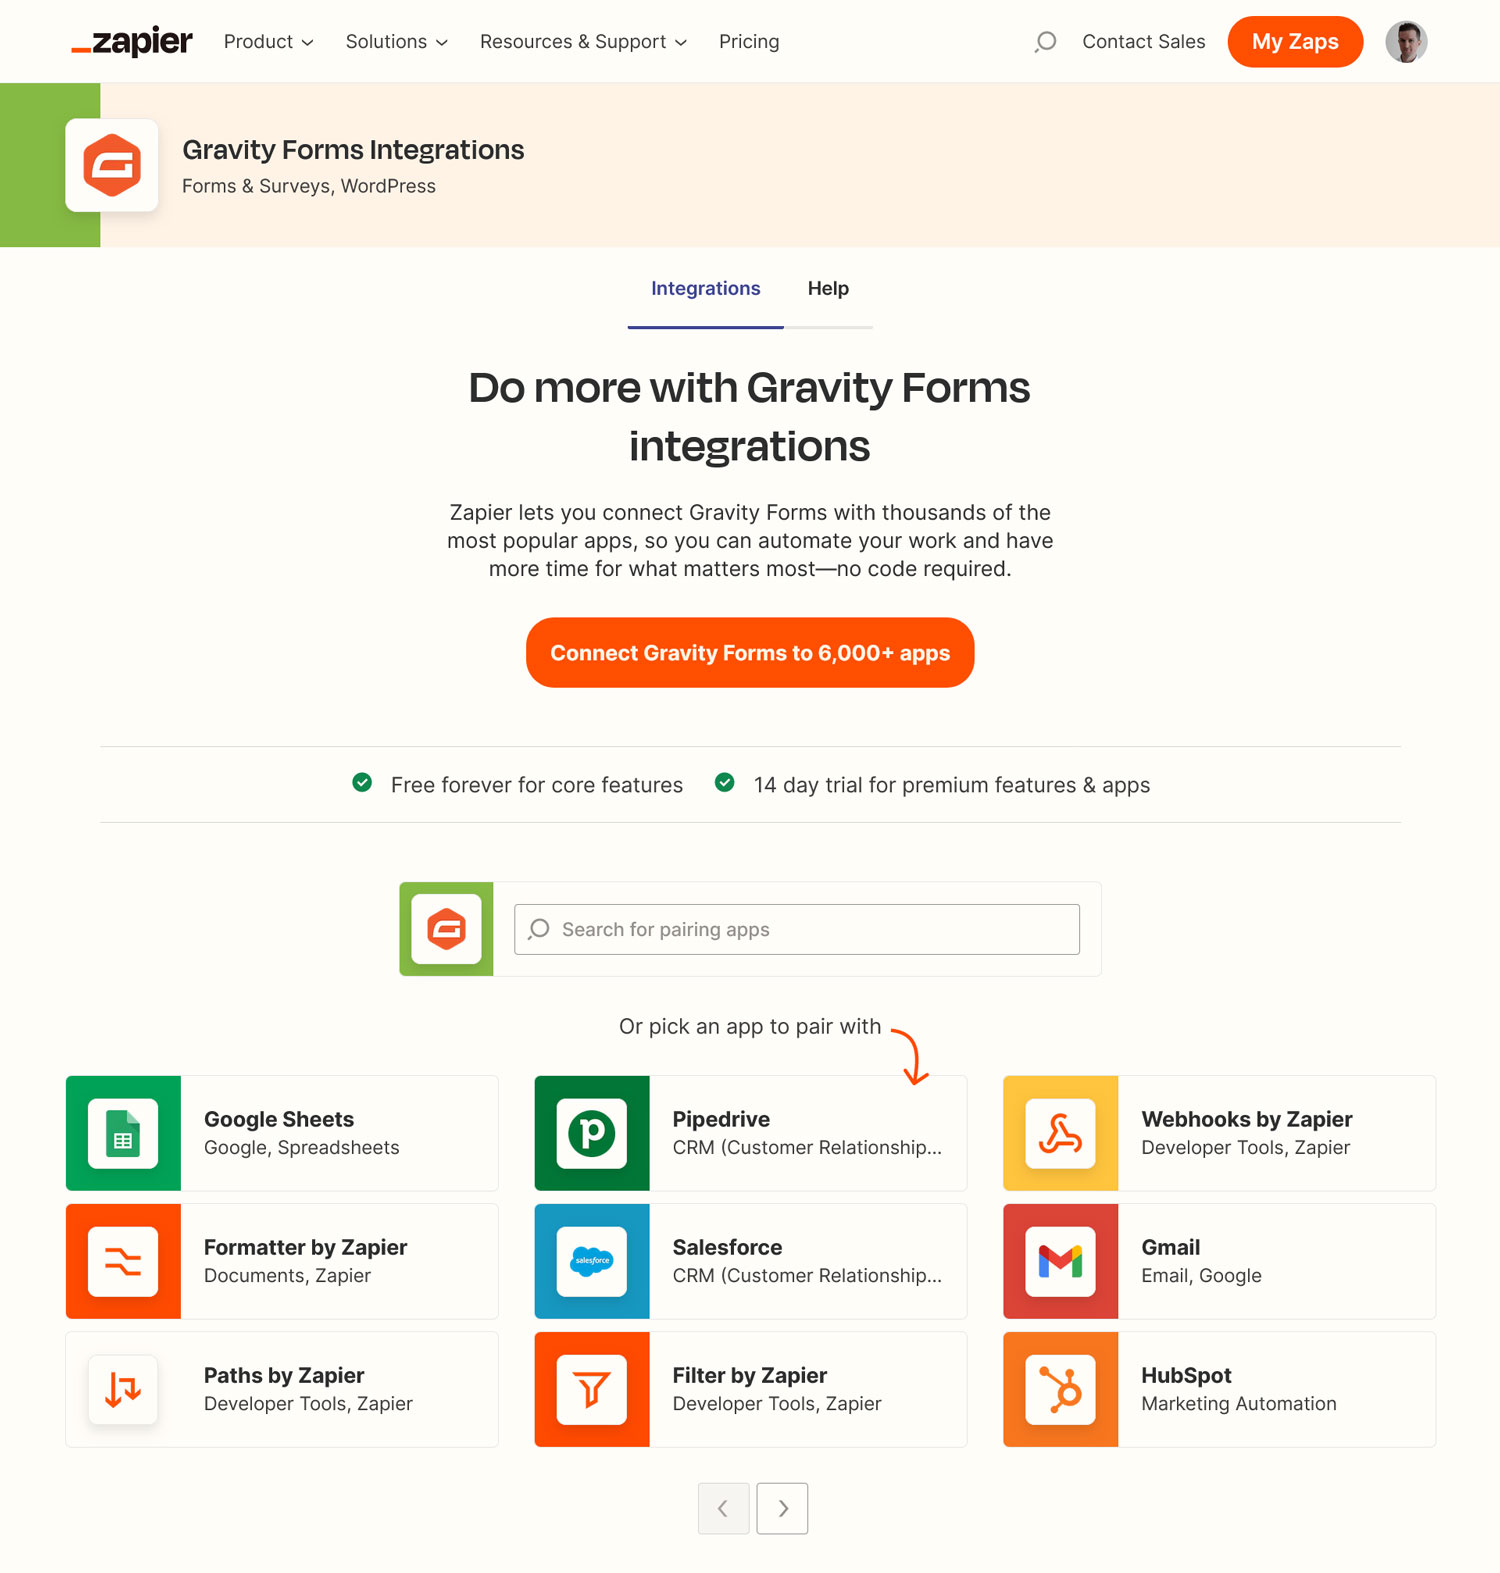
You can also limit search to single apps, like Brevo, using the search functionality.
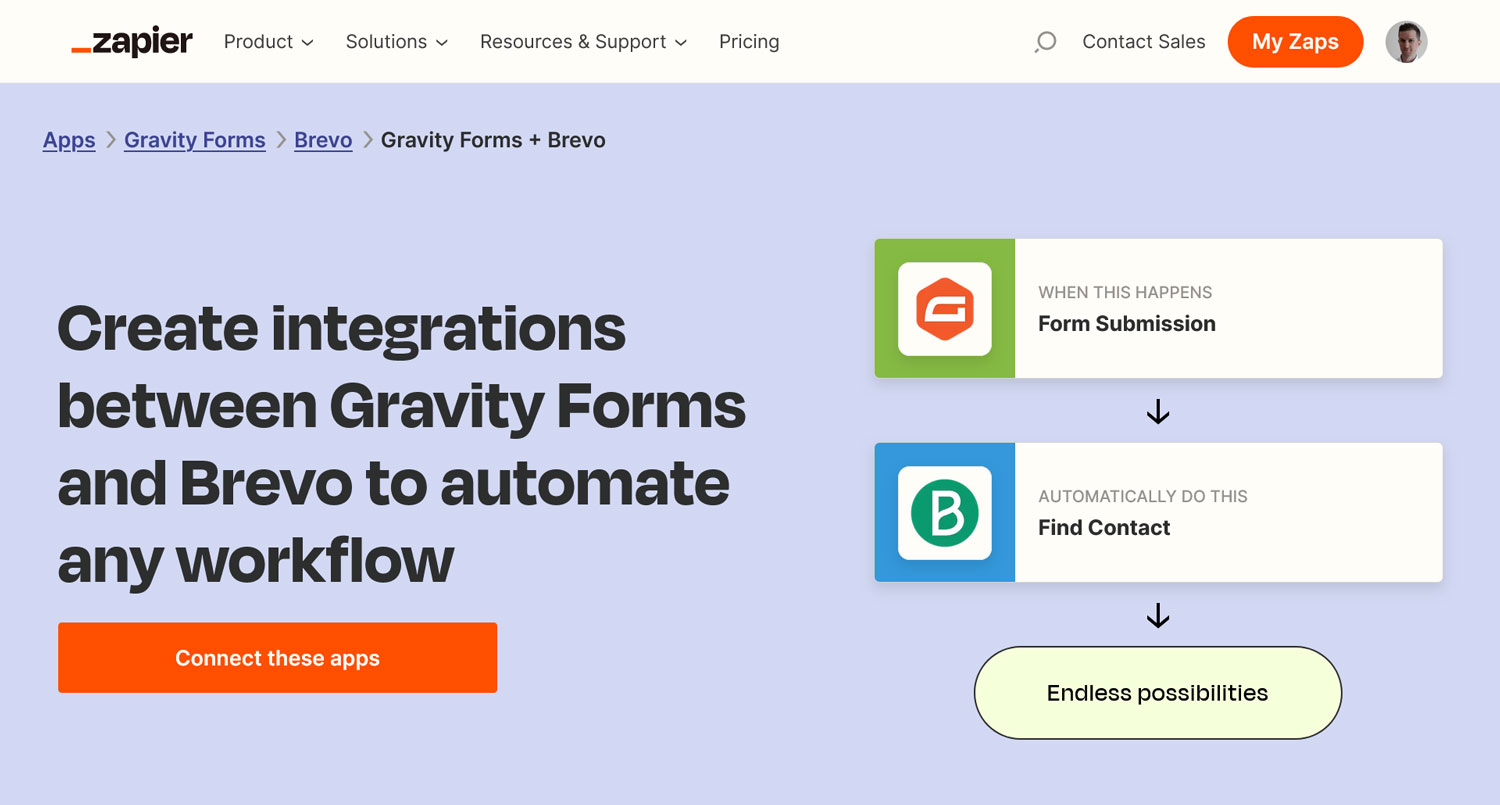
The page shows you available triggers and actions for both apps. In our case, the trigger can be a form submission, and the action can be adding a new Brevo subscriber. Click on Try it.
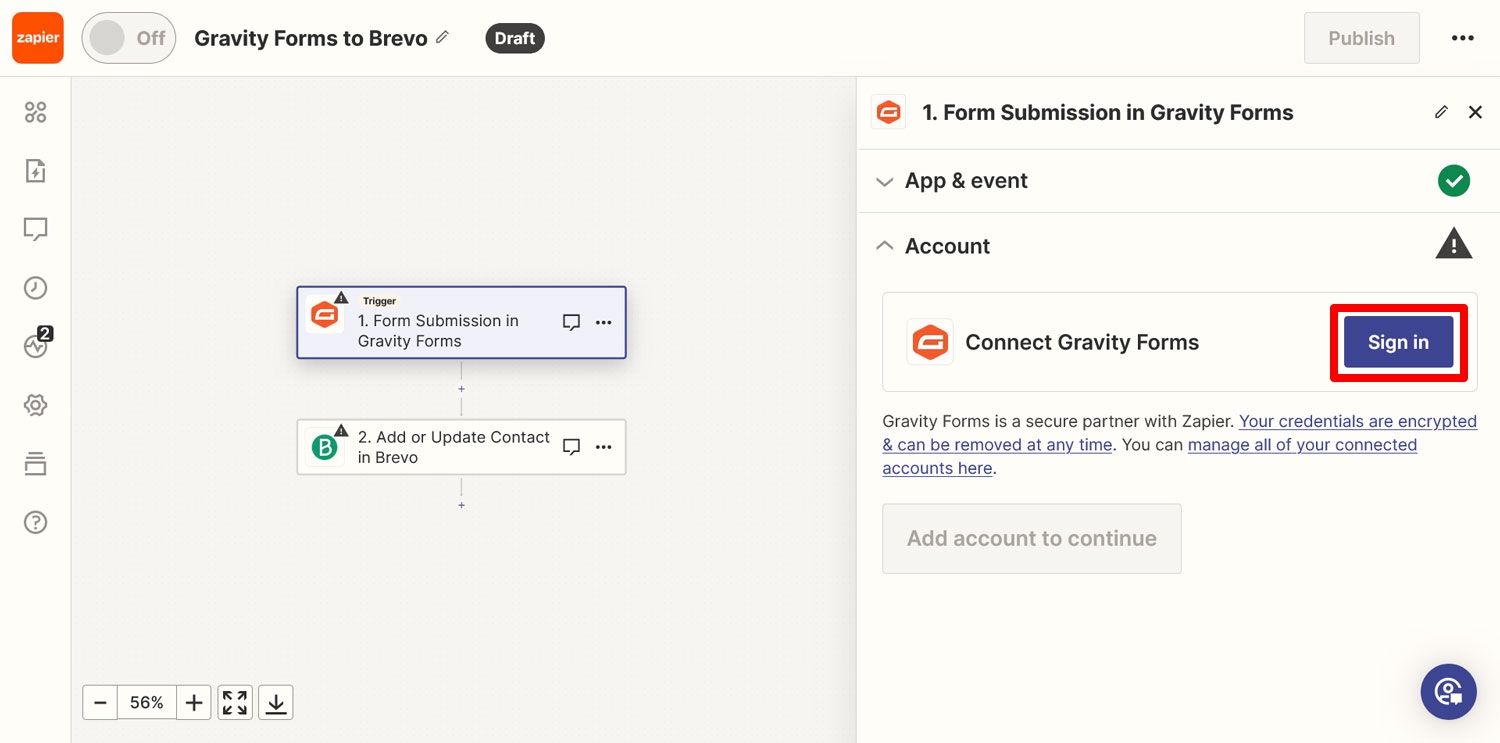
7. Connect to Gravity Forms
In the next step, input a name for the Zap in the upper left corner. Then, you’ll be asked to sign in to both apps to connect them. Start by clicking Sign in for Gravity Forms.
This will open up new form where you need to enter your enter your site URL and the Consumer Key and Consumer Secret we created earlier.
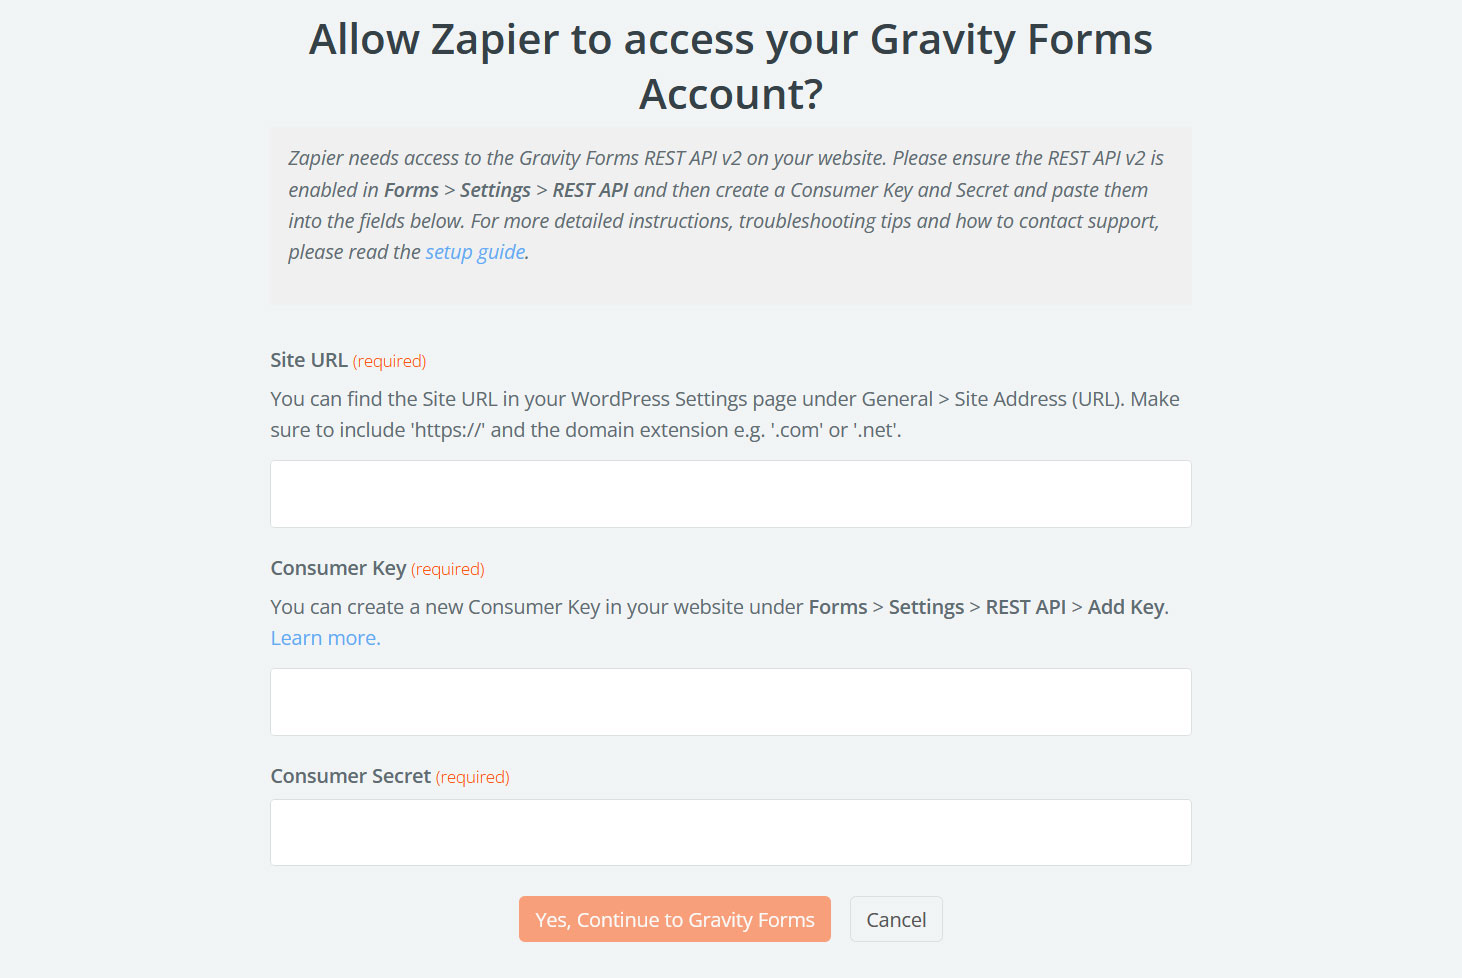
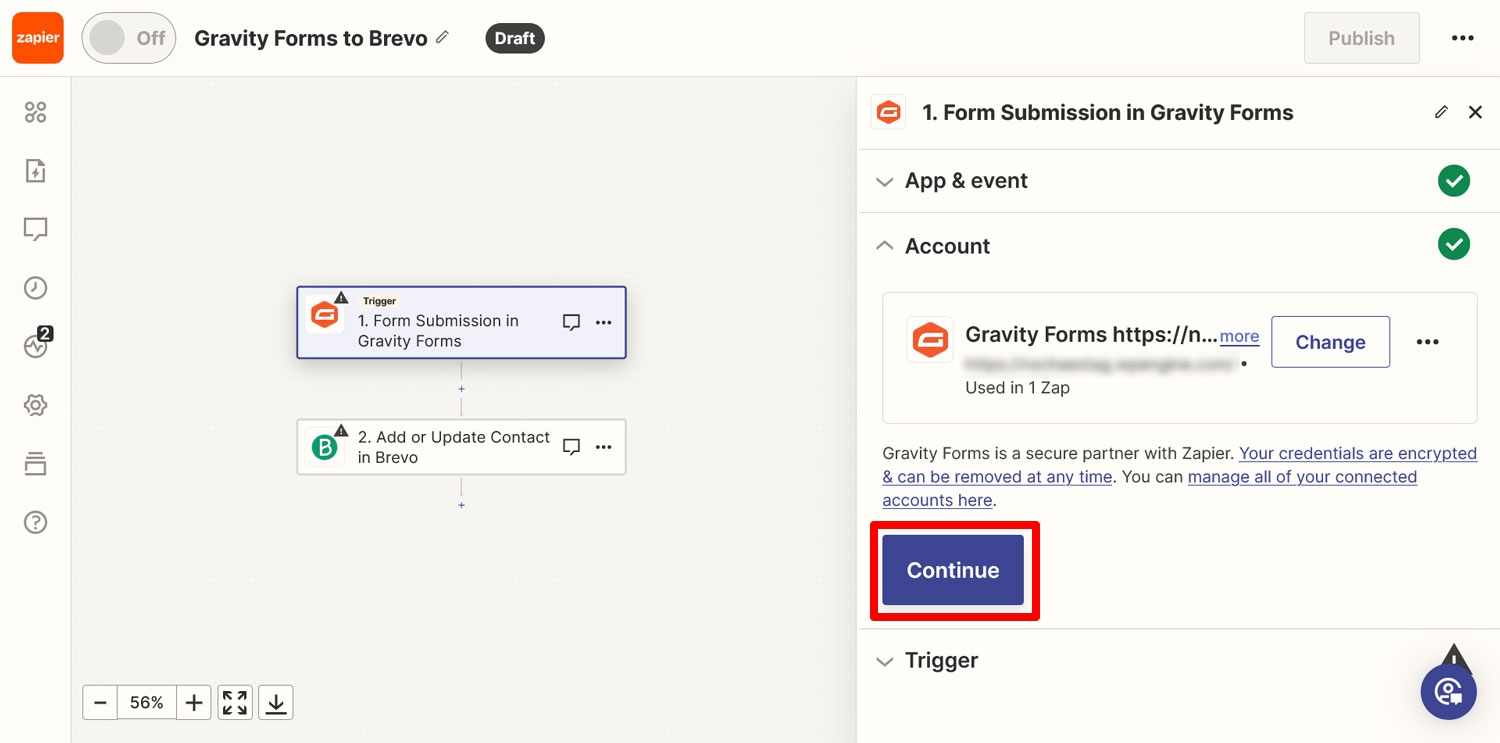
Do that and click Yes, Continue to Gravity Forms. After that, this part of the connection is established as you will see on the right side. You can move on to the next step by clicking Continue.
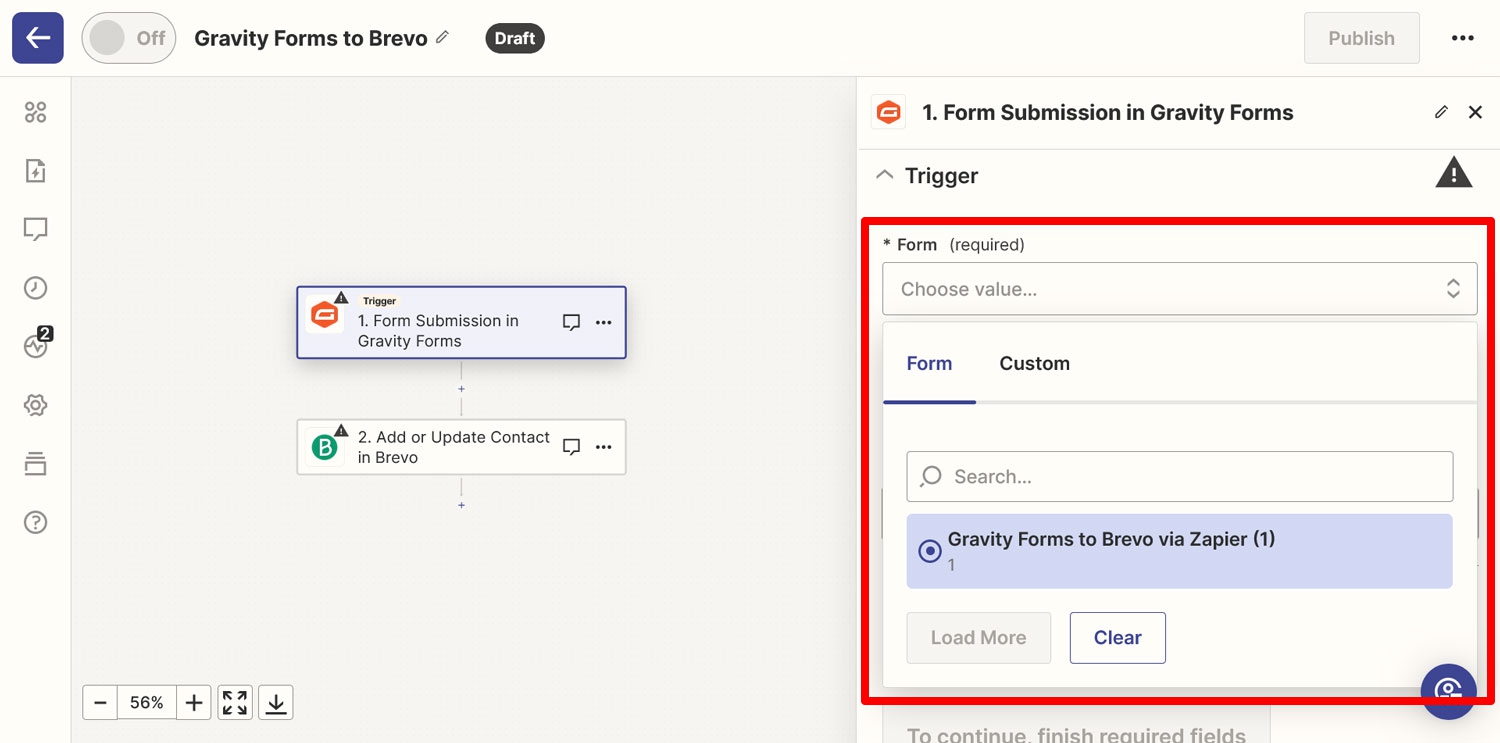
In the next step, you will see three drop-down menus. In the first menu, you have to choose the form that you want to use as the trigger. Pick the one you created earlier or another existing one that you want to use with Brevo.
The Use Admin Field Labels? section is only important if you added Admin Labels. If you didn’t, you can set it to False.
That only leaves Unique Name. Here, you need to enter some sort of unique descriptor for this Zap and form that Gravity Forms can use for handling the data. It needs to be one of a kind and you should not reuse it. Here is what it all looks like on my end.
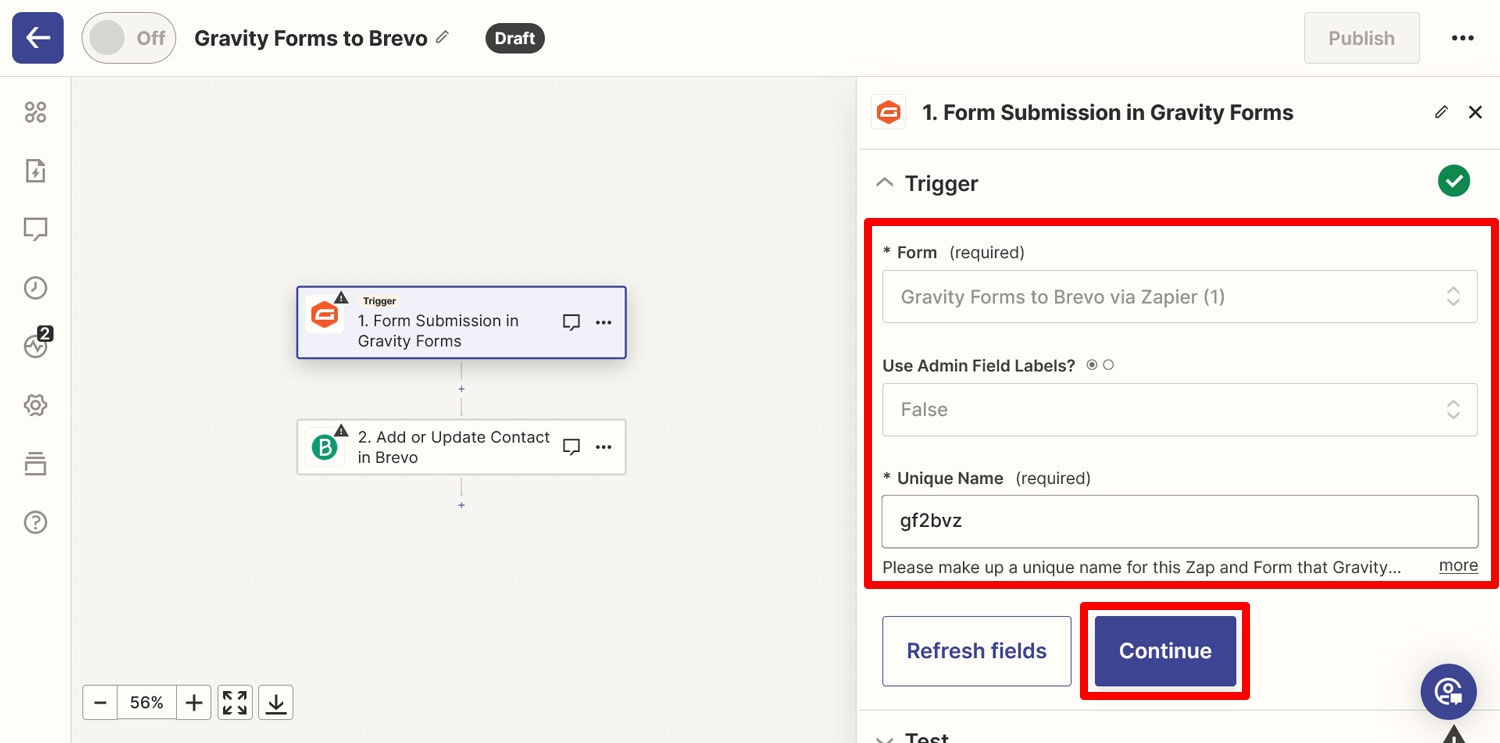
Once done, hit Continue again. Zapier will ask you to test the connection. Hit the big button and it will load some sample data from Gravity Forms (with a very tasteful Lord of the Rings joke).
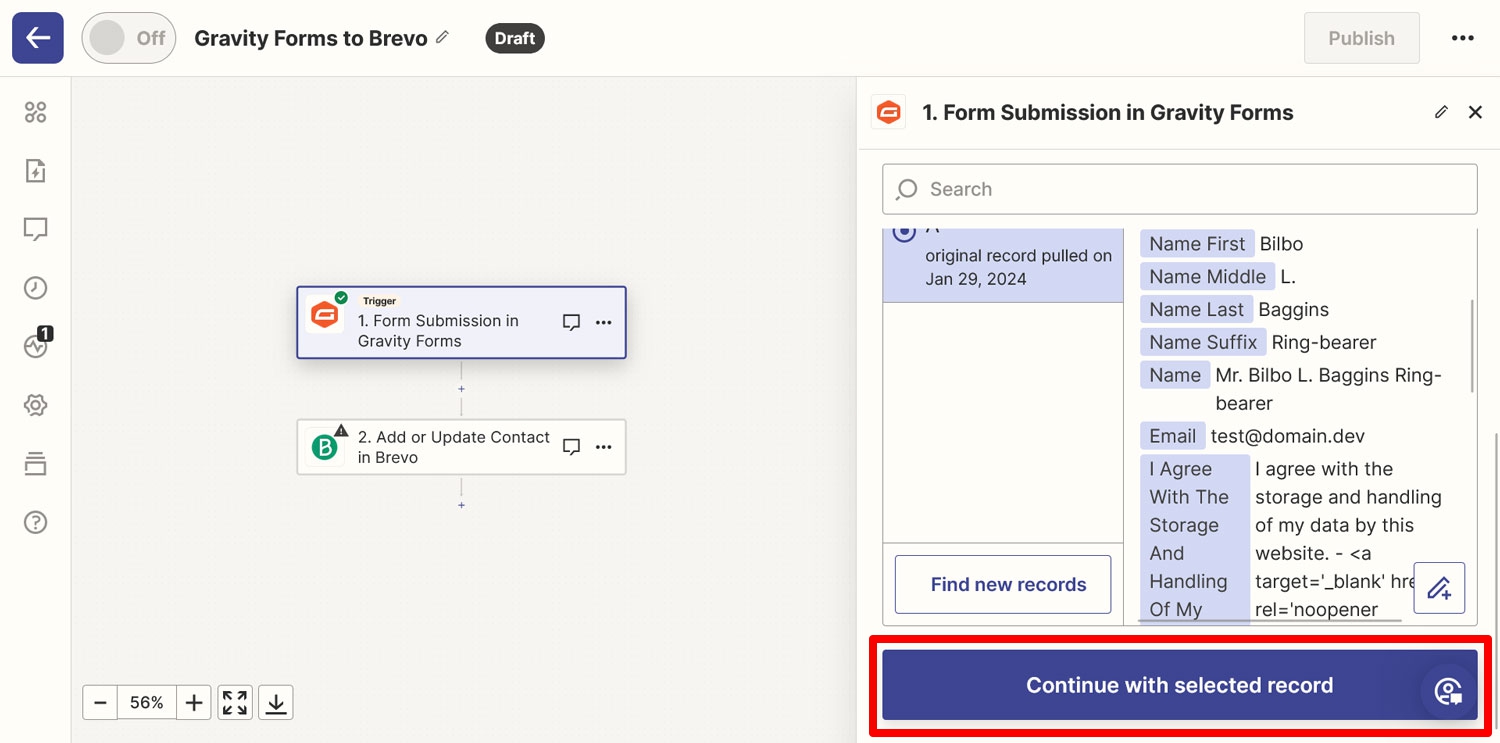
Click Continue with selected record to run the test. If all goes well, Zapier moves on to the next step.
8. Establish a Connection to Brevo
Now it’s time to deal with the other end of the connection–Brevo. In the next step, Zapier will ask you to sign in to your Brevo account.
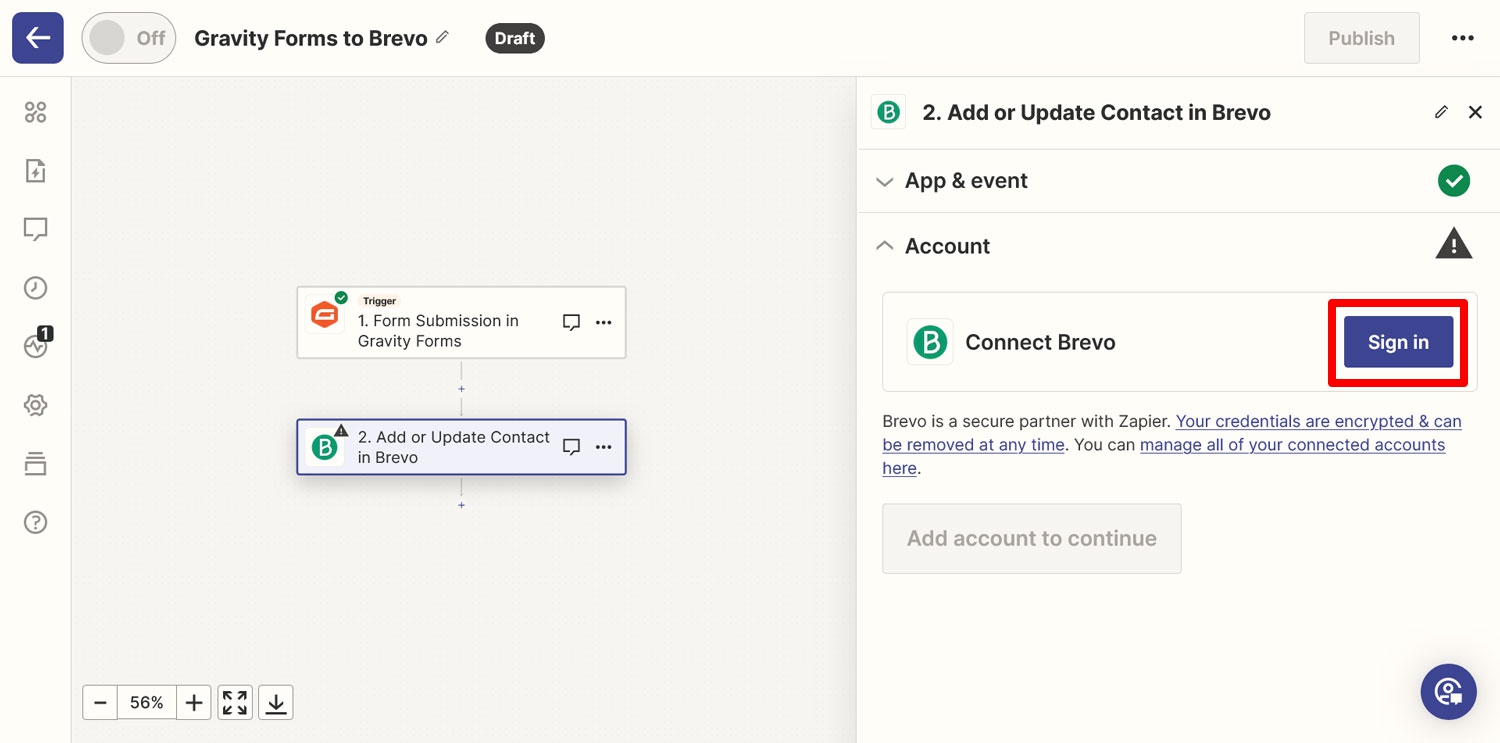
When you click the Sign in button, it opens up a new window where it asks you to input the API key we created earlier.

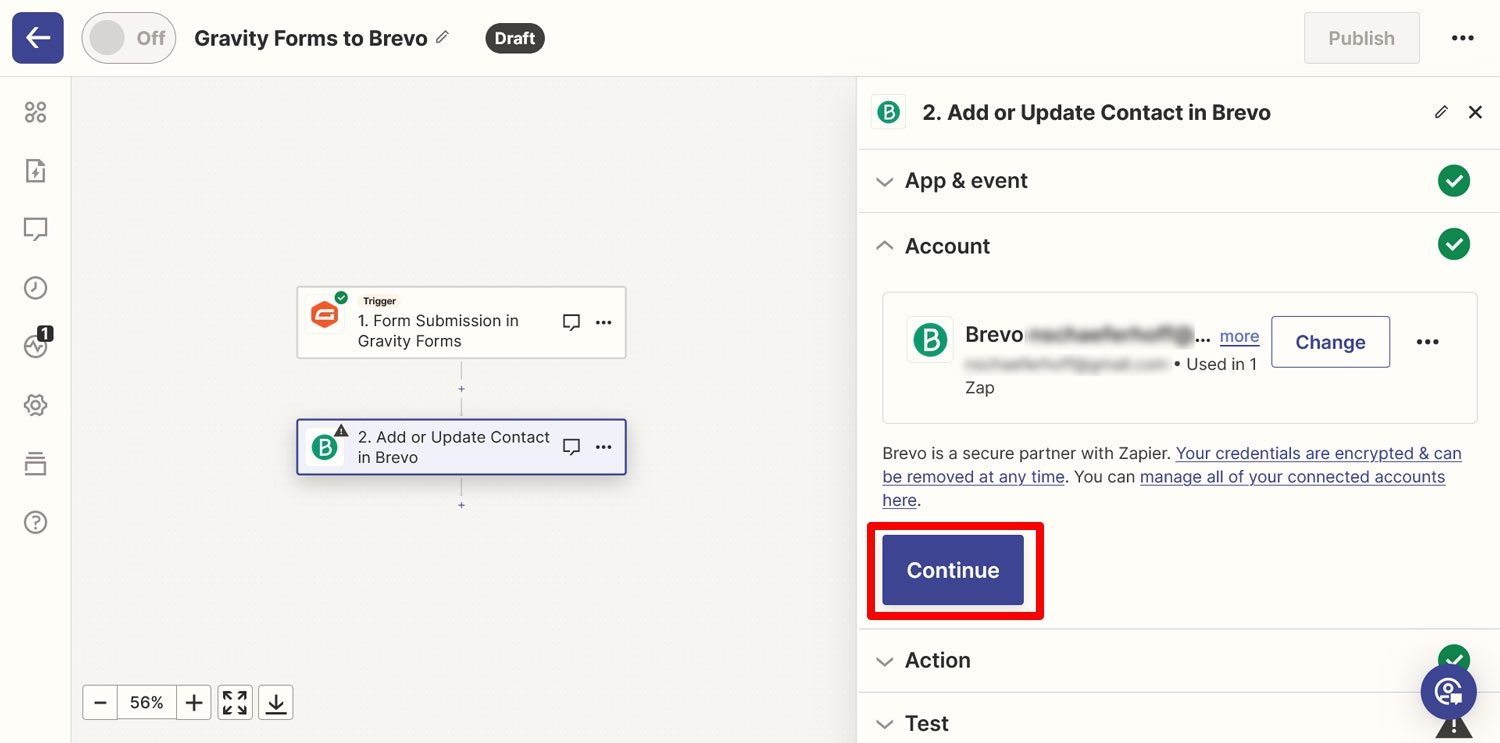
So, change back to that browser tab, copy your API key and paste it in the respective field. Then, click on Yes, Continue to Brevo. Once that is done, Zapier establishes the connection and lets you move on.
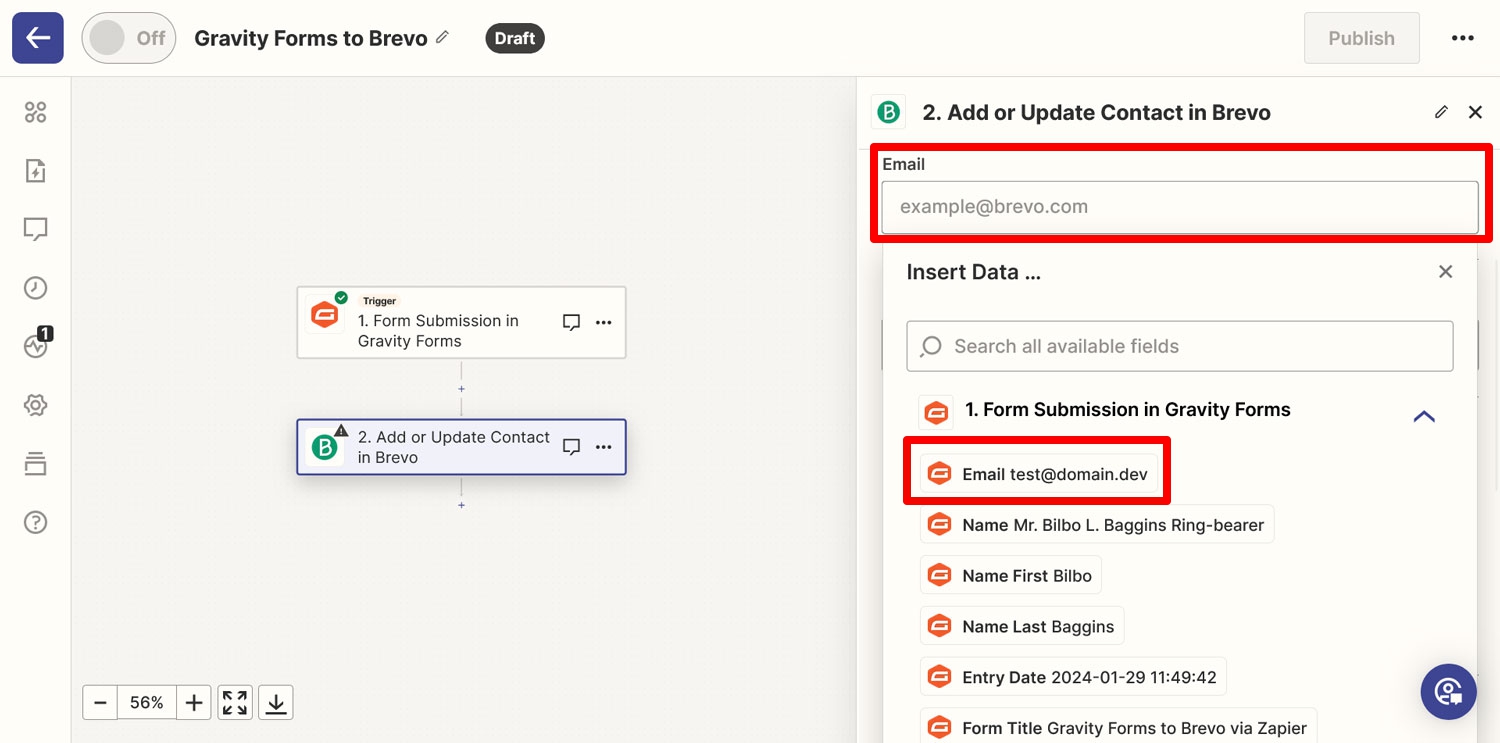
In the next step, it’s time to map the data from Gravity Forms to Brevo. By default, this only includes the email address. For that, simply click into the Email field and pick the appropriate information from the Gravity Forms example data.
The mobile number setting is only important if that is information you collect, which we are not doing here.
Under Lists, choose the list and folder you created earlier. For Update Type, leave it as Add. There are important settings under Attributes. If you want to map and transmit other information, such as the first name and last name of a subscriber, you need to create those manually here.
For that, it is necessary to add the Brevo attribute in capital letters and then choose the respective information under {Attribute value}. The attributes we are using here are FIRSTNAME and LASTNAME. Add them to fields and pick the appropriate data.
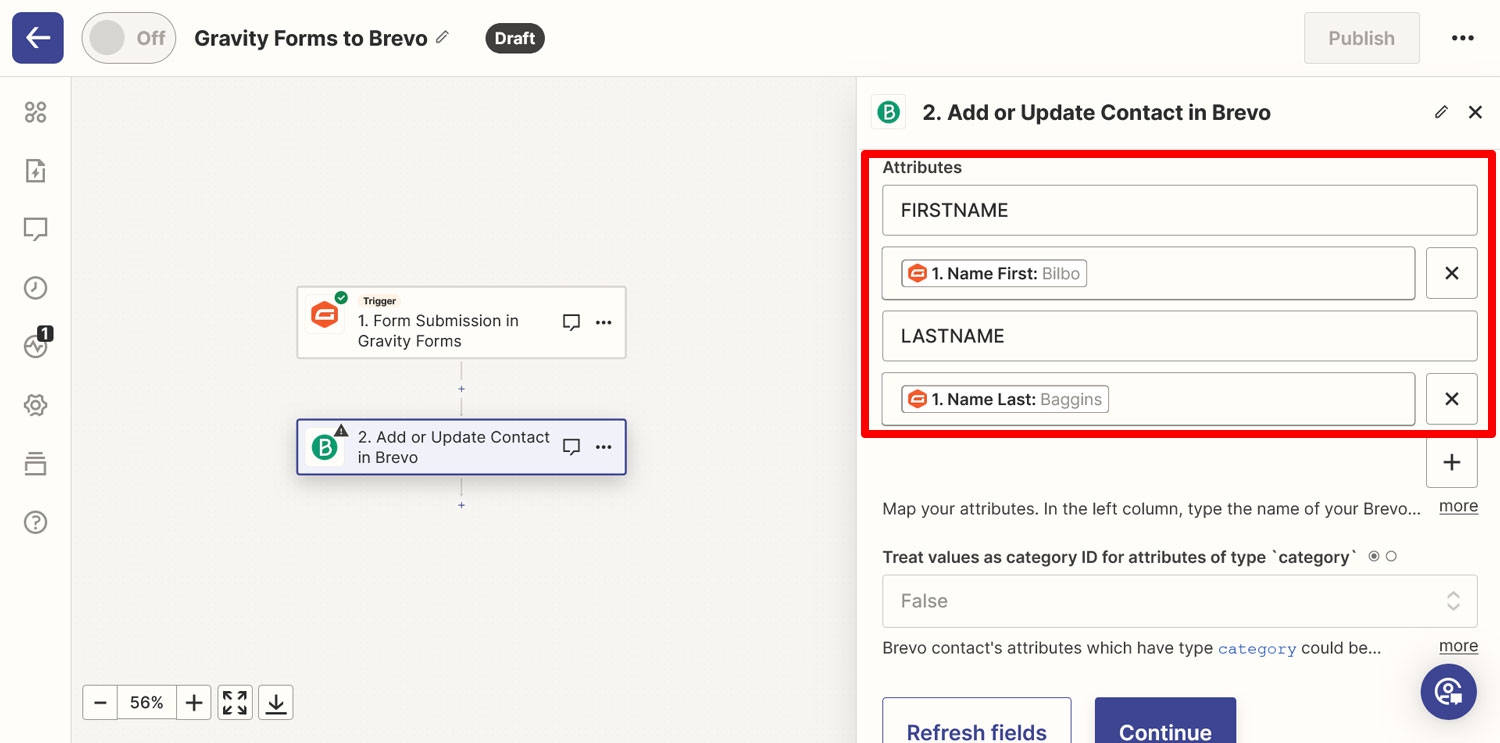
Finally, leave the part about treating values as category IDs for attributes as False and click Continue.
9. Test and Publish
The last step is testing the setup. Zapier will show a summary of the settings and allow you to check whether they are working by clicking Test step.
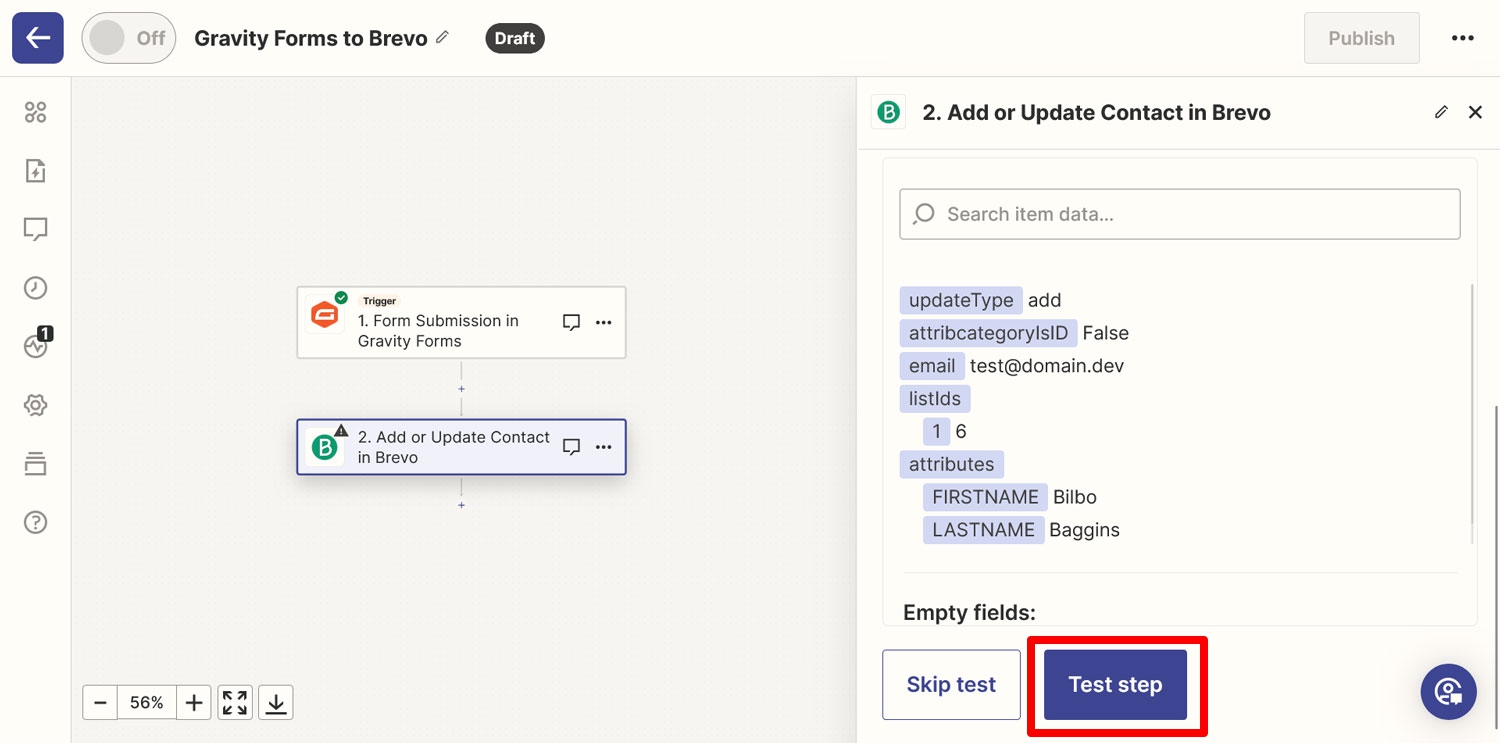
It will then send the data. Check in your Brevo account if it arrived.
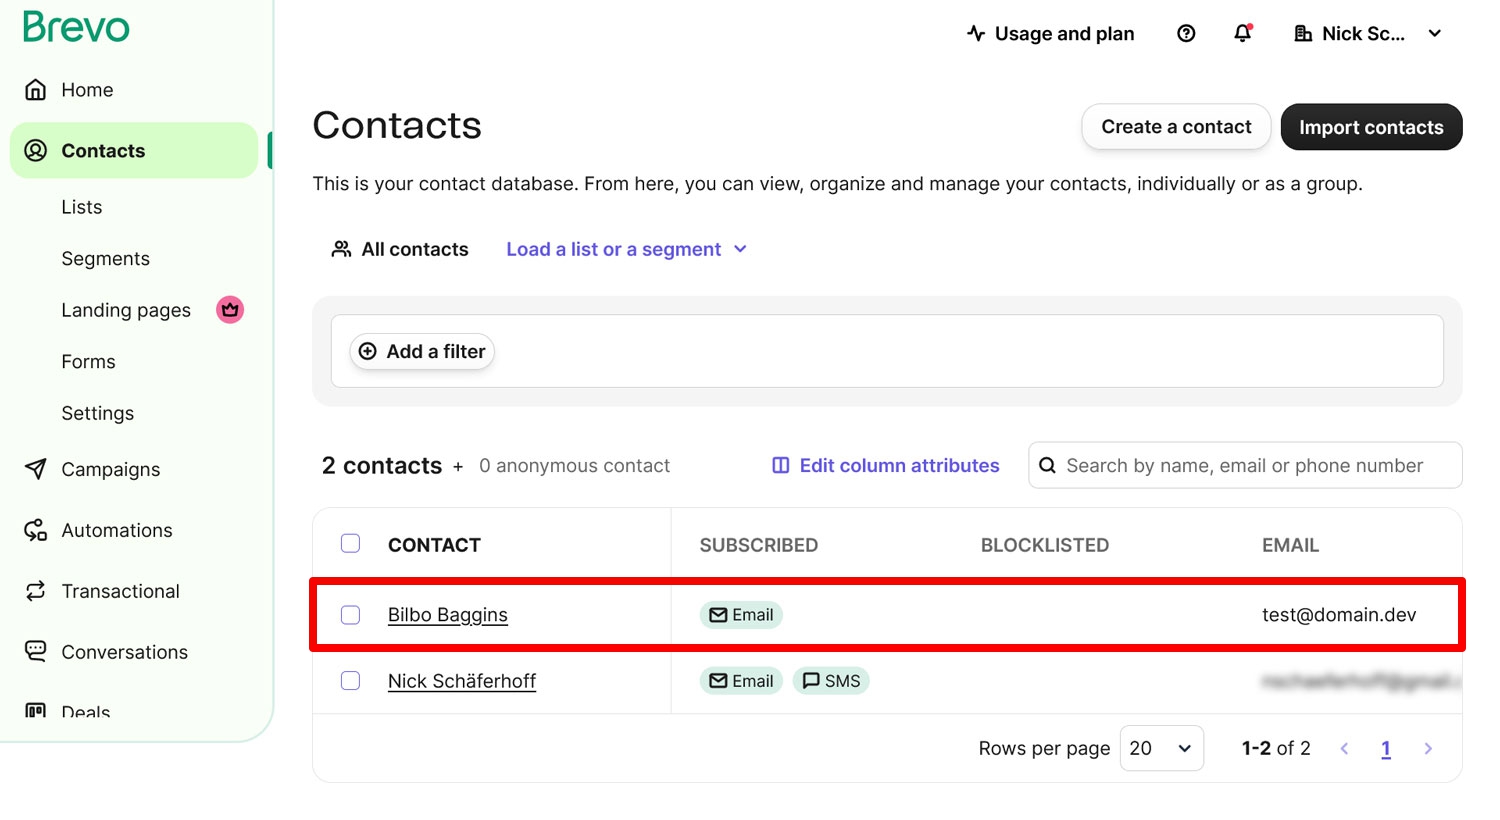
If it was successful, finalize the process by clicking Publish. Your Zap will now appear in your Zapier dashboard. If you embed your connected form somewhere on your website, it should pass on subscriber information to your Brevo list.
(Optionally) Use Conditional Logic
If you are happy sending every single subscriber from your form to Brevo, this last step is not for you. However, there are cases in which you might only want to send a form entry if a user has filled out the form in a certain way, ensuring only quality leads are sent to Brevo. To achieve this, you can use conditional logic in Gravity Forms.
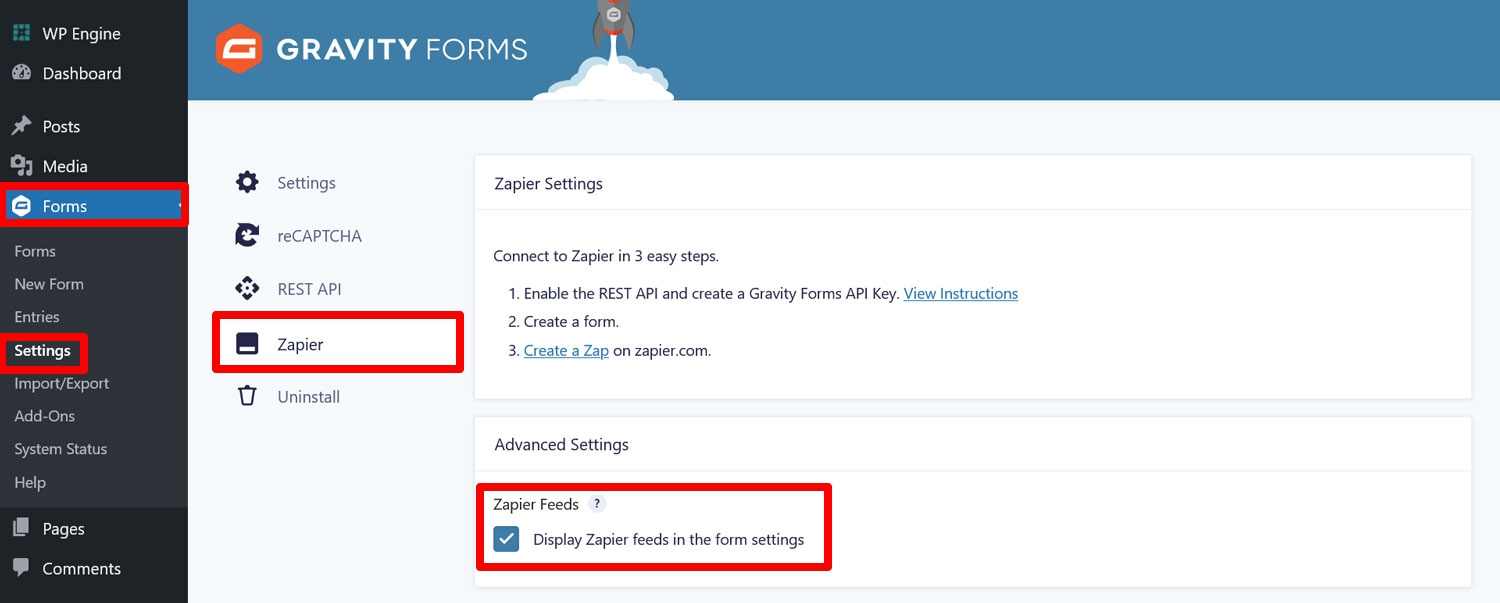
To get started, in your WordPress dashboard, go to Forms → Settings → Zapier in your WordPress dashboard and check the box for Display Zapier feeds….
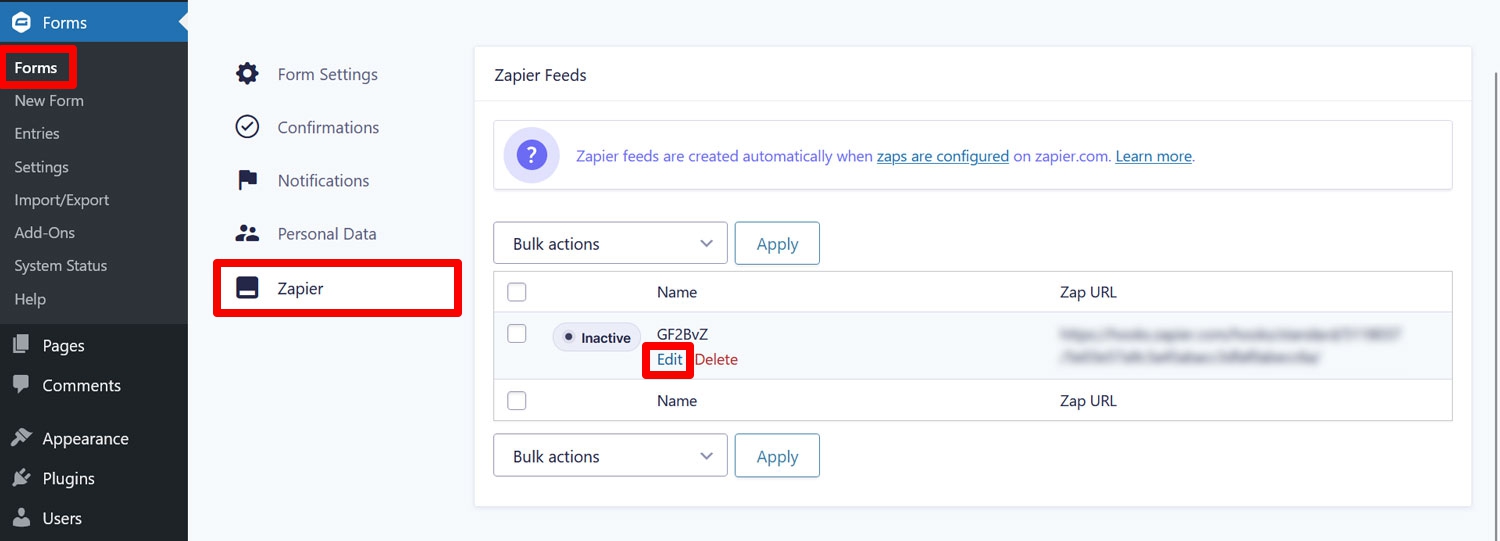
Now go to your form’s settings, open the Zapier tab, and click Edit under the Zapier feed that Gravity Forms has created automatically.
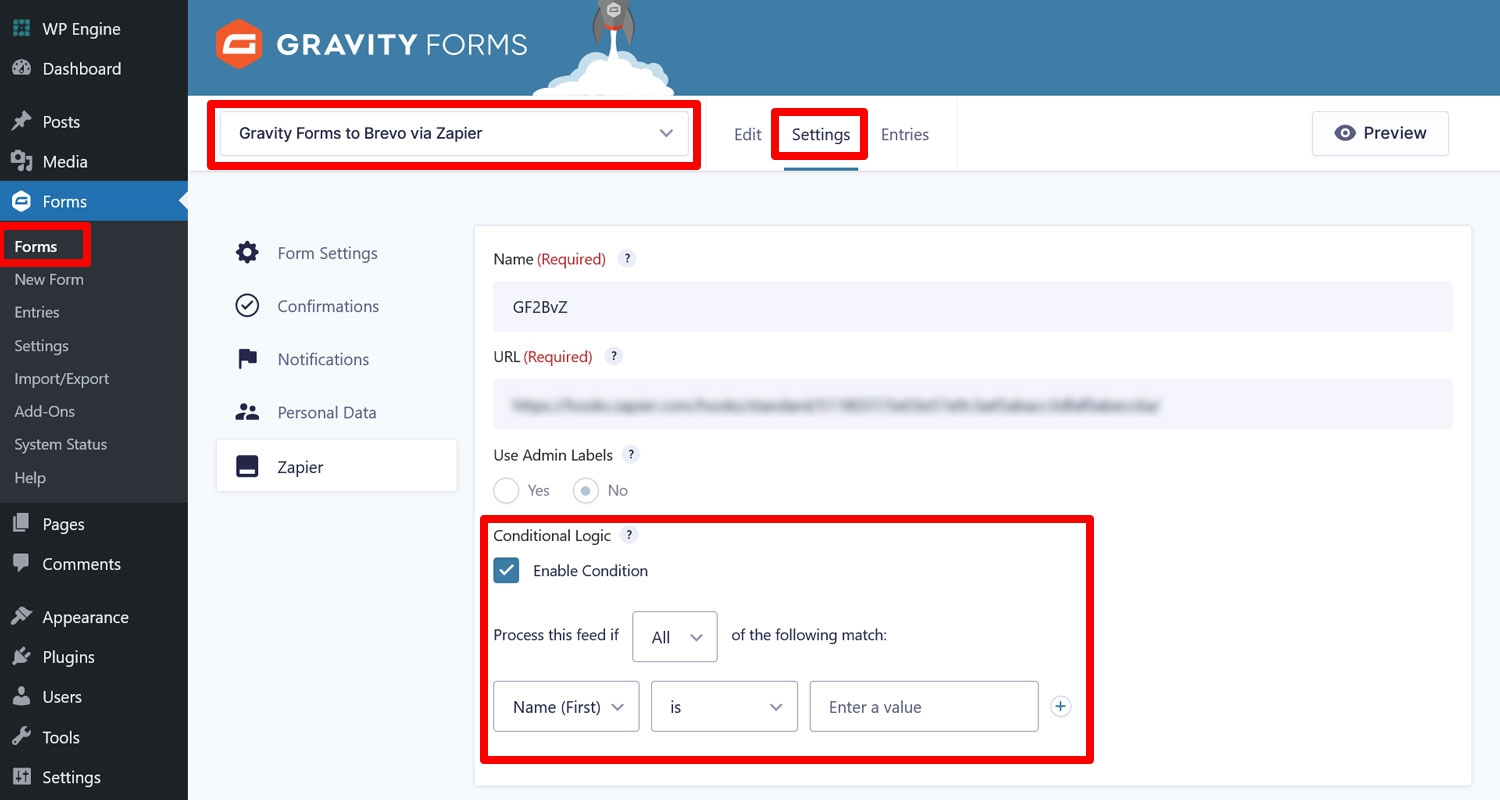
When you do so, you have the option to enable conditional logic at the bottom. Here you can set conditions, so only send entries that meet those conditions will make it to Brevo.
For more information on this, visit the Gravity Forms Documentation.
Final Thoughts: Gravity Forms, Brevo, and Zapier
Gravity Forms and Brevo make a great team for building, managing, and utilizing an email list. You can easily create forms to collect email subscribers, and Brevo takes care of delivering your messages to them.
Thanks to the Gravity Forms Zapier Add-On, connecting the two software solutions is fully automatic and very straightforward. In the end, you just need accounts at each service involved and to create API keys to establish the connection.
After that, it’s just a matter of ensuring the right information is passed on and received by following the instructions in the Zap setup. No coding is necessary, as everything happens in user-friendly interfaces.
Just a reminder, to take advantage of this integration, you’ll need the Gravity Forms Pro or Elite license. Here’s to the growth of your email list!

If you want to keep up-to-date with what’s happening on the blog sign up for the Gravity Forms newsletter!
"*" indicates required fields