

If you want to collect recurring payments on your WordPress.com website, Gravity Forms and Stripe make it very easy.
With very little time and effort, you can set up a site that can handle recurring subscription payments for a range of purposes, automatically collecting payments on a billing cycle of your choice. You can even create subscription plans with free trials and setup fees.
In this guide, we discuss the benefits of using Gravity Forms and Stripe to collect recurring subscription payments on your WordPress.com site, and then walk you through a step by step tutorial to help you get started.
Let’s jump in…
Why Use Gravity Forms?
If you want to generate recurring monthly revenue from your services, products, and other ventures, or collect recurring donations for your nonprofit, WordPress.com, Gravity Forms, and Stripe make doing so extremely straightforward.
There are a number of reasons why Gravity Forms is ideal for adding recurring subscription payment capabilities to a WordPress website, including:
- Ease of Use – Our user-friendly drag-and-drop form editor and intuitive form template library enables you to create forms within minutes, no coding required!
- Form Template Library – Kickstart form creation with editable payment form templates, including ecommerce and donation form templates, as well as a range of lead generation templates.
- Payment Processor Support – With multiple payment integrations to choose from, you can take payments in the way that you want.
- Built-in Features – Gravity Forms has a wide assortment of built-in features and functionality, available to all our customers whatever license type you choose. Features include conditional logic, multi-page forms, file uploads, and much more, enabling you to create professional custom forms that appeal directly to your specific target audience.
- Countless Integrations – Gravity Forms supports numerous add-ons to enhance and extend your forms. Integrate your forms with an email marketing provider or CRM to help manage leads, create polls, quizzes, and surveys for your website visitors, or connect with Zapier to gain access to thousands of further third-party services and apps.
Gravity Forms simplifies creating, customizing, and integrating web forms that work in the way that you want, including collecting recurring payments from your customers and subscribers.
Why Use Stripe?
As Stripe is one of the world’s leading payment processors, it makes an excellent choice for accepting payments for your website.
Once you have a Stripe account, you can accept and process payments from around the world in many different currencies, all via your website.
Importantly, there’s an official Gravity Forms Stripe Add-On, ensuring that connecting your web forms to the Stripe payment platform is very straightforward.
All your visitors have to do is enter their credit or debit card details into a form on your site, and Stripe will collect and process the payment, ready for you to withdraw from your account.
Some of the main reasons to use Stripe with Gravity Forms include:
- Payment Options – Accept all major credit and debit cards plus more than 20 other payment methods, including Apple Pay, Google Pay, and ACH debit.
- Stripe Link – Allow customers to auto-populate forms with payment and shipping information for faster checkout and improved cart conversion rates.
- Stripe App – View Gravity Forms form entries in your Stripe dashboard and add notes to payments accepted through your site.
- The Stripe App Marketplace makes it easy to connect your account to many third-party tools and services for a better view of your business.
- Display the Stripe Customer Portal on your website to enable subscribers to manage their subscriptions without leaving your site.
As Stripe is trusted, secure, and fast, it’s ideal for taking online payments via a website.
How to Collect Recurring Subscription Payments with Gravity Forms, Stripe, and WordPress.com
If you follow the steps below, you’ll have a WordPress.com site that can collect recurring payments from your visitors, all via a subscription form on your site, with payments processed by Stripe.
Before we start, you’ll need a subscription to one of the WordPress.com plugin-enabled plans, such as the Creator or Entrepreneur plan.
You can sign up to WordPress.com with a monthly subscription if you don’t want to commit long-term, but the three-year subscription is the best value option.
The WordPress.com money-back guarantee applies to all of the plans, so you can try them without risk.
1. Install Gravity Forms
Once you’ve signed up to the WordPress.com plugin-enabled Business plan or above, you can purchase and install Gravity Forms directly from WP Admin.
Once you’re logged into your WordPress site, click on Plugins → Add New from the sidebar menu.
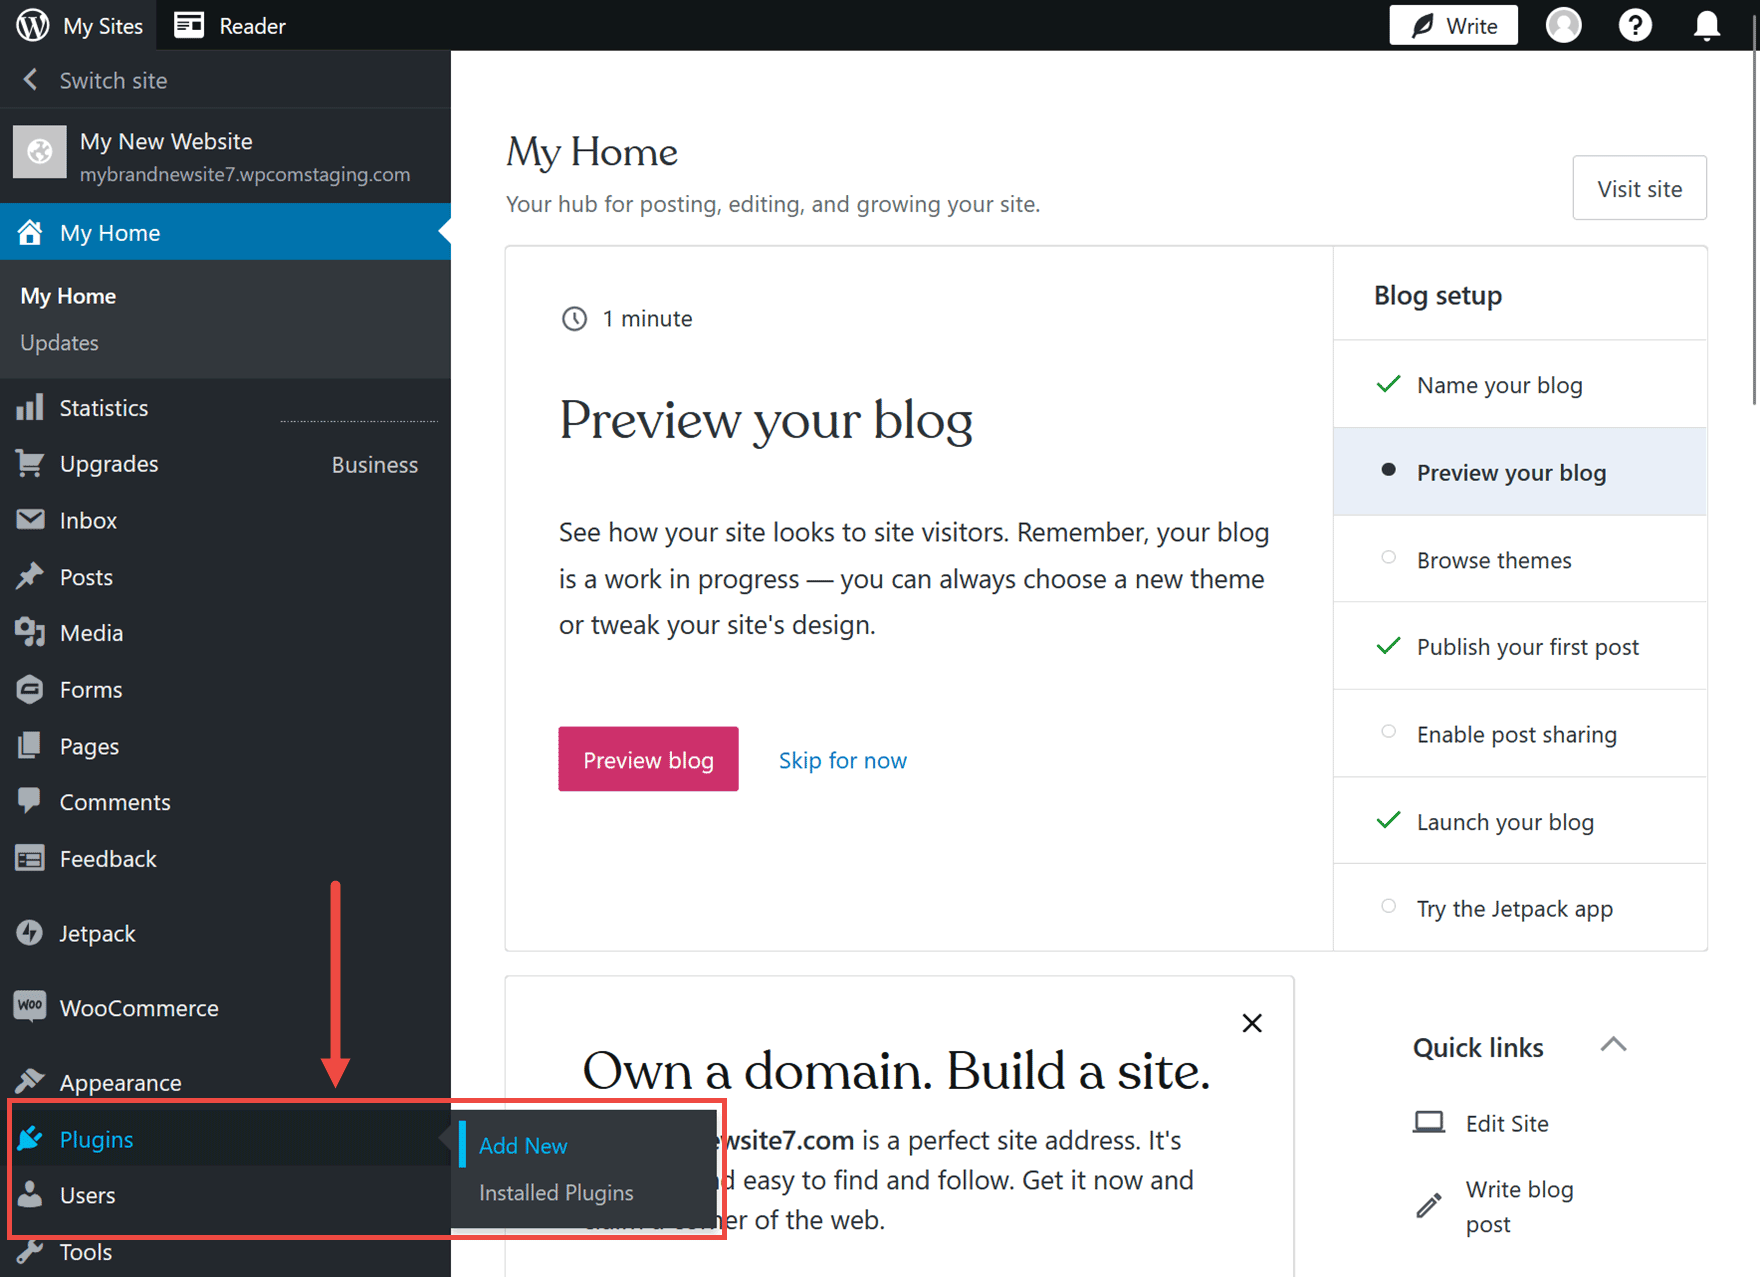
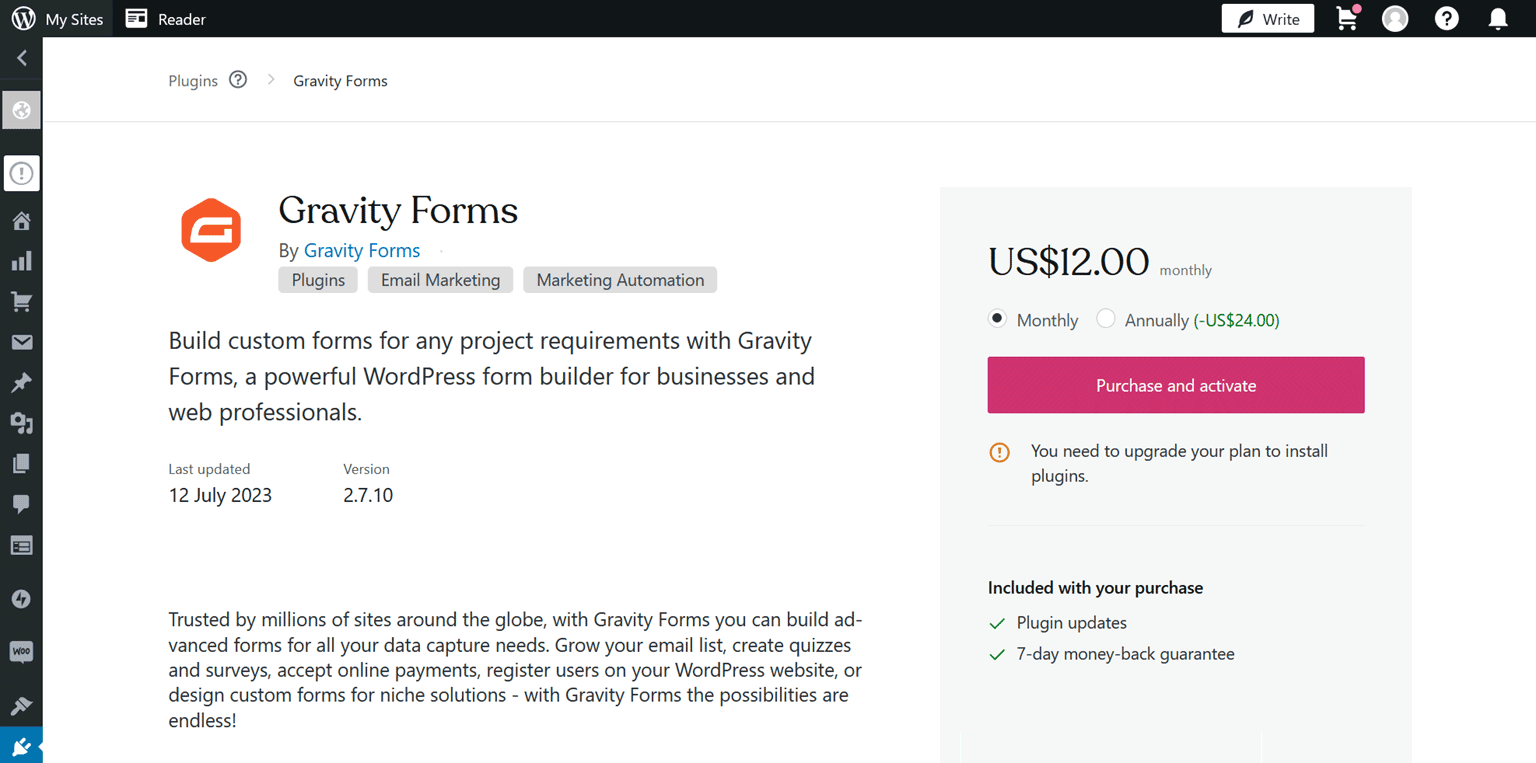
Search for Gravity Forms and click on the appropriate item from the search results.
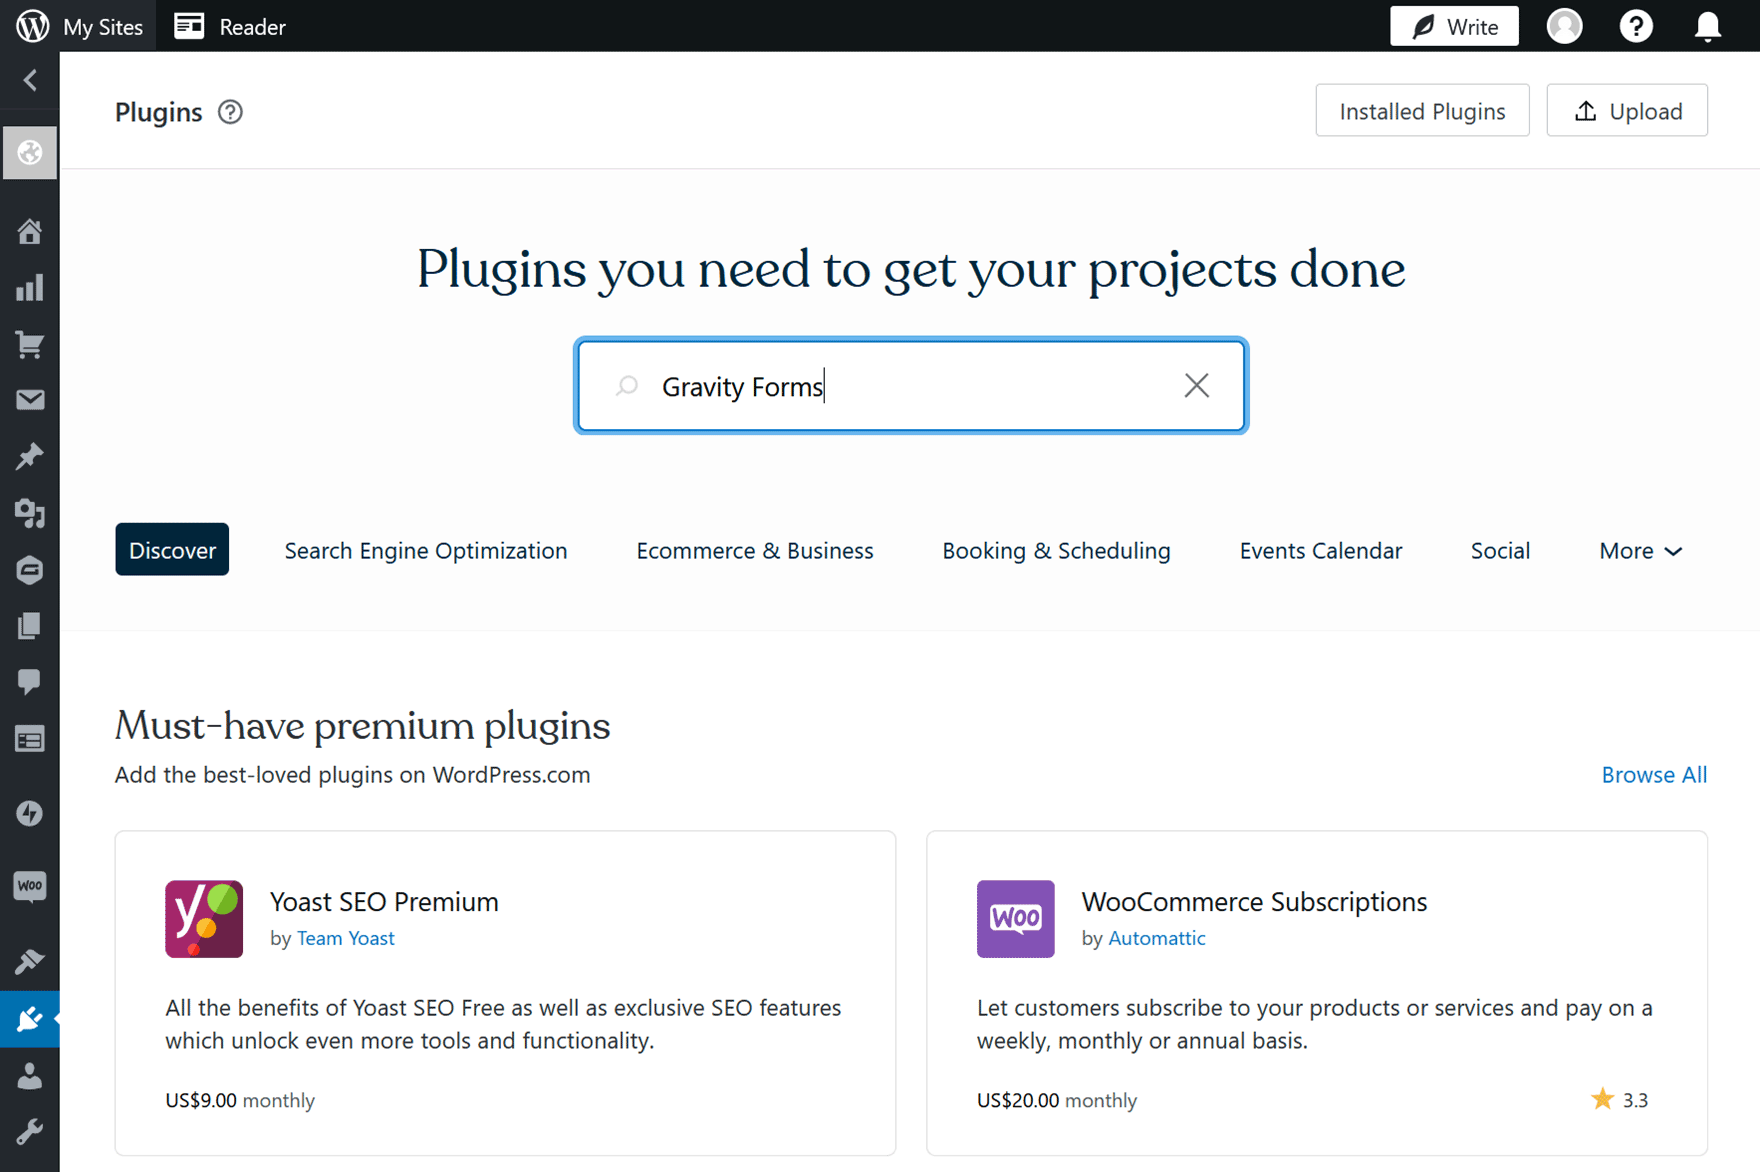
You can either pay monthly or yearly for Gravity Forms, but both options include all the features of this plugin and access to its library of official add-ons.
2. Install and Connect the Stripe Add-On
Once you’ve purchased Gravity Forms and it’s activated on your site, it’s time to install the Stripe Add-On.
To do so, click the Forms → Add-Ons sidebar menu item in WP Admin.
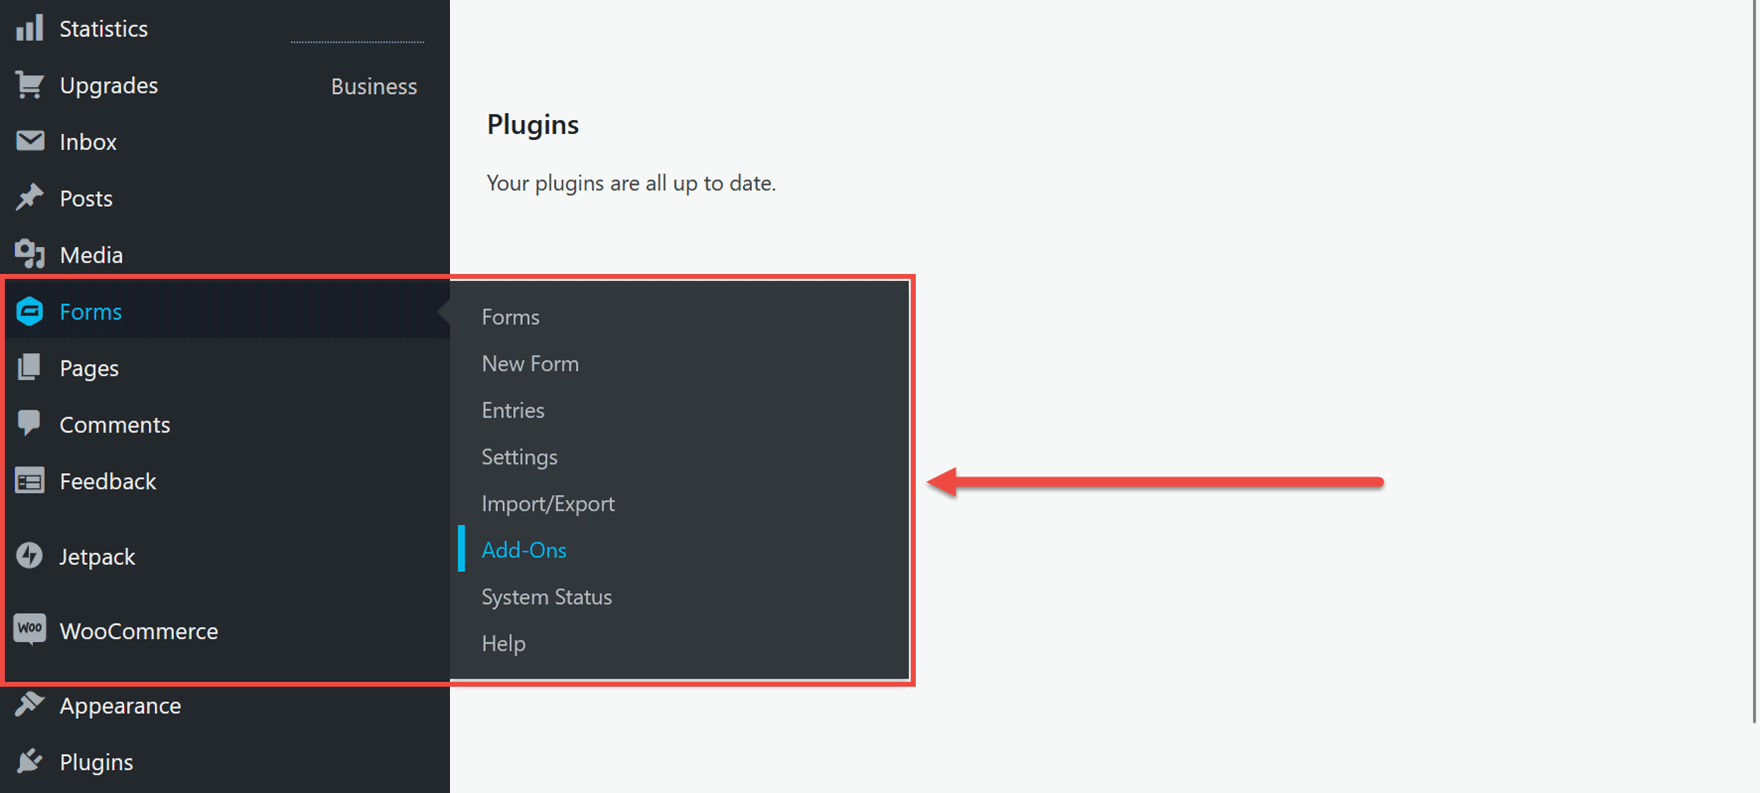
The add-ons are listed in alphabetical order, so scroll down to find the Stripe Add-On.
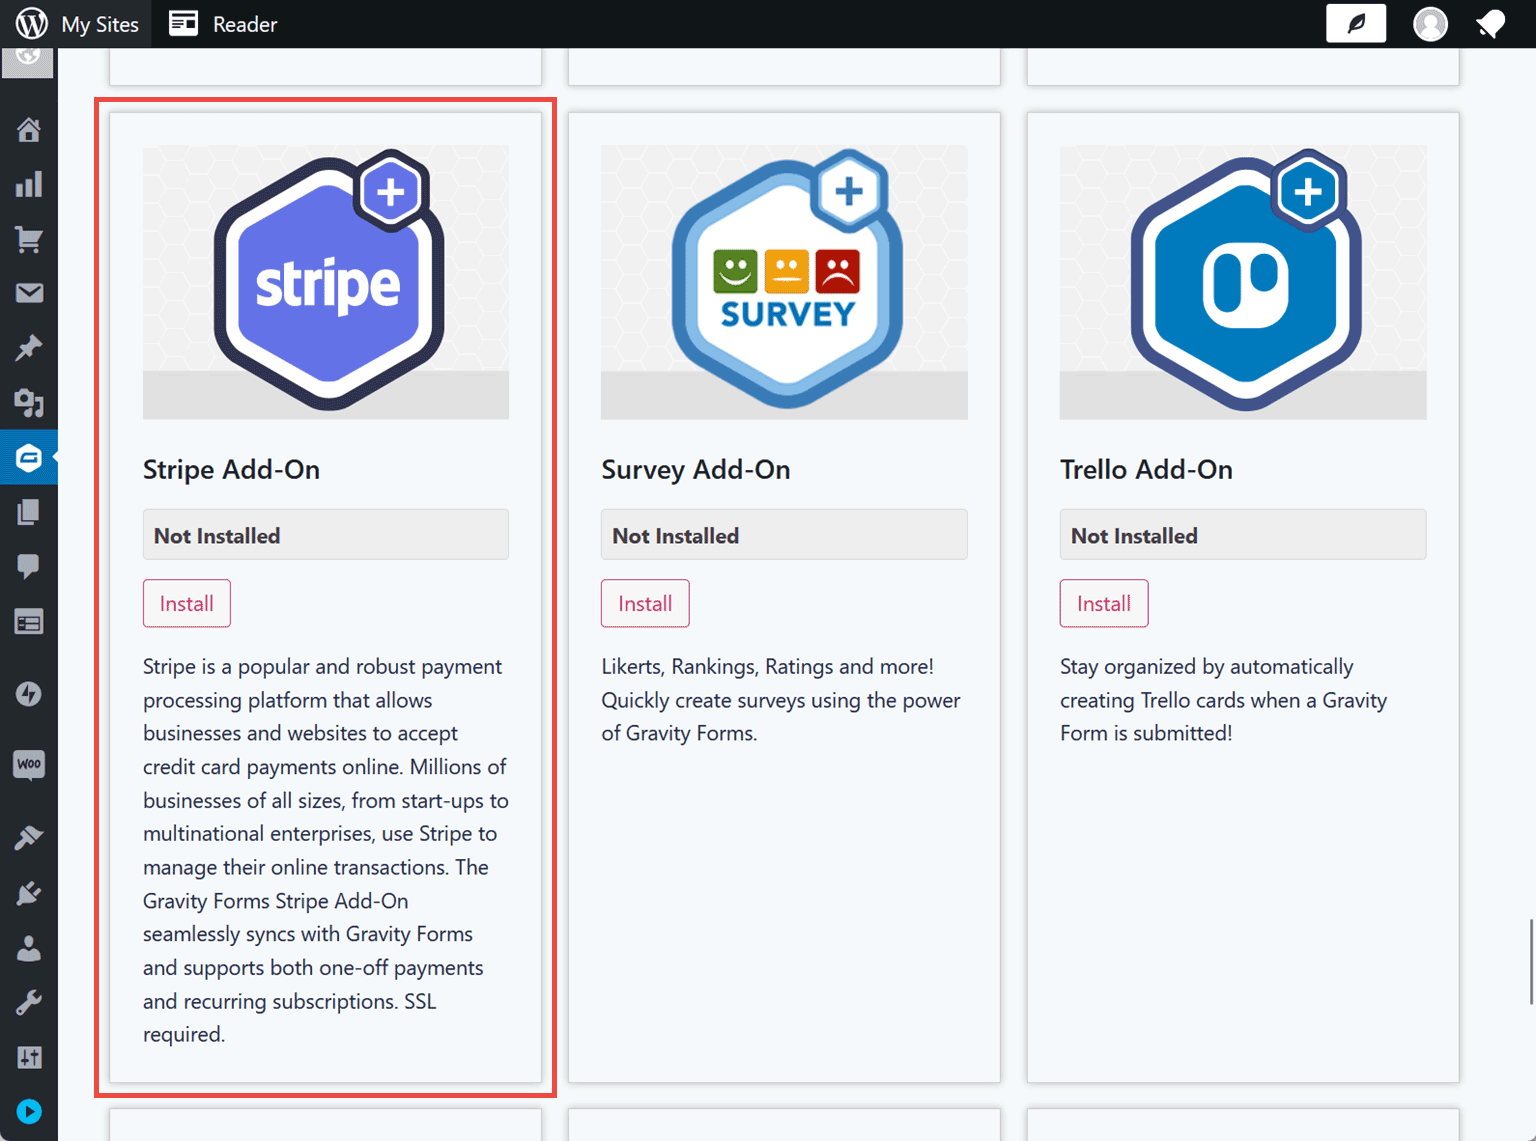
Click on Install and then Activate Plugin. Now click the Forms → Settings menu item. Next, click on Stripe.
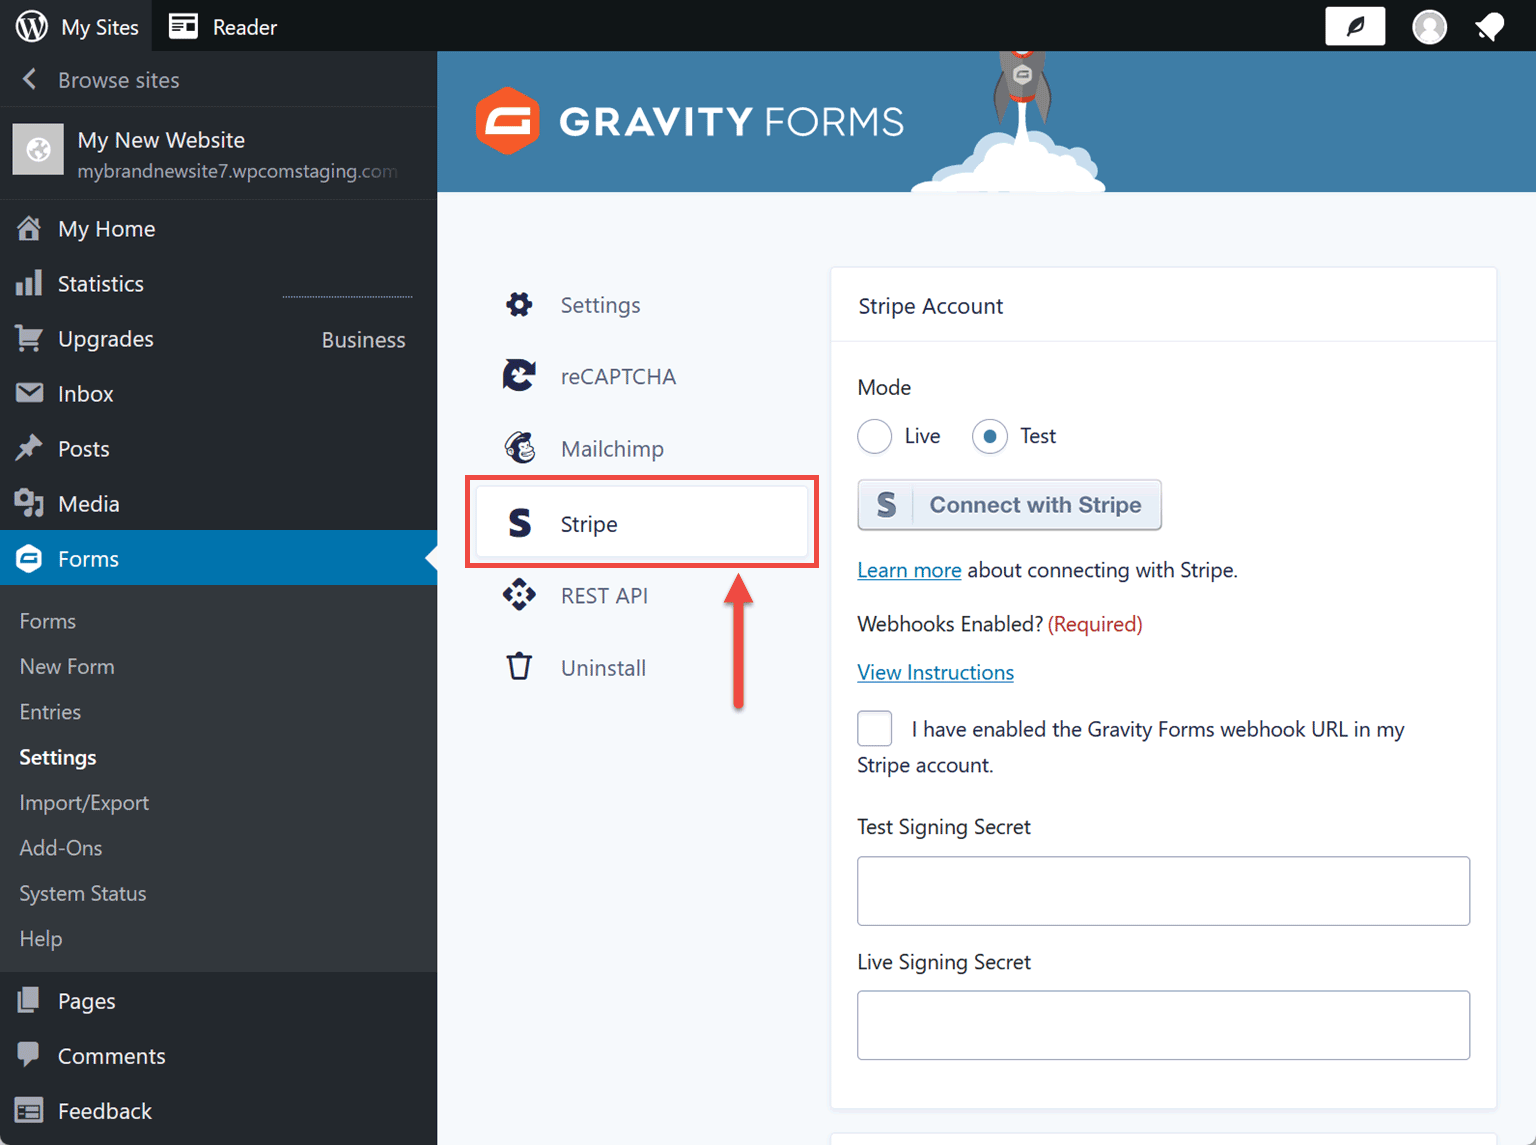
Now, click on the Connect with Stripe button. You can log in if you already have a Stripe account, and if you don’t, create one now.
After that, you can follow the onscreen instructions to enable webhooks to complete the configuration. Then, click on the Save Settings button at the bottom of the screen.
For more information on setting up the Stripe Add-On, read the guides here.
3. Create a Payment Form
Now that Gravity Forms and Stripe are enabled and integrated, it’s time to create and publish the payment form on your site.
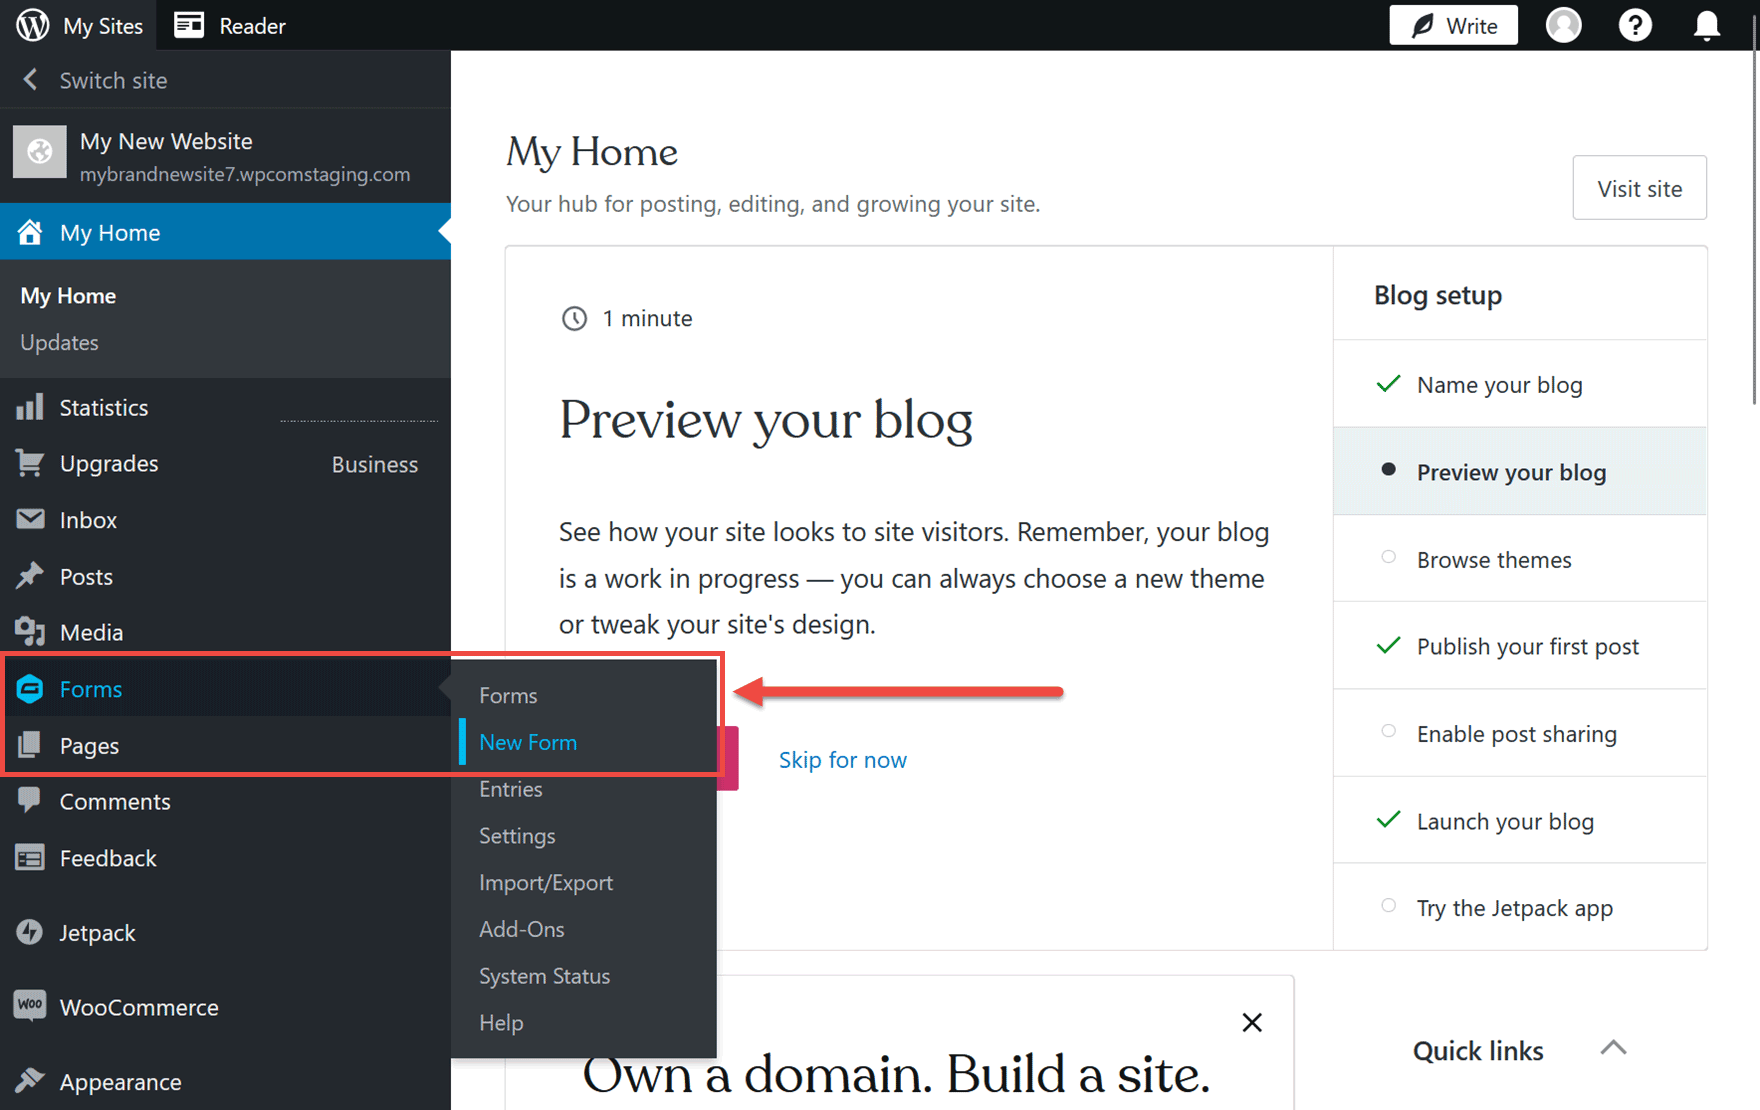
Using a template is the fastest option, so click on the Forms → New Form sidebar menu item.
Find the Stripe Checkout Form in the template library and click on the Use Template button.

Give your form a title and description on the next screen, and then click the Use Template button.
Now you can use the Gravity Forms drag-and-drop editor to customize the form.
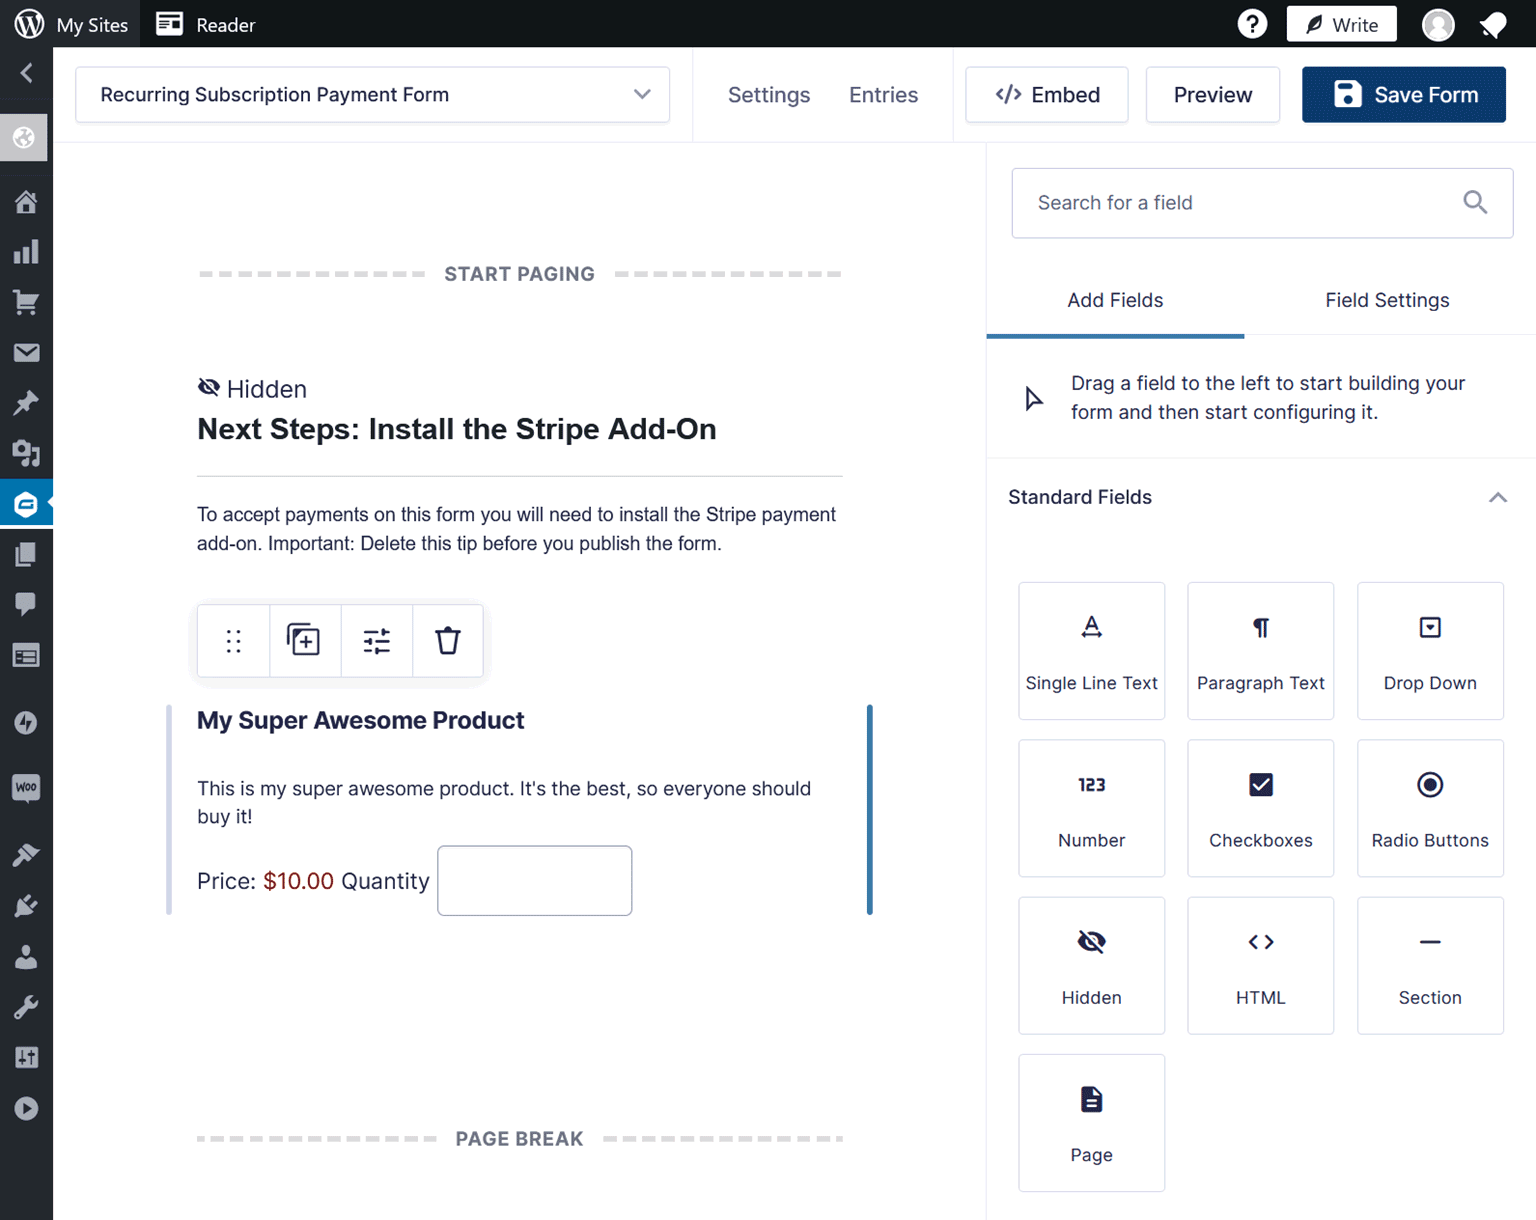
Here you can customize the form, such as adding or deleting fields, or editing existing fields and changing their labels in the Field Settings.
The Stripe field will ship with the Stripe Checkout form template. Under the Stripe Field Settings, you have the option of enabling additional payment methods, including Apple and Google Pay, ACH debit and others.
Once you’re happy with the form, click the Save Form button.
4. Create the Subscription Feed
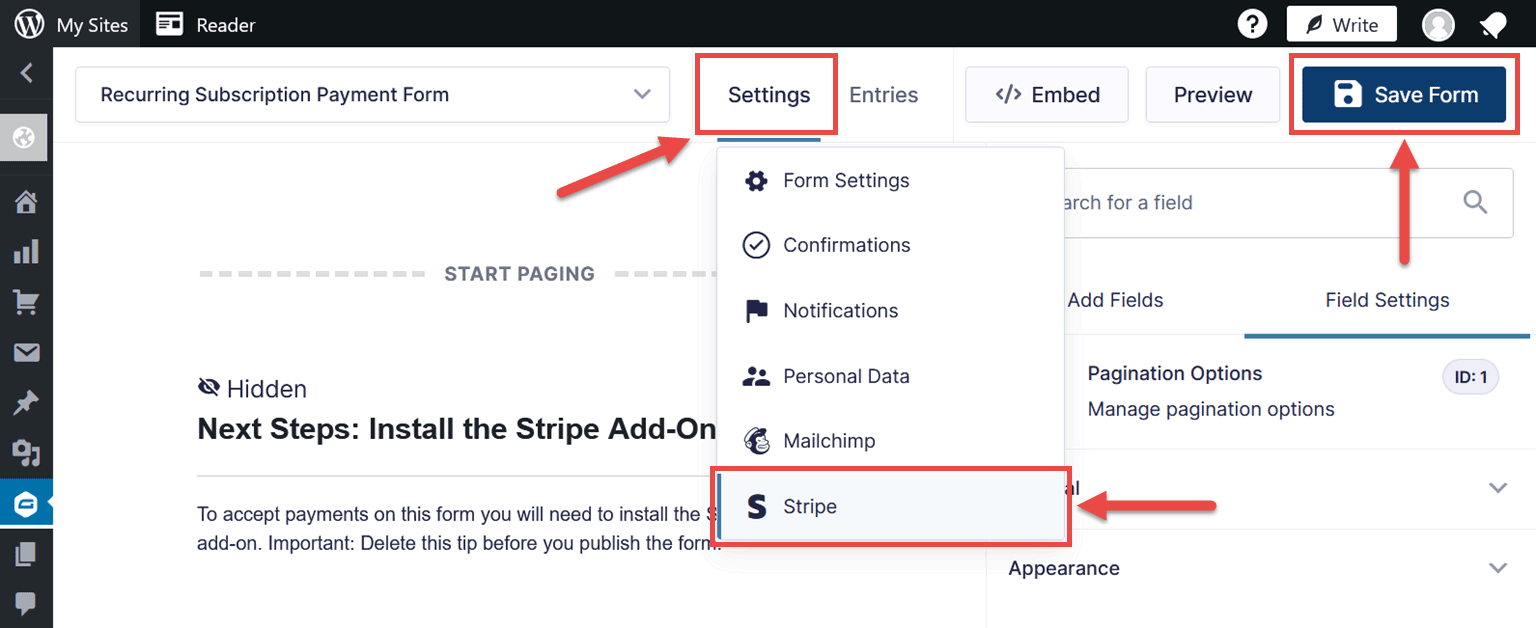
To enable subscription payments, you’ll need to create a form feed. To do so, click on Settings → Stripe from the form builder.
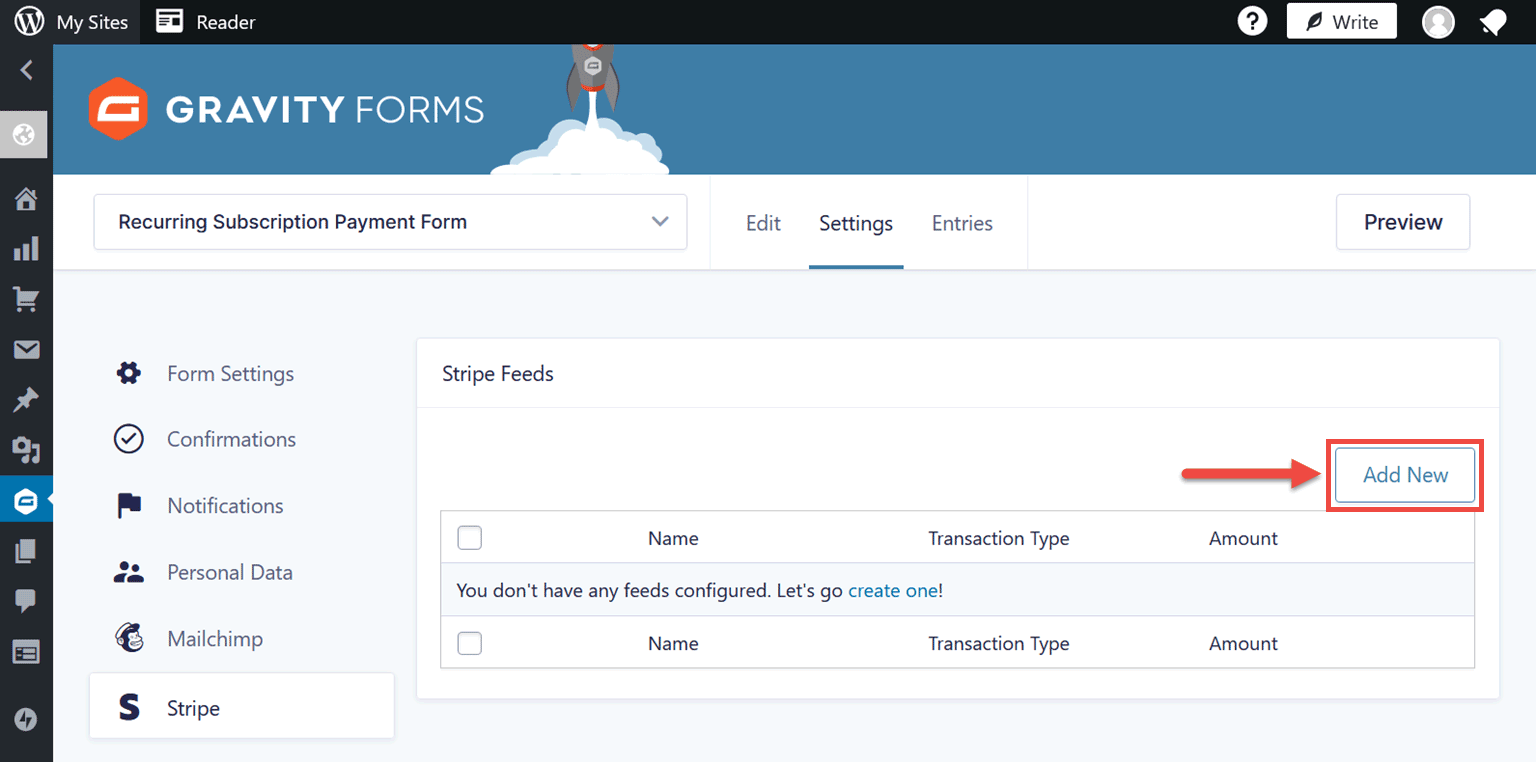
From the Stripe Feeds panel, click on Add New to create a new Stripe feed.
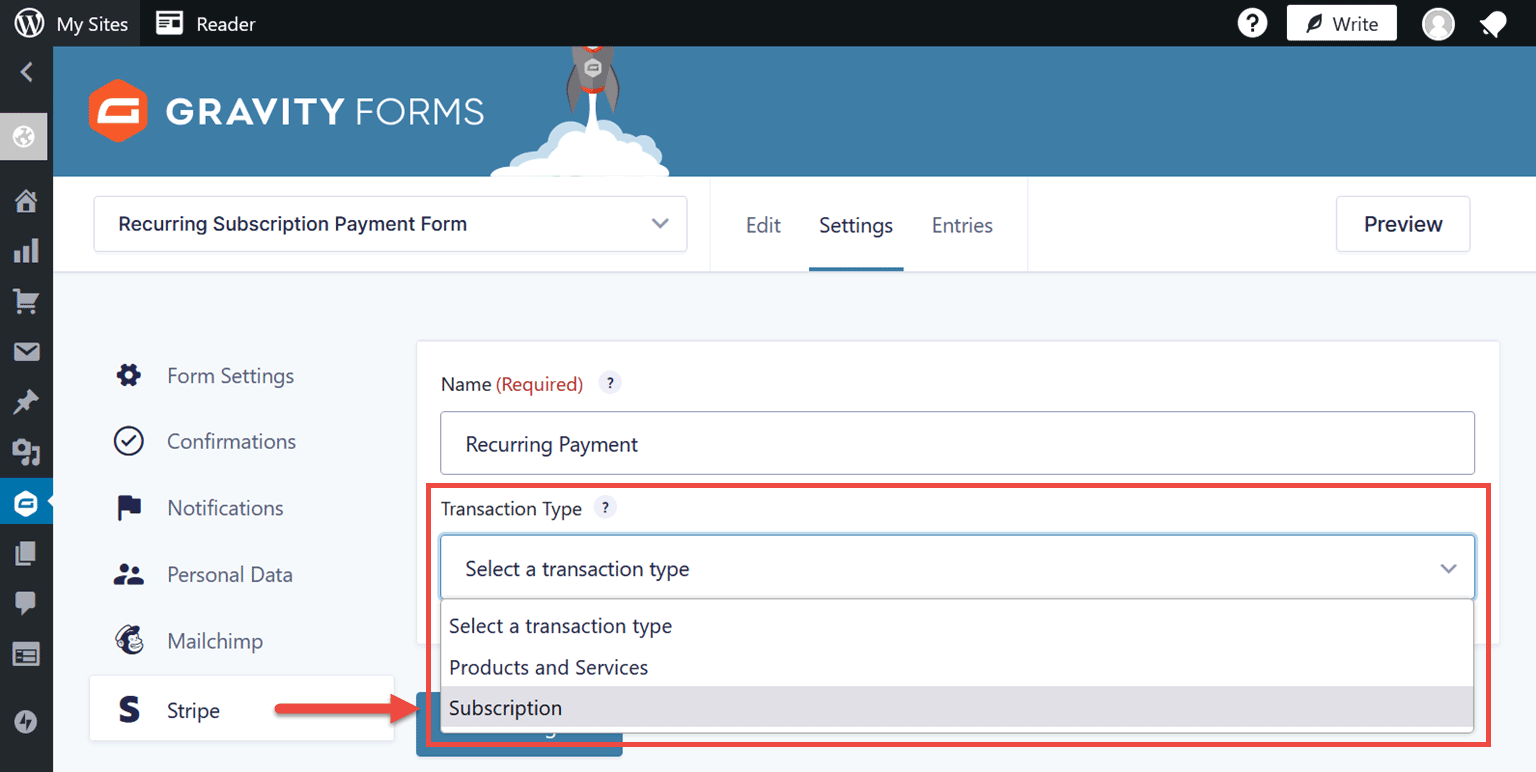
Give the feed a name, such as Recurring Payment, and select Subscription from the transaction types.
Now you can configure the details of the subscription, such as the billing cycle, optional setup fee, and trial period, before clicking the Save Settings button.
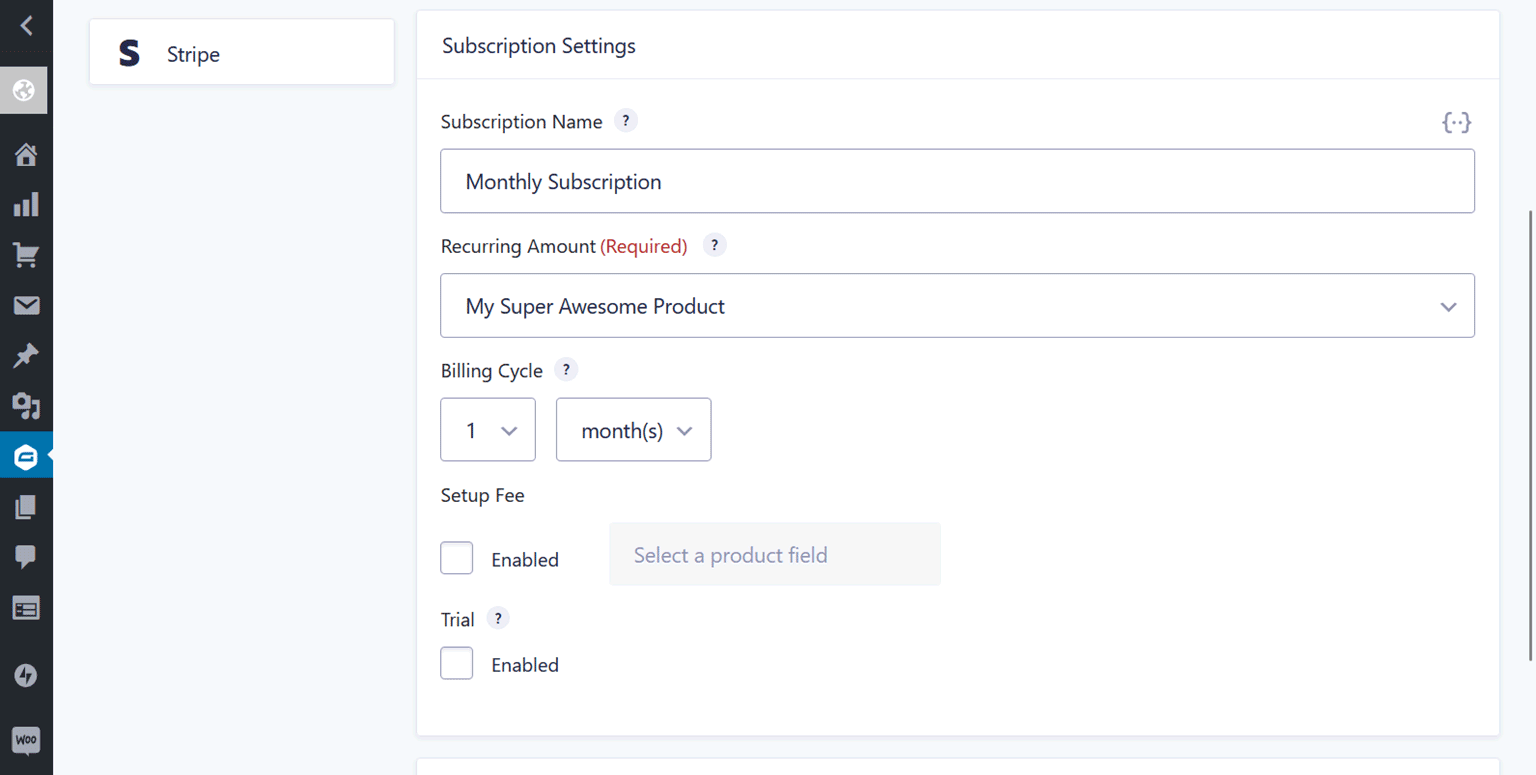
You can find more information about your options on the subscription settings reference page.
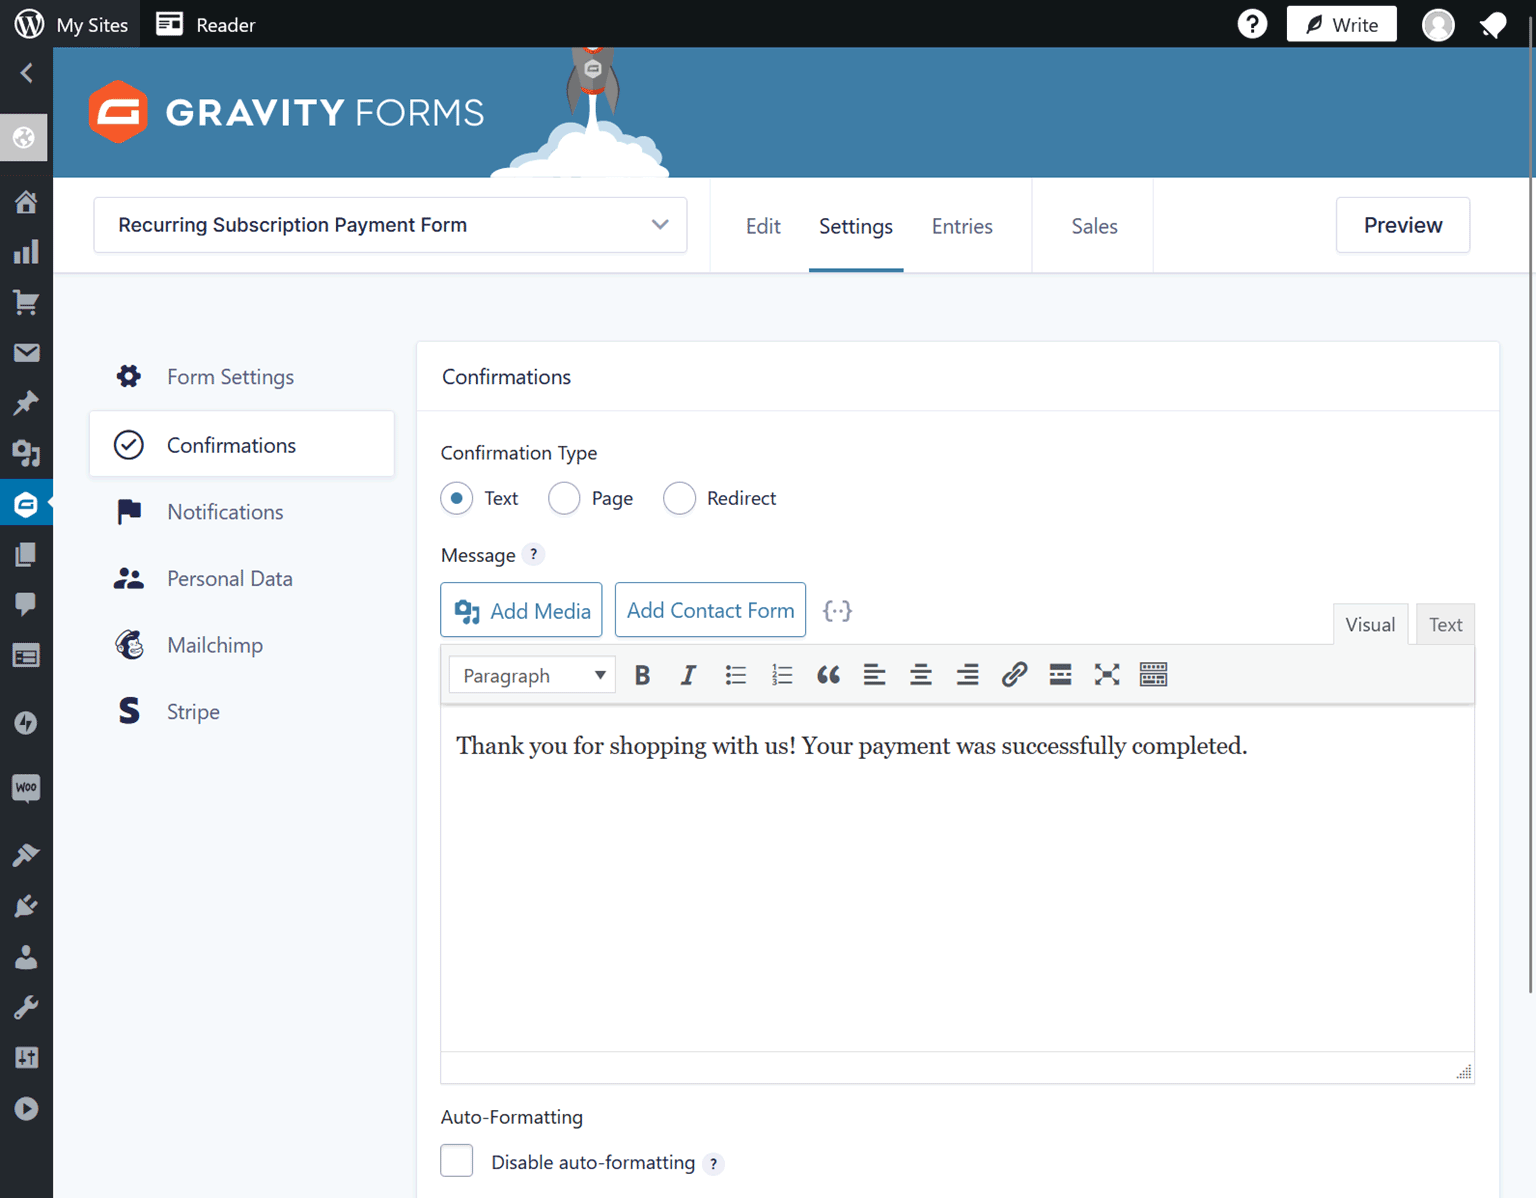
5. Customize Confirmations and Notifications
You can also configure the form Confirmations (Settings → Confirmations) and Notifications (Settings → Notifications) settings.
The Confirmations settings let you customize what happens after the form has been submitted, such as displaying a confirmation message, displaying a page on your site, or sending the user to a specific URL on the internet.
Through the Notifications settings, you can define who gets sent an email confirmation, such as the site owner and/or the person who completed the form, and what’s included in that email.
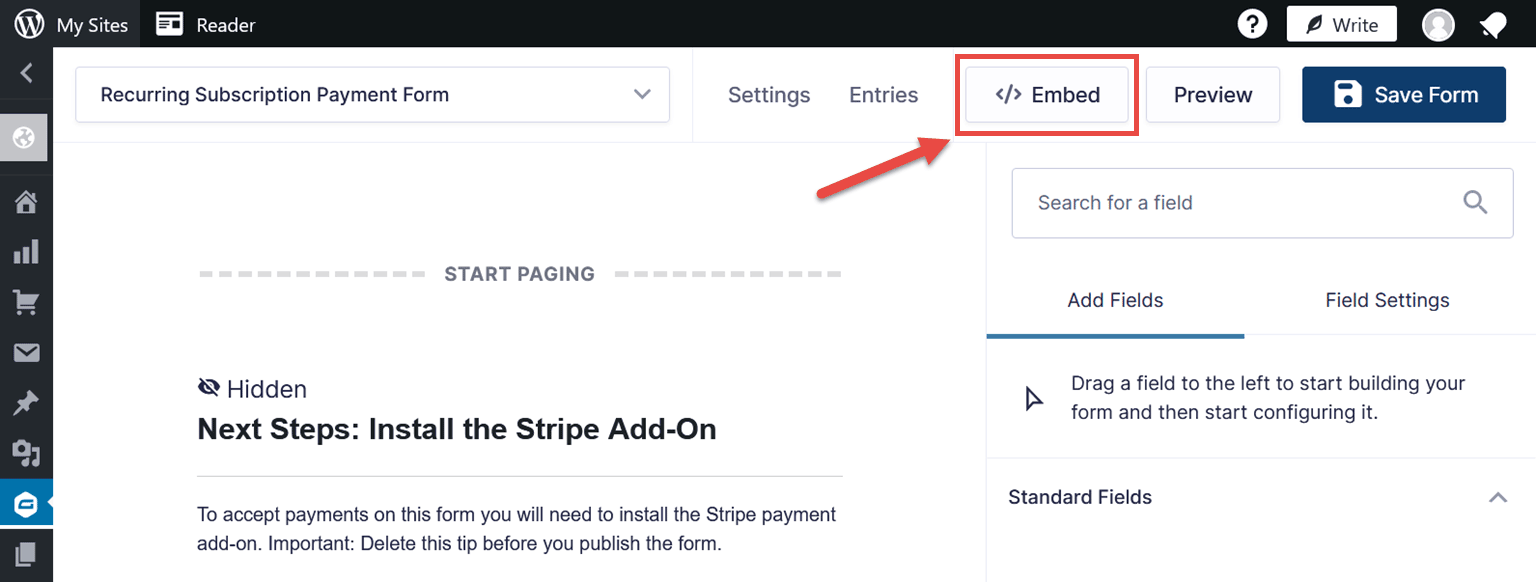
6. Publish the Form
To publish the form, return to the form builder by clicking on the Edit button at the top of the page. Then click the Embed button in the top right corner of the builder.
You can then embed the form into a new page or an existing one.
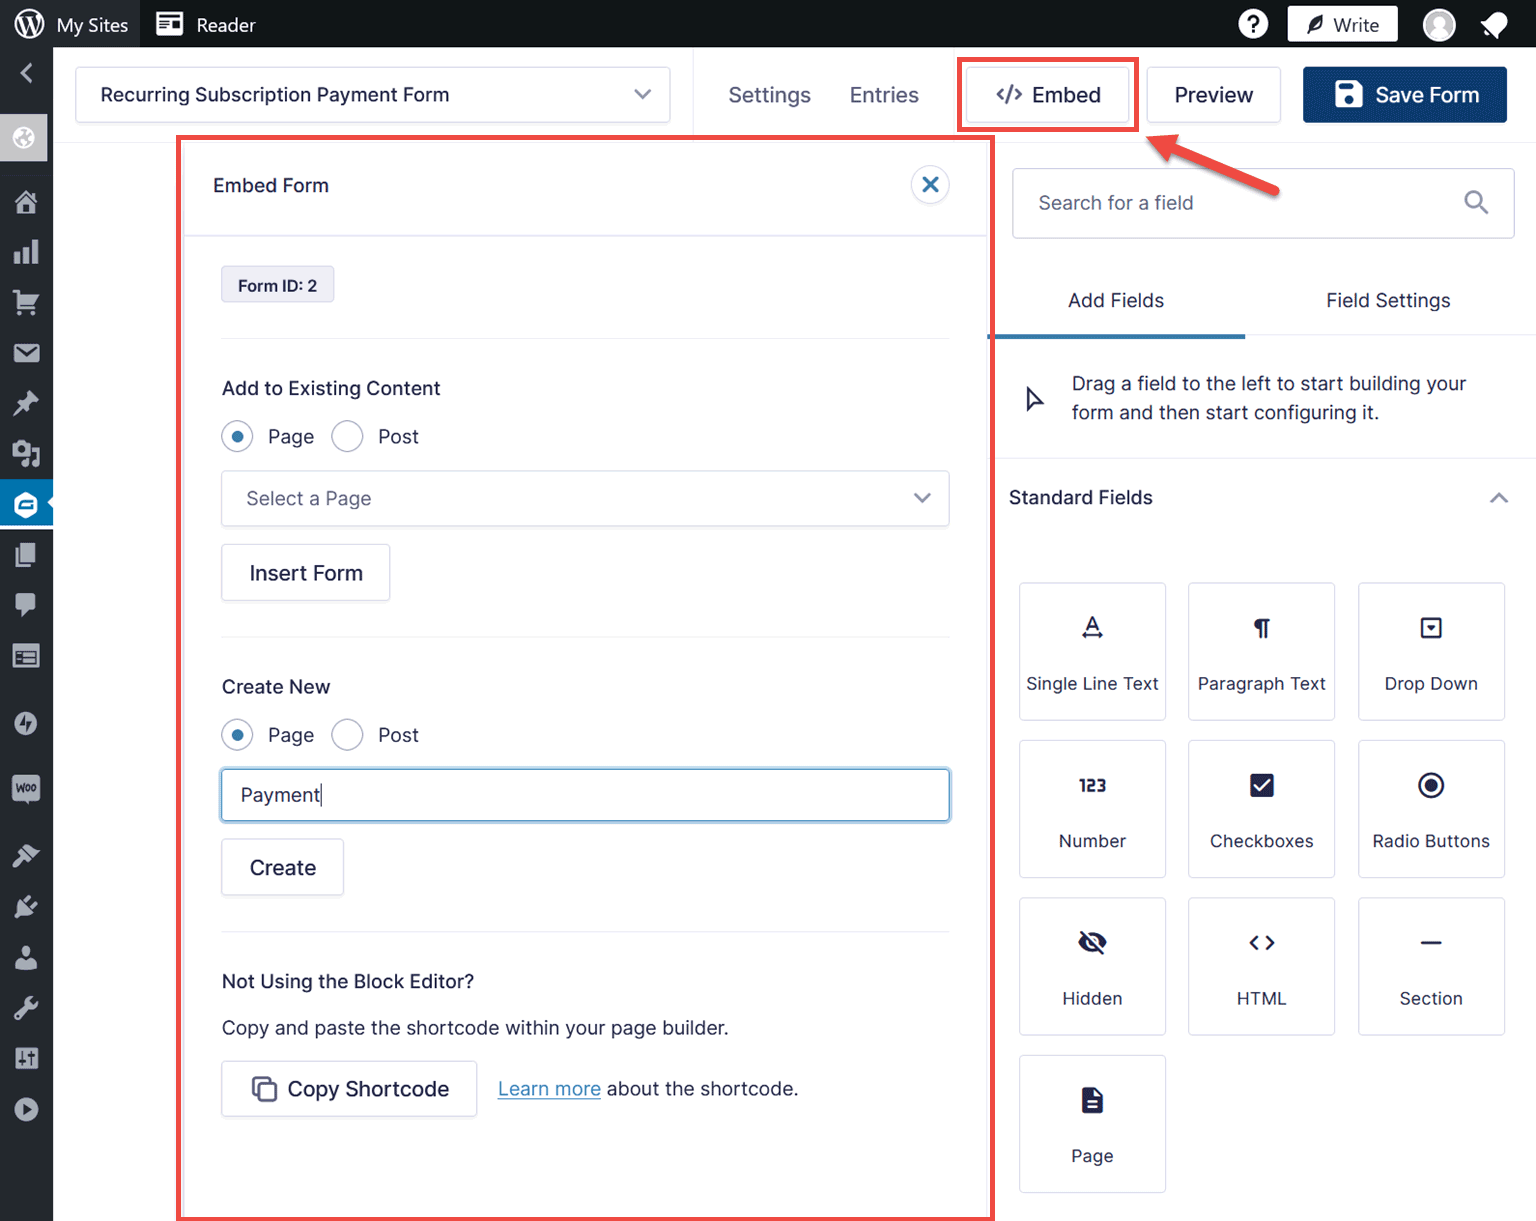
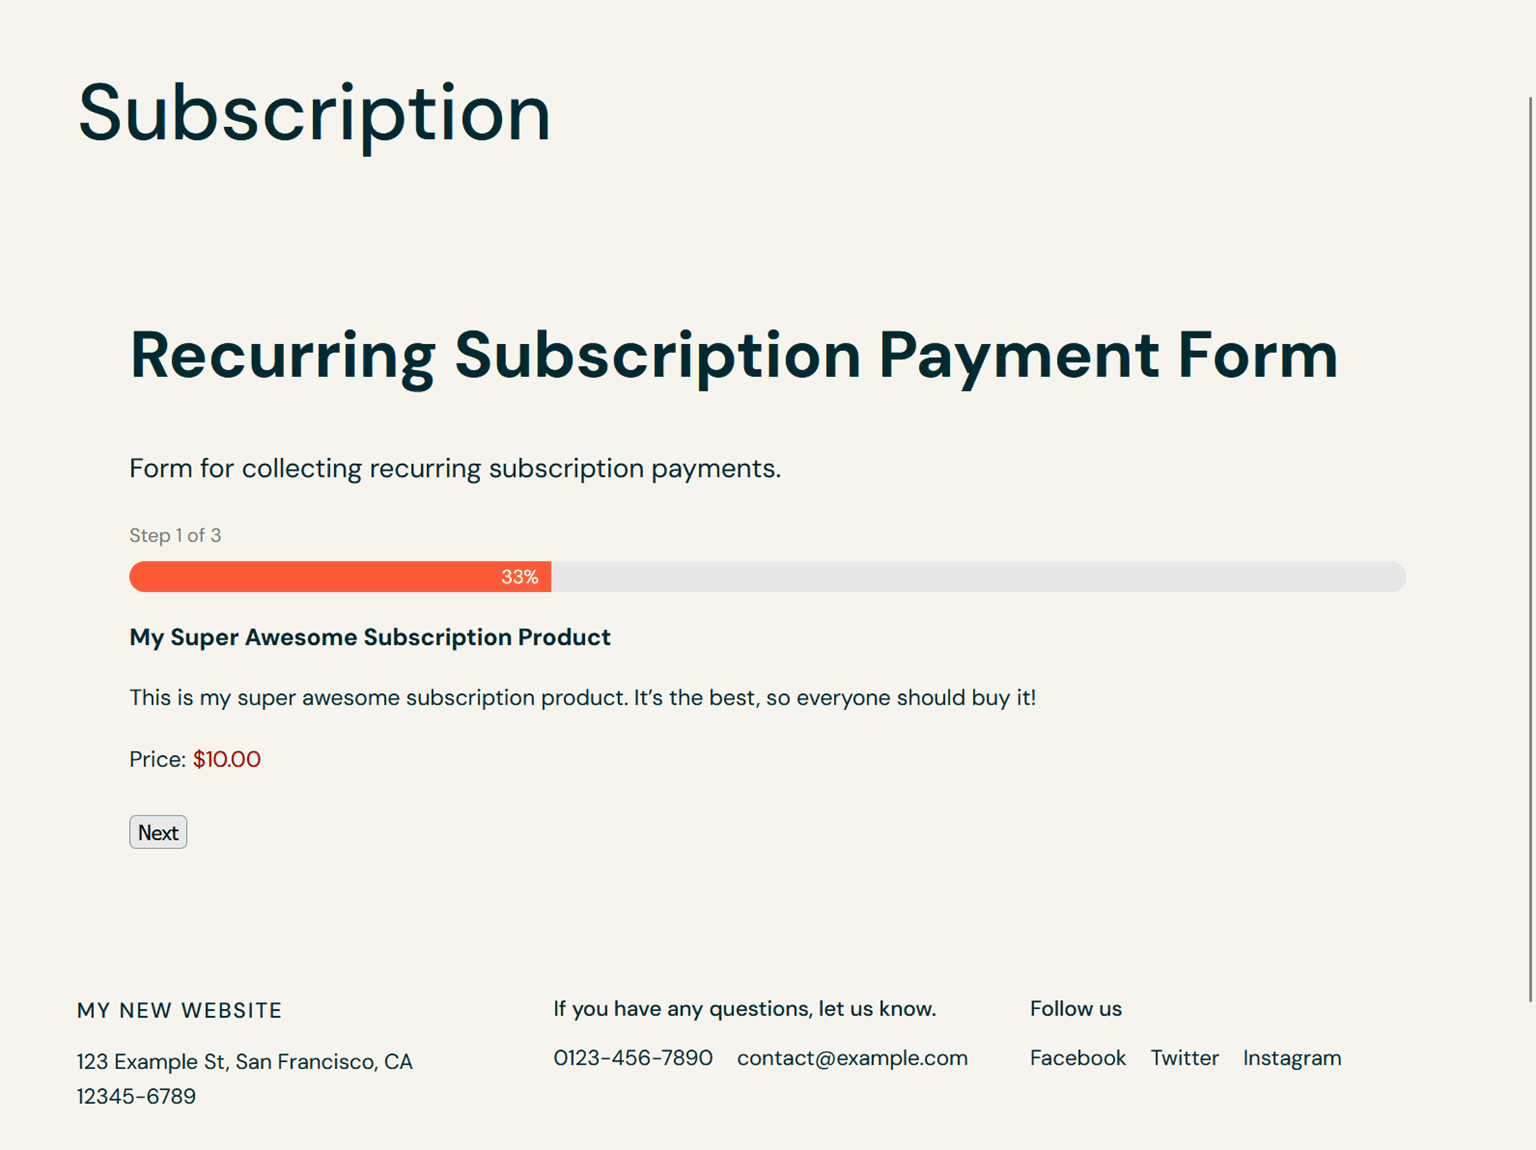
Once you’ve embedded the form and saved or published the page, the subscription should be available to your site visitors.
For more details about getting the most out of the Stripe Add-On, read our Stripe Ultimate Guide.
Summary
As you can see, signing up with WordPress.com, publishing a payment form with Gravity Forms, and integrating with Stripe is very straightforward.
As these three tools are all very easy to use, integrate seamlessly with each other, and are highly flexible, you should have no trouble creating the right custom subscription payment solution for your project.
If you’re ready to start taking recurring subscription payments on your site, head on over to your WordPress.com plugin page to purchase Gravity Forms today.


