Searching for the best solution to help you create a volunteer application form for your nonprofit?
If you’re looking to connect with more volunteers, creating a dedicated volunteer application form is a must. Not only will volunteers know exactly how to sign up, a dedicated form will help you more efficiently collect and store information about potential volunteers.
If done right, you can also automatically add volunteers to your email lists or send them other types of notifications, which helps you stay connected.
In this post, you’ll learn step-by-step how to create a volunteer application form on WordPress using the Gravity Forms plugin – no technical knowledge needed.
We’ll start with an example of the type of form that you can build, along with some of the key features that you might want to include (and how Gravity Forms can help you implement those features).
Then, we’ll get straight into the step-by-step tutorial, demonstrating how to set up everything and customize it for your organization’s needs.
An Example of the Volunteer Application Form That You’ll Be Building
If you want to create an efficient volunteer application form, you’ll want to include a few features:
- Personal information – you’ll want to be able to collect as much personal information as needed.
- Skills and job – you’ll want options to let volunteers share their skills or choose a specific job to volunteer for.
- Confirmations and email notifications – you’ll want to be able to provide information after a volunteer submits a form, such as displaying a confirmation message on your website and/or sending them an email notification.
- Volunteer database/CRM – you might want the ability to add volunteers to your CRM (or some other type of software to store volunteer details).
- Email list integration – you might want the ability to sign volunteers up for your volunteer newsletter.
- User registration – you might want the ability to register a user account for a volunteer, such as giving them access to private areas of your site that are just for volunteers.
If you follow the steps in this tutorial, you’ll be able to include all of those key features while still being able to customize everything to your nonprofit’s specific situation.
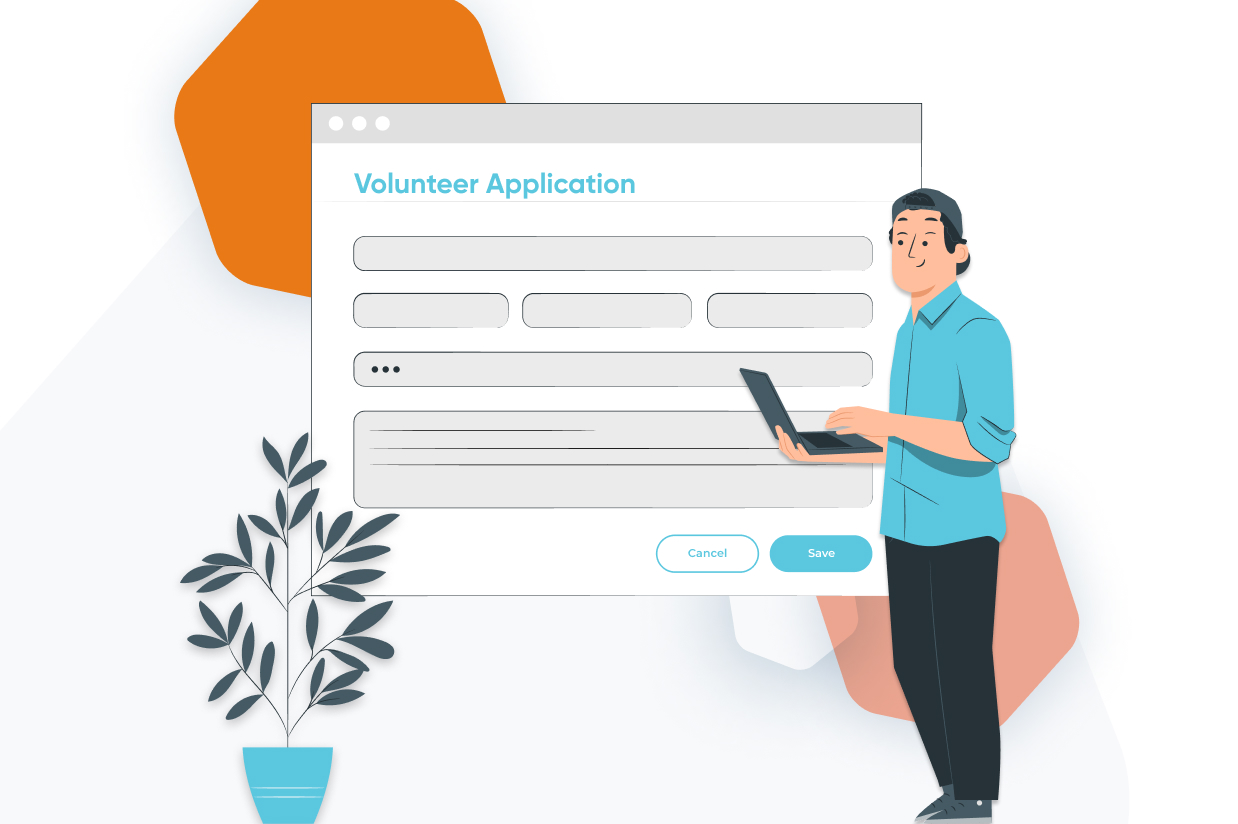
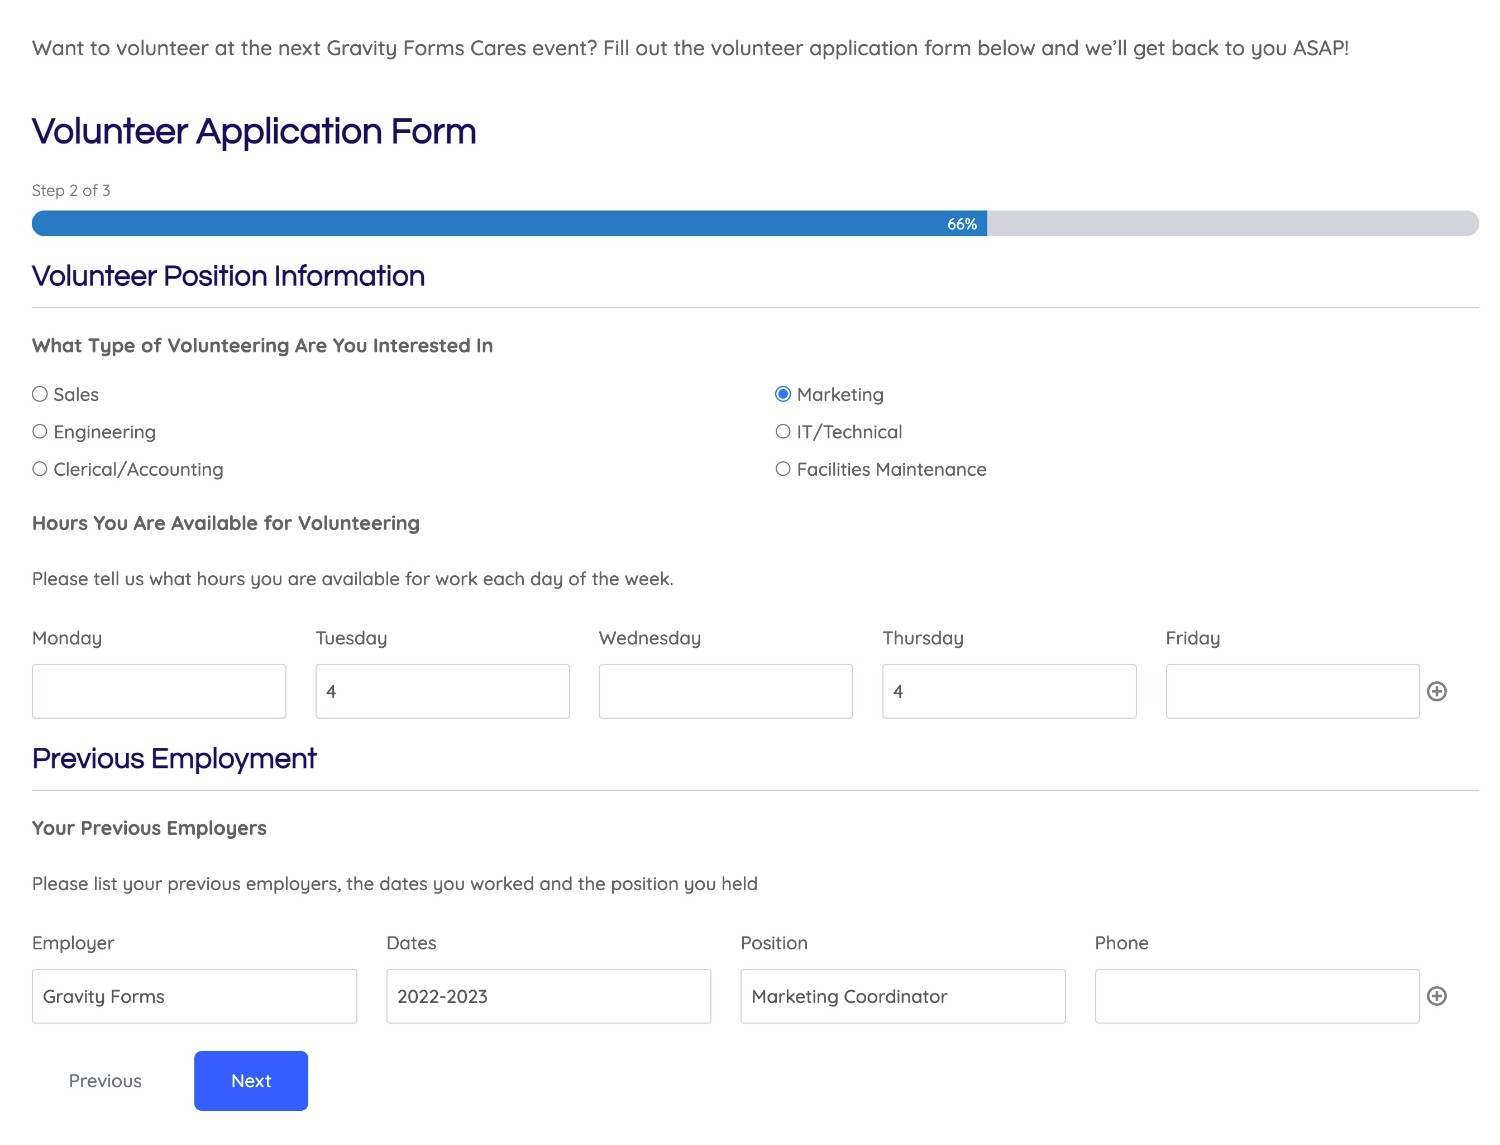
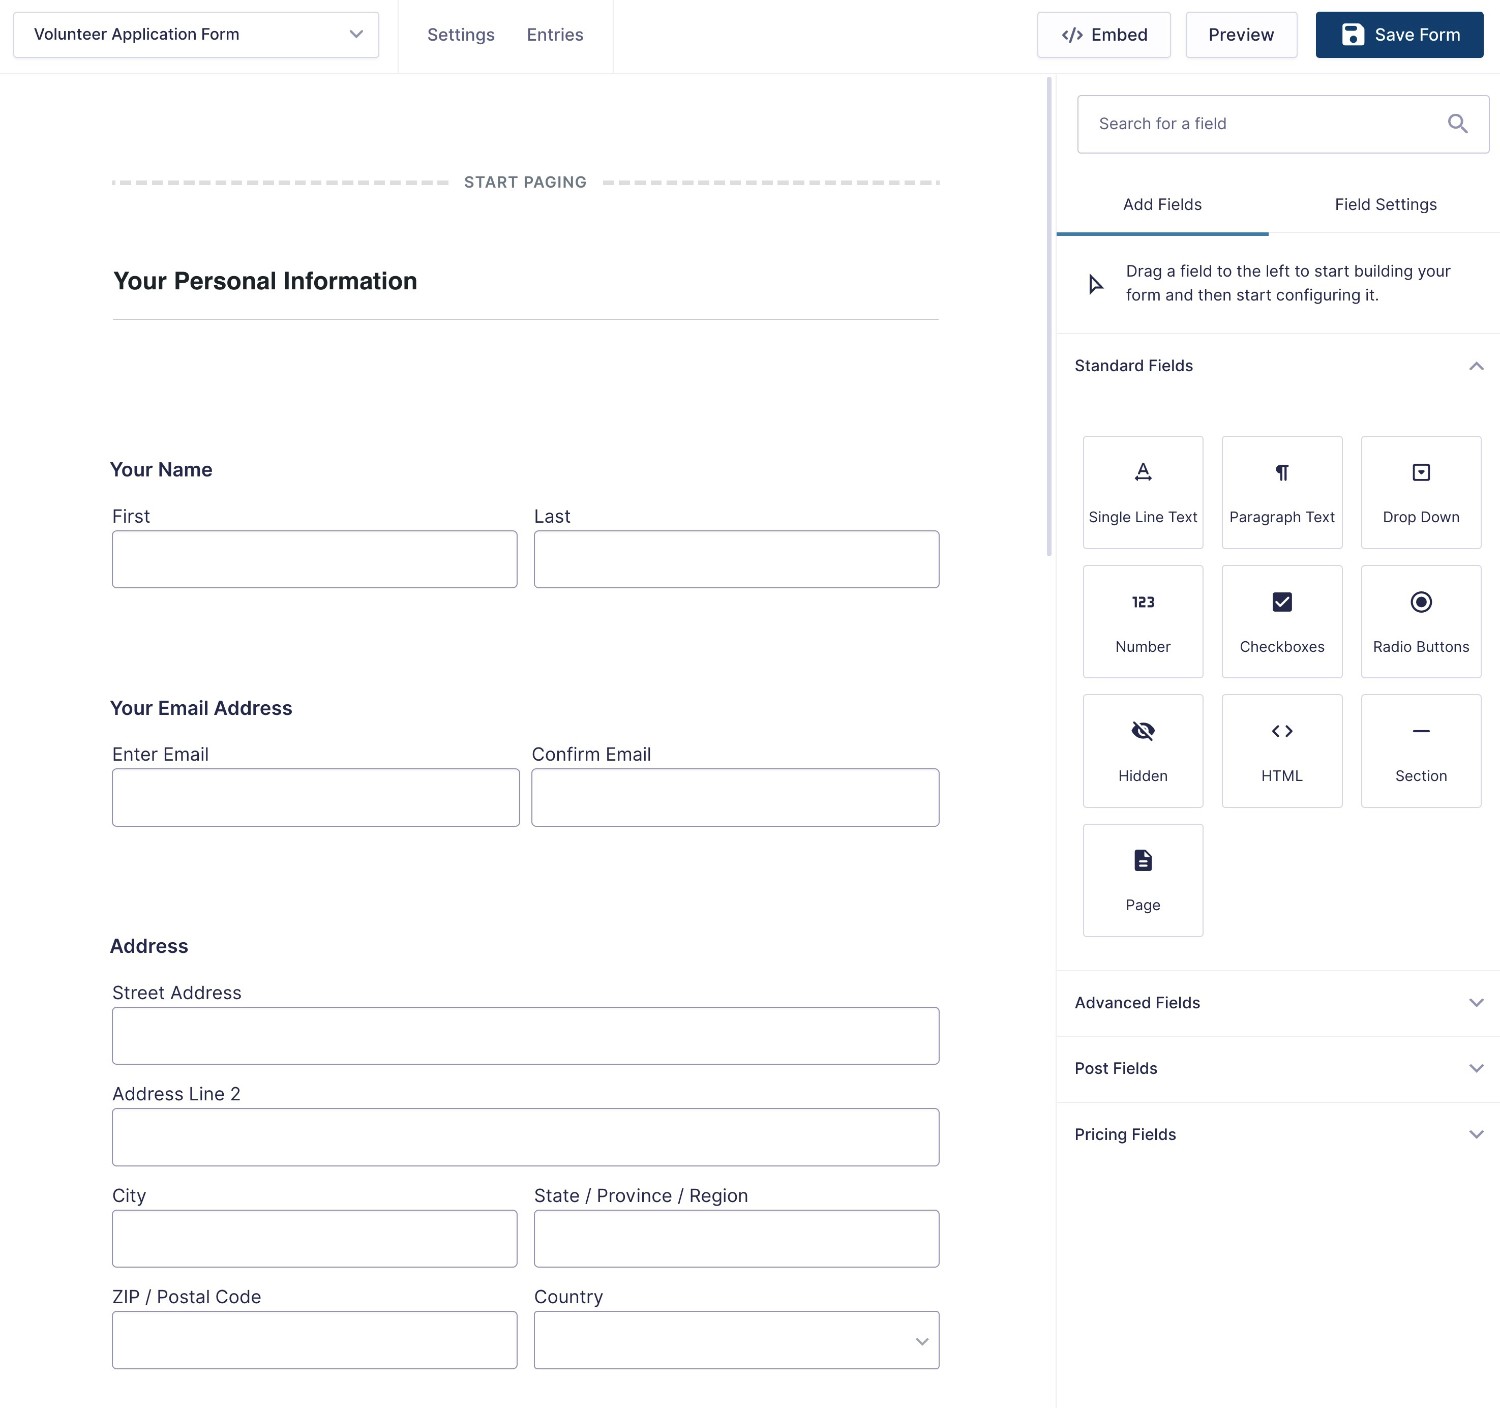
To start, you can include as many or as few form fields as needed to collect information from your volunteers:
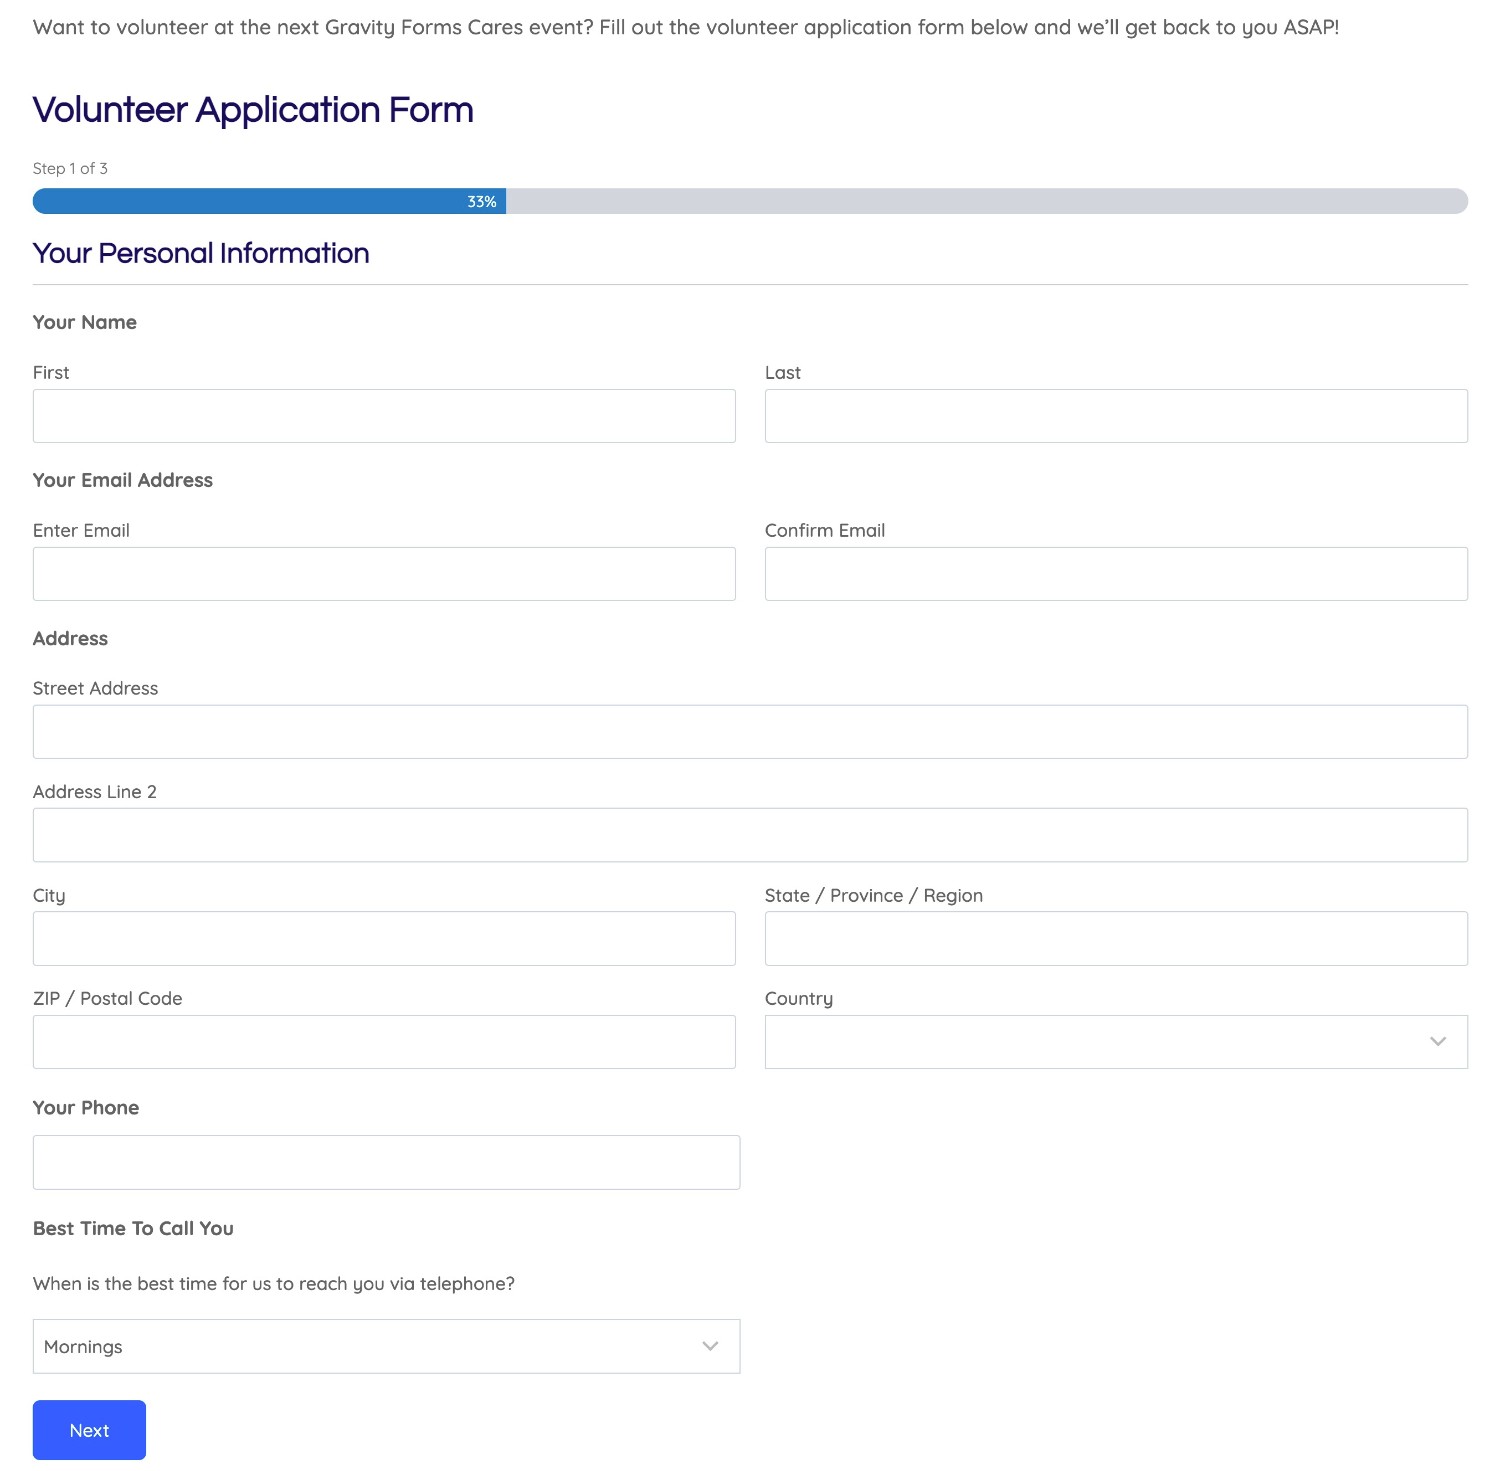
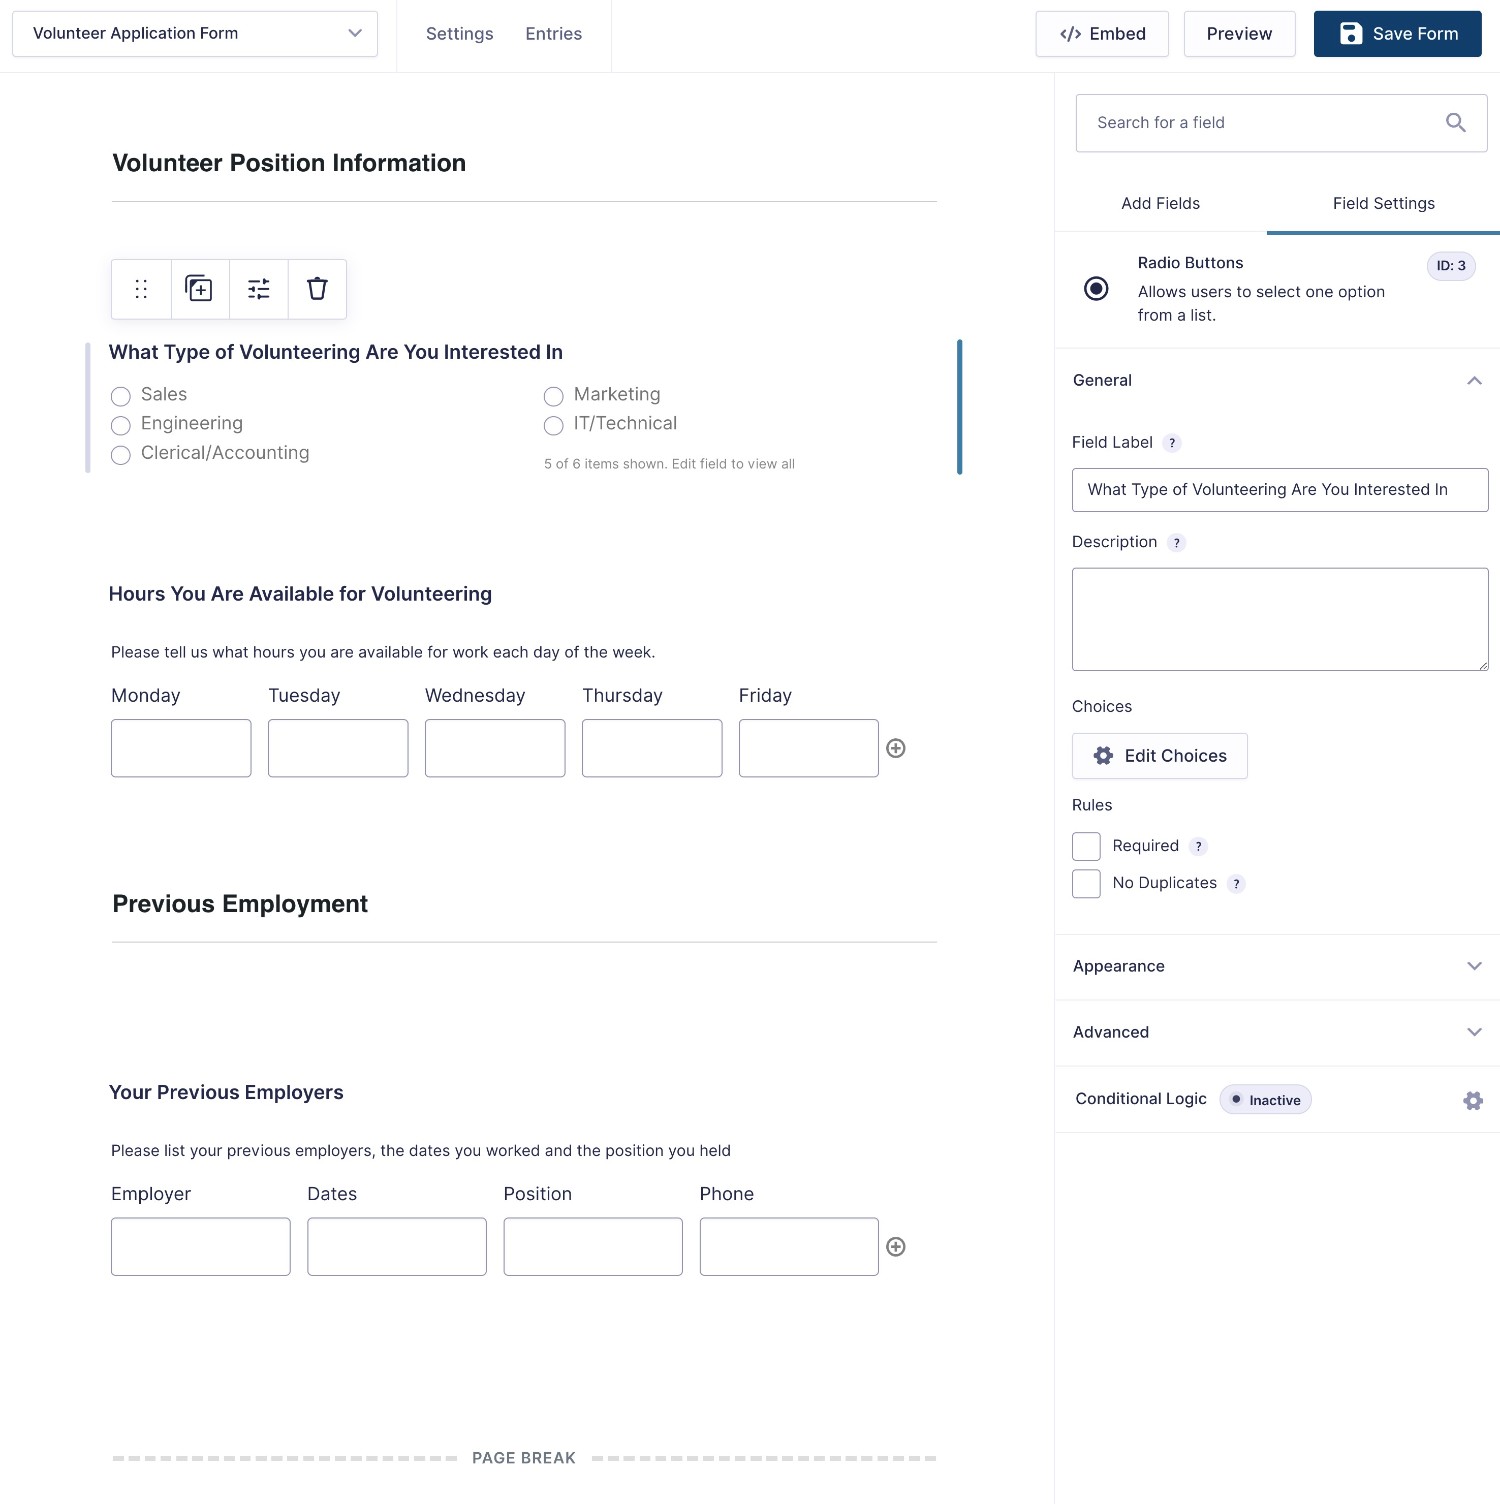
If your application form is long, you can break it into multiple pages to make things easier for your volunteers:
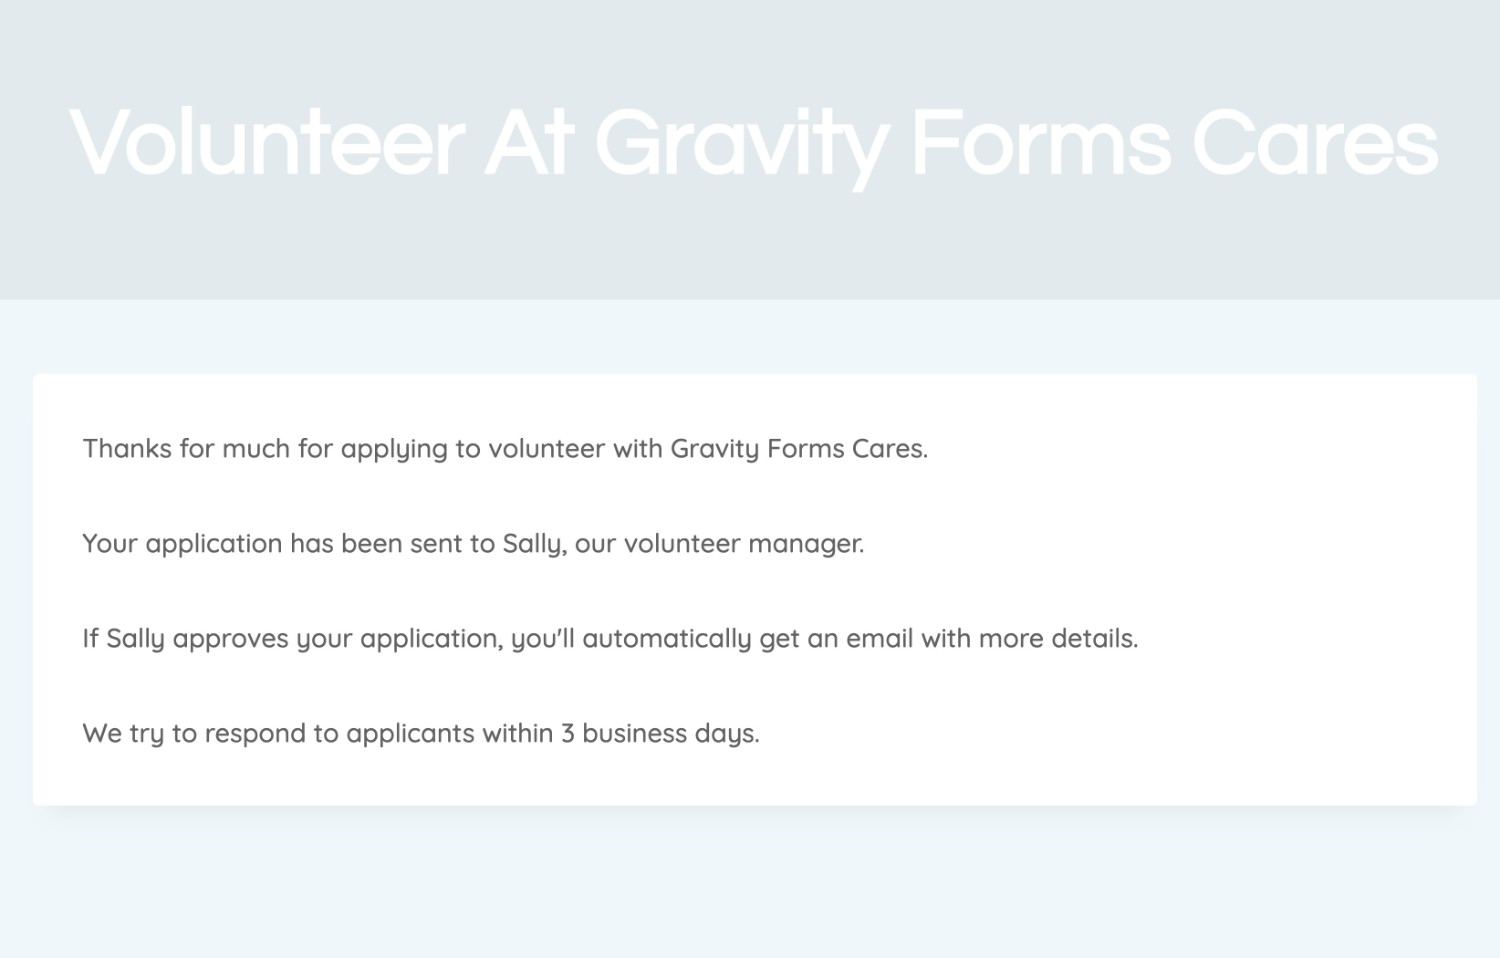
Once a volunteer submits the form, you can show a custom confirmation message on your site to let them know about the next steps:
You can also set up as many email notifications as needed. You can send emails to the volunteer applicant as well as to people in your organization (such as the person who manages volunteers).
If you want, you can also set up other integrations according to your needs. Here are a few examples of what you might do:
- Subscribe volunteers to a mailing list that lets them know about upcoming volunteer opportunities.
- Create a WordPress user account for volunteers to let them access information on your site.
- Add volunteers to some type of contact database, such as a CRM or some other software you use to manage volunteers.
For example, maybe you have a Mailchimp email list that you use to contact volunteers. You could add a checkbox to your volunteer application form that gives people the choice to join the newsletter.
If a potential volunteer checks that box, you could automatically subscribe them to the Mailchimp list.
How to Create a Volunteer Application Form on WordPress
Now that you know what’s possible, let’s dig into our step-by-step guide on how to create a WordPress volunteer application form using Gravity Forms.
1. Install Gravity Forms and Any Add-Ons That You Need
To get started, you’ll want to make sure that you’ve installed the Gravity Forms plugin on your WordPress site.
Beyond the core Gravity Forms plugin, you’ll also want to install any Gravity Forms Add-Ons that you’d like to use.
This is optional – you don’t need any add-ons to create a basic volunteer application form. But you will want add-ons for certain use cases:
- Adding volunteers to your email list – you’ll want to install an add-on for your preferred email marketing service.
- Create WordPress user accounts for volunteers – you’ll want to install the User Registration Add-On.
- Setting up automations – you might want to install the Zapier Add-On to connect to apps on Zapier (or the Webhooks Add-On to set up custom Webhooks).
- Etc.
2. Create a New Form
To create your volunteer application form, go to Forms → New Form in your WordPress dashboard.
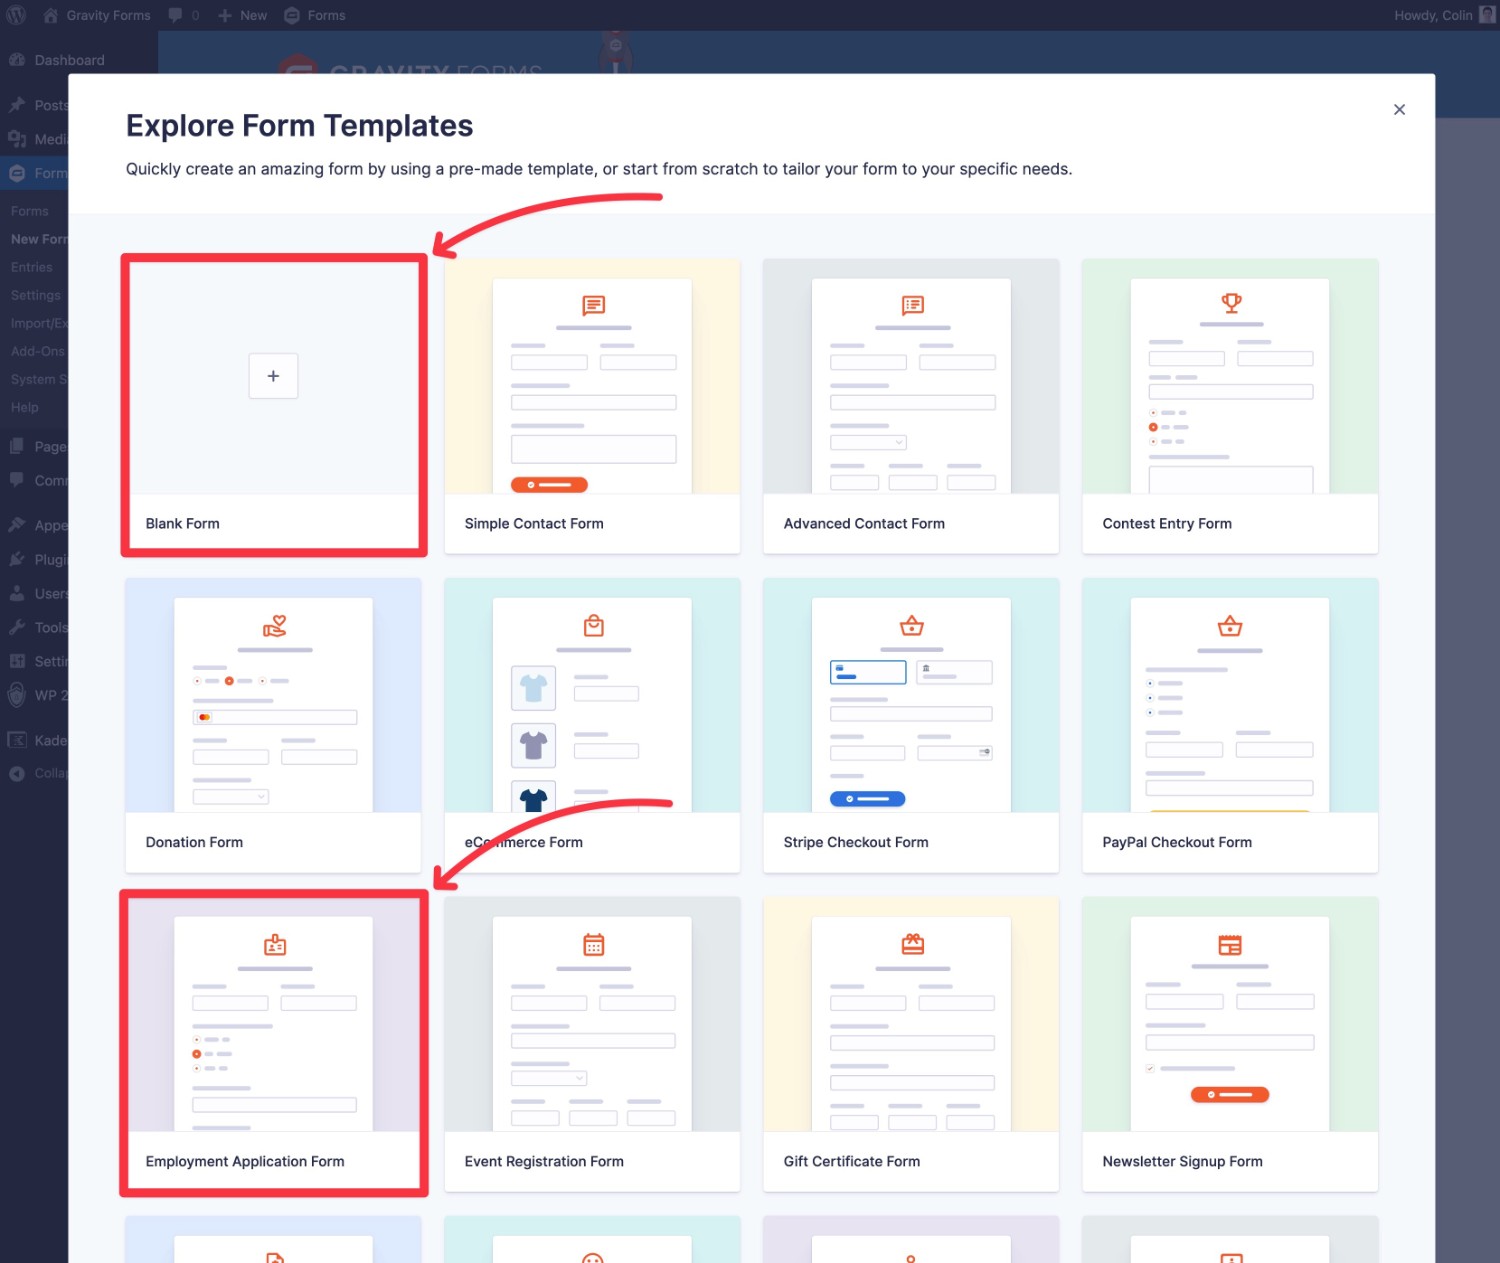
You’ll then see a popup with some premade form templates.
If you want to save time, you can start from the Employment Application Form template. While this template is focused on commercial employment applications, you can easily adjust it to the volunteer use case.
Or, you can also click the Blank Form option to set up your volunteer application form from scratch – it’s totally up to you!
3. Customize Your Form Fields As Needed
Once you’ve chosen your starting point, you’ll want to configure/adjust your form fields as needed.
Here is some of the information that you’ll likely want to collect:
- Contact details for the volunteer, including name, email address, phone number, etc.
- The position/focus that the person wants to volunteer for (if multiple different positions).
- Any relevant skills that the volunteer has.
- The work availability of the volunteer.
If you use the Employment Application Form template, it will include many of these fields by default. You just might want to tweak them and remove some fields.
For example, you might not want to collect “Previous Employment” information or a person’s resume for a solely volunteer position. You can easily edit or delete these fields as needed.
4. Set Up Confirmation Message and Email Notifications
Once you’re happy with the fields in your volunteer application form, you’ll next want to set up your confirmations and notifications:
- Confirmation – this displays on your website after people submit the form.
- Notifications – these are sent to people via email (you can also set up other notification types such as SMS/text messages, Slack messages, and more).
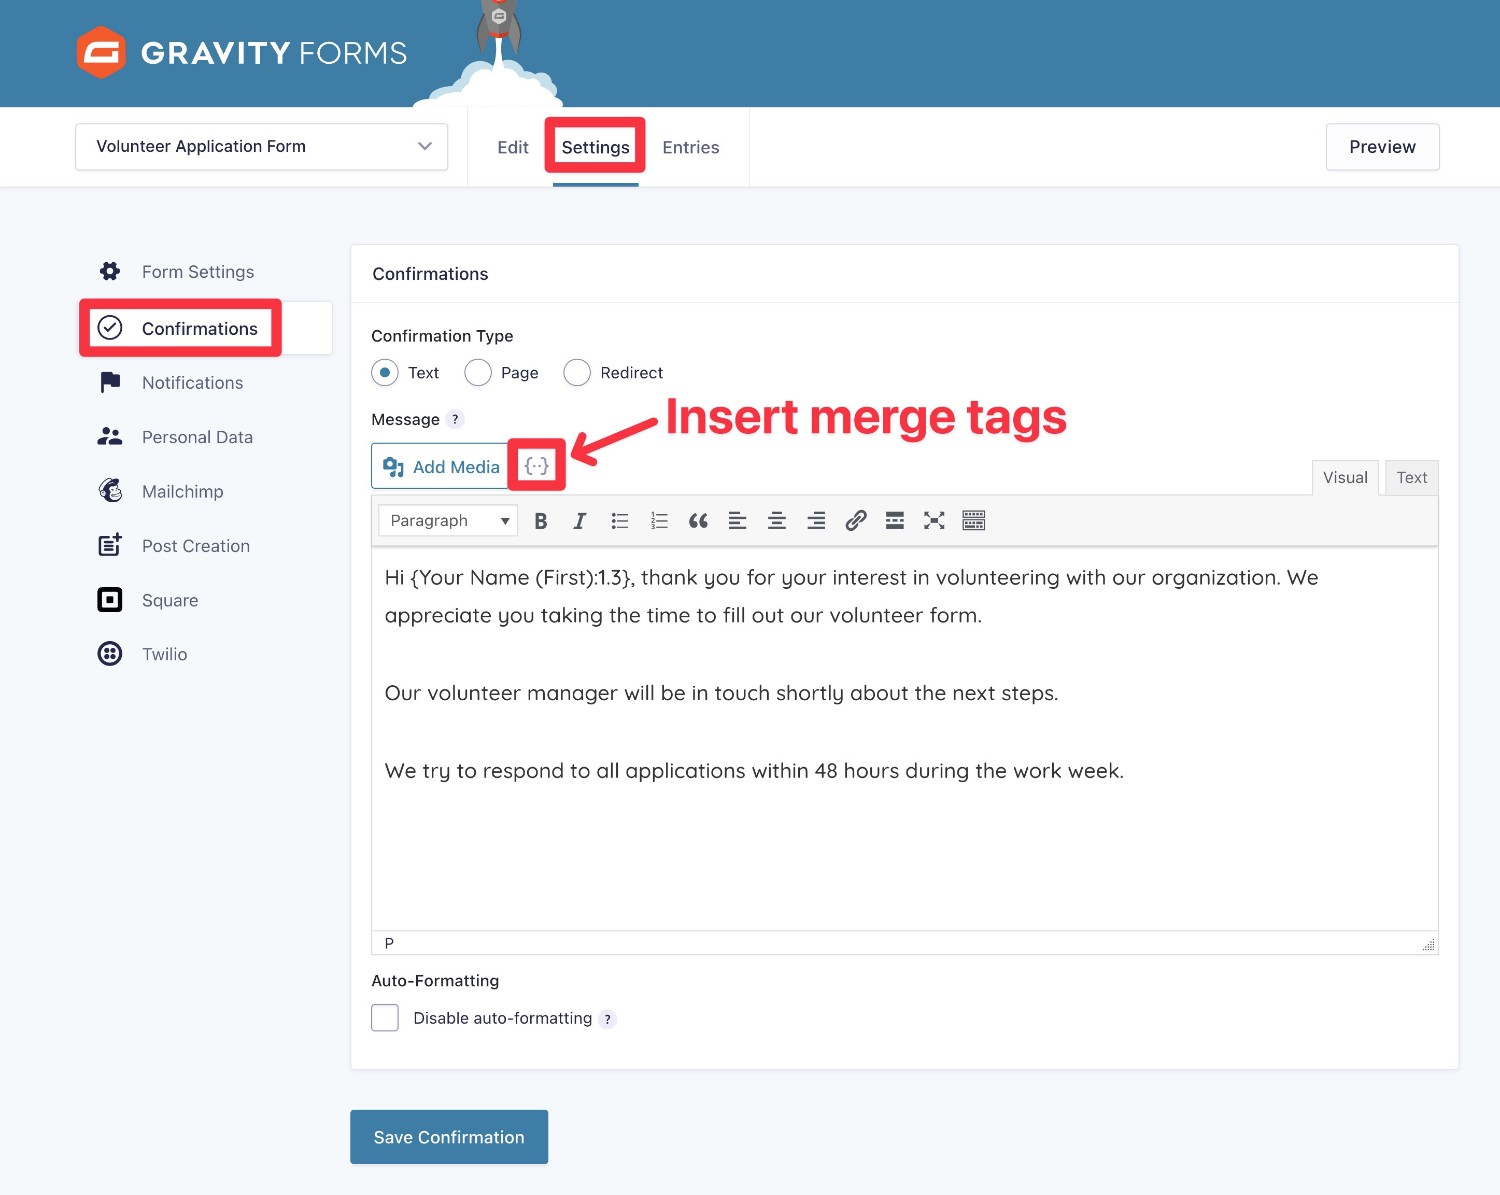
To set up the confirmation message, go to Settings → Confirmations in the form editor interface and edit the default confirmation.
You can add your own text, including using merge tags to insert information from the form (such as a volunteer’s first name).
Alternatively, you can also show a dedicated page or redirect users to any URL by changing the Confirmation Type.
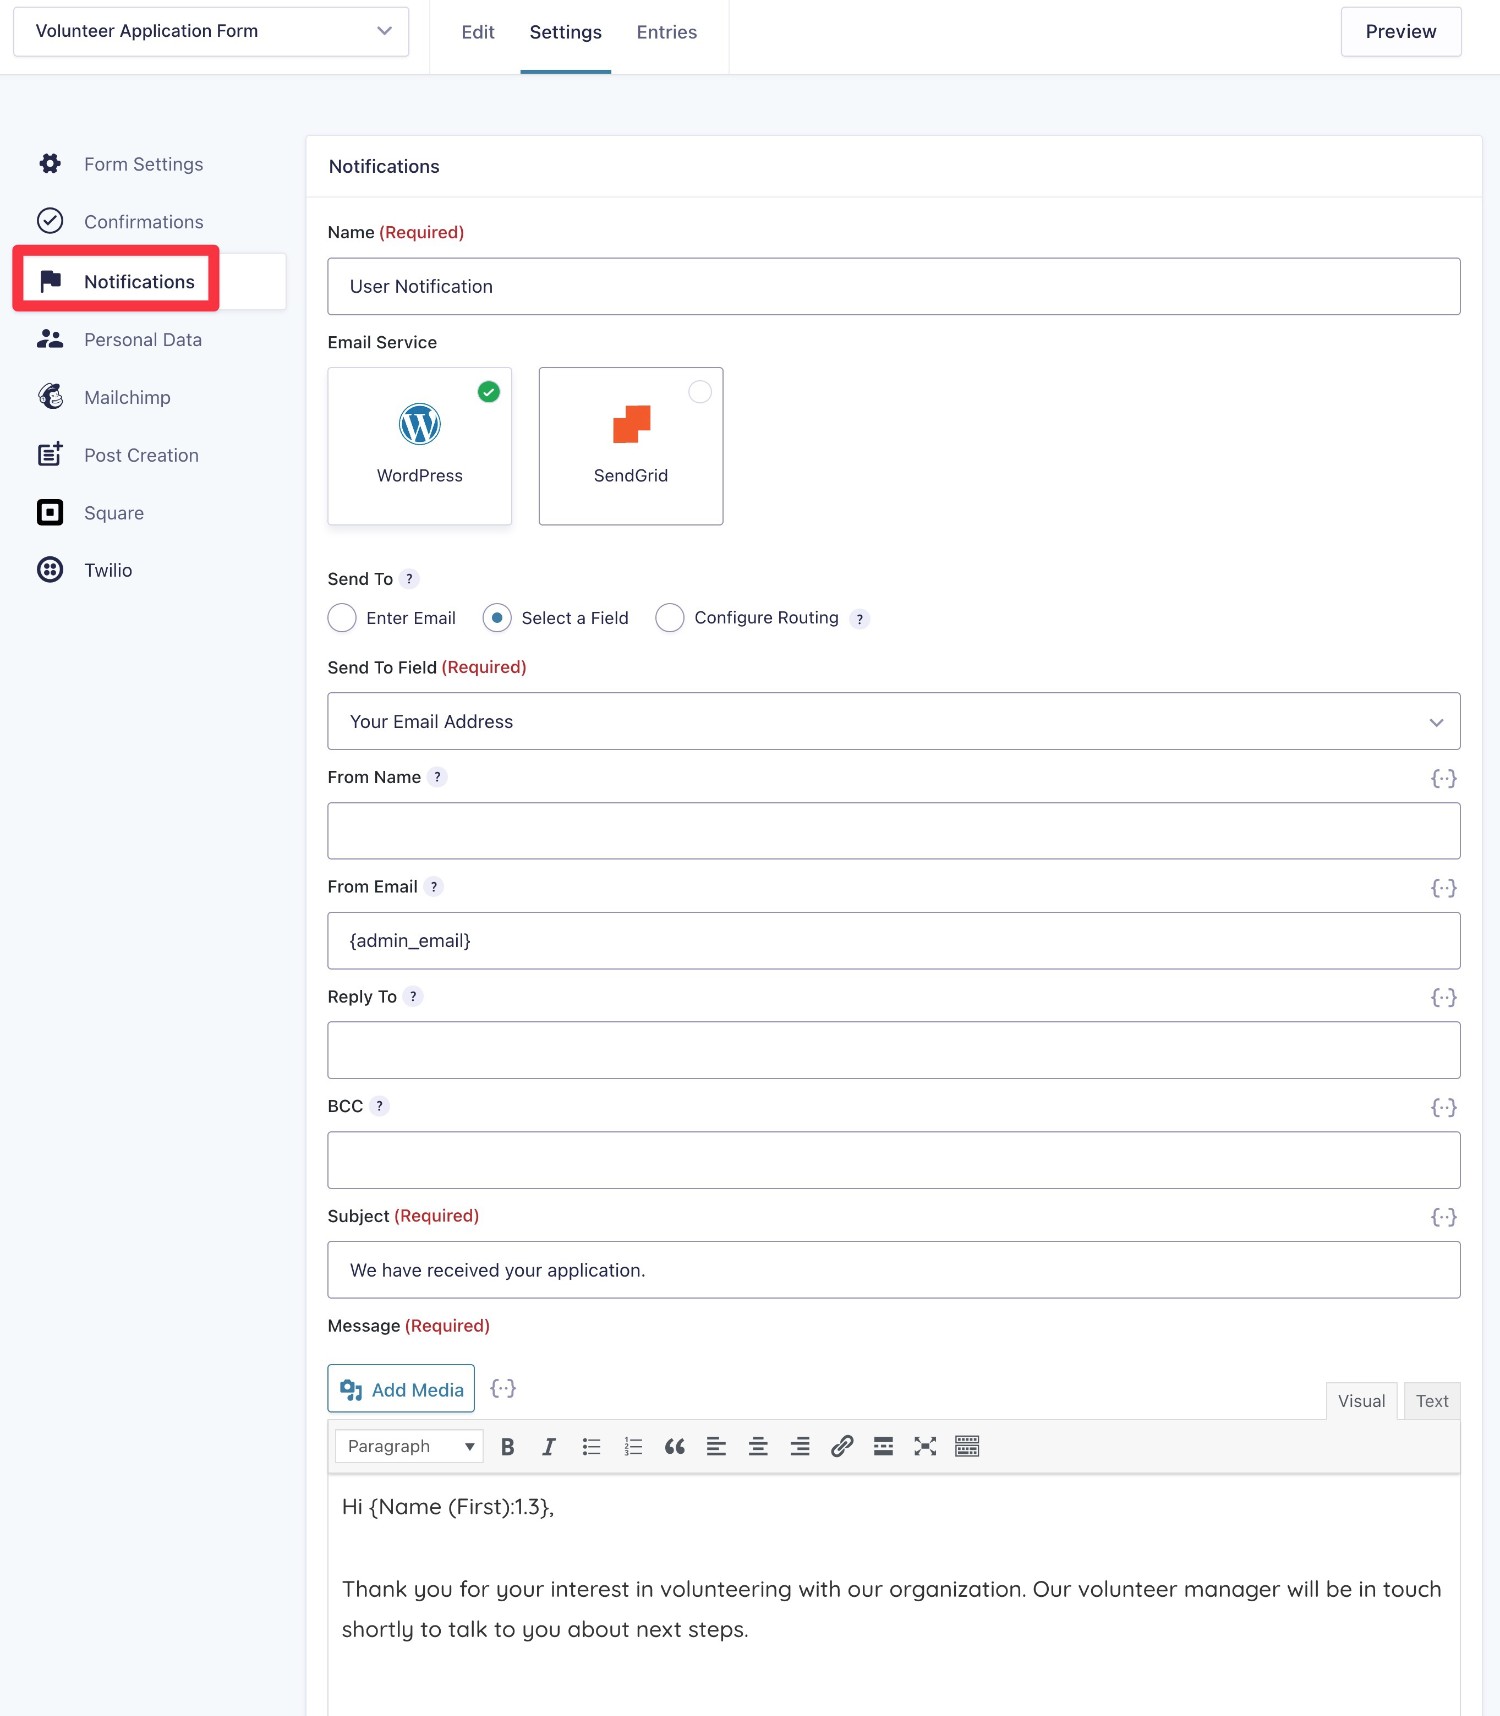
To set up email notifications, go to the Notifications tab in the form settings area and edit the relevant notification (or create a new one).
As with the confirmation message, you can include merge tags in the email to insert dynamic information.
5. Set Up Any Desired Integrations (Optional)
If you want to set up any additional integrations for your volunteer application form, now is the time to do that.
This step is 100% optional and the exact integrations that you set up will be unique to your use case.
For example, let’s say that you want to subscribe new volunteers to a newsletter that you manage with Mailchimp.
After installing the Mailchimp Add-On, you would get a new Mailchimp tab in the form settings area that would let you add people who submit the form to your Mailchimp list.
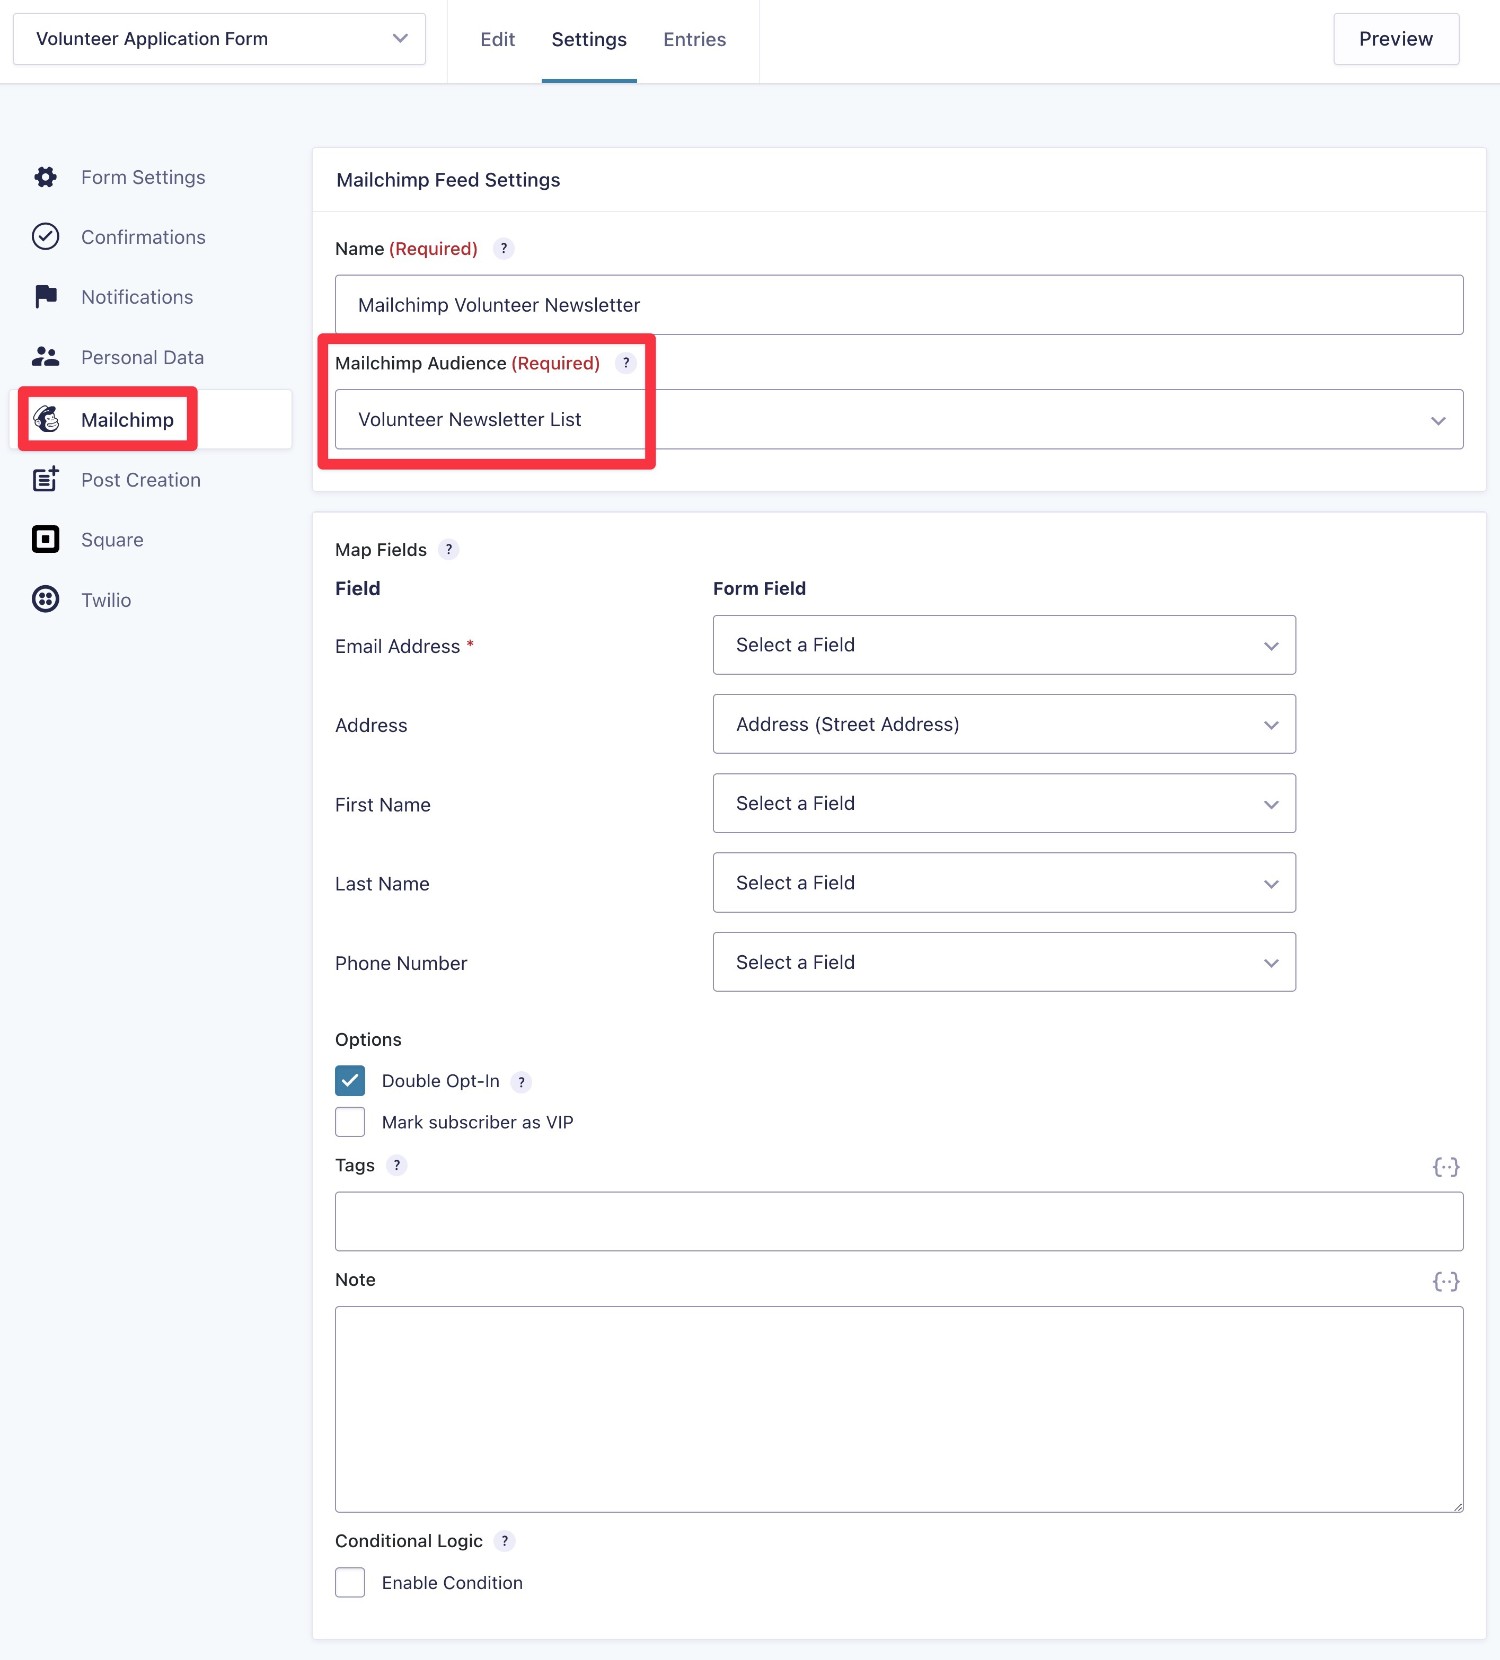
You can set up as many integrations as needed. If you want to integrate with an app for which there isn’t a dedicated Gravity Forms Add-On, you can also use the Gravity Forms Zapier Add-On to connect via Zapier.
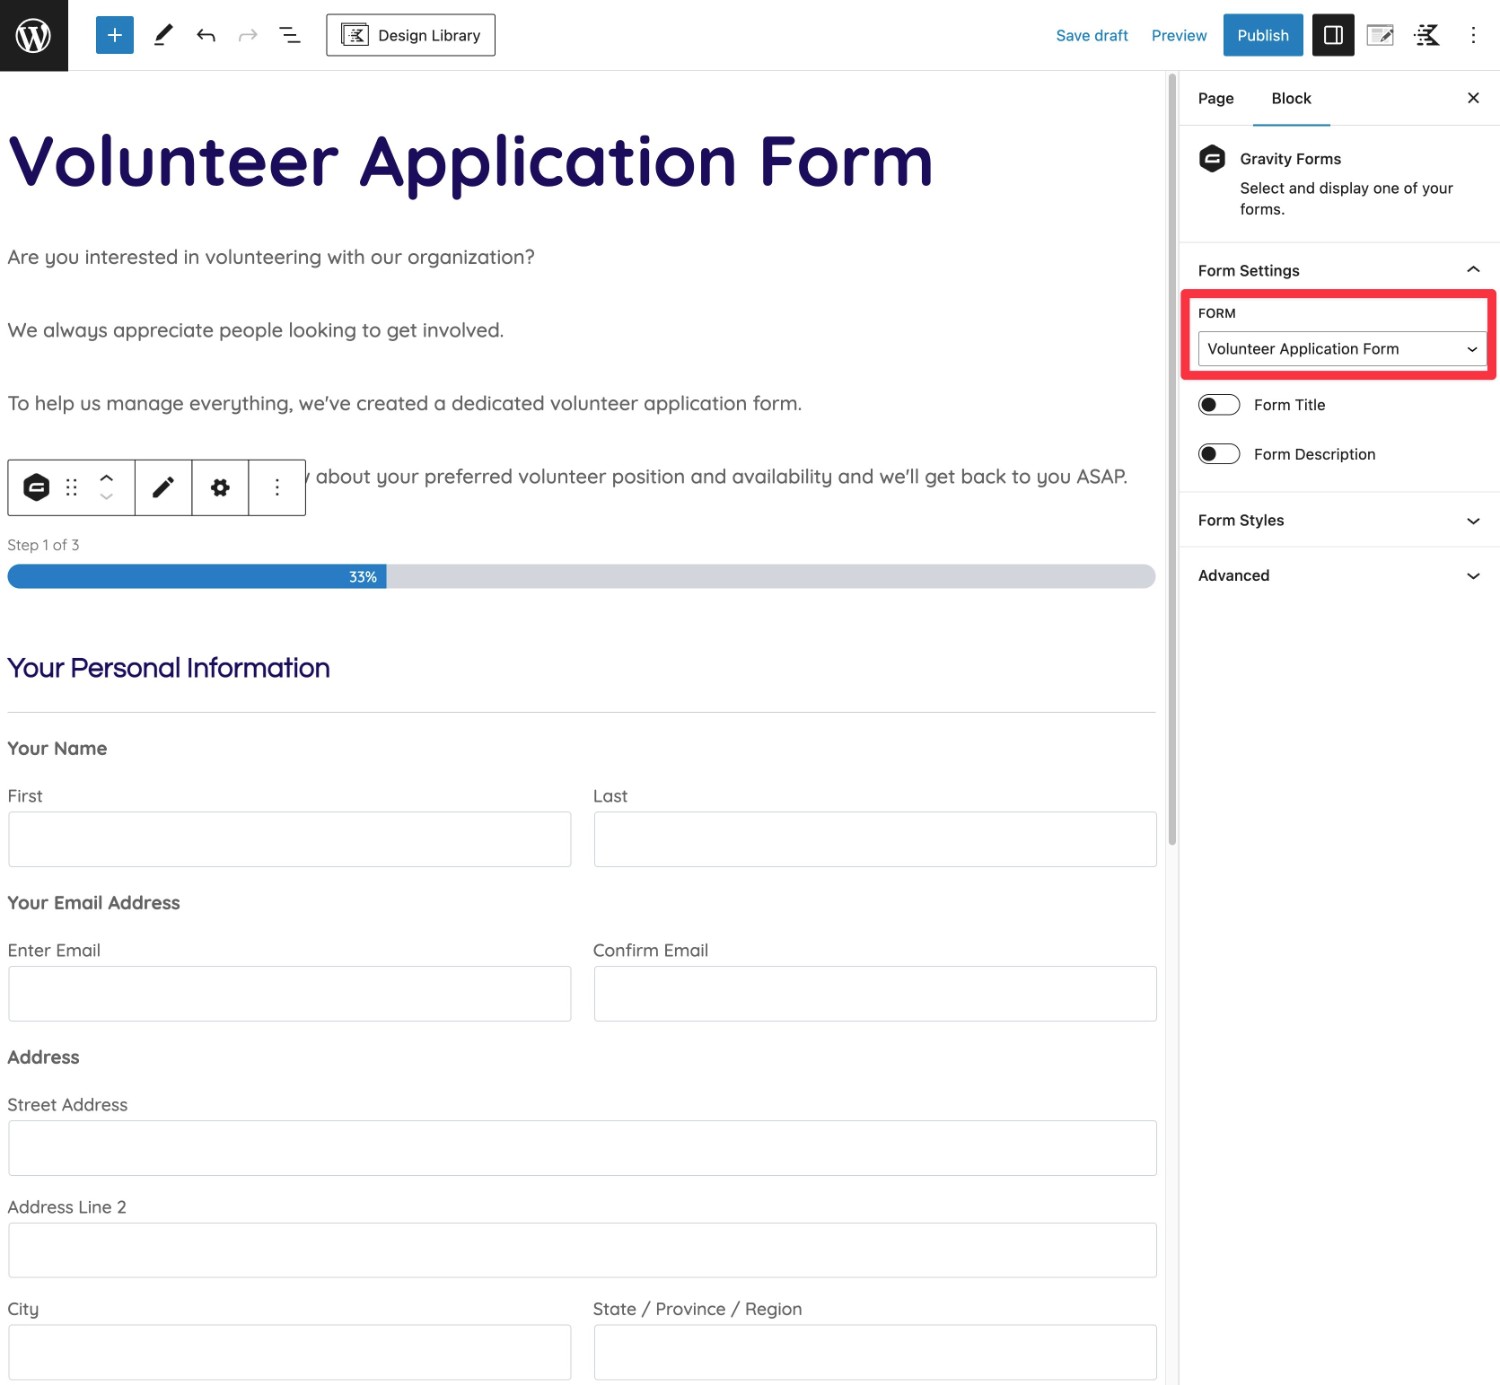
6. Embed Your Volunteer Application Form
To finish things out, you’ll want to embed the volunteer application form on your WordPress site.
You can do this using the Gravity Forms block or the Gravity Forms shortcode.
To use the block, just add the Gravity Forms block to any post or page on your site. Then, select your volunteer application form and you should see a live preview right there in the editor.
As people start submitting your volunteer application form, you’ll be able to manage new applications from your WordPress dashboard. You can also send yourself email notifications so that you can stay on top of things from anywhere.
Build Multi-Step Volunteer Application Forms With Gravity Flow
If you want to automate more of the processes around your volunteer application forms, you can add Gravity Flow to the mix.
Gravity Flow is a workflow automation tool from the same team behind Gravity Forms. With it, you can set up multi-step workflows based on your volunteer application forms.
Here are some ideas for how you could enhance your volunteer application forms with Gravity Flow:
- Send new applications to your volunteer manager for approval. After a volunteer is approved, you can automatically send the volunteer an email about the next steps.
- Set up email drip campaigns to send multiple emails on a schedule. You could use these for volunteer onboarding or to send a reminder before a volunteer event takes place.
- Send volunteers an agreement that they need to sign. Once they sign, you can automatically approve them.
Create Your Volunteer Application Form Today
That wraps up our guide on how to create a nonprofit volunteer application form on WordPress using the Gravity Forms plugin.
If your organization is already using Gravity Forms, just follow the steps above to set up your first volunteer application form.
Otherwise, here’s how you can get started…
If you’re running a nonprofit organization, the Gravity Forms Nonprofit License gives you access to all our current add-ons for just $129. Purchase the Nonprofit License today to get started.
If you’re running a commercial organization, you can still follow this tutorial, you’ll just need to purchase one of the other licenses. You only need the Basic license for the core application form functionality, but you might want to purchase a different license to access other add-ons that you may want for your form.
Or, if you want to test creating a WordPress volunteer application form before buying, you can spin up a free, fully functioning demo site to try all of the features.

If you want to keep up-to-date with what’s happening on the blog sign up for the Gravity Forms newsletter!
"*" indicates required fields