
Want to connect Gravity Forms and WordPress to Capsule CRM?
With this month’s featured add-on – the Gravity Forms Capsule CRM Add-On – you can easily connect your WordPress forms to Capsule, a popular customer relationship manager (CRM).
You can add new people to Capsule as contacts (or update existing contacts), including mapping form fields to fields in the Capsule CRM.
Plus, you can also create new tasks in Capsule, including assigning those tasks to the people that you create as part of the form.
In this post, we’ll introduce you to Capsule and explain how the Gravity Forms Capsule CRM can help you connect WordPress to Capsule CRM.
Then, we’ll show you step-by-step how to create your first form that connects to Capsule.
What Does Capsule CRM Offer?
Capsule is an affordable and easy-to-use customer relationship manager (CRM).
It offers a simple way to nurture customer relationships and win more sales. In addition to storing customer details, you can also track your interactions with each customer and optimize your sales pipeline.
It also includes task and project management tools to help you stay on top of everything. For example, you can create tasks for key actions and track everything in a calendar.
You can also connect with customers via email marketing tools and streamline your workflows with automations.
With a forever-free plan and paid plans starting at just $18 per month per user (at time of writing), Capsule offers all of these features at an affordable price.
To learn more about it, you can check out the Capsule CRM website and features page.
What Does the Gravity Forms Capsule CRM Add-On Do?
With the Gravity Forms Capsule CRM Add-On, you can connect your WordPress forms to Capsule CRM to perform two key actions:
- Create or update people – you can add a new person in Capsule, including support for mapping form fields to Capsule CRM fields and assigning the person to a new case and/or opportunity. If the person already exists in Capsule, you can also choose to update or append the data instead of creating a new person.
- Create new tasks – you can create new tasks when someone submits a form, including assigning them a due date, owner, and more. If you’re also creating a new person as part of the form, you can also assign the task to that created person.
You can perform both actions from the same form. Or, you can only perform one or the other.
You can also use conditional logic to control when/how to perform each action. For example, you could assign a task to different owners in Capsule depending on how the form was filled out.
When setting up either type of action, you’ll get plenty of opportunities to map form fields to data in Capsule CRM, including using merge tags to dynamically insert information.
For example, if you’re assigning a task, you can use merge tags to dynamically generate the task’s description based on data from the form.
How to Connect Gravity Forms to Capsule CRM
Now that you know more about Capsule and how you can integrate it with Gravity Forms, let’s get into the more actionable part of this post.
Below, we’ll take you through how to set up the Gravity Forms Capsule CRM Add-On and start syncing leads from your forms to Capsule.
To follow this guide, you’ll only need two things:
- Capsule CRM account – if you don’t already have a Capsule account, you’ll want to create one before beginning. Capsule offers a forever-free plan for up to 250 contacts, so you can set everything up without needing a paid account.
- Gravity Forms Pro or Elite license – the Capsule CRM Add-On is available on the Pro and Elite licenses (as well as the Nonprofit license for registered nonprofits). If you don’t have a license yet, you can purchase the Pro license here or upgrade your existing Basic license and only pay the prorated difference.
1. Install the Gravity Forms Capsule CRM Add-On
To get started, you’ll want to install and activate the Gravity Forms Capsule CRM Add-On on your site.
Assuming you’ve already installed the core Gravity Forms plugin, here’s how to do that:
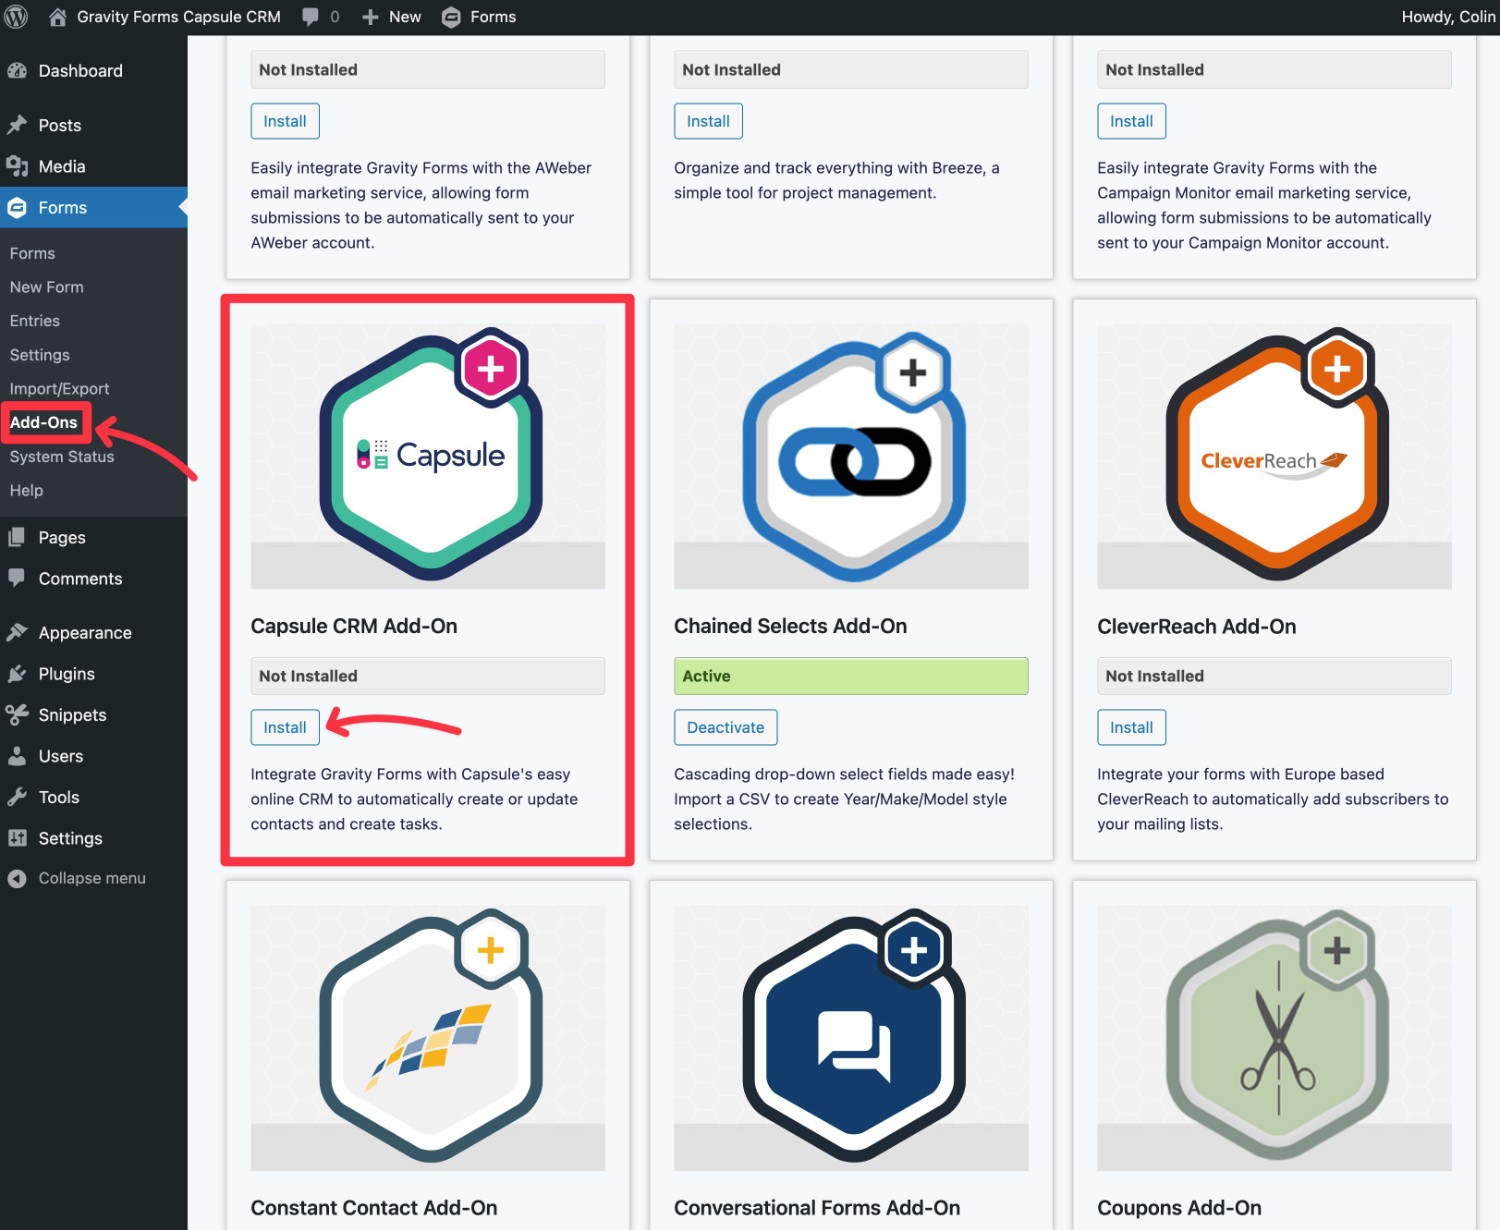
- Go to Forms → Add-Ons in your WordPress dashboard.
- Find the Capsule CRM Add-On in the list.
- Click the Install button.
- On the next screen, click the Activate Plugin button to make it live on your site.
2. Connect Gravity Forms to Capsule CRM
Once you’ve activated the add-on, you’ll next need to connect Gravity Forms to your Capsule account by adding your Capsule API key.
Here’s how:
- Go to Forms → Settings → Capsule CRM in your WordPress dashboard.
- Add your Capsule CRM Personal Access Token to the box (we’ll show you how to find this below)
- Click Save Settings.
- If Gravity Forms is able to connect, you should see a green check mark appear.

Here’s how to find your Capsule Personal Access Token:
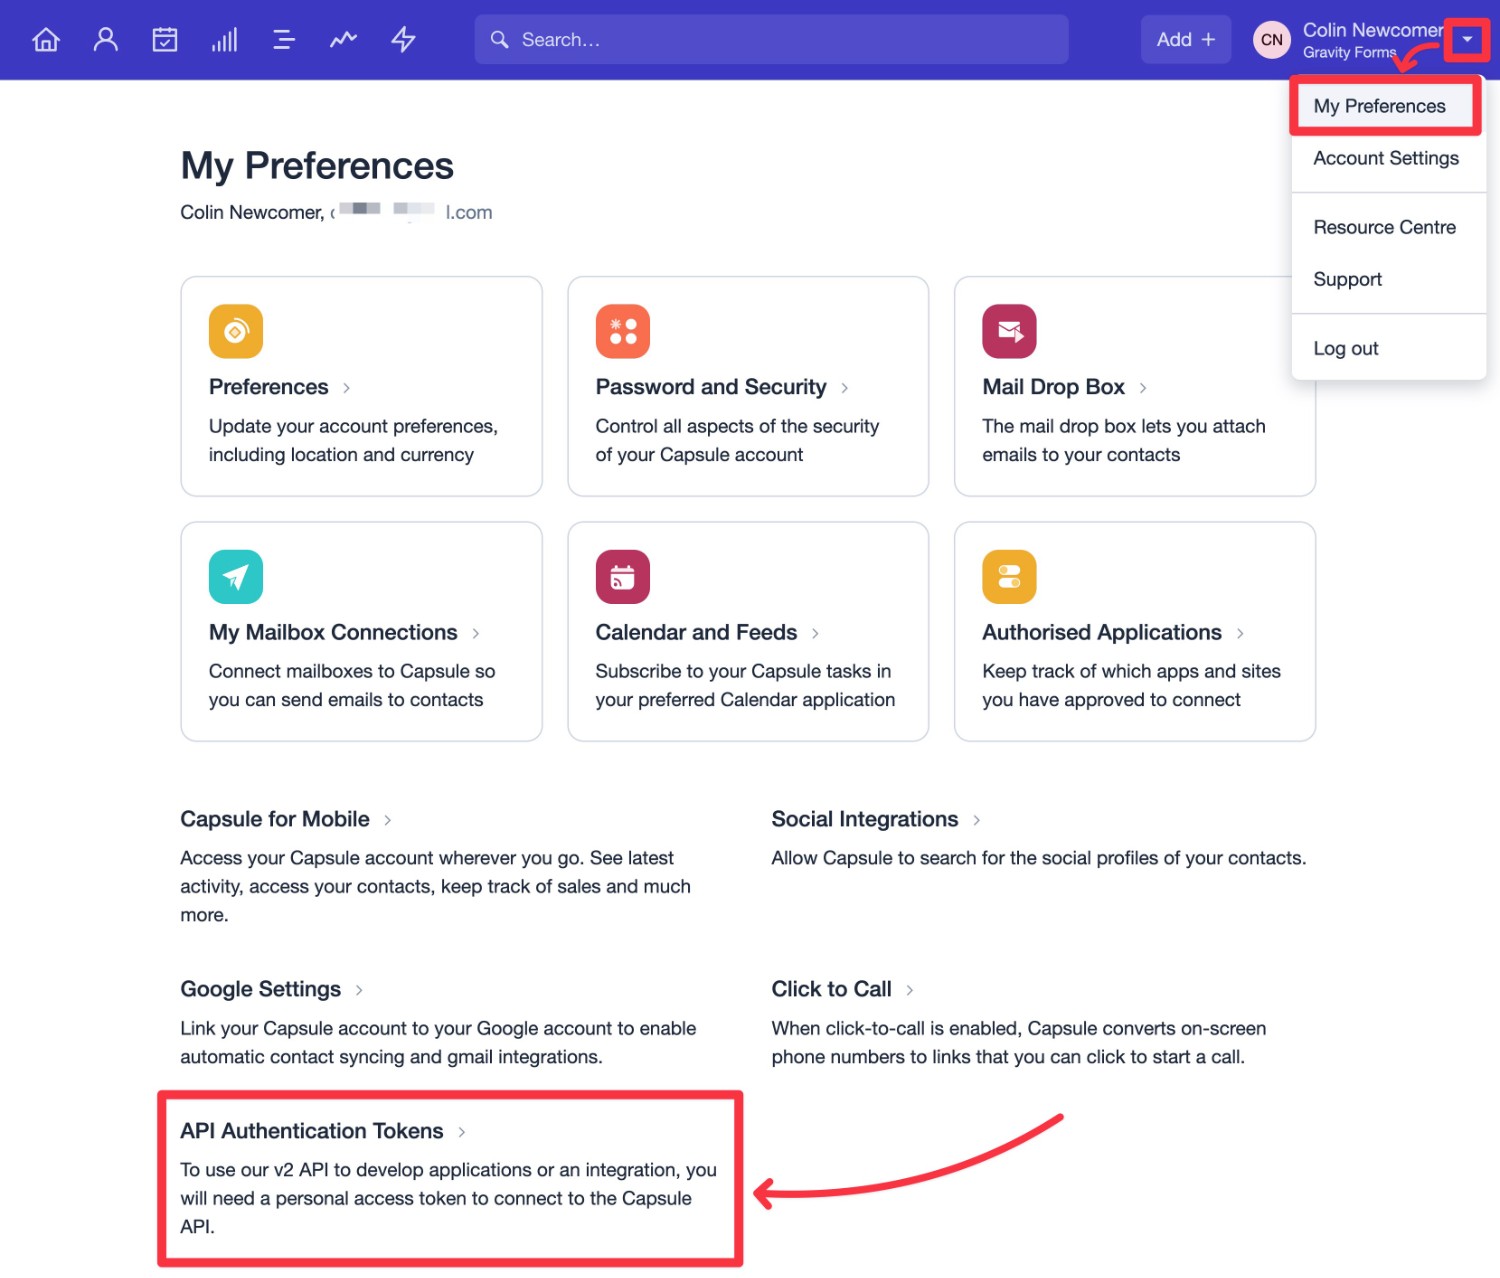
- Sign in to your Capsule account, if you haven’t done so already.
- Click on the “down arrow” next to your account name in the top-right corner of the Capsule interface.
- Select My Preferences from the drop-down that appears.
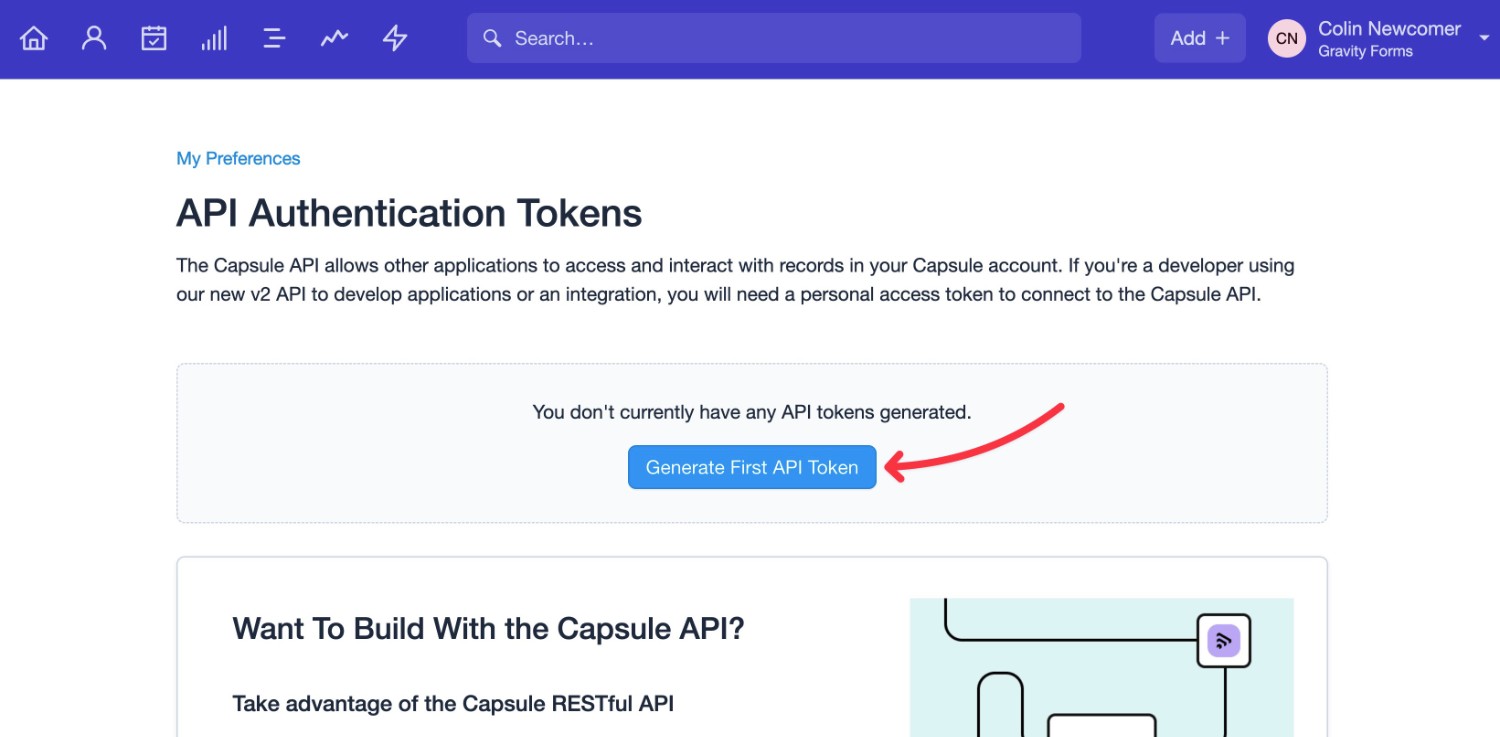
- Select the API Authentication Tokens option to open the API dashboard.
Then, click the button to Generate First API Token.
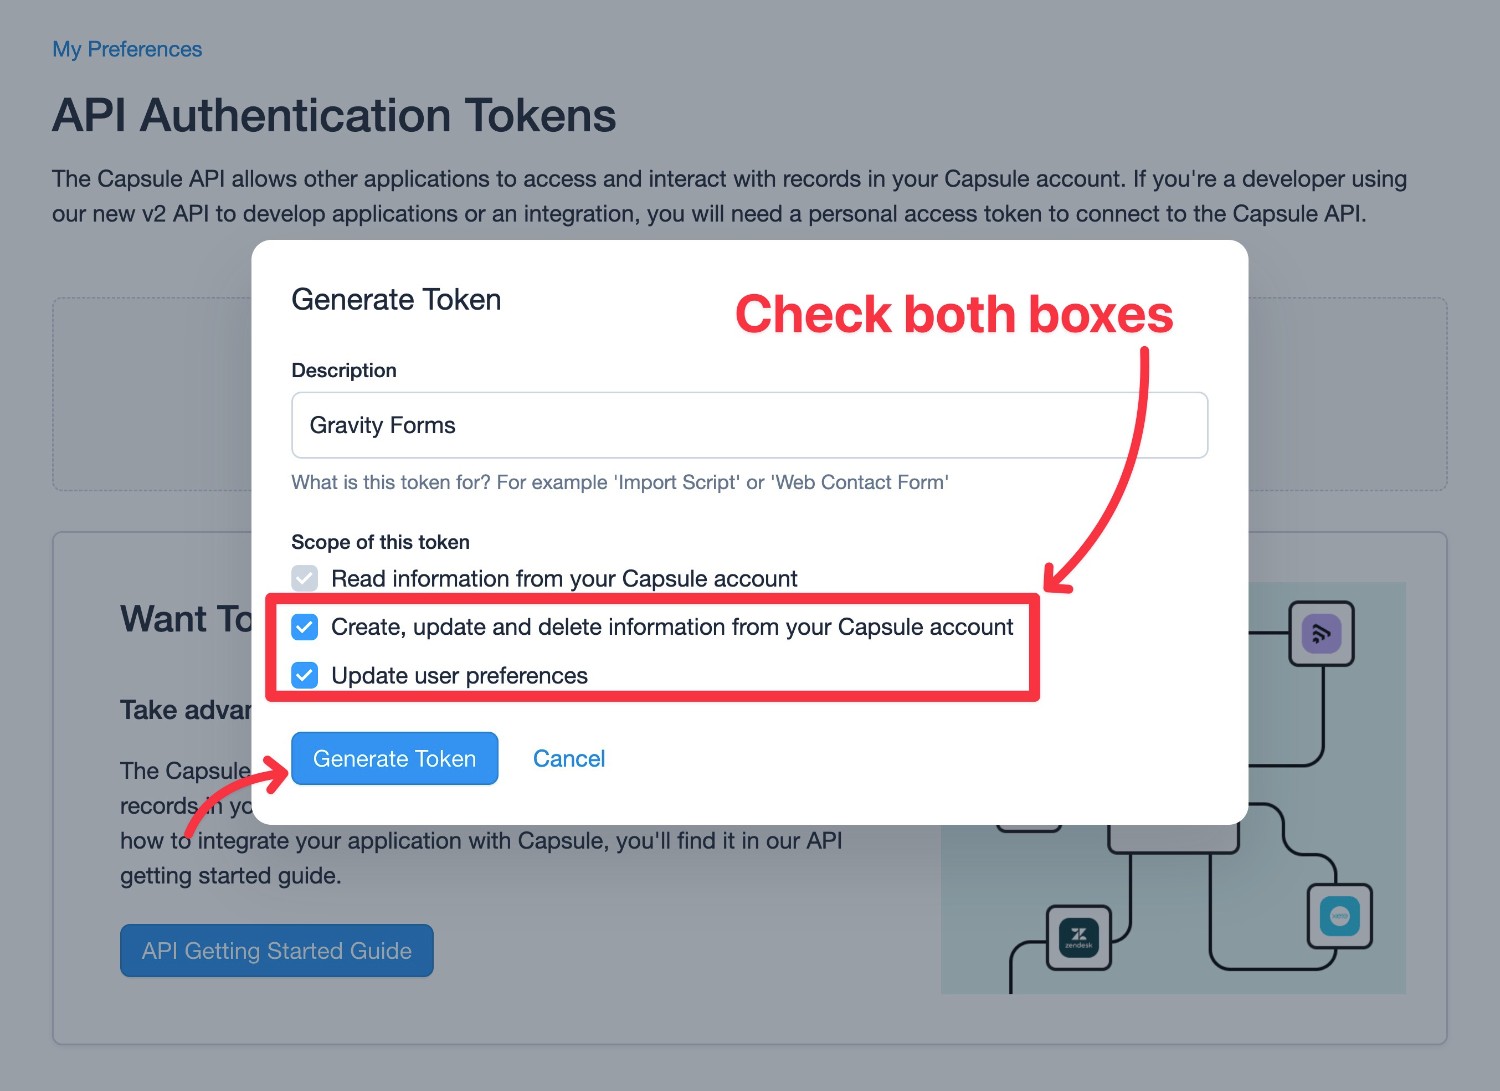
You’ll now see a popup to configure the token:
- Add a description to help you remember what the token is for.
- Check the boxes to Create, update and delete… and Update user preferences under Scope of this token.
- Click Generate Token.
You should now see your API token. Copy this value to the Gravity Forms Capsule CRM settings area, as we showed you above.
If you see a red “X” appear after saving your settings in Gravity Forms, here are two troubleshooting tips:
- Make sure that you didn’t accidentally make a typo, such as adding or deleting a character from the API key when you copied it.
- Make sure that you checked all the boxes under Scope of this token when you created your token.
3. Create a Lead Generation Form (or Edit an Existing One)
Next, you’ll want to set up the form that you plan to use to sync leads to Capsule.
You could use a dedicated lead generation form. Or, you can sync user details from other types of forms, such as automatically adding customer details from a payment form, a user registration form, a webinar registration form, an event registration form, a contact form, and so on.
If you already have such a form, you can edit that existing form. Or, you can create a brand new form, which is what we’ll do for this guide. More specifically, we’ll use the pre-made Webinar Registration template.
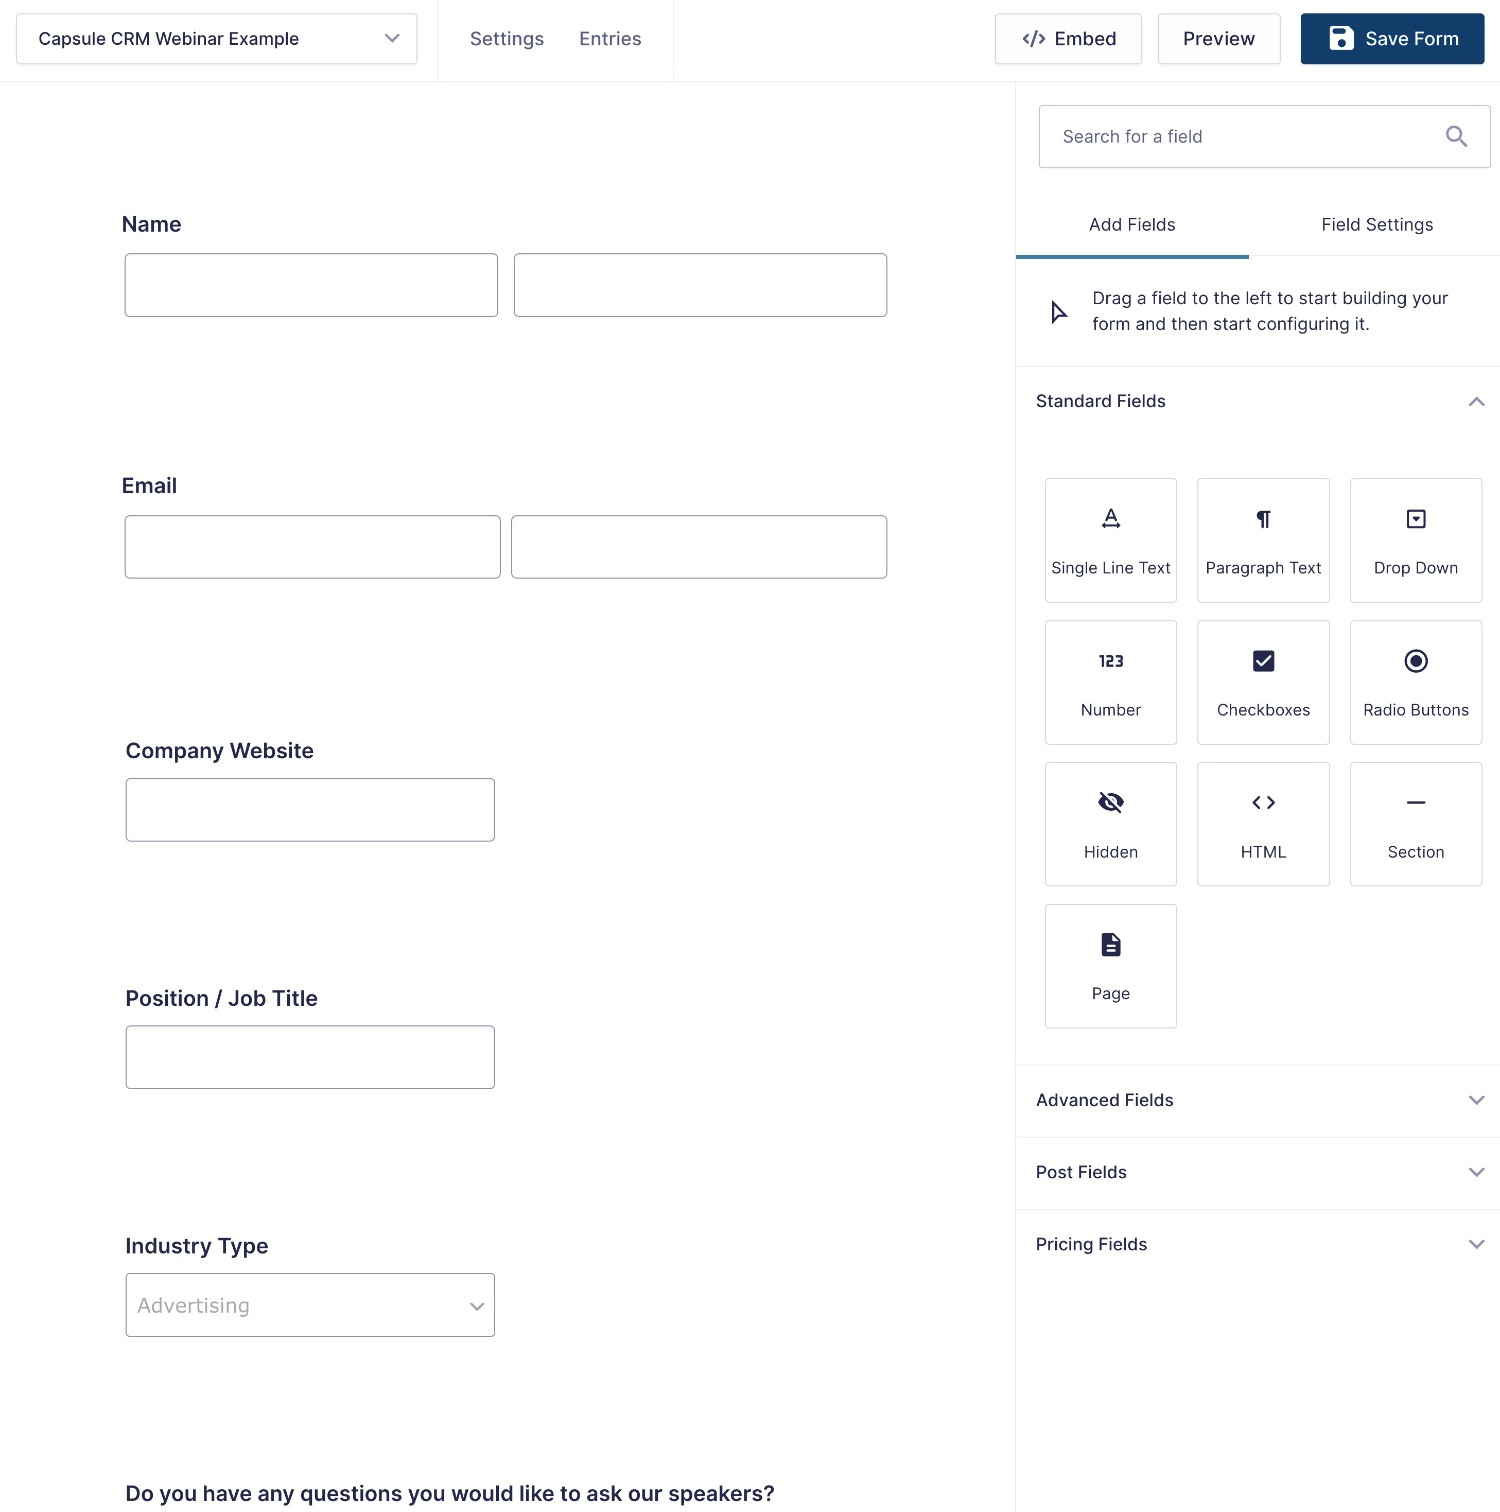
You’re free to set up your form fields however you want. However, at a minimum, you’ll want to collect a person’s first name, last name, and email address if you want to add them to Capsule as a person.
You don’t need this information if you’re only going to create a task, though.
4. Set Up a Capsule CRM Feed
Once you’ve set up your form, the next step is to create one or more Capsule CRM feeds.
Your feeds can perform two actions:
- Create a new person – you can create a new contact in Capsule with information from the form.
- Create a new task – you can add a new task in Capsule and assign it to a specific owner.
You can perform just one of those actions or you can perform both from the same feed.
You can also create multiple feeds and use conditional logic to control when to apply each feed. For example, you could assign a task to a different owner depending on how the form was filled out.
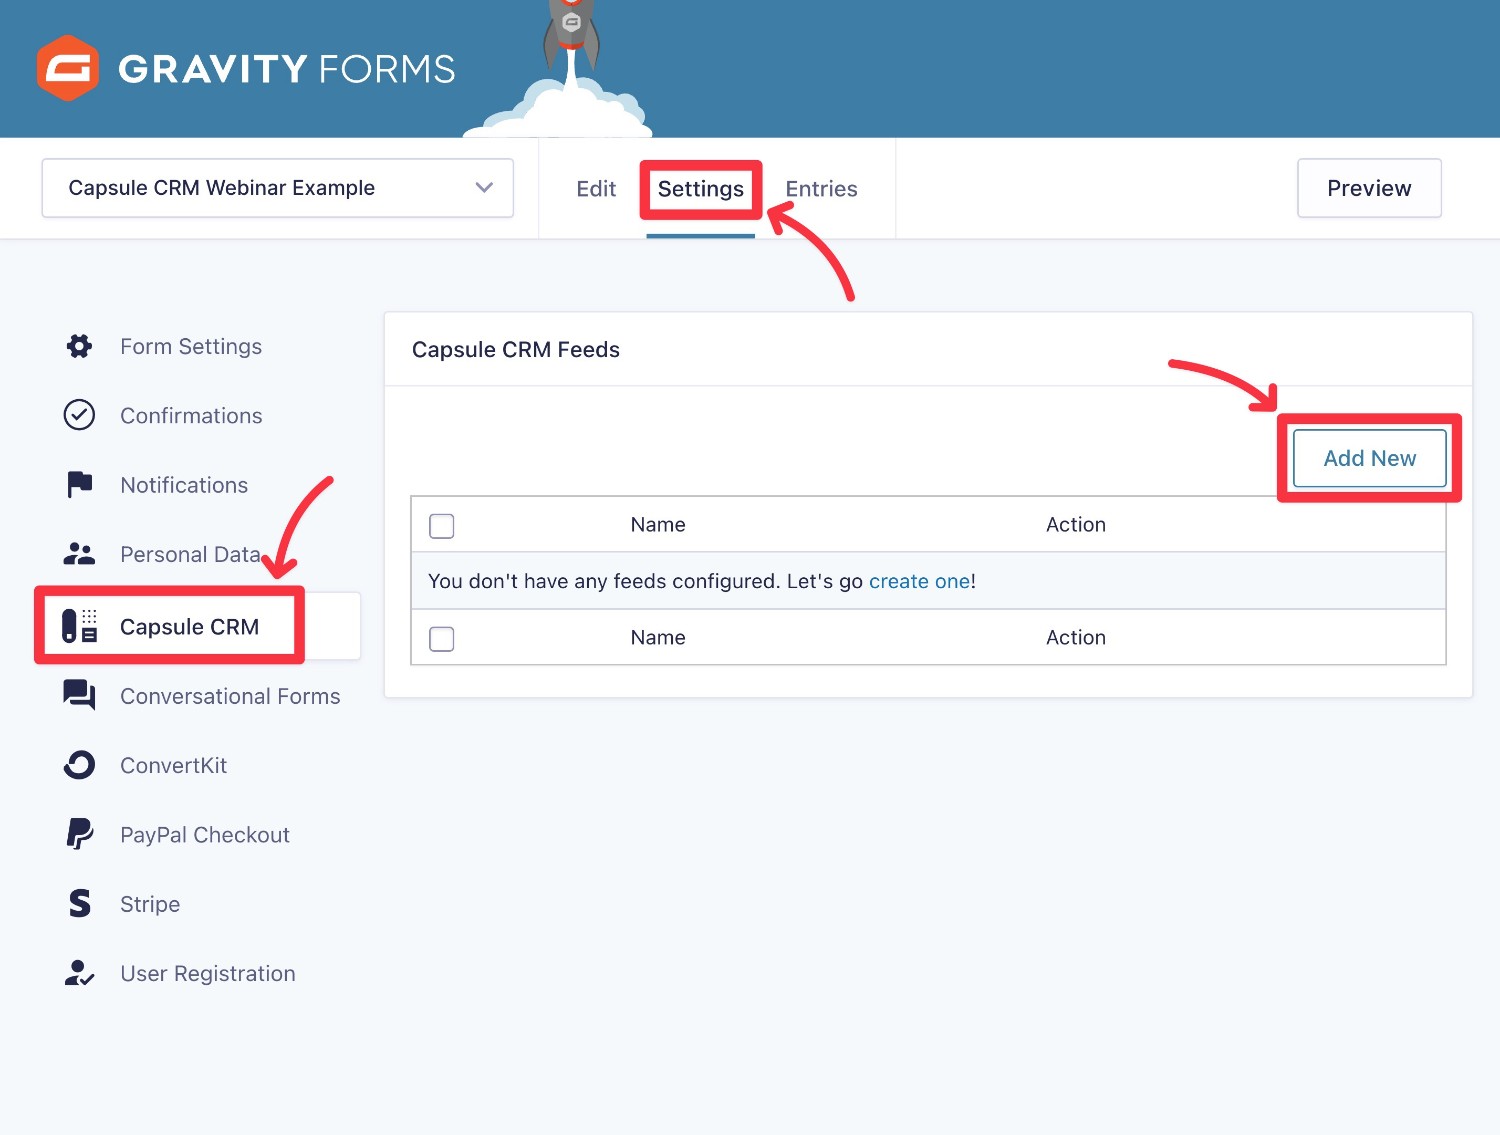
To create a feed, go to Settings → Capsule CRM → Add New in the form editor interface.
At the top, choose which action(s) you want to perform. You can choose one or both options.
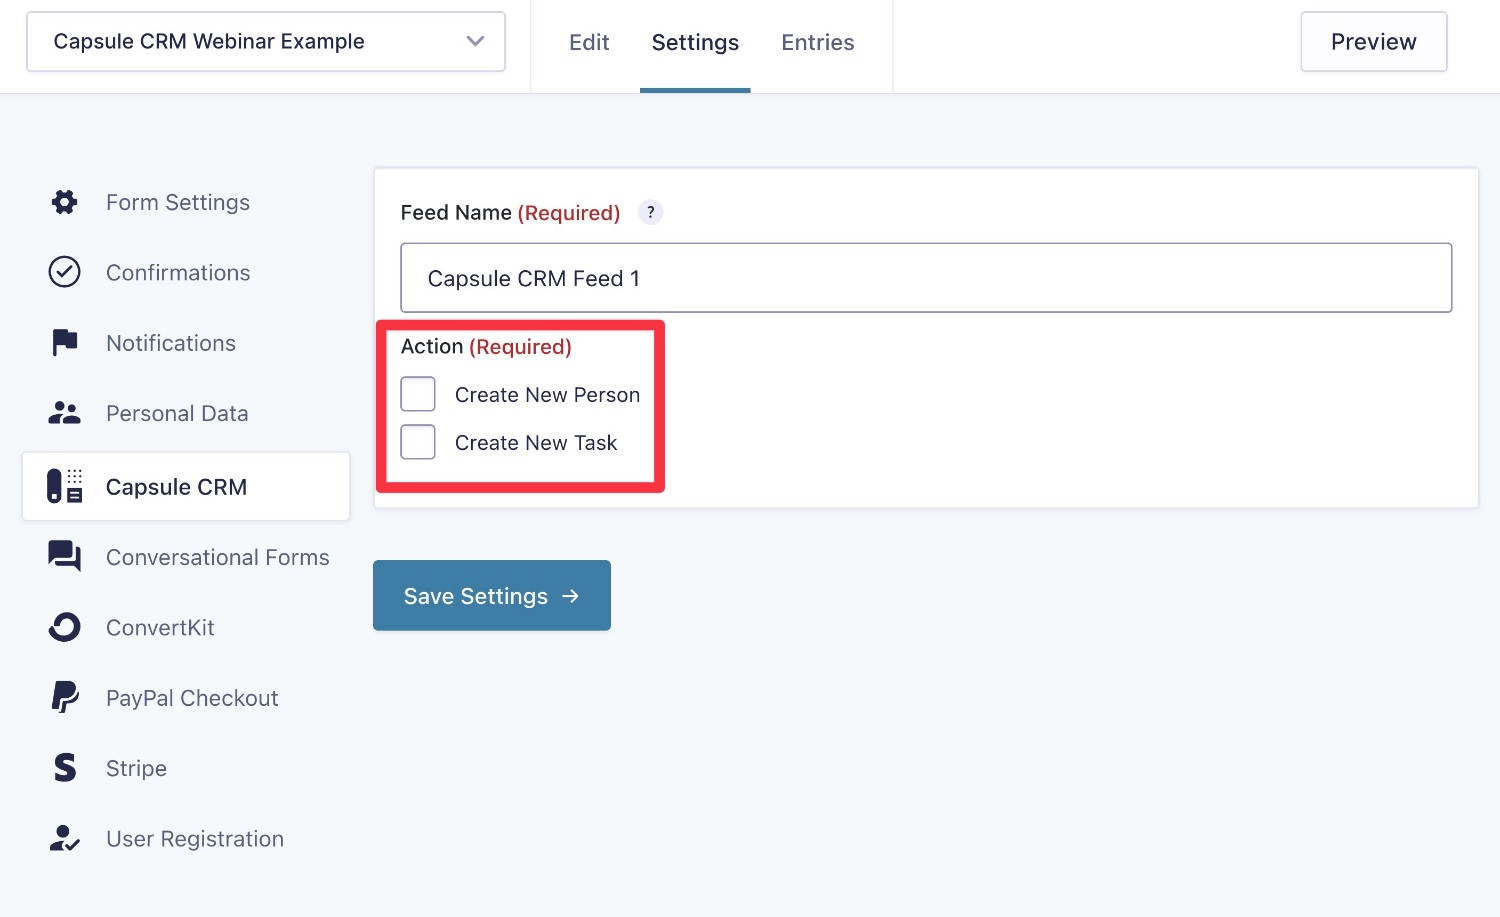
Based on the action(s) that you selected, you’ll see additional settings appear.
Create a New Person
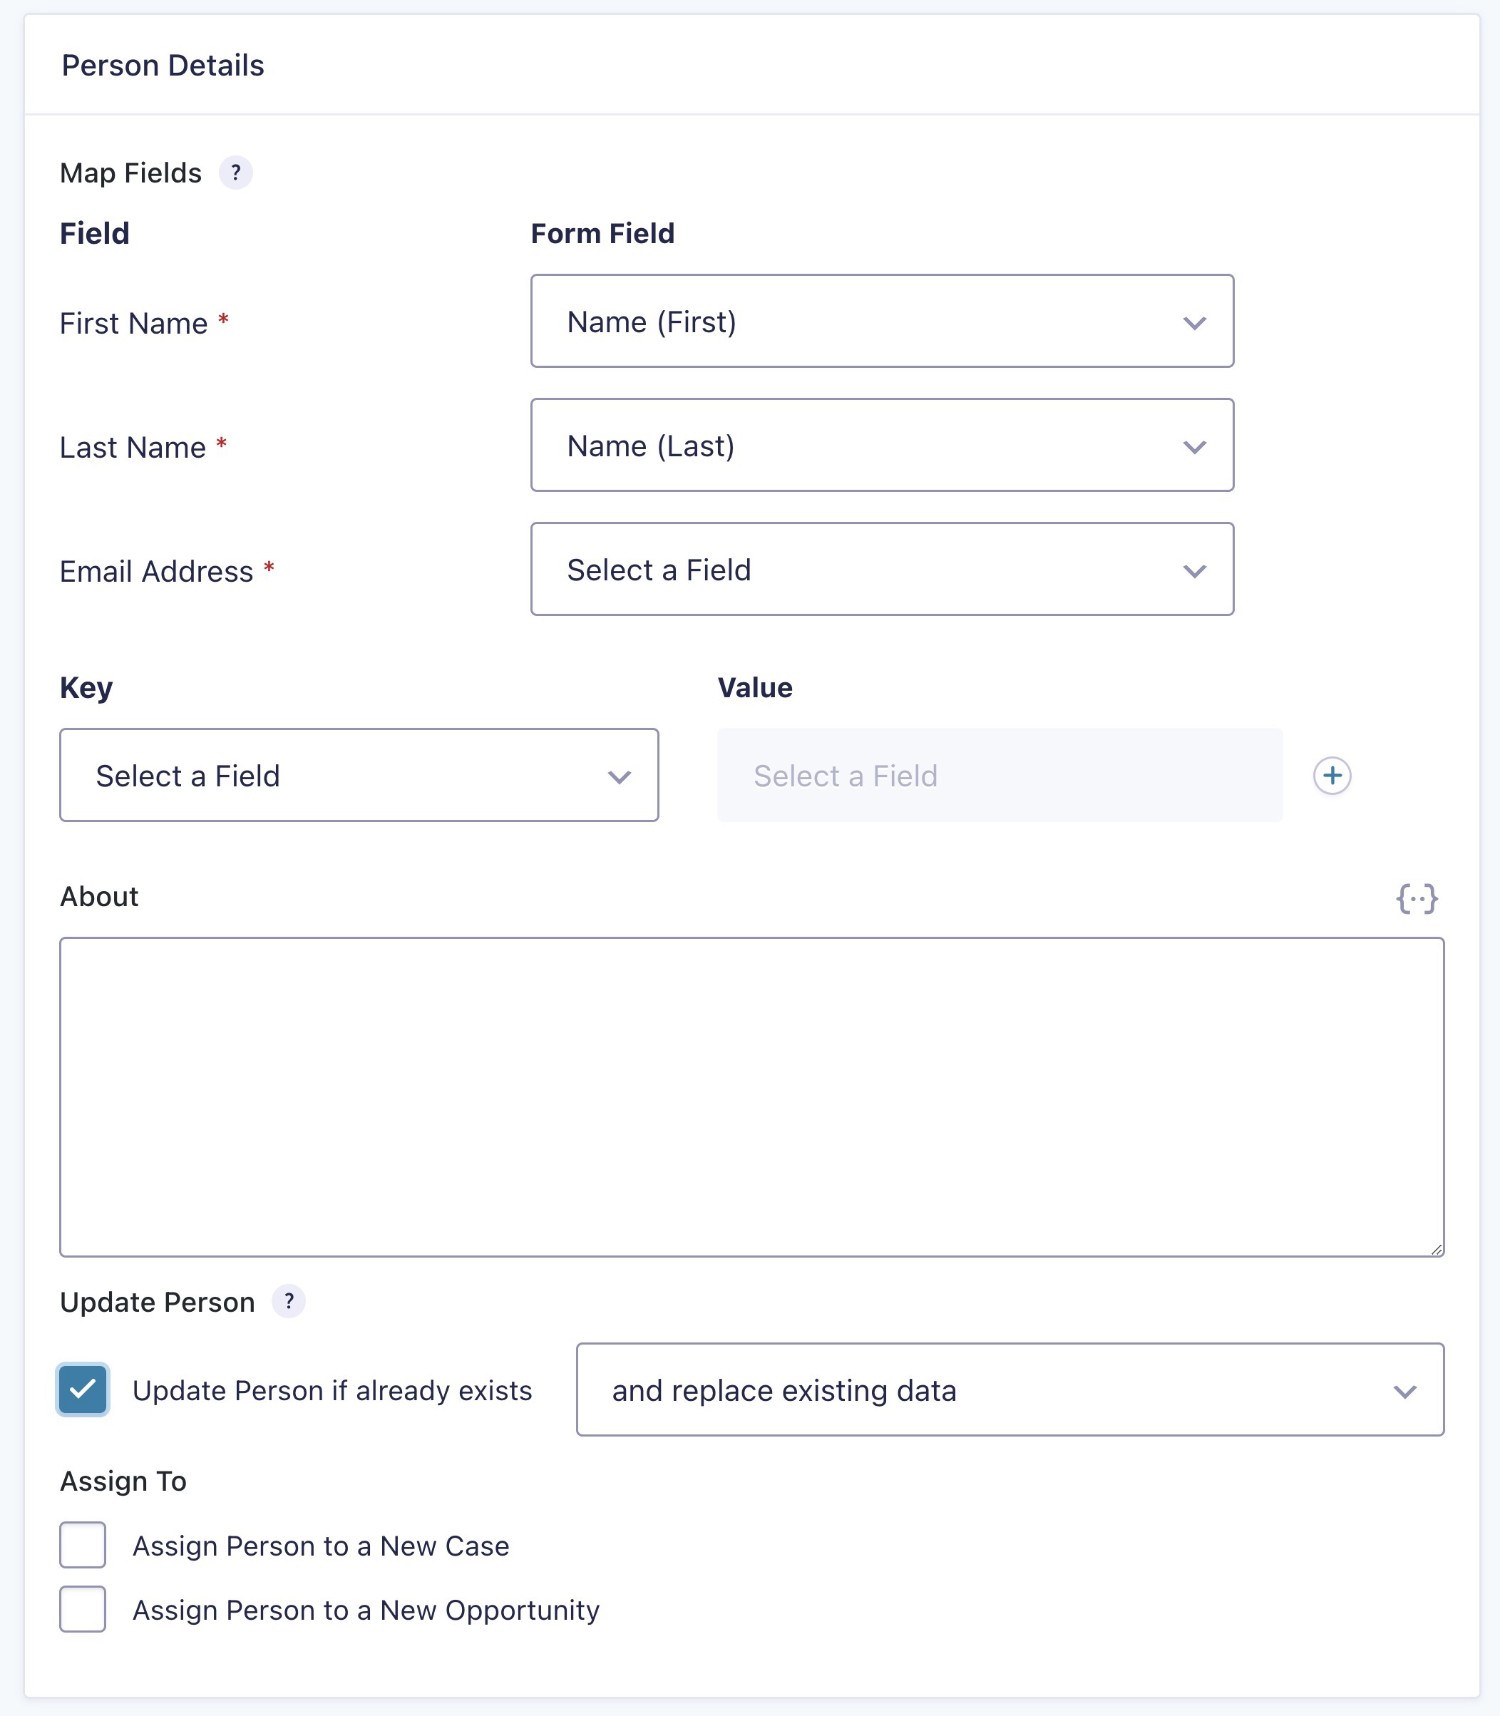
If you choose Create New Person, you’ll see options to map fields from your form to fields in Capsule.
In addition to the preset fields for First Name, Last Name, and Email Address (which are all required), you can also use the Key/Value pairs to map other form fields to additional information in Capsule CRM and add a description (including support for merge tags).
Below that, you can choose what to do if the person already exists in Capsule CRM. For example, you can choose to replace the existing data or just append the new data.
Finally, you can choose whether to assign this person to a new case and/or opportunity.
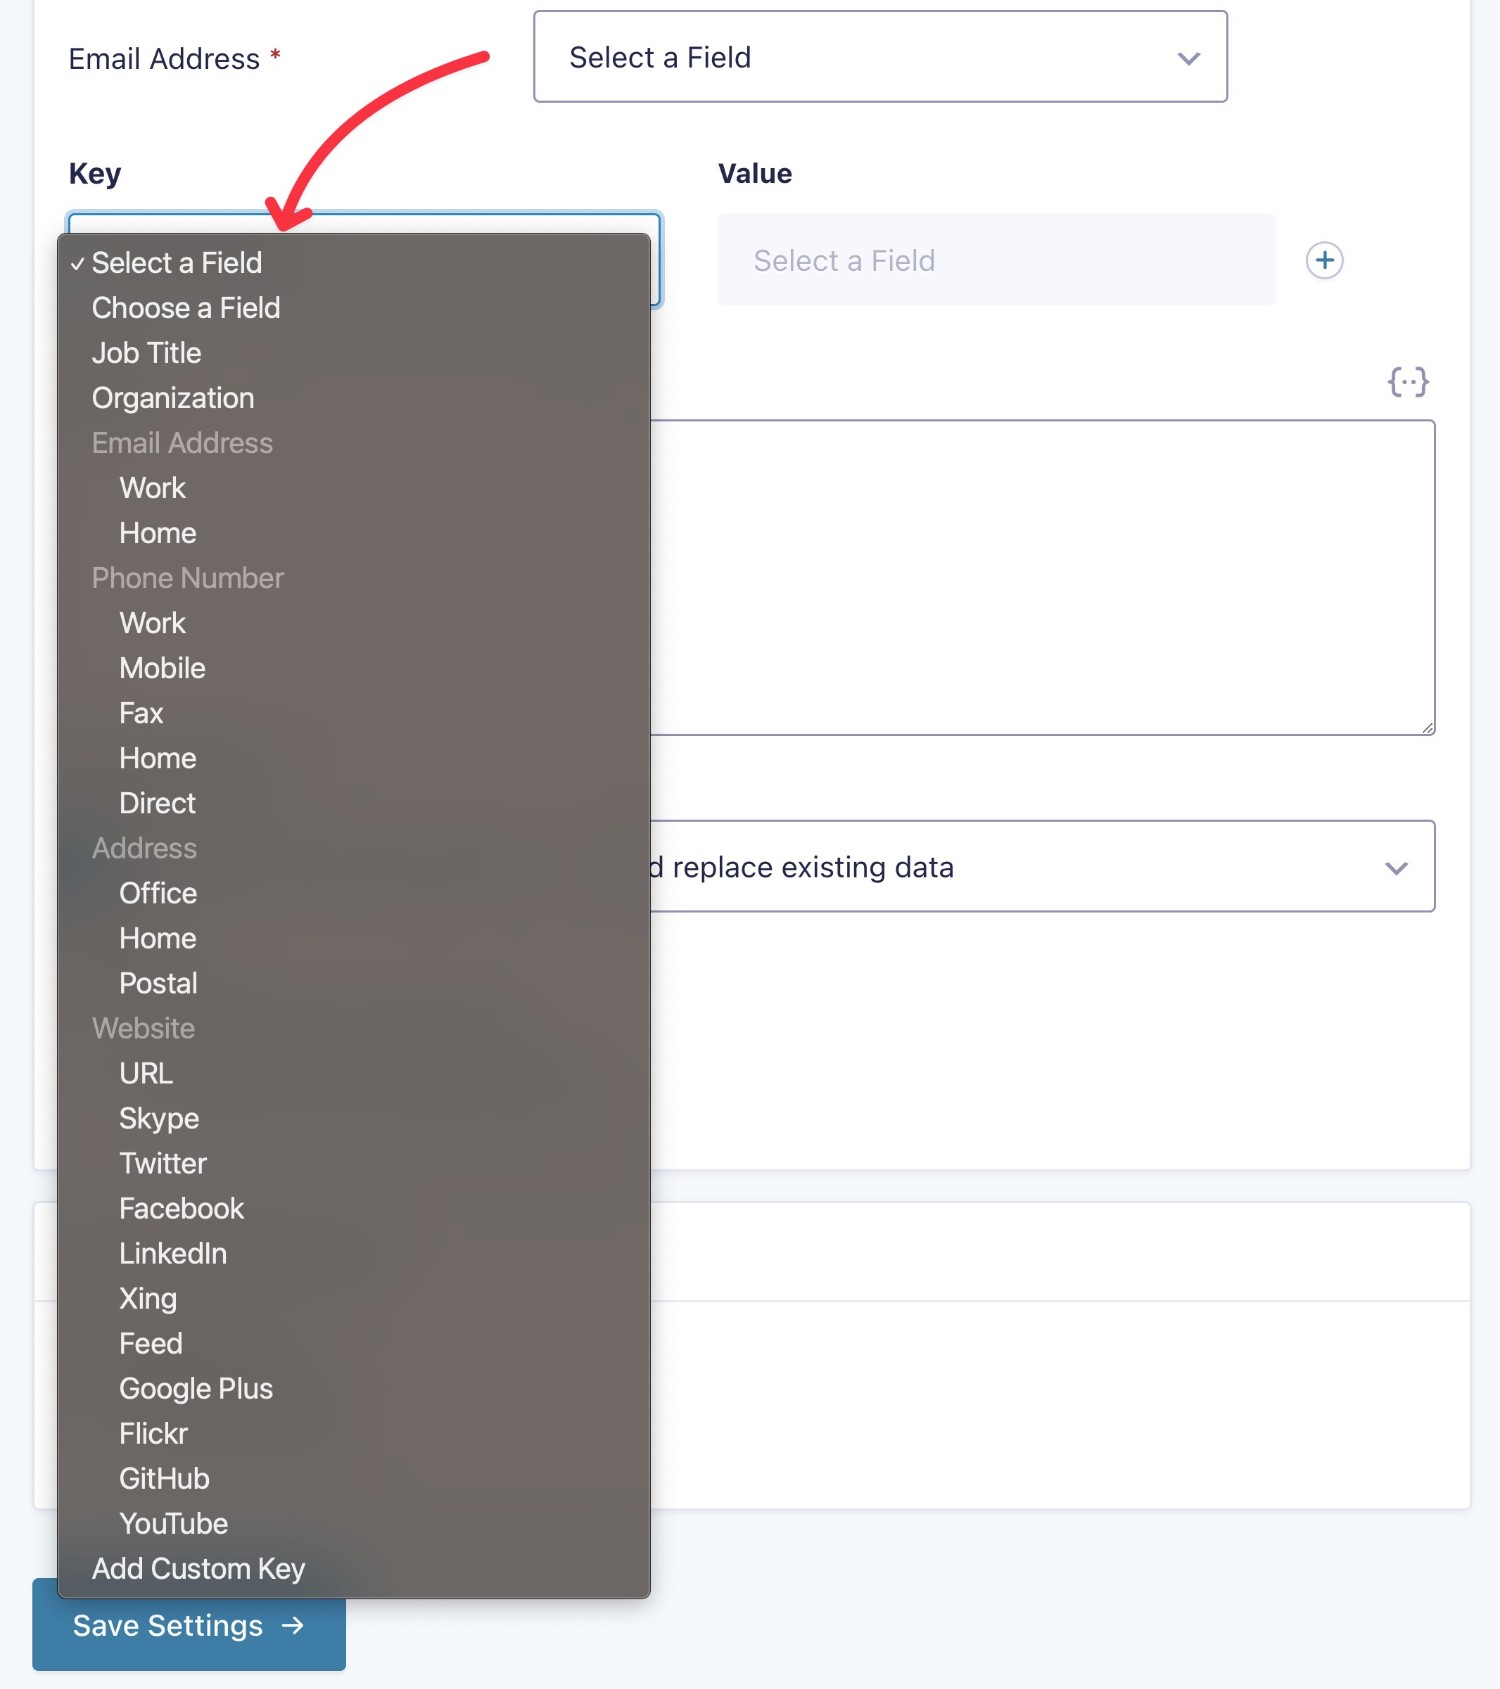
Here’s what it looks like to expand the Key drop-down – you can see that you get a huge number of new options to map additional information to Capsule CRM.
Create New Task
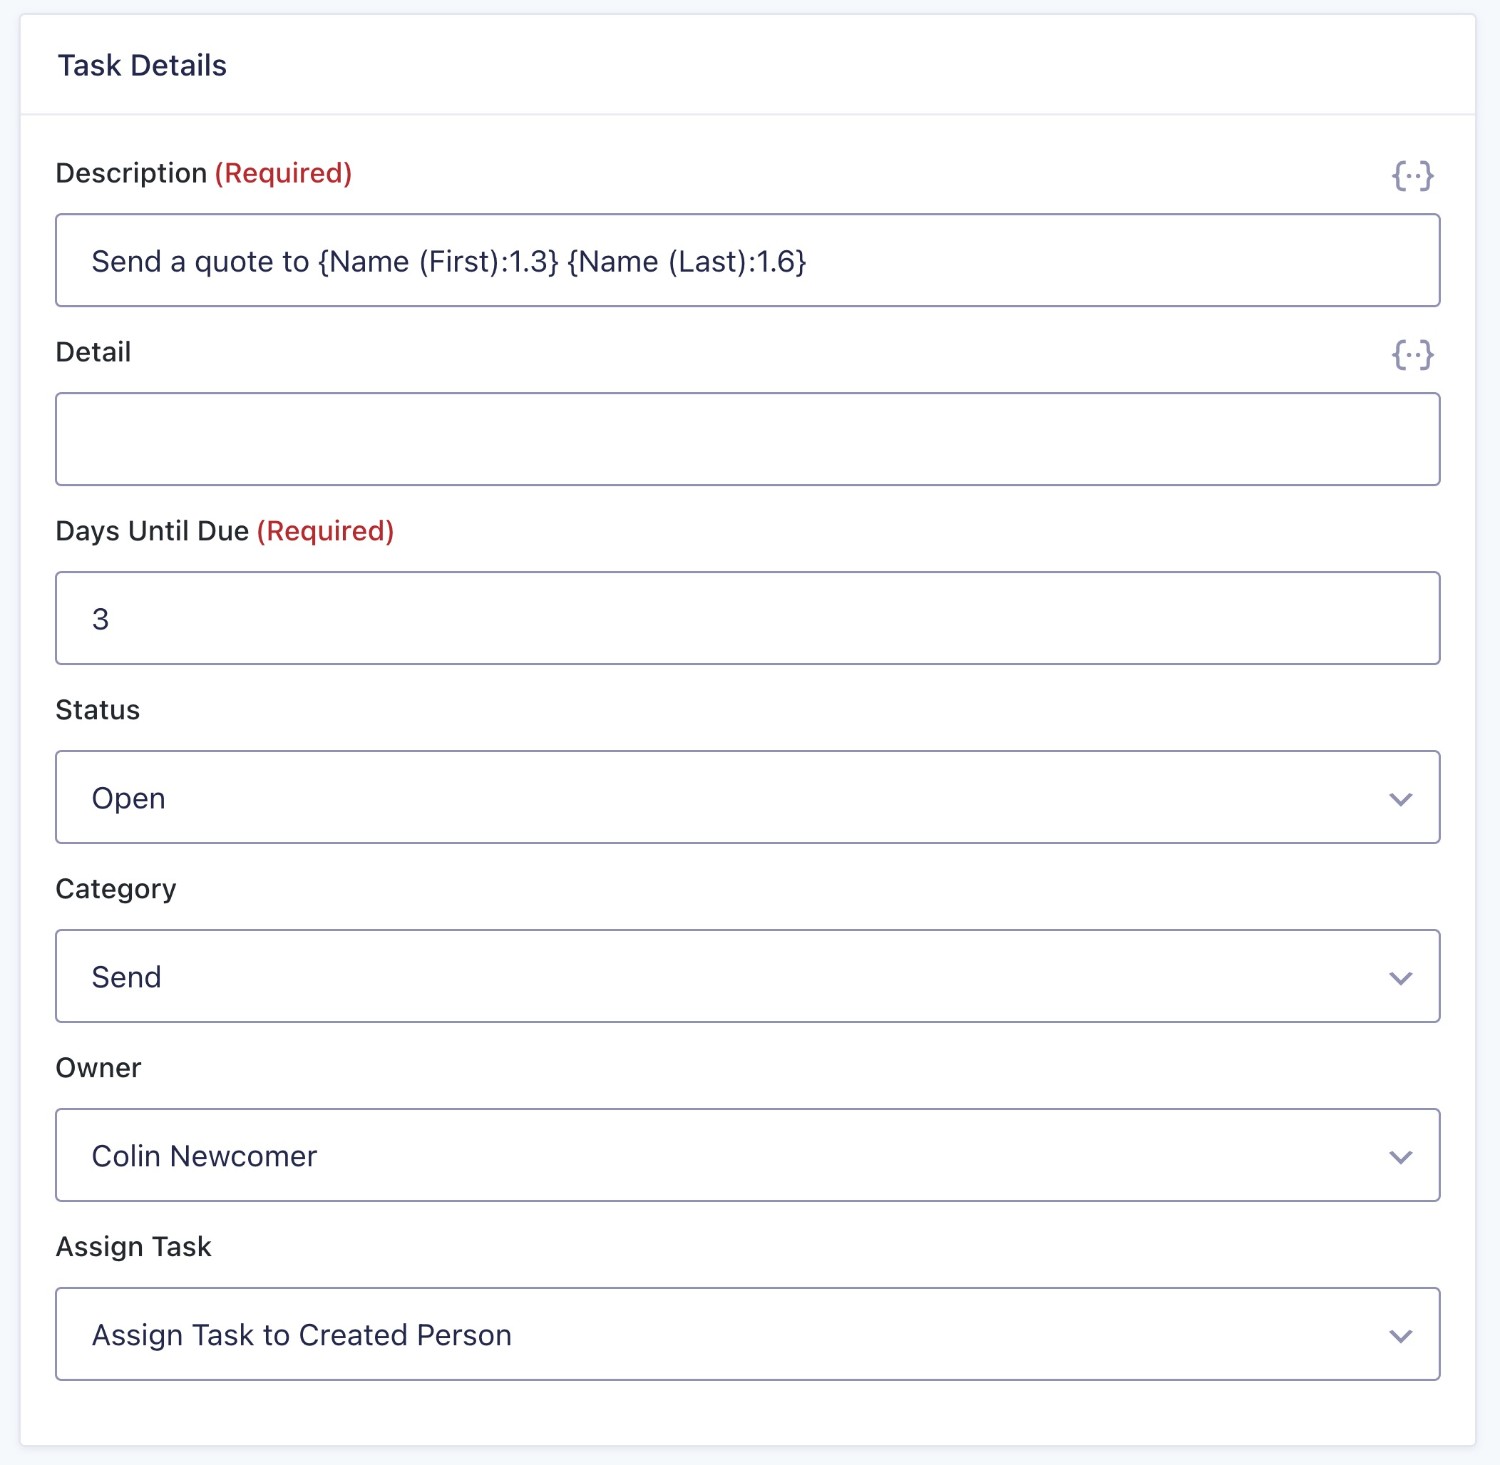
If you choose Create New Task, you’ll see a new box to configure the task details, including the following:
- Description (supports merge tags to dynamically insert form information)
- Detail (supports merge tags to dynamically insert form information)
- Days until due
- Status
- Owner (choose a Capsule CRM user)
- How to assign task (if you also create a person, you can automatically assign this task to that person)
Conditional Logic
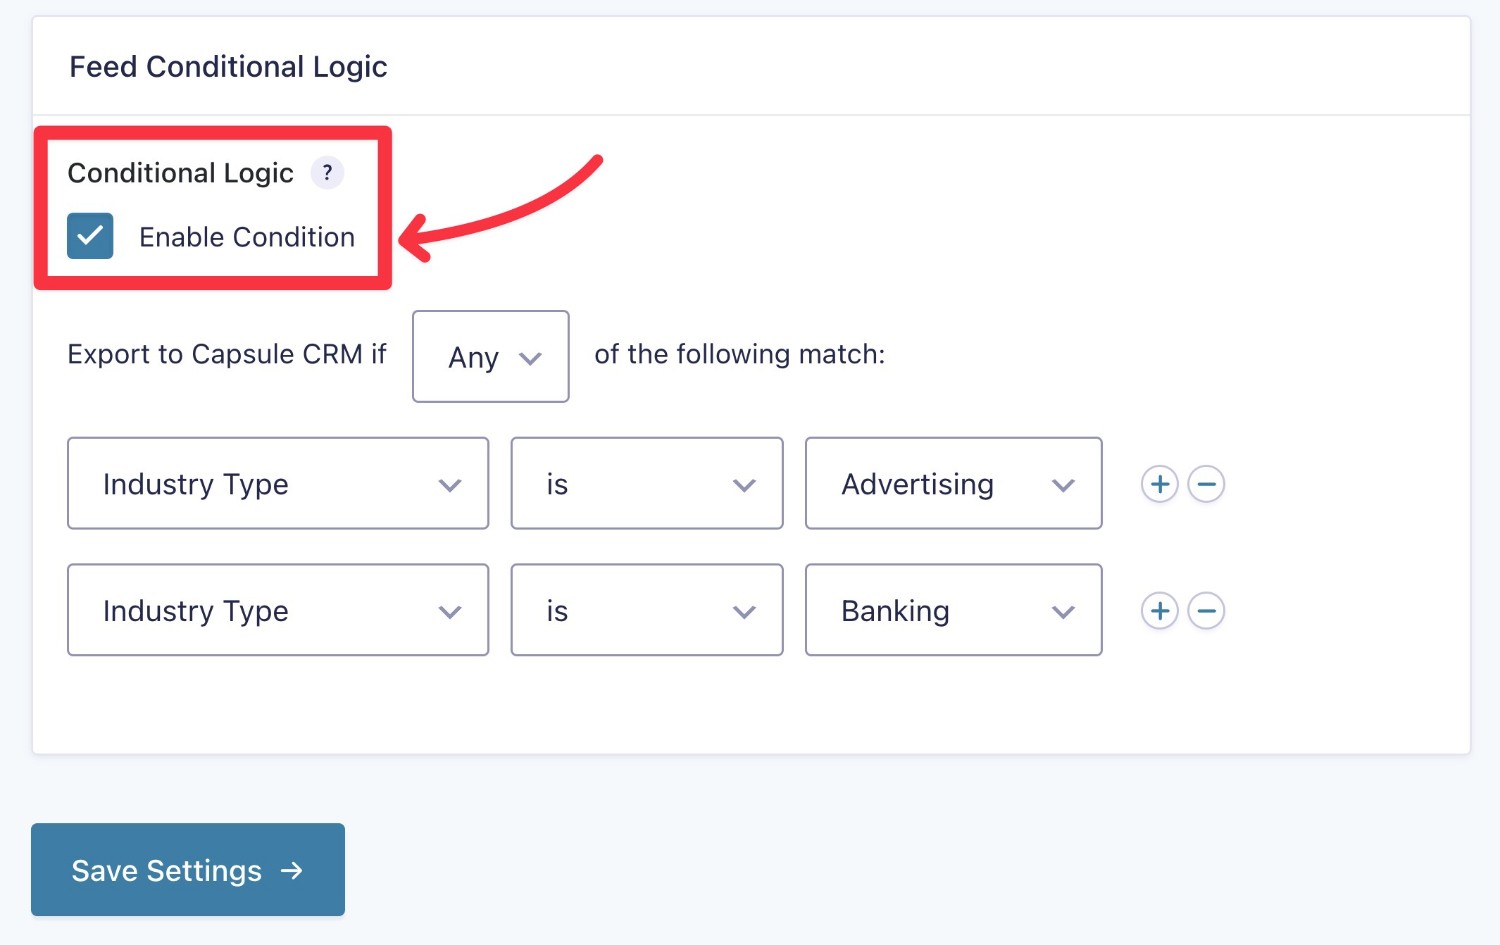
Finally, you can also use conditional logic to only execute this feed if it meets certain conditions.
Again, one popular use case here would be to set a task to a different owner depending on how the person filled out the form.
You could do this by creating multiple feeds and using conditional logic rules to only execute each feed if the person filled out the form in a certain way.
Using conditional logic is totally optional, though.
Save Your Feed
Once you’ve filled out everything, make sure to click Save Settings. If needed, you can repeat these steps to create additional feeds.
5. Embed Your Form and Test
After you’ve set up your Capsule CRM feed, the last step is to embed your form using the Gravity Forms block or shortcode.
Once you’ve embedded the form, we recommend submitting it with some dummy information to test that everything is working properly.
If you’re seeing data being synced to Capsule, you’re done! Feel free to create additional forms as needed.
Try the Gravity Forms Capsule CRM Add-On Today
If you’re already using Capsule (or you’re on the hunt for the best CRM for your business and considering Capsule), the official Gravity Forms Capsule CRM Add-On offers an easy way to connect your WordPress forms to Capsule.
The Gravity Forms Capsule CRM Add-On is available on the Pro, Elite, and Nonprofit licenses. If you’re already holding one of those licenses, install the add-on today to connect WordPress to Capsule CRM.
If you’re not a license holder yet, you can purchase a license here or upgrade your existing Basic license and only pay the prorated difference.
Or, if you want to try the Gravity Forms Capsule CRM add-on before you buy, you can spin up a free, fully functional demo site and connect it to your Capsule account to test how things work.

If you want to keep up-to-date with what’s happening on the blog sign up for the Gravity Forms newsletter!
"*" indicates required fields


