Growing and managing an email list for your business can not only be costly, but with some email marketing tools, the learning curve can be steep and time-consuming. EmailOctopus breaks down these barriers by providing an extremely user-friendly and affordable service – perfect for small to medium sized businesses on a budget!
In this article, we’ll look in-depth at the features and benefits EmailOctopus has to offer, as well as what you can expect from the Gravity Forms EmailOctopus integration. We’ll also run you through a quick tutorial on how to get started with Gravity Forms and EmailOctopus so you can start taking control of your email marketing today!
Let’s jump in…
EmailOctopus: An Introduction
EmailOctopus is a simple yet powerful email marketing service that will help you manage your email list and get the right content to the right people. Providing a suite of tools, EmailOctopus caters to all marketing needs, and at a cost that doesn’t break the bank!
Here are just a few top features…
- Ease of Use – Extremely user-friendly and quick to master, EmailOctopus ensures that the usability of its platform does not disappoint. From a drag-and-drop email editor and beautiful customizable templates to the ability to connect with your favorite apps, you can set up your EmailOctopus account and integrate it with your business processes in no time at all.
- Suite of Marketing Tools – From the moment you collect a new contact, EmailOctopus can support the nurturing of that lead through your marketing funnel. Use insights and data to segment your subscribers into target audiences, tag contacts to keep your data tidy, and send highly targeted email campaigns to boost engagement.
- Analytics – Track your campaigns to see what’s working and what isn’t. Check out the open and click-through rates of particular emails, or monitor campaigns over time to gain insight into your audience and what they respond to.
- Support – EmailOctopus has a friendly support team who are there to help every step of the way, from getting started to getting the most out of your campaigns.
- Price – EmailOctopus are so sure that their pricing structure offers not only great value for money but great savings, they provide a cost calculator page. Check out the big names in the email marketing sphere and see how much you will save by switching to EmailOctopus.
Head on over to the EmailOctopus website to get started today for free.
Gravity Forms EmailOctopus Add-On

As mentioned, you can connect your EmailOctopus account with numerous apps and services. Gravity Forms is one such tool! With the Gravity Forms EmailOctopus Add-On, you can quickly and easily connect your WordPress website and online forms with your EmailOctopus account.
Here are a few of the benefits of using this add-on…
- Seamless Integration – Once set up, the Gravity Forms EmailOctopus Add-On will automatically send form data collected directly to your EmailOctopus account. No more manual uploading of contacts and lists, just let the add-on do the work for you!
- Control Where the Data is Sent – From within the EmailOctopus Form Feed Settings in your WordPress dashboard you can select the EmailOctopus list you want to populate with form data. You can also easily create multiple Form Feeds and set conditional logic to ensure your leads are segmented based on the information they supply in the form. This will help you to ensure your new leads get the email campaigns most relevant to their needs and interests.
- Collect the Information Your Business Needs – The EmailOctopus Add-On enables you to send all the data you need from a form to an email list. Within a Form Feed you can map each email list field to the appropriate form field that you wish to be a source for that information. By capturing and collating all the data you need, you are better placed to send targeted campaigns that boost engagement and conversions.
- Utilize Conditional Logic – The EmailOctopus Add-On works with all Gravity Forms features, including conditional logic. As mentioned, you can set the conditions which determine when form submissions are sent to EmailOctopus, as well as which mailing lists users are added to. This gives you control over the data you collect, ensuring that your mailing lists are correctly segmented and full of valuable and qualified leads.
The EmailOctopus Add-On is available with ALL Gravity Forms licenses. For more information on this add-on, check out the Gravity Forms Documentation.
Get Started with Gravity Forms and EmailOctopus
We’ll now run through how to get set up with Gravity Forms and EmailOctopus. If you haven’t already, you will need to create an EmailOctopus account. This tutorial also presumes you have an active Gravity Forms license and the plugin installed on your WordPress website.
Step 1: Install the EmailOctopus Add-On
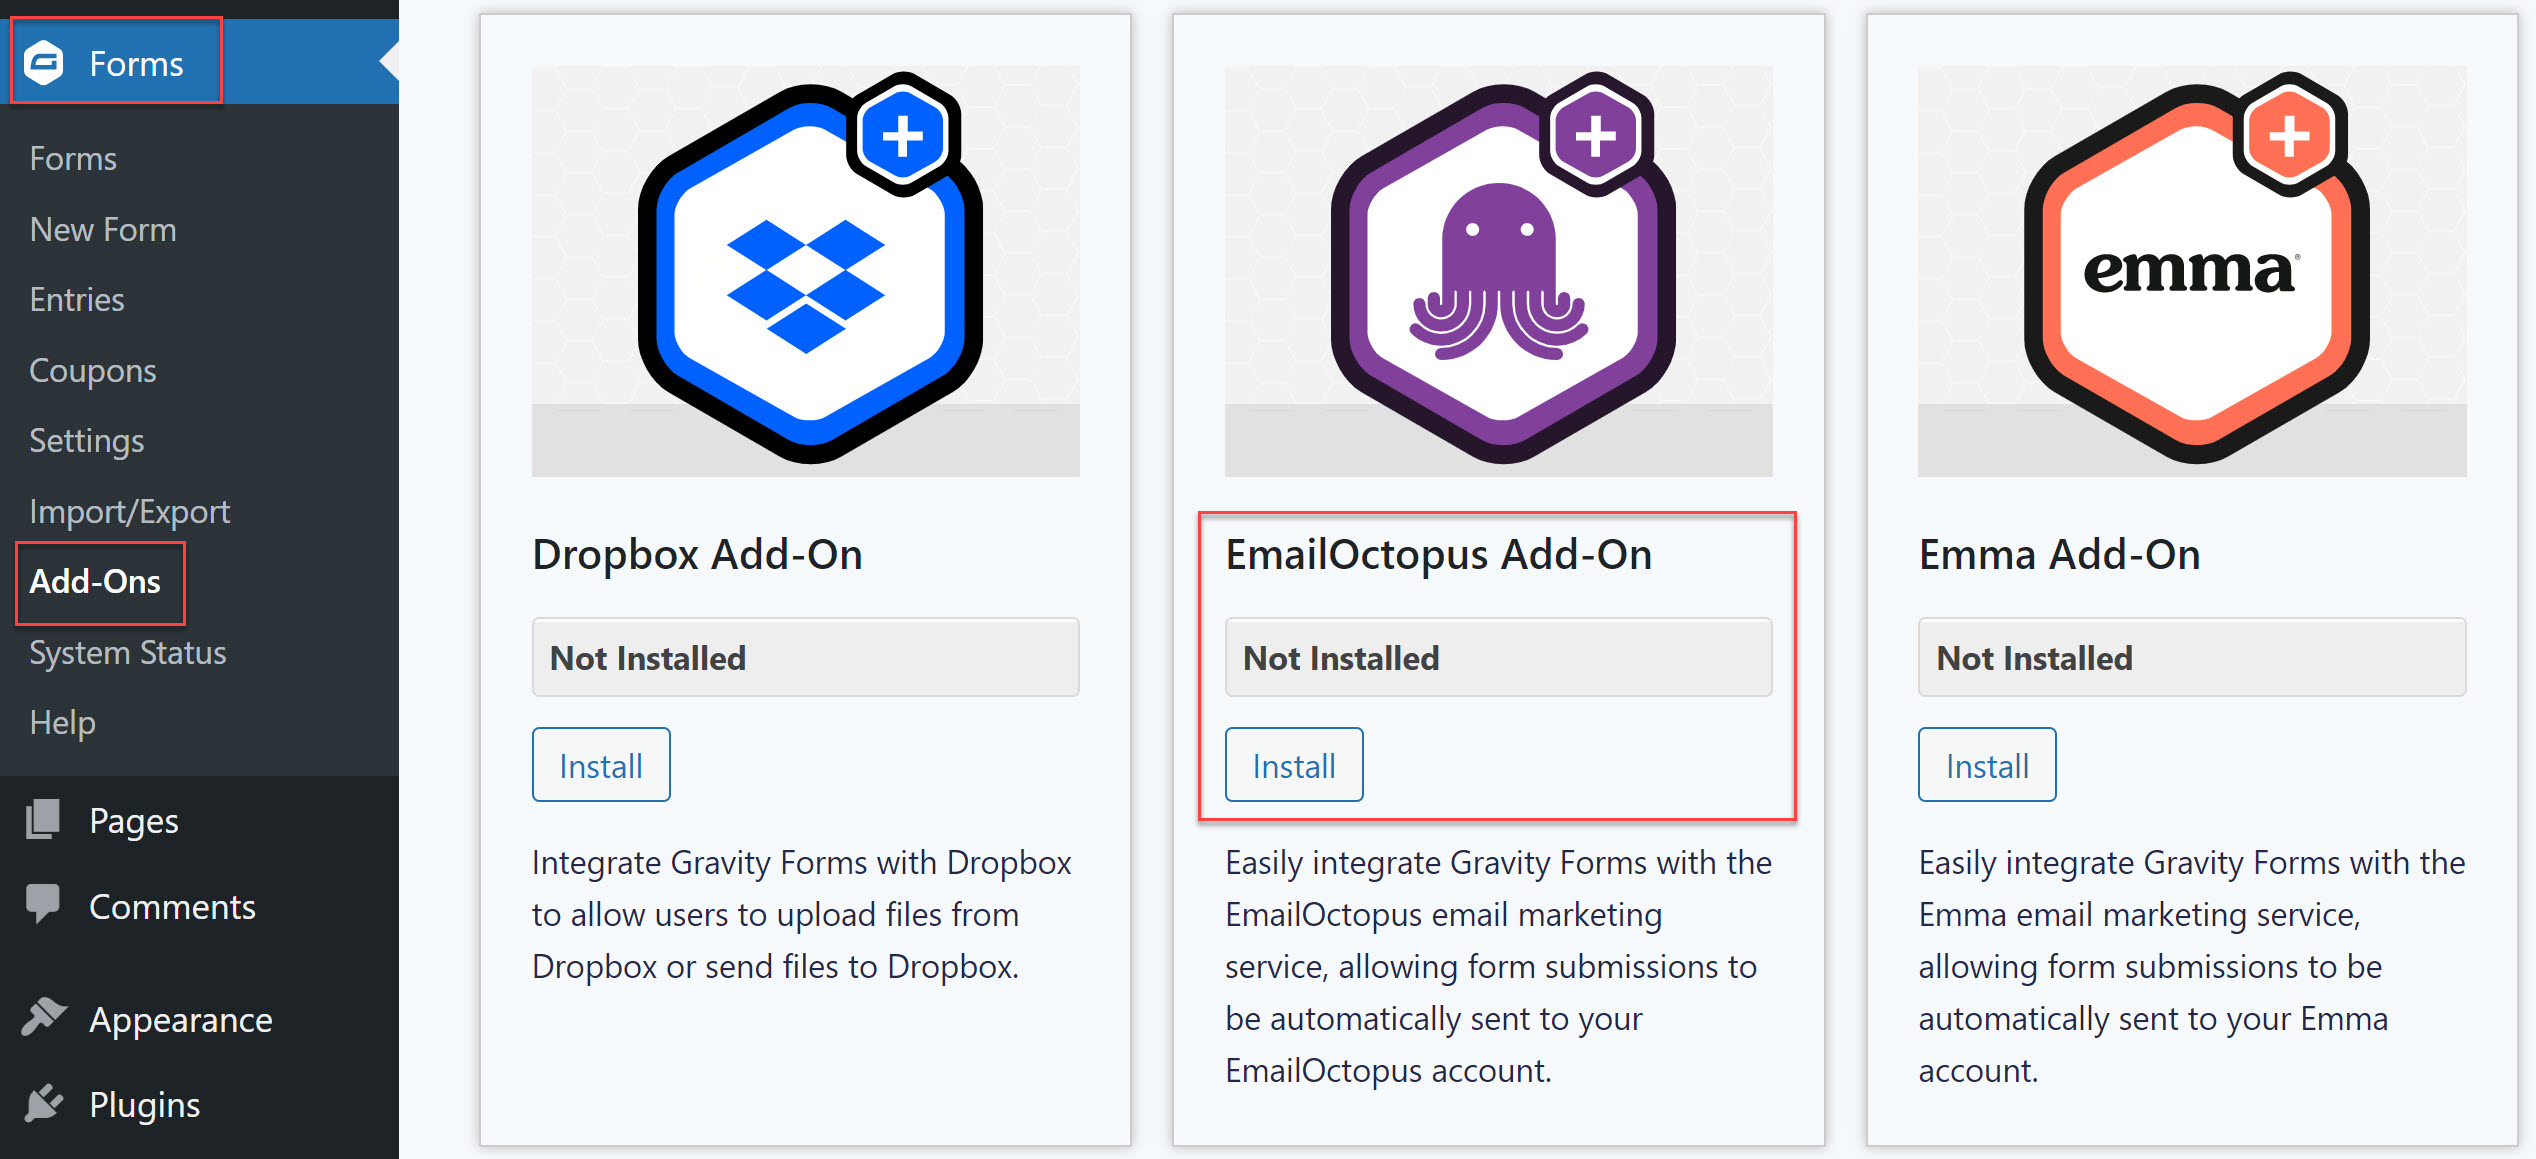
Gravity Forms supports a wide assortment of integrations and all the add-ons can be found either in your Gravity Forms account dashboard, or in the Add-On Browser within WordPress Admin under Forms > Add-Ons.
Below you will see we have navigated to the Add-On Browser where you simply need to click Install > Activate.
Step 2: Connect with Your EmailOctopus Account
Once the EmailOctopus Add-On is installed, you will need to connect Gravity Forms with your EmailOctopus account. To do so, select Forms > Settings > EmailOctopus.
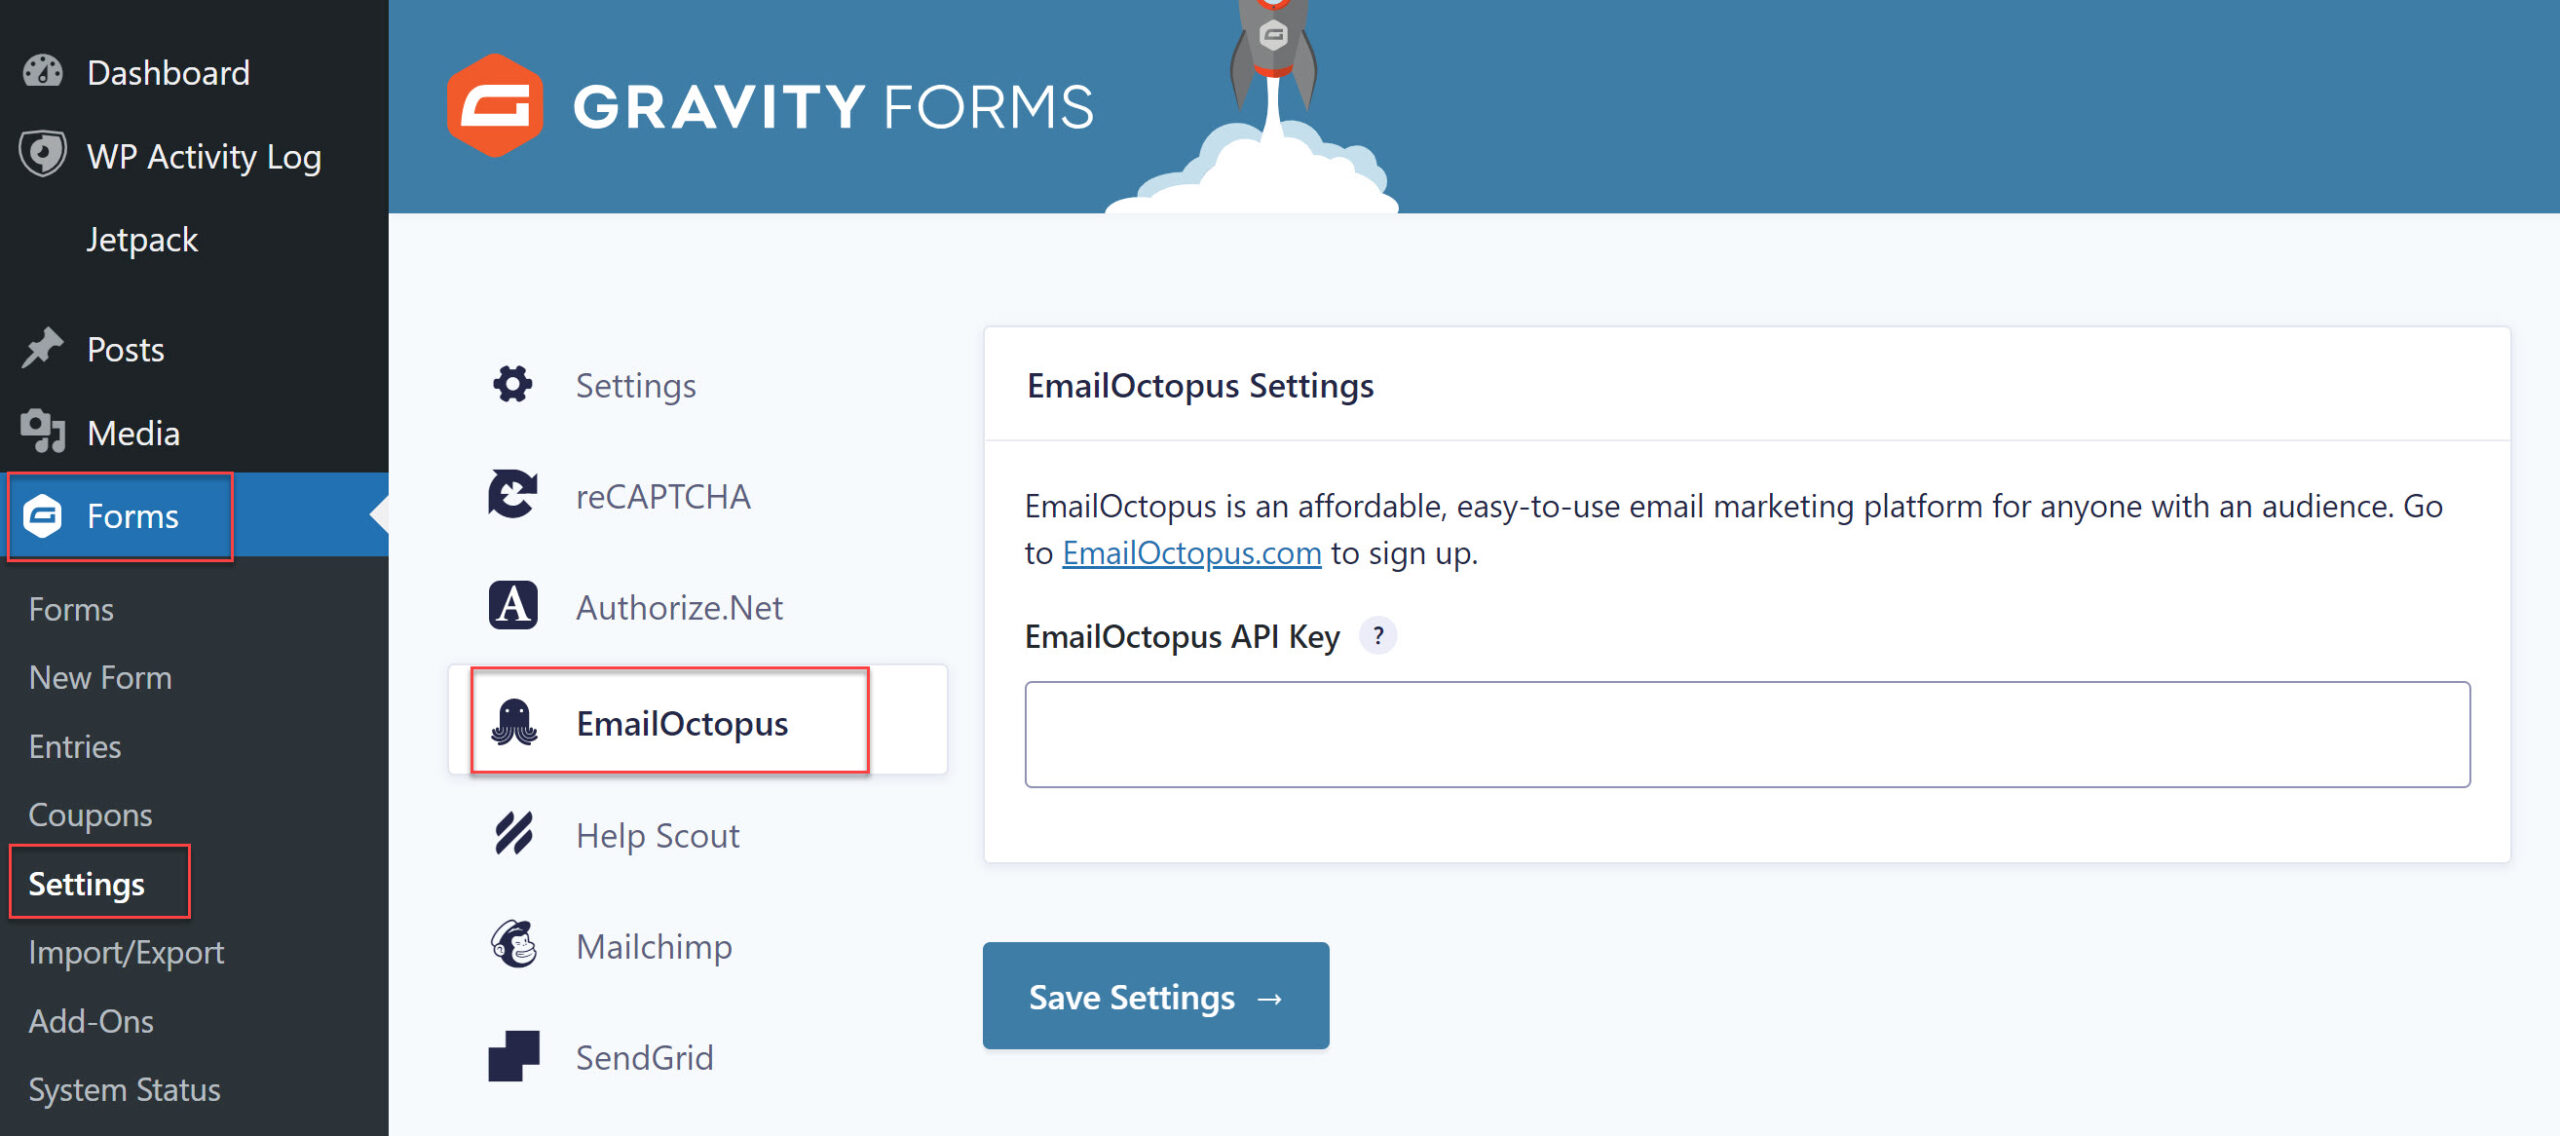
Here you will need to enter your EmailOctopus API Key. To create an API key, head over to the API area within your EmailOctopus dashboard. Select Create Key and give the key a name.
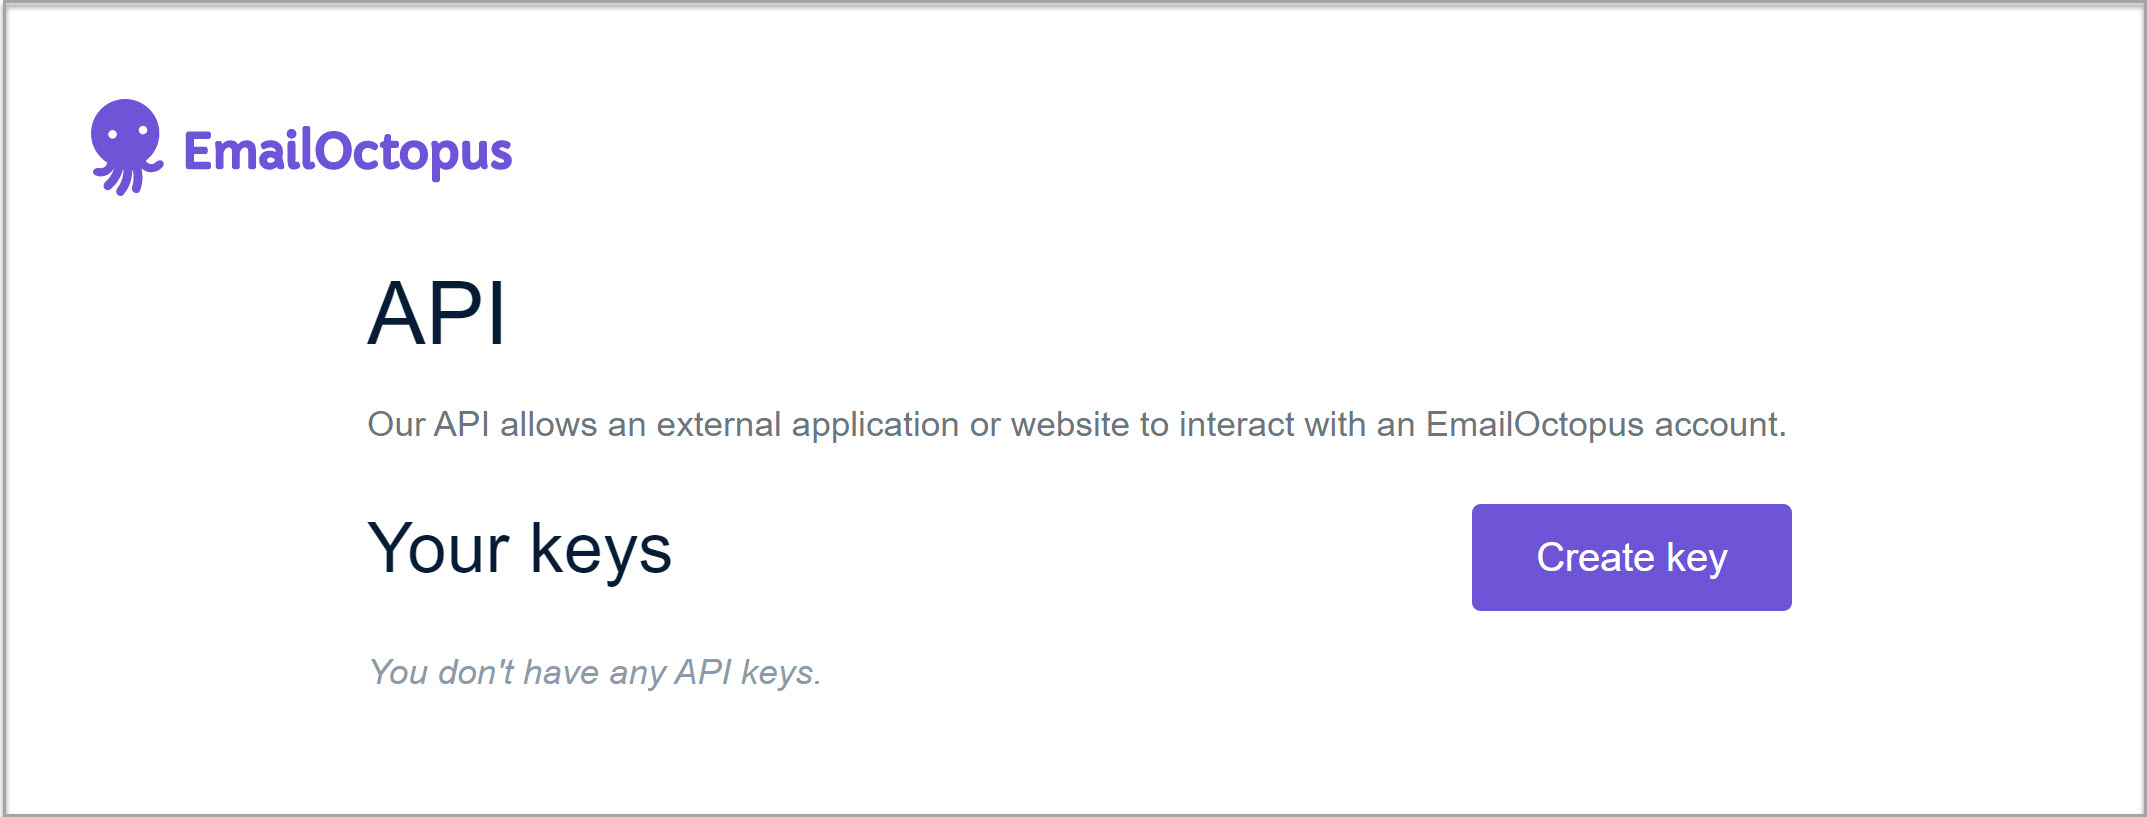
EmailOctopus will now generate an API key which you need to copy. Switch back to your WordPress dashboard and paste this key within the EmailOctopus Settings. Then click Save Settings to connect your accounts.
For more information on how to create an API key, have a read of this article from EmailOctopus.
Step 3: Create a Form
The next step is to create a form. Here you have a few options. You can use any existing form, import and customize a form template, or create a form from scratch.
Here we’ll cover how to create a form from scratch, which is a quick and easy process. Simply select Forms > New Form and give your new form a name.

Within the form editor you can now use the drag and drop functionality to add and move fields around to create your form. If you’re creating a basic signup or opt-in form, we recommend adding at least name and email fields to your form.
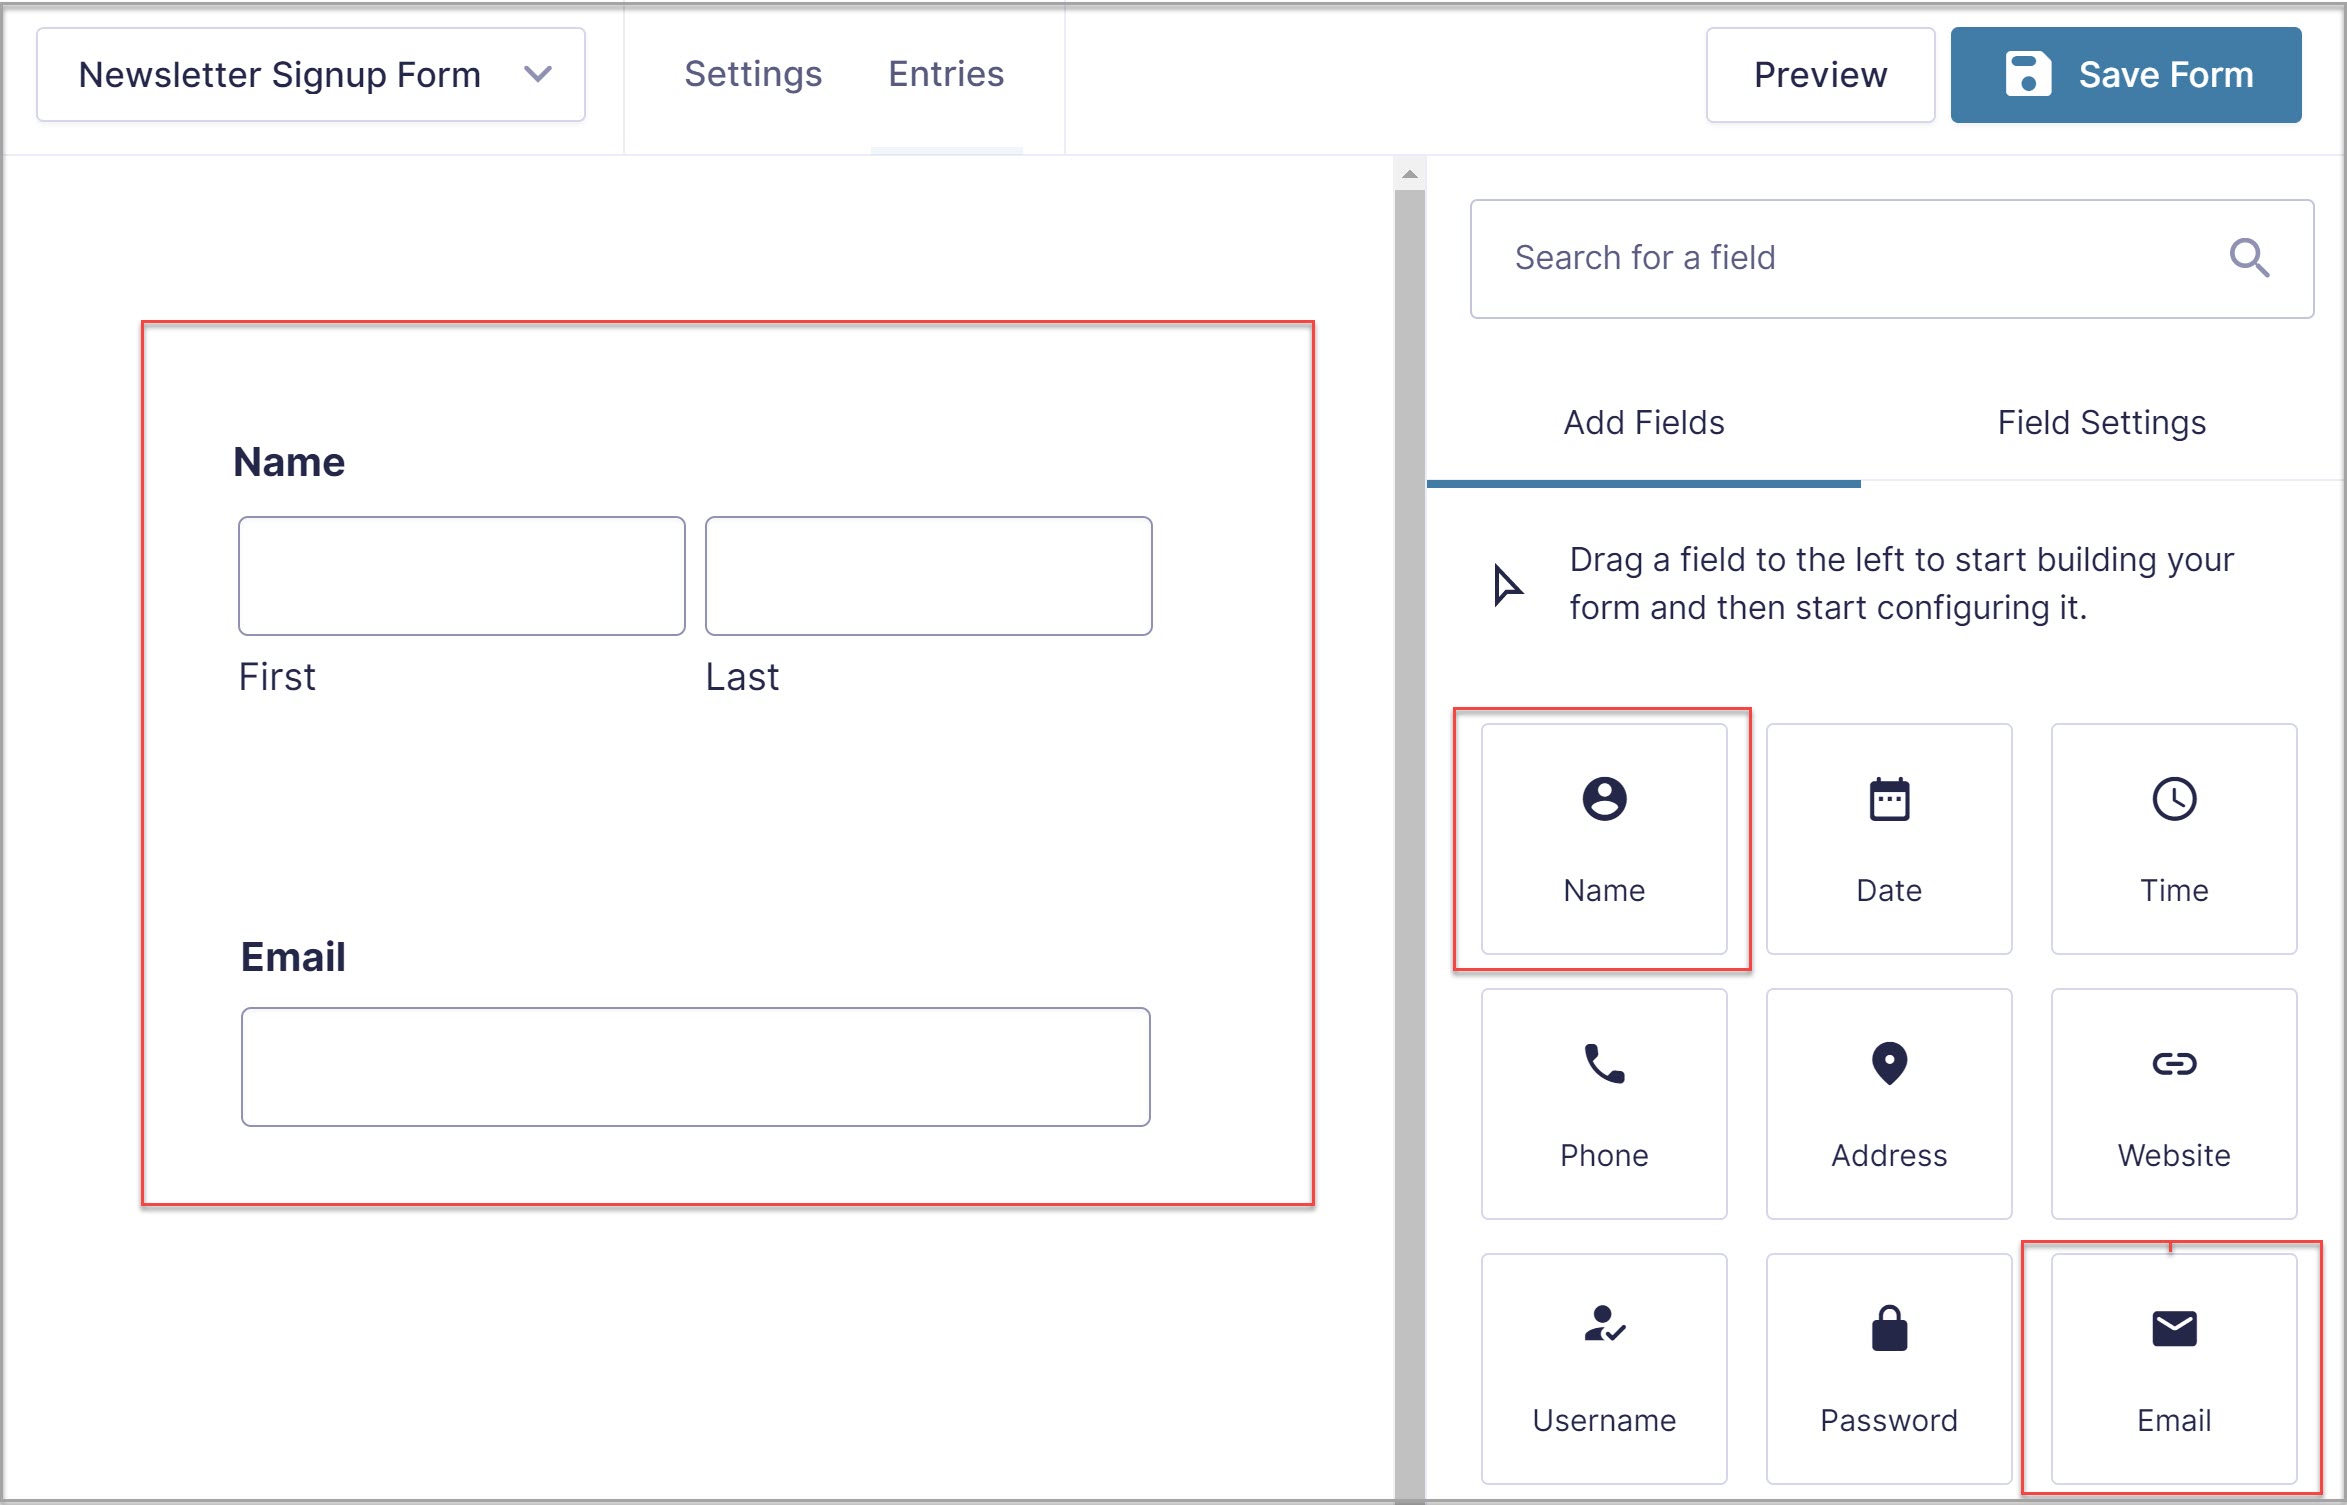
However, you can also create more complex forms, adding as many fields to your form as you need to collect relevant information. Keep in mind though, that shorter forms convert better.
For more information on getting started with your first form, check out this article – How to Create a Form in WordPress.
Step 4: Create a Form Feed
You will now need to create a form feed for the add-on so the leads collected via Gravity Forms get sent to your EmailOctopus account. Within the form editor, navigate to Settings > EmailOctopus and click to create a new feed.
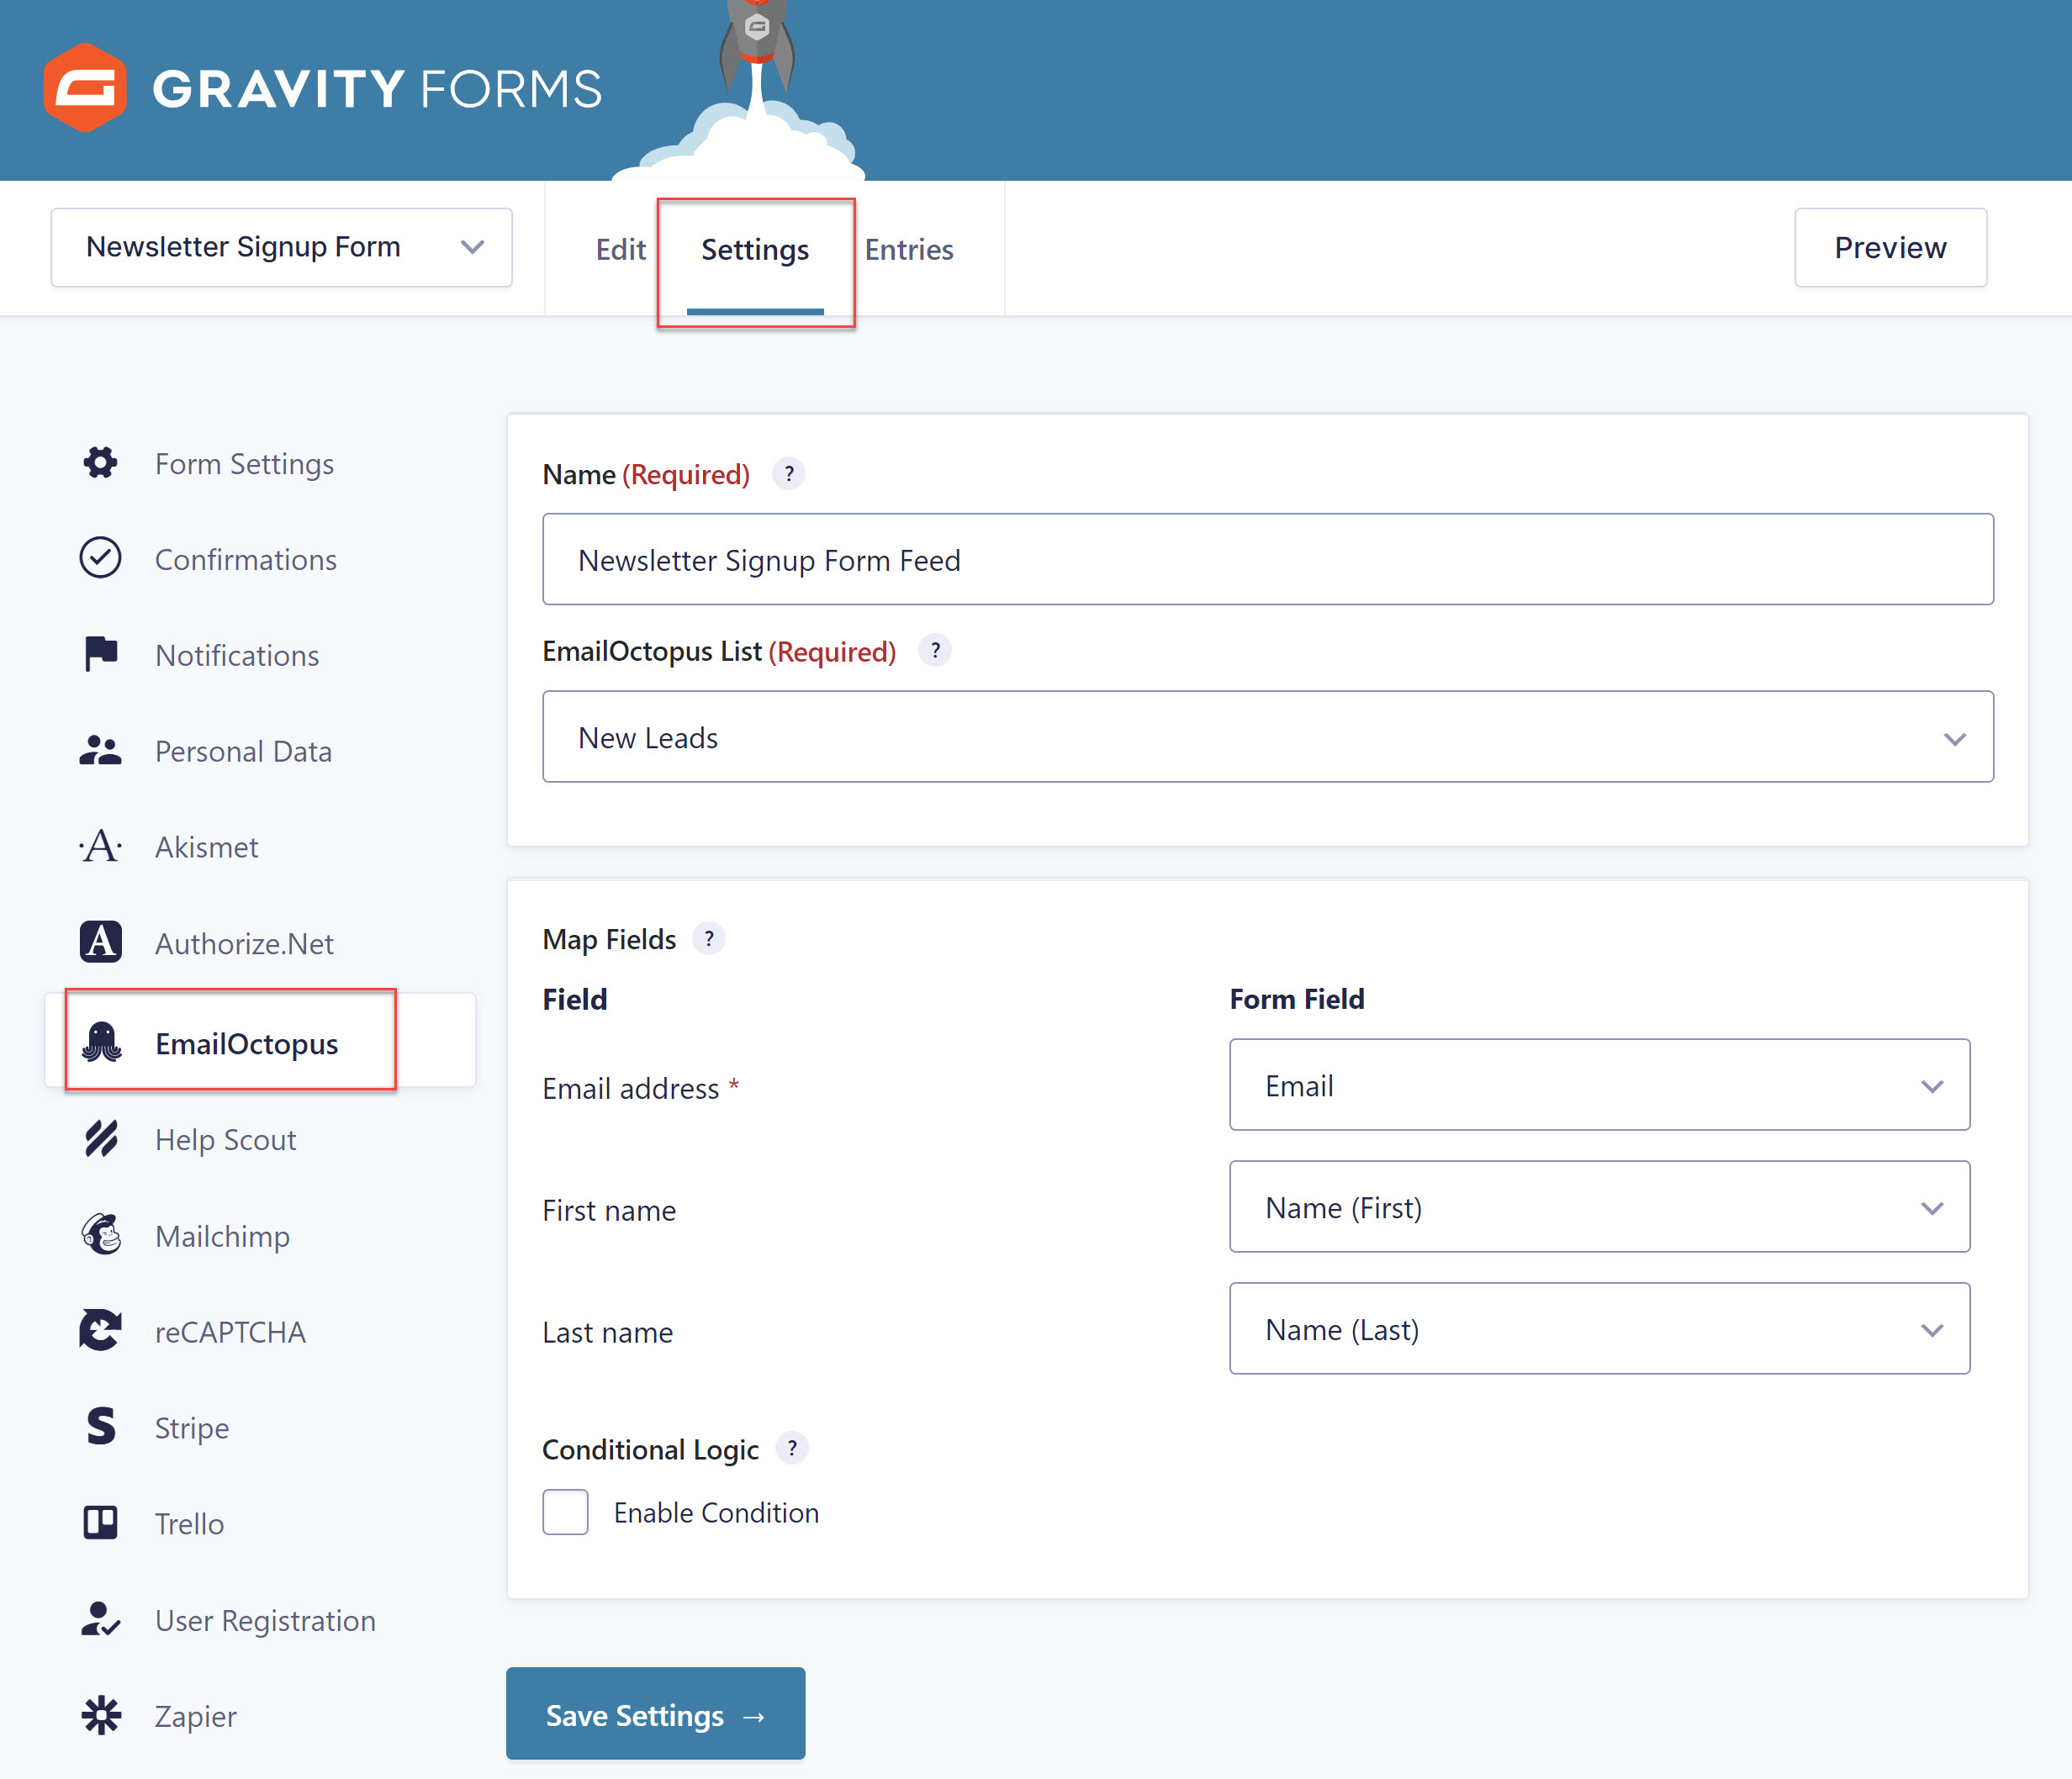
You will need to give the form feed a name and select the EmailOctopus email list you want to populate with the form data captured. Then simply map the form fields you’ve selected to the list fields.
Here you can also enable conditional logic, opting to only send the form data to EmailOctopus if certain conditions are met. For more information on how to use conditional logic to enahnce your forms, check out this article – How to Use Conditional Logic to Create Smarter Forms.
Step 5: Publish your Form
The last step in this process is to embed and publish the form on your website. If you’ve updated to Gravity Forms 2.6, then you can now embed a form in a page or a post directly from the form editor using the new Embed Form flyout.
The Embed Form flyout utilizes the WordPress Block editor, and gives you the option of selecting to display the form on a new or existing page or post, or a custom post type (with the use of filters). To get started with the Embed Form flyout, within the form editor simply click on Embed, which you will find in the top right corner of the screen.
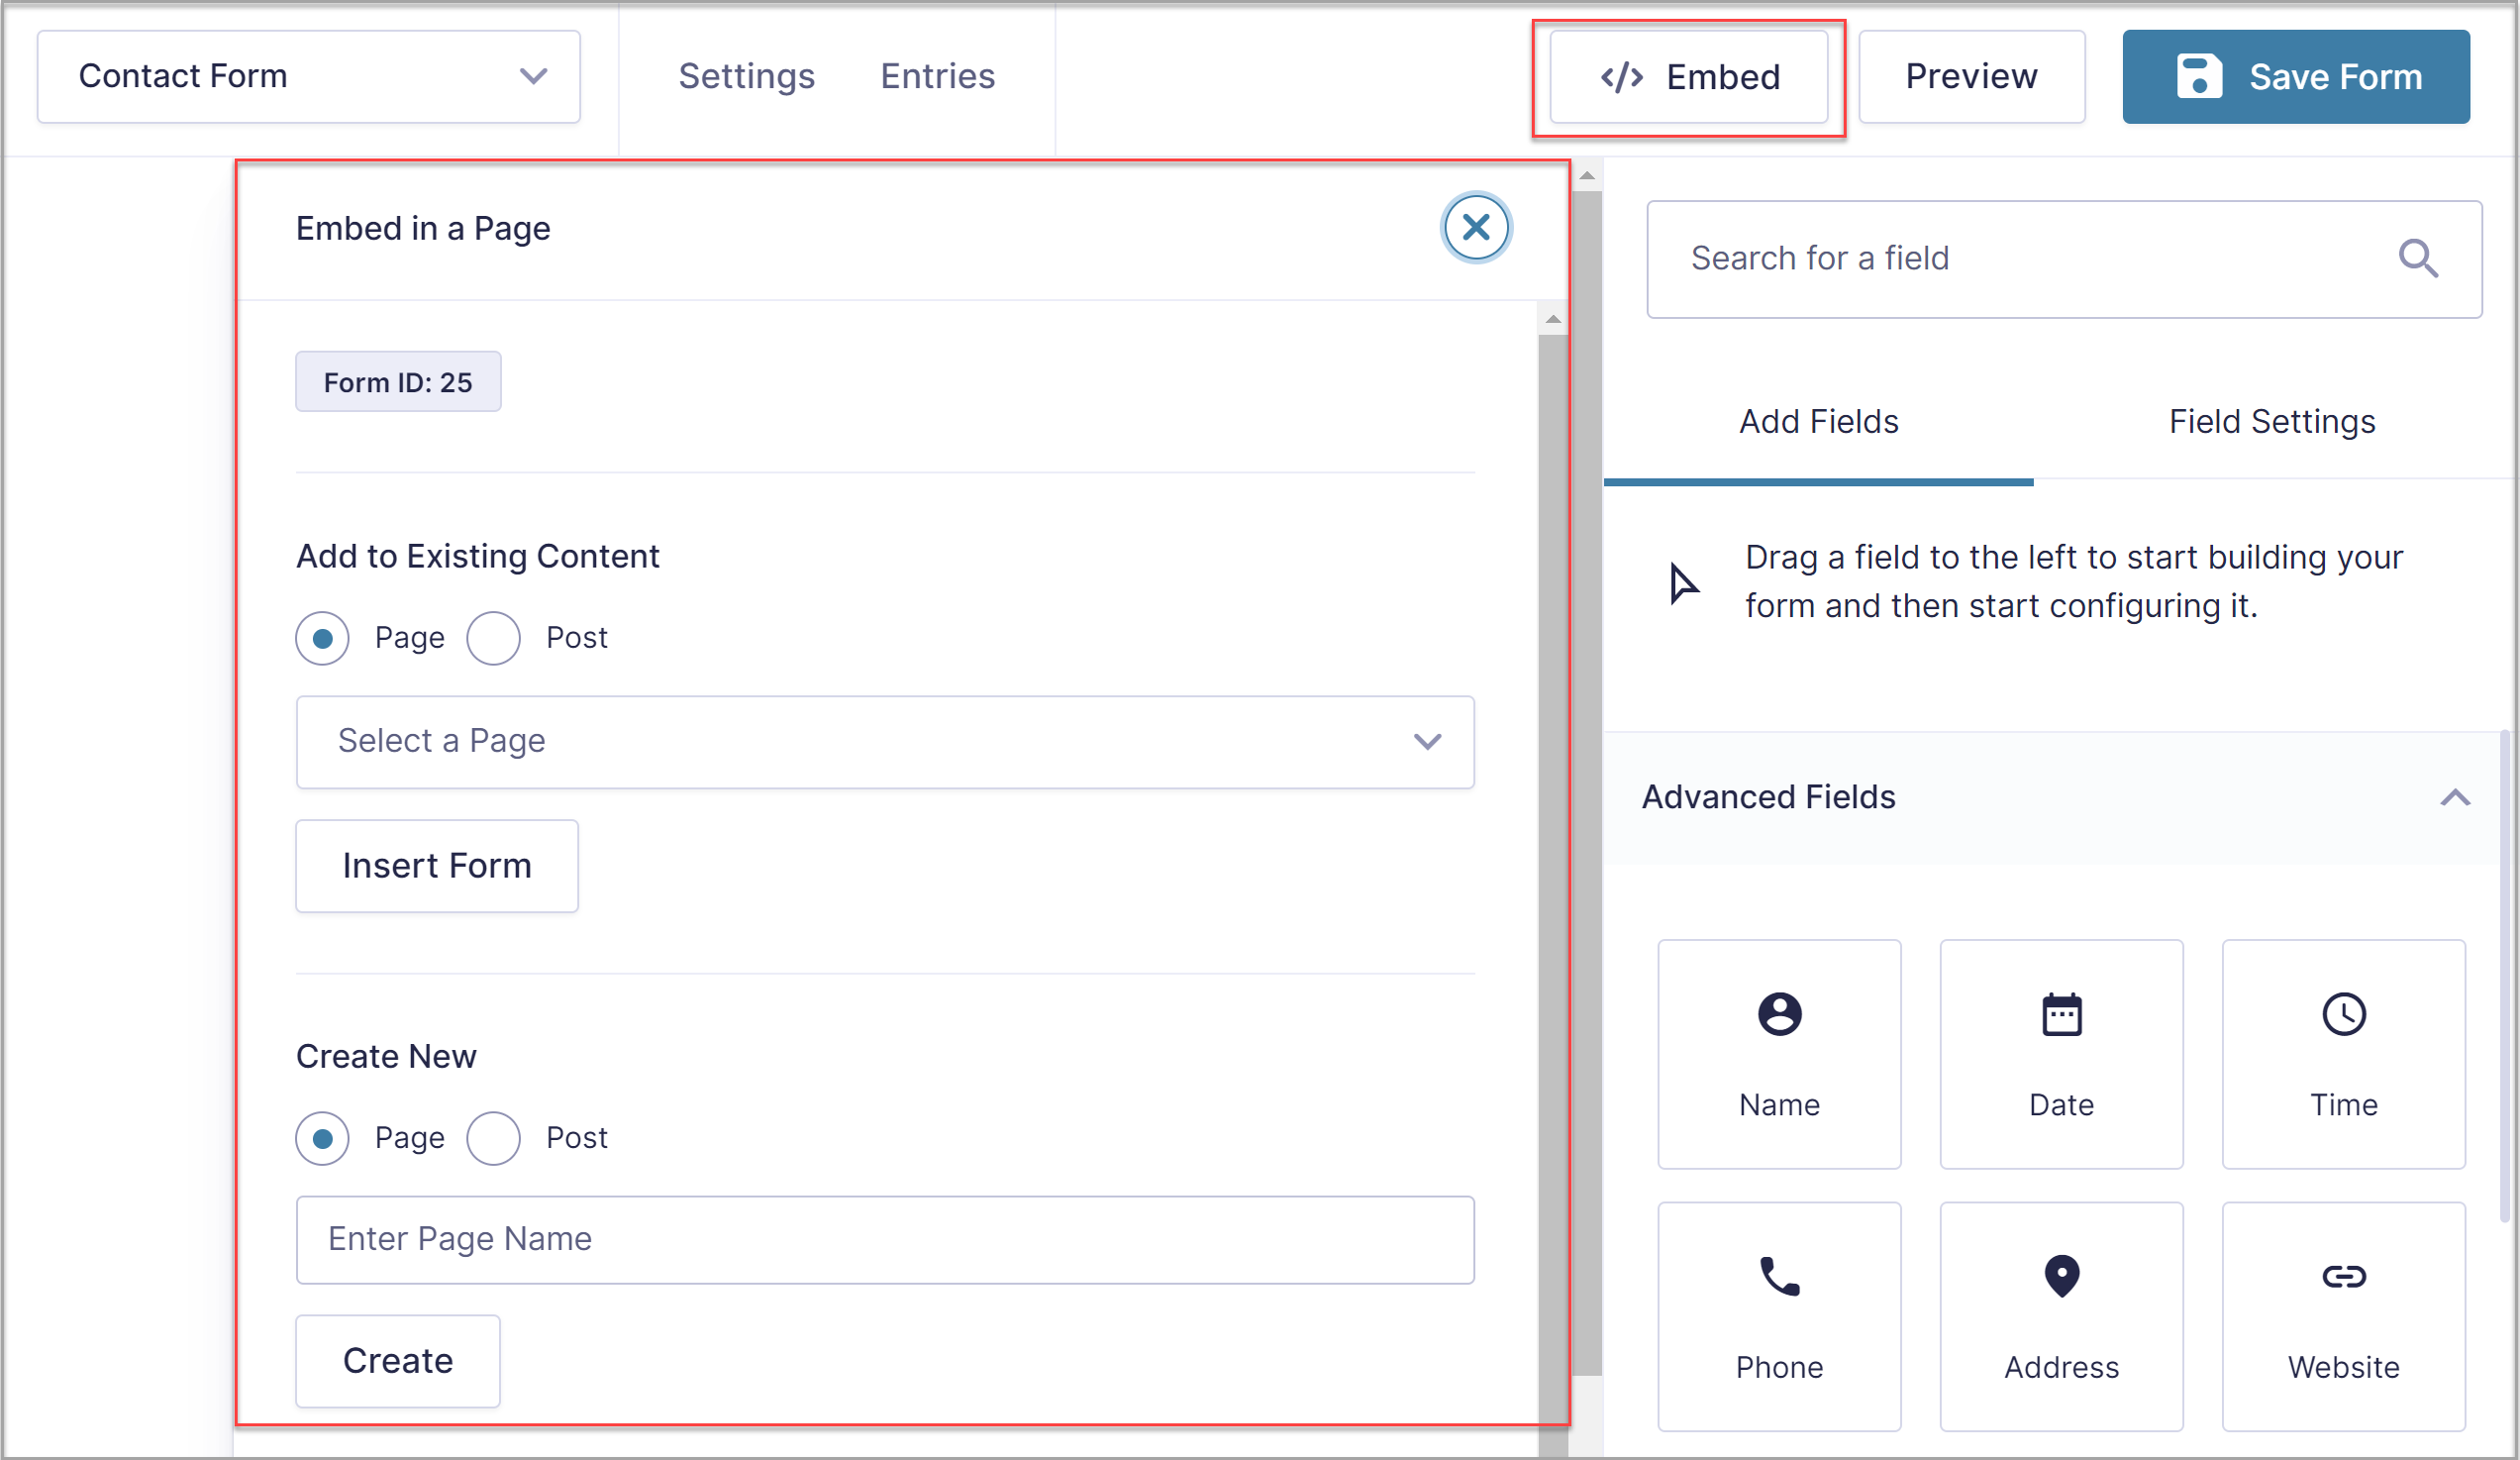
Then, within the Embed Form flyout select the page or post where you would like to add your form. Alternatively, you can choose to create a new page or post. Now select Insert Form (or Create) and the WordPress editor will automatically open your new or existing page or post.
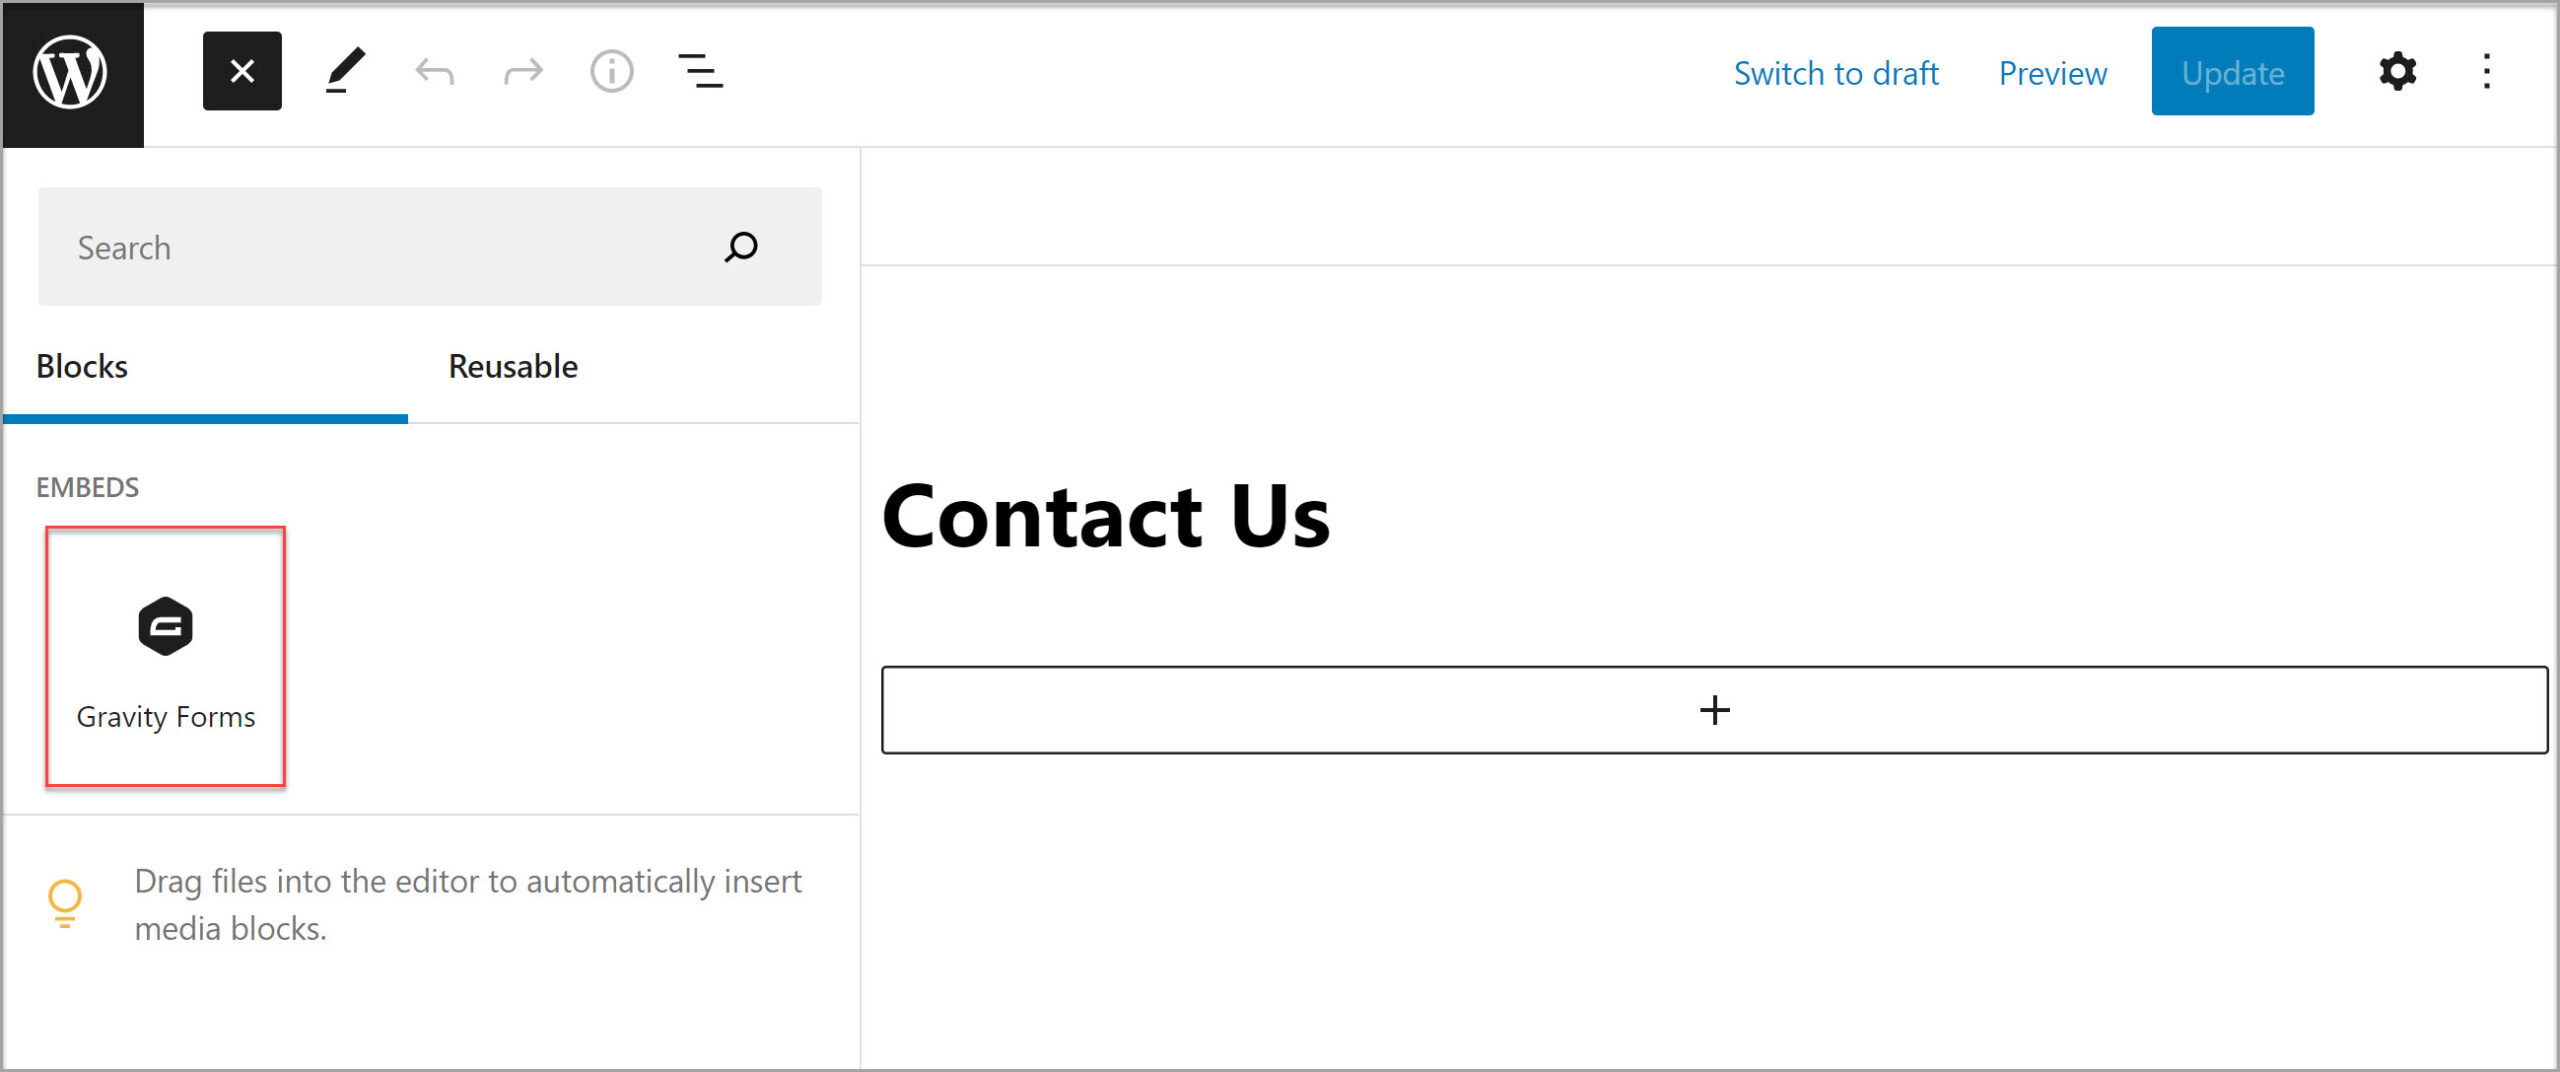
If you have chosen to embed your form in an existing page or post, you will find the Gravity Forms block highlighted under Embeds. Drag and drop the block, positioning it within the existing content where you deem appropriate.
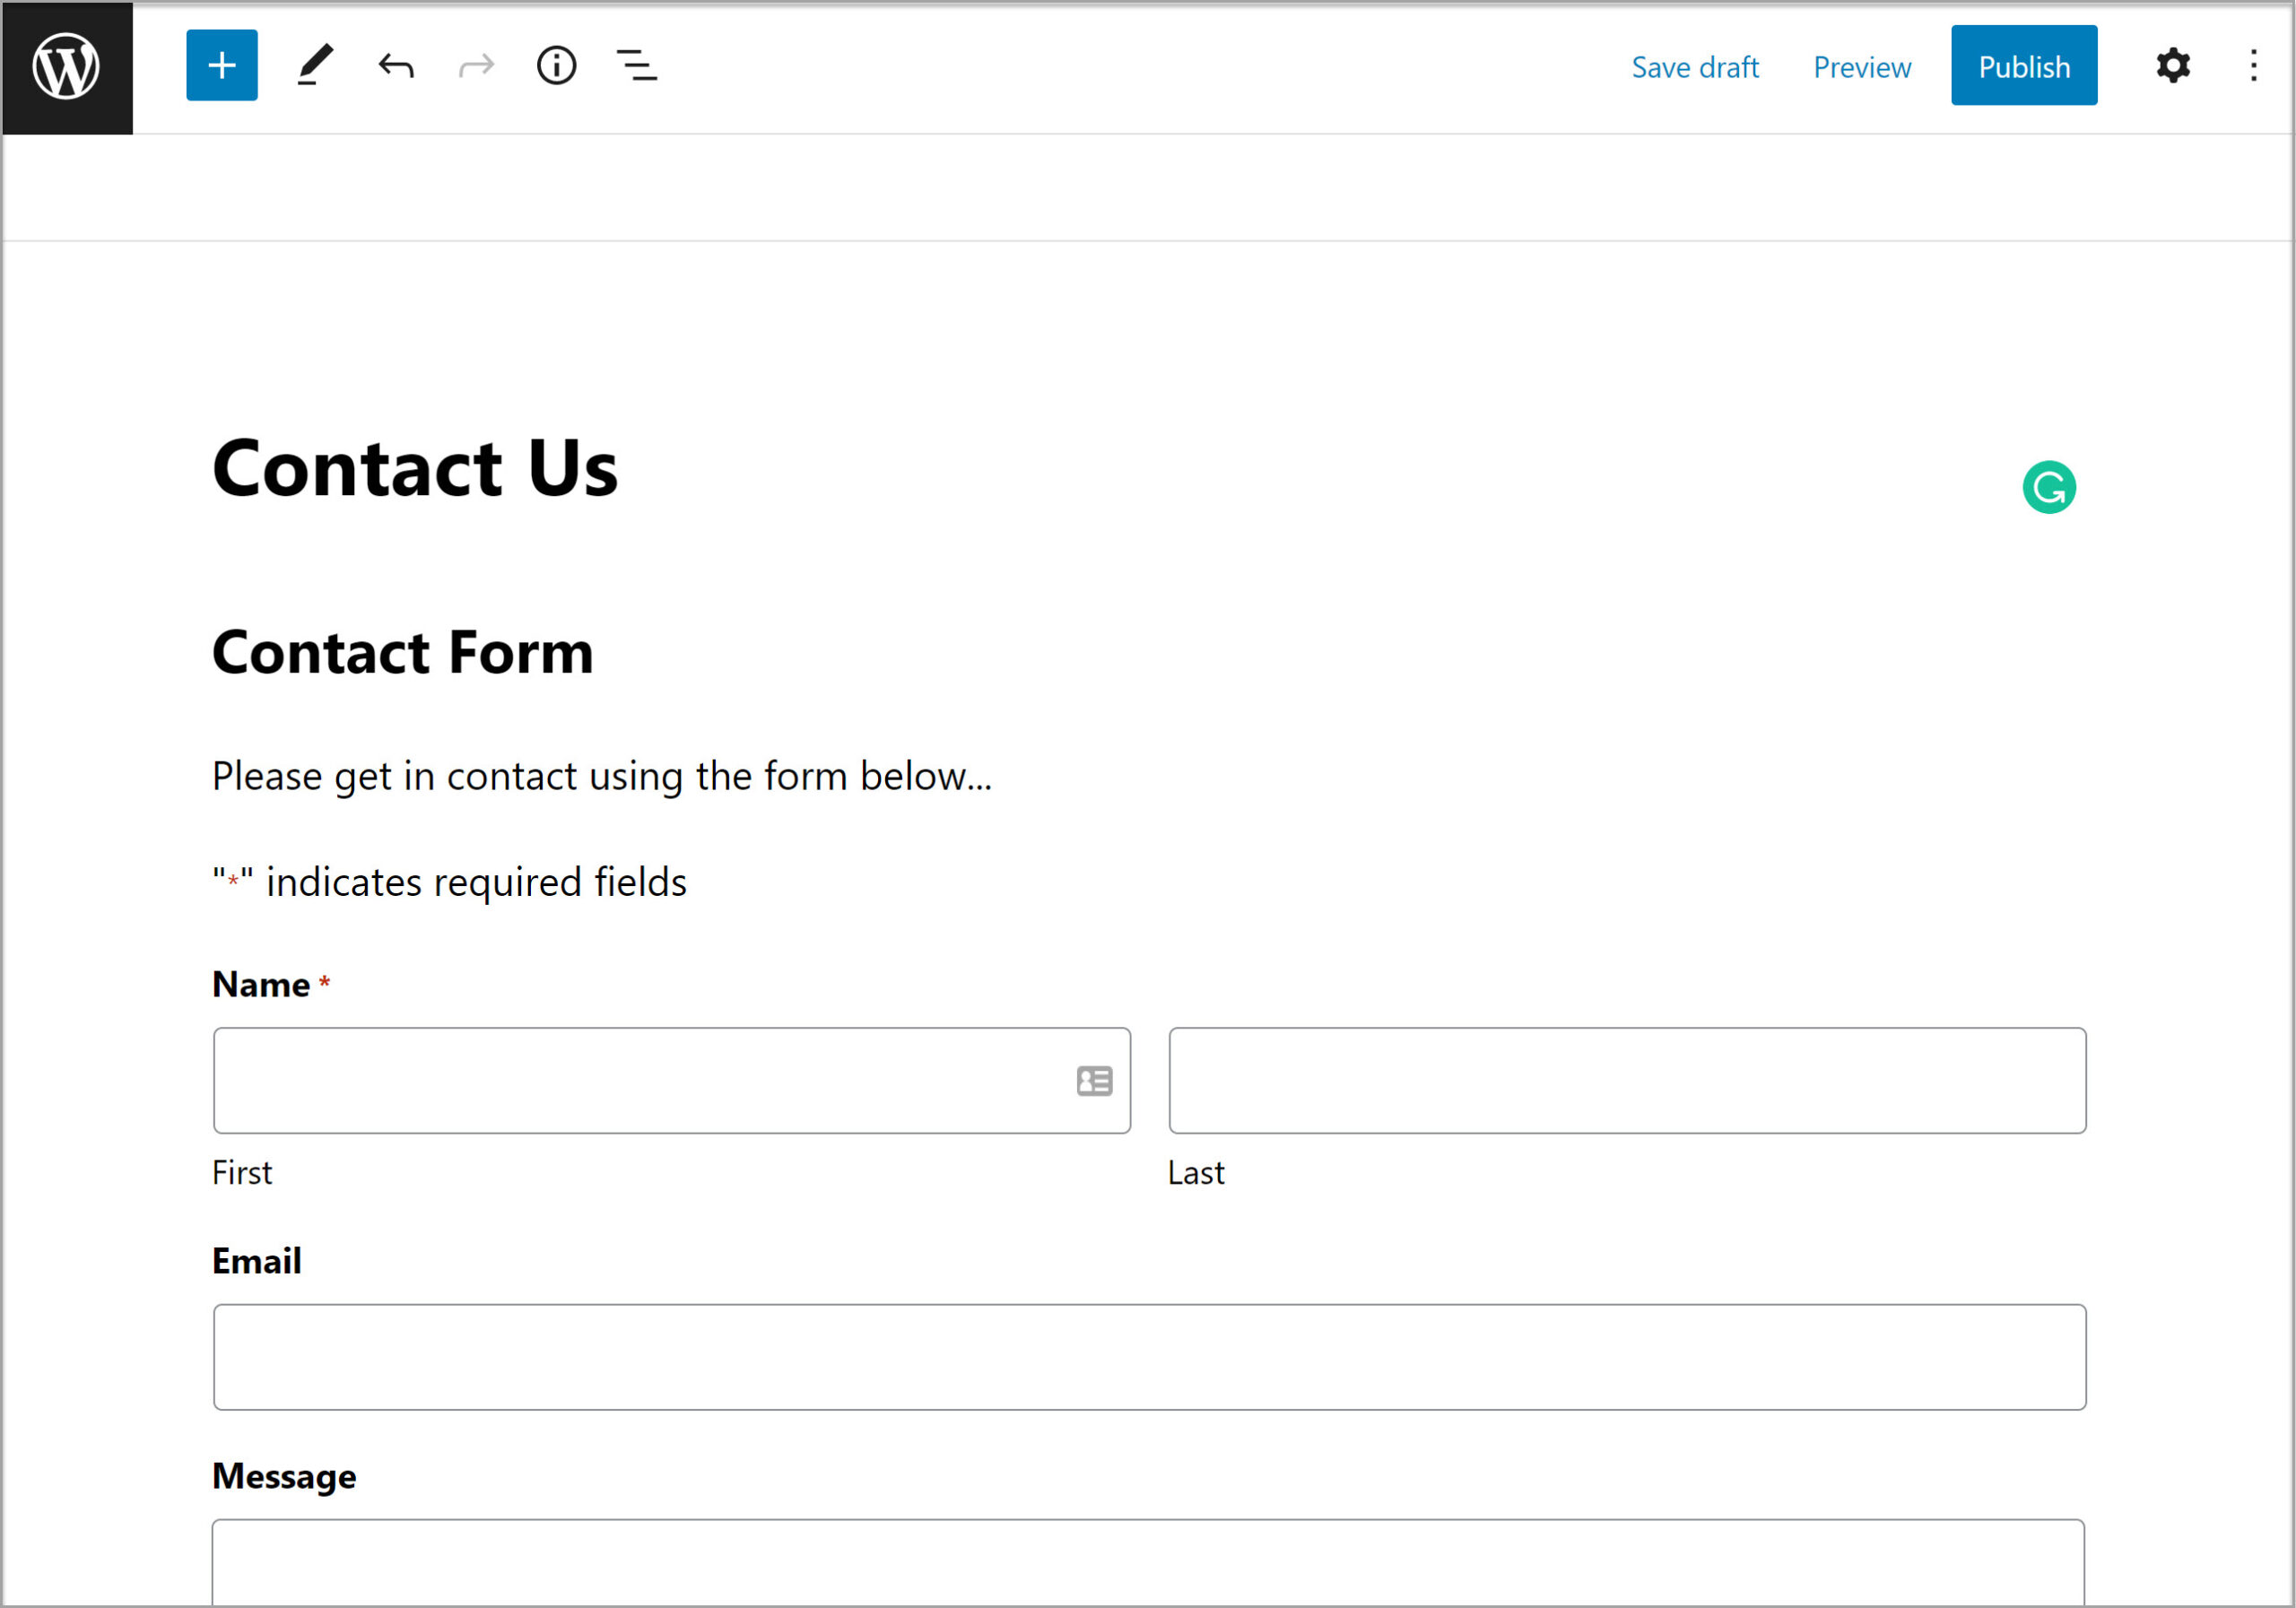
If you have chosen to create a new page or post, you will find the form automatically embedded within the Block editor.
If needed, you can use the Block Options to control how the form appears on your site. A few options include:
- Toggling the title of the form on or off
- Toggling the description of the form on or off
- Embedding the form on the front-end using AJAX, so confirmations and changes between form pages can happen without page reloads
When you’re done going through these options, save your changes and then view and publish the page. For more information on the Form Embed flyout, check out the Gravity Forms Documentation.
Don’t Have Gravity Forms Yet?
As you can see, getting started with Gravity Forms and EmailOctopus is quick and easy, and has lots of benefits!
If you’re not yet a Gravity Forms customer, don’t worry! You can take Gravity Forms for a test drive with our free personalized demo and try out all the features Gravity Forms offers. And while you’re at it, be sure to install the many Gravity Forms Add-Ons, alongside EmailOctopus, to see how you can easily extend and enhance your forms.
Already in love? Purchase our premium WordPress form plugin today!
Newsletter
If you want to keep up-to-date with what’s happening on the blog sign up for the Gravity Forms newsletter!
"*" indicates required fields