This Month’s Featured Add-On… Authorize.Net

When you sell services and products online, offering your customers a variety of payment methods is crucial. That’s why you need a robust payment gateway that supports all major credit and debit cards.
Depending on your business, you may also need a payment gateway that supports one-time and recurring payments so you can offer flexible payment terms to potential customers and clients. Enter Authorize.Net!
Gravity Forms integrates with numerous payment gateways, one of which is Authorize.Net. In this article, we’ll take a closer look at our Authorize.Net integration and the features it offers. We’ll then discuss how to create an Authorize.Net payment form and start accepting credit card payments on your WordPress.
Authorize.Net: An Introduction
Authorize.Net is a popular and secure payment processor that makes taking credit card payments on your website a quick and painless process. From selling digital or physical products online, to taking payments for your services via subscriptions, Gravity Forms and Authorize.Net have you covered. Here are a few examples of different types of payment forms you can create:
- One-time payment forms for digital or physical products
- One-time and recurring payment forms for services
- Donation forms
- Course registration and payment forms
- Event registration and payment forms
- Subscription forms for membership sites
- Restaurant order forms
With the Gravity Forms Authorize.Net Add-On, you can easily accept one-off payments for products or services, or set up recurring subscriptions for monthly memberships or ongoing work. Let’s have a look in more detail…
Accept All Major Credit Cards
You can accept both credit card and debit card payments via your forms once you install and activate the Authorize.Net Add-On. This includes Visa, AmericanExpress, MasterCard, Discover, Diners, and more. Your customers can easily choose their preferred payment method, helping to increase your Authorize.Net payment form conversion rates.
Accept One Time Payments
Authorize.Net makes it easy to accept one-time payments by capturing payments as soon as the form is submitted. This means you can easily sell services, products, tickets to events, or anything that requires a one-off payment.
Set Up Recurring Subscriptions
If you sell retainer services such as monthly copywriting, website maintenance, or any other type of ongoing service, you can set up your forms with recurring subscriptions. No more having to remember to invoice your clients at the beginning of each month. Instead, set up your forms once and let Authorize.Net handle the rest.
How To Install the Authorize.Net Add-On
Let’s next take a look at how to install and configure the Authorize.Net Add-On on your website. To get started you’ll need to have Gravity Forms installed and activated on your site.
Step 1: Install Authorize.Net Add-On
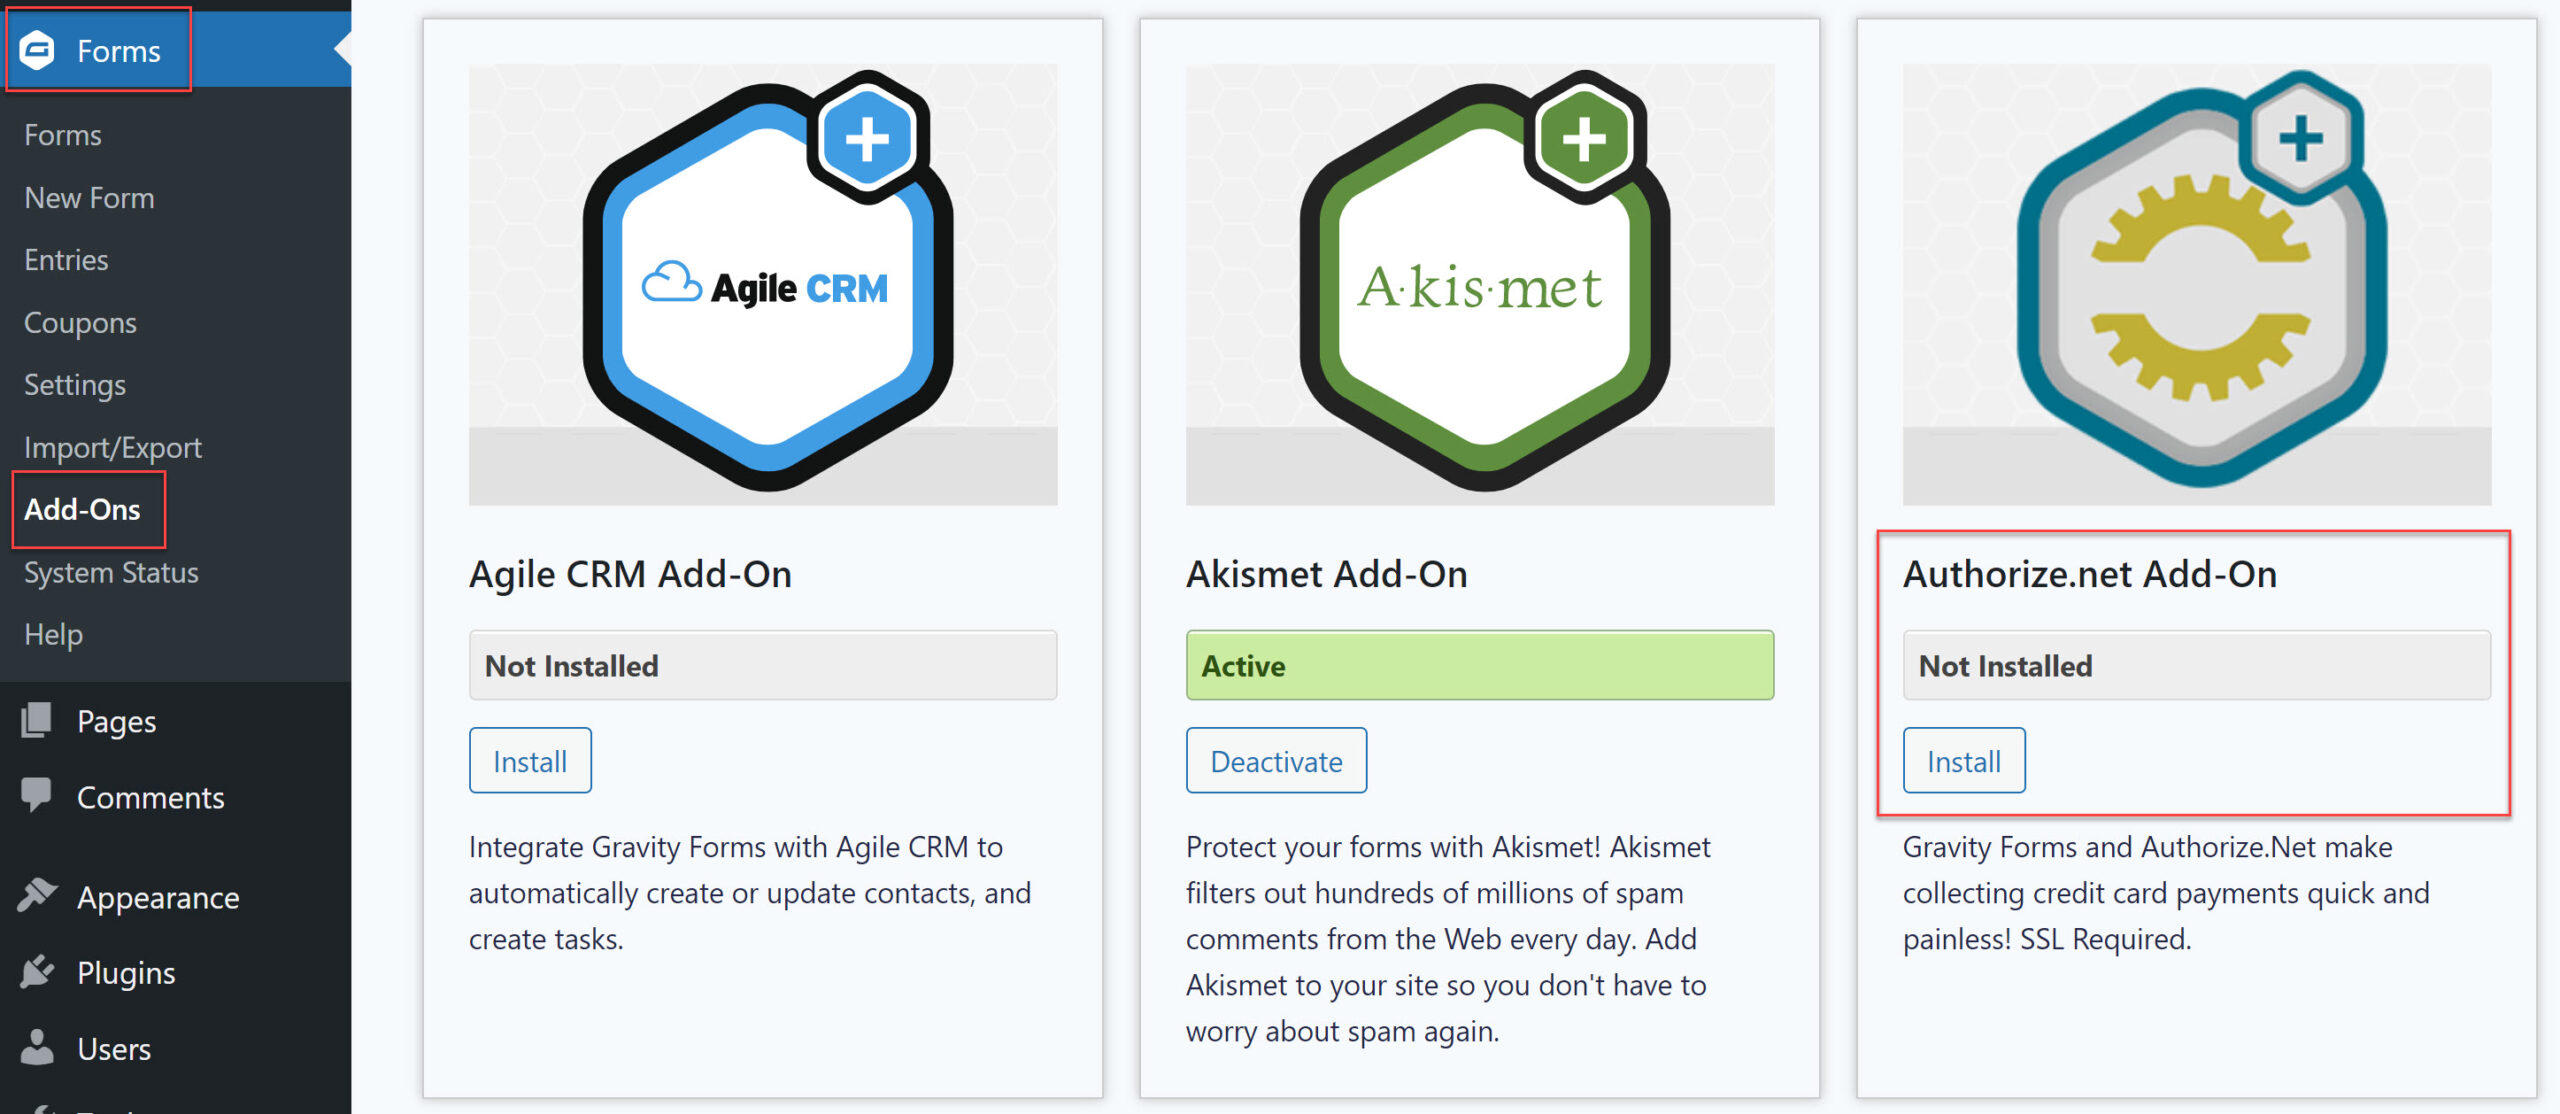
The first step is to install the Authorize.Net Add-On on your website. Log into your WordPress website and click on Forms > Add-Ons. Look for Authorize.Net and click on Install > Activate to activate the add-on.
Step 2: Configure The Authorize.Net Add-On
Once the add-on has been activated, go to Forms > Settings and click on the tab for Authorize.Net.
You’ll now need to enter your API login information to connect your website with your Authorize.Net account. Be sure to also check the ARB and Automatic Retry box if you have those options enabled in your Authorize.Net account and want to be able to use them in your forms.
The add-on makes it easy to switch between Test and Production mode. This means that during setup, you can test your Authorize.Net payment form to ensure everything is configured properly. When you’re done testing, you can simply switch to the Production mode to start accepting payments.
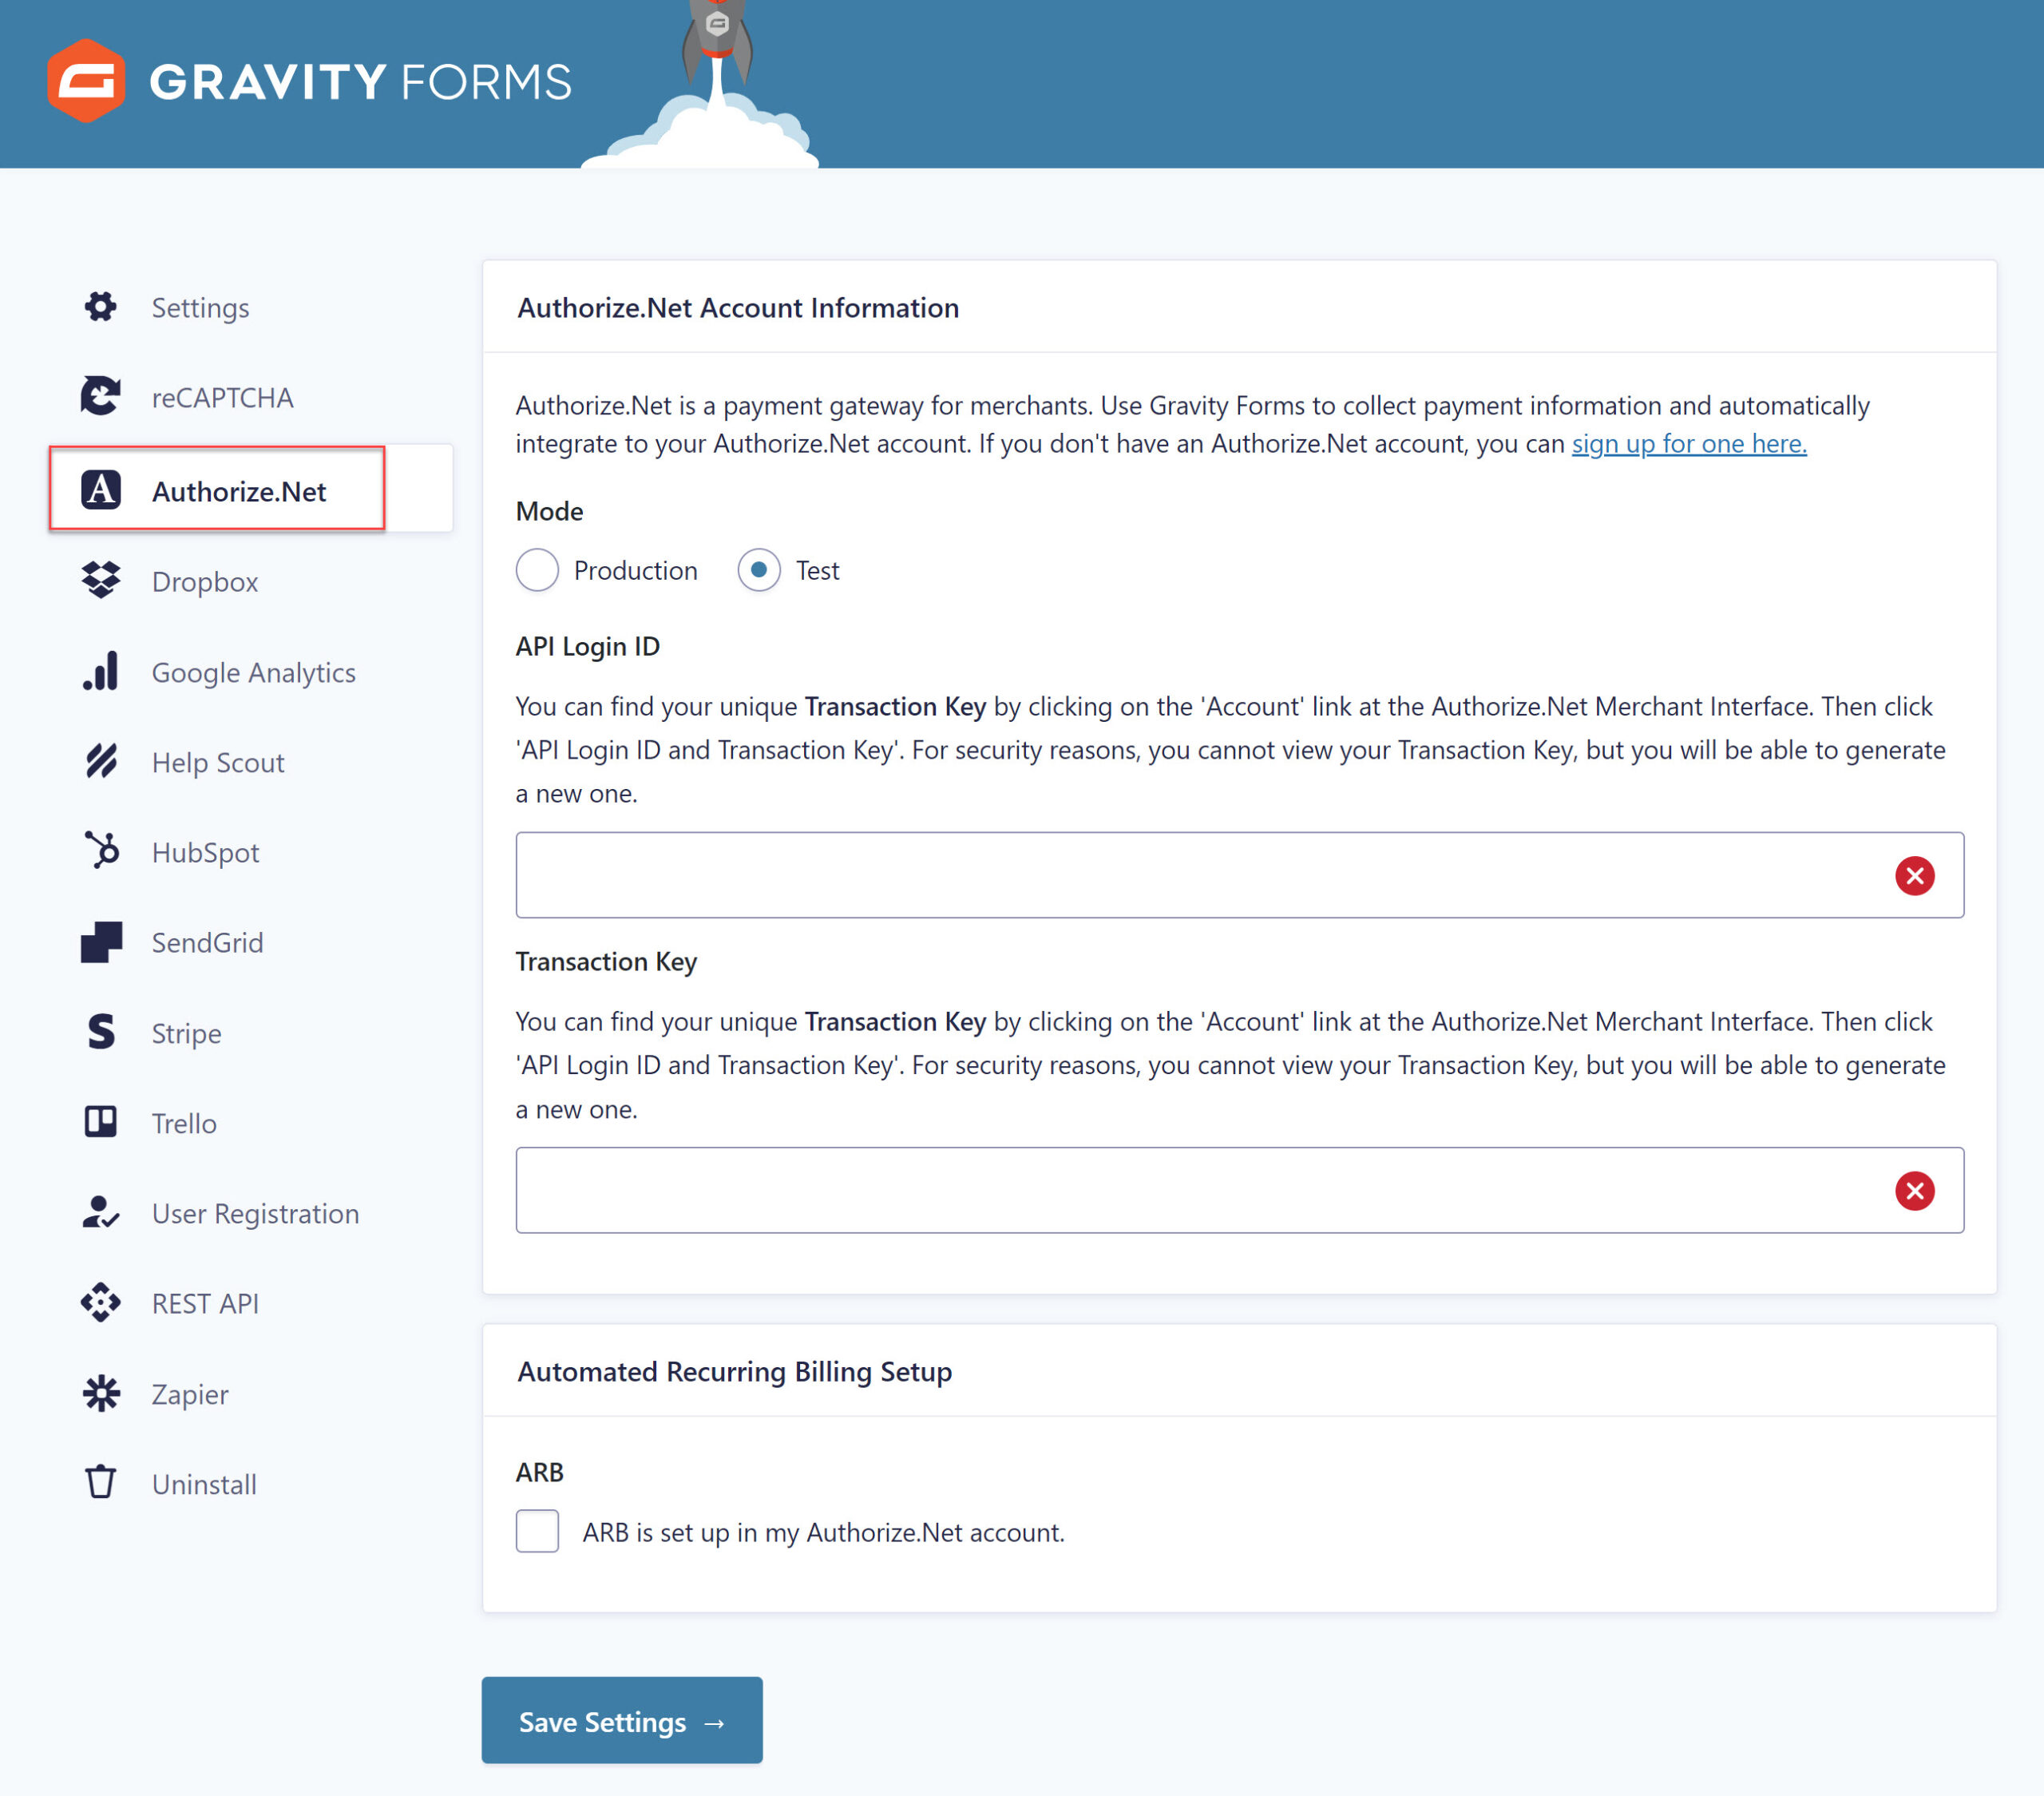
Click Save Settings – you’ll see a green checkmark next to every box if the setup was successful.
Step 3: Set Up The Payment Form
Now that the add-on has been configured, it’s time to set up the payment form. You have two options for creating the form. You can start from scratch or you can use one of our premade form templates. More specifically, you can import our eCommerce form to speed up this part of the process.
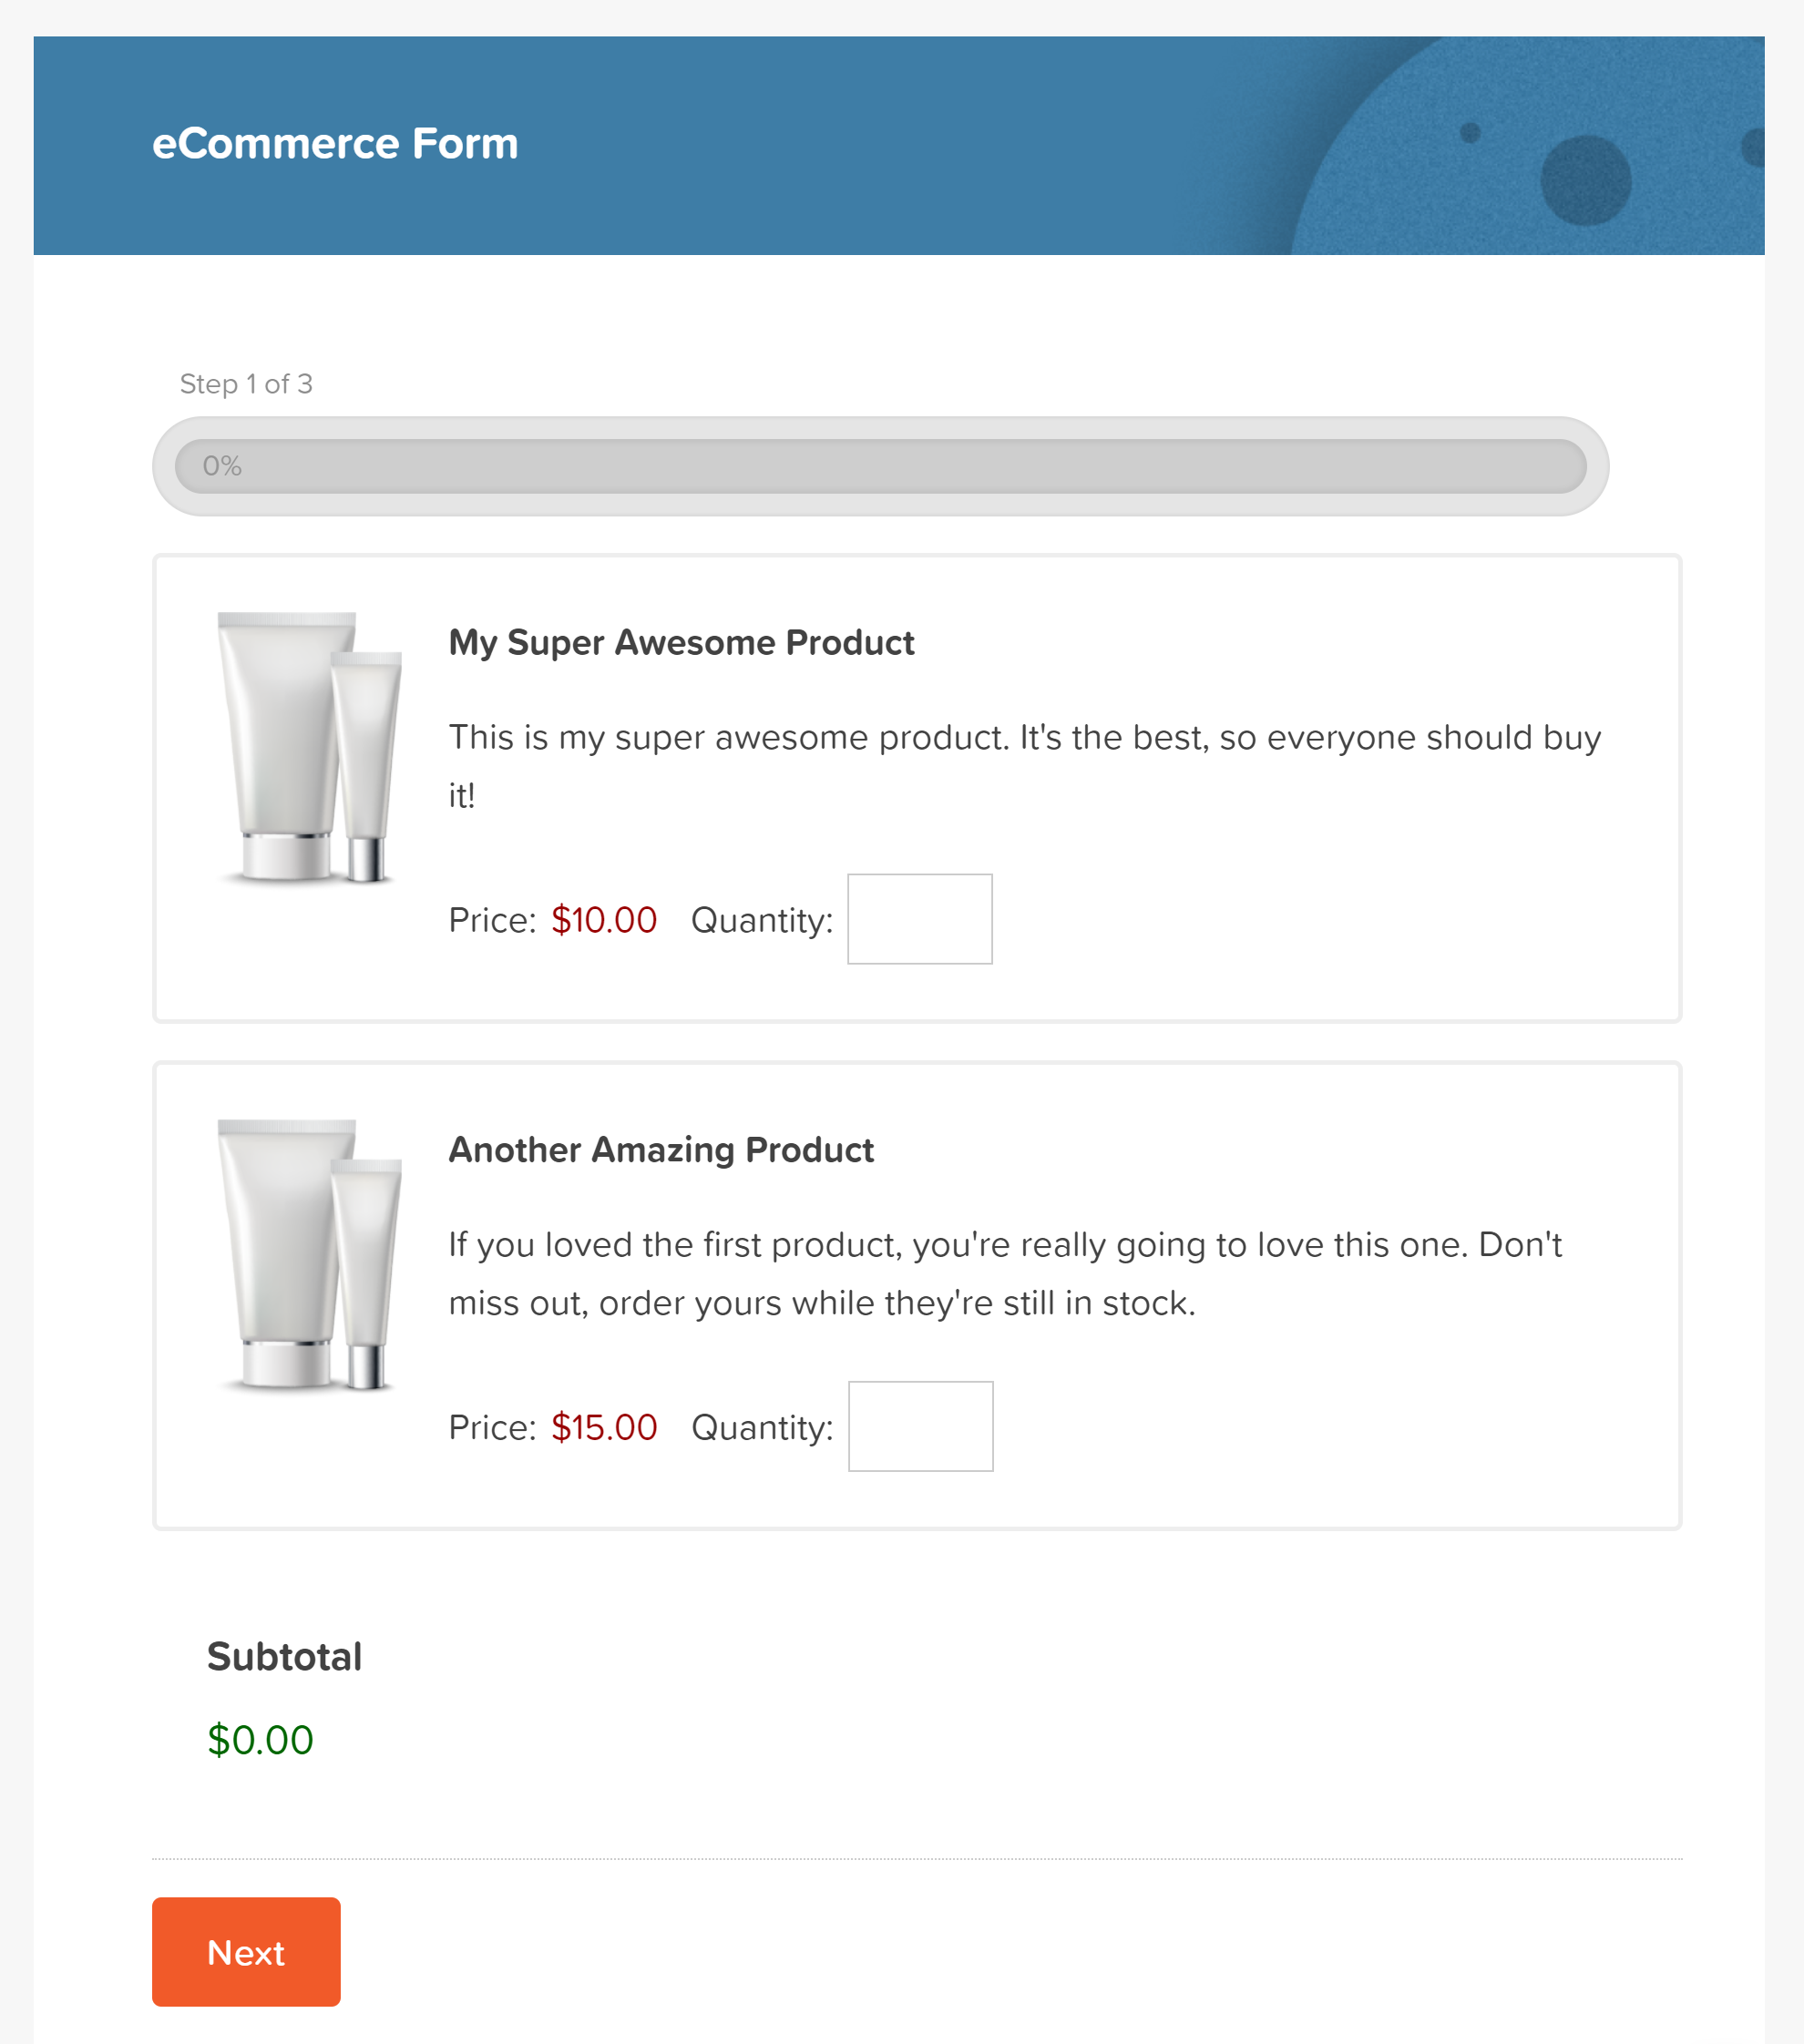
Start by visiting our form template library and locating the eCommerce form. The form will download in .json format – save it somewhere where you can easily access it.
Then, within your WordPress dashboard, go to Forms > Import/Export. Click on the Import tab and choose the downloaded form template. Press Import.
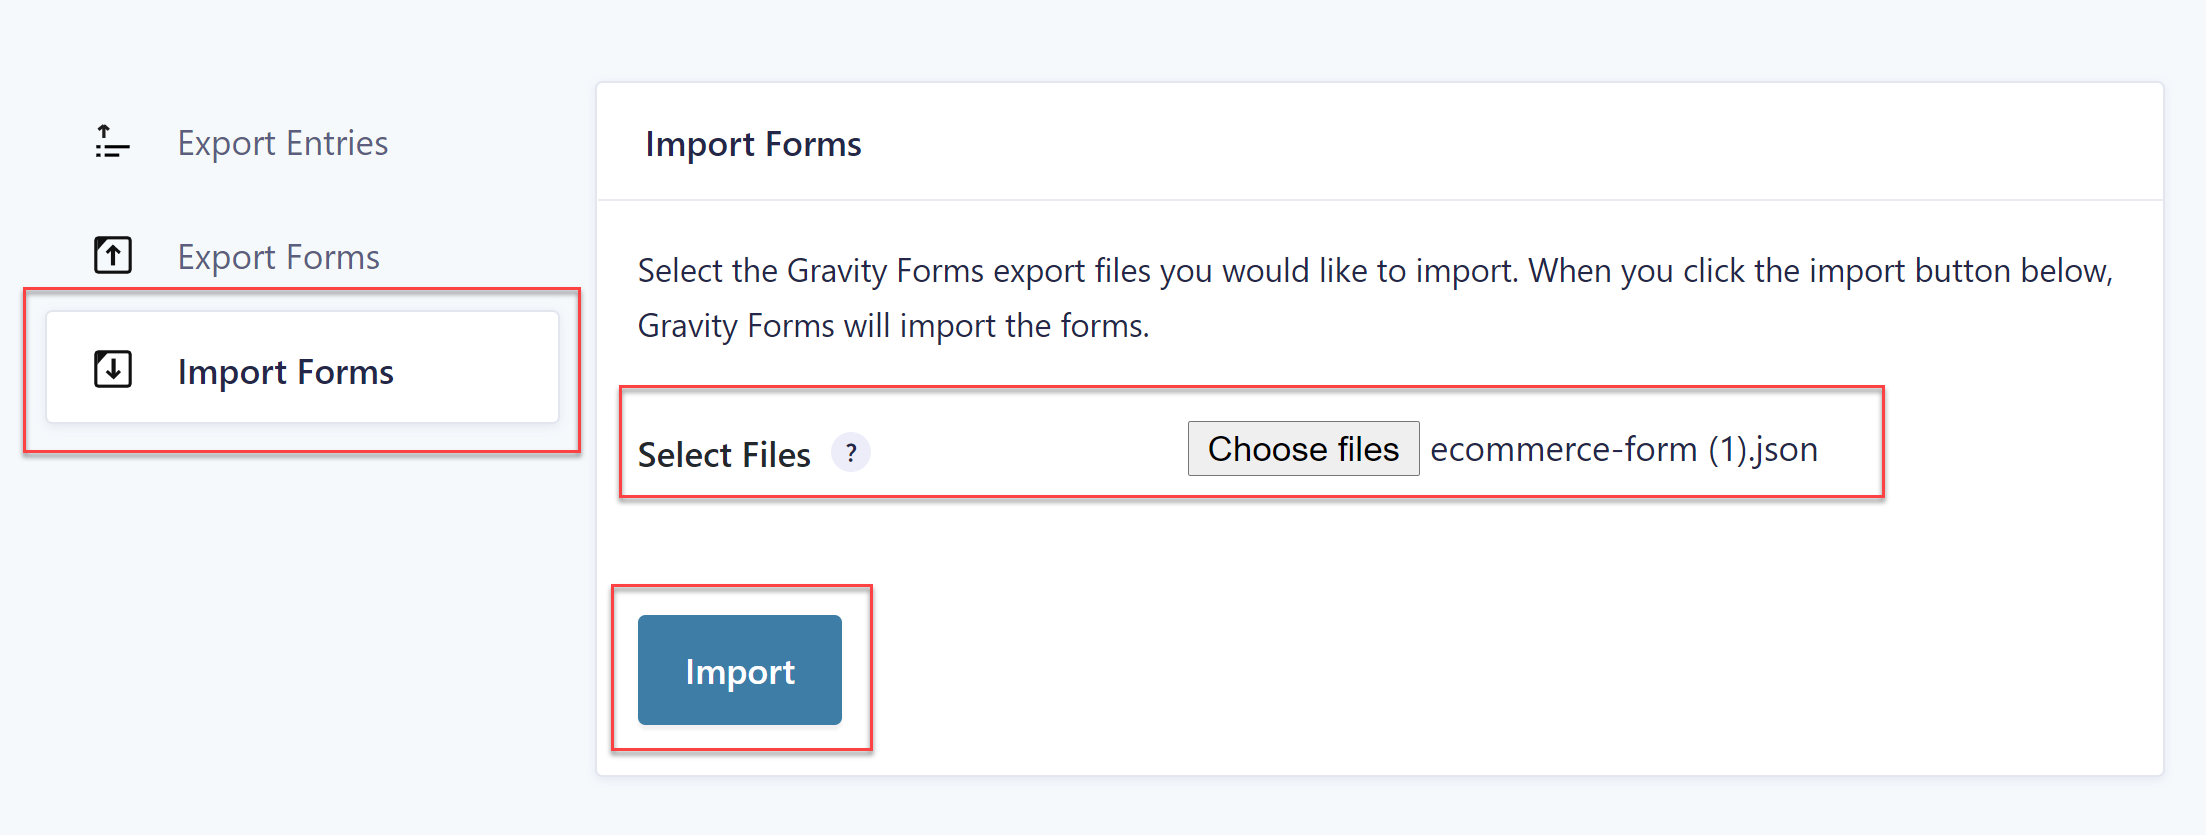
Once imported, you can customize the form with your products and add any additional fields you may need. For more information on how to create an effective eCommerce form for your website, check out this article – Starter Guide: How to Sell Products on Your WordPress Website.
Step 4: Create The Form Feed
The last step in the process is to create the feed for the Authorize.Net Add-On. Click on your payment form Settings and then click the Authorize.Net tab.
Select Add New to create a new feed. Give your feed a name and choose whether you want to configure it for products and services or subscriptions. Keep in mind that you’ll have to configure additional options, depending on the options you’ve chosen here.
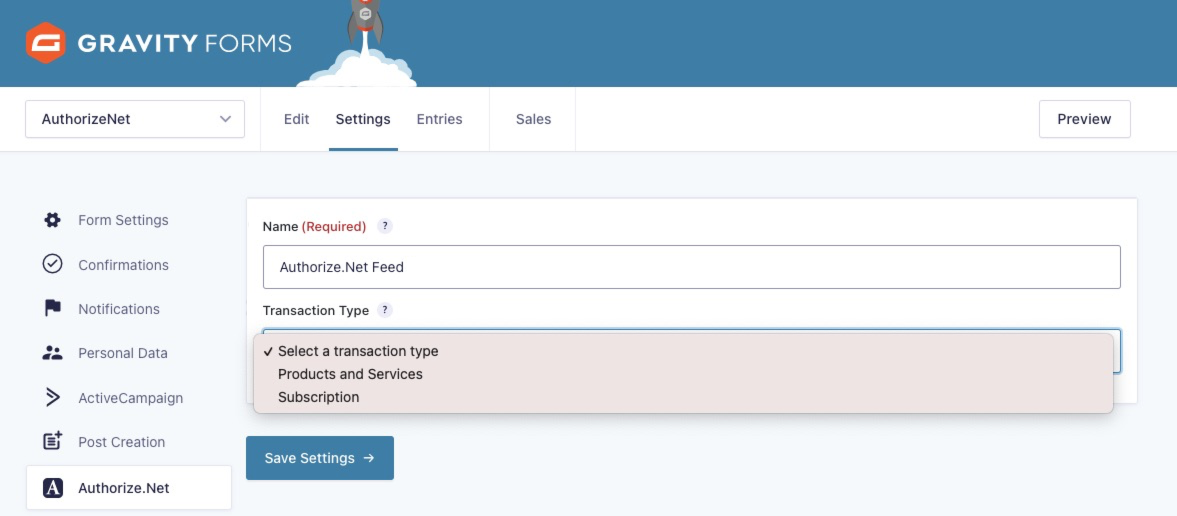
If you choose products or services, you’ll need to select the correct Product Field from the drop-down menu, so the customer is charged the correct amount on form submission. If you choose the subscription option, you’ll also need to configure the billing cycle, how many times the payment should recur, and whether the subscription comes with a free trial or a setup fee.
Lastly, under Other Settings, you’ll need to configure the billing information and make sure that the forms fields are mapped correctly. There is also the option to configure the add-on to send a receipt to the customer. When you’re done, click Save at the bottom of the section.
For more information on how to set up the Authorize.Net form feed, check out this article in the Gravity Forms Documentation.
Extra Requirements For The Authorize.Net Add-On
It’s worth mentioning that you will need to ensure that your website meets additional requirements:
- You’ll need to have an SSL certificate installed and configured on your website.
- You’ll also need the PHP cURL extension installed on your server. This will facilitate communication with Authorize.Net. If you need help setting this up, get in touch with your web host.
Ready To Create an Authorize.Net Payment Form?
Accepting payments on your WordPress website is easy with Gravity Forms and the Authorize.Net Add-On. These resources will help you learn more about creating an Authorize.Net payment form on your website:
- The Ultimate Guide to Taking Payments on Your WordPress Website
- Authorize.Net Add-On Official Docs
- Authorize.Net Add-On v2.11 Update
If you don’t have Gravity Forms or the Authorize.Net Add-On, don’t worry. You can still test out everything in this article for free inside your own personalized Gravity Forms demo and see why Gravity Forms is the top choice for WordPress sites worldwide.
Already sold on using Gravity Forms? Purchase our premium WordPress form plugin today!

If you want to keep up-to-date with what’s happening on the blog sign up for the Gravity Forms newsletter!
