

Gravity Forms is more than just a forms plugin. It’s a comprehensive contact, engagement and lead generation tool. What’s more, you can expand it to serve lots of additional functions.
But that level of functionality comes with a challenge for users. When there’s so much that can be done with a tool, users aren’t likely to learn everything about it. So they need a resource to look up what they don’t know.
That’s exactly what we’ve built for Gravity Forms. In fact, our documentation is more robust than what most other form builders offer.
Gravity Forms Documentation includes everything you could ever need to know about Gravity Forms. We’ve painstakingly documented every feature, setting and interface to help you get the most value out of the plugin. We even explain how to build your own Gravity Forms features to make our plugin meet your specific needs.
In this post, we’d like to go over a few ways you can use our documentation to launch advanced forms. We strongly encourage you to at least browse the guides we link to in this post to understand the breadth of what Gravity Forms can do.
Add-Ons
Gravity Forms is a powerful plugin on its own, but you can greatly extend its functionality by activating one or several of our versatile add-ons. Add-Ons are one of the ways we distinguish ourselves from other freemium form plugins.
What can you do with Gravity Forms Add-Ons?
You can pass form submission data to your favorite third party services. Use our MailChimp Add-On to build your email list, our Dropbox Add-On to allow users to upload files to your Dropbox account, or our Trello Add-On to turn form submissions into tasks for you and your team.
You can collect payments through popular payment processors with our Stripe Add-On, our Authorize.net Add On, or one of our PayPal Add-ons: PayPal Payments Standard Add-On or PayPal Payments Pro Add-On.
Most importantly, you can use Add-Ons to extend what Gravity Forms can do. Use our Quiz Add-On to quickly create quizzes that are automatically graded or scored when the form is submitted, our Survey Add-On to collect and analyze data from your users, or our User Registration Add-On to let users create their own accounts on your WordPress site.
These are just a few of the tools you can combine with Gravity Forms. See our Add-On list to browse the whole library.
The best part is that you don’t have to figure things out on your own. We’ve created robust instructions that take you through the entire process of installing, setting up and using each Add-On. See our Add-On documentation for more information.
Conditional Logic
Your users don’t want to spend their time answering questions that don’t apply to their specific circumstances. In fact, irrelevant fields on forms can strain the user experience and ultimately diminish conversions.
Conditional logic is a tool to create dynamic fields that respond to inputs. Your forms can automatically update upcoming fields depending on user responses.
Here’s an example: you want to ask a user a few questions about their company, but not if they’re a solo freelancer. You could use conditional logic by first asking for the size of their company. If they answer anything other than “one,” conditional logic would display additional questions. This way people who work alone will skip fields that don’t apply.
This is a powerful way to shorten your forms and personalize them to each user. Since no one is forced to wade through irrelevant fields, they’ll have a user-friendly experience and complete their form faster.
Conditional logic seems complex, but it’s actually quite simple. Each Gravity Forms form field has a checkbox called Enable Conditional Logic. Some options appear when you click the box.
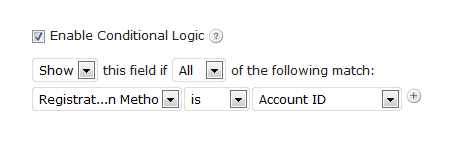
Use the conditional logic options to create a rule that dynamically displays or hides the field based on values from another field.
Learn how to use this feature and see a detailed example in our conditional logic documentation.
Save and Continue
If you create large forms, you should definitely enable save and continue functionality. This tool lets users save whatever they’ve completed on a form and come back when they’re ready, rather than starting over again.
How does it work? When a user clicks the Save button, Gravity Forms creates a special link and presents it to the user. When the user clicks that link at a later date, they’re taken back to their partially filled form. Links expire after 30 days by default (but that can be changed with a filter)
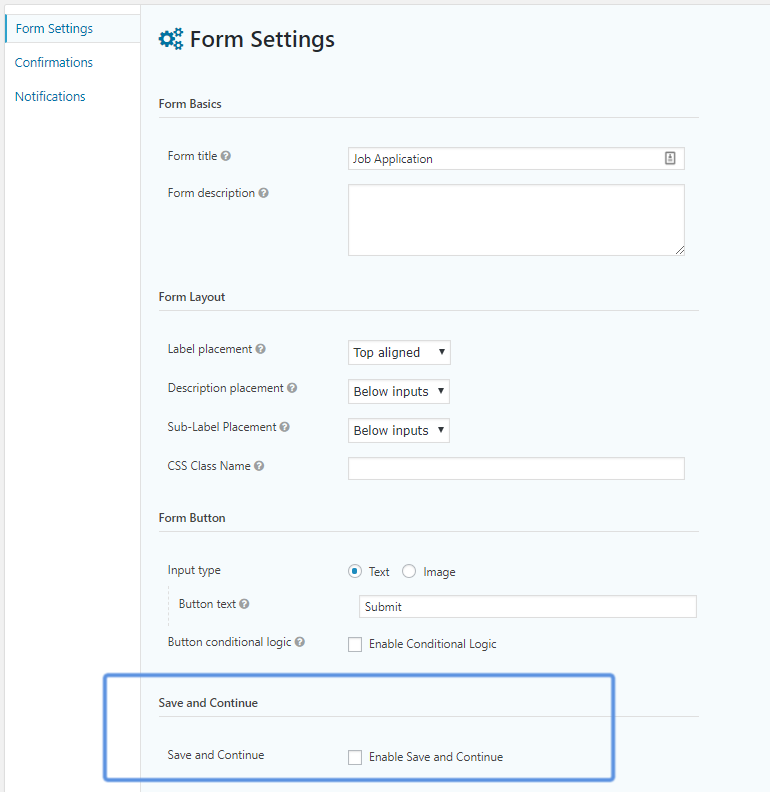
You have to enable Save and Continue on each form in the Form Settings tab.
What happens if they lose the link? We thought of that too! You can include a special merge tag in confirmations (on-page messages) and notifications (emailed messages) so users have multiple ways of accessing their saved form. Notification emails are especially useful so users have the link in their inbox all the time.
Read our Save and Continue documentation to set it up on your site.
File Uploads
Advanced forms often require additional documents from users. For instance, a job application form would require a resume and/or cover letter. A survey form might ask users to submit screenshots of their problems.
So it’s important to have the option to let your users upload files to your WordPress site. In Gravity Forms, that happens through the File Upload field.

Unlike other form plugins, our file upload field comes with multiple settings. You can limit the types and sizes of files you accept. You can also let users upload multiple files.
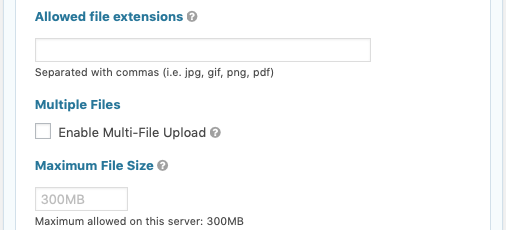
To learn how to enable and set up this field, read our file upload documentation.
API and Hooks
Our goal with Gravity Forms is to create a comprehensive tool that works in whatever way you need it to. We want Gravity Forms to be flexible so it will fit into your workflow and process. We don’t want to force you to change the way you work because Gravity Forms doesn’t have the functionality you need.
That’s why we built an extensive developer API for Gravity Forms. You can use it to extend Gravity Forms’ functionality any way you like.
Our PHP API has tools for you to access Gravity Forms when you’re developing in the same site/server as Gravity Forms. You could manipulate core data (like entries, forms, notifications and confirmations), create a new type of field, or make a custom Add-On.
Our REST API provides endpoints that lets users create interactions between Gravity Forms and external clients, like Javascript, mobile apps or web apps.
We also have an extensive list of action hooks, filters and Javascript hooks you can use to modify almost any aspect of Gravity Forms’ default functionality. You can use these to perform actions and modify data.
If you’re a developer, we strongly encourage you to read through our developer documentation.
Multi-Page Forms
Long forms tend to overwhelm users. In fact, the most effective way to optimize your forms for conversions is to make them shorter.
But sometimes you don’t have any choice but to create a long form. In these cases, it’s best to split your form across multiple pages so users aren’t intimidated when they see it.
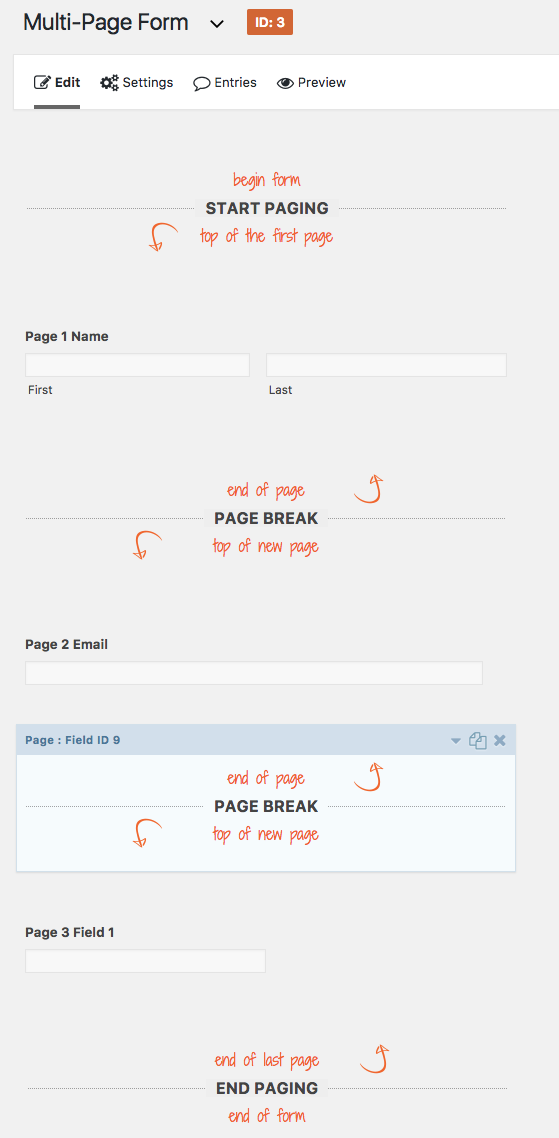
In Gravity Forms, spreading a form across multiple pages is remarkably simple. You set it up right in the form editor using the Page Field.
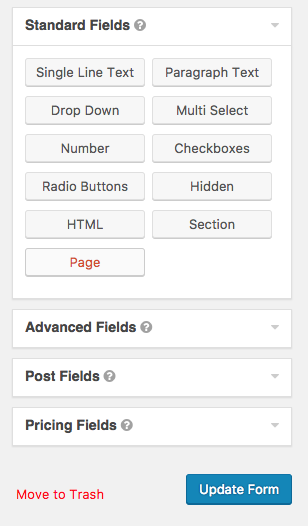
When you click the Page Field, three elements will appear in your form editor: A Beginning Page, an Ending Page and a Page Break. The first two elements are locked, but you can drag the Page Break around to wherever you want your form to break. Click the Page Field again to add additional breaks.
Read our page break documentation to learn more about setting up multi-page forms.
Build Forms That Meet Your Needs
We’ve shown you just a few ways to use our documentation to create advanced forms in Gravity Forms, but this list certainly isn’t exhaustive. Make full use of our form fields and library of Add-Ons to build the form that meets your specific needs.
Have you created a unique form? Share it with us! We love to see what our users create. 🙂


