Taking online payments via your WordPress website is a must for many businesses. With Gravity Forms, you can easily create an online order form, allowing you to accept payments for your products and/or services.
In this article, we run through some of the benefits of using Gravity Forms to accept payments on your WordPress website and which industries should consider using this form plugin. We then discuss how to create an order form, providing step-by-step instructions so you can start growing your revenue today!
Let’s begin…
Gravity Forms for Payments

Gravity Forms is an extremely popular and powerful WordPress plugin that supports a diverse range of customers and needs. Due to Gravity Forms’ advanced features and extensive integrations, the potential of what you can do with the plugin is limitless.
One of the plugin’s most popular use cases is accepting online payments. With Gravity Forms you can easily create online order forms, allowing you to accept payments for products and services directly on your WordPress website.
So who can benefit from using Gravity Forms? Here are just a few industries that should consider using an order form…
- Online Services – Web agencies and freelancers often keep their services all online, never meeting face to face. Add a payment form to your website to make online payments part of your client workflow.
- eCommerce – Whether you’re selling physical or digital products online, you’ll need an effective order form to collect the payments.
- Health Industry – If you run a gym, yoga studio, or you are a personal trainer, then providing an online booking and payment option makes the customer experience that bit smoother.
- Restaurants and Cafes – Make it easy for your customers to order directly on your website by adding a user-friendly order form.
- In-Person Services – Are you a piano teacher, a therapist, or any other type of professional that offers a face-to-face service? Streamline your payment system and let Gravity Forms help you to collect the payments.
Due to Gravity Forms’ advanced functionality, you can create complex forms that match the exact needs of your business. However, rest assured that the intuitive drag-and-drop visual form editor lends itself to a frustration-free design process. Gravity Forms also has an impressive security track-record, making it a best fit with any professional business that deals with customer data.
Gravity Forms is well-positioned to support a wide assortment of businesses and industries grow their revenue. So let’s now find out how to use Gravity Forms to turn your site into an online store…
How to Start Selling Online with Gravity Forms
Setting up Gravity Forms on your WordPress website is a quick and straightforward process. Whether you want to sell products or services, this initial start-up procedure will apply to all websites…
Step 1: Install Gravity Forms on Your WordPress Website
Gravity Forms is a premium plugin, so before you can install it on your site you will need to hop over to the Gravity Forms pricing page and make a purchase.
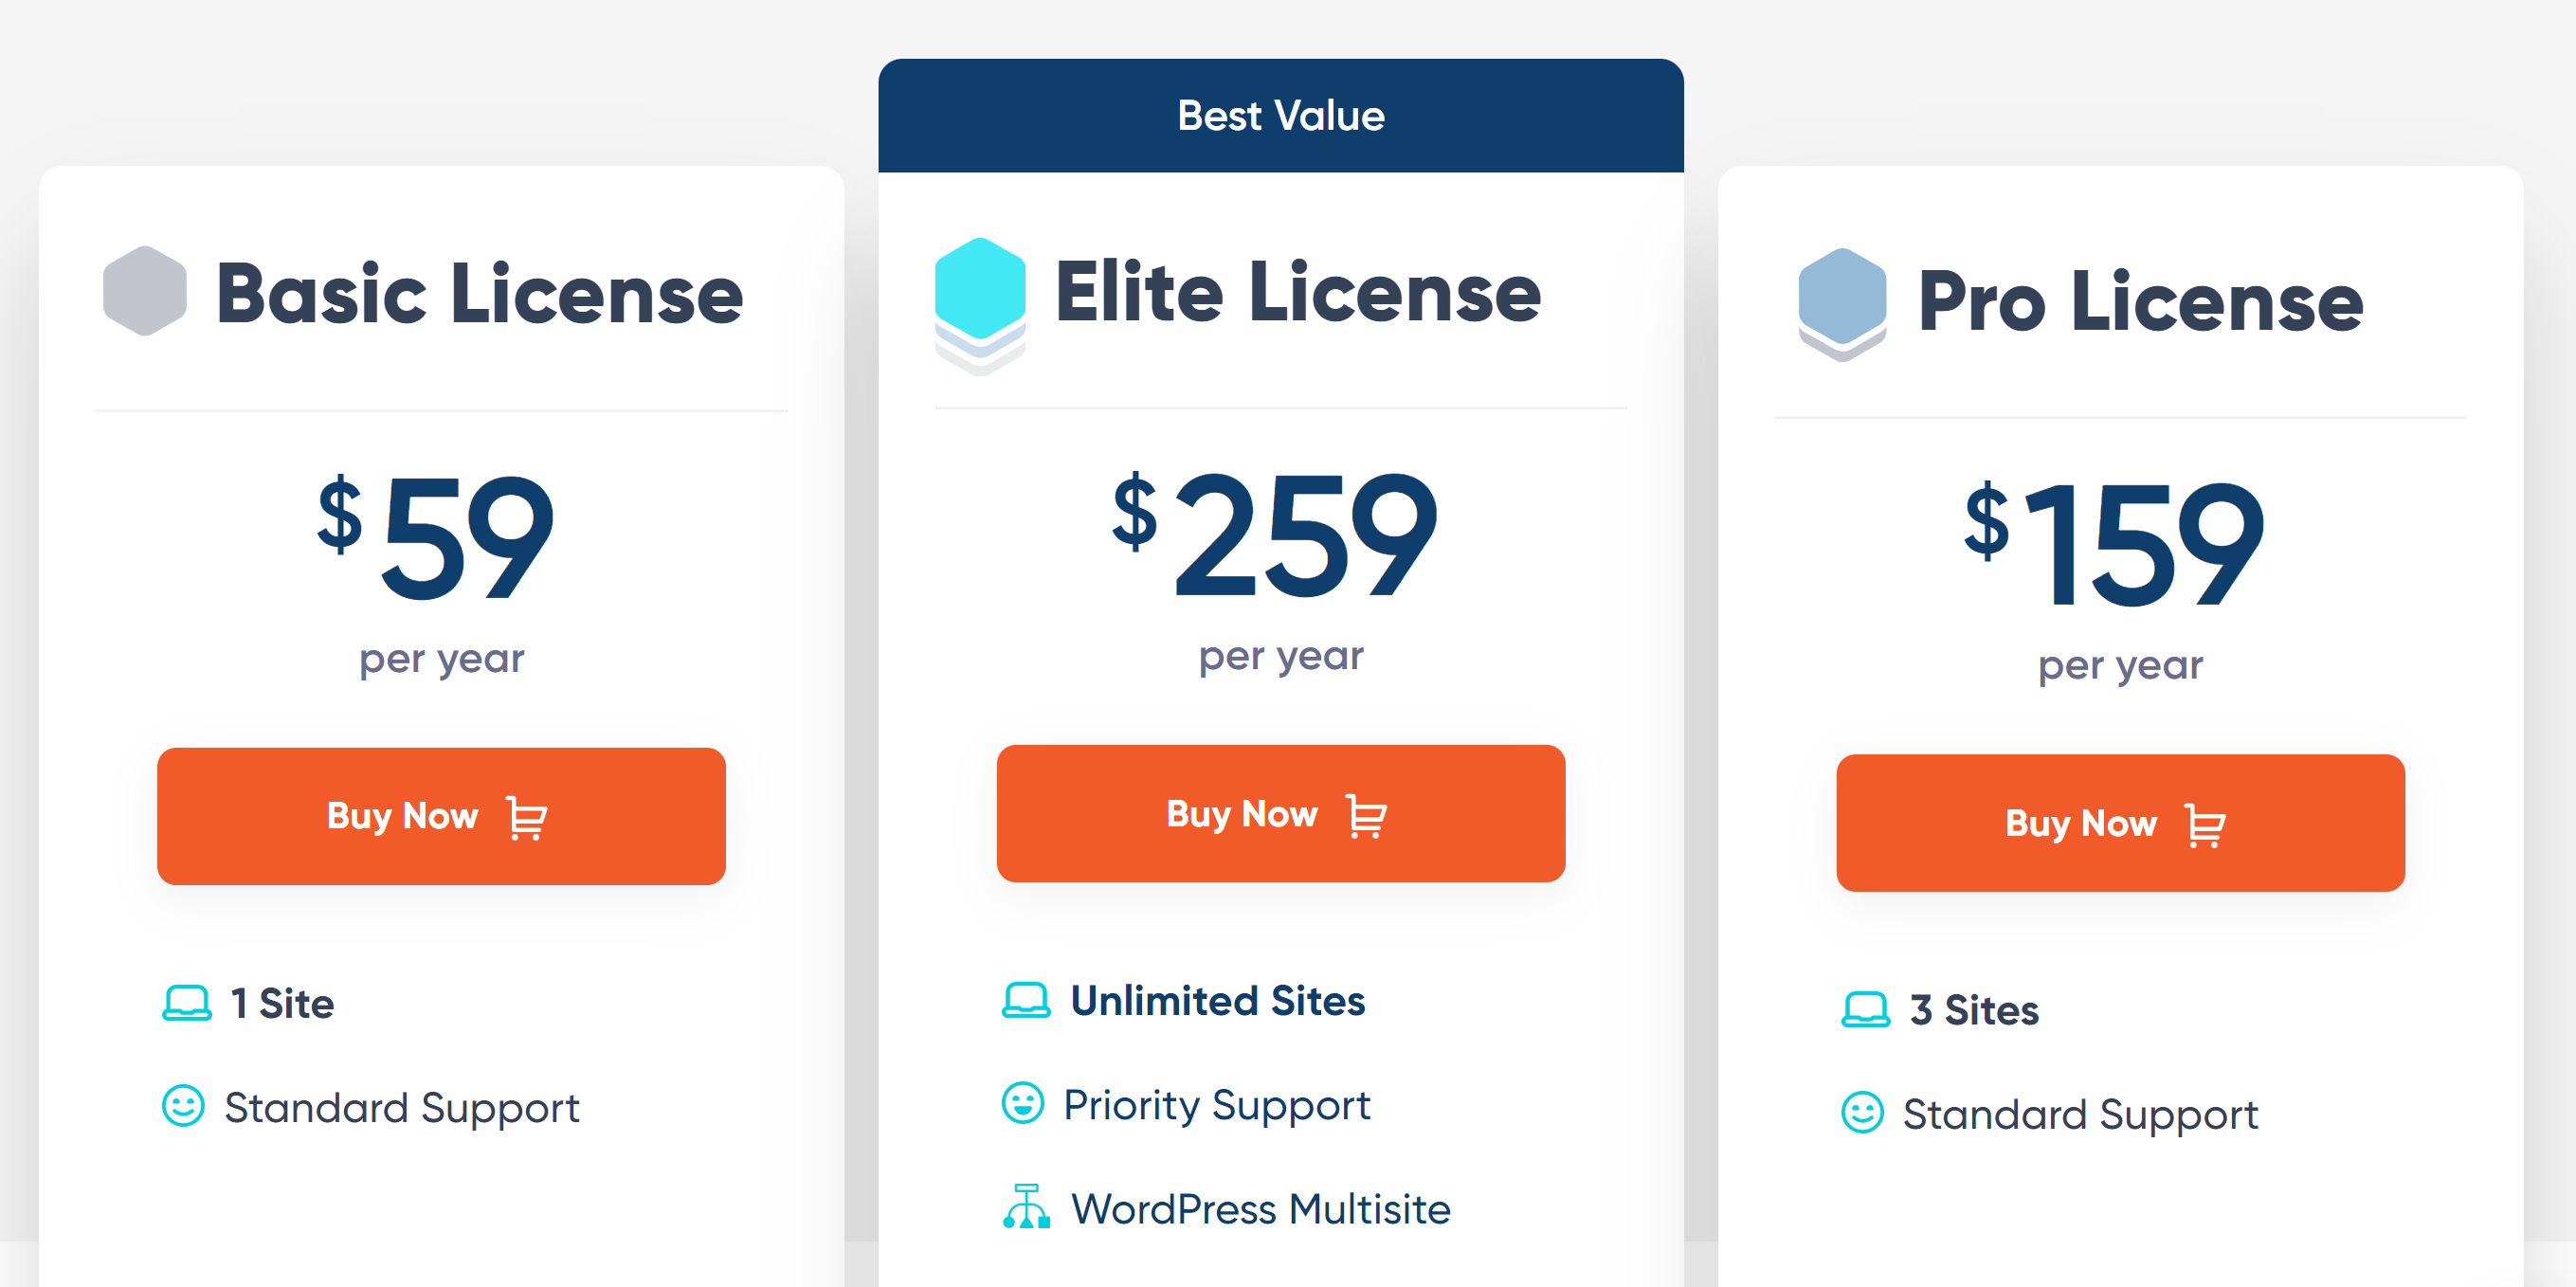
It is important to note that payment processor integration is not available with the Gravity Forms Basic license. Depending on the payment gateway you would like to use, you will need to purchase either an Elite or Pro package.
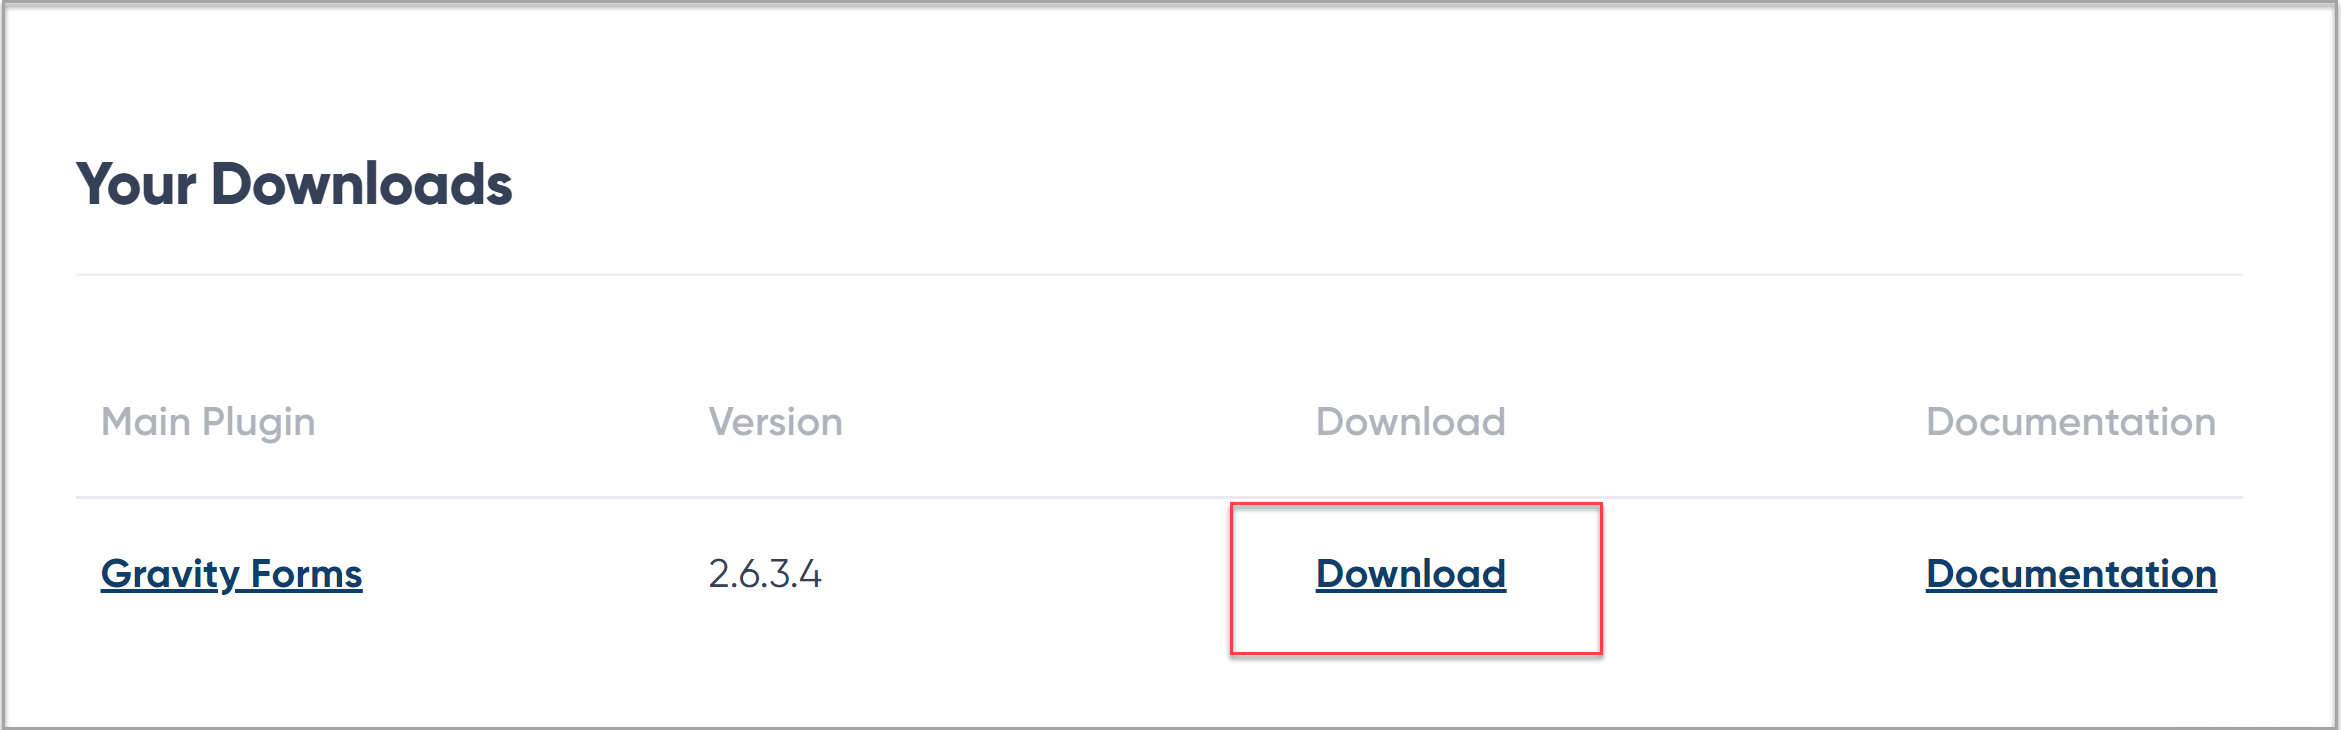
After you have made a purchase, the plugin can be downloaded directly from your Gravity Forms account dashboard and then uploaded to your WordPress website. You will then need to enter the license key to validate your installation of Gravity Forms.
Gravity Forms provides in-depth documentation to support the plugin, so if you need any help with the installation process check out this Getting Started Guide.
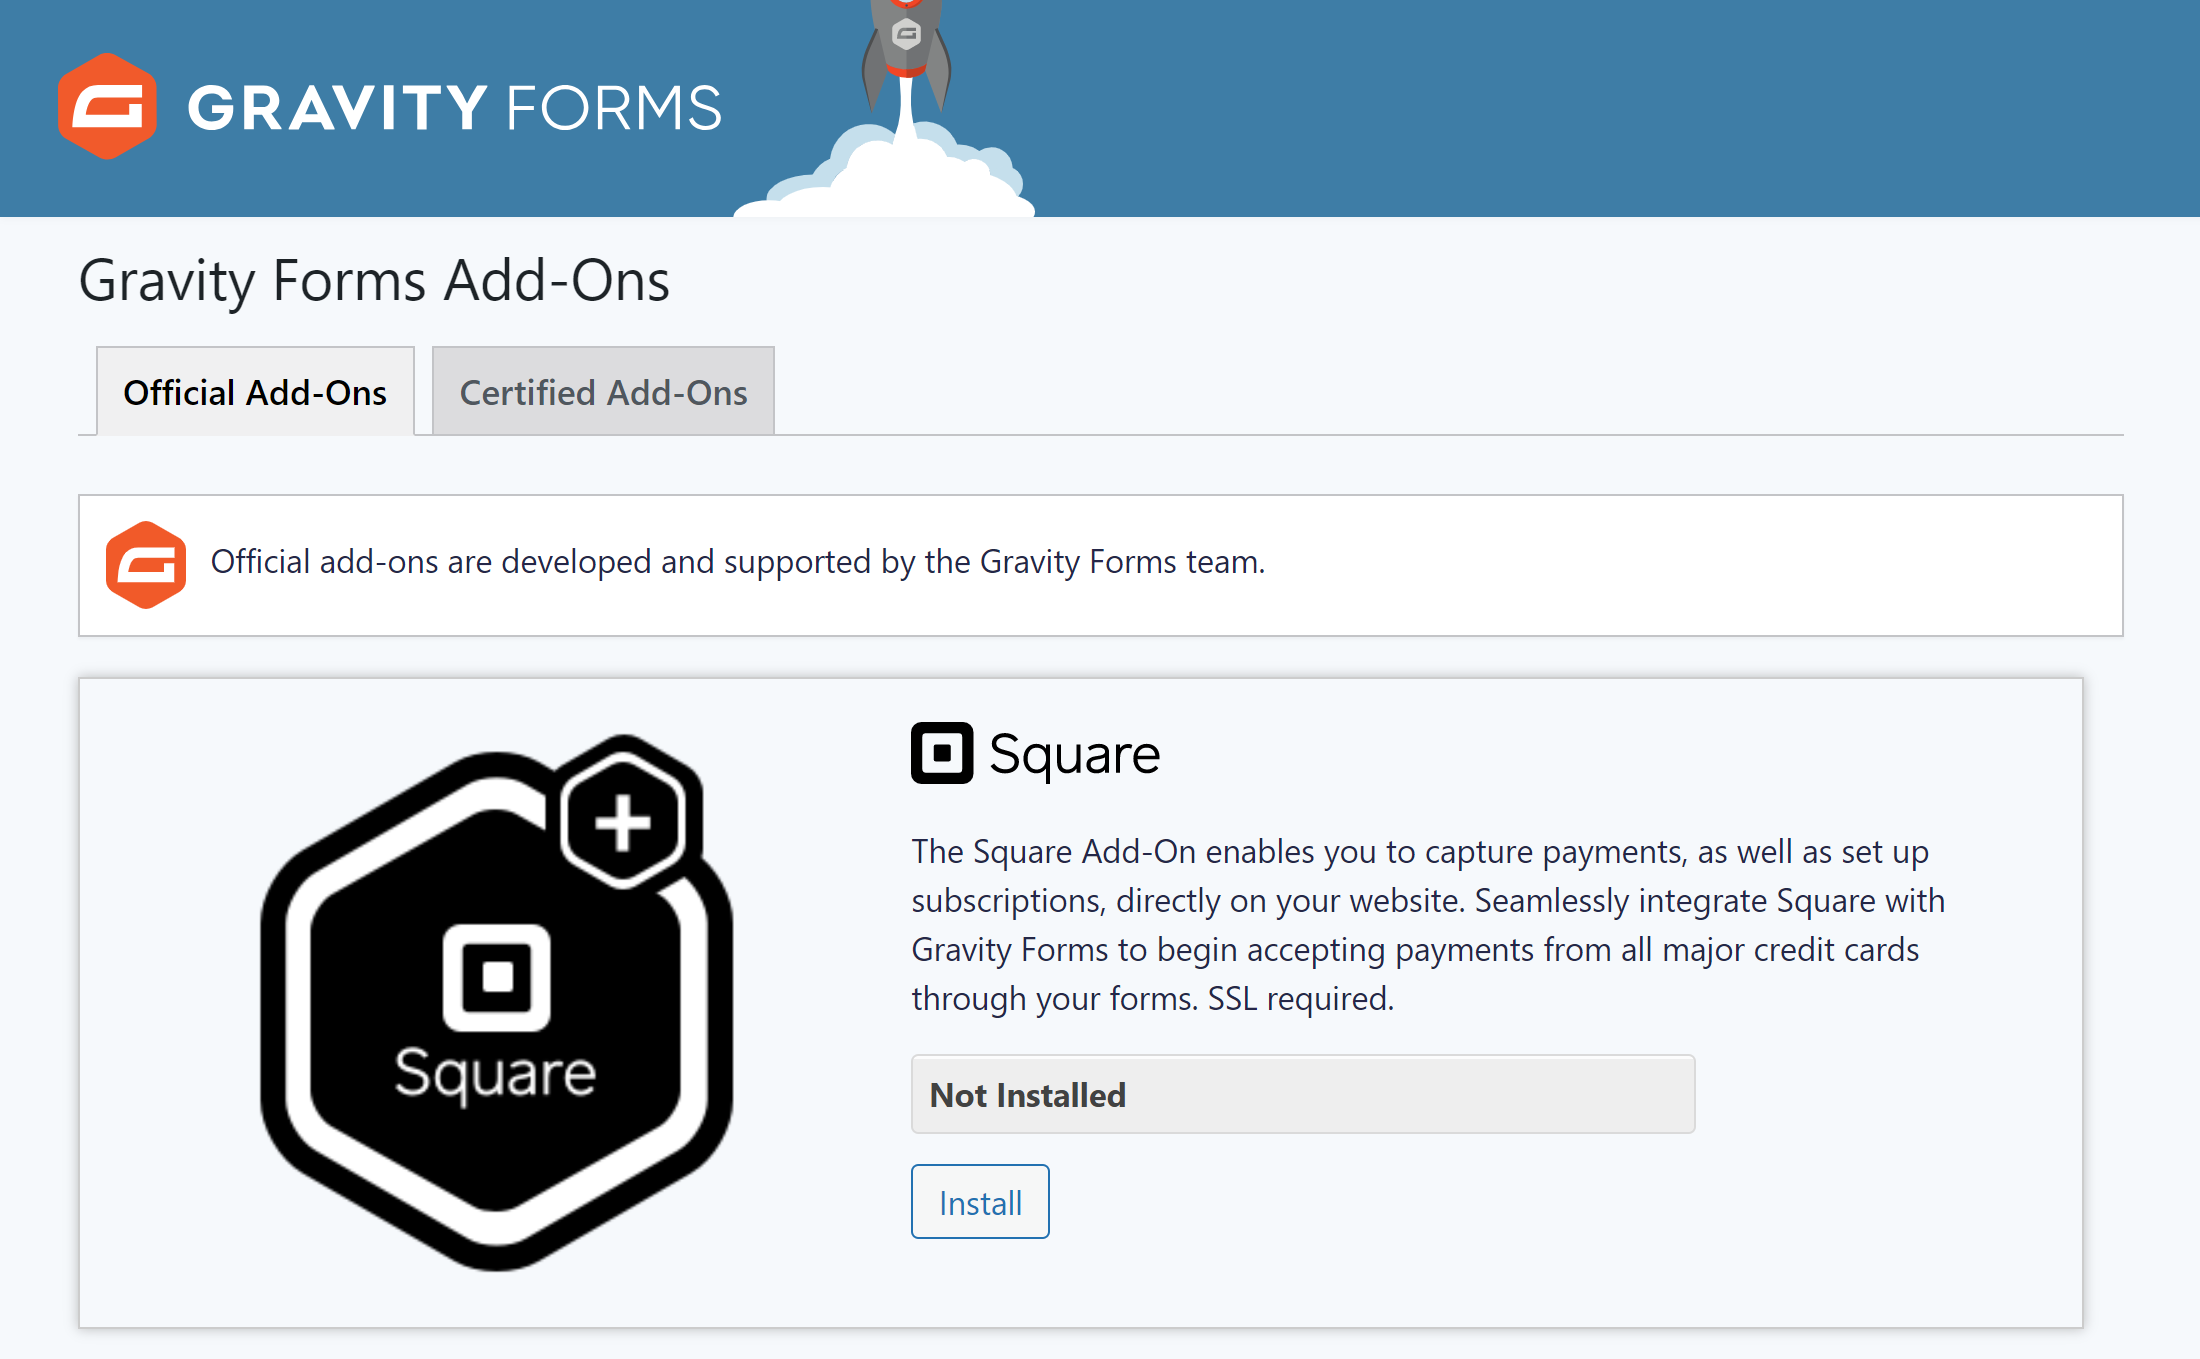
Step 2: Install the Appropriate Payment Processor
As mentioned, Gravity Forms integrates with numerous payment processors, giving you extensive options over the payment provider you use. Here are just a few of the payment Add-Ons that you can choose from…
Selecting the right payment provider for your business can be a difficult decision. Try considering these key factors before making your mind up…
- Payment Options – Each payment processor offers a range of different payment methods that your customers can use to make a purchase on your site. As well as all major debit and credit card providers, look for other payment methods offered, like Google and Apple Pay, or country-specific payment options.
- Fees – All payment processors charge transaction fees, which vary greatly in price. Transaction fees can also differ depending on the products you are selling, and the country/currency you are selling in. However, choosing the payment processor with the cheapest transaction fees isn’t always the right option – often higher fees mean that better tools, features, and support are offered, which can be well worth the extra money.
- Currencies – If you are based outside of the US then it is always worth checking that the payment processor deals with your local currency (and again check the fees charged for that currency).
- Support – Reliable support is always a must when you are selling online. Do your research and find out which payment providers are known for their high-level support. 24/7 live chat or phone support within your region is always useful, as well as a user-friendly help center.
Payment processors can be installed from the Add-On browser within your WordPress dashboard, or downloaded from within your Gravity Forms Account dashboard.
Once installed you will need to connect the payment processor with Gravity Forms. Again, there is extensive documentation written on how to integrate Gravity Forms with all of the payment Add-Ons.
Step 3: Create an Order Form
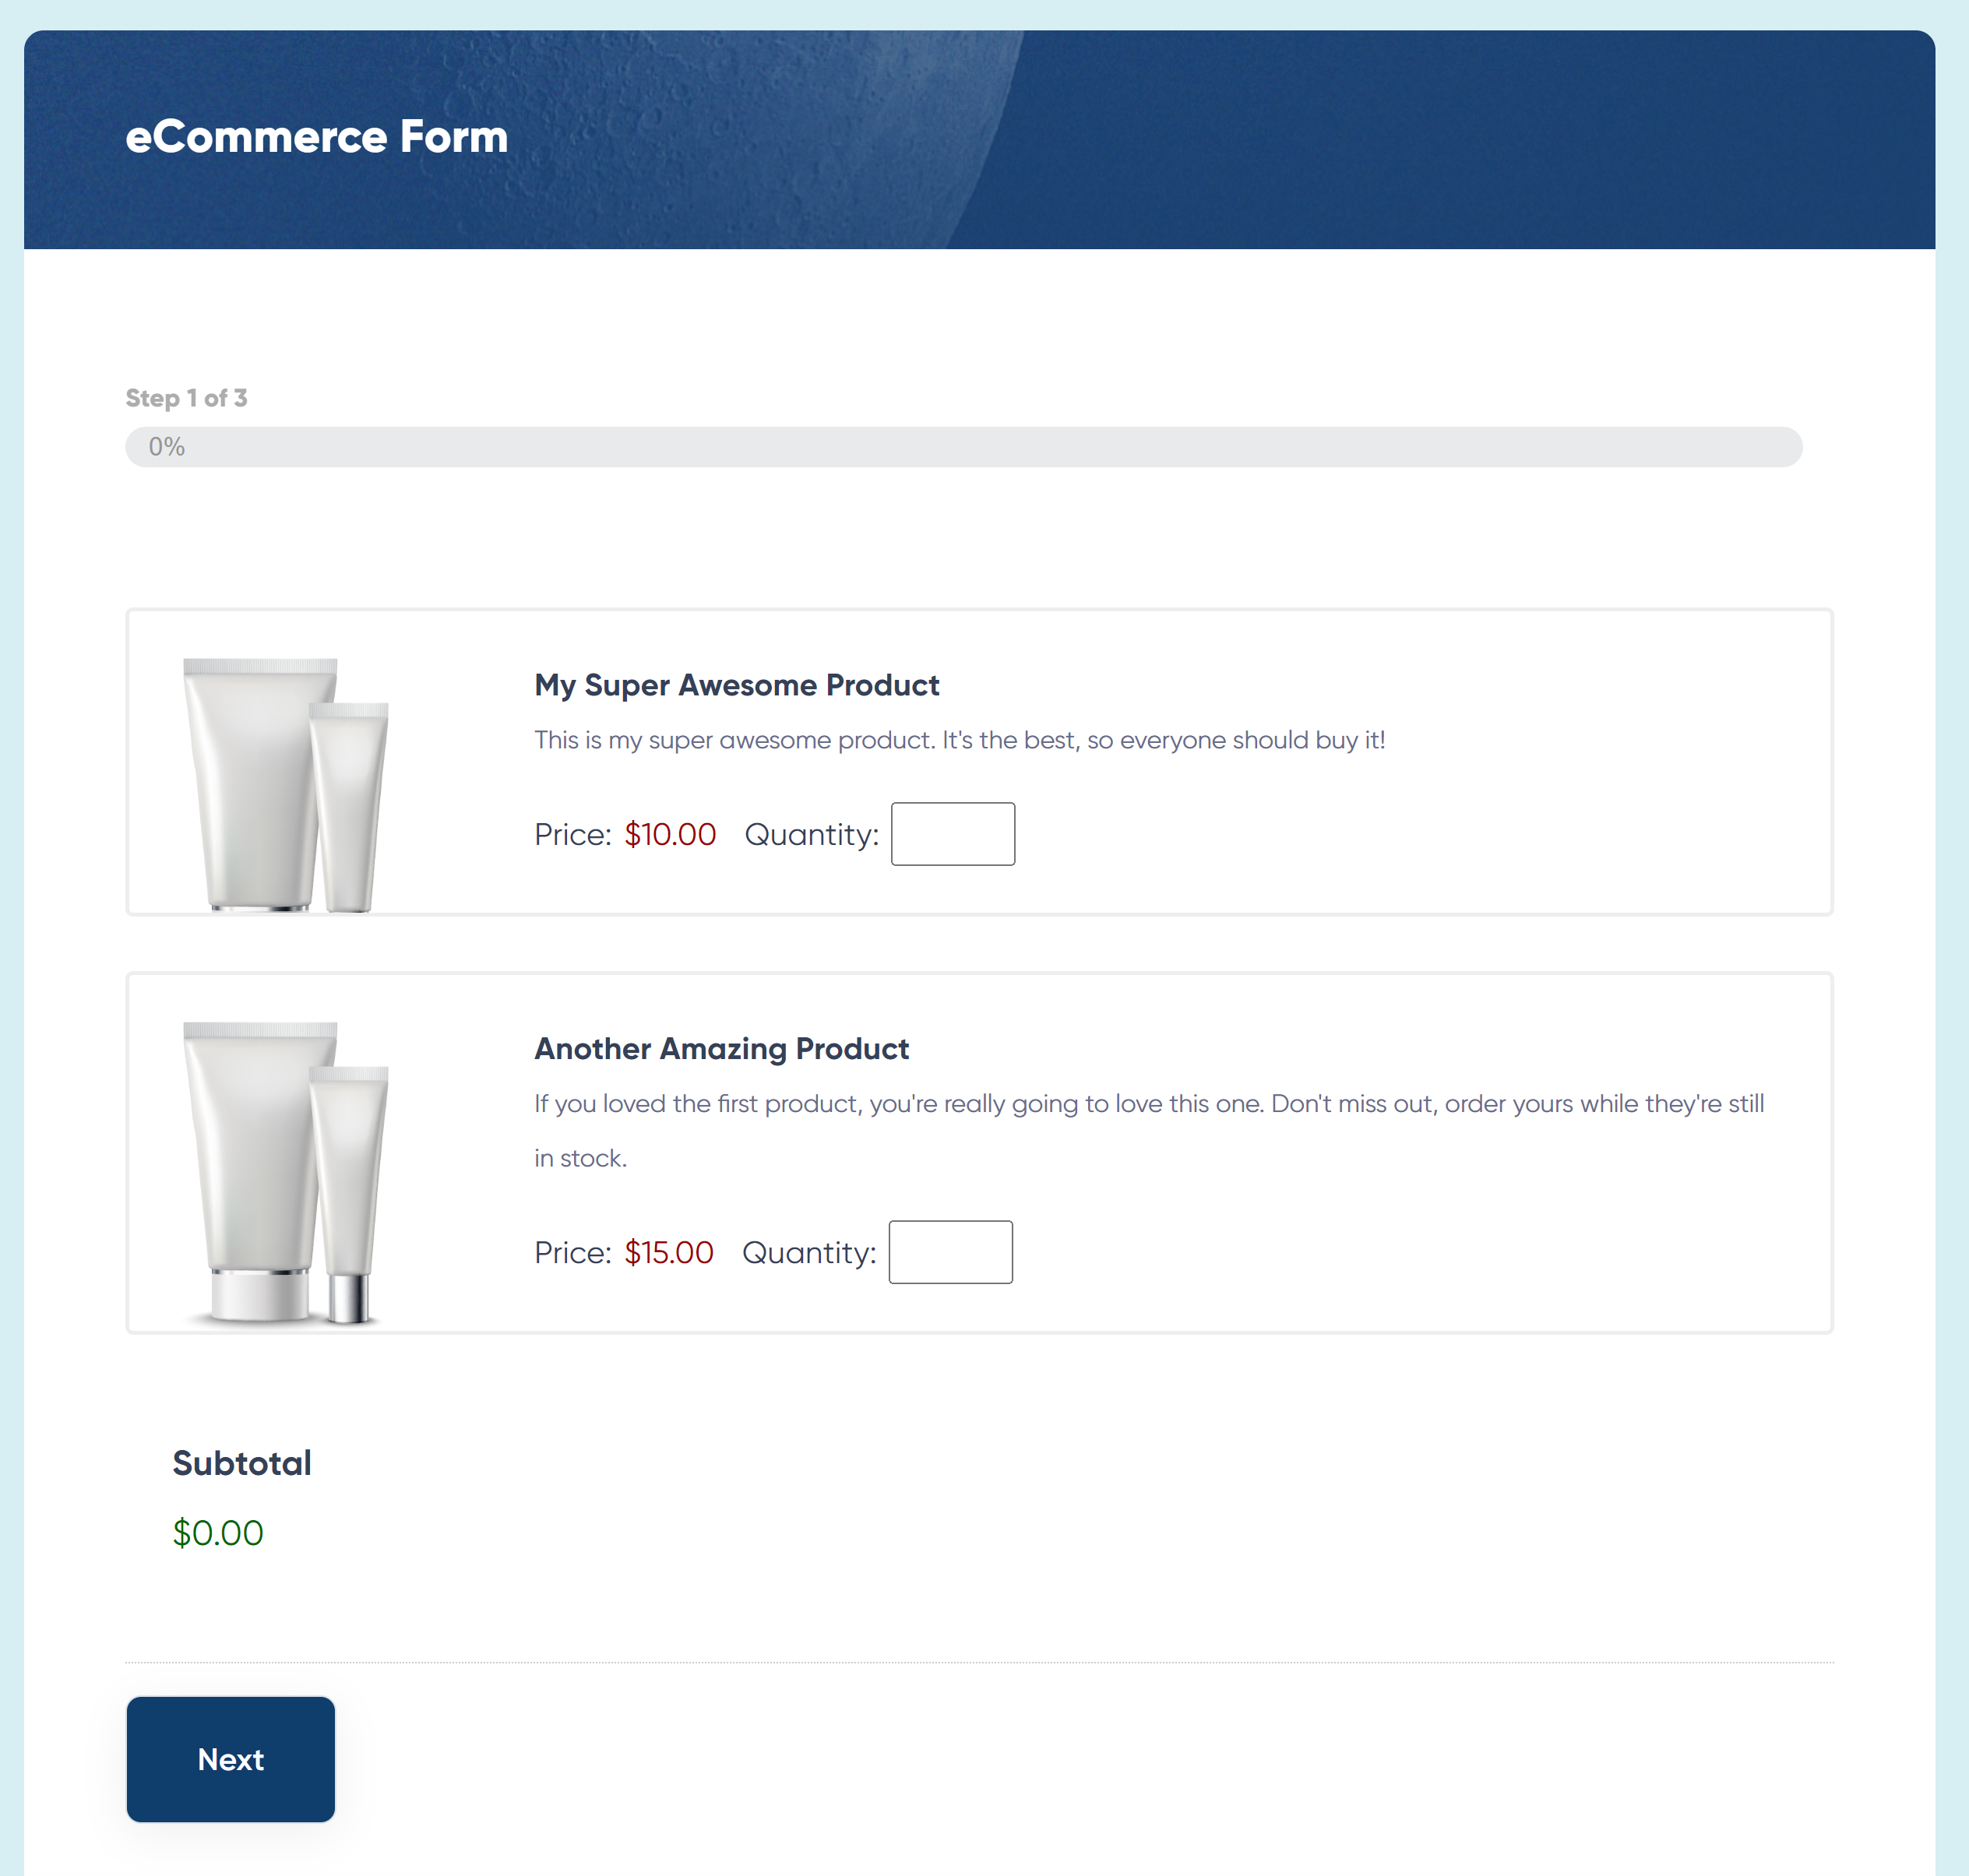
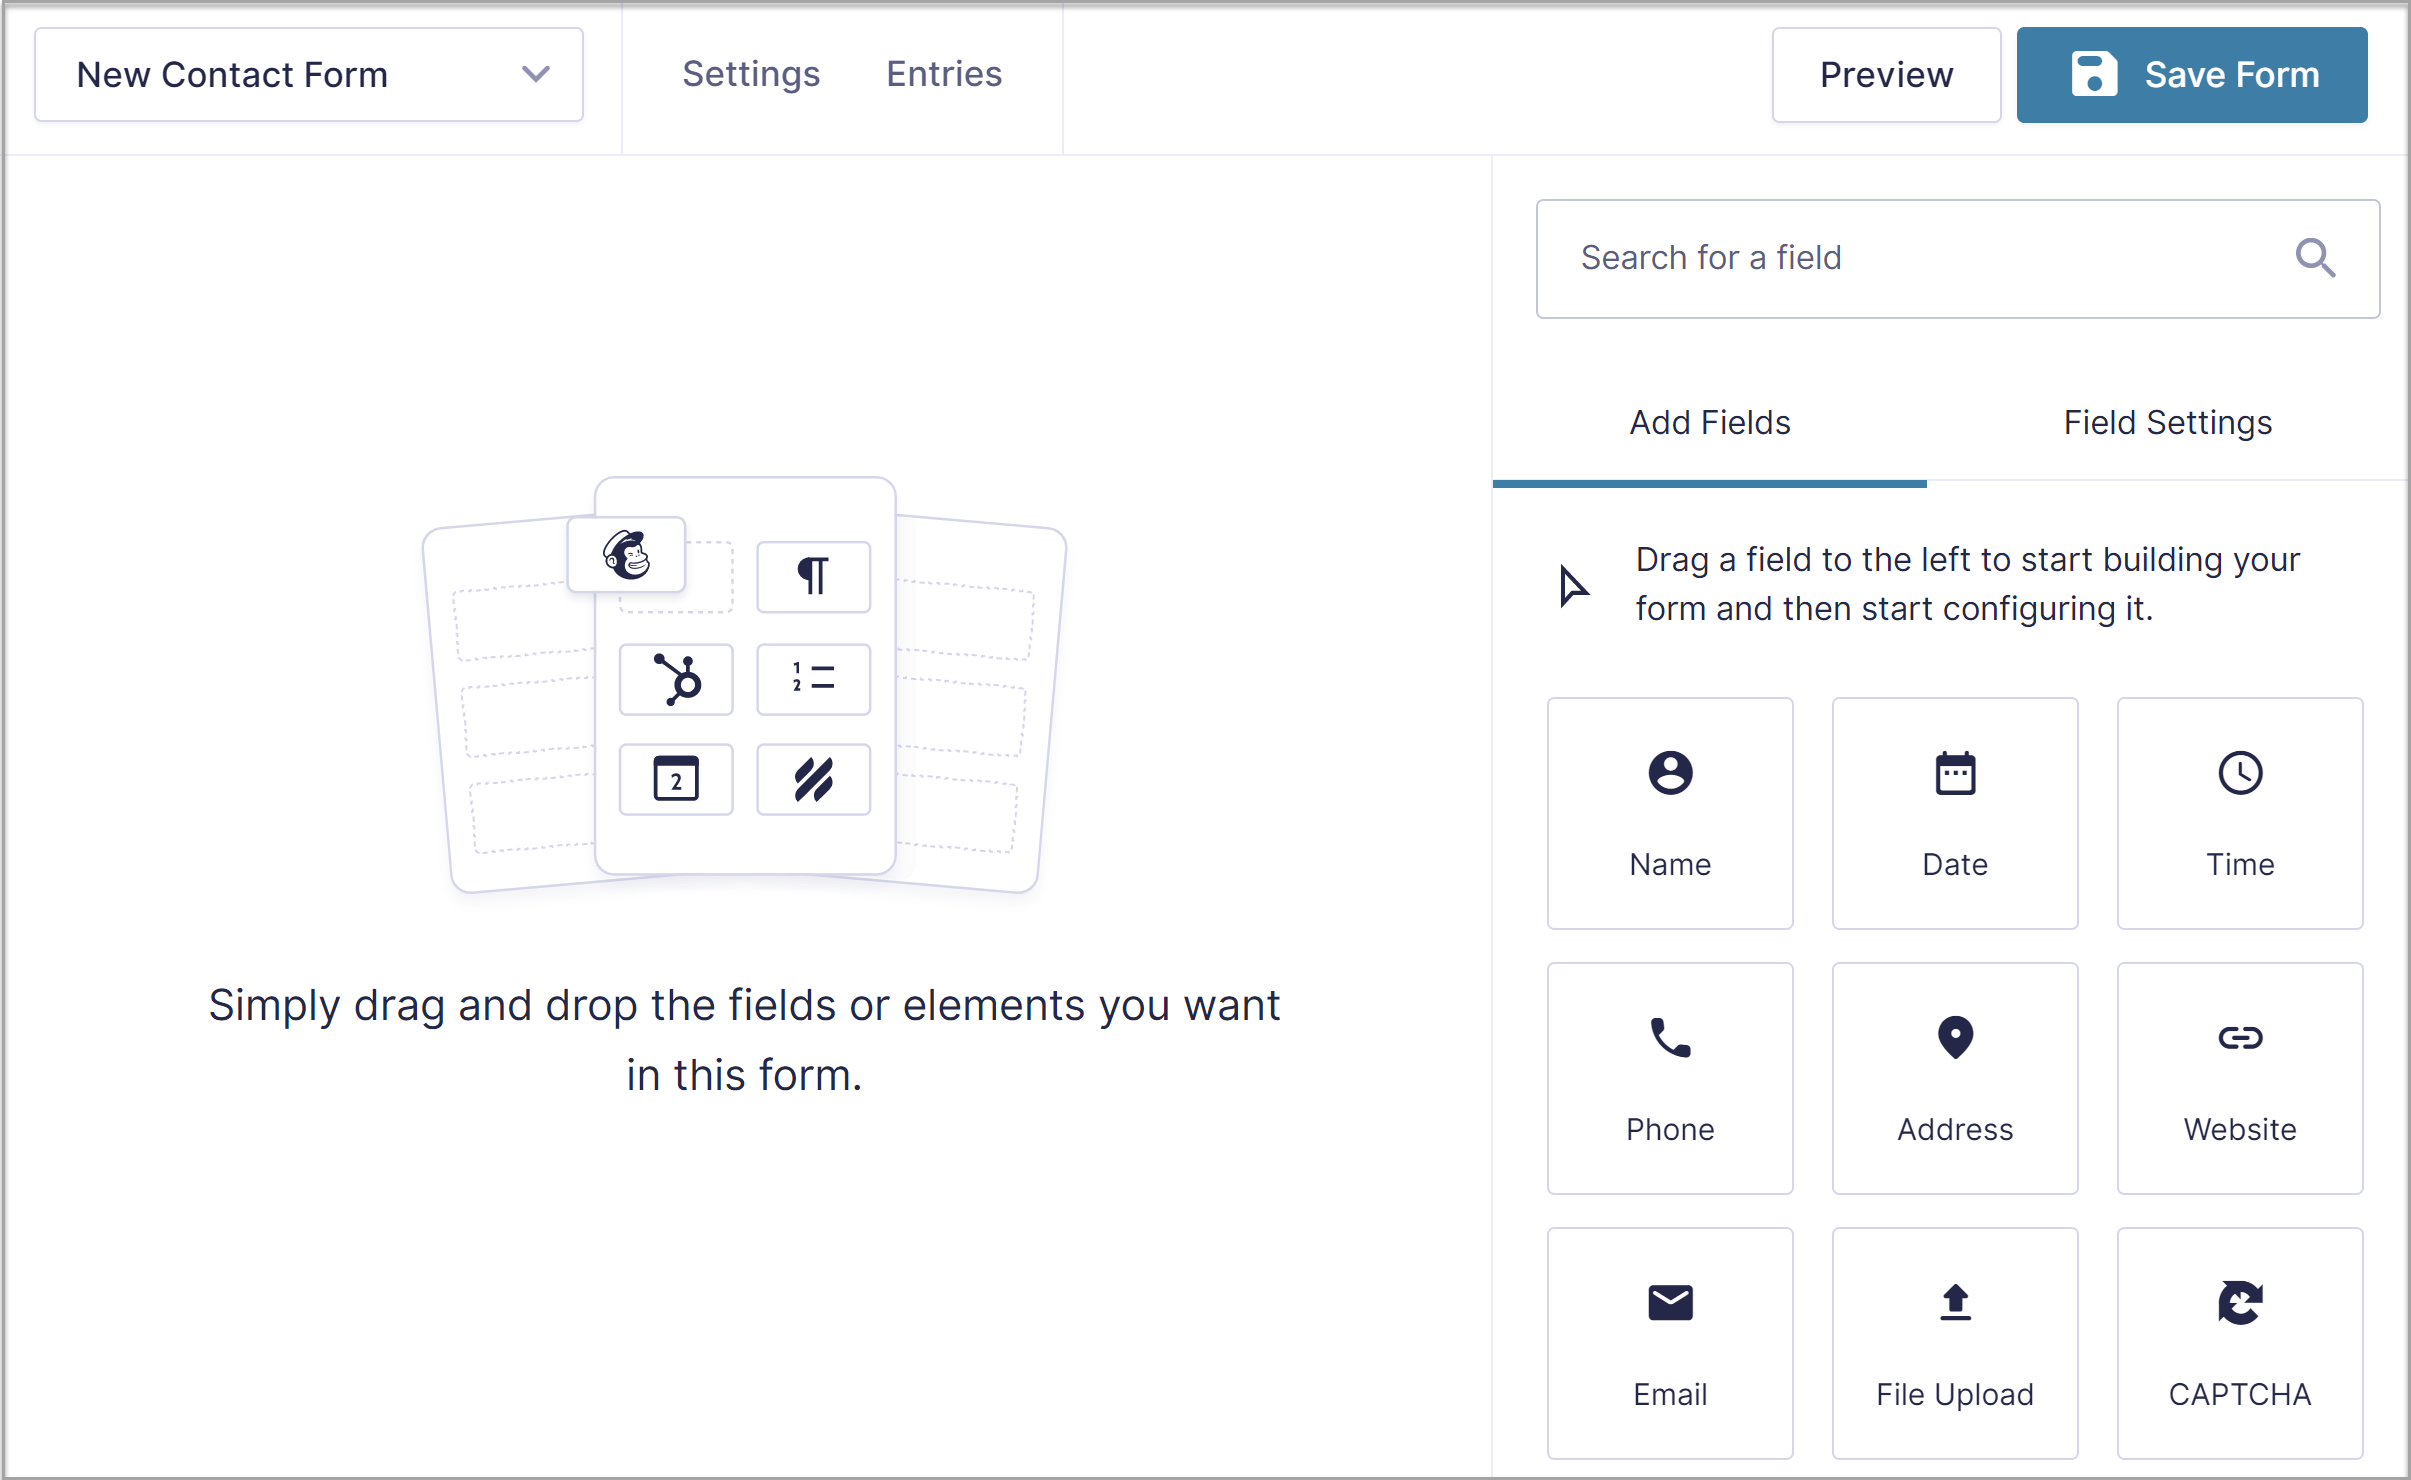
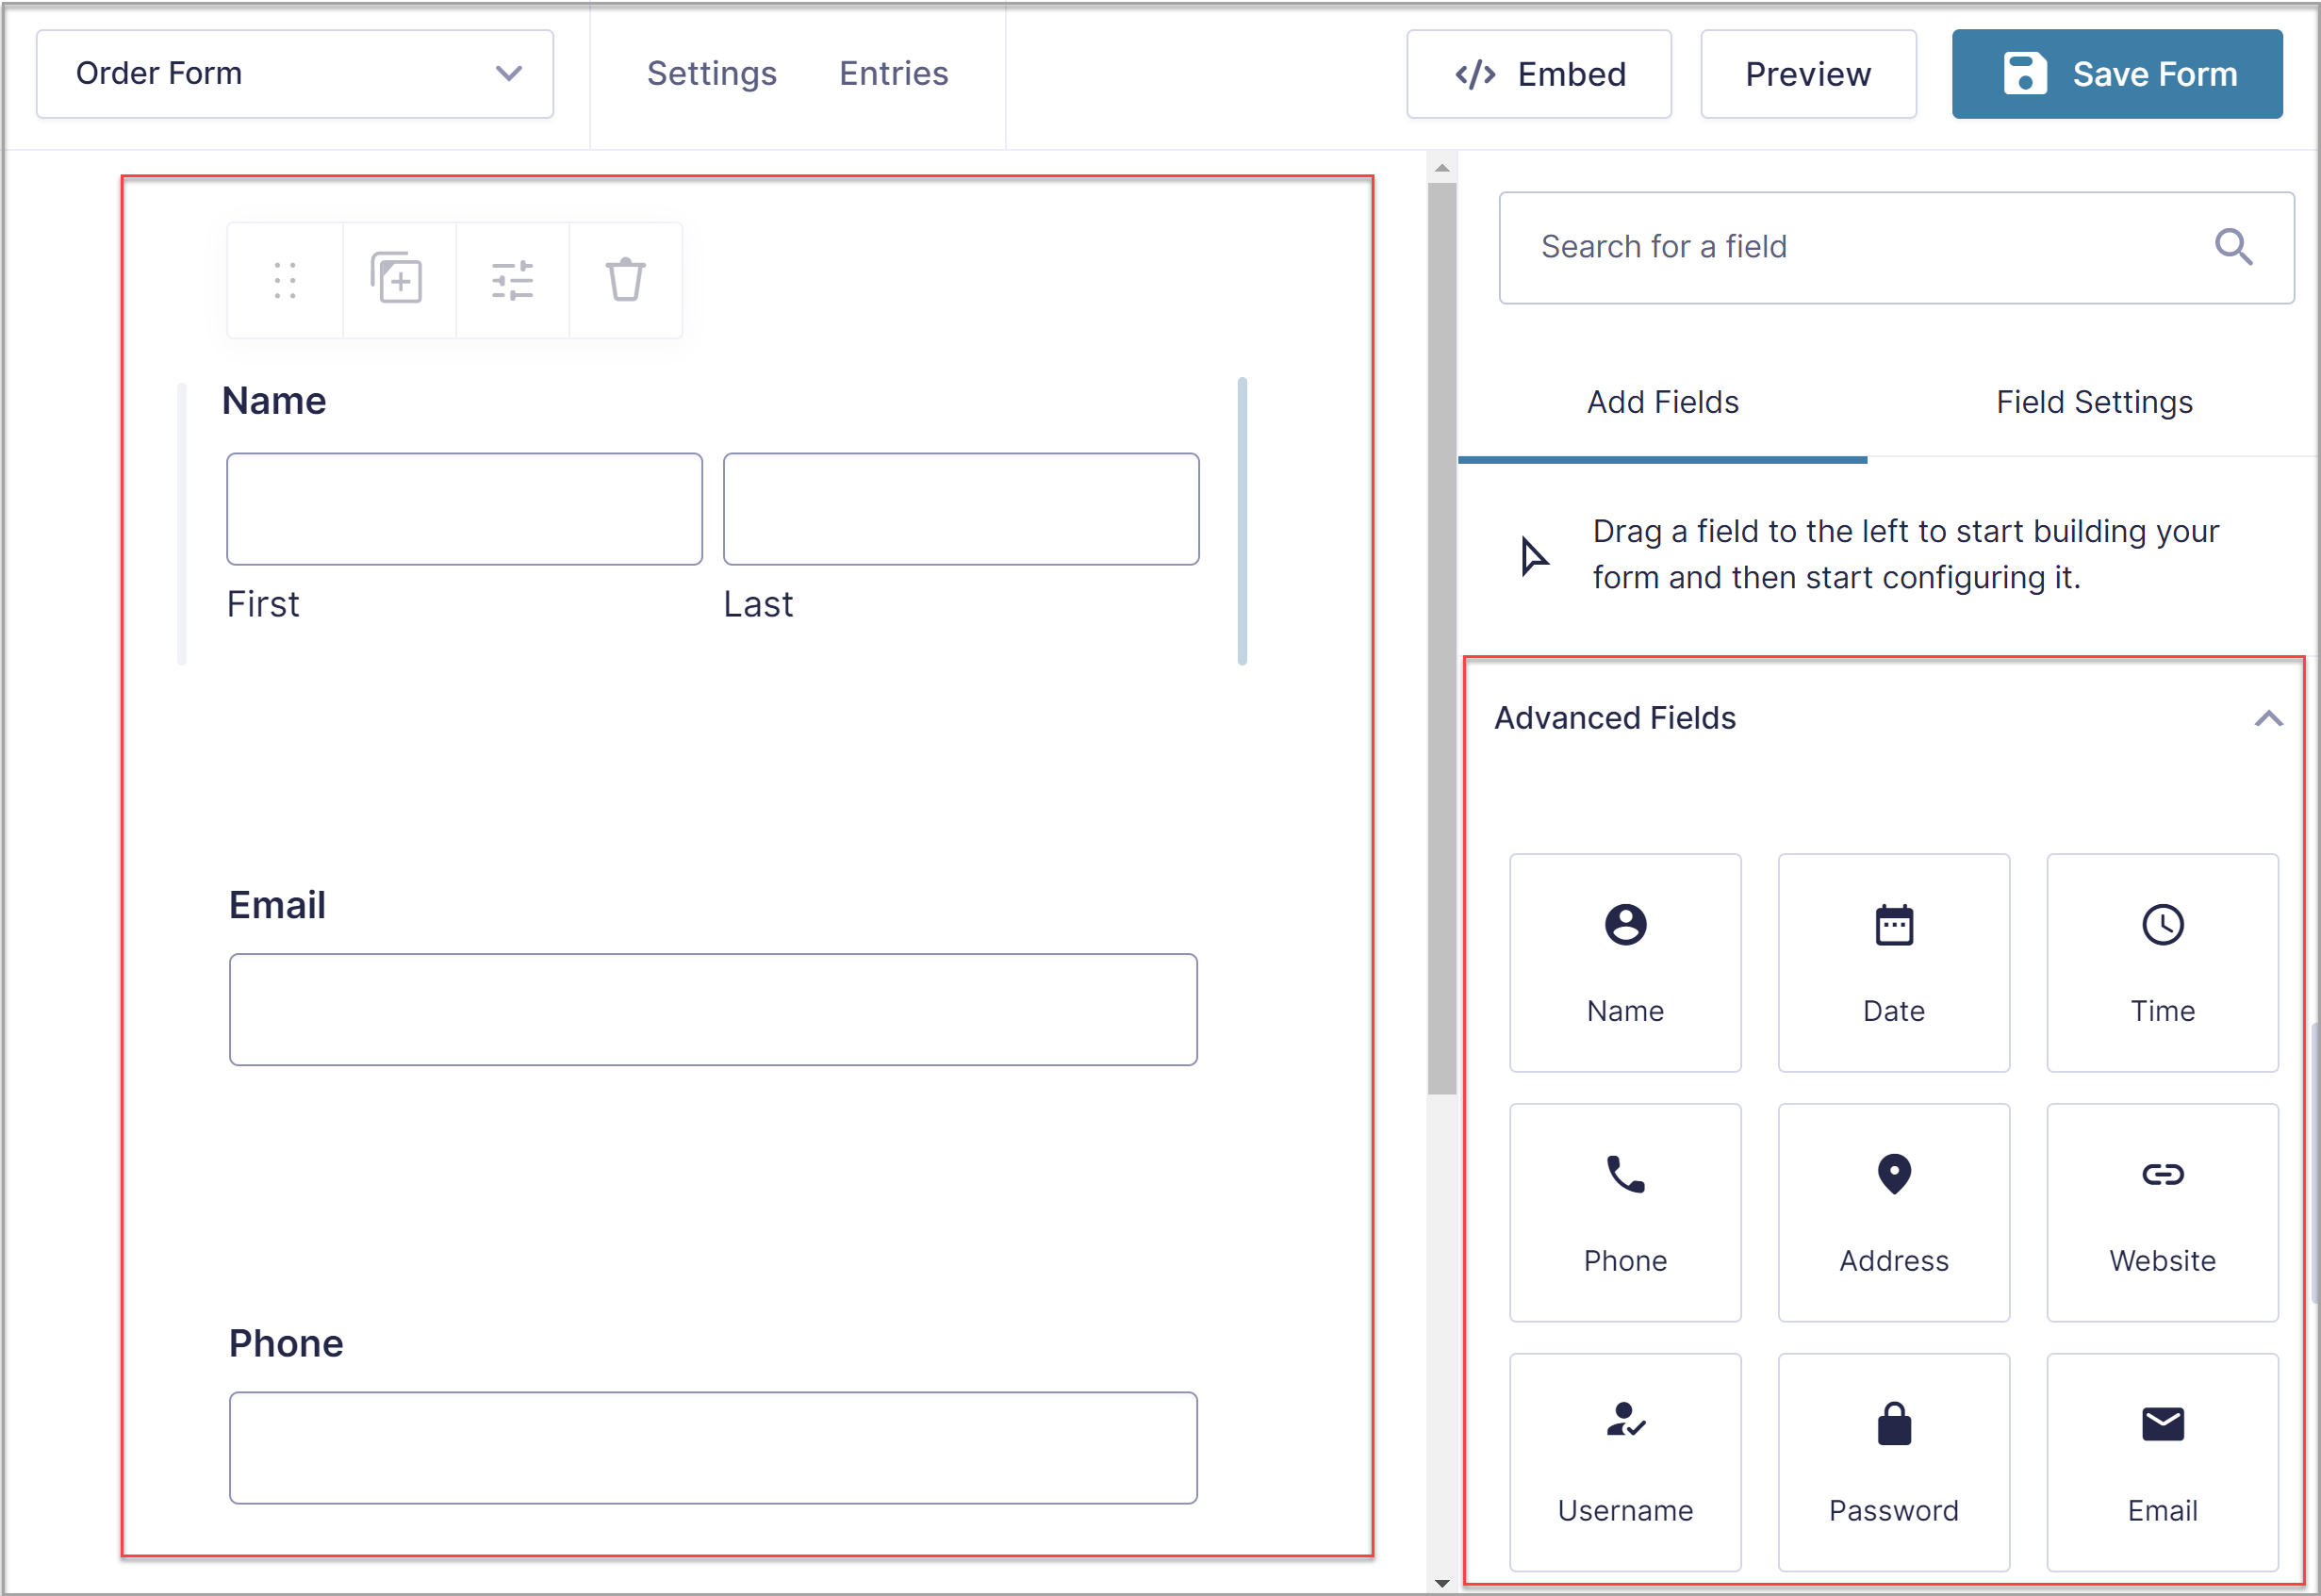
With Gravity Forms you can easily create stylish and functional forms to your exact specifications, using the drag-and-drop form editor. To create a new form, select Forms > New Forms. Then within the form editor, simply drag and drop the appropriate form fields to create the form layout of your choice.
The type of order form you create will very much depend on your business, and the types of products or services you are selling. However, there are some general form fields that all forms will need regardless of industry – for example, name, phone number, email, and address.
You will also see a section of form fields entitled Pricing Fields. These fields will display the products or services you are selling, explain shipping fees, calculate the total price, and enable your customers to make a payment – all essential form fields for a payment form!

Don’t forget to Save and Preview your form as you go.
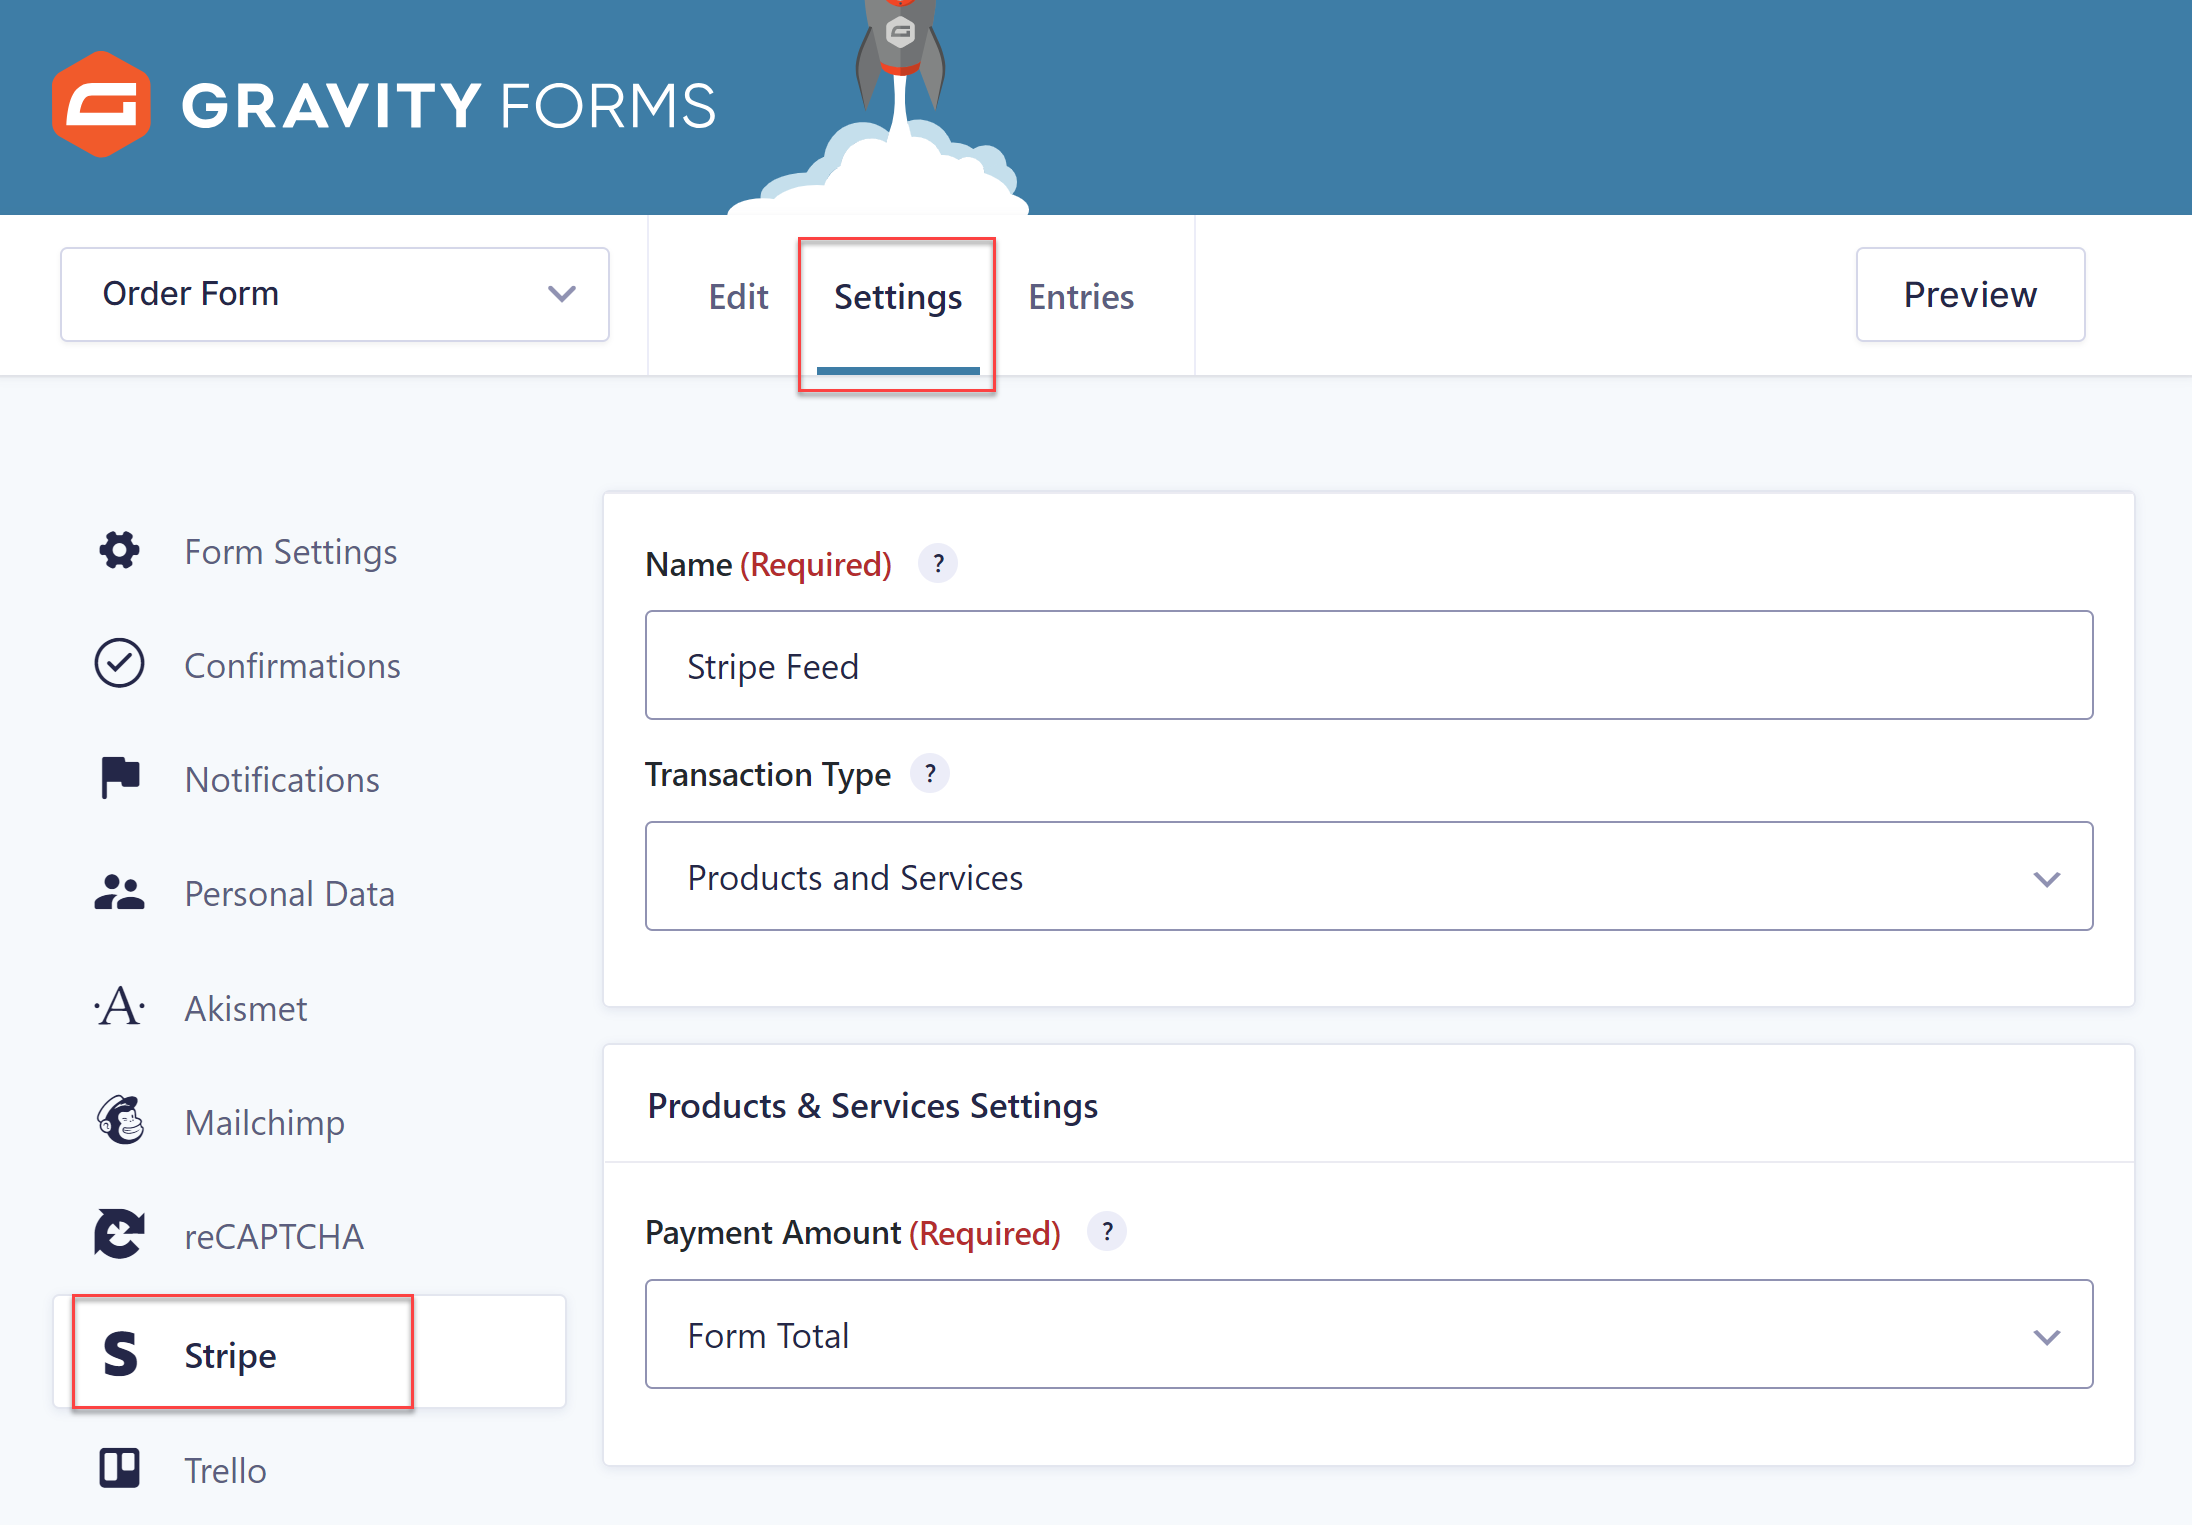
Step 4: Create a Feed for the Order Form
To connect your form with your payment processor you will need to create a form feed. This is a quick and easy process, simply navigate to the form Settings and select your payment processor. Then follow the steps in the feed to configure the settings to work with your form.
Once your form and feed are both complete, all that is left to do is to embed your form into a page or post on your website.
Step 5: Embed the Form
If you’ve updated to Gravity Forms 2.6, then you can now embed a form in a page or a post directly from the form editor using the new Embed Form flyout.
The Embed Form flyout utilizes the WordPress Block editor, and gives you the option of selecting to display the form on a new or existing page or post, or a custom post type (with the use of filters). To get started with the Embed Form flyout, within the form editor simply click on Embed, which you will find in the top right corner of the screen.
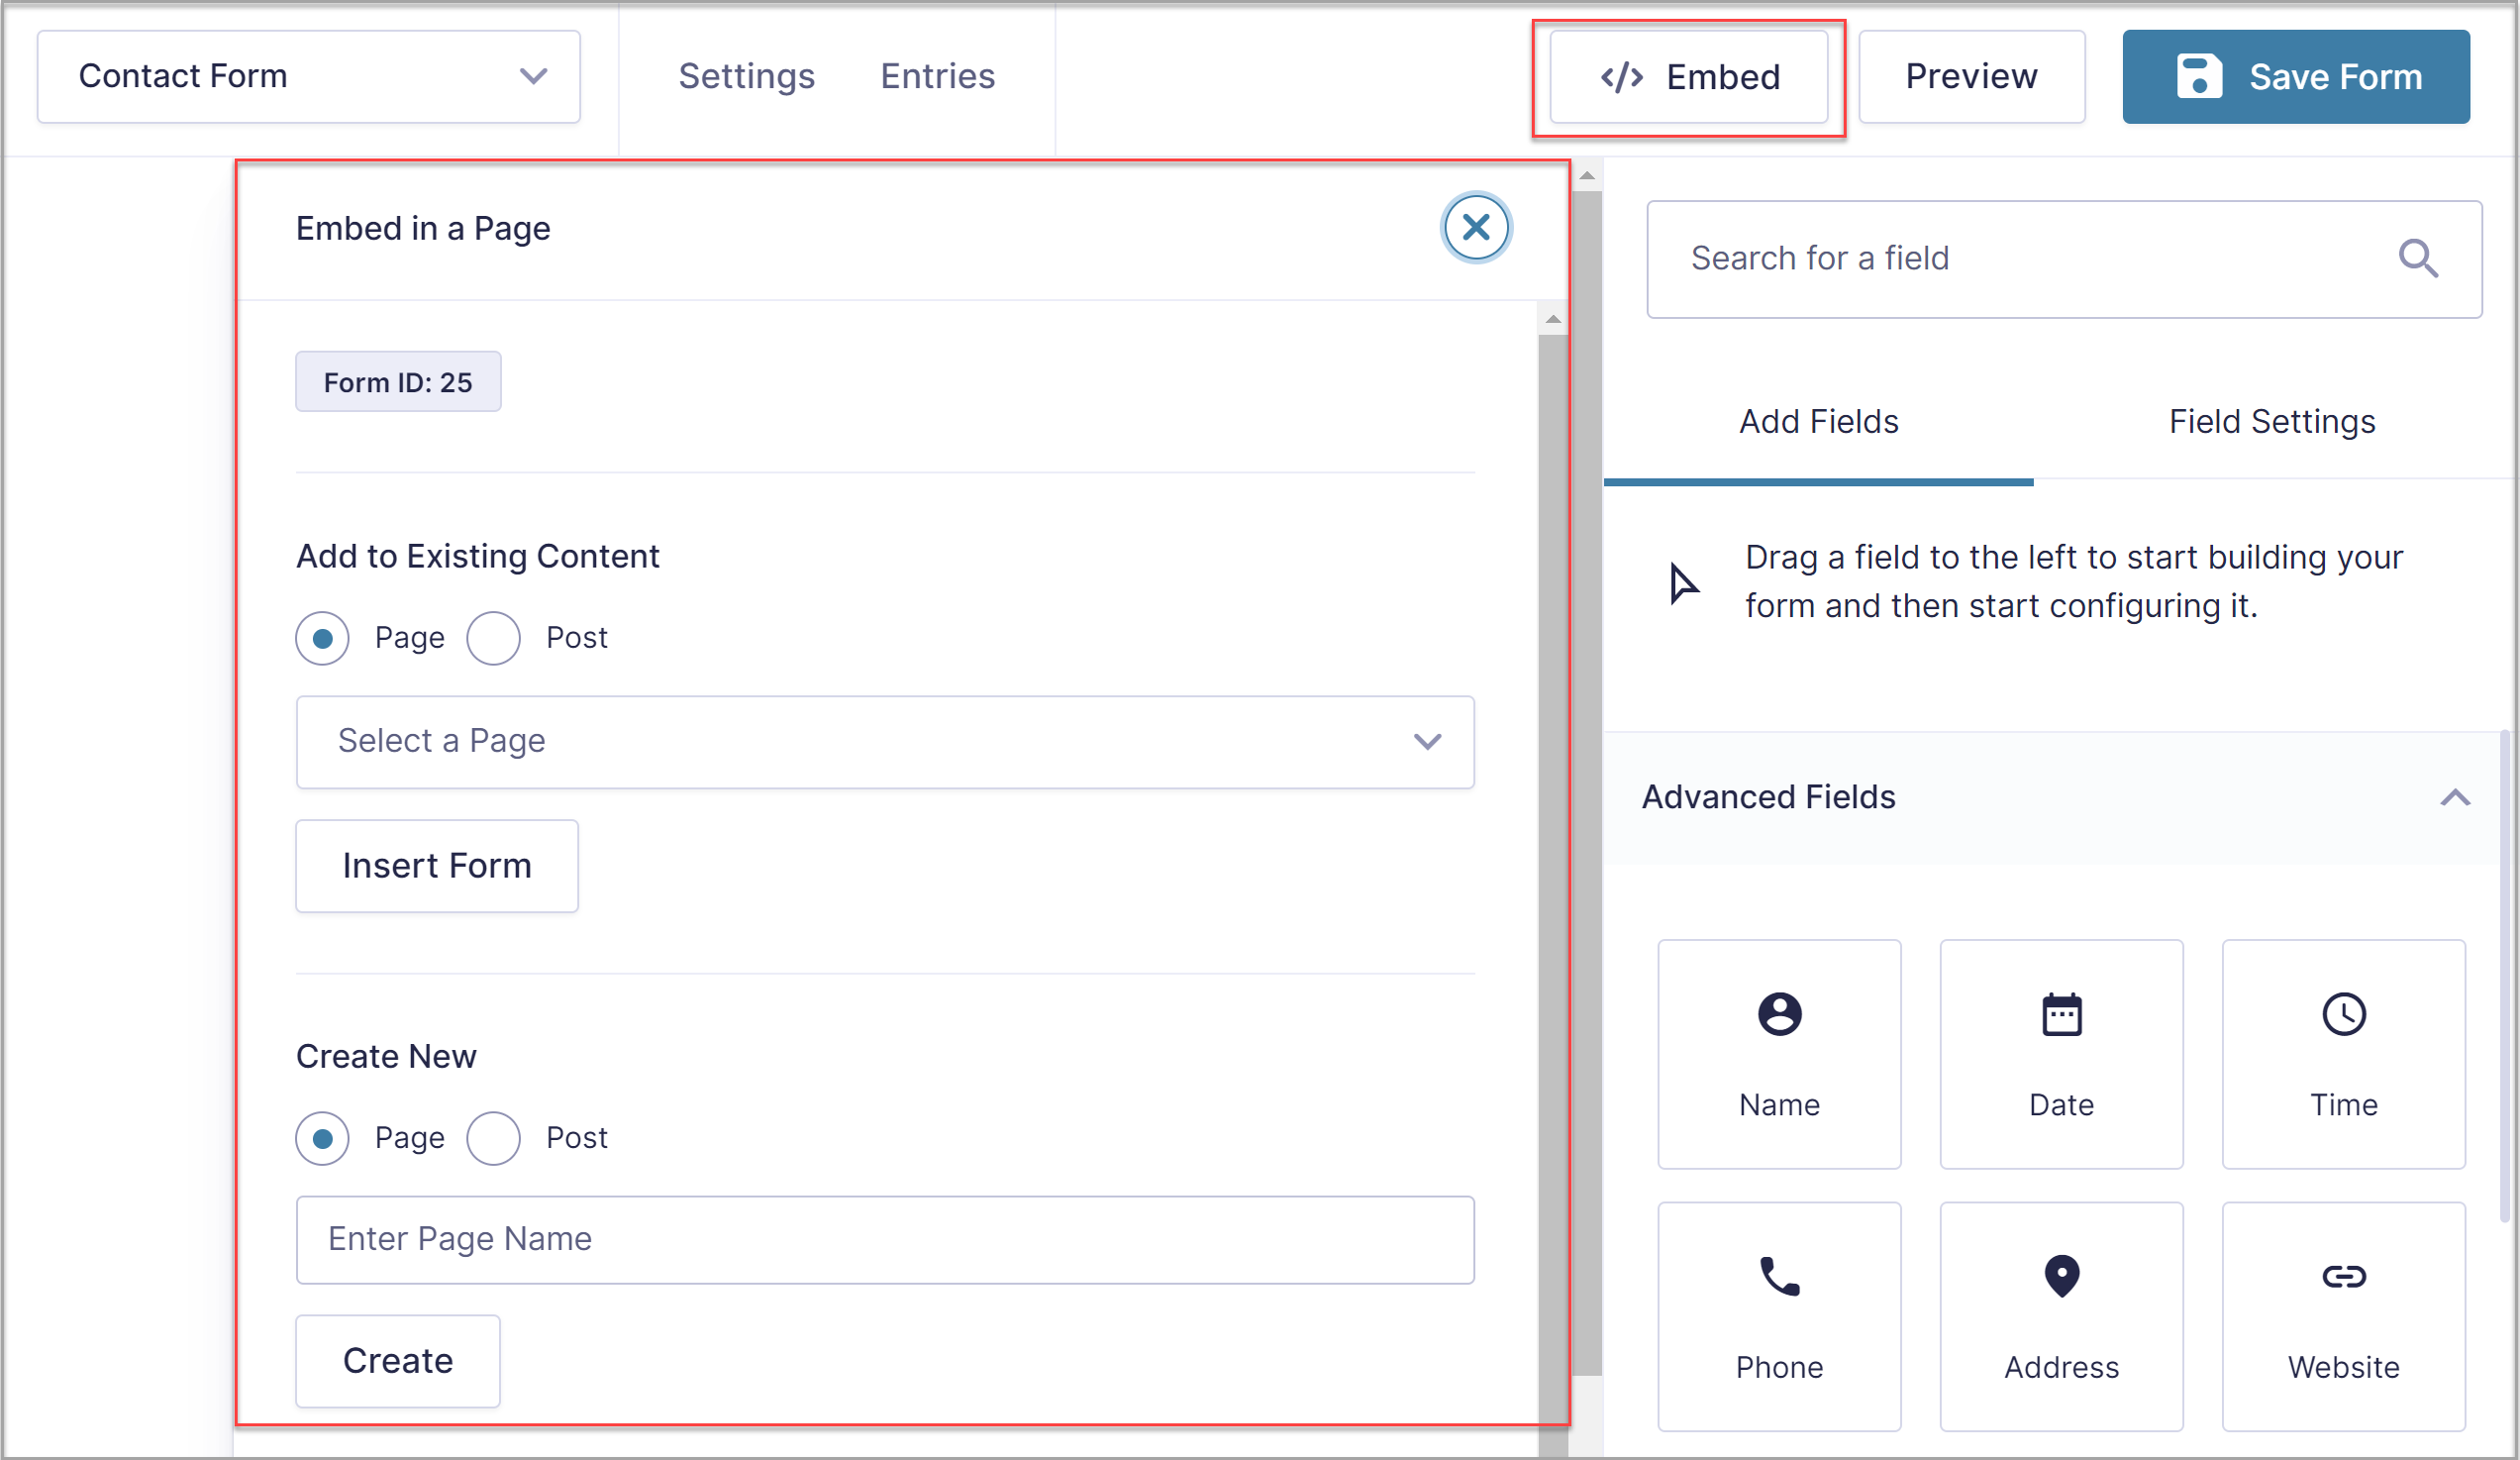
Then, within the Embed Form flyout select the page or post where you would like to add your form. Alternatively, you can choose to create a new page or post. Now select Insert Form (or Create) and the WordPress editor will automatically open your new or existing page or post.
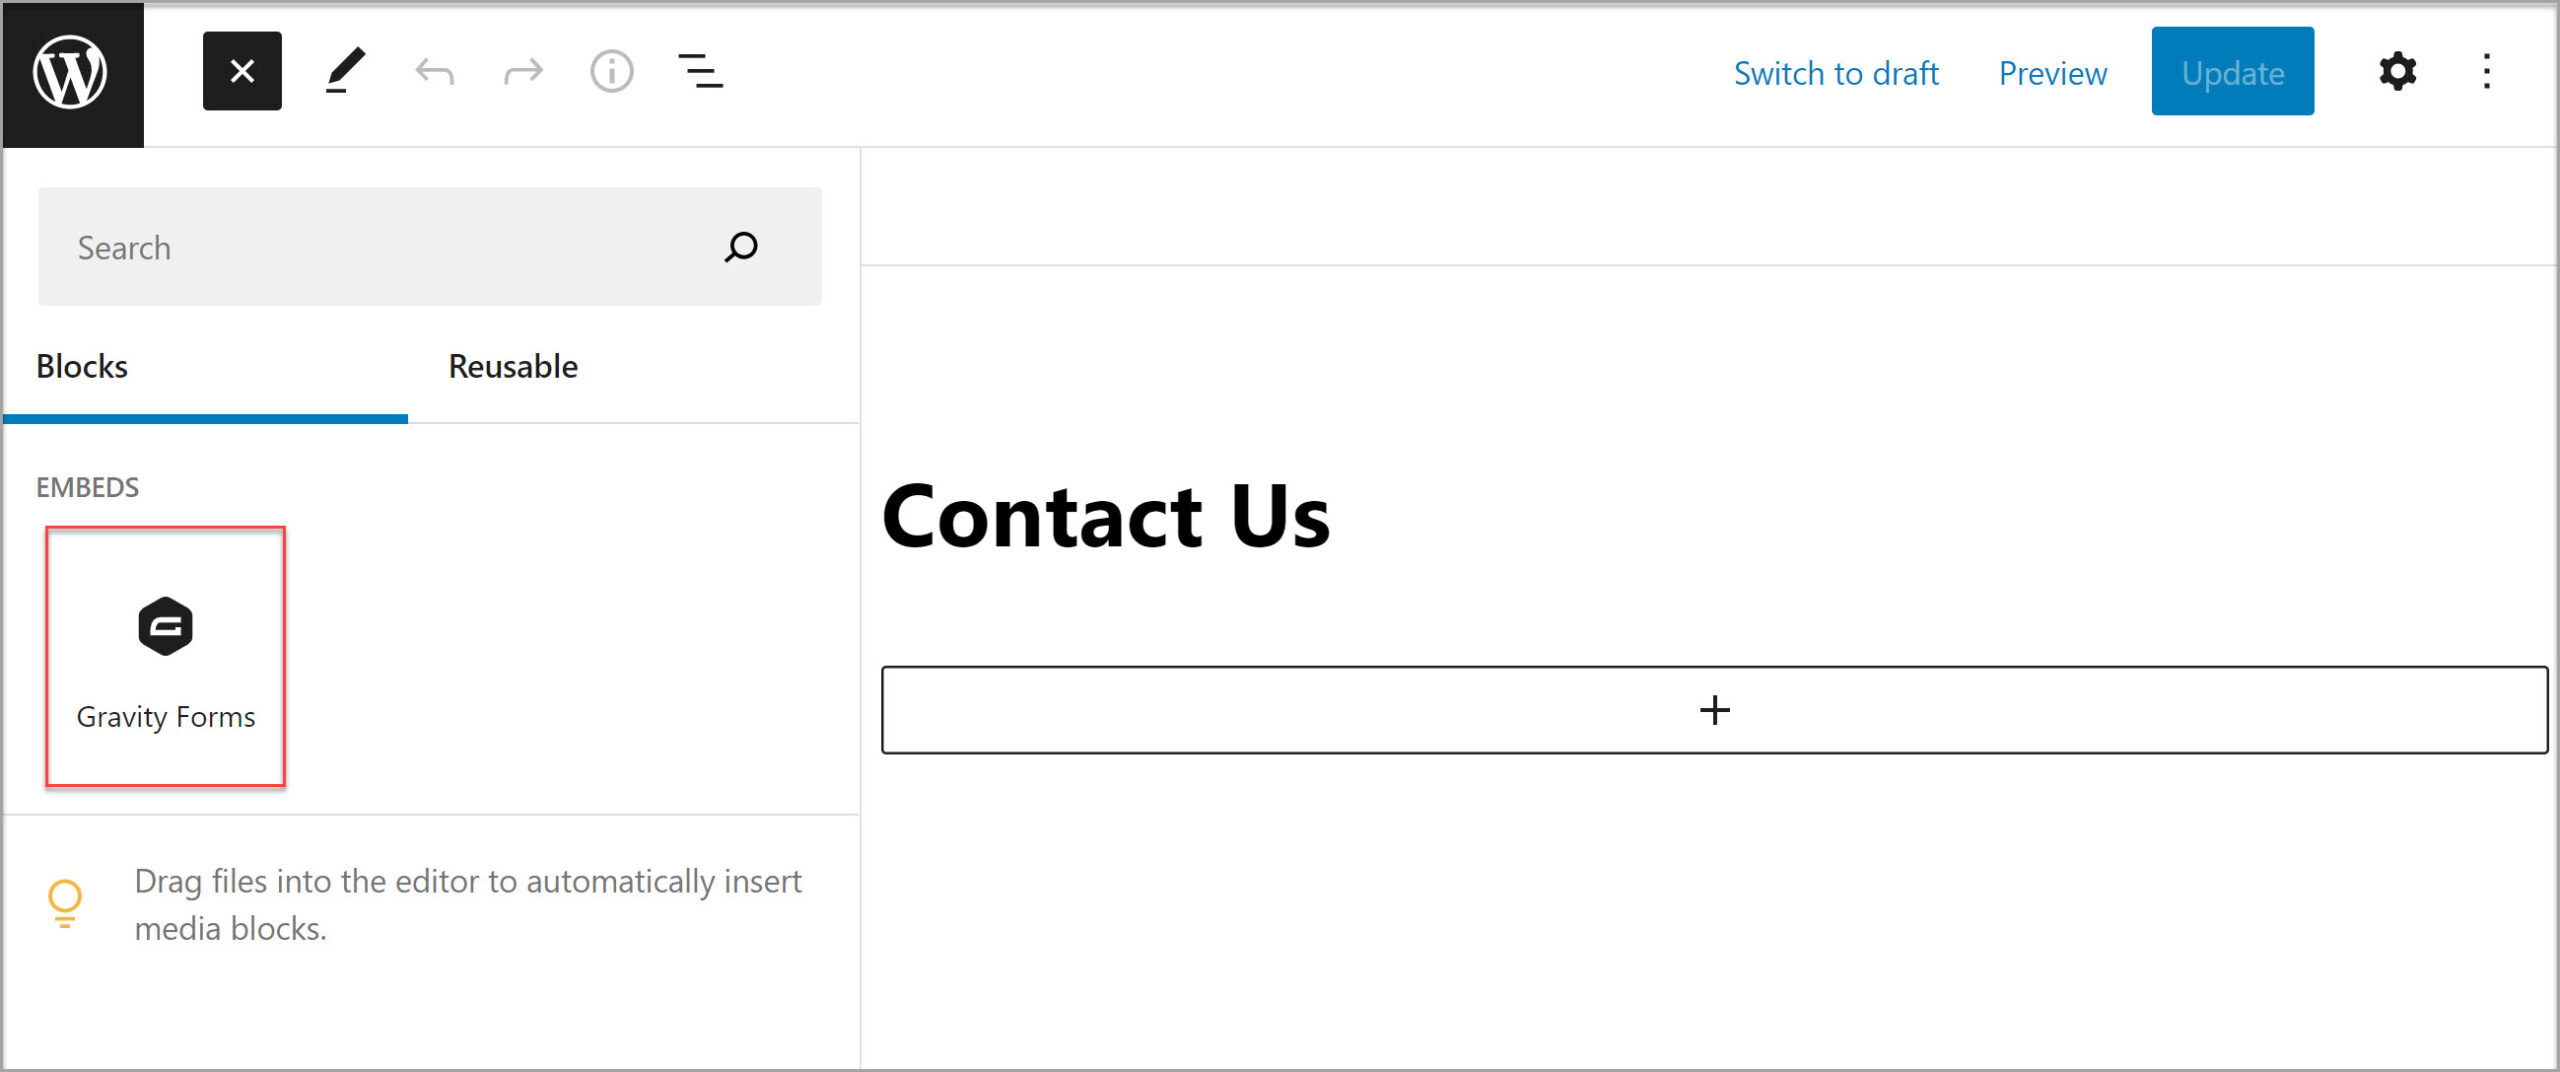
Here we have chosen to embed the form in an existing page or post. You will see the Gravity Forms block highlighted under Embeds – drag and drop the block, positioning it within the existing content where you deem appropriate.
If needed, you can use the Block Options to control how the form appears on your site. A few options include:
- Toggling the title of the form on or off
- Toggling the description of the form on or off
- Embedding the form on the front-end using AJAX, so confirmations and changes between form pages can happen without page reloads
When you’re done going through these options, save your changes and then view and publish the page. For more information on the Form Embed flyout, check out the Gravity Forms Documentation.
Don’t Have Gravity Forms Yet?
Although we have given you a quick tutorial on how to create an order form, the Gravity Forms plugin is capable of much much more. If you aren’t yet a customer, take Gravity Forms for a test drive with our free personalized demo and find out exactly what it has to offer. Try out the many features, install the add-ons, customize the templates or create a form from scratch. We know you’re going to love what you find!
Already in love? Purchase our premium WordPress form plugin today!

If you want to keep up-to-date with what’s happening on the blog sign up for the Gravity Forms newsletter!
"*" indicates required fields