

No matter what kind of business you have, an email list is one of your most important business assets. Given that 98% of first-time website visitors aren’t ready to buy, it’s crucial that you collect their email addresses so you can stay in touch with them. This allows you to build relationships and establish trust, making people more likely to buy from you in the future.
With Gravity Forms, you can easily capture those all important leads on your WordPress website. Gravity Forms is a form plugin for WordPress that allows you to add beautiful lead generation forms anywhere on your site. It also integrates with a number of different third-party tools and applications – one of which we will discuss today!
Campaign Monitor is a powerful email marketing platform that can be integrated seamlessly with Gravity Forms. In this article, we’ll take a look at the benefits of using Campaign Monitor as well as how to use Gravity Forms and the Campaign Monitor Add-On to create powerful forms and manage those leads. Let’s jump in…
Why Use Campaign Monitor?

Campaign Monitor markets itself as a straightforward email marketing platform that makes it easy to connect with your audience. They offer a drag and drop email builder that facilitates creating and sending email campaigns.
They also offer email marketing personalization, automation, audience segmentation, and many more powerful features that allow you to send the right message at the right time to the right audience.
Another great reason why you’d want to use this email marketing platform includes different Campaign Monitor integrations that allow you to seamlessly connect your email marketing with other tools you use in your business. A few notable examples include Salesforce, Zapier, WooCommerce, and more.
So how do you connect your WordPress website with Campaign Monitor? That’s where our Campaign Monitor Add-On comes in.
Campaign Monitor Add-On: Features
The Campaign Monitor Add-On syncs your Gravity Forms entries seamlessly with your Campaign Monitor account. Once you’ve integrated the two platforms, you can send form submission information straight to your marketing lists.
What’s more, you can go beyond the usual email address and name information. Thanks to custom fields, you can collect and send the exact details you need from your subscribers to Campaign Monitor, and then tailor your marketing campaigns based on their preferences.
The Campaign Monitor Add-On also allows you to resubscribe previous subscribers and add them to automations that send engaging content, converting those leads into long-term customers.
In addition to that, you can use conditional logic to segment your subscribers as well as define conditions for which users will be added to your email marketing lists and which won’t.
Getting Started With WordPress, Campaign Monitor, And Gravity Forms
Now that you know what the Campaign Monitor Add-On has to offer, let’s go through the steps necessary to integrate Campaign Monitor and Gravity Forms. Keep in mind that for this Campaign Monitor integration, you’ll need Gravity Forms already installed on your website.
The add-on is available on the Basic, Pro, and Elite license plans, so choose the license that best fits your needs and install Gravity Forms on your site.
1. Install The Campaign Monitor Add-On
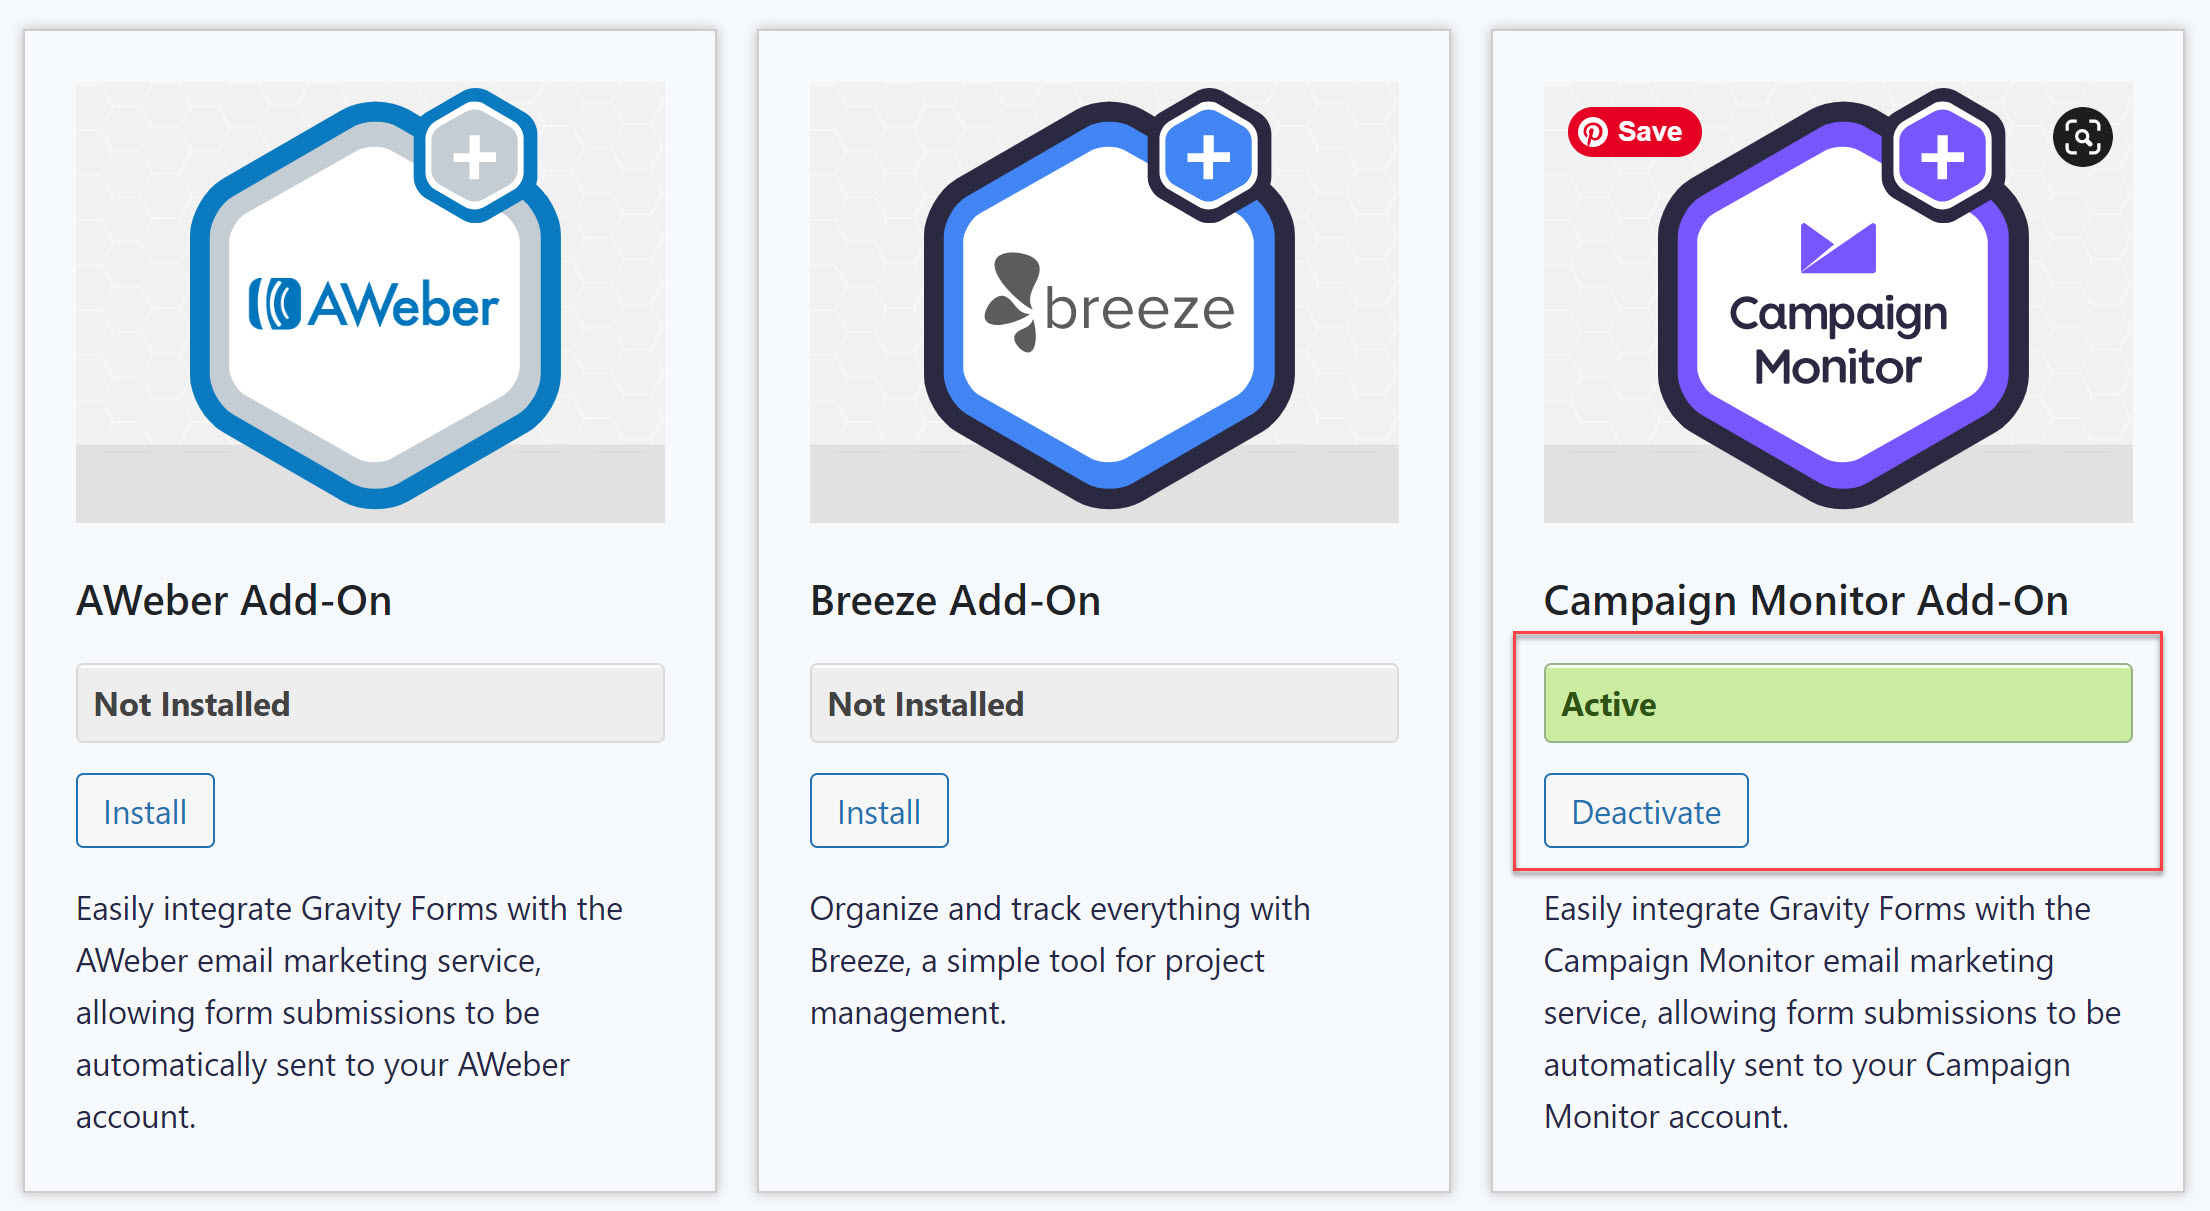
To get started, you’ll first need to install the Campaign Monitor Add-On on your site. So log in to your WordPress dashboard and then navigate to Forms > Add-Ons. Locate the Campaign Monitor Add-On and press Install > Activate.
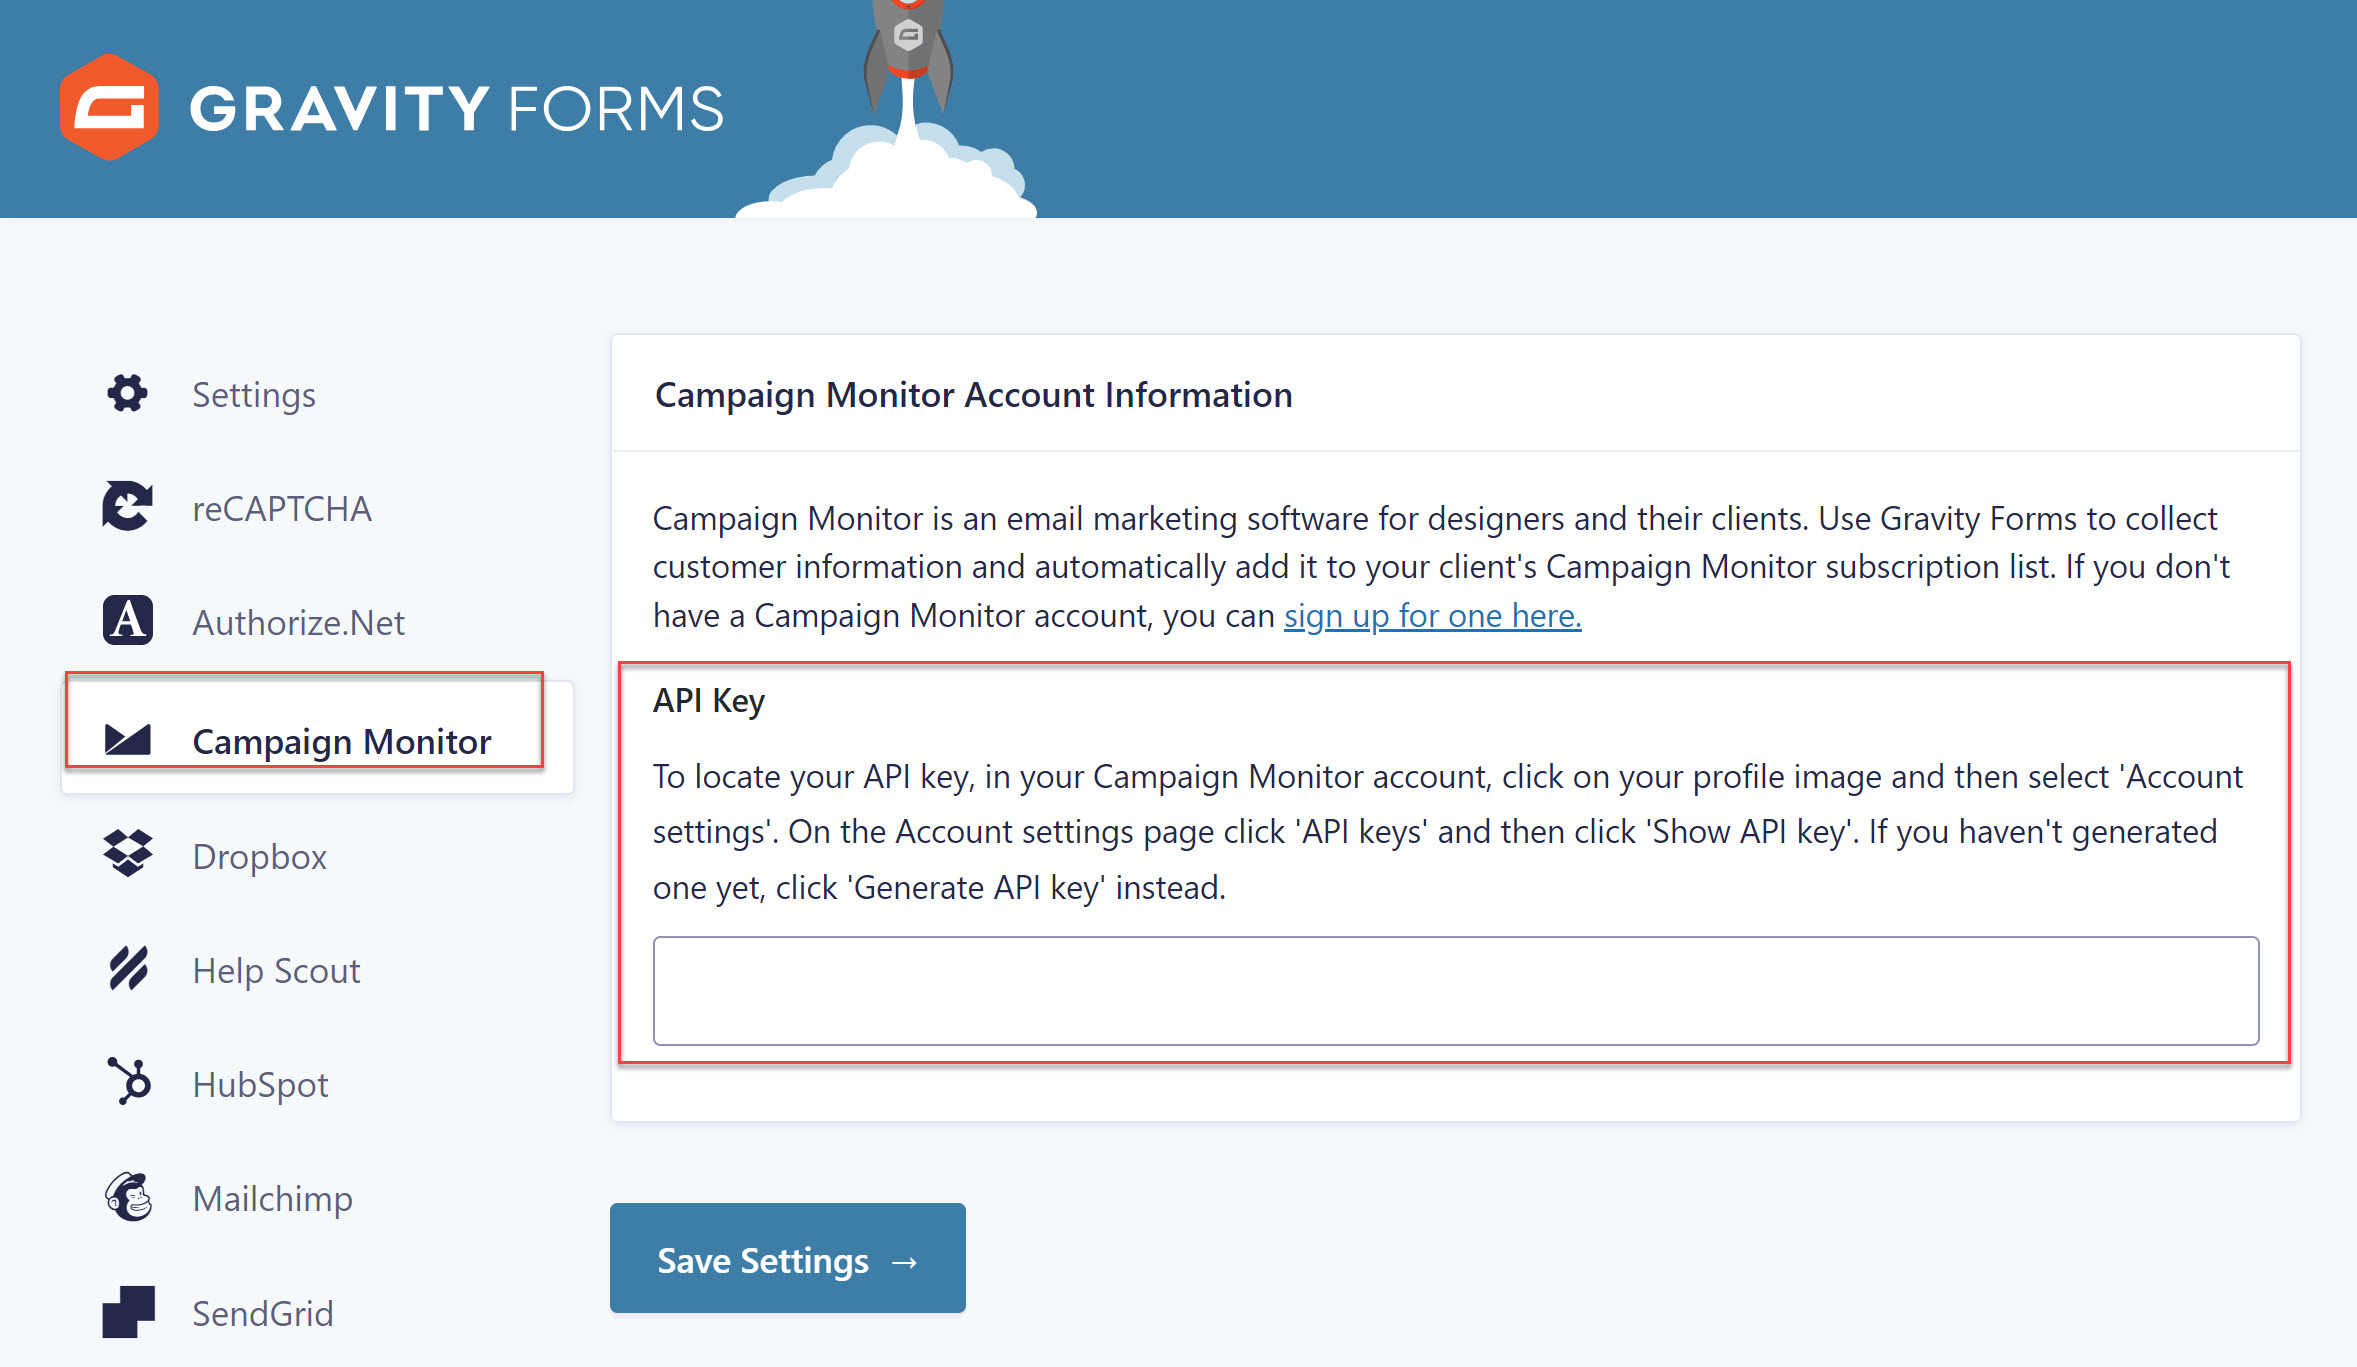
Once the add-on has been activated, you’ll need to connect your Campaign Monitor account with Gravity Forms. To do this, you need your Campaign Monitor API key – log in to your Campaign Monitor account, click on your profile image, and then select Account settings.
When the Account settings page loads, click API keys and then click Show API key. If you haven’t generated an API key yet, click Generate API key instead.
Copy the generated key, go back to your WordPress website and click on Forms > Settings > Campaign Monitor. Then, paste the API key into the box and save your changes.
For more in-depth information on how to get started with the Campaign Monitor Add-On, check out the Gravity Forms Documentation.
2. Create Your Lead Generation Form
Once you’ve activated the add-on, you’ll need a lead generation form. You have two options for this step. First, you can create a form from scratch. All you have to do is go to Forms > New Form and enter the name for your form. Then, use the form editor to add the necessary fields.
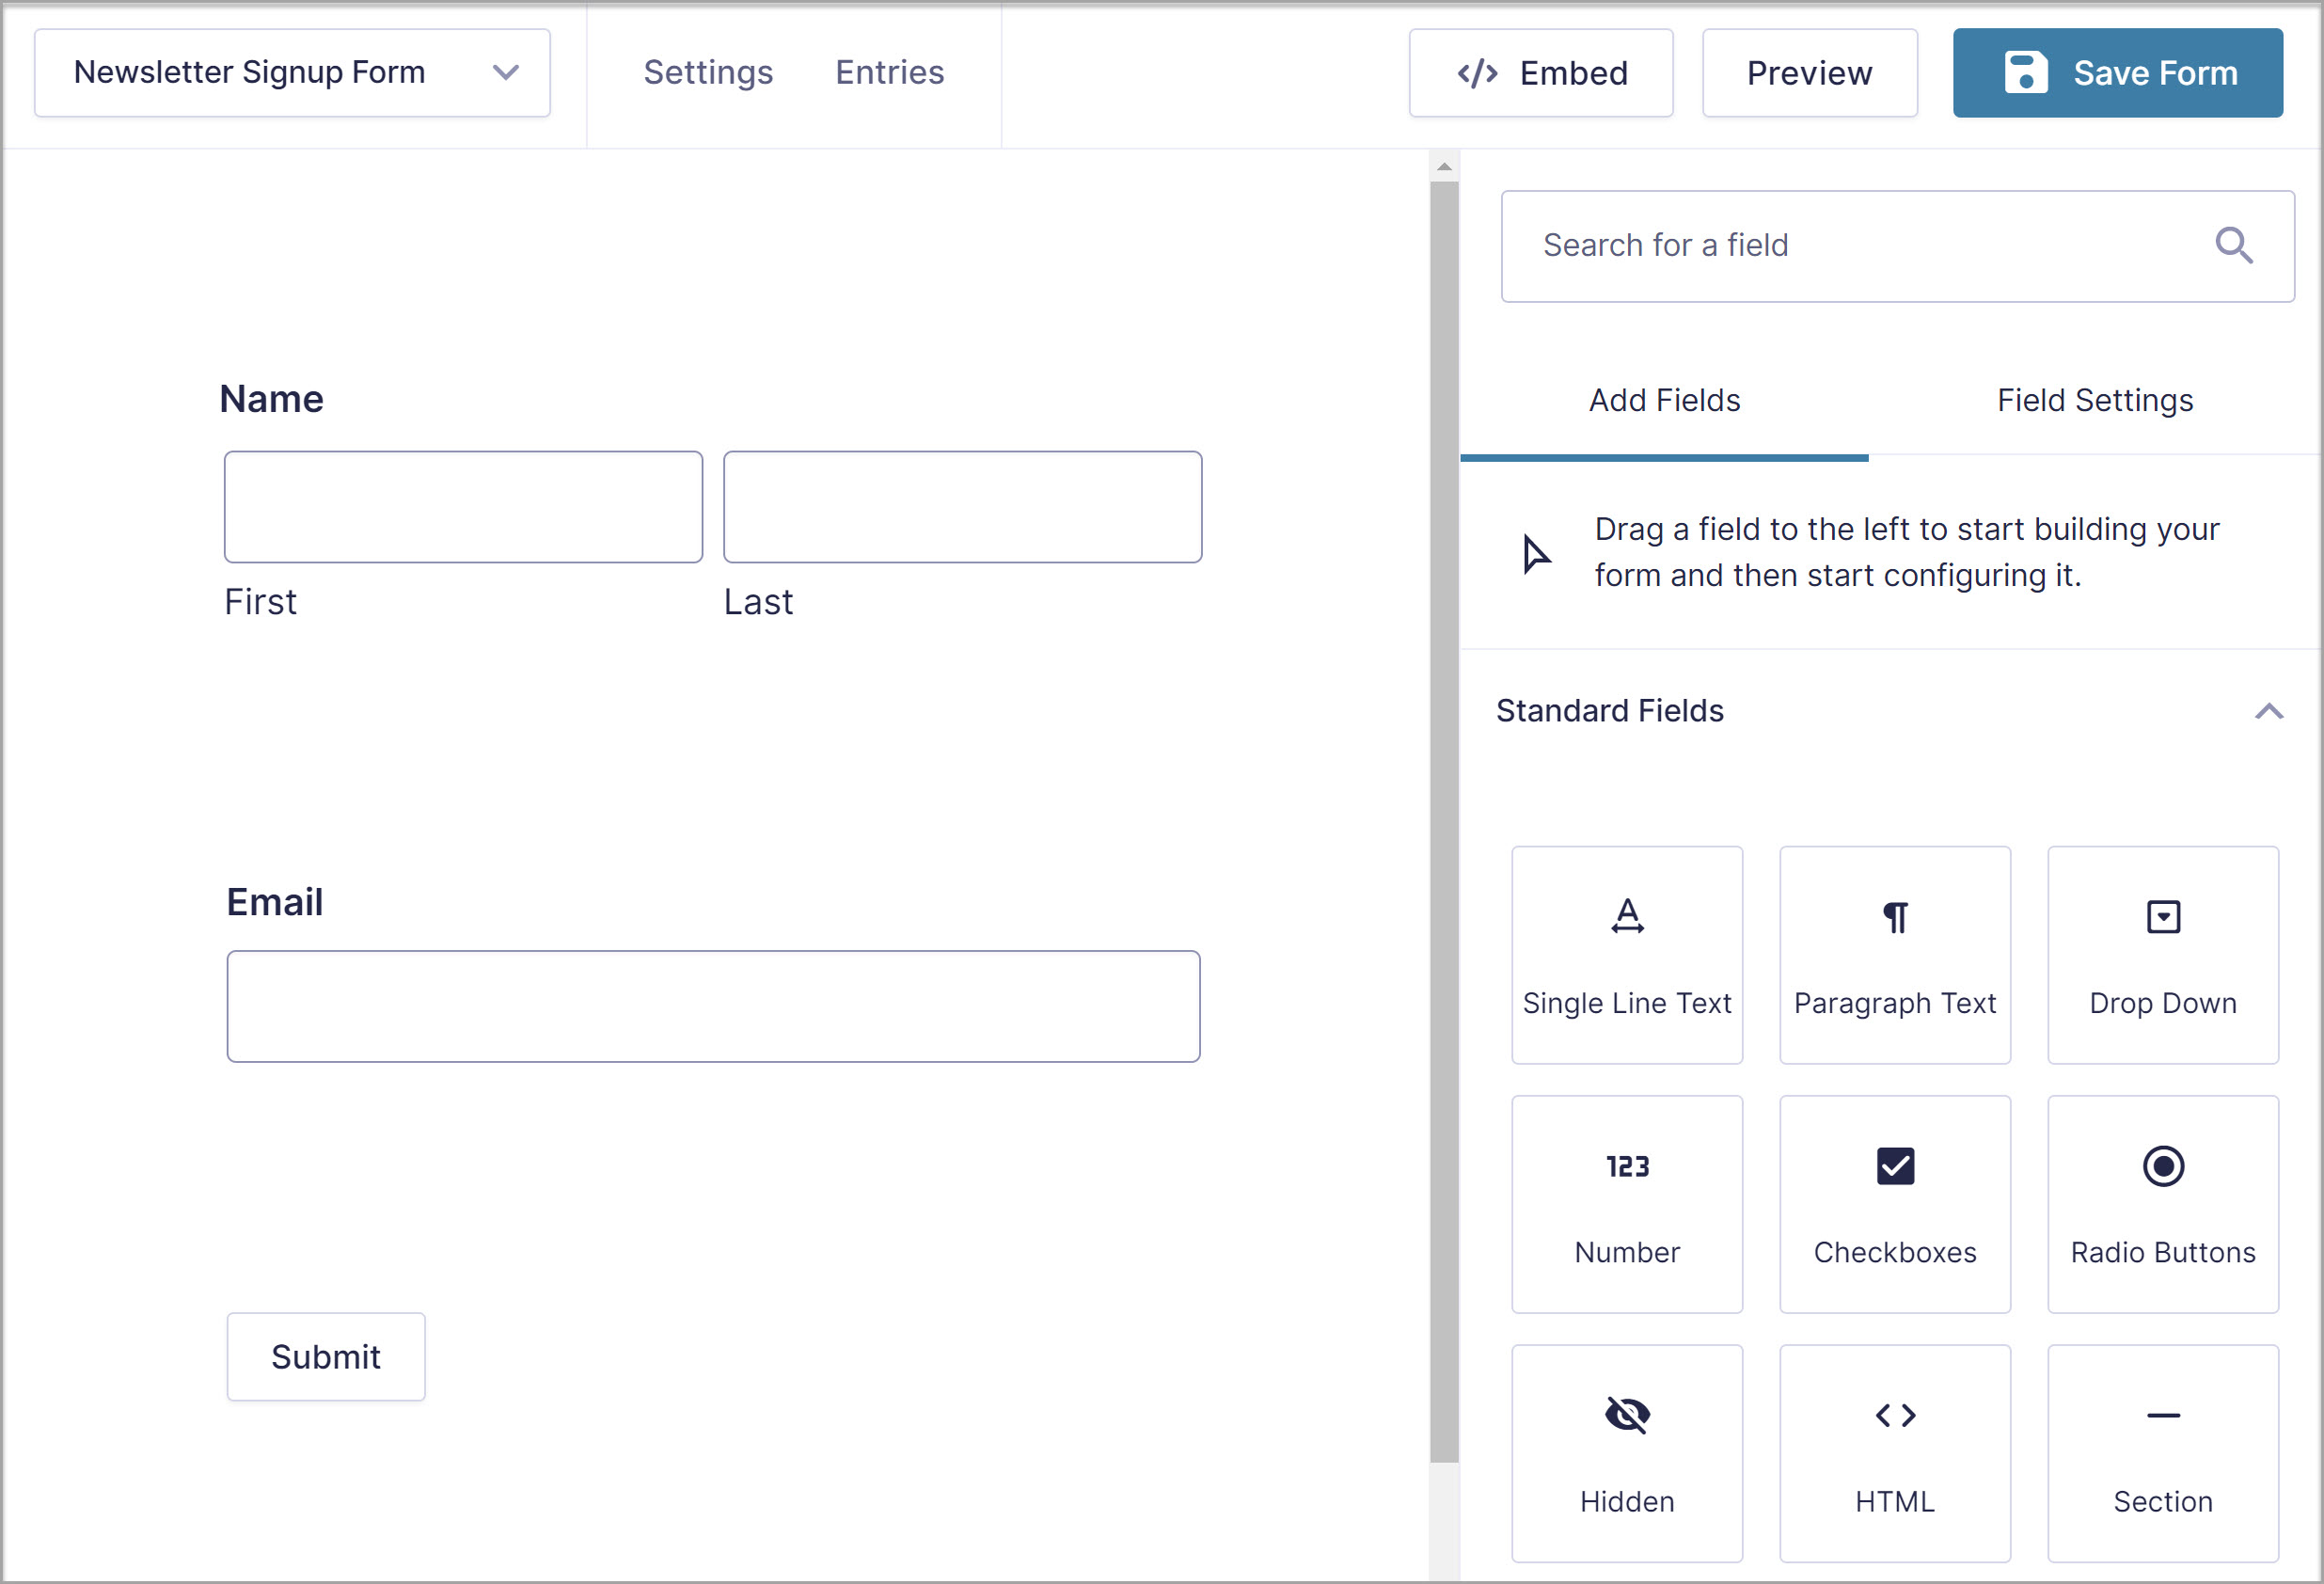
As a bare minimum, you’ll want to include the first name and email address field. A few other options include:
- A checkbox to indicate topics they’re interested in.
- A consent checkbox confirming they are happy with your data collection policy.
- A reCAPTCHA field to prevent spam form entries.
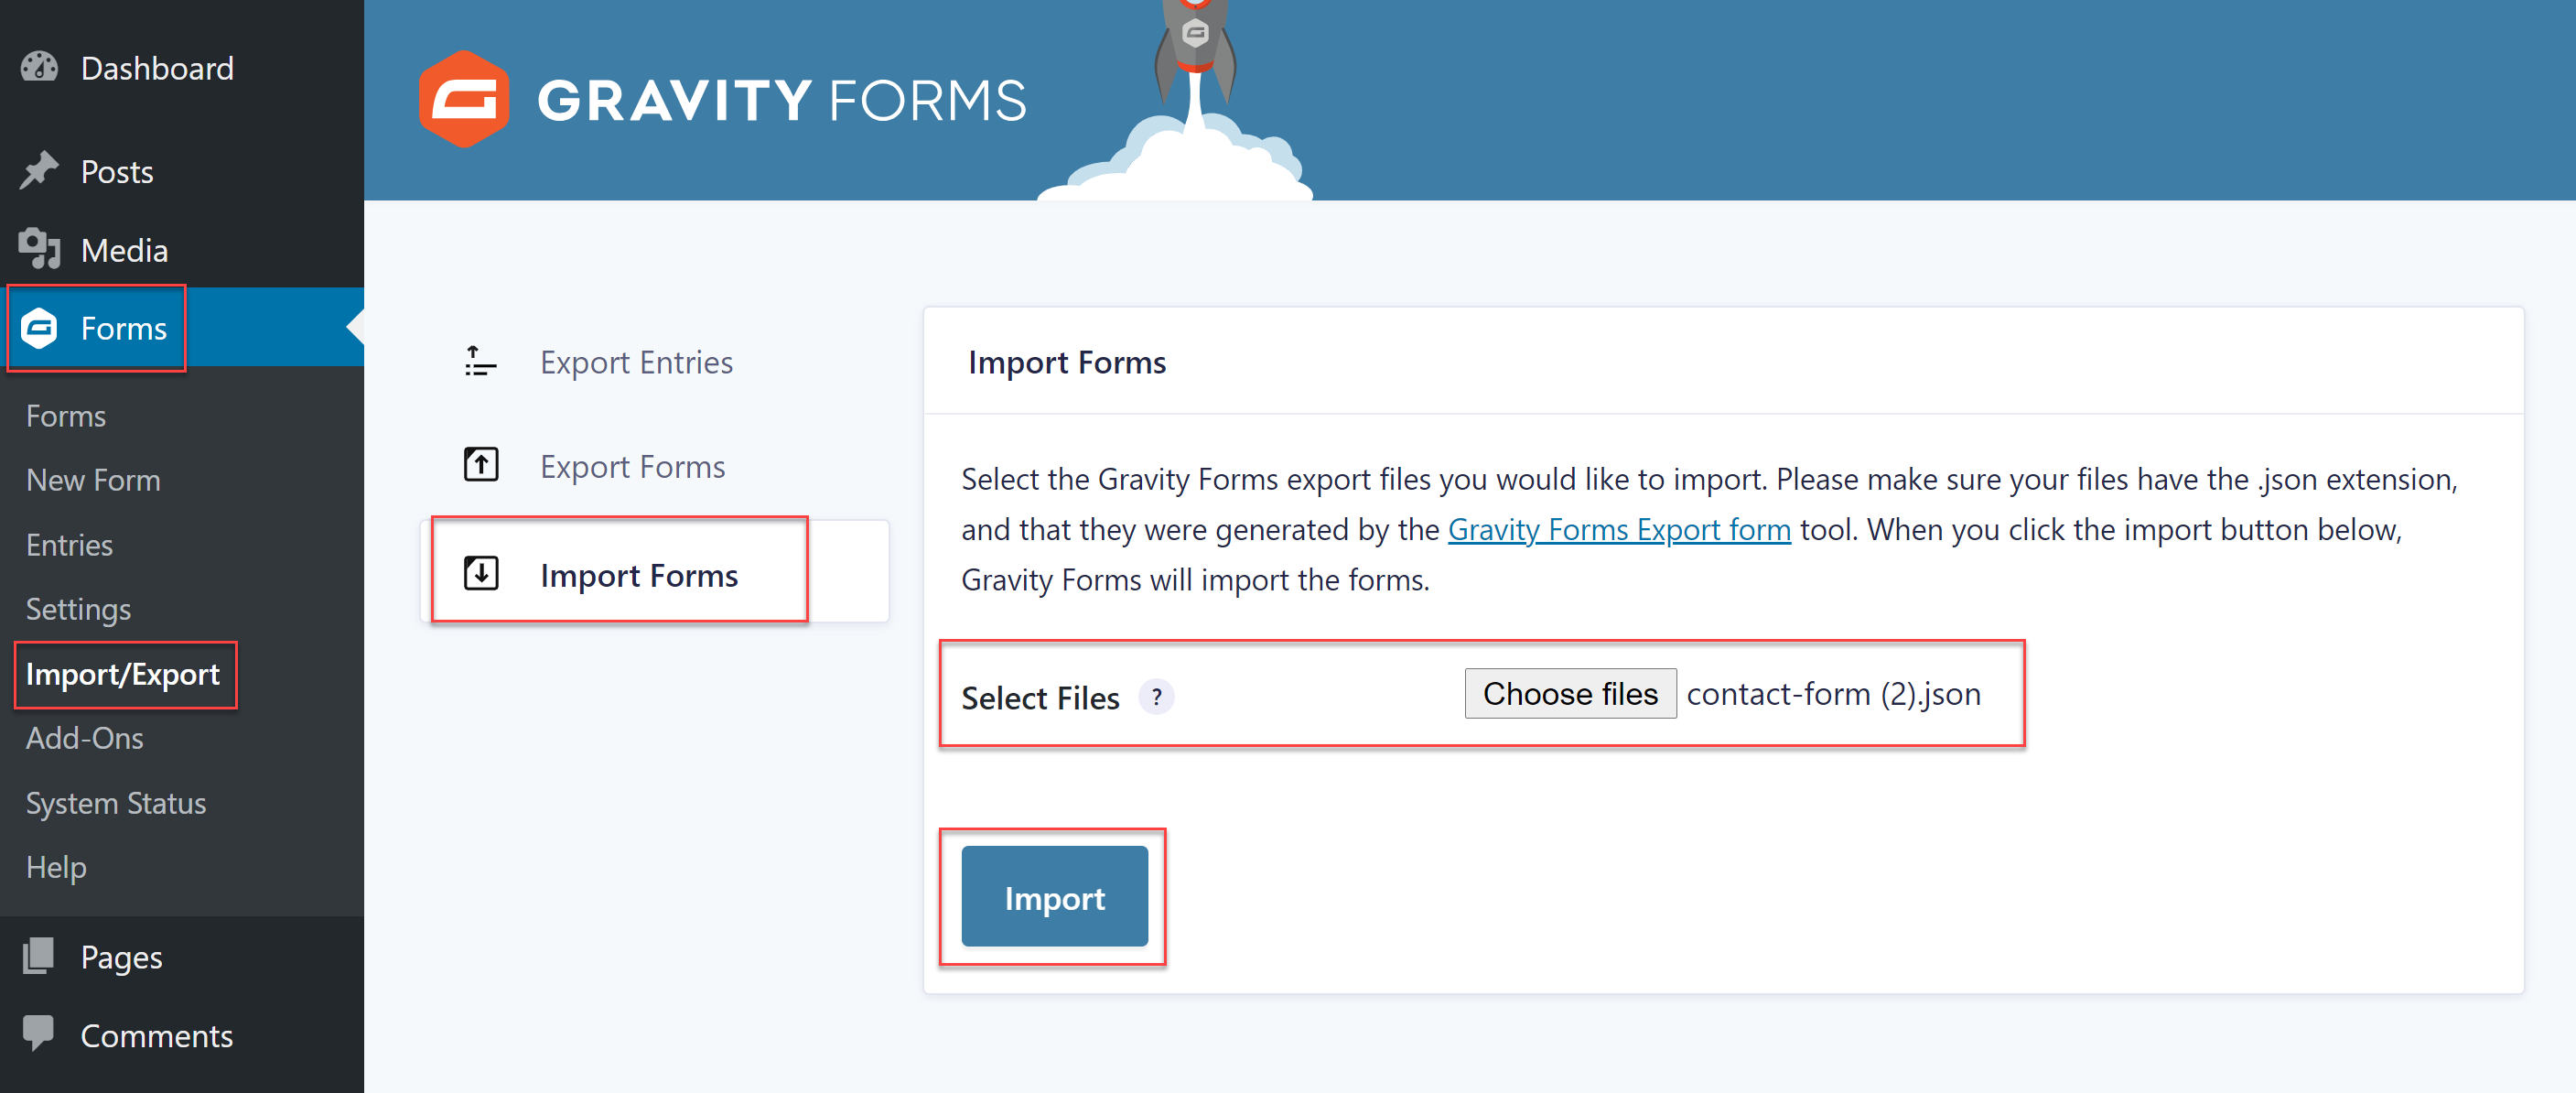
The second option is to use one of our premade form templates to save time. Head on over to our form template library, select the form that works best for your project, and download the form to your computer.
Then, go back to your WordPress dashboard and navigate to Forms > Import/Export. Click on the Import tab and locate the form template you’ve downloaded on your computer. Click the Import button and wait for the import process to finish.
You can then customize the form with your choice of fields to ensure it meets your business needs. For more information on getting started with your first form, check out this article – How to Create a Form in WordPress.
3. Configure The Feed For The Campaign Monitor Add-On
The last step in the process is to configure the Campaign Monitor Add-On. For that, you’ll need to create a feed so let’s do that now so you can start sending your form submission data to your Campaign Monitor account.
Go to Forms and select the lead generation form you’ve created or imported in the previous step. Click Settings > Campaign Monitor. Then, click the Add New button to create a new feed.
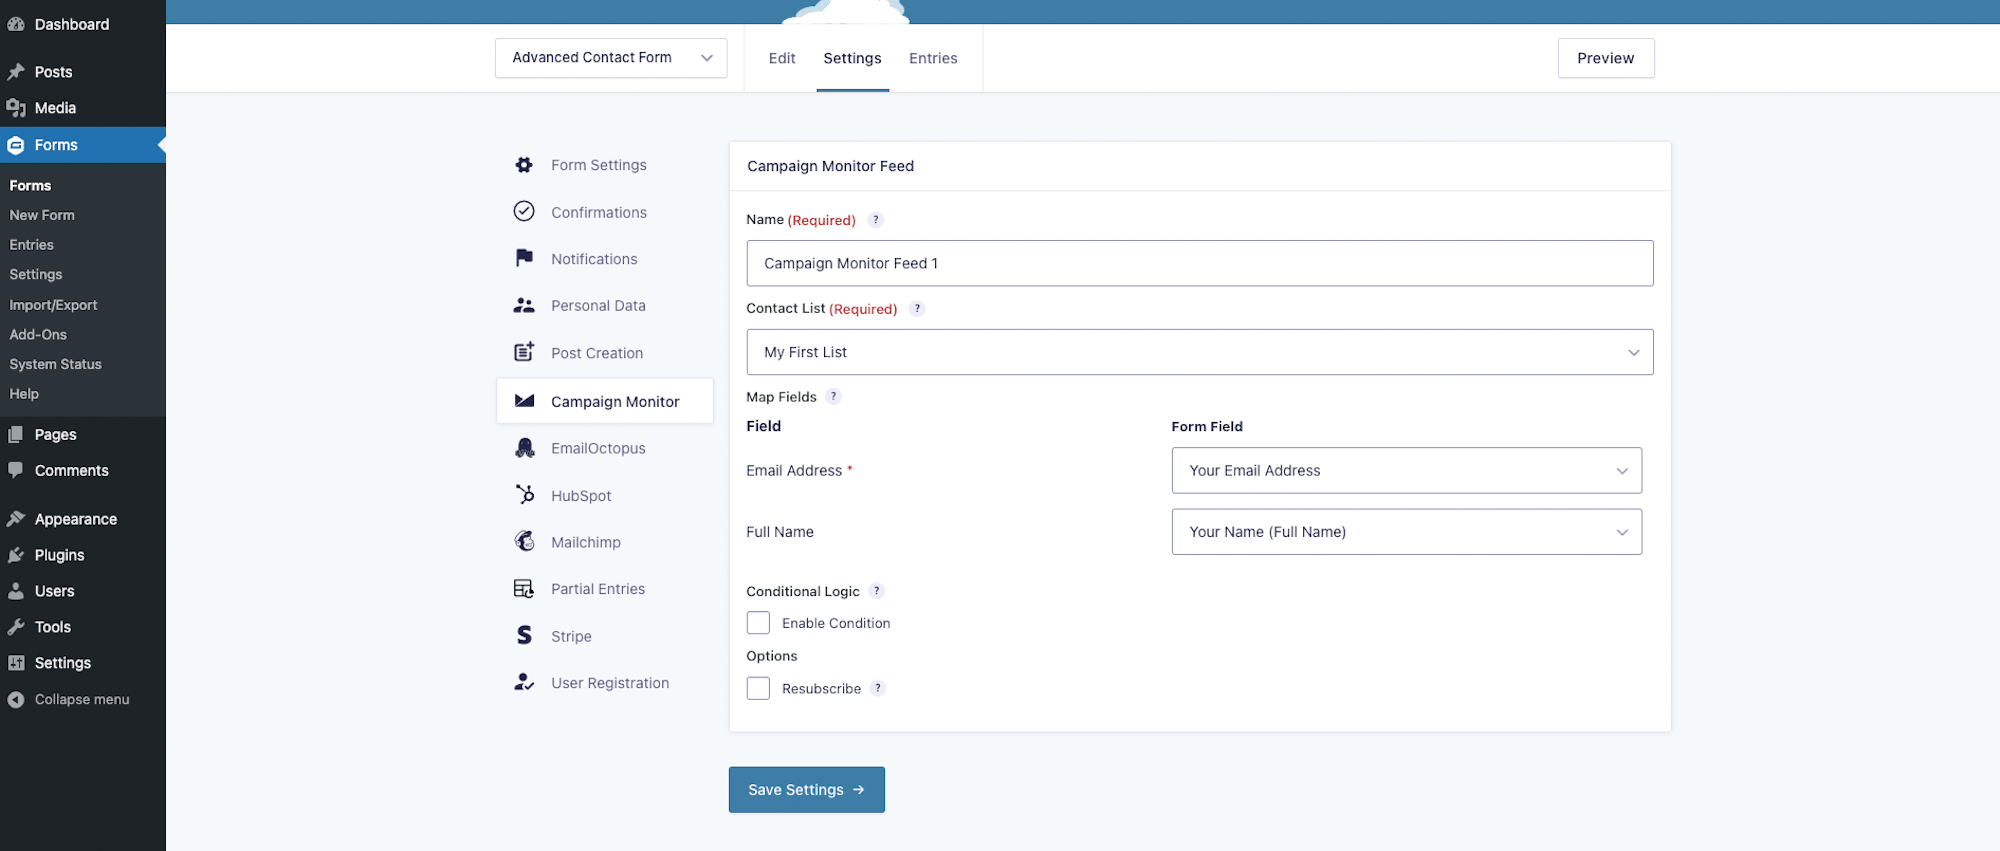
Give the feed a name and select the appropriate Campaign Monitor email list from the drop-down menu where you would like the form entries to be sent. You’ll then be presented with a few further options you’ll need to configure.
Firstly, you’ll need to map your Gravity Forms fields to the correct fields in your Campaign Monitor account to ensure the form data ends up where it should be.
Secondly, you can enable conditional logic. This will allow you to specify a set of conditions when the form submission will be sent to your Campaign Monitor list. For example, you can add a checkbox asking them to consent to subscribing to your newsletter and use conditional logic to only send form submissions when the box is checked.
If you decide to leave the conditional logic option unchecked, every form submission will be sent to your Campaign Monitor account.
The last option is to tick the Resubscribe box. This option allows you to resubscribe users who have previously opted out of your email marketing campaigns. In some cases, they may not want to be resubscribed. Other times, they might have unsubscribed by accident or simply weren’t interested in your offers at the time. As such, it’s best to use this feature with caution and it’s also a good idea to add a consent box to your form.
When you’re done configuring the options, click Save Settings. Your form is now complete and ready to be published on your WordPress website.
Ready To Integrate WordPress With Campaign Monitor?
Building your email list and collecting potential leads on your WordPress website is easy with Gravity Forms and the Campaign Monitor Add-On. These resources will help you learn more about using Gravity Forms and the Campaign Monitor Add-On to grow your list:
- Campaign Monitor Add-On Archives – Gravity Forms Documentation
- Starter Guide: How to Create a Newsletter Signup Form
- Increase Form Conversion Rates with these Five Simple Tips
Don’t Have Gravity Forms Yet?
Don’t have Gravity Forms? Don’t worry! You can take Gravity Forms for a test drive with our free personalized demo and try out all the features Gravity Forms offers. And while you’re at it, be sure to install the many Gravity Forms Add-Ons to see how you can easily extend and enhance your forms.
Already in love? Purchase our premium WordPress form plugin today!
Newsletter
If you want to keep up-to-date with what’s happening on the blog sign up for the Gravity Forms newsletter!
"*" indicates required fields


