Have you ever wished that you could accept video recordings from users via your forms?
With this month’s featured add-on – the Gravity Forms Pipe Video Recording Add-On – you can easily let users record and submit videos in any of your WordPress forms.
You can use these videos in all types of different ways, such as having applicants submit a video on a job or volunteer application form, collecting video testimonials or reviews, soliciting user feedback, offering customer support more effectively (by letting users record a video of their issues), and lots more.
In this post, we’ll dig into everything that you need to know about the Pipe Video Recording Add-On.
We’ll start with an introduction to what Pipe offers and how the Gravity Forms Pipe Video Recording Add-On works. Then, we’ll show you step-by-step how to set up Pipe and start accepting videos via your forms.
What Does Pipe Offer?
In a nutshell, Pipe offers an easy way for your site’s users to record videos and submit them to your site.
Users can record videos right from their web browsers on both desktop and mobile devices.
Pipe handles all of the storage and transcoding for you so that those video files are then playable on any device via a .mp4 file. You also have the option to add a watermark if needed.
While Pipe can handle the video storage for you and deliver files via its content delivery network (CDN), it also lets you push the video files to your own storage solution if you’d prefer to maintain full control.
Pipe supports pushing video recordings to the following services:
- SFTP/FTP(s) – this lets you store video files on your own server.
- Amazon S3 (or other S3-compatible services like Backblaze B2, Wasabi, and many others)
- Dropbox
- YouTube
Pipe is also in the process of adding screen recording functionality, which is in beta at the time of this post. This feature could be especially useful for offering customer support for software products, as it would allow users to record the issue on their screens and submit it along with a customer support form.
What Does the Gravity Forms Pipe Add-On Do?
The Gravity Forms Pipe Add-On lets you integrate Pipe video recordings into your WordPress forms.
Users can record videos right from your form and submit those videos along with the rest of the form submission.
You also have the option to automatically save the video, regardless of whether or not the user actually submits the form.
When you install the add-on, you can access a new Pipe Recording field that you can add anywhere on your form.
In the field’s settings, you’ll get detailed options to control how your video recordings will function. For example, you can set a maximum time limit, control the resolution and dimensions, and more.
You’re also free to add multiple Pipe Recording fields to the same form, which lets you give users the option of recording multiple unique videos in a single submission.
How to Connect Gravity Forms to Pipe
Now that you know what Pipe offers and how the Gravity Forms Pipe Add-On, let’s get into the actual step-by-step guide for how to set up Pipe with Gravity Forms and start accepting video recordings via your forms.
For this tutorial, we’ll only assume two things:
- You have the Gravity Forms Pro, Elite, or Nonprofit license, which are required to access the Gravity Forms Pipe Video Recording Add-On. If you’re not holding one of these licenses yet, you can purchase a new license here or upgrade your existing Basic license and only pay the prorated difference.
- You have a Pipe account. If you don’t have one yet, you can register for an account here. Pipe offers a 14-day free trial with no credit card required, so you can follow this guide and test things out at no risk to your wallet. After those 14 days, plans cost $50 per month for Standard features or $250 per month for Pro features.
Once you have those things ready to go, here’s how to set up the Gravity Forms Pipe Video Recording Add-On…
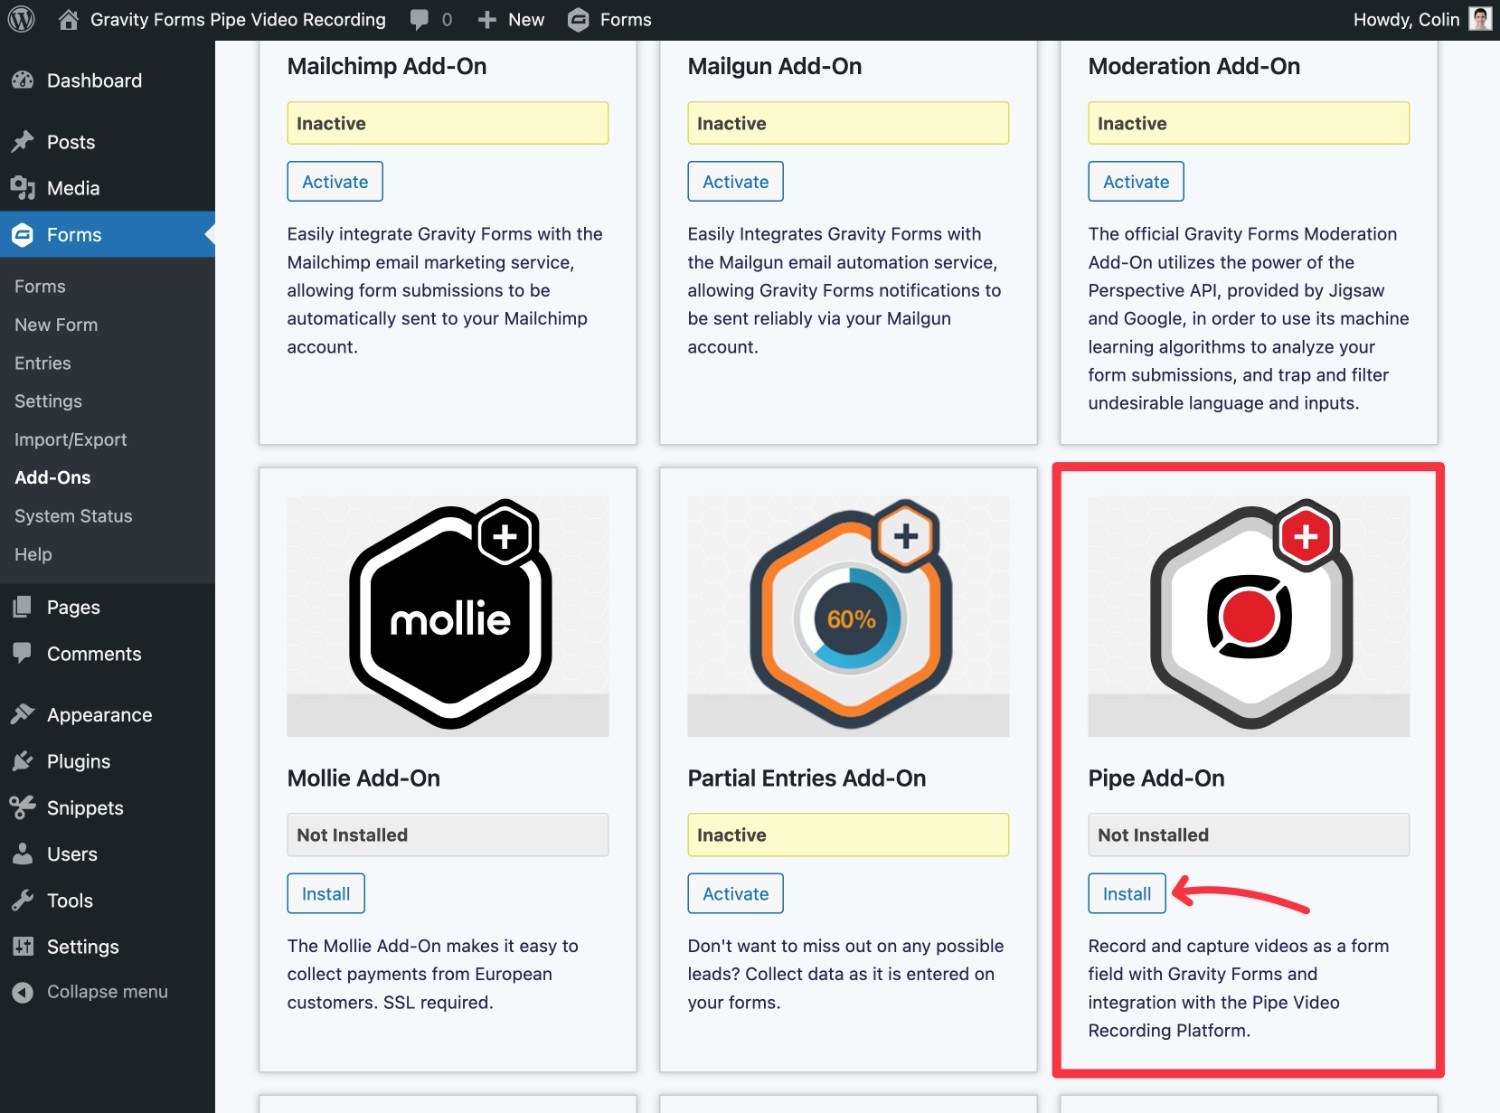
1. Install the Pipe Video Recording Add-On
To begin, you’ll want to install the Pipe Video Recording Add-On on your site:
- Go to Forms → Add-Ons in your WordPress dashboard.
- Find the Pipe Video Recording Add-On in the list of available add-ons.
- Click the Install button under the listing.
- Once the installation finishes, make sure to activate the add-on.
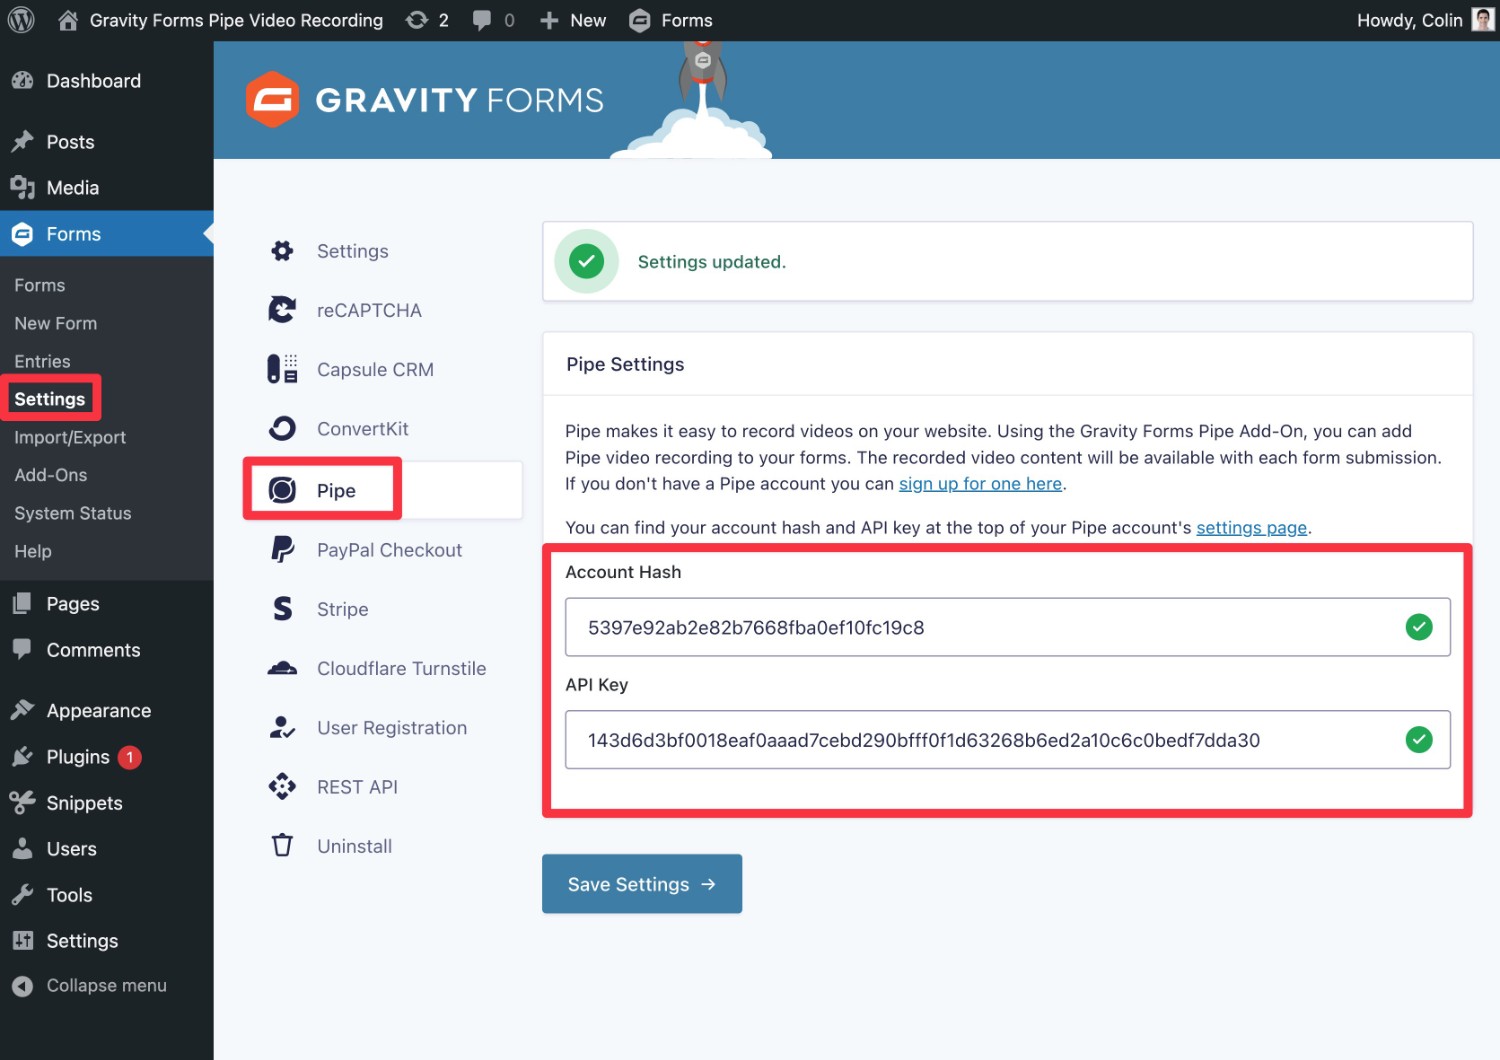
2. Connect Gravity Forms to Pipe
Once you’ve installed the add-on, the next step is to connect Gravity Forms to your Pipe account:
- Go to Forms → Settings → Pipe in your WordPress dashboard.
- Add your Pipe Account Hash to the Account Hash box (we’ll show you how to find this below).
- Add your Pipe API key to the API Key box (we’ll show you how to find this below).
- Click Save Settings.
- If it worked correctly, you should see green check marks next to each item. If you see a red “X” instead, make sure that you didn’t accidentally enter a typo and that you pasted the correct string into each box (that is, you didn’t accidentally add the Account Hash to the API Key field).
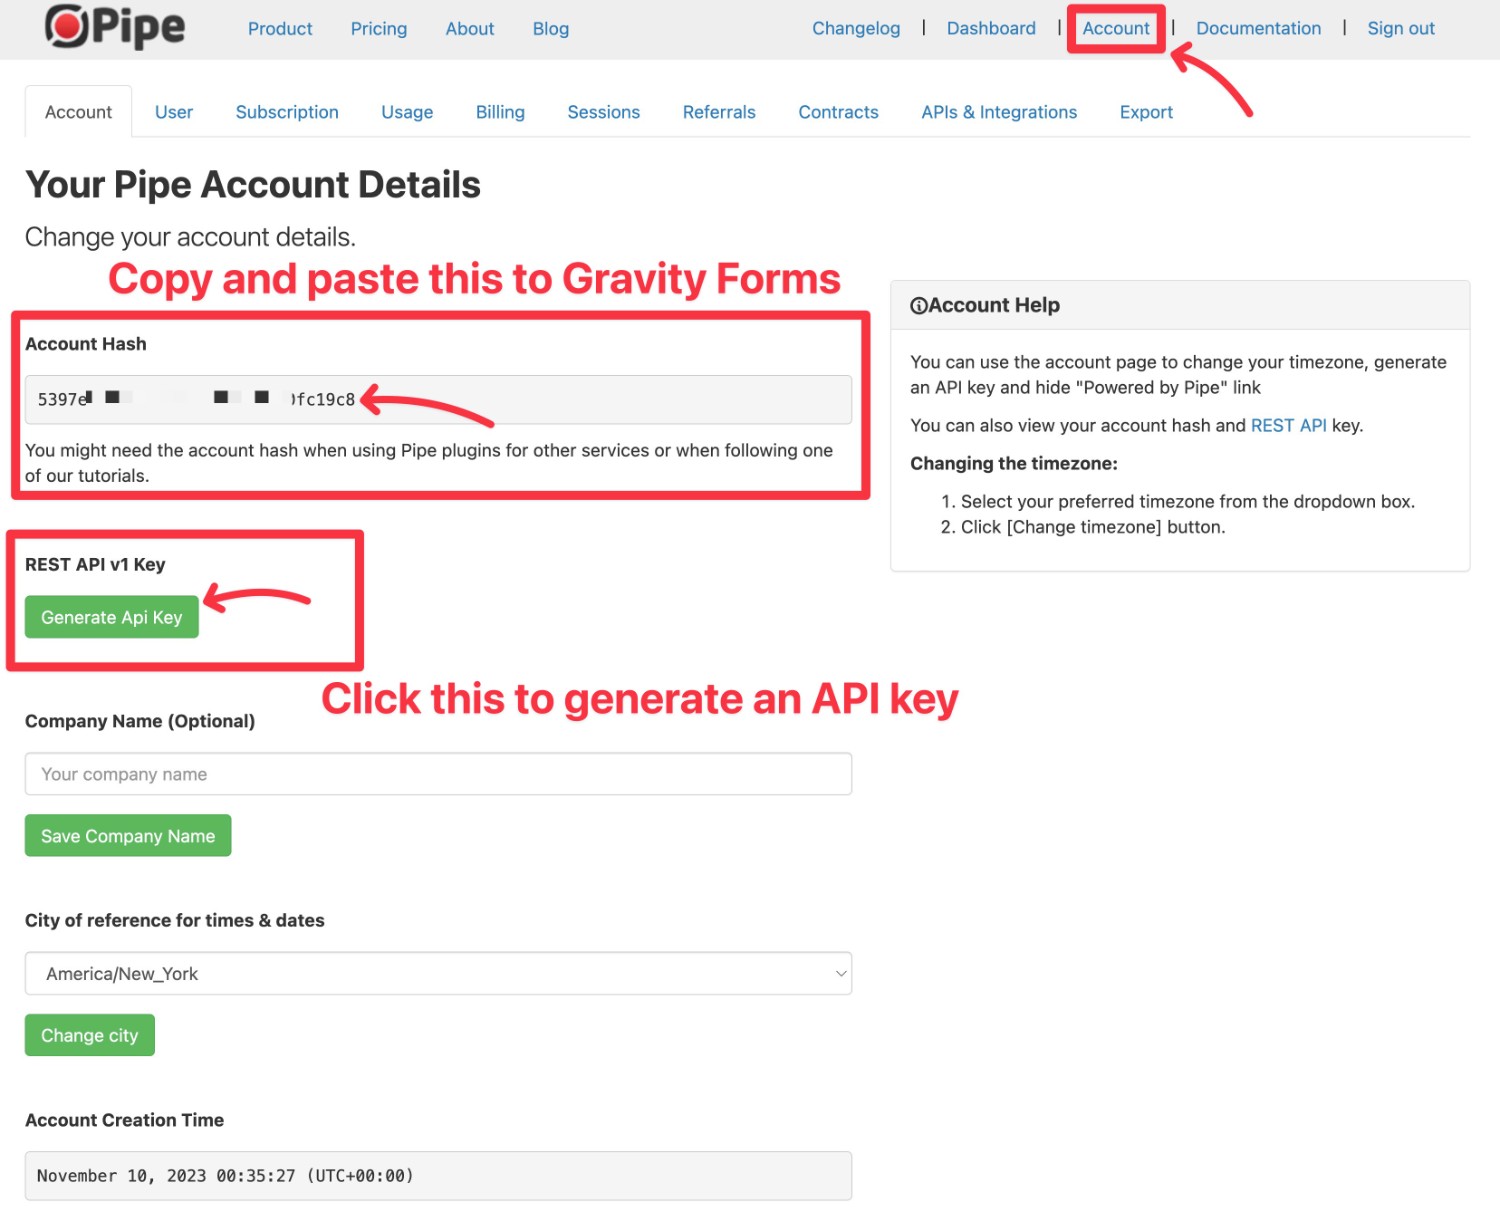
To find your Pipe Account Hash and API Key, you can click on the Account option on the top menu bar of the Pipe dashboard. Or, you can click this link to go straight to the relevant page.
You should see the Account Hash right away – just copy and paste that value into the Gravity Forms Pipe settings page.
Then, click the Generate Api Key button under REST API v1 Key to create an API key for your account.
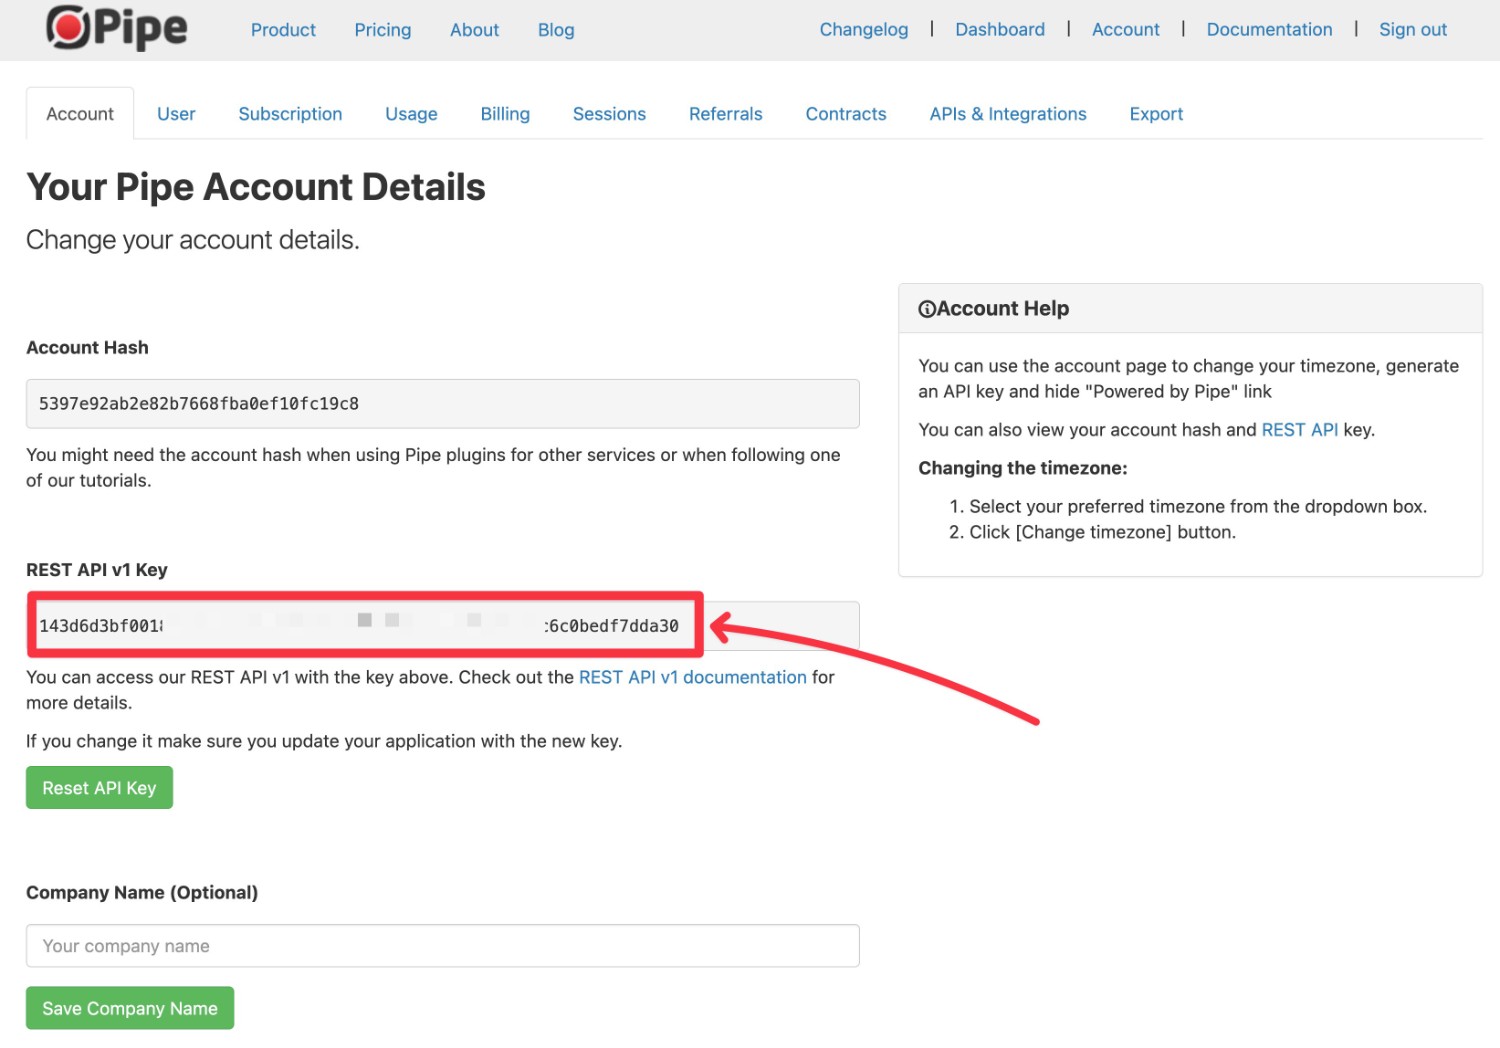
After clicking the Generate API Key button, you should see the API key appear in a box. Copy and paste this value to the API Key box in Gravity Forms.
3. Create/Edit Form and Add Pipe Recorder Field
Now, you’re ready to jump into the actual form where you’ll accept video submissions.
You can add the Pipe video recording functionality to any form on your site. It could be a dedicated form just for video submissions. Or, you could just add an optional or required video submission option as part of a larger form.
Set Up Your Basic Form
To get started, you can either create a brand new form or edit an existing form where you want to accept video submissions.
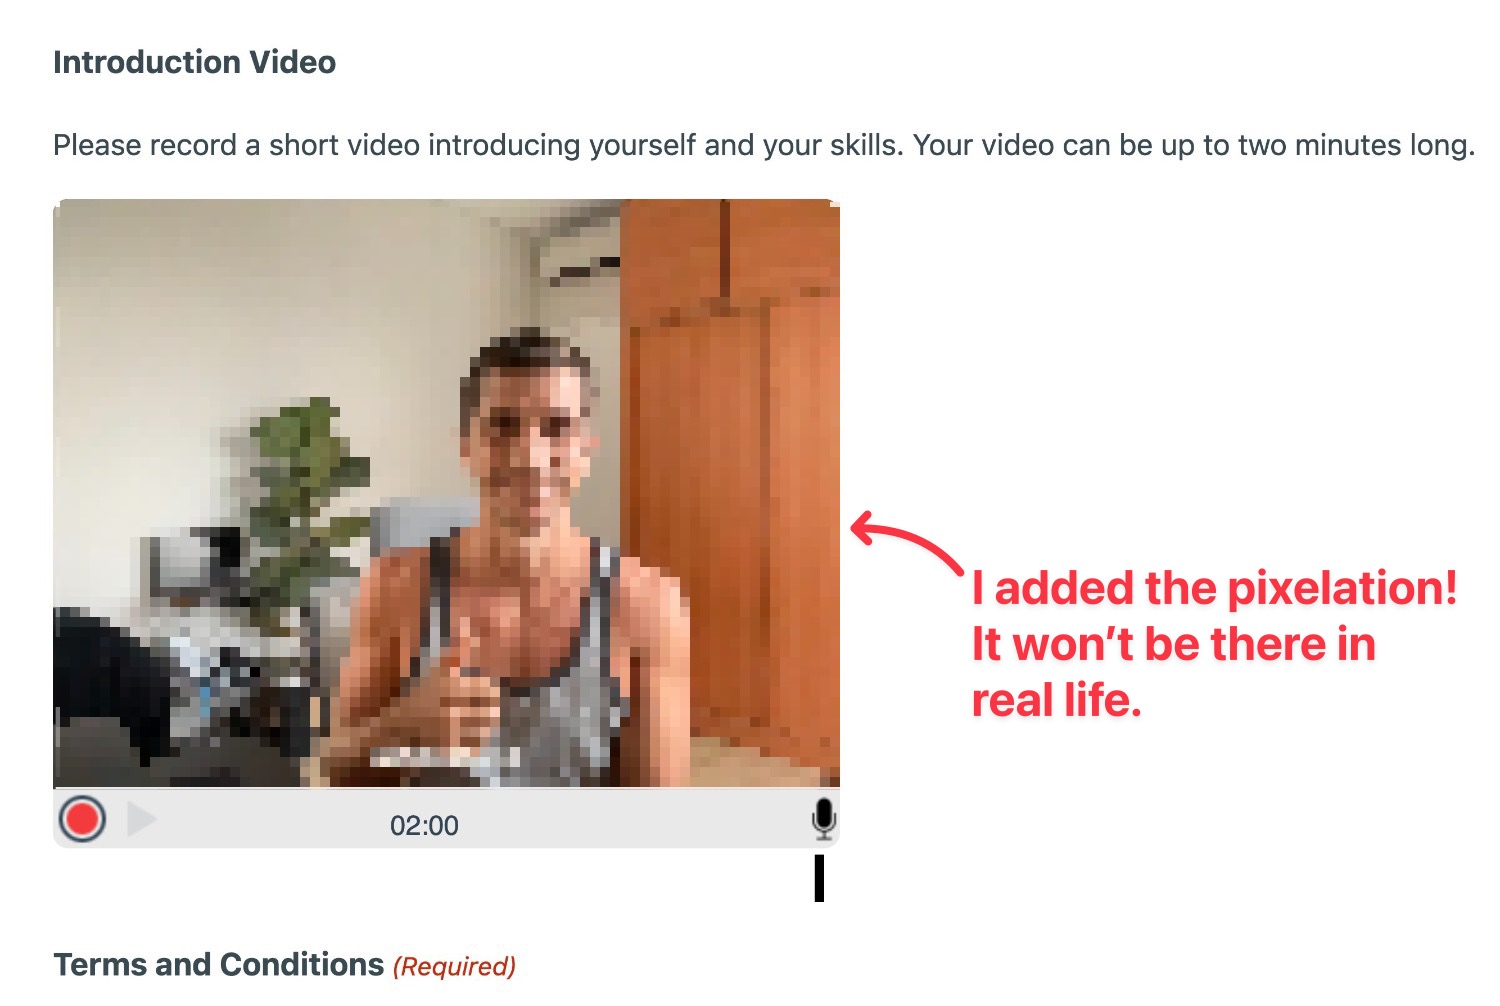
For this example, we’re using the premade Employment Application Form template and we’ll ask applicants to record a short video introducing themselves as part of the job application form. However, the same basic steps apply to any type of form.
Go ahead and add all the regular form fields like you normally would.
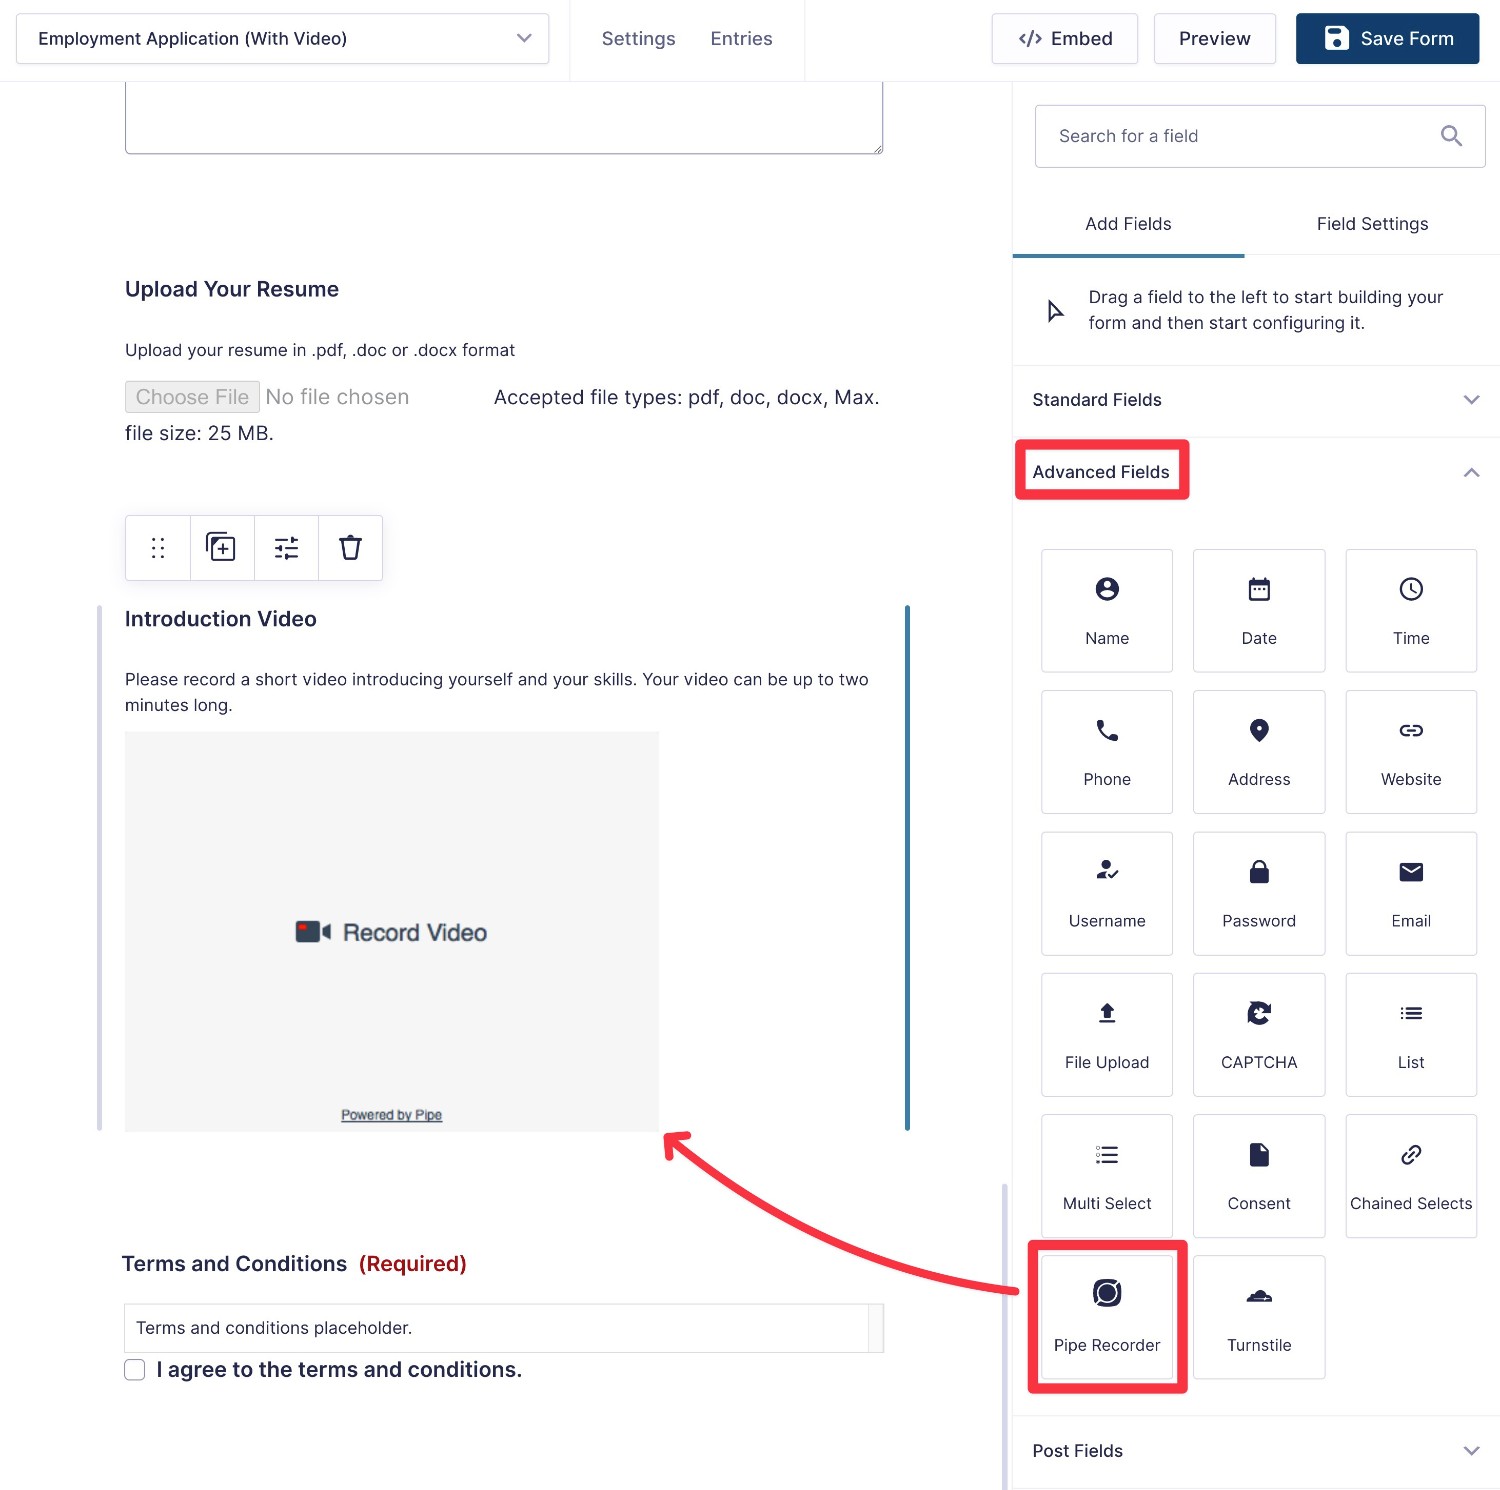
Add the Pipe Recorder Field
When you’re ready to add the video recording option, you can add the Pipe Recorder field to your form, which is available in the Advanced Fields section.
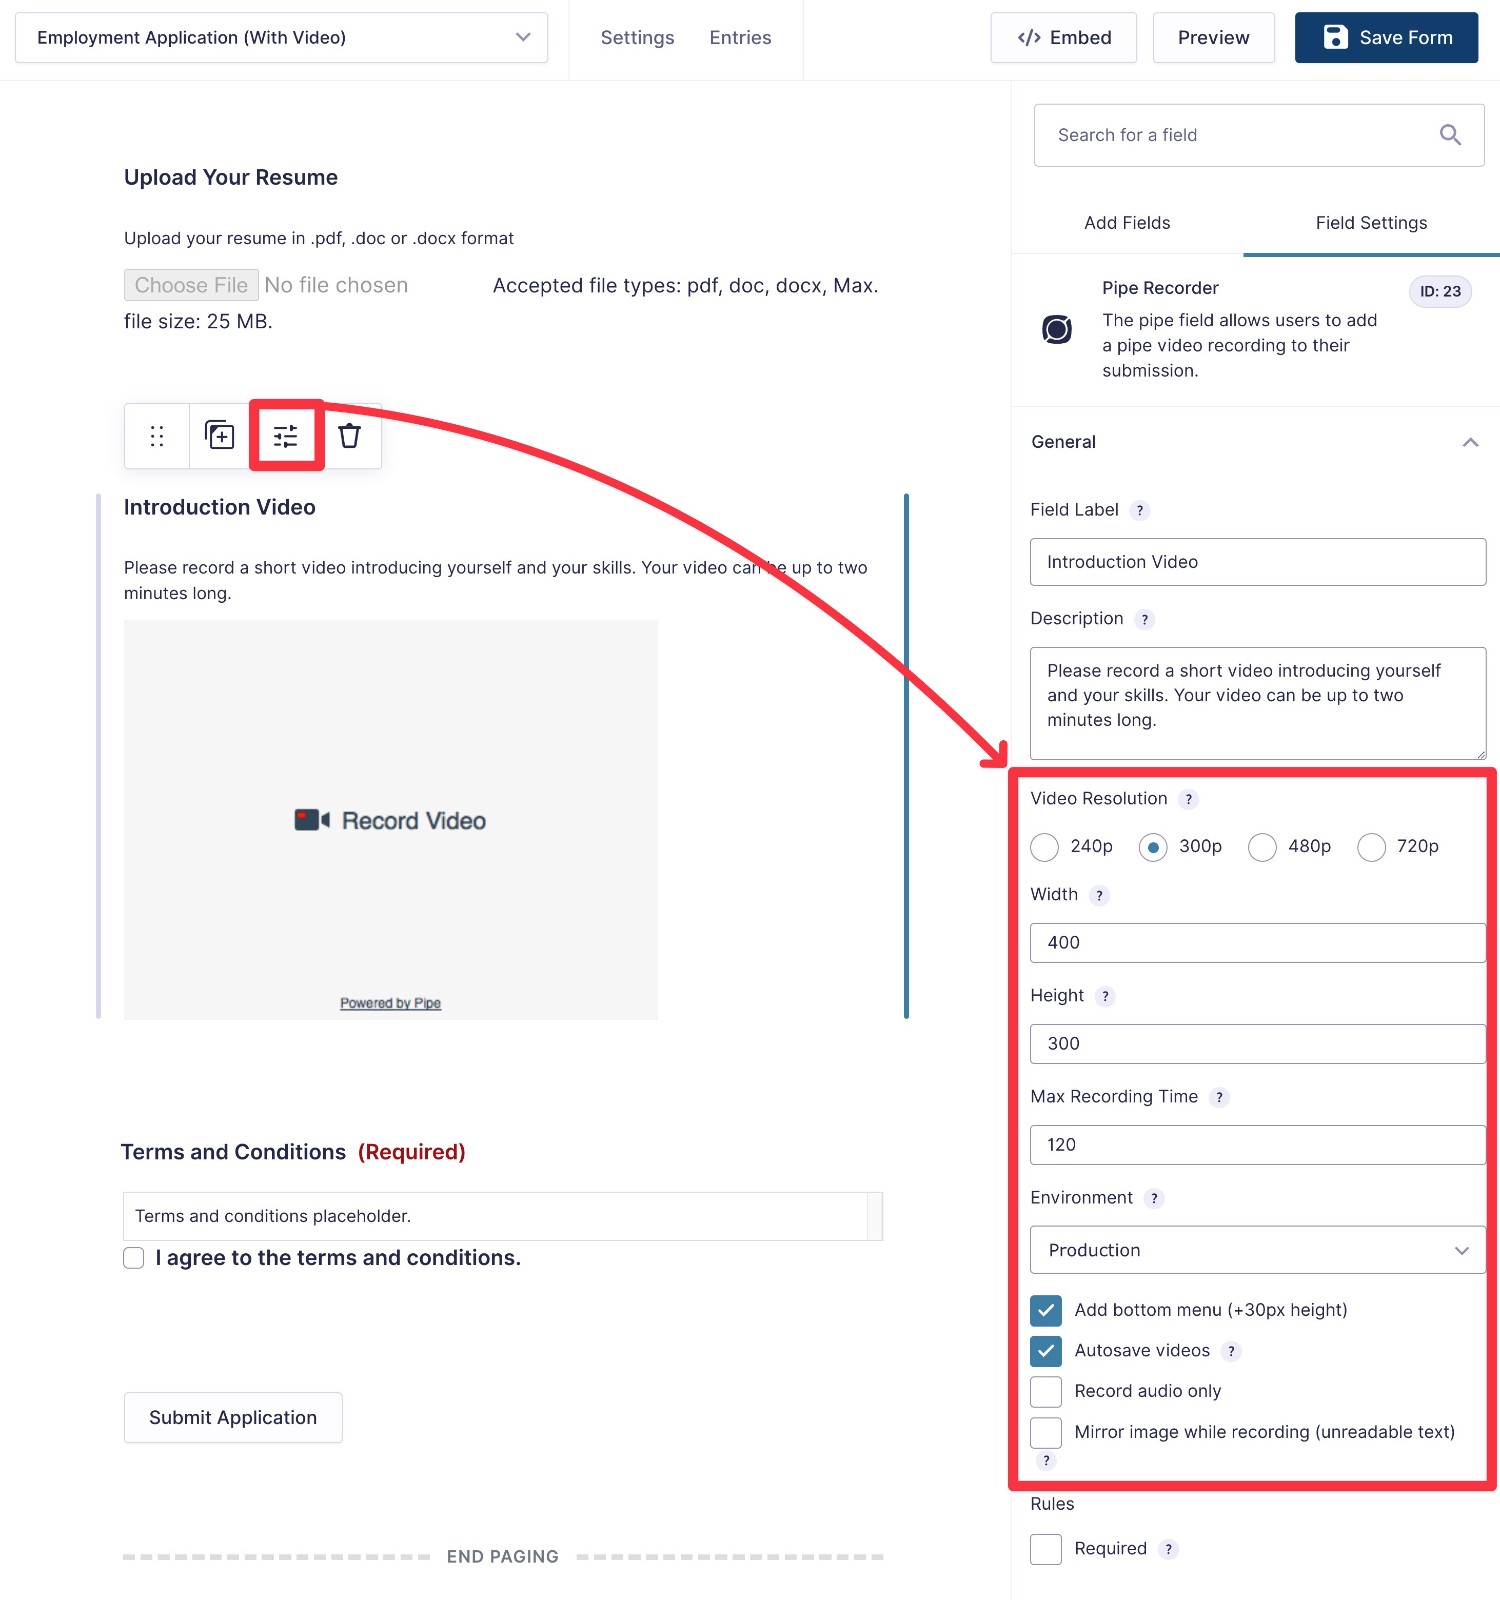
Configure Pipe Recorder Field Settings
To further configure how the video recording should work, you can open the settings for the Pipe Recorder Field.
Here, you can make several key choices:
- Video Resolution – with the Pipe Standard plan, you can choose from 240p to 720p. The Pipe Pro plan adds support for up to 4K resolution (including a Full HD option). Higher resolution videos will cost more money if you exceed your Pipe plan’s included limits, as detailed in this picture.
- Height and width – these control the dimensions of the video recorder interface on desktop devices. On mobile devices, the width is automatically set to 100% and the height is 120 px.
- Maximum recording time – this controls how long a user’s video can be (in seconds).
- Environment – if you’ve created multiple environments via your Pipe dashboard, you can choose between different environments using this setting. By default, there’s only one option (Production) unless you create more in your Pipe account.
- Autosave videos – if you disable this, videos will only be saved if the user specifically clicks the Save button. When enabled, videos will be automatically saved after the user stops the recording.
- Audio only – you can check this box to disable video recording and only save the audio.
- Mirror image while recording – whether or not to mirror (flip) the video while it’s being recorded. Even if you enable this setting, the final video will not be mirrored/flipped. It only applies while the user is actively recording their video.
Save Your Form (Or Add More Video Recording Fields)
Because you configure the Pipe Recording field’s settings in the form editor, there’s no need to create a separate Pipe feed like you need to do for some other Gravity Forms Add-Ons.
So, whenever you’re happy with how you configured the field, you’re finished with setting up the Pipe integration. Just make sure to click the Save Form button to save your changes.
If you want to give users the option to record multiple videos, you can also add another Pipe Recorder field.
4. Embed Your Form and Test
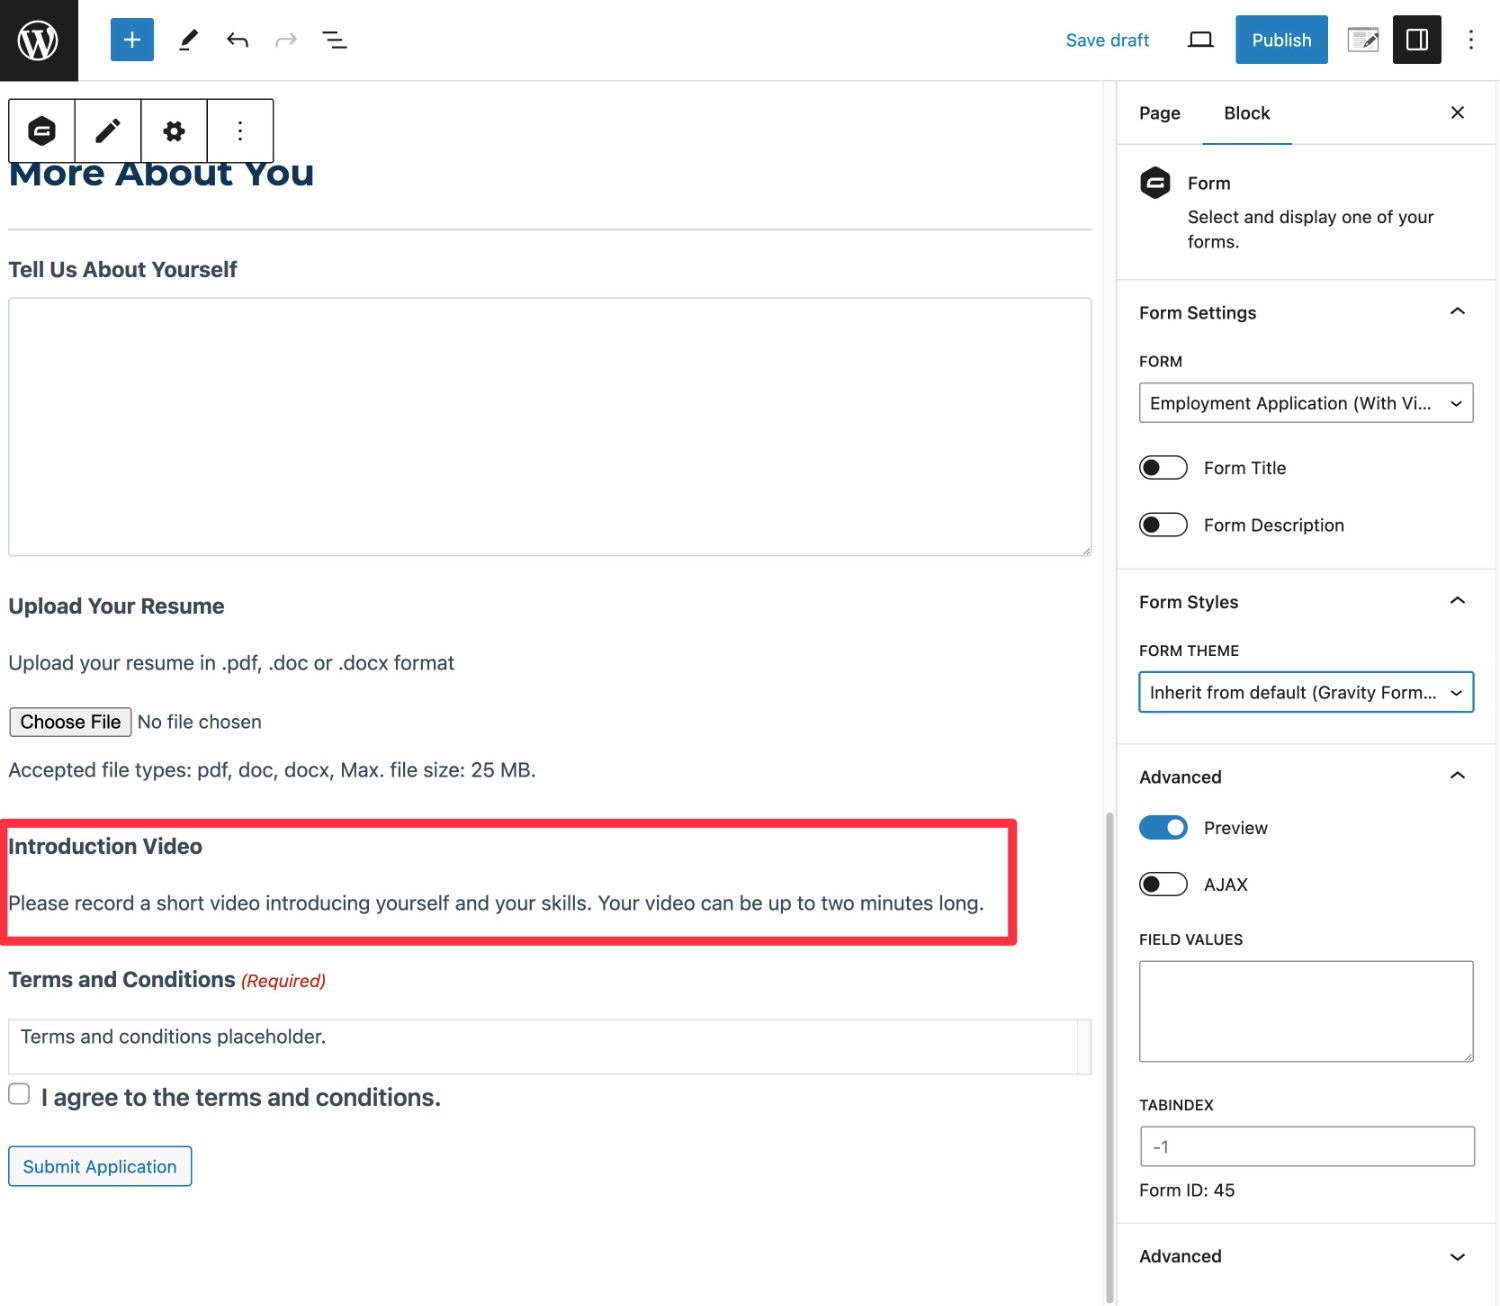
Once you’ve added the Pipe Recorder field and you’re happy with how the rest of your form is configured, the last step is to embed the form on your site.
You can do this using the Gravity Forms block or shortcode.
Note – you will not see the actual video recorder interface in the backend block editor, but it will still be live on the frontend of your site.
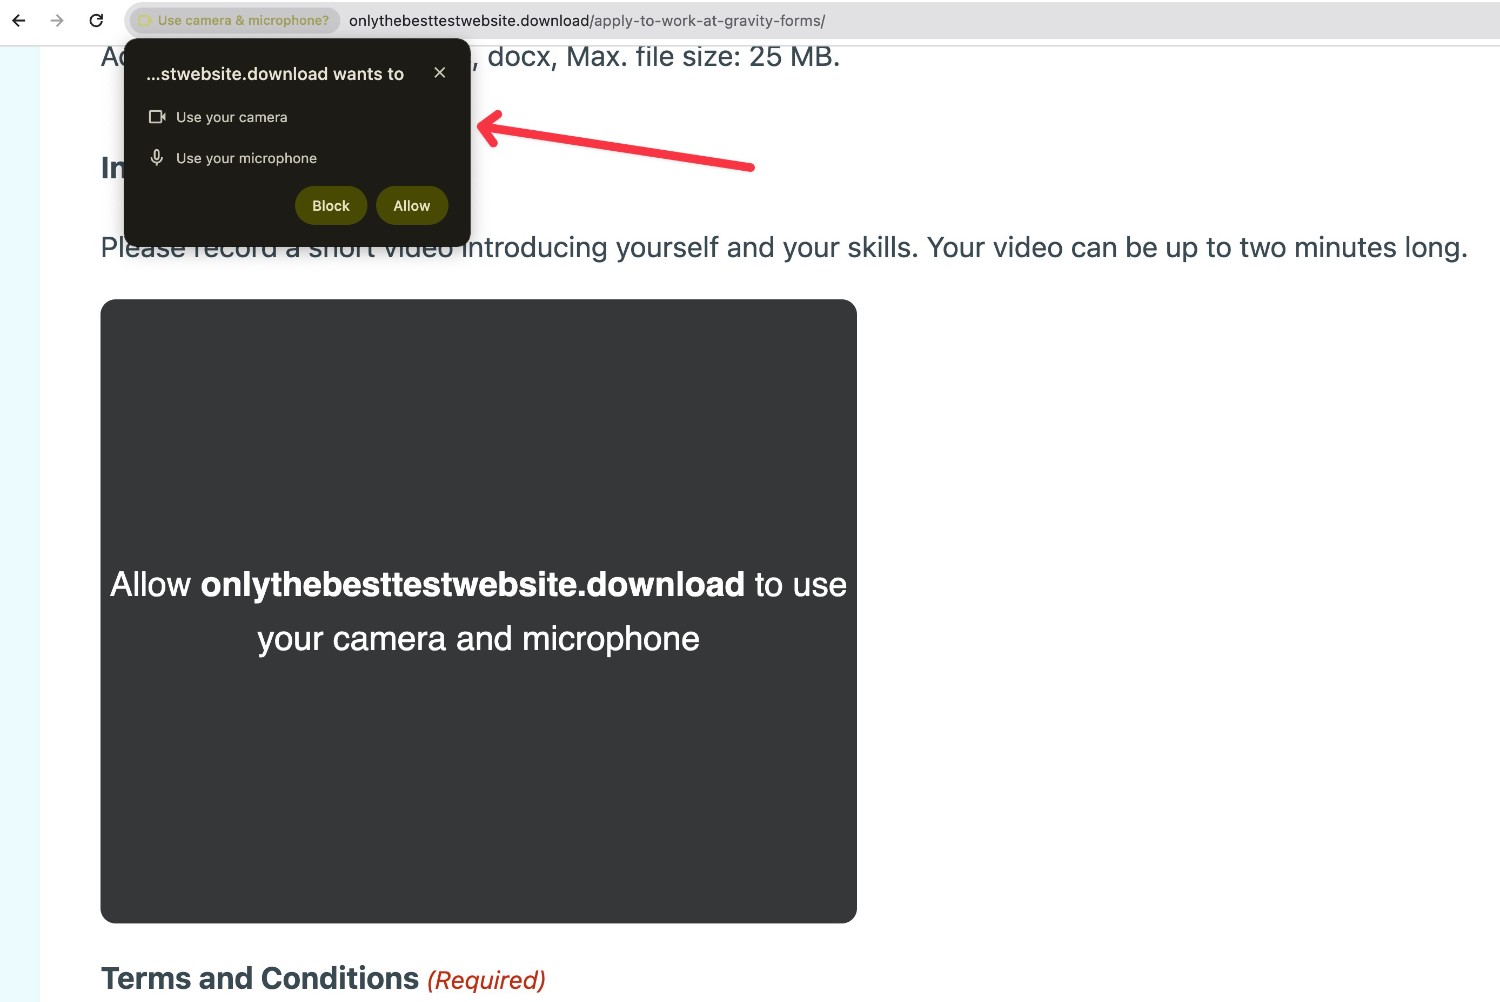
Once you’ve embedded the form, you can record a test video to make sure that everything is working.
When you click the Record Video button, you’ll first need to give permission for the form to access your computer’s microphone and webcam, which are required for the recording.
This happens via the normal web browser interface – it’s not unique to Gravity Forms or Pipe.
Then, you’ll see a live preview of the video right in the form, which lets you see exactly what your video will look like while you’re recording it.
If you enable the autosave feature in the Pipe Recorder, the video will be automatically saved as soon as you click the stop button, regardless of whether the form is actually submitted or not.
If you disable the autosave feature, the video will only be saved if you click the save icon, which is located next to the stop button.
Either way, users do not need to submit the form to save the video in your Pipe dashboard.
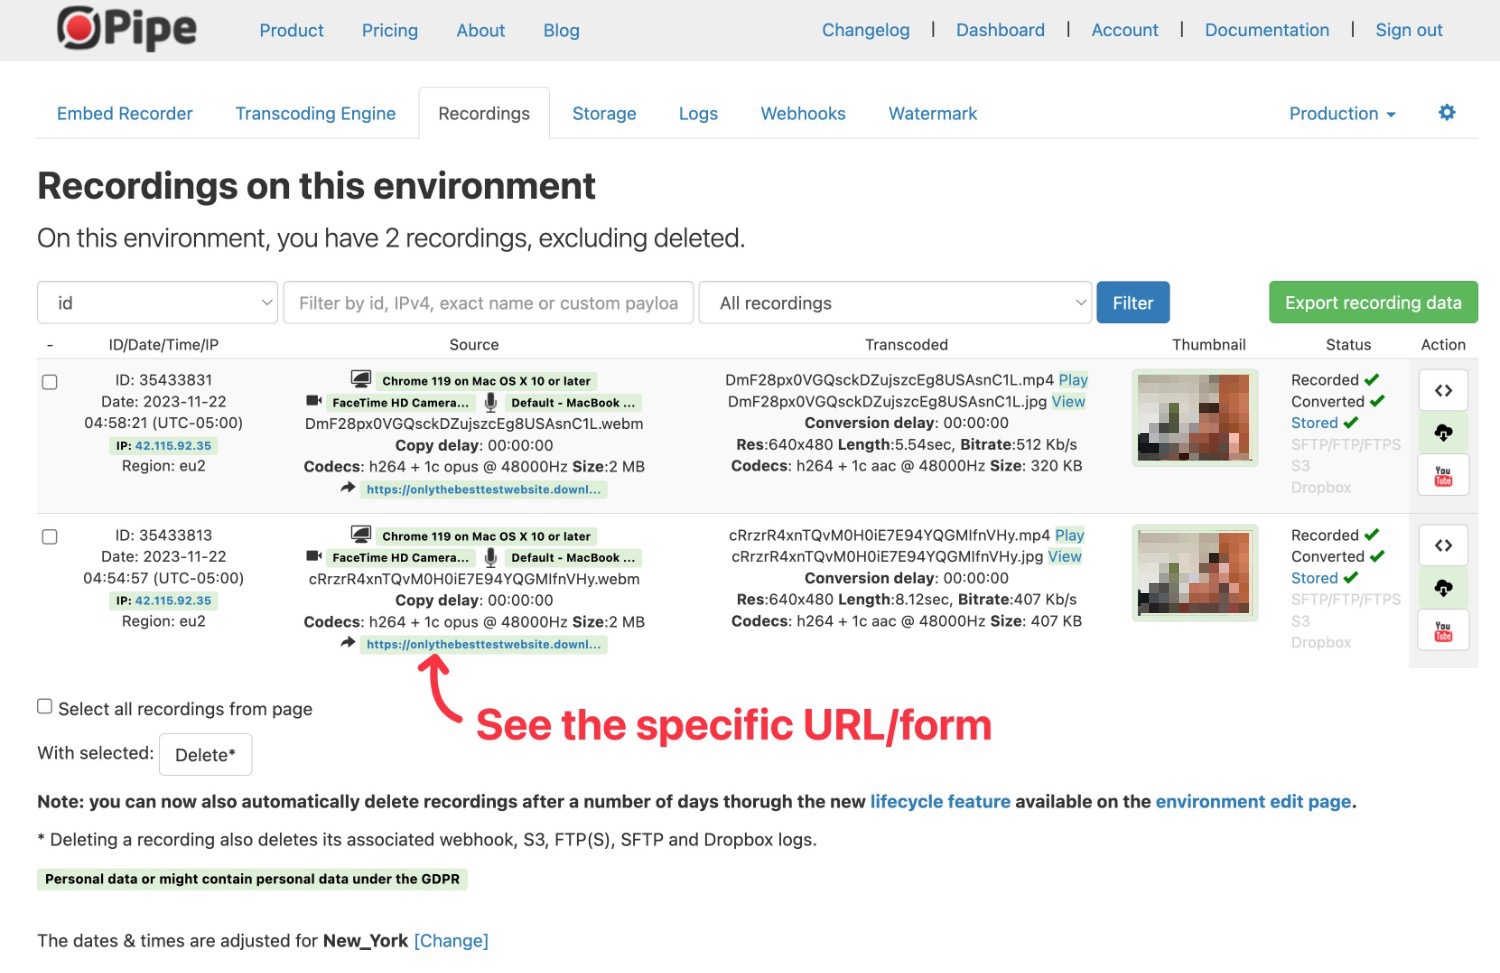
How to View Video Recordings
As we mentioned above, saved video recordings will appear in your Pipe dashboard regardless of whether or not the person submits the form.
You can view them from the Recordings tab in your Pipe dashboard. You’ll also be able to see the URL where the video was recorded, which lets you associate videos with specific forms in your Pipe dashboard.
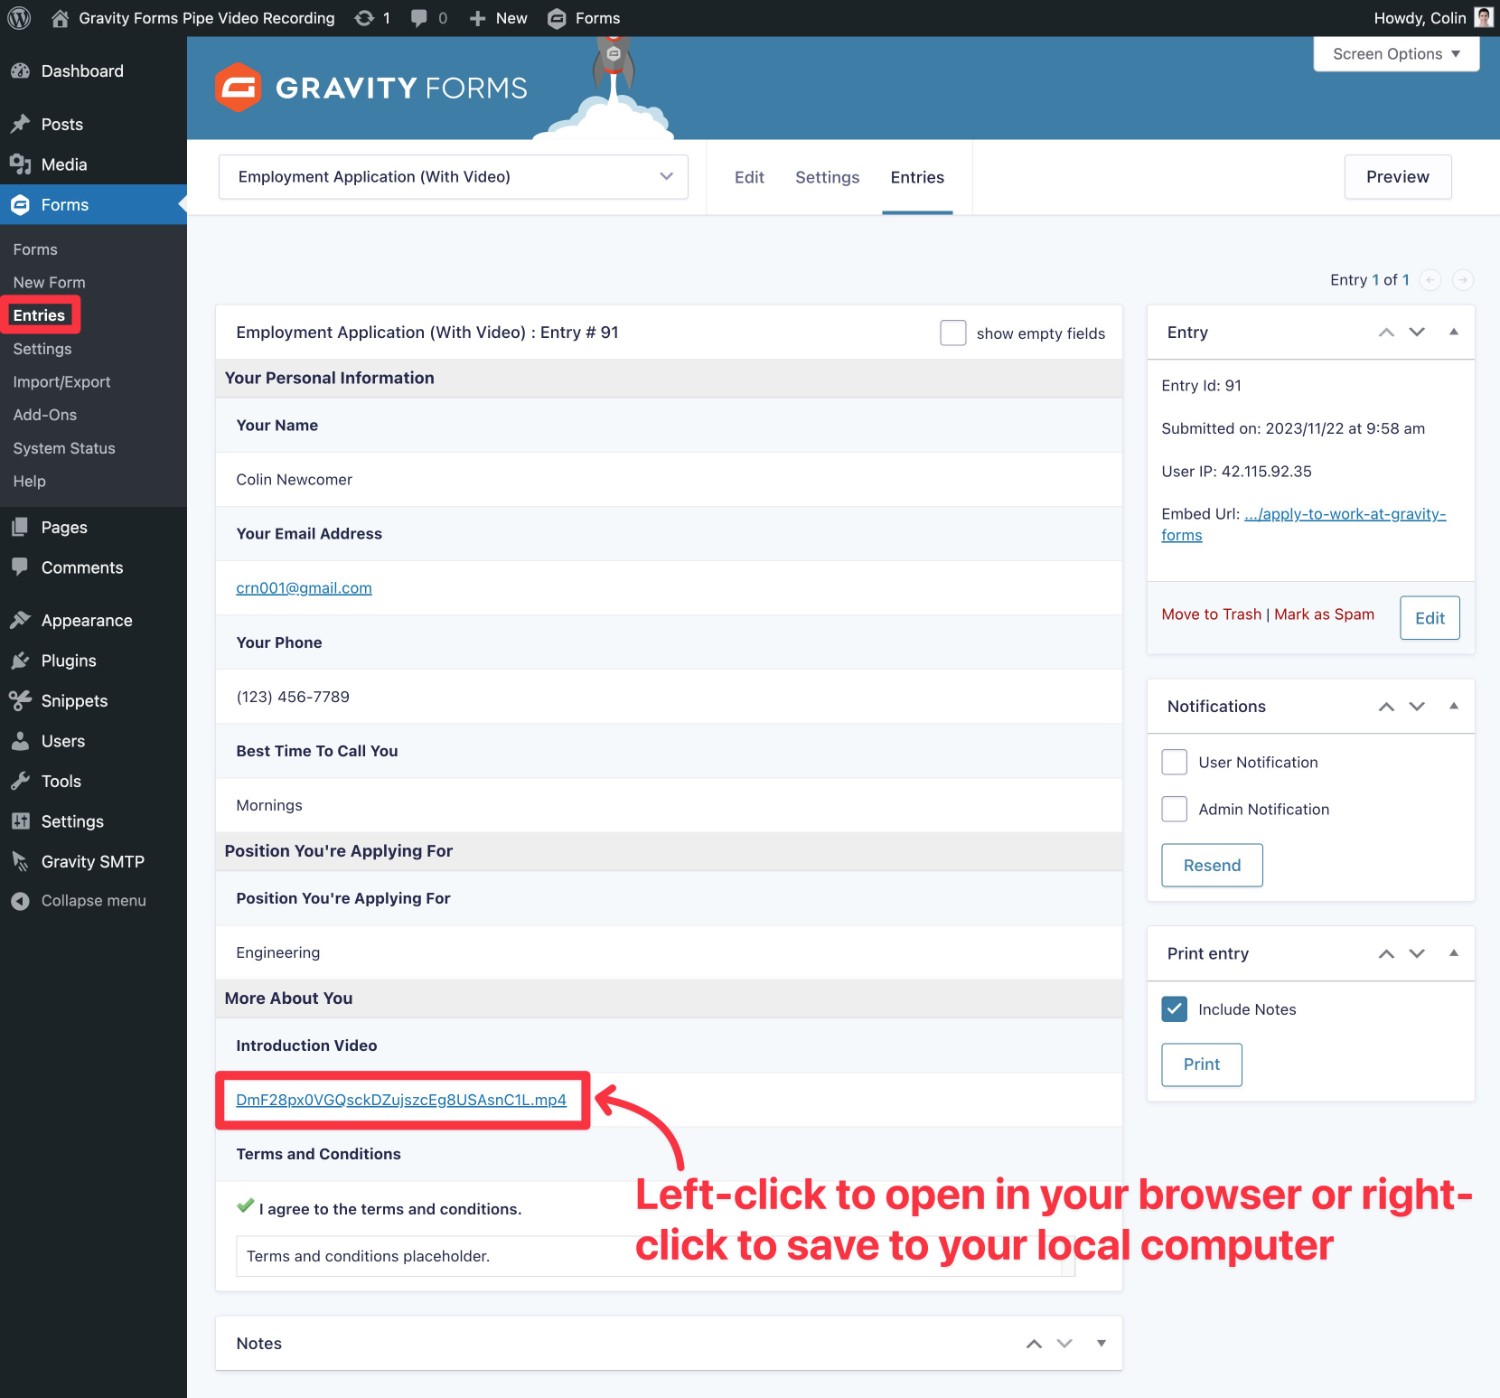
For videos where the user did submit the form, you’ll also see an .mp4 version of the video in the form entry detail page in your WordPress dashboard. This .mp4 file is hosted on Pipe’s server by default, not your WordPress site’s server.
You can click the link to view the video directly in your web browser or download it to your local computer.
Try the Gravity Forms Pipe Video Recorder Add-On Today
That wraps up our introduction to the official Gravity Forms Pipe Video Recording Add-On.
With this setup, you can let users record and submit videos right from your forms. This can work great for applications, review/testimonial generating, and any other situation where you think having video could make things better.
The Gravity Forms Pipe Video Recorder Add-On is available with the Pro and Elite licenses (as well as the Nonprofit license, for registered non-profit organizations).
If you’re not holding one of those licenses yet, purchase your Pro or Elite license today to get started. Or, you can upgrade your existing Basic license and only pay the prorated difference.
If you’d like to try this functionality before you make your purchase, you can also create a free demo site to access the Pipe Video Recording Add-On, as well as all of the other official Gravity Forms Add-Ons.

If you want to keep up-to-date with what’s happening on the blog sign up for the Gravity Forms newsletter!
"*" indicates required fields