

Would you like to take payments through your WordPress.com site using Gravity Forms?
If so, or if you have an interest in how this can be achieved, this guide is for you.
To make this possible, WordPress.com hosting lets you install plugins on your site — provided you’re on a plugin-enabled plan (e.g. Business and Commerce.)
Thanks to this, you can now do pretty much everything with a WordPress.com hosted site that you can with a self-hosted WordPress.org one.
For example, taking payments online through your WordPress.com site using a third-party plugin, such as Gravity Forms.
If you’d like to know how this can be achieved, this guide explains exactly how to use WordPress.com and Gravity Forms to accept payments online with the Square payment platform, but you could also use PayPal, Stripe, or others.
Table of Contents
- Why Take Payments on Your WordPress Site
- Why Use Gravity Forms to Take Payments on Your WordPress.com Site
- How to Take Online Payments with Gravity Forms and WordPress.com
- Publish the Square Payment Form
- Summary
Why Take Payments on Your WordPress Site
If you’ve already decided that you need to take payments through your WordPress.com site, you can skip ahead to the next section to learn how to take online payments with Gravity Forms and WordPress.com.
However, if you’re not yet entirely sure if taking online payments through your website is the right option for you, here are some reasons why you might want to:
- Sell products and services online directly from your site.
- Offer subscription pricing for access to products, content, or services.
- Give customers more ways to pay.
- Instantly receive payments into your account.
- Accept payments in multiple currencies.
- Collect deposits online for services provided in person.
- Take full or partial payments upfront before sending a product or providing a service.
- Accept donations from your audience.
- Can be more secure than taking payments over the phone or in person.
- More convenient for you than depositing checks and cash.
- Online payments can be easier to track and analyze.
If you want to move to a more secure, automated, flexible, and streamlined process for taking payments, then setting up your website so that it can accept payments online is an excellent option.
As we’re about to see, with the right tools, it’s very straightforward, too.
Why Use Gravity Forms to Take Payments on Your WordPress.com Site
When it comes to accepting payments from visitors to your WordPress.com site, our Gravity Forms plugin is an excellent choice.
Whether you want to take one-off payments for your goods or services, accept recurring donations for your nonprofit, or pretty much any other reason you can think of, Gravity Forms has the features to make it possible.
Some of the main reasons to choose Gravity Forms include:
- Take one-time and recurring subscription payments.
- Create custom forms with the user-friendly drag-and-drop form editor.
- Kickstart your form creation with the library of editable payment form templates.
- Use the 30+ form fields to create the forms you need.
- Take payments in the way that you want, through the many payment processors.
- A library of official and third-party add-ons makes integrations easy.
If you like the sound of Gravity Forms and its payment-taking capabilities, read on to find out how easily you can start accepting payments with WordPress.com and Gravity Forms.
How to Take Online Payments with Gravity Forms and WordPress.com
In order to take payments online with Gravity Forms, you’ll need a WordPress website.
One way to start a WordPress website is to sign up with WordPress.com.
By signing up for one of the WordPress.com plugin-enabled plans, you’ll not only have a new website online in a matter of minutes but you’ll be able to use the thousands of plugins available for WordPress — including Gravity Forms — to add new features and functionality to your site.
1. Sign up with WordPress.com
If you haven’t already, sign up with WordPress.com and choose one of their plugin-enabled plans, which at the time of writing are the Business and Commerce plans.
2. Purchase and Install Gravity Forms
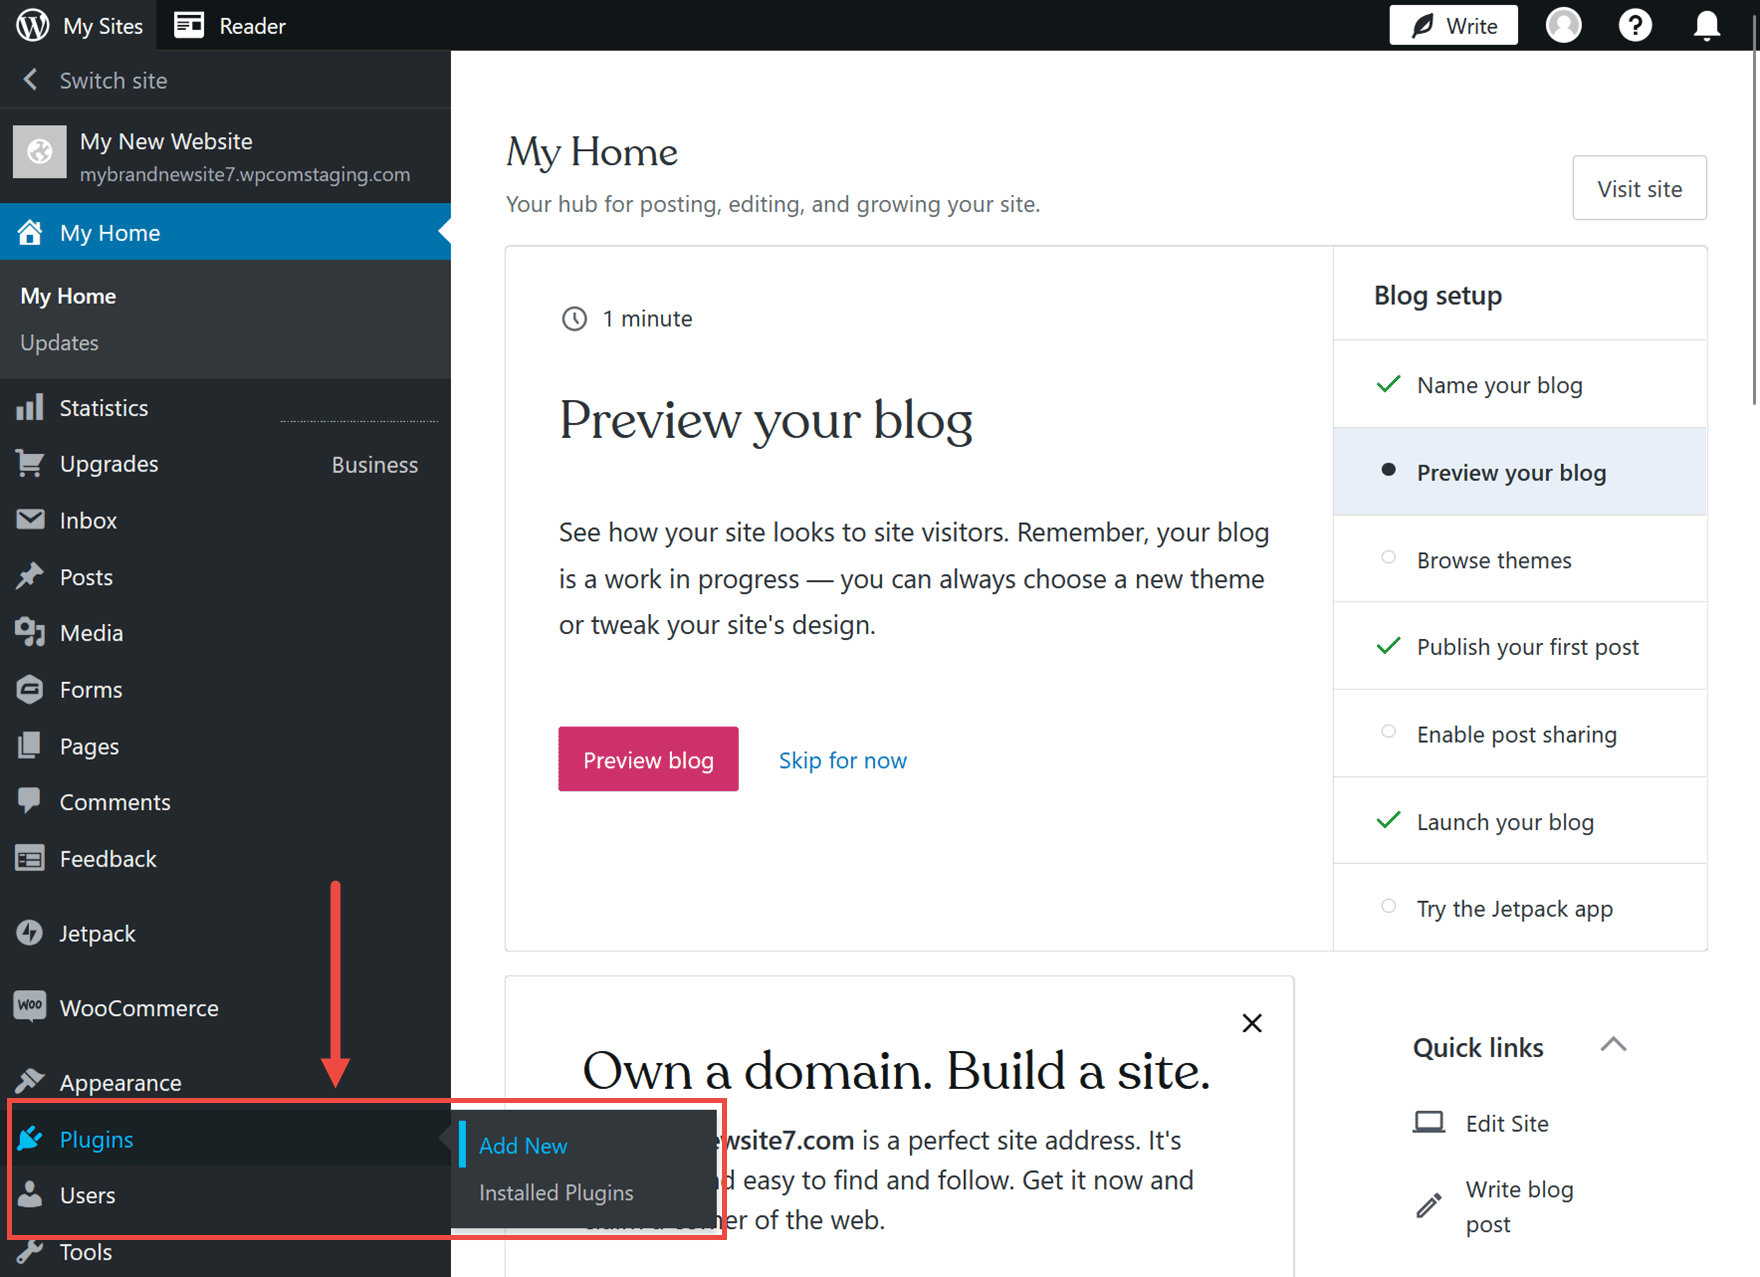
From your WordPress.com dashboard, click on the Plugins → Add New menu item.
Next, search for Gravity Forms.
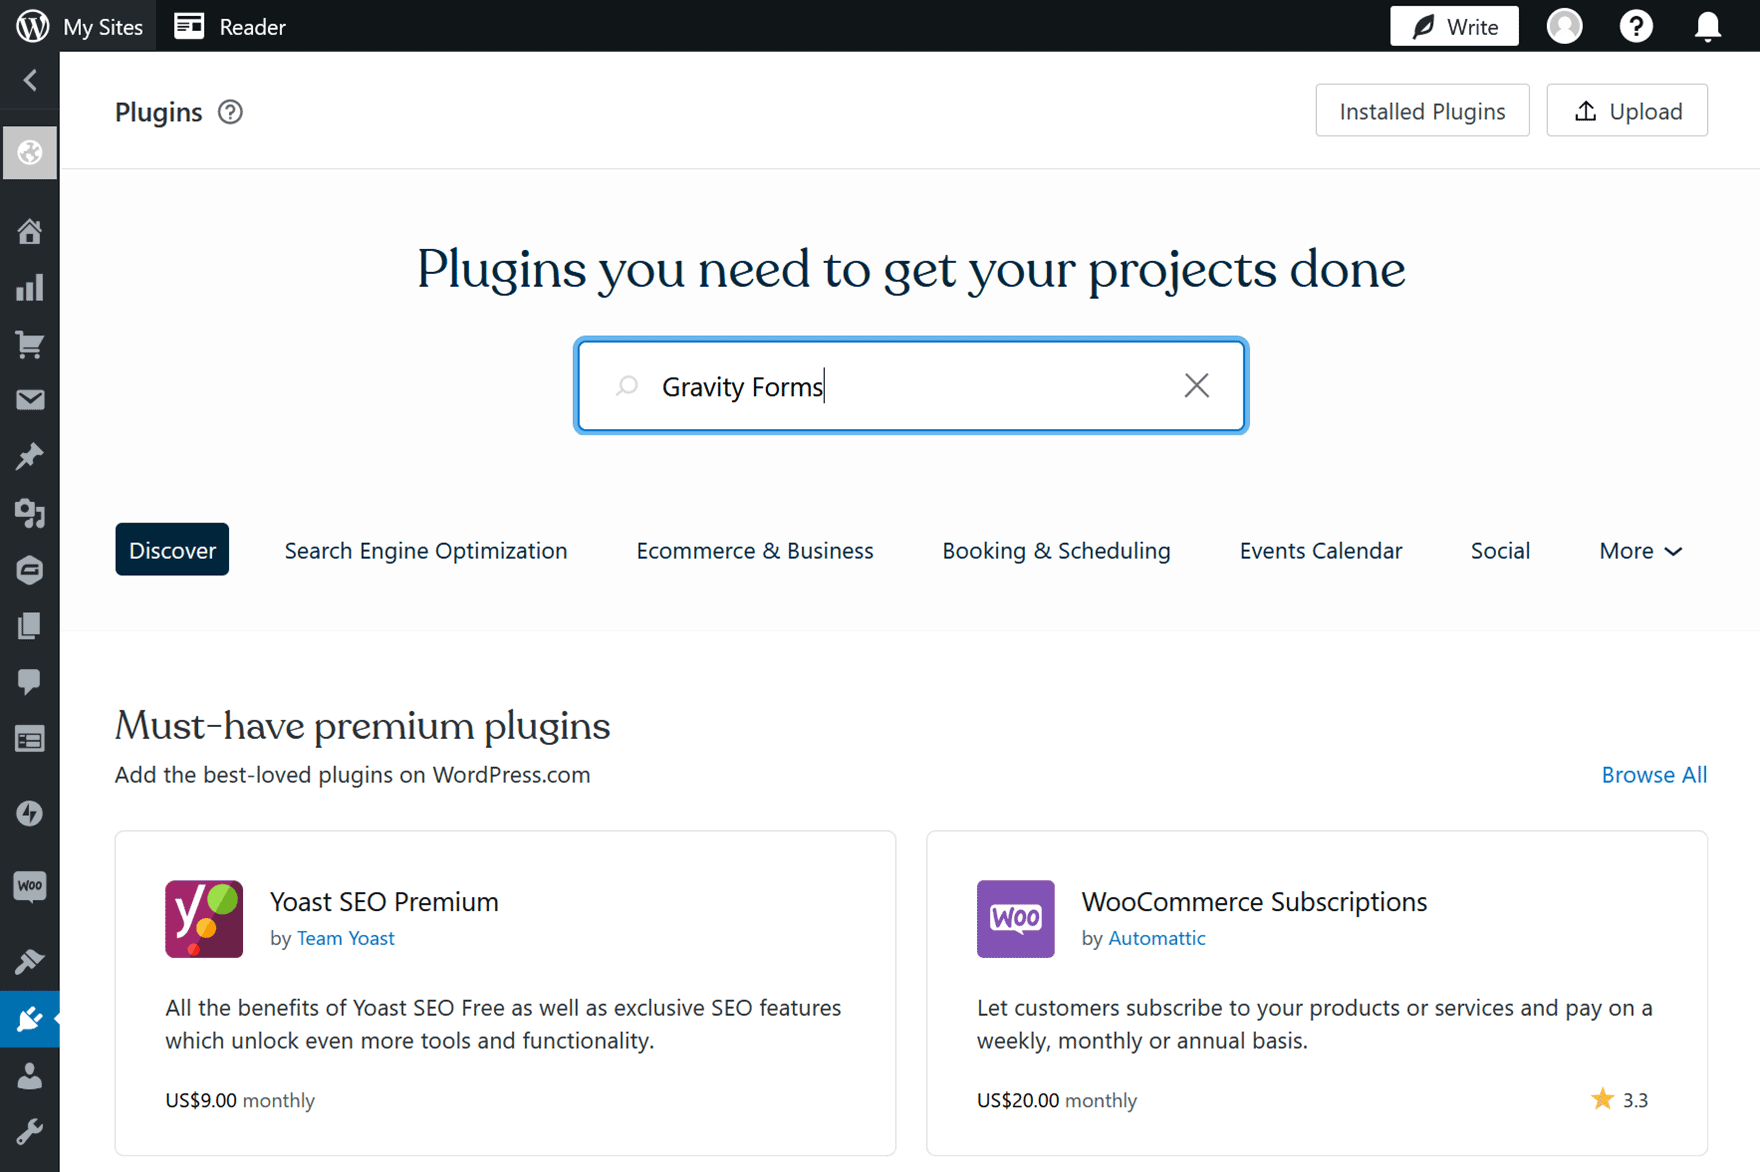
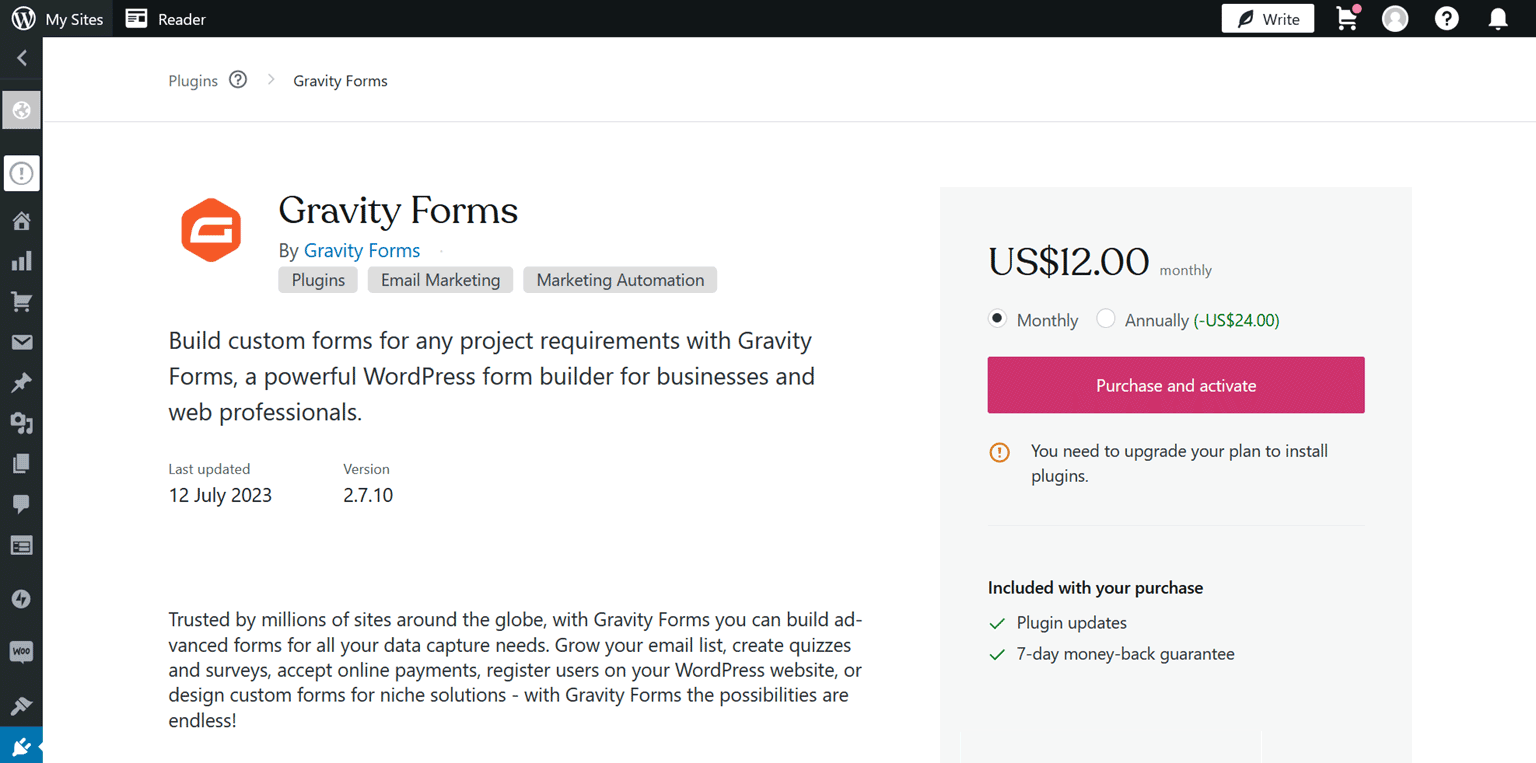
Then, choose between the monthly or annual payment options to purchase Gravity Forms and add it to your WordPress.com site.
Gravity Forms has a money-back guarantee so you can try our plugin without risk.
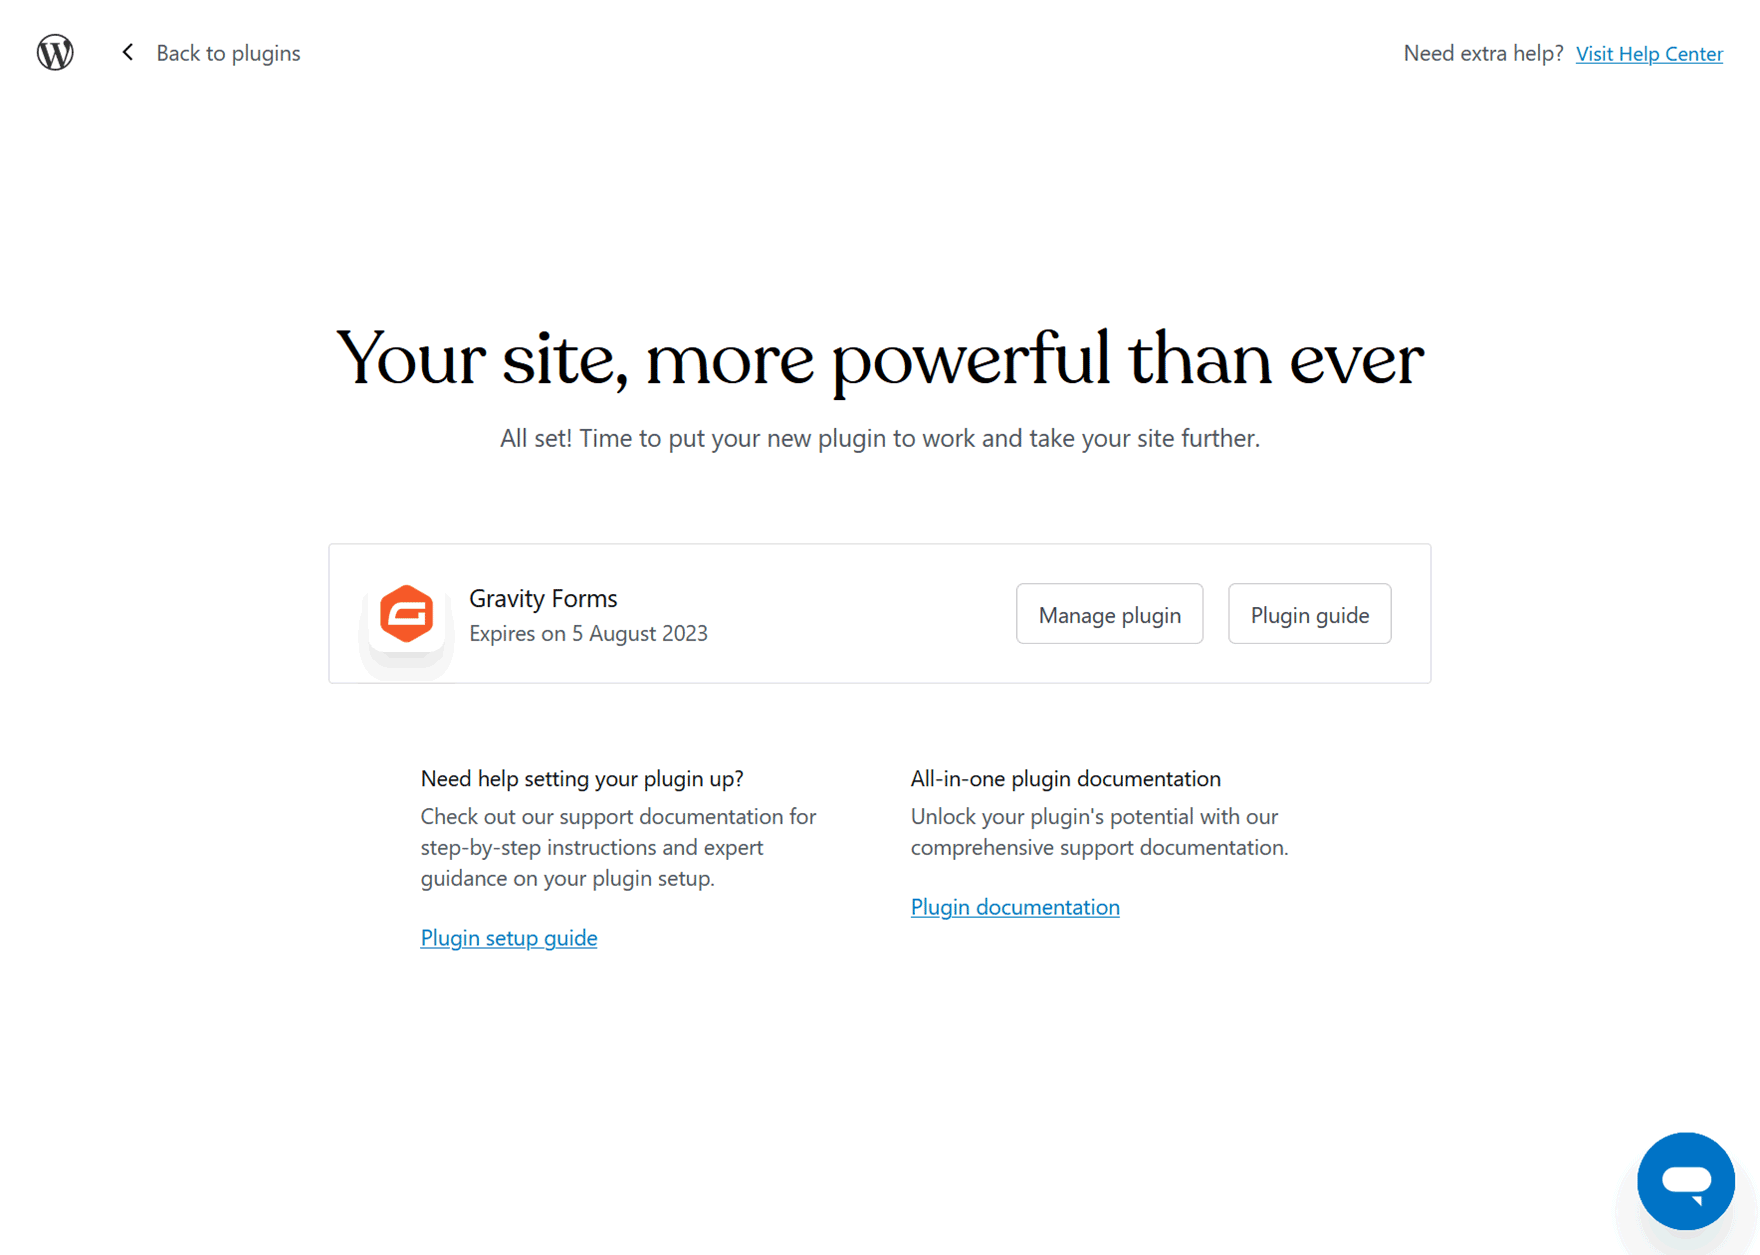
Once you’ve made the payment, you can click on the Manage plugin button to start using Gravity Forms
3. Install the Gravity Forms Square Add-On
As mentioned, Gravity Forms works with many payment platforms, gateways, and processors, allowing you to accept and collect payments in the way you want.
However, for this guide, we’ll be using the Square Add-On for Gravity Forms. Using Square as your payment platform or processor has many benefits. Some examples include:
- Can handle one-time and recurring subscription payments.
- Supports authorization and capture so you can collect an authorized payment at a later date.
- Process refunds directly from your WordPress dashboard in just one click.
- Robust security features to keep your transactions secure.
- New Square users can get fee-free processing for up to 180 days on their first $2,000 of transactions.
If Square sounds like the right option for your site, you can install the Gravity Forms Square Add-On from your WordPress.com dashboard.
Gravity Forms works with many other payment platforms and services, check out the other options.
To start using Square, simply click on the Forms → Add-Ons sidebar menu item in your WordPress.com dashboard.
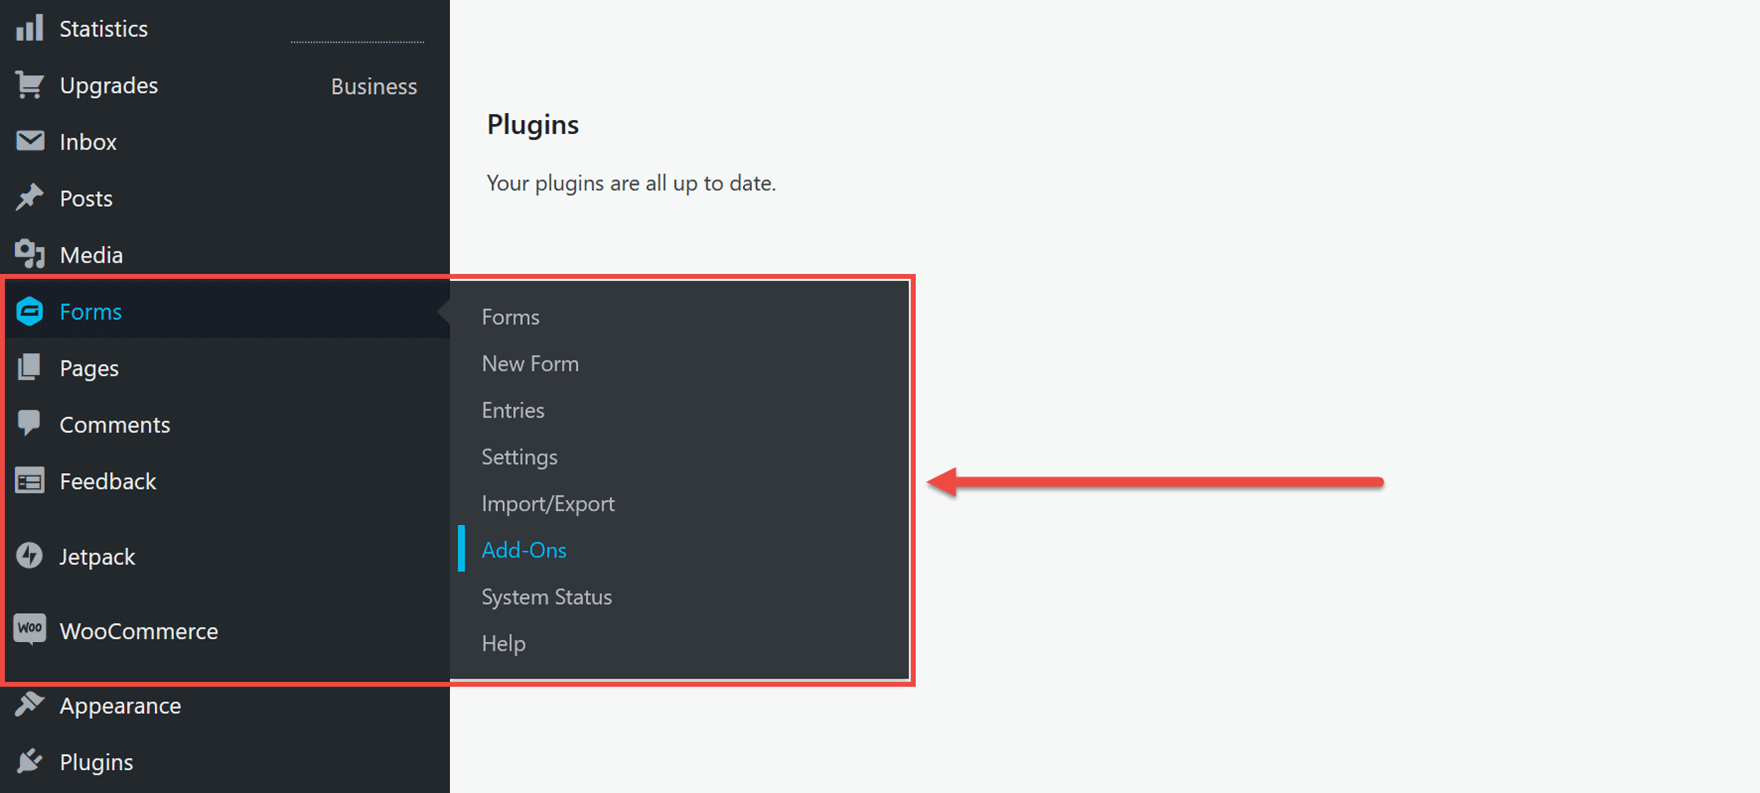
Scroll down to the Square Add-On and click the Install button.
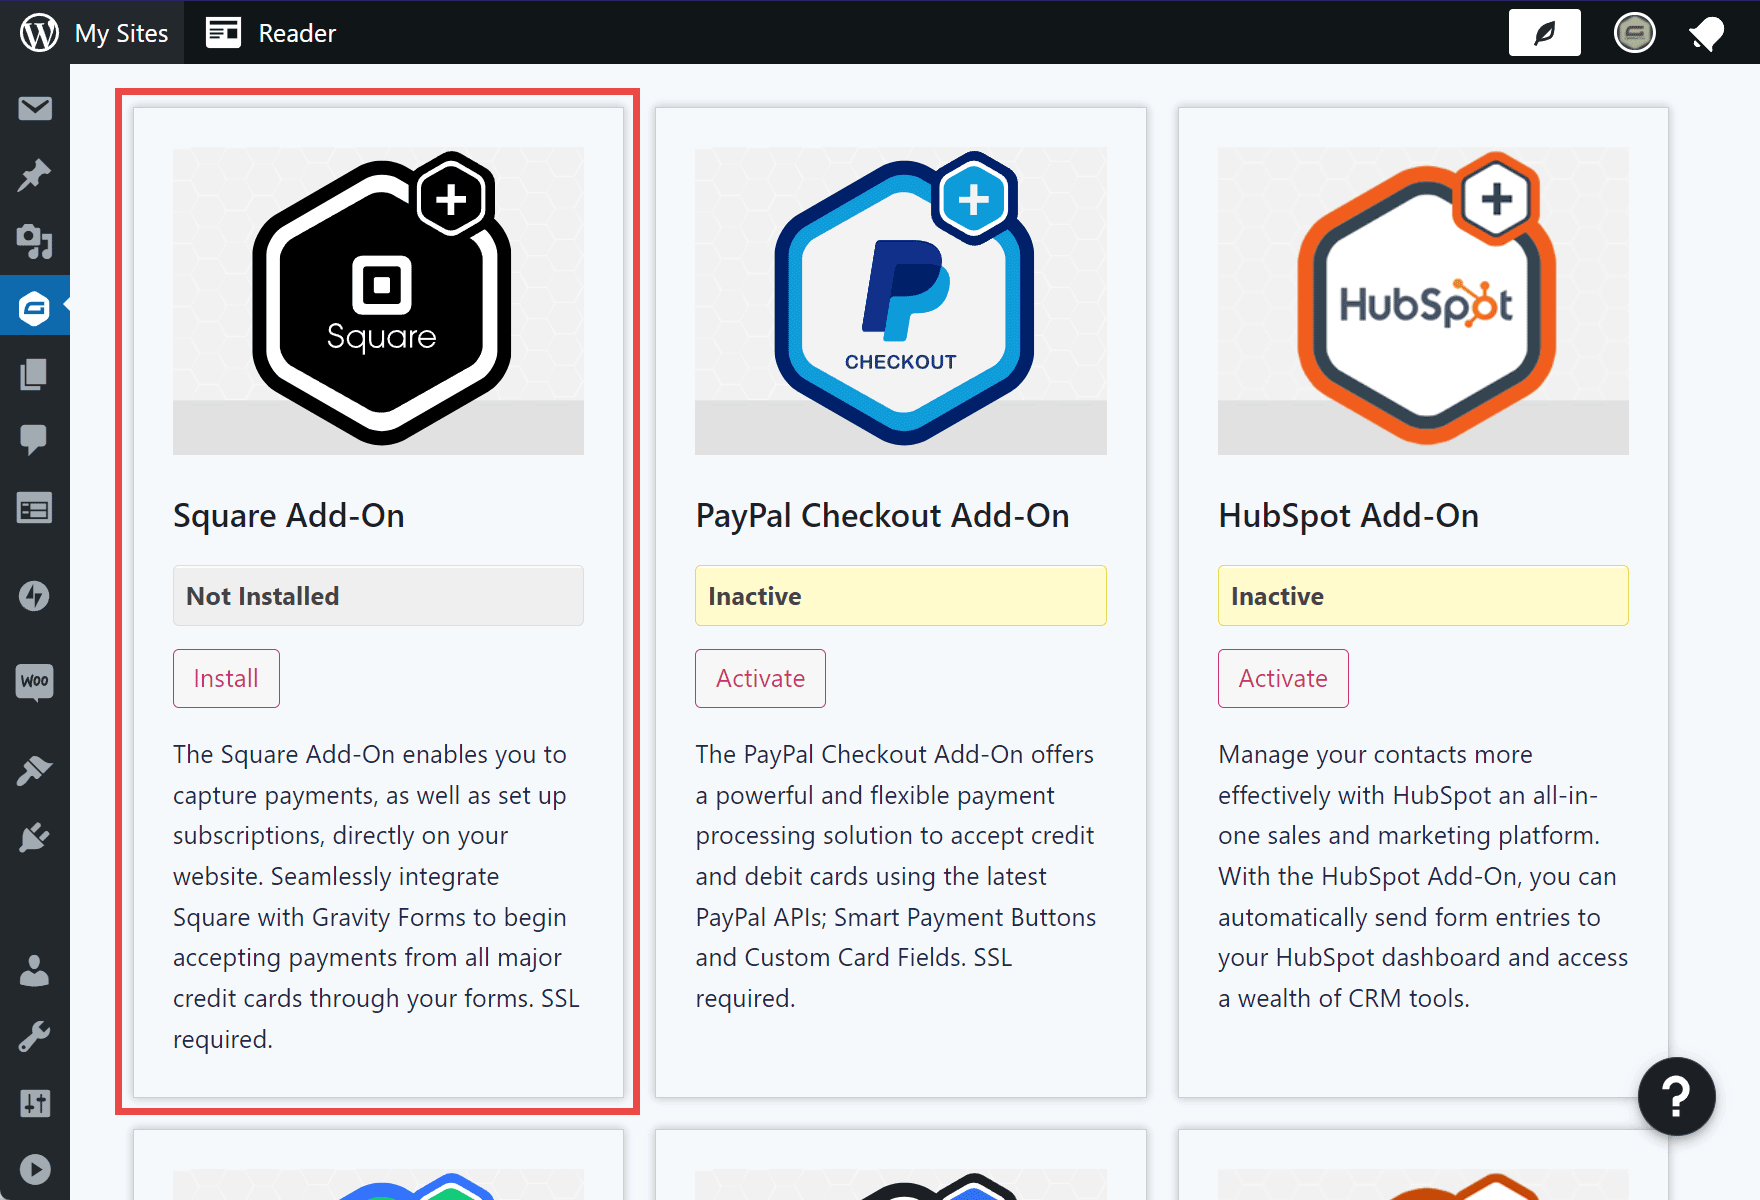
After clicking the Install and then Activate Plugin buttons, you can begin configuring the Square integration.
4. Set Up the Square Integration
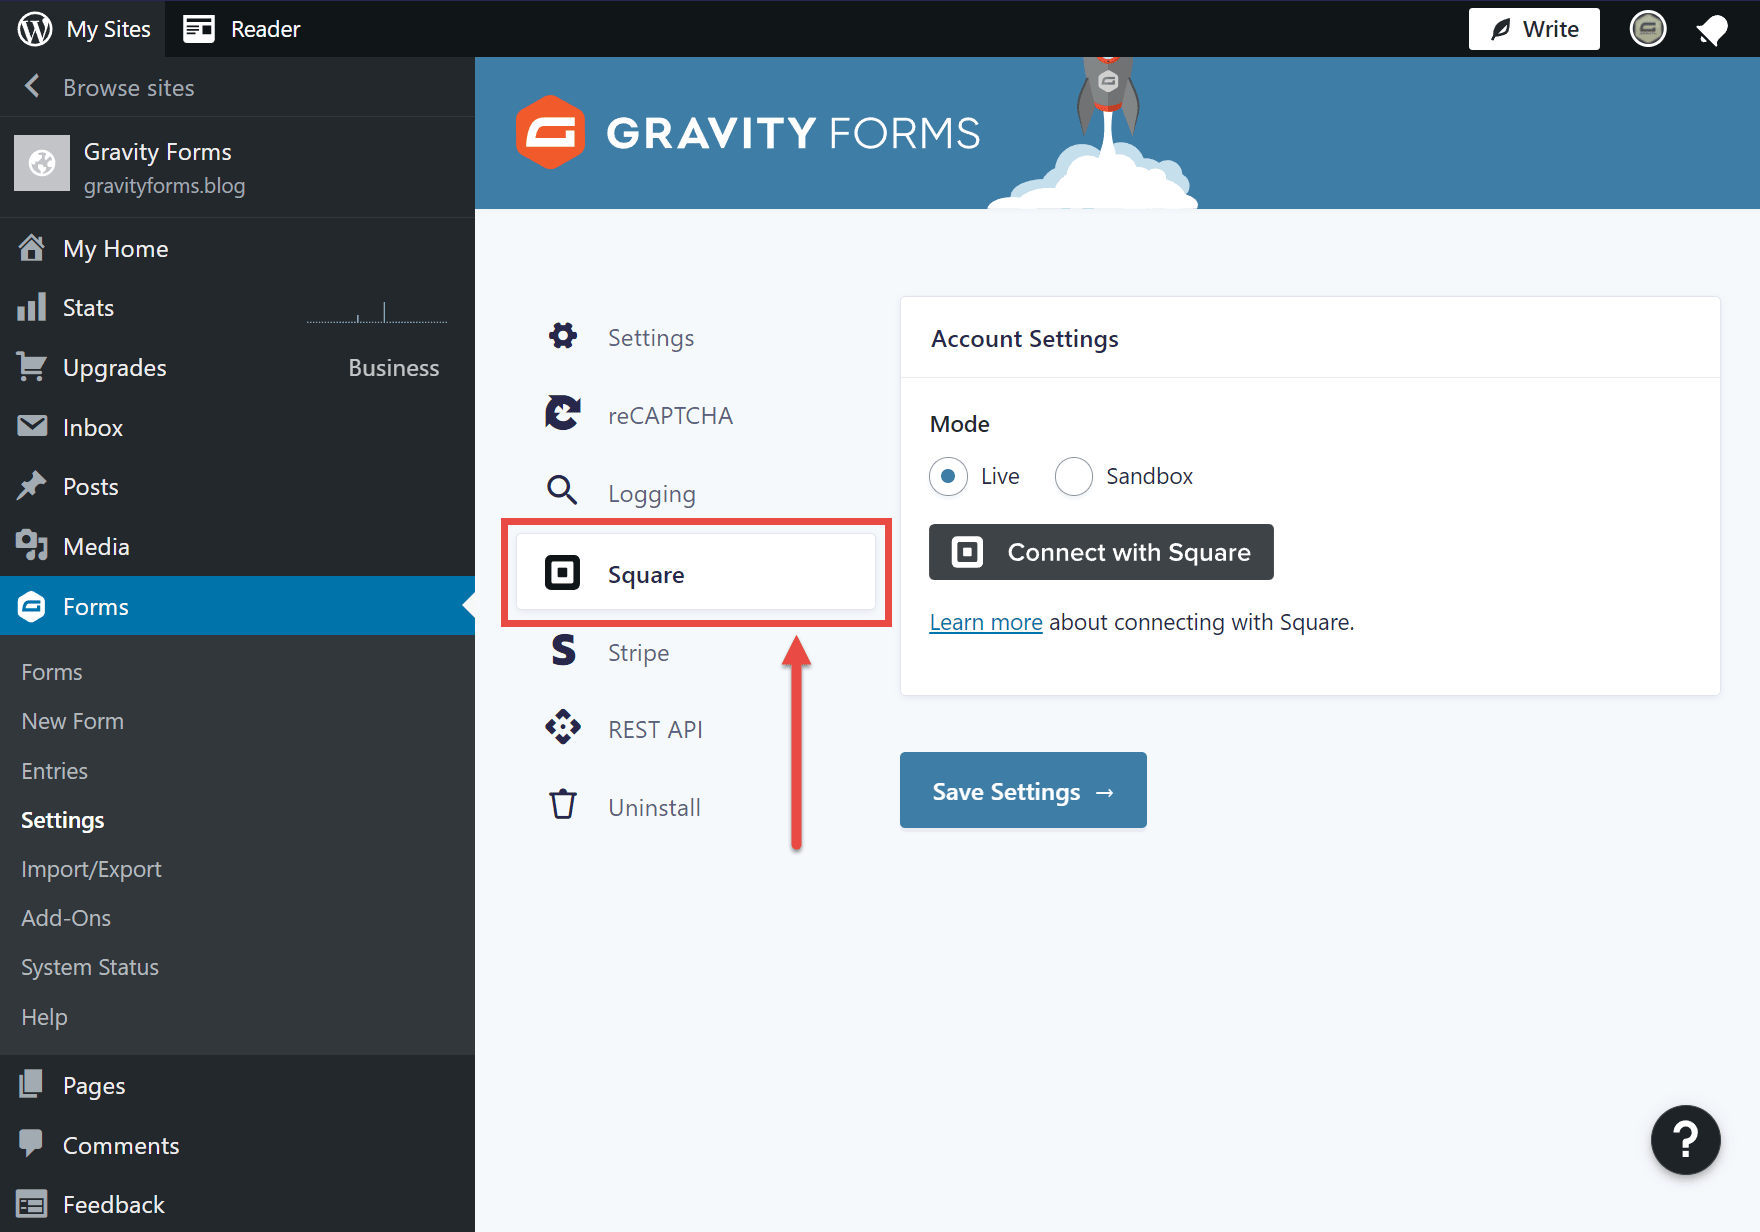
To configure the Square integration, click on the Forms → Settings sidebar menu.
Then click on the Square button, as illustrated below.
For the next step, you’ll need a Square account. If you don’t yet have one, you can sign up here.
Gravity Forms and Square are currently running a promotion for new Square users: free processing fees for up to 180 days (on up to $2,000 in credit card transactions.) Sign up here.
Once you have an account, click on the Connect with Square button.
The onscreen instructions will then walk you through the process of connecting your WordPress.com site and Gravity Forms with your Square account.
If you need any more information on setting up Square, you can find it in the Gravity Forms and Square integration documentation.
5. Create an Online Payment Form
To take payments via Square on your WordPress.com site, you’ll need to publish a form on your site.
When it comes to creating the payment form with Gravity Forms, you can start with a blank form or use one of the templates.
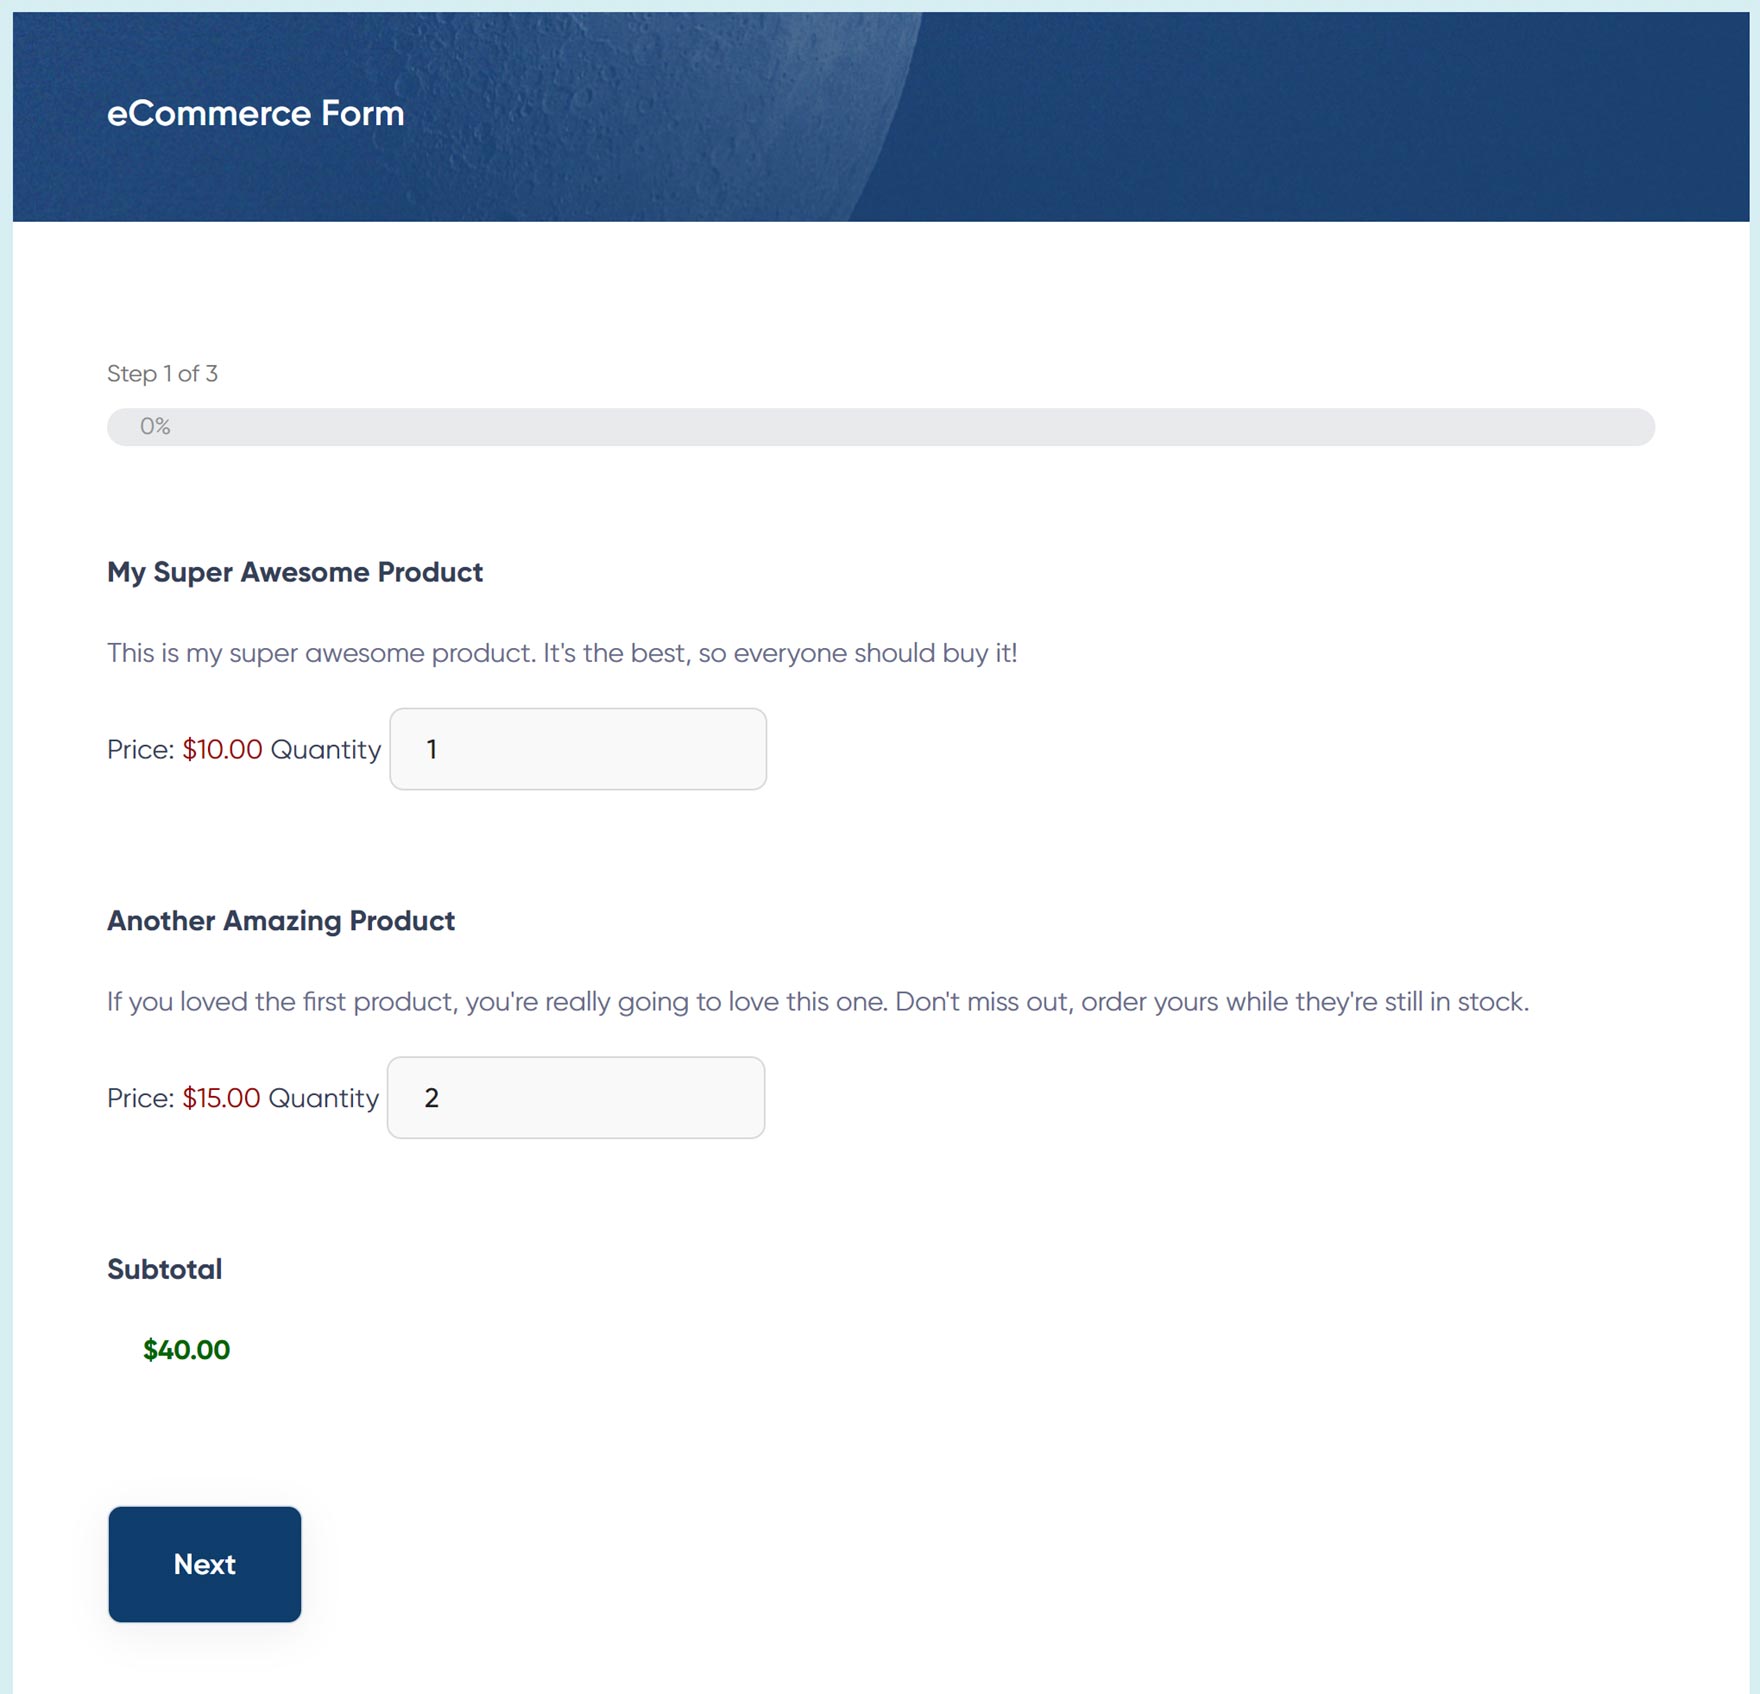
Starting with the eCommerce From template gives you a quick way to build the form. As the templates are fully editable through the Gravity Forms drag-and-drop editor, you can customize the form to work in the way that you want.
To create your payment form, click on the Forms → New Forms sidebar menu item in your WordPress.com dashboard.
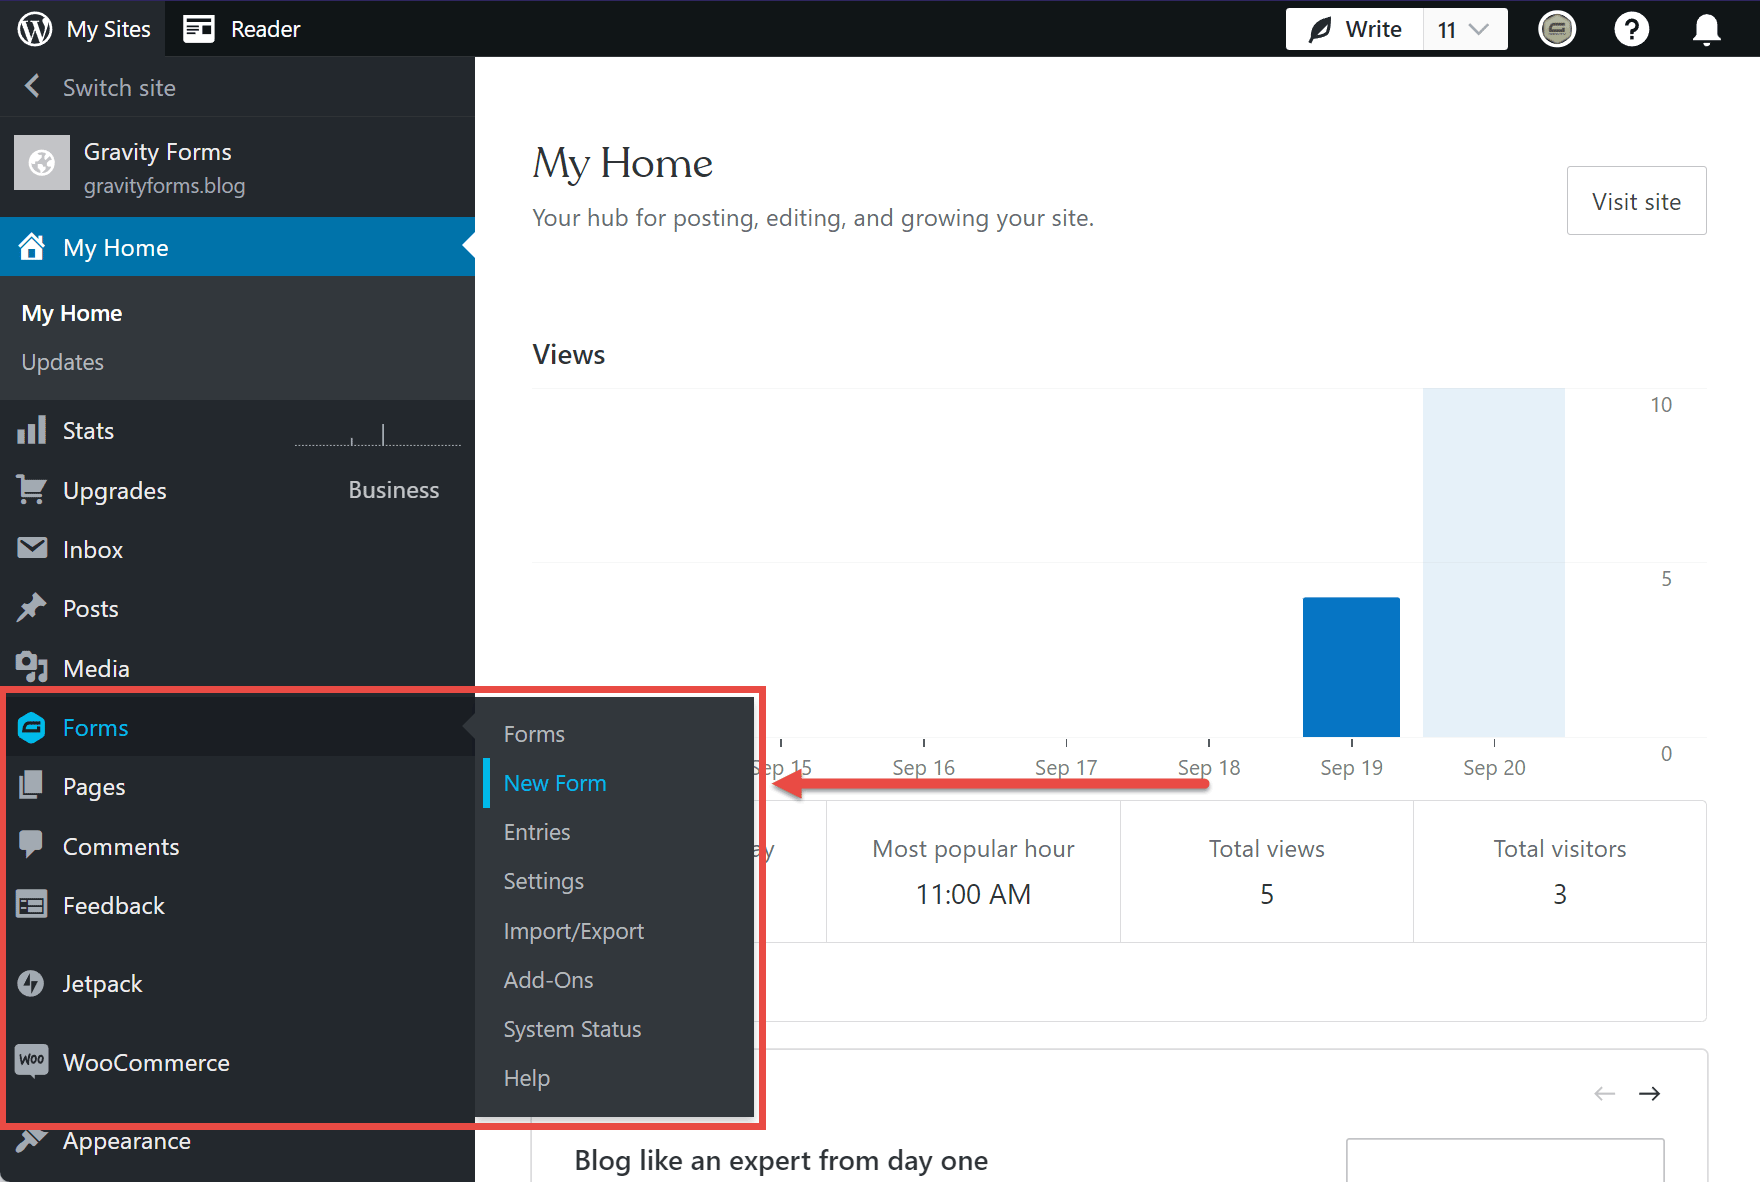
You can choose a template on the next screen or start with a blank form. As mentioned, using the eCommerce Form template is a good option.
If you want to create your own form from scratch, our guide to setting up a Square-compatible form will walk you through the process.
While the eCommerce Form template has most of the fields you’ll need to get started, you will have to add the Square field to the form to enable payments to be processed with Square.
You can find the Square field in the Pricing Fields section on the panel on the right.
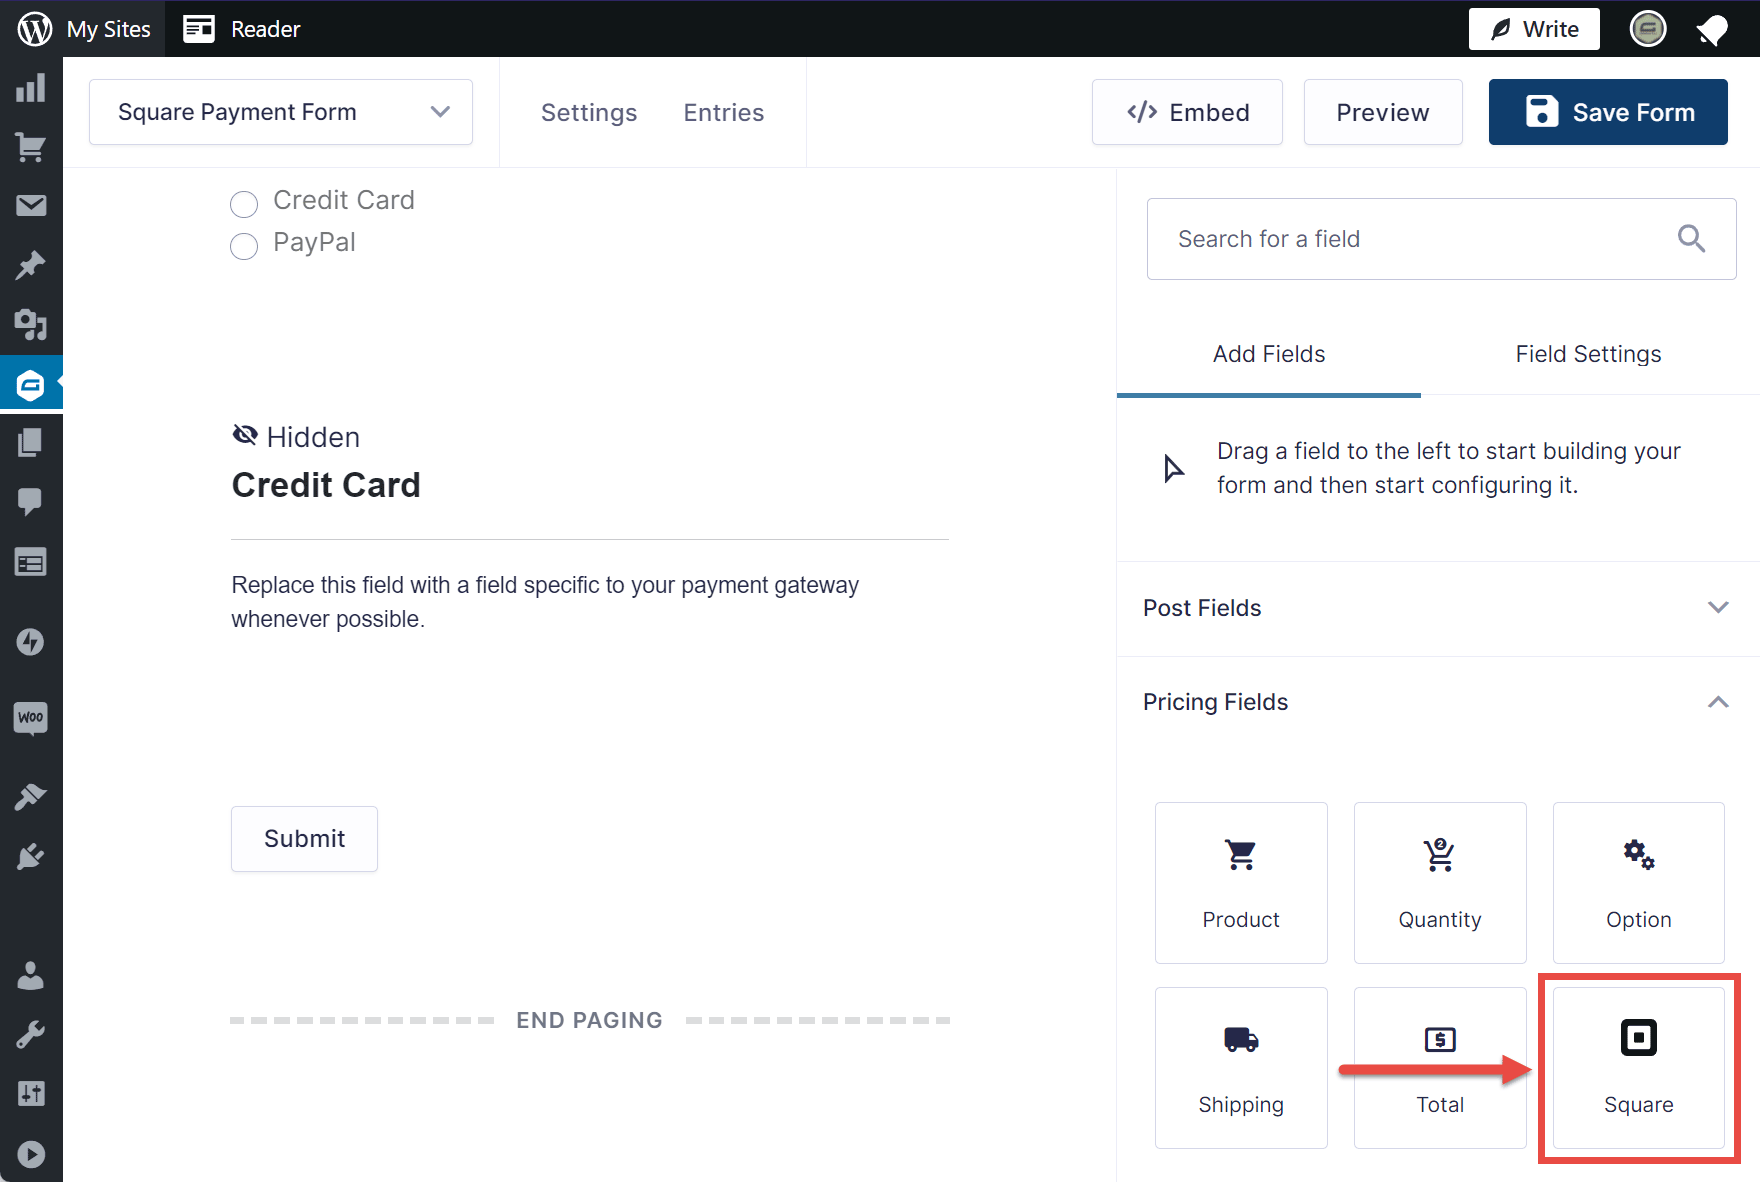
Once you’ve found the Square field, you can drag it onto your form. Doing so will add the necessary credit card payment fields to the form.
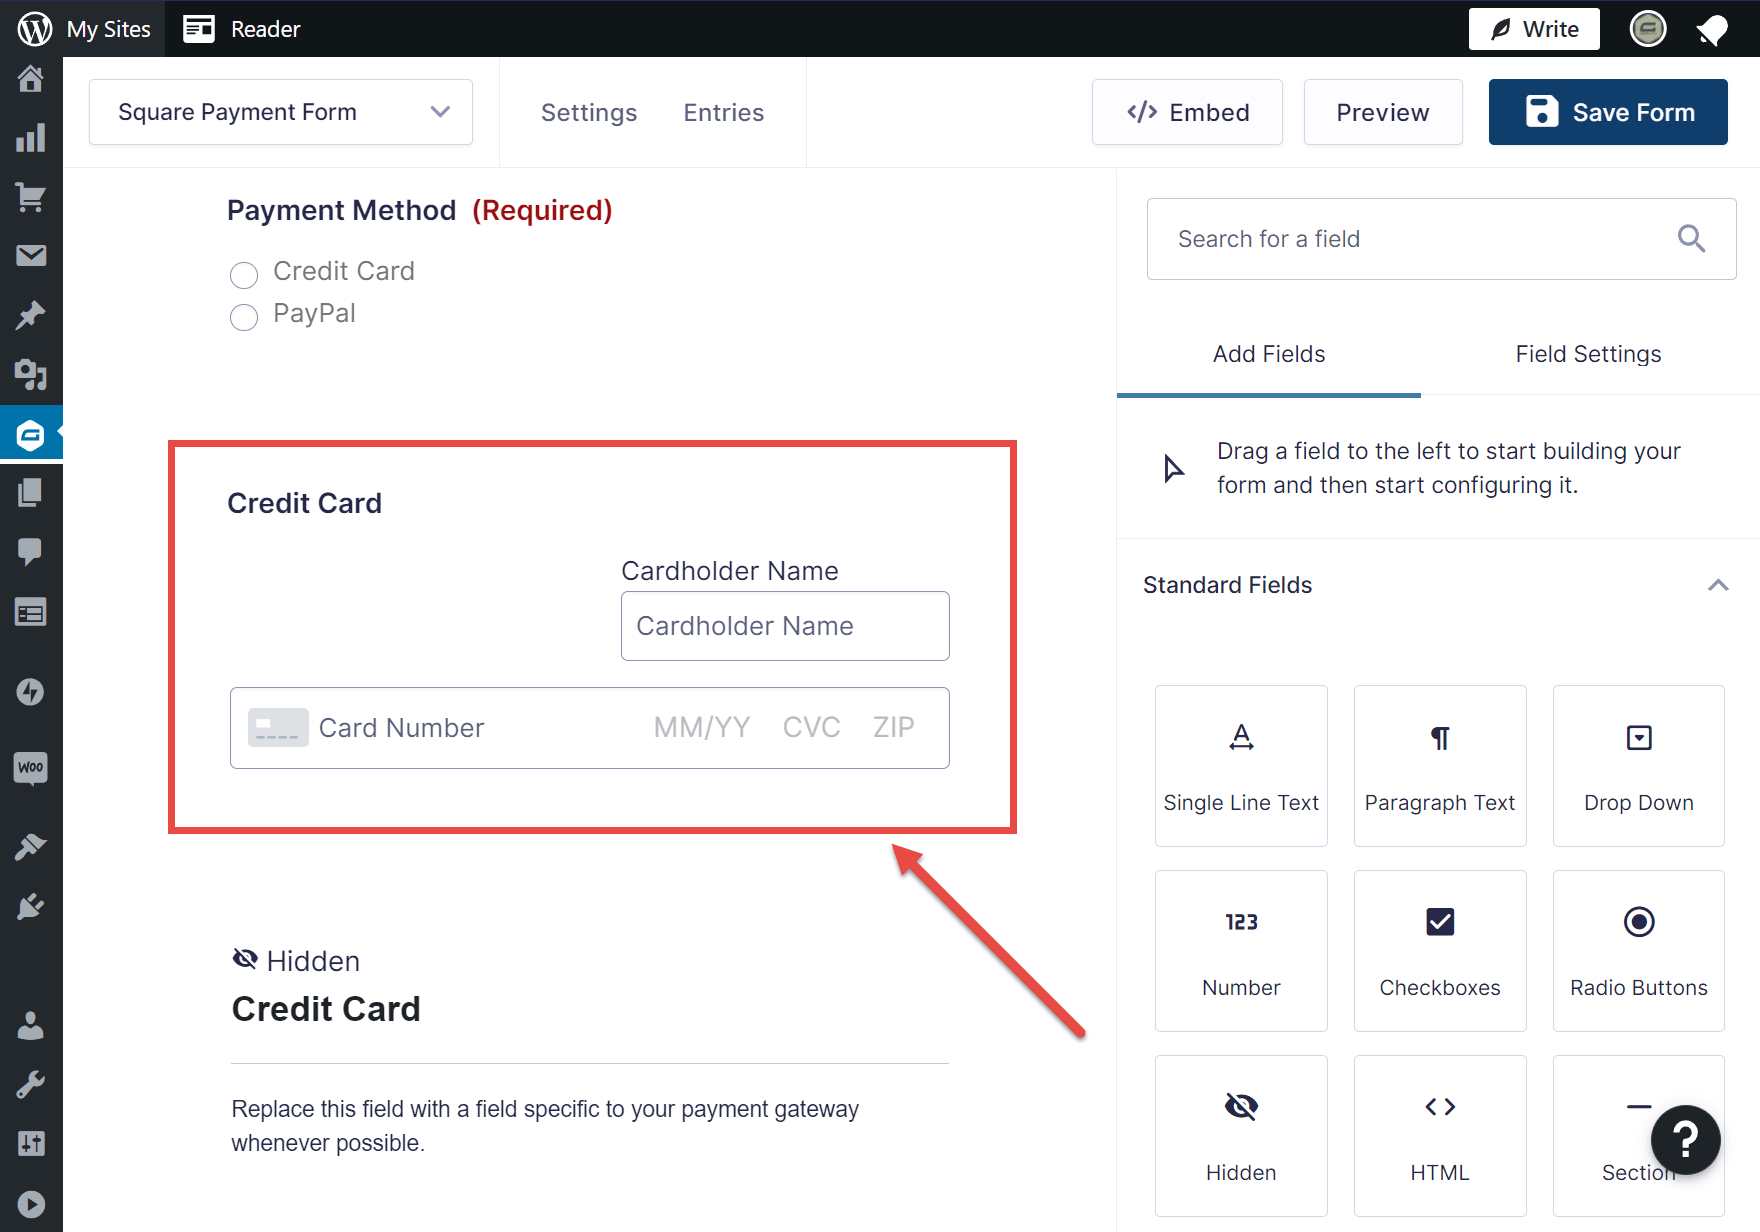
The eCommerce Form template has a hidden placeholder field called Credit Card which you should delete once you’ve added the Square field.
The next step after adding the Square field is to create a Square feed.
a. Create a Square Feed
The Square feed sends information from the form to Square so that the payment can be processed.
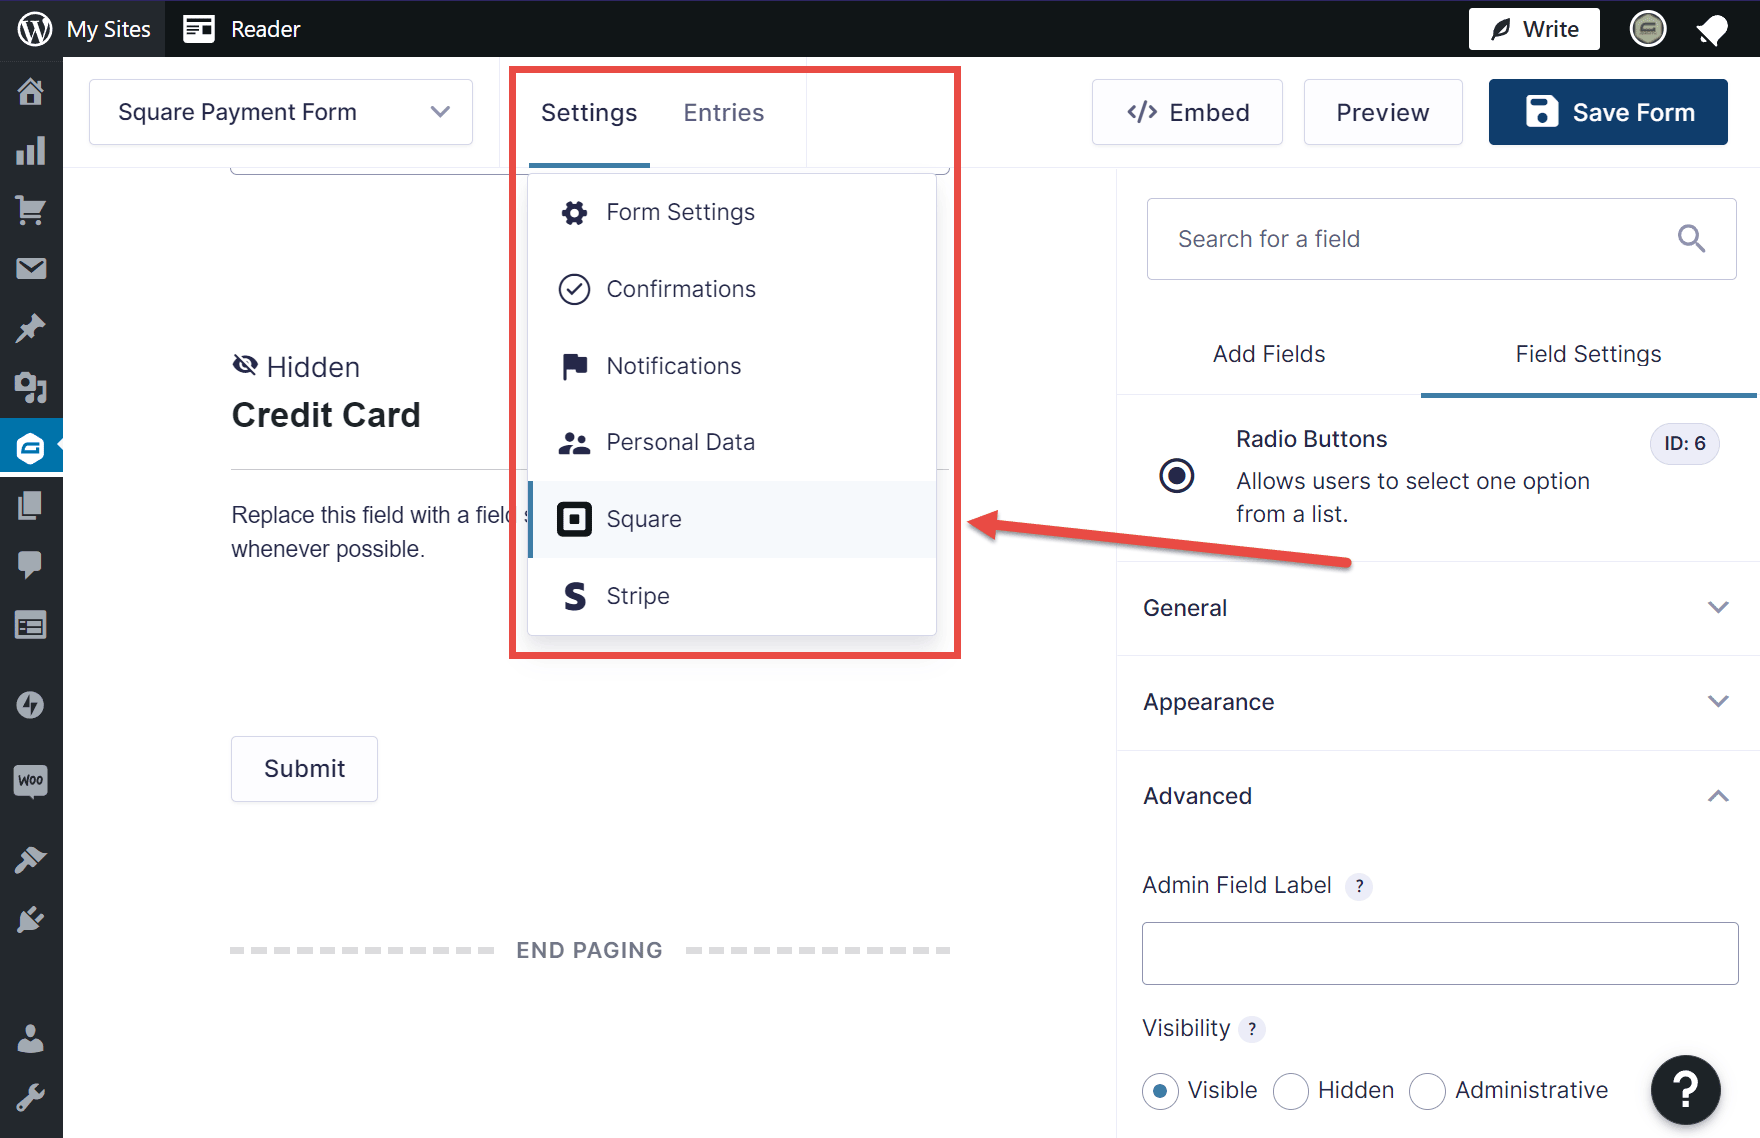
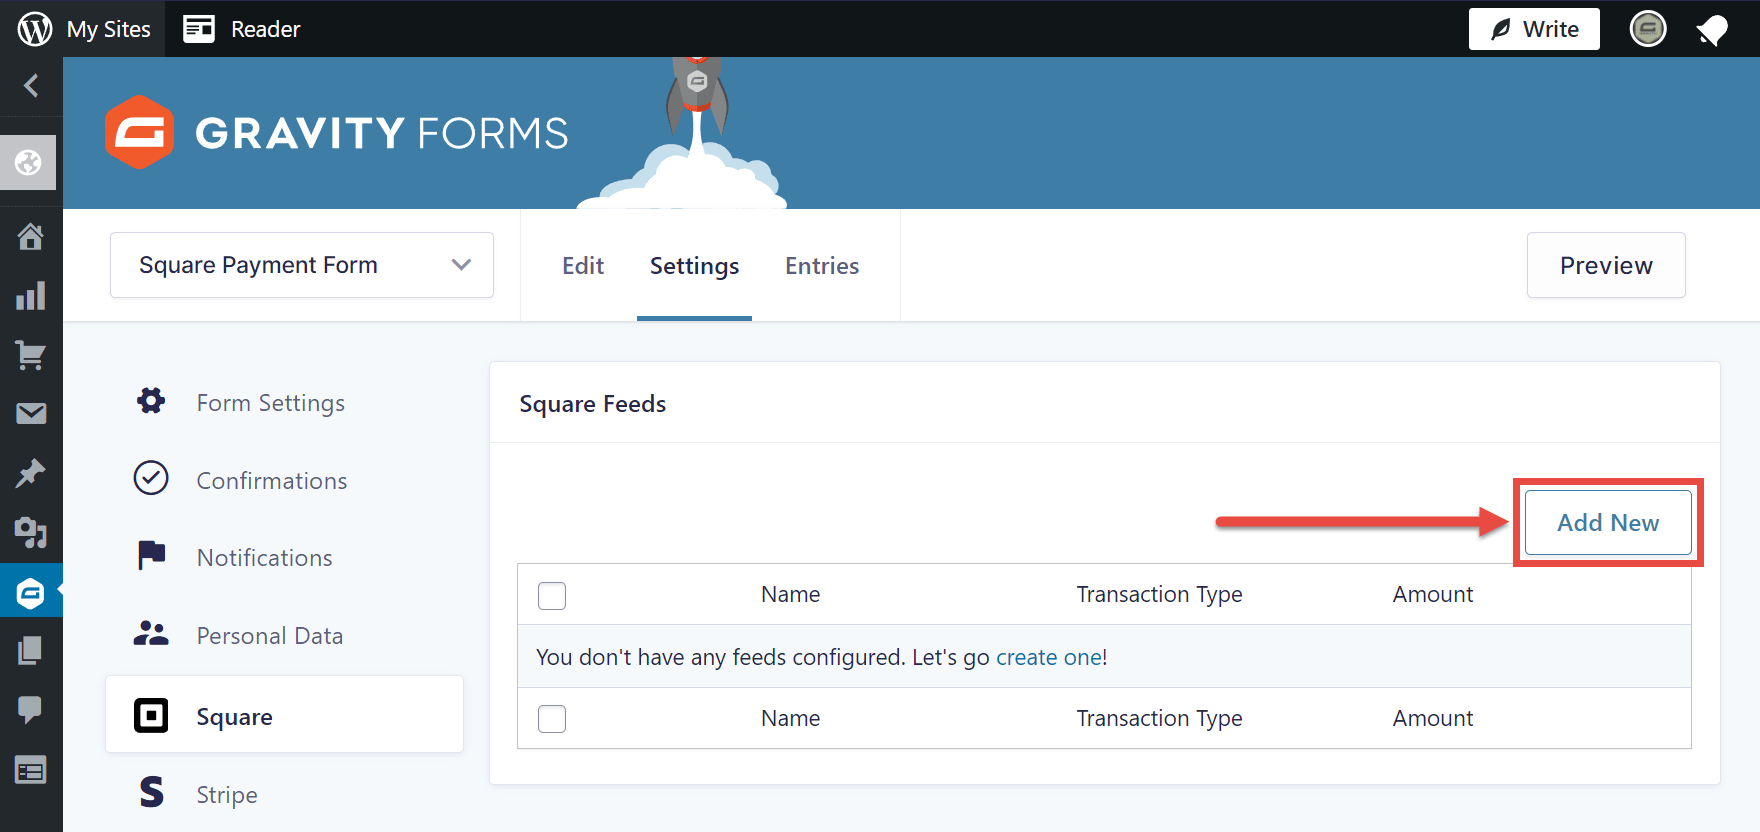
To create the feed, click Settings in the form builder, then click Square on the drop-down menu.
Next, click Add New from the Square Feeds screen.
Now, give your feed a name. This will be used so that you can identify it later if necessary.
You must also choose a transaction type. The two options are Products and Services, which is used for one-time payments, such as the purchase of a product, and Subscription, which you should choose if you want to set up a recurring payment, such as for a membership site or to collect monthly donations.
If you do want to set up recurring payments, see our guide to creating a feed for subscription billing.
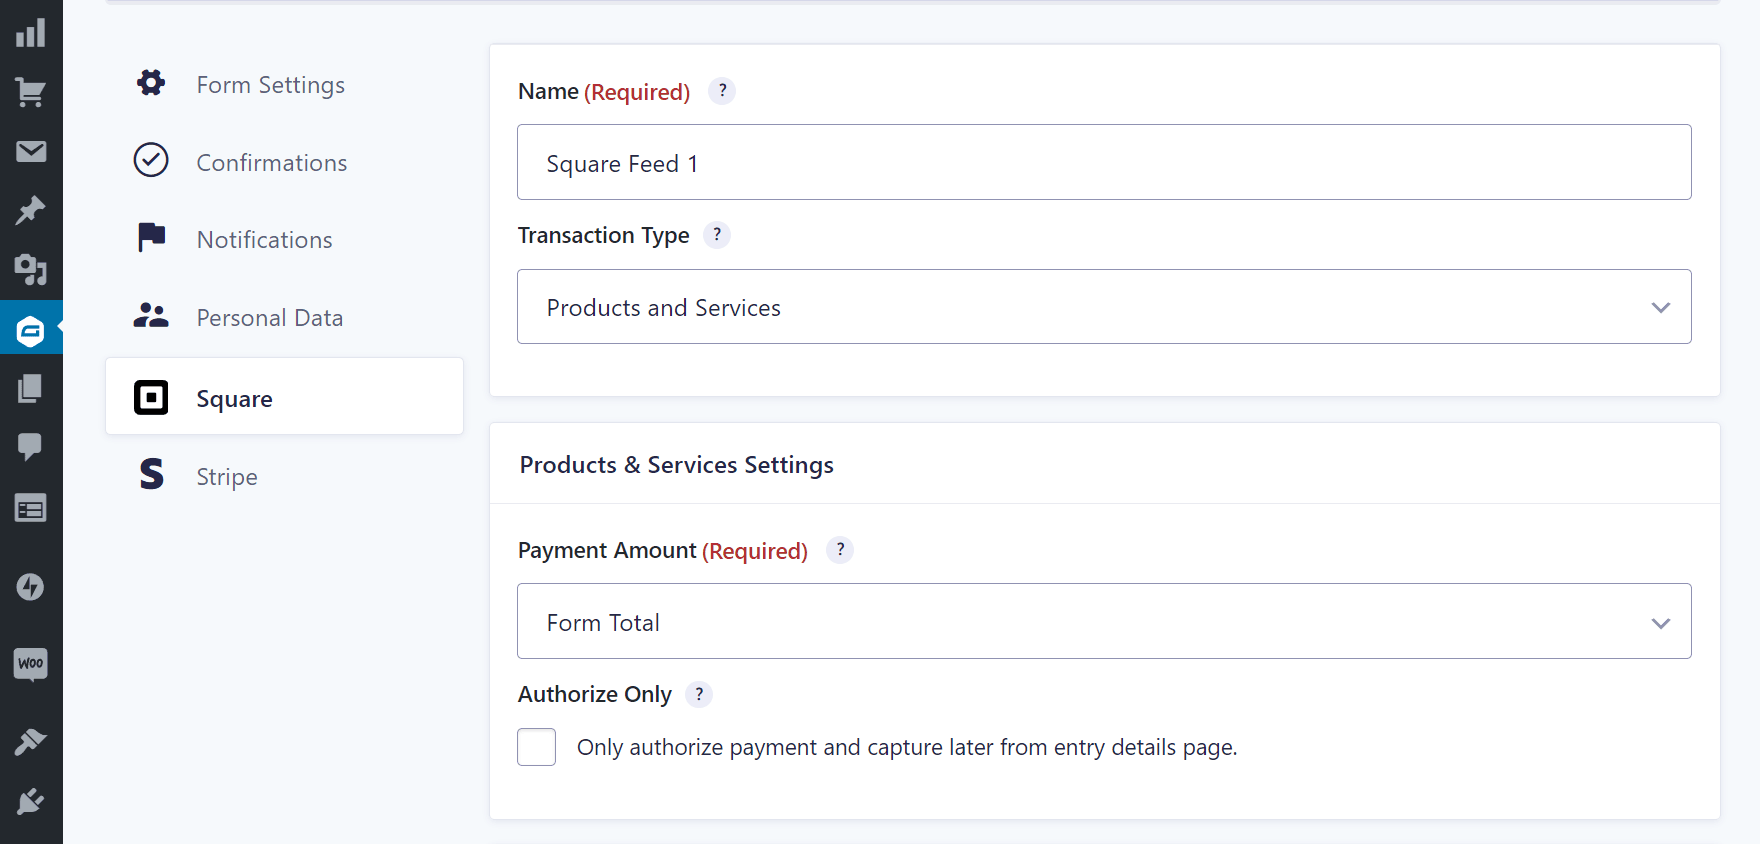
Once you’ve chosen from the Transaction Type options, you must complete the next steps on the page. Depending on your form, this can include selecting which field determines the payment amount or if you want to use the form total to determine how much the user will be charged.
You must also map the form fields to determine what information from the form is sent to Square, such as selecting the email field from the Email address drop-down menu.
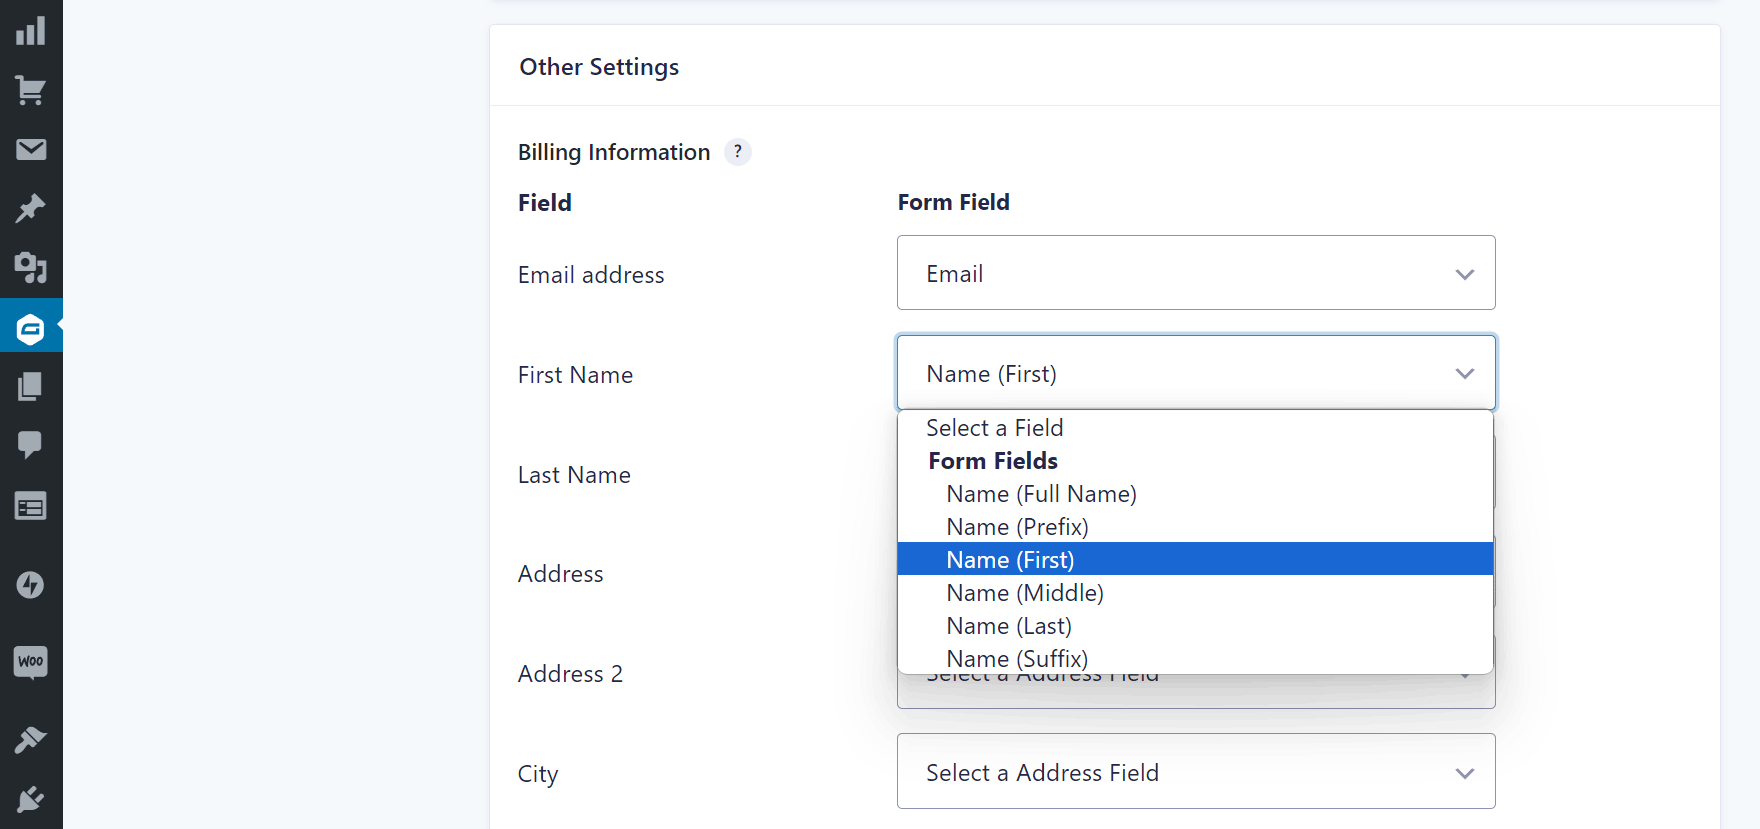
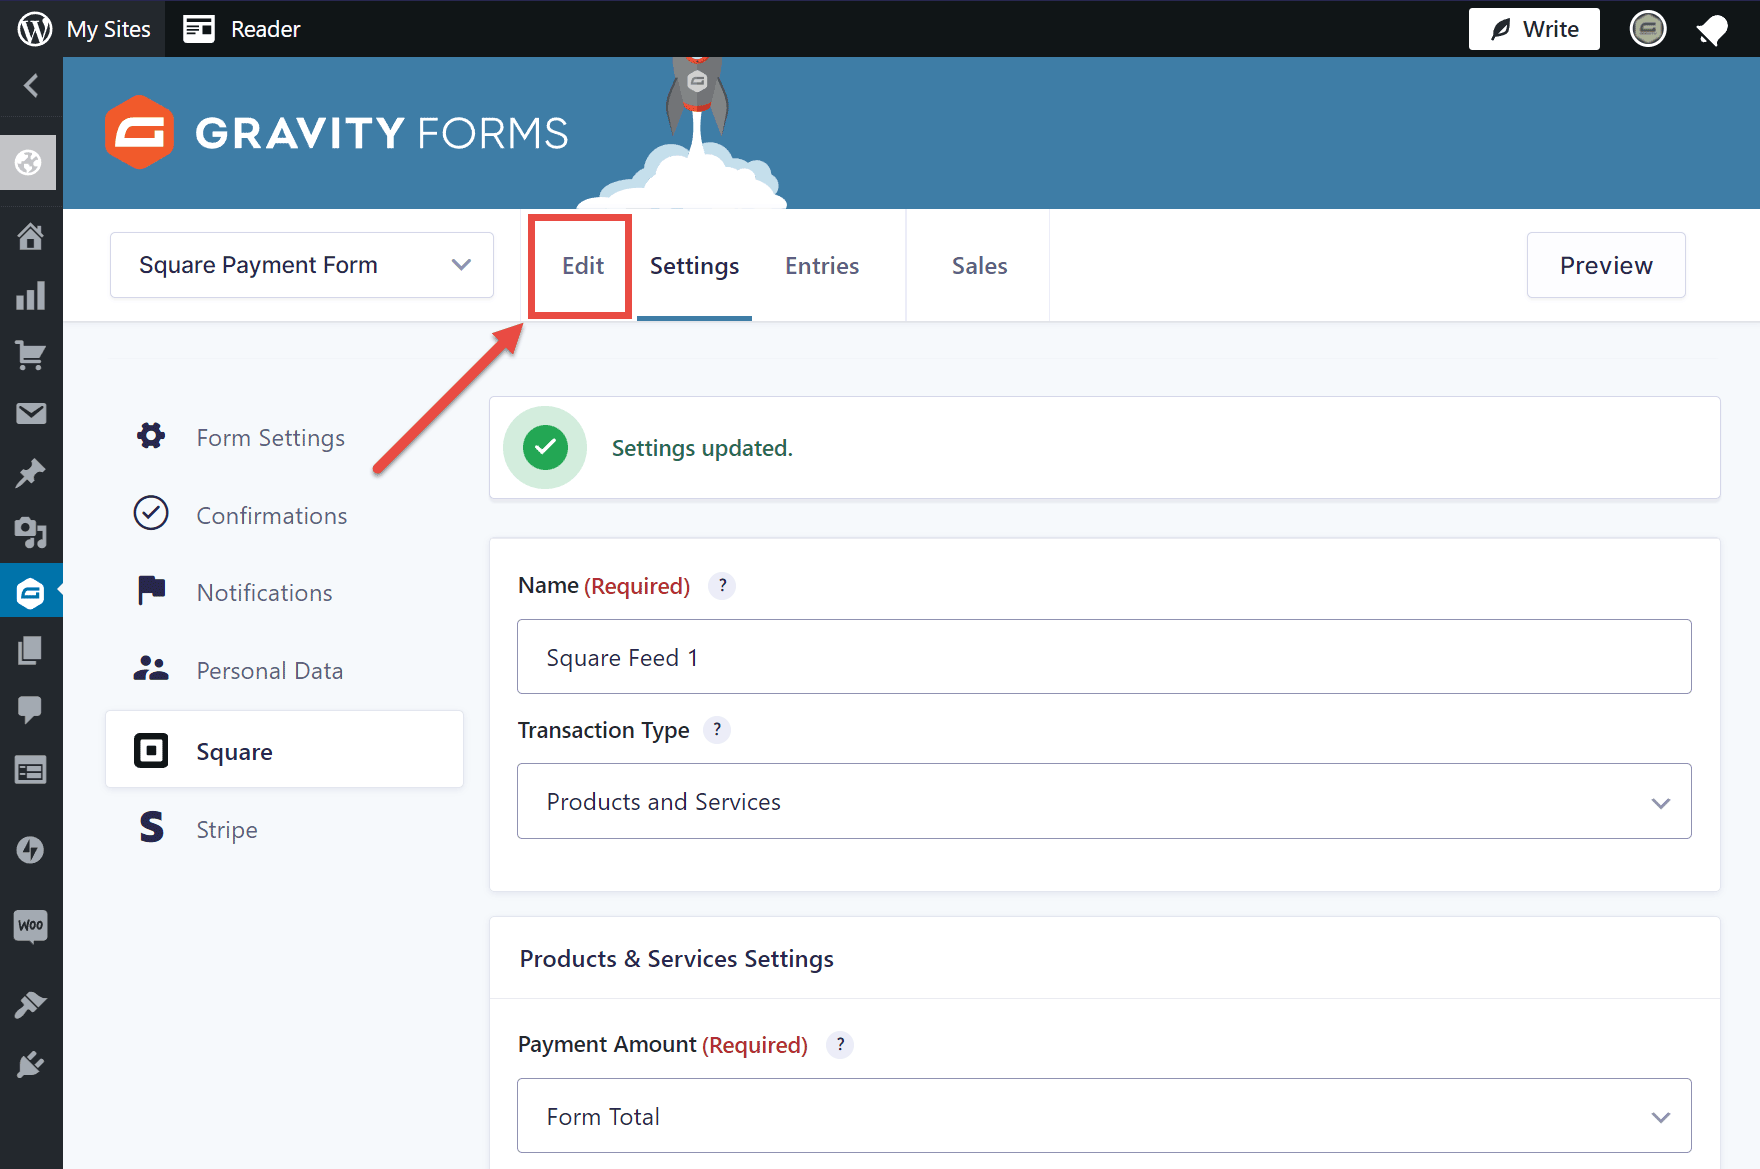
Once you’ve chosen all of the form fields, click the Save Settings button.
Now that you’ve created the feed, you can click on Edit to go back to the form editor to finish setting up the form.
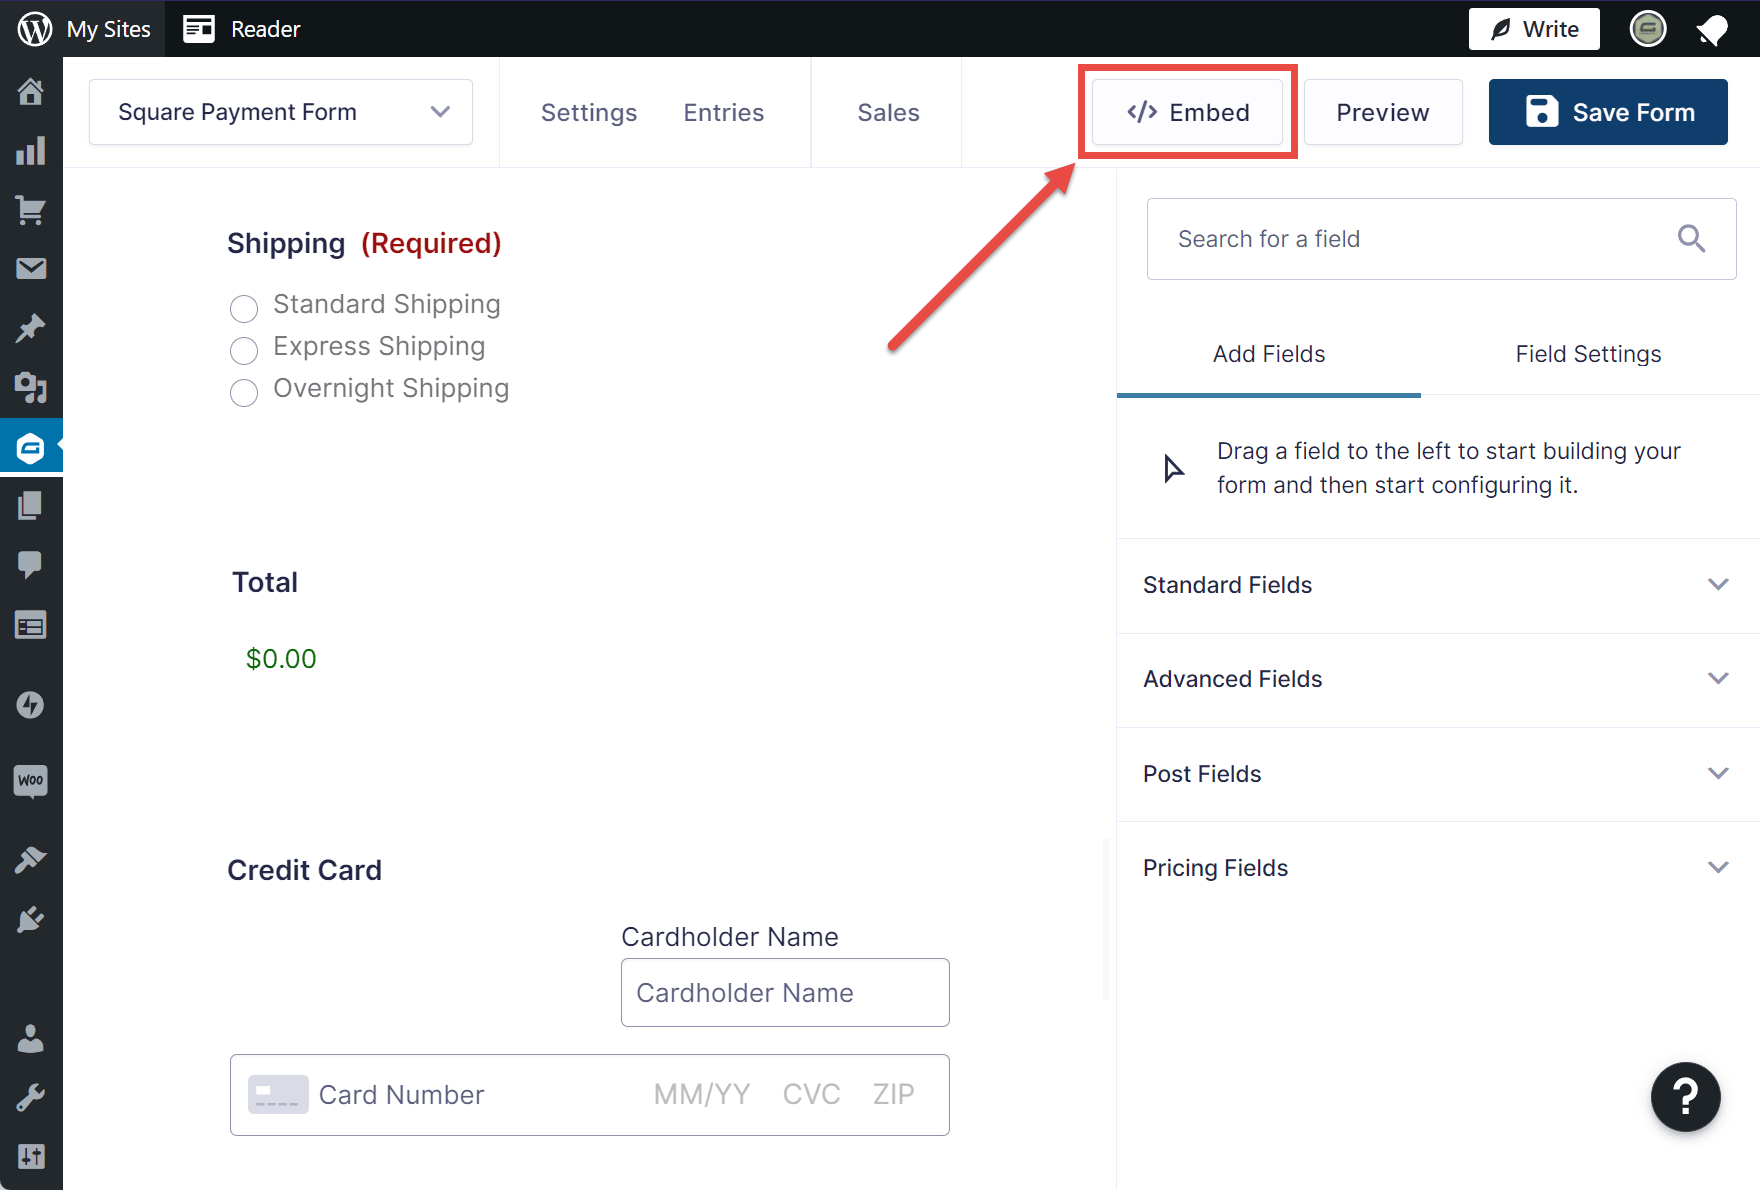
6. Publish the Square Payment Form
To publish the form on your site so that your visitors can start using it, click on the Embed button.
You can now choose to embed the form on an existing page on your site or on a new page.
If you want to publish the form on a new page, enter a page name in the Create New section of the embed form options.
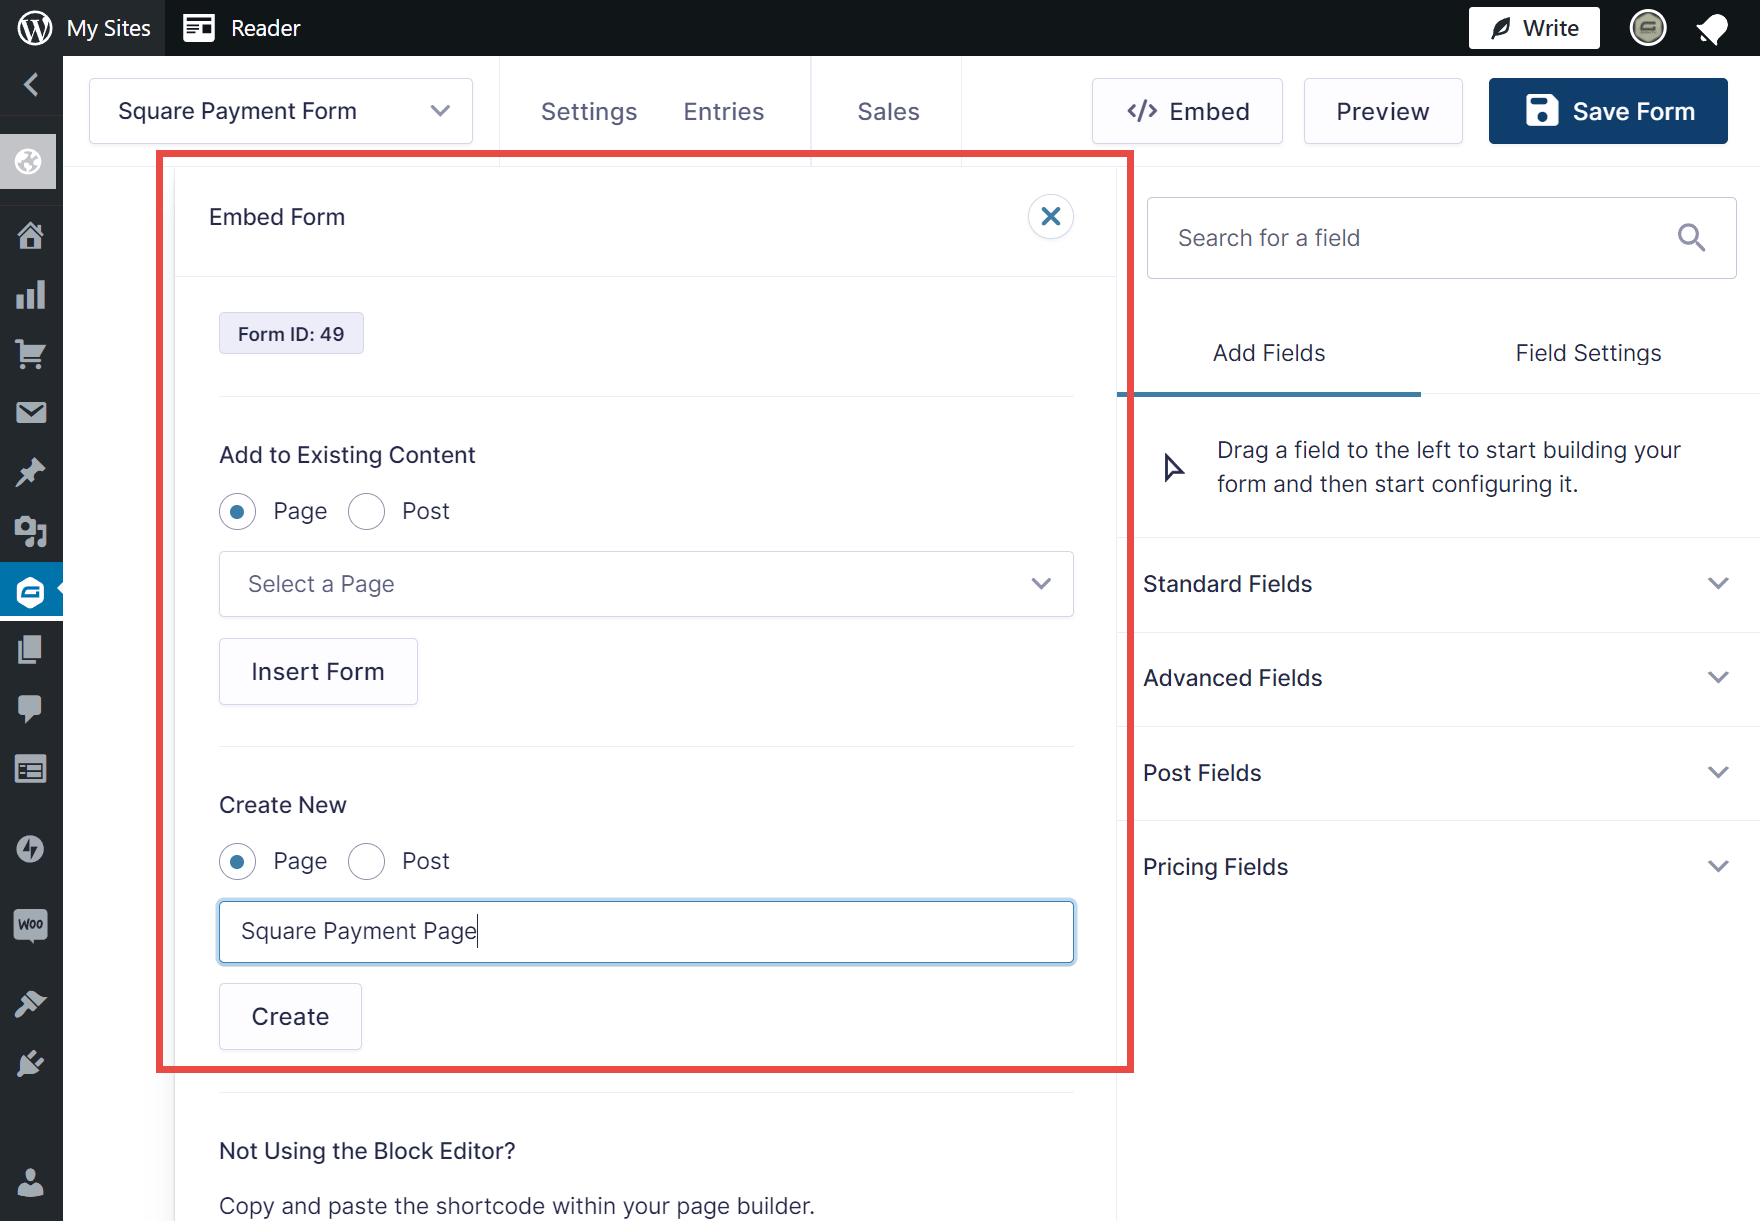
Once you click the Insert Form or Create button, the page will load, displaying the form.
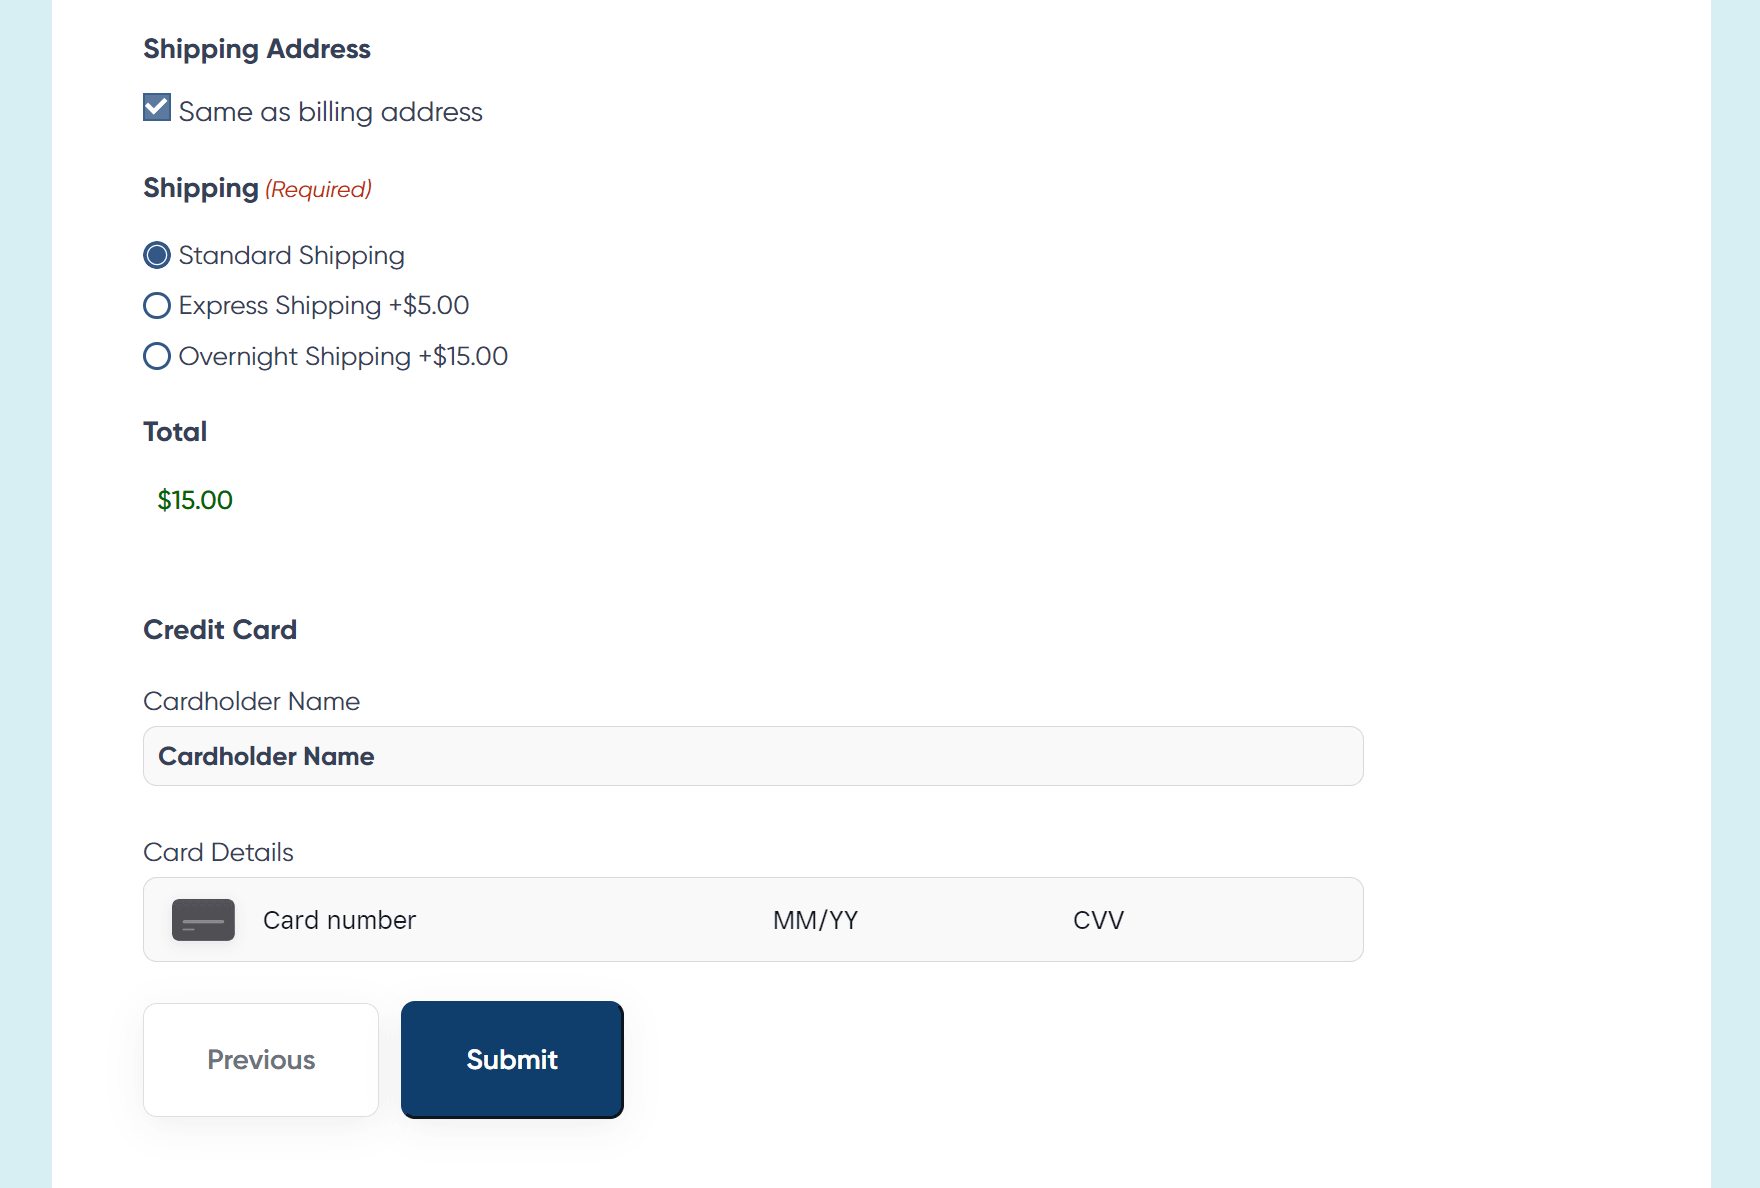
You can then click Publish to make the page and the form available on your site.
Now visitors can make a purchase through a form on your site, with the payment processed by Square.
Summary
Now that Gravity Forms is available to WordPress.com users, you can easily create a wide range of custom forms for all types of projects using our powerful plugin while also accessing all of the useful features of the WordPress.com plugin-enabled plugins.
As we’ve just seen, creating a custom form that accepts payments via Square is very straightforward.
If you haven’t signed up with Square yet, you can get fee-free processing for up to 180 days (on up to $2,000 in credit card transactions) by signing up here.
Square isn’t the only payment platform that’s compatible with Gravity Forms, though. Other options, including PayPal, and Stripe, are available via the Add-Ons directory.
Thanks to the Gravity Forms library of form templates and the drag-and-drop form editor, it shouldn’t take you long to create the right type of form for your site, whether you have a self-hosted WordPress site or you’re using WordPress.com.

If you want to keep up-to-date with what’s happening on the blog sign up for the Gravity Forms newsletter!
"*" indicates required fields


