How to create a podcast guest application form with Gravity Forms
As podcasting continues to grow in popularity, so does the challenge of efficiently managing the guest selection process. Inviting guests to your podcast can elevate your content, engage your audience, and grow your brand, but not if the process is disorganized.
Spreadsheets, email threads, and hastily scribbled notes simply don’t cut it anymore when you’re serious about scaling your show and attracting quality guests. A well-organized guest application process helps you stay on top of submissions and maintain smooth communication with your potential guests.
This is where a podcast guest application form built with Gravity Forms can help streamline the process.
By the end of this tutorial, you’ll have a fully functional guest application form that automates tasks, organizes data, and sets clear expectations for potential guests.
Do I really need a formal podcast guest application form?
Before we dive into the tutorial, let’s take a moment to discuss why it’s important for your podcast to have a polished, professional guest application process.
When you invite people to your show, first impressions matter – not just for your audience but for your potential guests as well.
A well-structured and easy-to-complete guest application form offers benefits beyond convenience. It doesn’t just save you time, it elevates your entire production.

Why it matters for your guest
- Professionalism – A polished application process signals that your podcast is organized and takes guest appearances seriously.
- Clarity – Applicants understand what’s expected, reducing back-and-forth emails.
- Time savings – Guests appreciate a quick and easy way to submit relevant information.
Why it matters for your brand
- Consistency – Standardized submissions ensure that you collect consistent information from every guest.
- Stronger content – By asking the right questions, you’ll select guests who align with your brand’s values and audience interests.
- Better preparation – Knowing the background and preferred topics of your guest(s) allows you to craft more engaging interviews. Depending on your podcast format, once a guest is approved, you could create a pre-podcast questionnaire form to ensure the interview stays on brand.
Why it matters for your business
- Efficiency – Automation streamlines follow-ups and simplifies administrative tasks, so you can focus on building connections with your guests.
- Seamless Communication – Automated email notifications and confirmations ensure guests stay informed and engaged.
At the end of the day, remember, you should treat your podcast guest application as an extension of your brand. The experience your guest has applying to your show should mirror the experience they’ll have during the recording.
Thankfully, with WordPress and Gravity Forms, it’s easy to create a guest application form. Read on to learn how…
How to make a podcast guest application form with Gravity Forms
Now that you know some of the benefits, it’s time to create your form.
Purchase a Gravity Forms license or use our free demo
If you’re completely new to Gravity Forms, you can get started in one of two ways: use our free demo, or purchase a Gravity Forms license.
Gravity Forms offers a few types of licenses, all of which include access to our knowledgeable and friendly support team. You can compare license types here and pick the one that will suit your needs.
Any license will work for the purposes of this tutorial, but it’s worth noting that if you also want to be able to accept payments on your site, you’ll need to purchase a Pro, Elite, or Nonprofit license.
If you’d like to try Gravity Forms first, you can use our free demo – it has all the functionality you’ll need to follow along with this tutorial. If you want to stick with the demo for now, skip ahead to the Create your first form section.
Install Gravity Forms
After you’ve made your purchase, you can log in and download Gravity Forms directly from your My Account section. This download should remain a ZIP file, as this is the format in which you’ll upload it to your WordPress site.
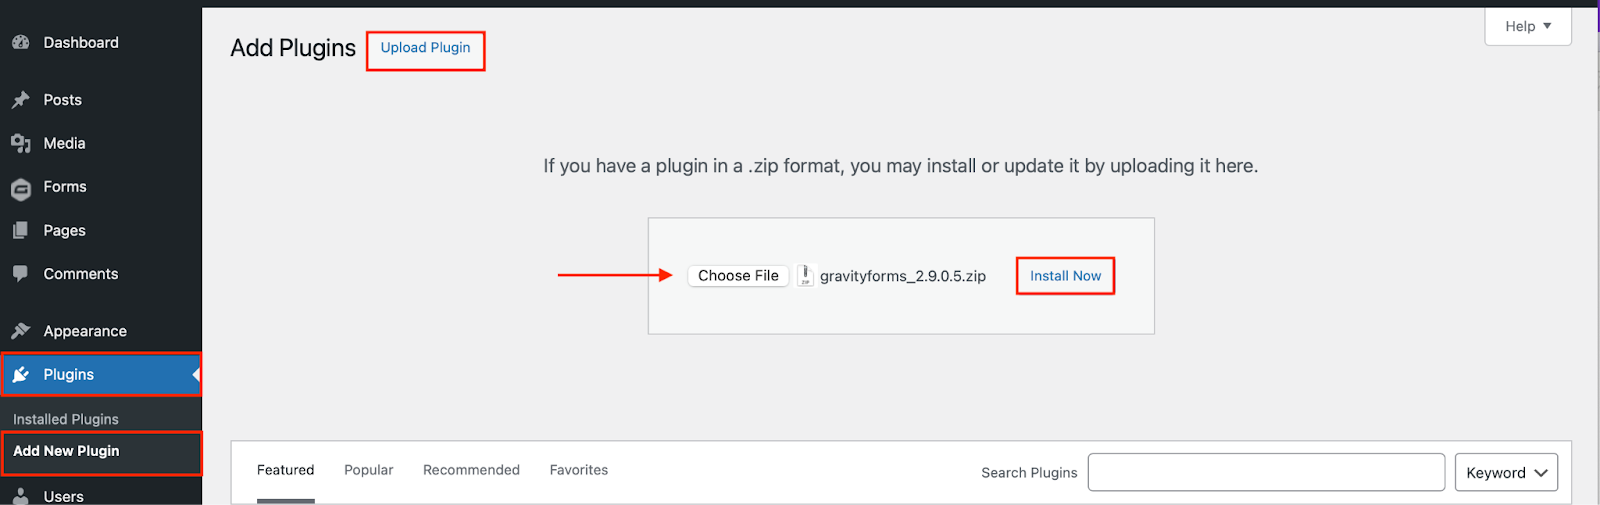
Next, install the Gravity Forms plugin on your WordPress site. Here’s how:
- Go to your WordPress dashboard and navigate to Plugins → Add New Plugin.
- Click Upload Plugin.
- Choose the ZIP file you just downloaded, then click Install Now.
- After the plugin is installed, click Activate.
Now, follow the instructions in the Setup Wizard. You’ll be asked to enter your Gravity Forms license key and answer a few questions to help you get started. You can find your license key by logging in to Gravity Forms and clicking My Account.
Create your first form
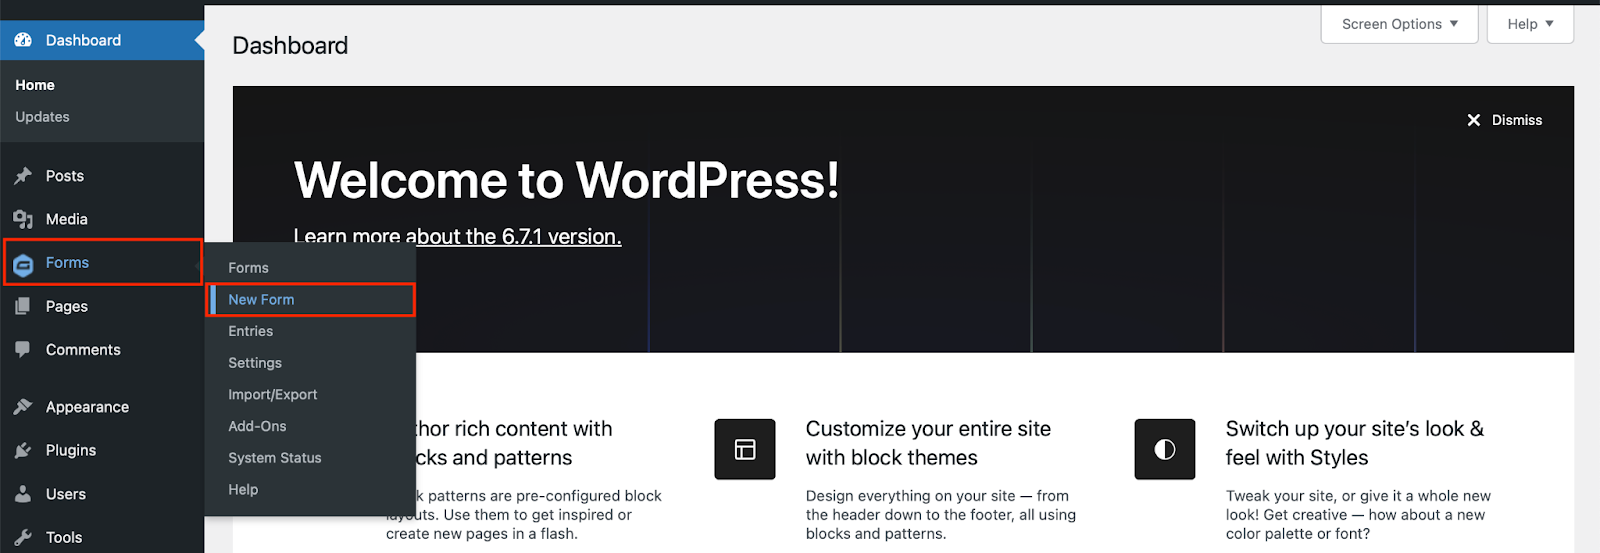
Once Gravity Forms is installed (or if you’re using our demo), creating a form is simple. Here’s how:
From your WordPress dashboard, go to Forms → New Form.
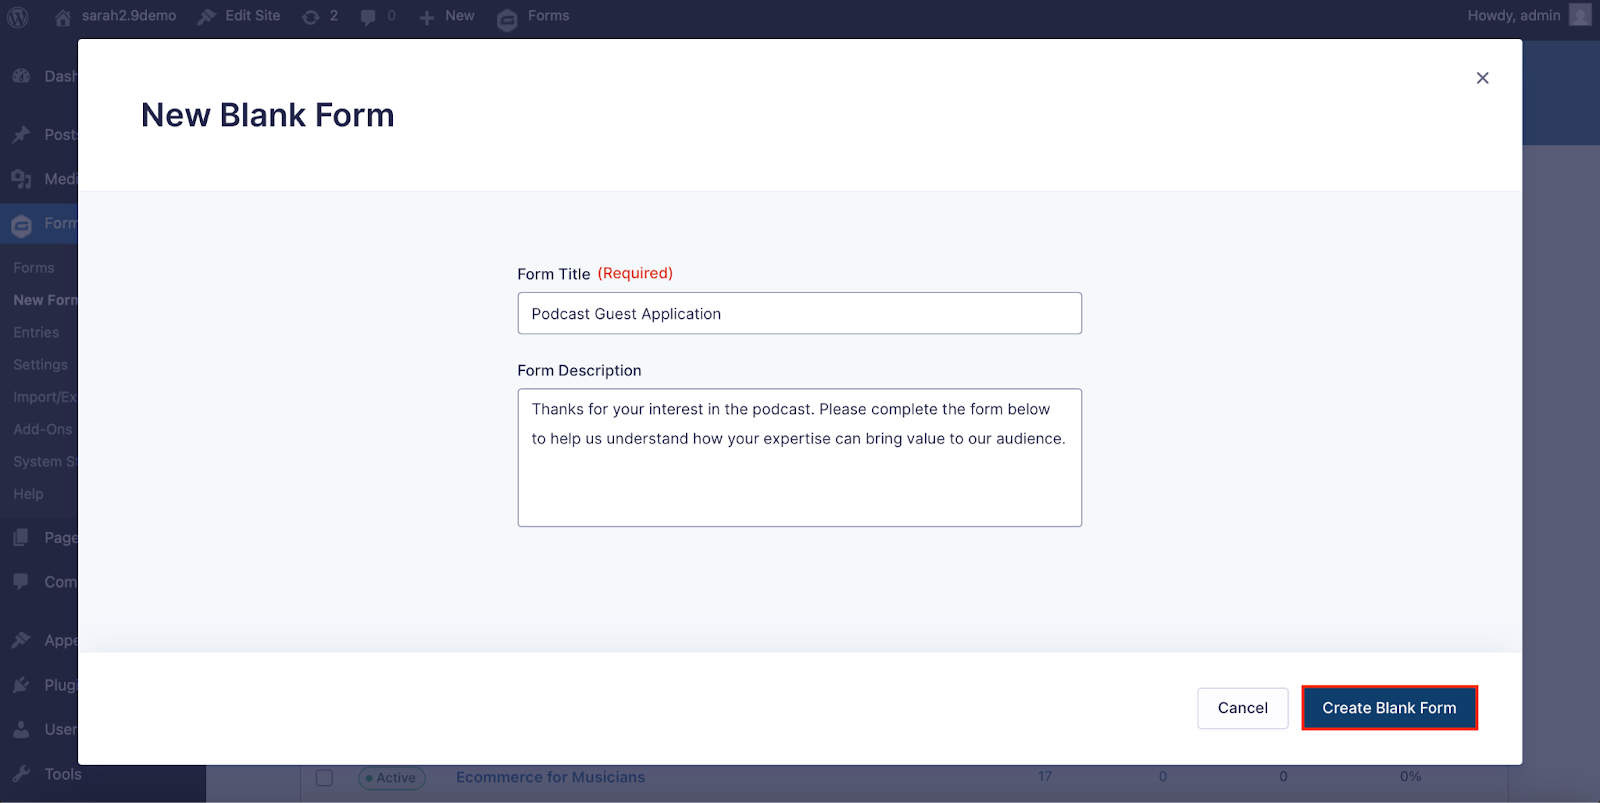
Choose a form template from the Gravity Forms template library, or start from scratch by choosing the Blank Form.
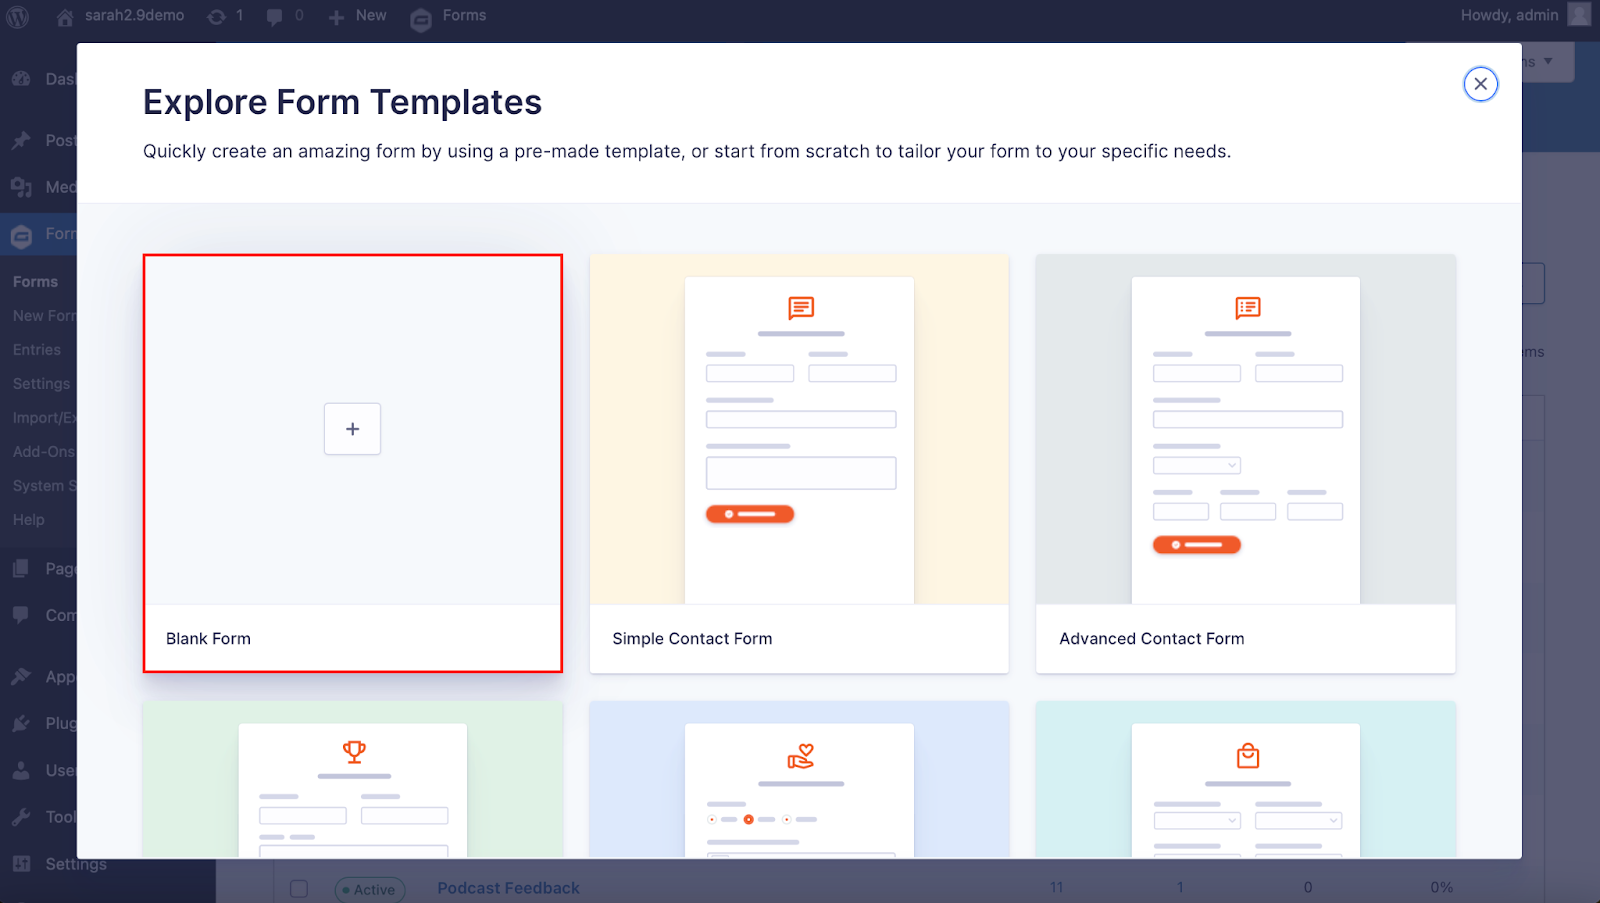
In this tutorial, we’ll create a Podcast Guest Application form. Give your form a title and optionally a description, and then click Create Blank Form.
Add essential fields to your form
This is the fun part. Drag and drop fields onto your form and arrange them as needed.
Edit the field settings to make fields required, modify the appearance, add conditional logic, etc. With Gravity Forms, you have enormous flexibility when it comes to customization.
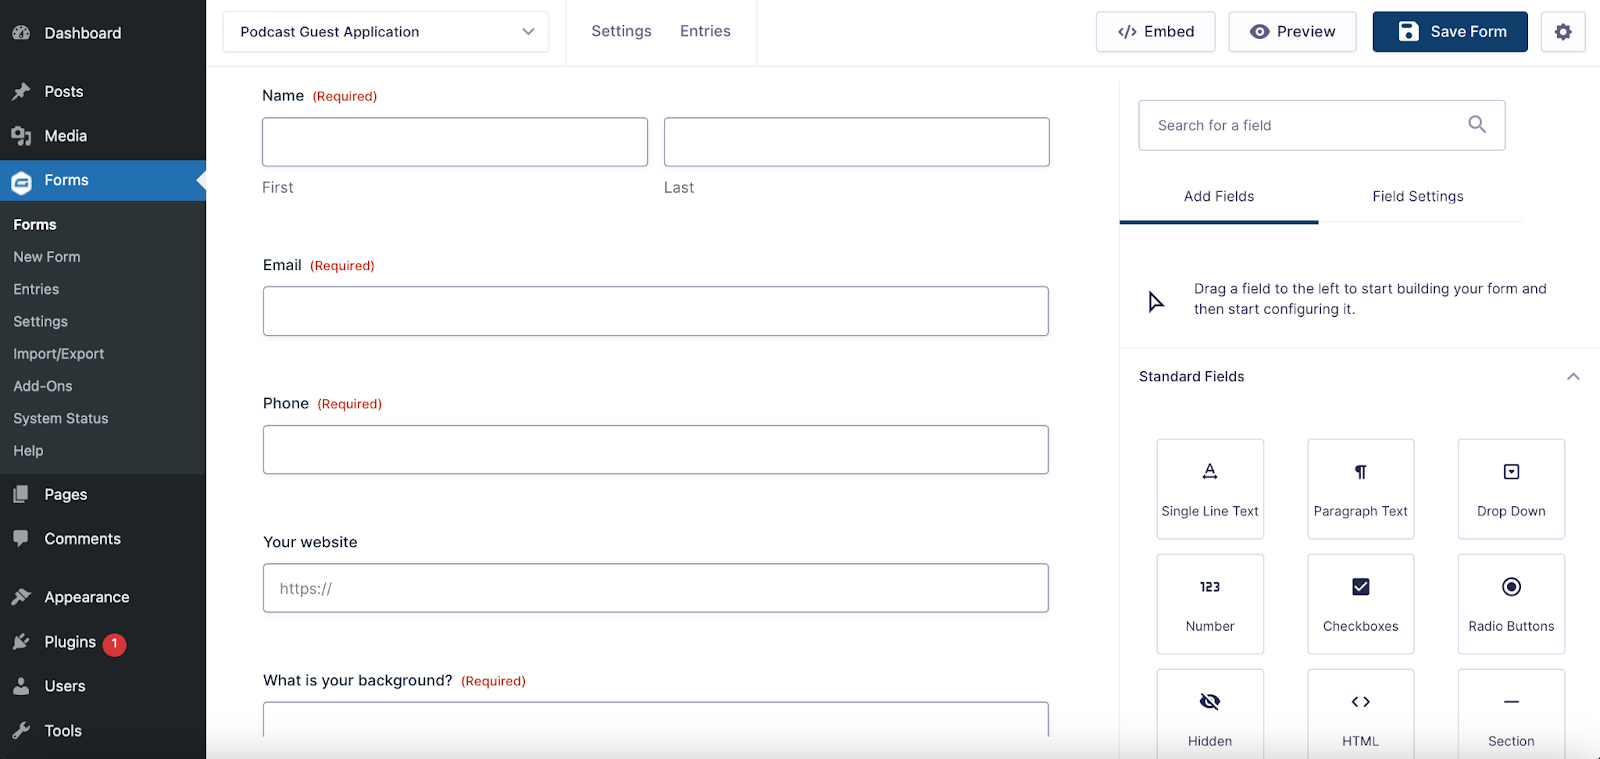
When building your form, you’ll want to add enough fields to gather enough information to decide whether you want to accept someone as a guest on your show. For longer, more comprehensive forms, consider adding section breaks to organize your fields into smaller, more digestible groups.
Here are some ideas:
Basic Information (all available under Advanced Fields):
- Name – Use the Name field to keep entries organized.
- Email Address – A must for follow-up communication and email notifications.
- Website – To include in show notes and for your own research. If this isn’t relevant to your show or audience, don’t make this a required field.
- Phone Number – Helpful for urgent contact.
Guest Background
- Bio/Professional Background – Add a Paragraph Text field to gather a short bio.
- Area of Expertise/Topic Suggestions – Use Dropdown or Checkbox fields to allow guests to choose from a list of preferred categories.
- Social Media/Website Links – Include fields for social media or additional websites.
Scheduling and Availability
- Preferred Recording Dates/Times – Use a Date and Time field or Dropdown to capture availability. Here, you might even state if you only record your podcast on set days/times.
- Time Zone – Use a Dropdown to avoid scheduling confusion.
Supporting Materials
- File Upload fields – Allow guests to upload promotional material or headshots for use in marketing the episode.
- Additional Materials -For example, if you’re hosting an author, a PDF of their book can be helpful for preparation. Similarly, course materials, lead magnets, or other relevant resources can provide valuable context.
Consent and Agreement
- Add a required checkbox where applicants can agree to your recording, publication, and promotional terms. Be sure to clearly outline or link to your terms in the field description.
Quick Tip: Use conditional logic to show or hide fields depending on user responses. For example, if a guest indicates they’ve been on other podcasts, display a field where they can list links.
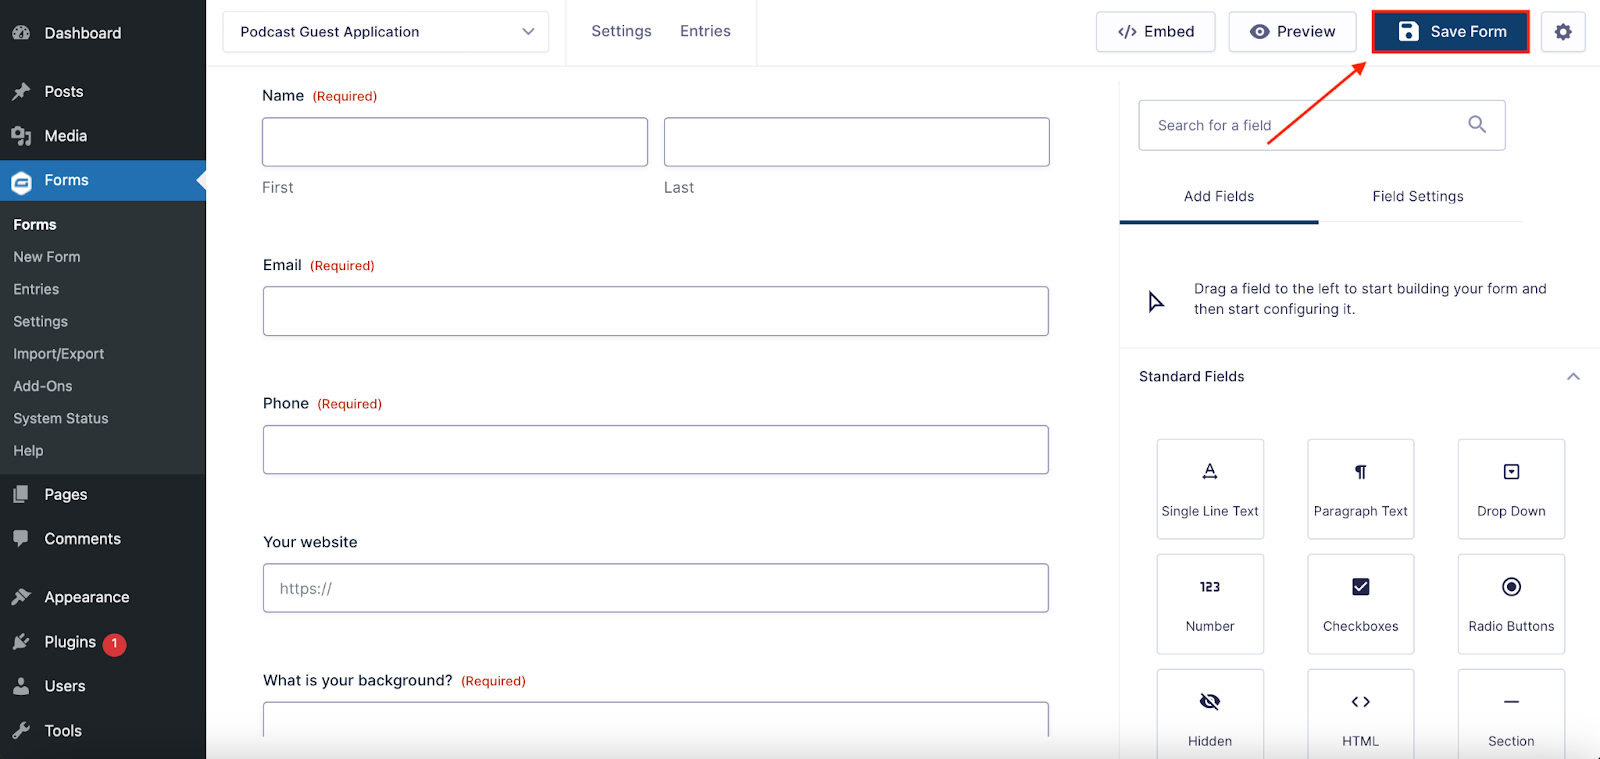
When you are satisfied, click Save Form.
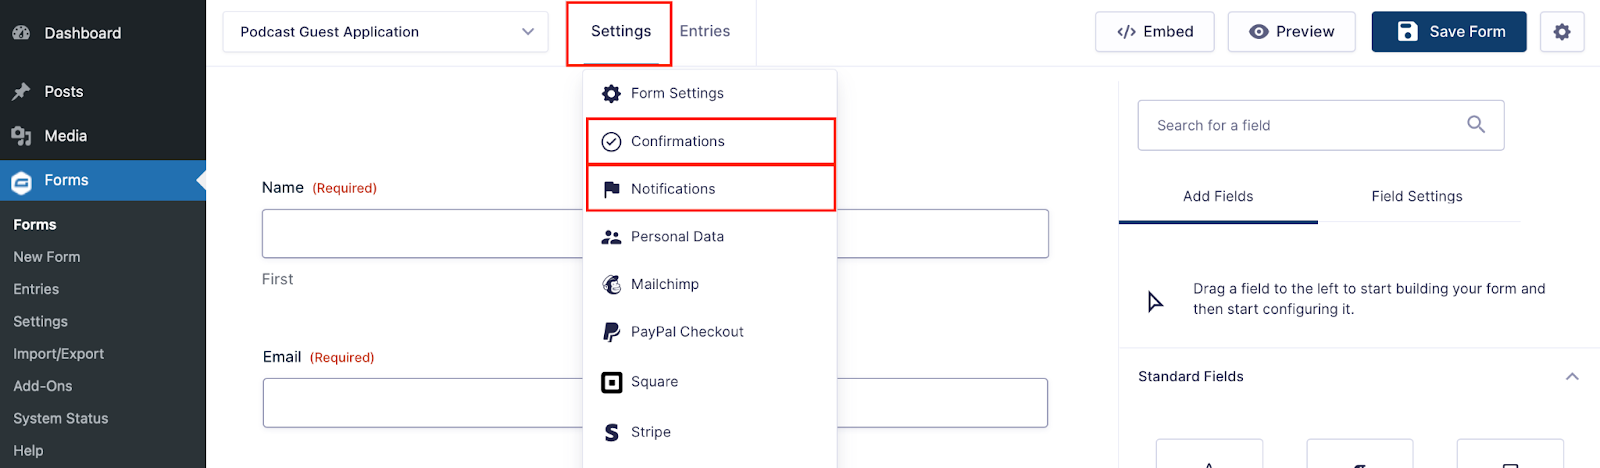
Enhance your form
Under Settings, you can further enhance your form by customizing the notifications and confirmations to let your users know their form has been submitted successfully. Our documentation will help you get started with notifications and confirmations.
To view the finished product, embed the form on any page or post. In this case, we’ll embed the form on a new page:
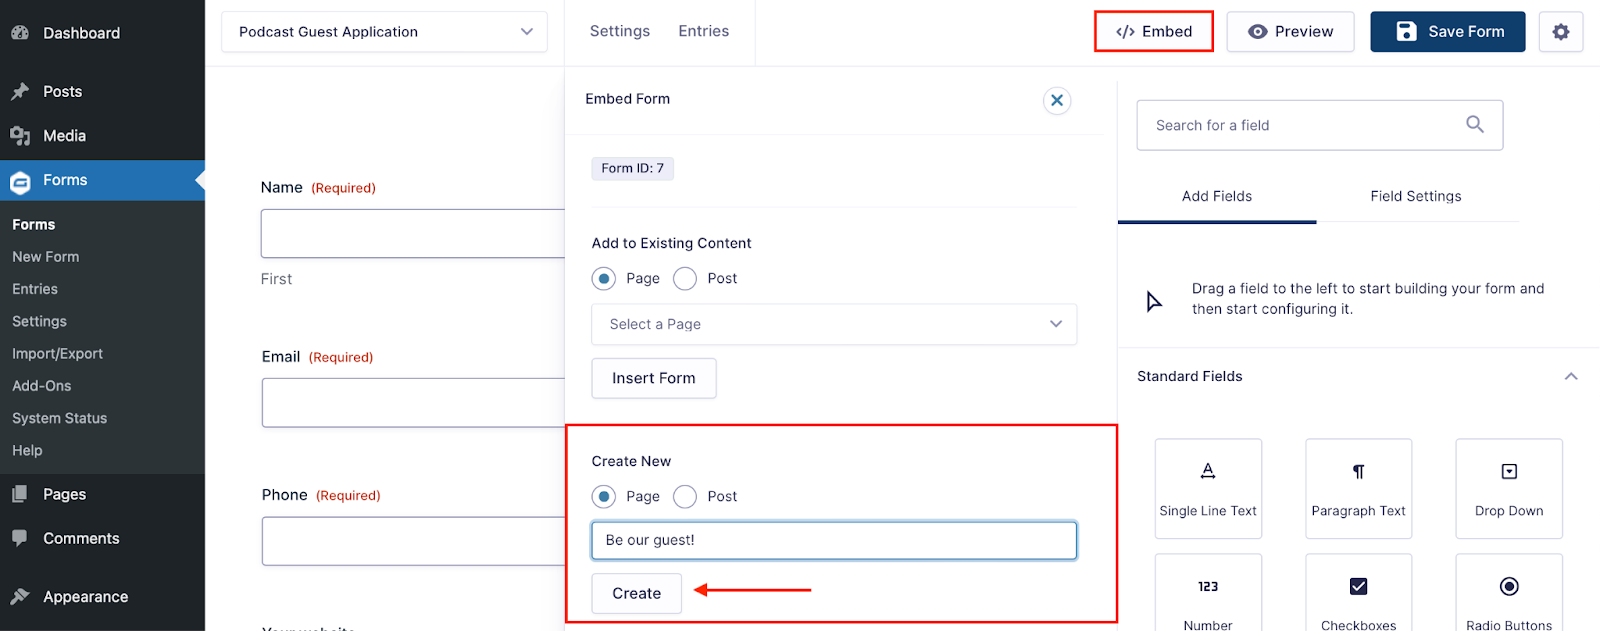
From here, you can view your form, make further changes, and style your form via the block editor as needed. Don’t worry, this page starts out in Draft status, so you can still make as many changes as needed before publishing for the world to see.

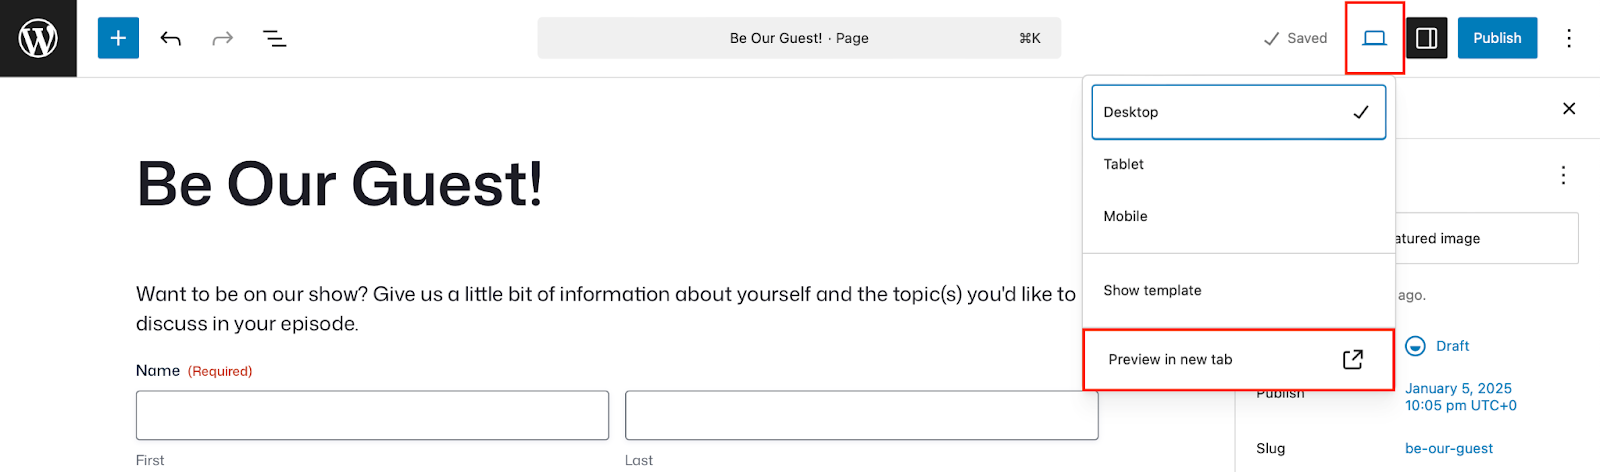
Test your form
Make sure to test your form by submitting a few test entries. The easiest way to do this is from the page editor, by clicking Preview in new tab.
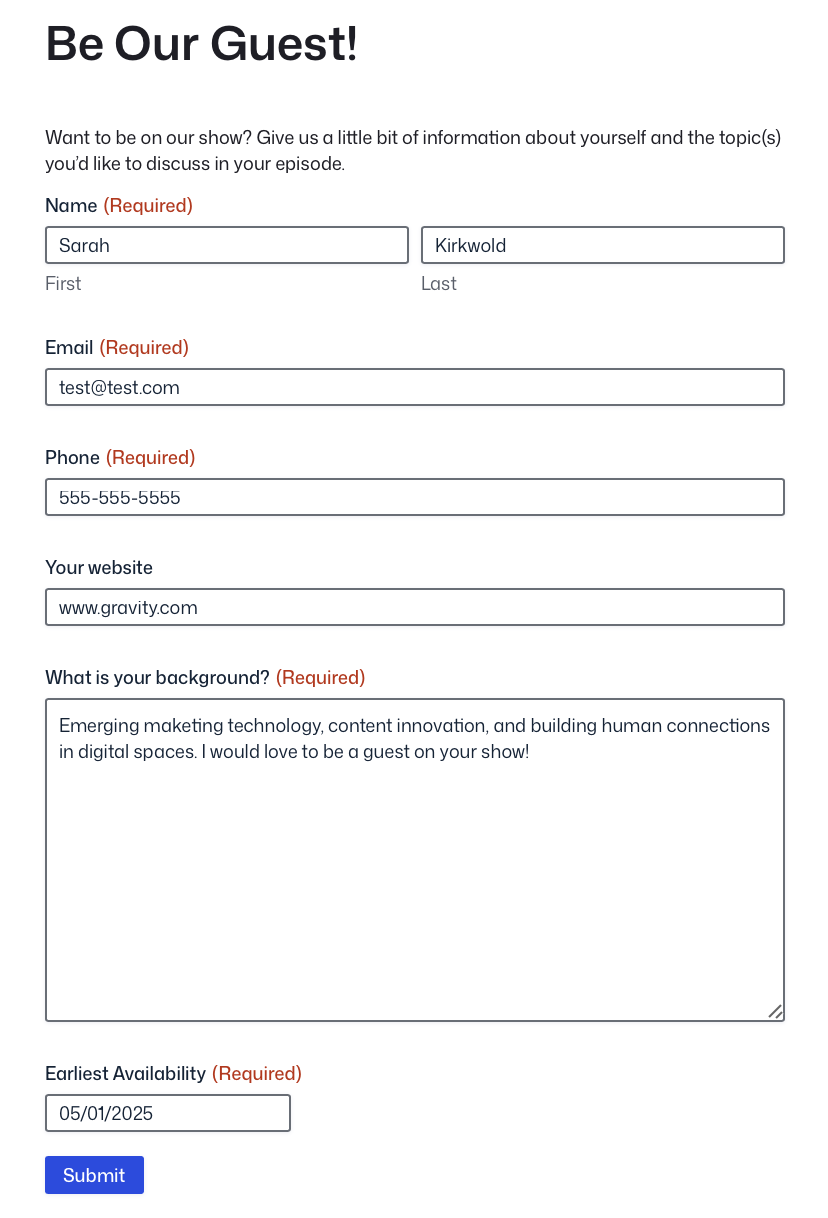
Fill out the form and click to submit.
This way, you can ensure everything is working as expected and that all submissions are being routed correctly. This is also how you’ll be able to validate your confirmation messages and notifications, if you’ve added any.
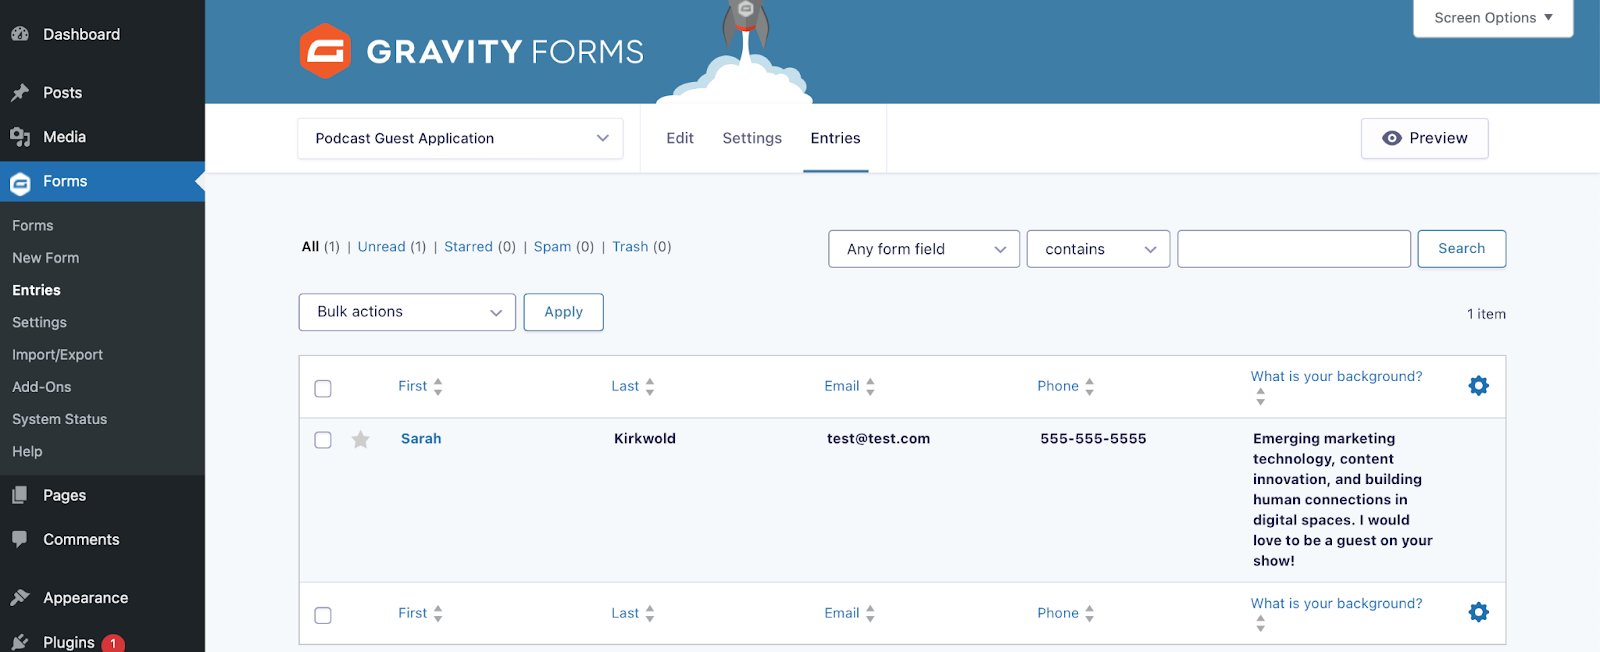
To check that your form submission has been received, head to your Forms list and click Entries.
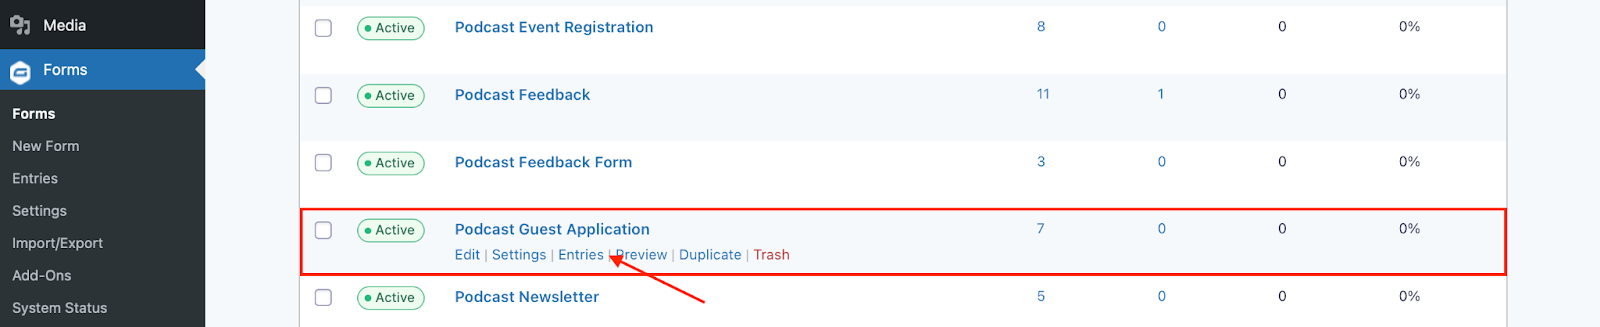
Here you should see the test entry you just submitted, and can confirm everything is working properly.
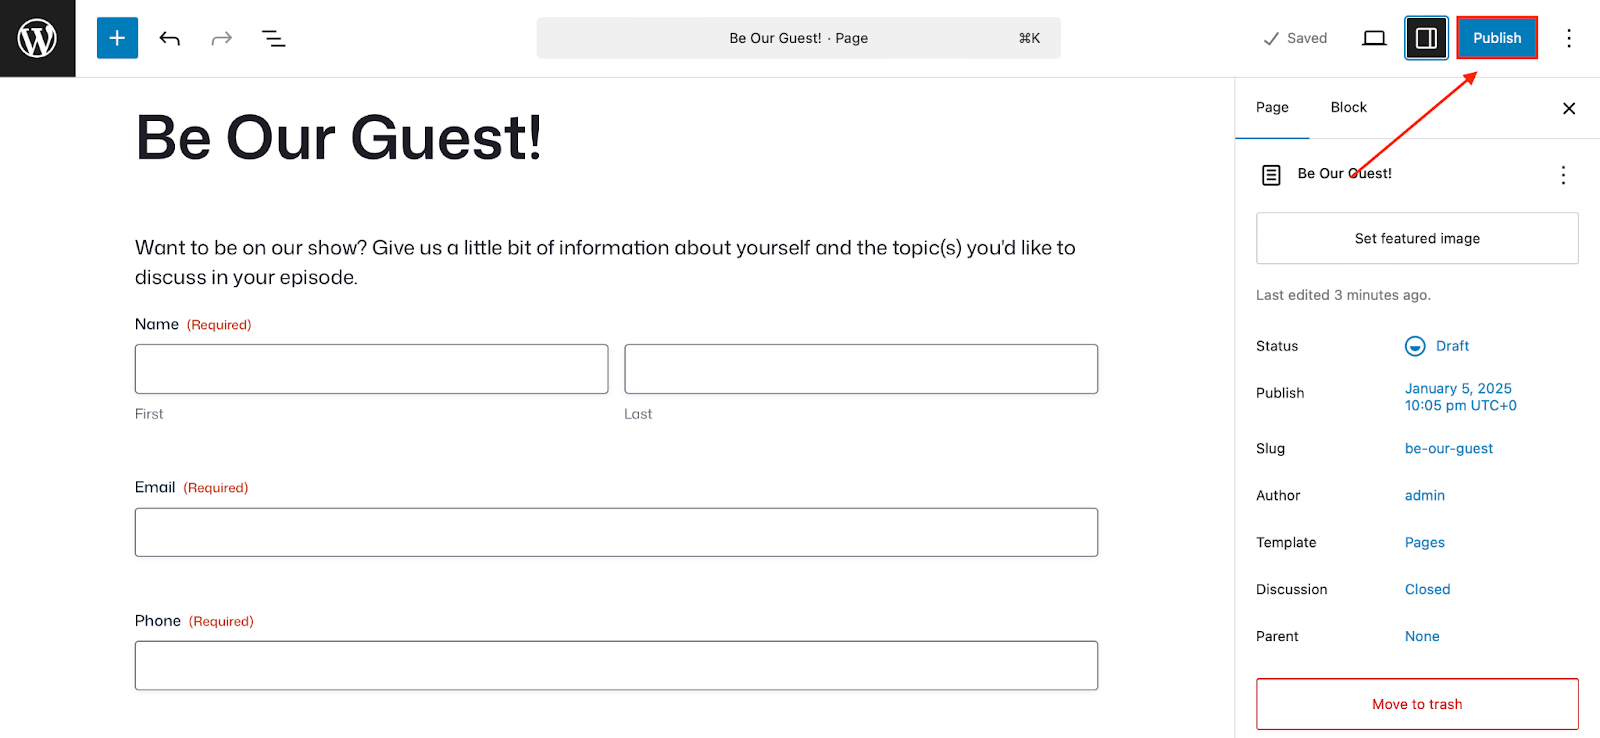
Publish your form
When you are ready to publish your page, simply navigate back to the page you created and click Publish. That’s it!
Extend the functionality of your forms
If you really want to create a seamless experience, think about the entire guest journey – from application to post-interview follow-up – and automate where possible.
With Gravity Forms you can extend the functionality of your WordPress site by taking advantage of the many features and add-ons available with your Gravity Forms license.
To name a few:
- Gravity Flow – Automate behind-the-scenes work like routing applications to the right team member as your podcast grow. To see examples of automation in action, check out the Gravity Flow video tutorials in our documentation or try out a free demo!
- HubSpot – Tag or segment applicants into a “Podcast Guest Applicant” list, create a custom pipeline (e.g., New → Reviewed → Invited → Scheduled → Recorded → Published), assign tasks to your team to follow up with potential guests, and more.
- Kit (formerly ConverKit) – An email marketing platform that lets you nurture relationships and automate guest follow-ups.
- Zapier – The add-on that lets you connect your forms with thousands of applications and services, giving you extensive options when it comes to managing your forms and form entries.
Impress your guests and try Gravity Forms today!
Creating a streamlined podcast guest application process isn’t just about convenience – it’s about elevating your show’s professionalism and attracting high-quality guests who will bring value to your audience. Remember, your application form often gives guests the first impression of your production quality.
A well-designed form and smooth user experience signal that you take your podcast seriously and respect everyone’s time. With Gravity Forms, you can easily create a customized guest application form that captures exactly what you need while offering a seamless experience for your potential guests.
By implementing the steps outlined in this guide, you’ll save countless hours of back-and-forth emails. Plus, you’ll be able to ensure you’re gathering all the critical information upfront to make informed decisions about who appears on your show.
Ready to transform your podcast guest management system? Purchase your Gravity Forms license today and start building your professional application form in minutes.

If you want to keep up-to-date with what’s happening on the blog sign up for the Gravity Forms newsletter!