How to Use MailerSend for WordPress transactional emails
Trying to set up MailerSend WordPress transactional emails on your site?
MailerSend is a great option for improving the reliability of your WordPress site’s transactional emails. It can be free for many sites and it’s still affordable if you do end up needing one of the paid plans.
However, to connect everything, you’ll need the help of a WordPress SMTP plugin, which is what we’re going to cover in this post.
Below, we’ll show you step-by-step how to connect WordPress to MailerSend using the Gravity SMTP plugin.
You do not need any technical knowledge to do this – just follow along as we cover every step of the process.
Why use MailerSend for WordPress transactional emails?
MailerSend is a dedicated transactional email service from MailerLite, a popular and affordable email marketing service.
One of the biggest advantages of MailerSend is its affordable pricing.
To start, it offers a free plan that lets you send up to 3,000 emails per month, which will already be enough for a lot of WordPress sites.
If you ever need to exceed that limit, you have two options:
- You can use pay-as-you-go pricing of $1 per 1,000 emails (though this approach doesn’t give you access to all of the features).
- There are fixed monthly paid plans that add more features, starting at $35 to send up to 50,000 emails per month.
Beyond that, MailerSend is just generally a quality transactional service, with all of the features that you need:
- Tracking and analytics – MailerSend includes its own tracking and analytics reports (and you can also access tracking through Gravity SMTP).
- Suppression management – You can set up suppressions directly in MailerSend (though Gravity SMTP also has a feature to do this).
- SMS messages – In addition to transactional emails, MailerSend’s paid plans also let you send SMS messages.
- Webhook alerts – You can use webhooks to receive notifications about transactional email events on your site.
- Custom tracking domain – With the preset paid plans, you can use your own custom domain name for tracking links.
- Multi-user support – Even the free plan lets you have five user seats for your MailerSend account.
How Gravity SMTP helps you use MailerSend on WordPress
While MailerSend works great for WordPress sites, WordPress doesn’t offer any built-in functionality to connect to MailerSend.
To fix this, you can use the Gravity SMTP plugin, which lets you connect your site directly to MailerSend using the MailerSend API (which is the most reliable way to send transactional emails).
Beyond letting you use the API, here are some of the other benefits of using Gravity SMTP for WordPress MailerSend transactional emails:
- Email logging – You can see a log of individual emails that your site has sent, including technical information about each email along with the ability to log the actual email content and attachments. This is especially useful because MailerSend’s free plan only stores data for 24 hours (7-30 days on the paid plans).
- Email usage reports – You get high-level details about how many emails your site has sent, along with the top sending sources and recipients.
- Open tracking – You can track email opens to see if people are engaging with your emails.
- Email suppressions – You can add suppressed recipients to avoid sending emails to those users.
- Real-time alerts for email issues – You can receive immediate alerts via SMS or webhook (such as Slack alerts) so that you can quickly fix problems.
- Backup email sending methods – You can set up a backup email sending method in addition to MailerSend. If any email ever fails to send via MailerSend, Gravity SMTP can automatically resend the email using your backup method.
In addition to that, you also get direct support from the Gravity SMTP team if you ever have issues.
Currently, Gravity SMTP is available for free to anyone holding one of these Gravity Forms licenses:
- Elite license
- Nonprofit license
- Developer license (legacy)
While you will download Gravity SMTP from the Gravity Forms My Account area, Gravity SMTP is still a standalone plugin and you do not need to be using Gravity Forms to set up Gravity SMTP.
How to set up the WordPress MailerSend integration with Gravity SMTP
Now, let’s get into the actual step-by-step guide on how you can set up WordPress MailerSend email sending using the Gravity SMTP plugin.
1. Install the Gravity SMTP plugin
To begin, you should install the Gravity SMTP plugin on the WordPress site where you want to set up MailerSend.
Gravity SMTP is currently available for free to anyone holding one of these Gravity Forms licenses:
- Elite license
- Nonprofit license
- Developer license (legacy)
You can download the Gravity SMTP plugin from your Gravity Forms My Account area and install it like any other plugin. You do not need to have the Gravity Forms plugin installed to use Gravity SMTP, though Gravity SMTP works great for Gravity Forms notification emails.
2. Register for your MailerSend account
Next, you’ll want to register for your MailerSend account if you haven’t done so already.
MailerSend offers a free Hobby plan that you can use to follow this guide without entering a credit card. It lets you send up to 3,000 emails per month, which is already enough for many WordPress sites.
If you need to send more than 3,000 emails per month, you have two options:
- You can keep using the Hobby plan and just pay $1 per 1,000 emails that you send over the limit. However, it’s important to note that the Hobby plan also has some feature limitations. For example, it only stores data for 24 hours and you can’t set up a custom tracking domain.
- You can pay for the Starter or Professional plans. These plans increase the sending limit and also give you access to more features. The Starter plan begins at $35 per month to send up to 50,000 emails per month.
When in doubt, you can always start with the free Hobby plan and upgrade later.
For this guide, we’ll exclusively use the Hobby plan. You can click here to create your free account.
3. Authenticate your domain name with MailerSend
Once you’ve registered for MailerSend, the next step is to authenticate your WordPress site’s domain name with MailerSend.
While MailerSend does let you set up a single email address sender identity, we recommend authenticating your domain name for a couple of reasons:
- It can improve deliverability.
- It lets you send from any email address on your domain name, instead of just a single sender identity.
We’re going to use the domain authentication approach for this guide. However, if you’re unable to manage DNS records for your domain name, you can consider using a sender identity instead (Email → Sender identities).
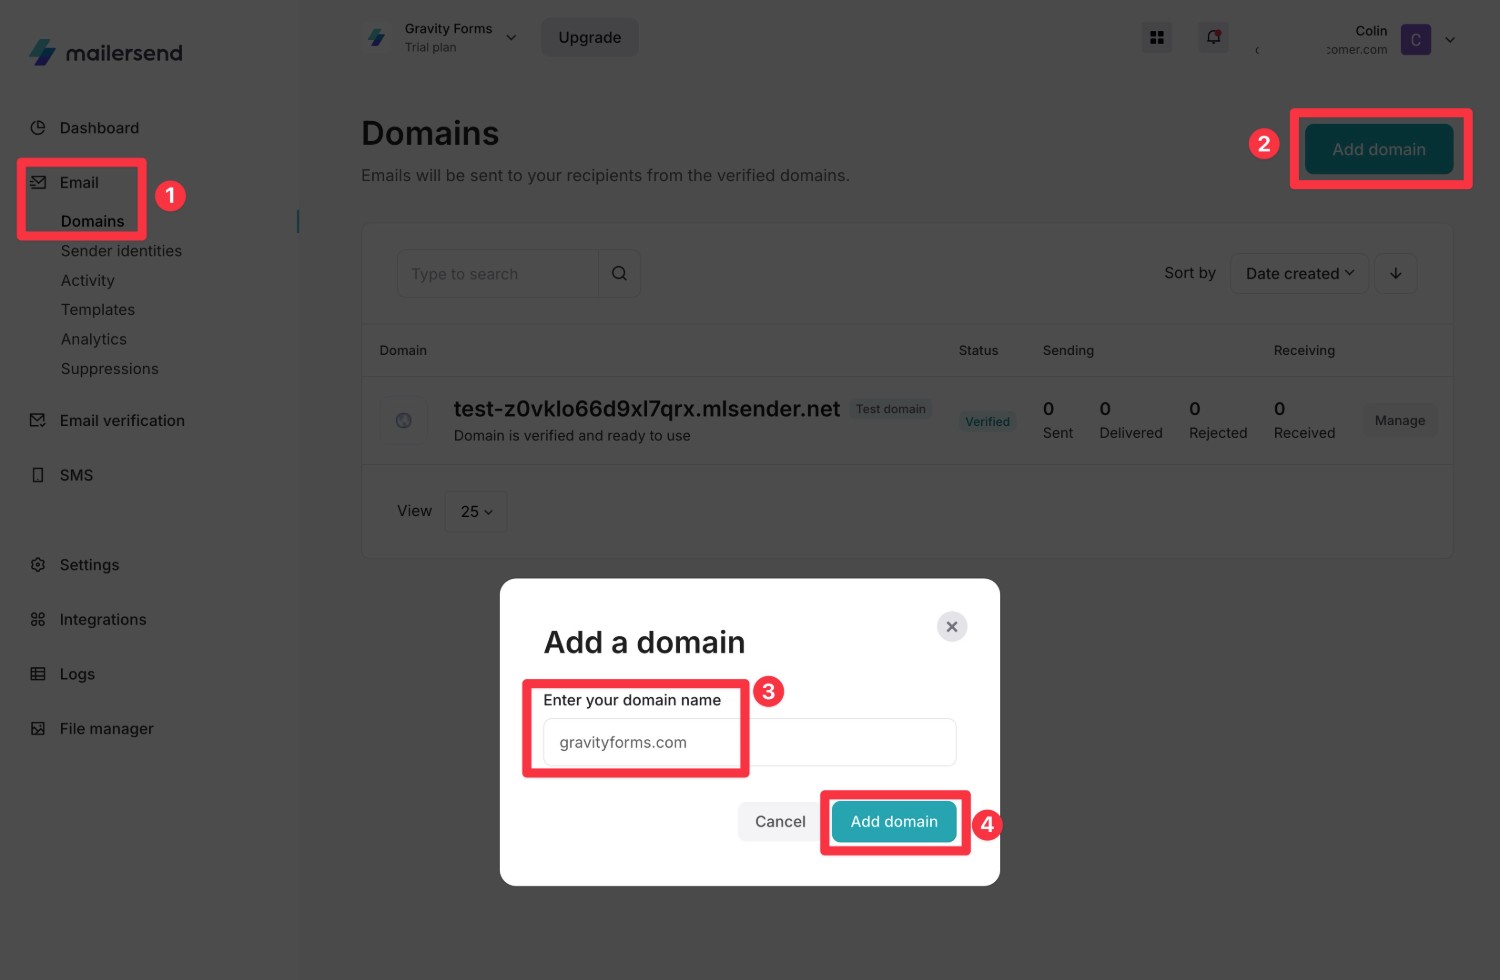
Here’s how to add your domain name:
- Go to Email → Domains in your MailerSend dashboard
- Click Add domain in the top-right corner.
- Enter your WordPress site’s domain name in the popup that appears.
- Click Add domain in the popup.
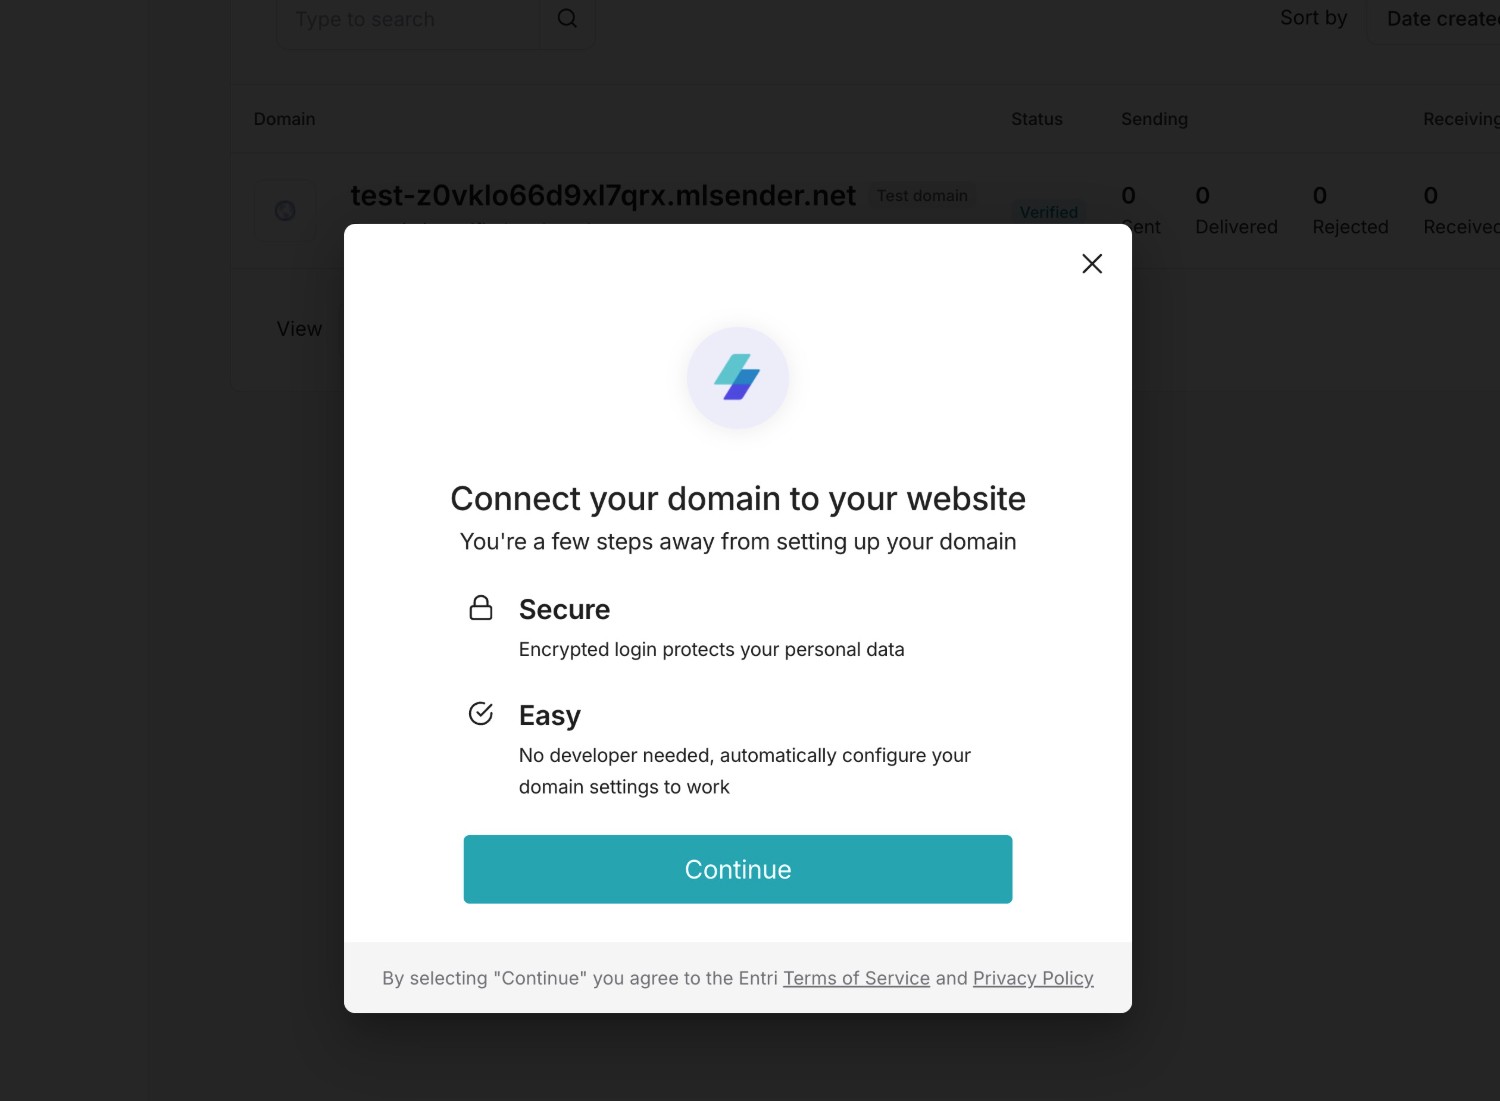
MailerSend will then prompt you to connect your domain name. To advance, click Continue.
MailerSend will then scan your domain name.
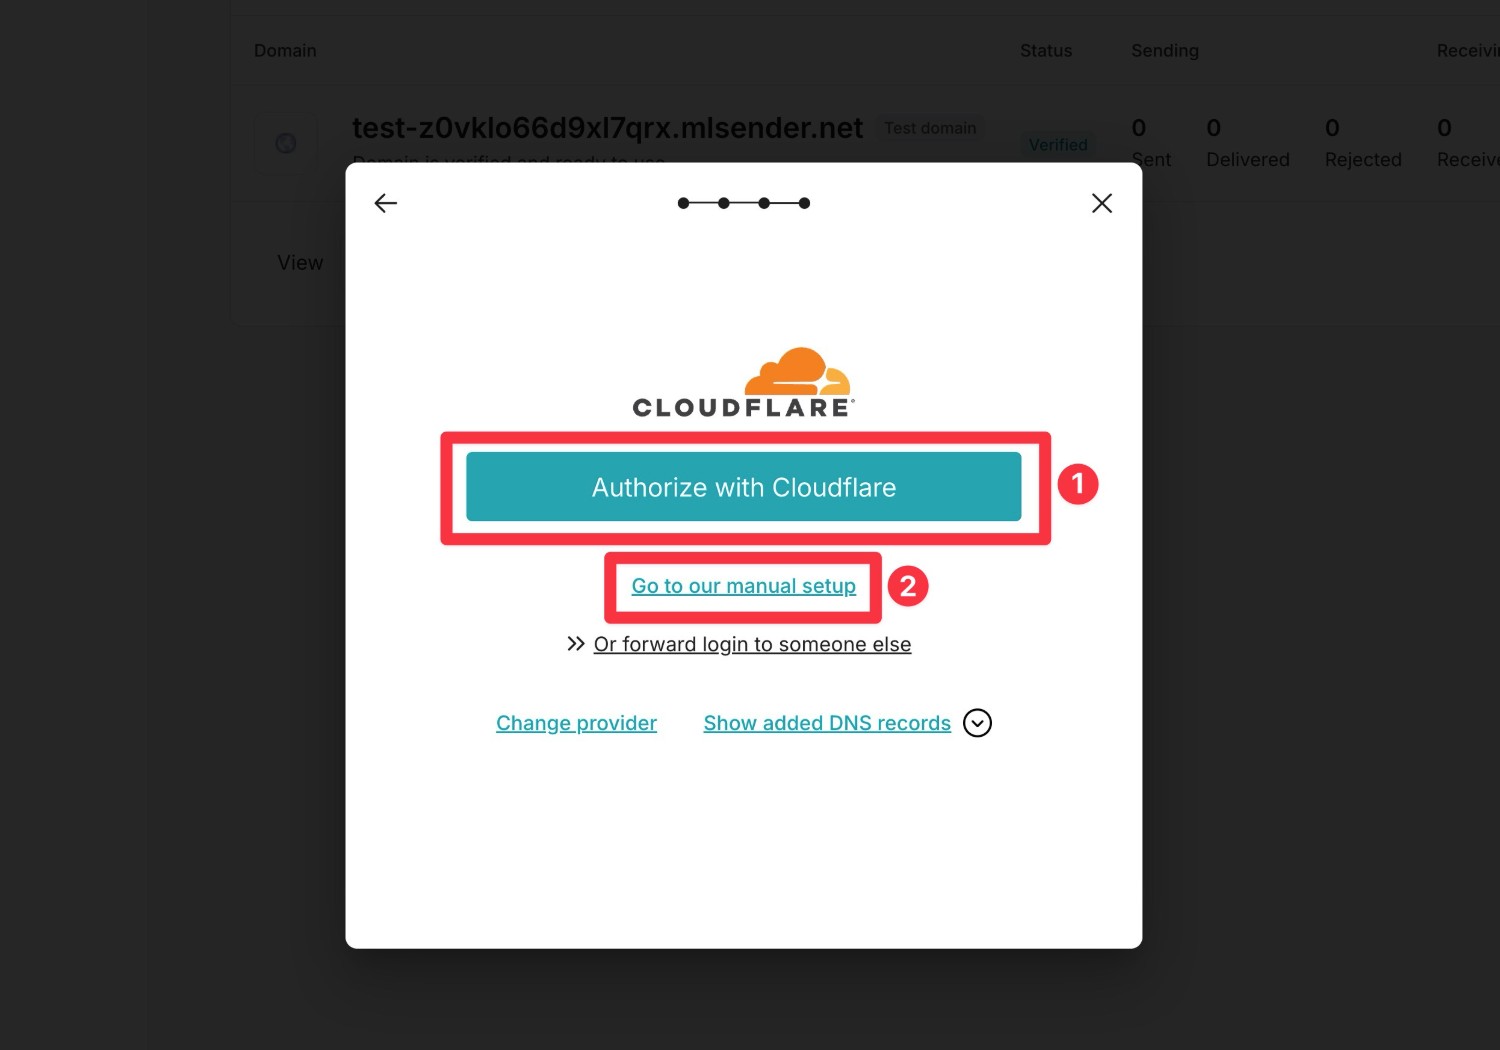
If possible, it will give you a non-technical authorization process for your domain provider.
If you’d rather work directly with DNS records, you can click the Go to our manual setup link.
For this example, we’ll use the manual setup because it will work with any provider. However, you can try the non-technical authorization option if you prefer that approach.
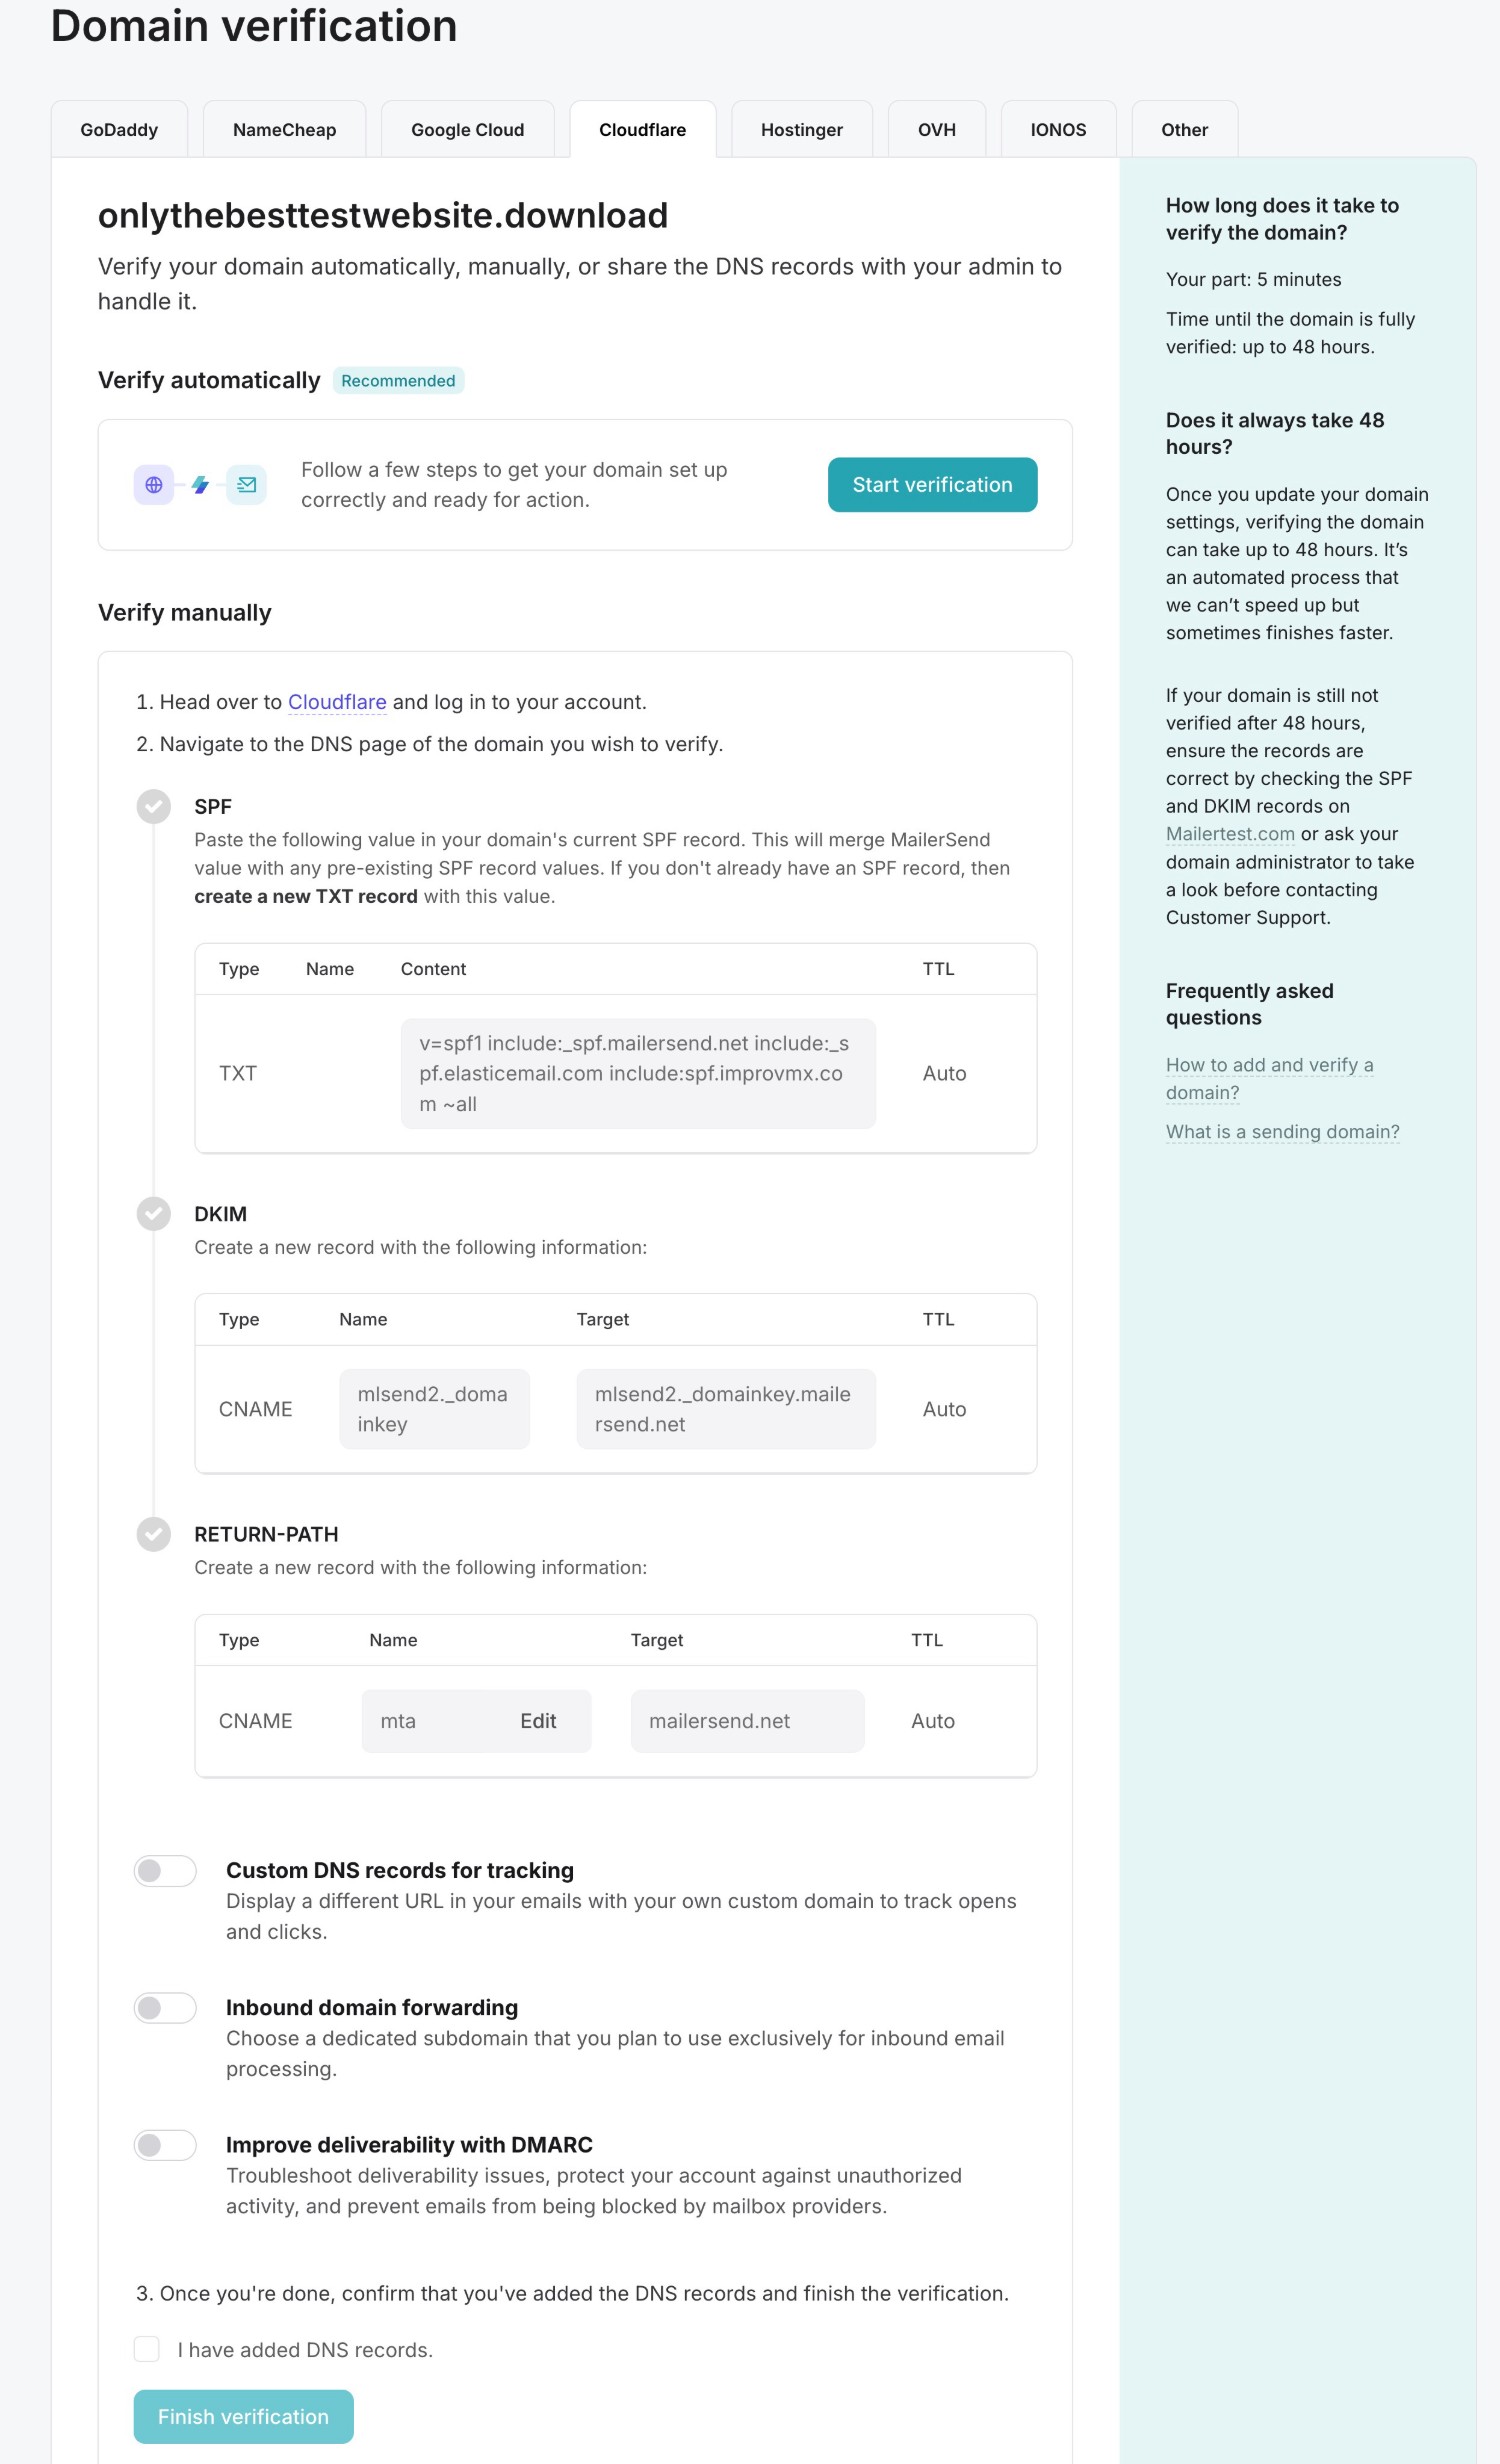
If you choose the manual method, MailerSend will provide you with a few different DNS records that you need to add wherever you manage your domain name’s DNS.
Once you’ve added the records manually, click Finish verification at the bottom.
If you did everything correctly, you should be taken to your domain’s dashboard. If the verification check fails, try waiting 30 minutes and rechecking, as sometimes it can take some time for the DNS record changes to propagate.
4. Create your MailerSend API key
Once you’ve authenticated your domain name with MailerSend, the next step is to generate your MailerSend API key. This is what you’ll add to Gravity SMTP to actually connect your WordPress site to MailerSend.
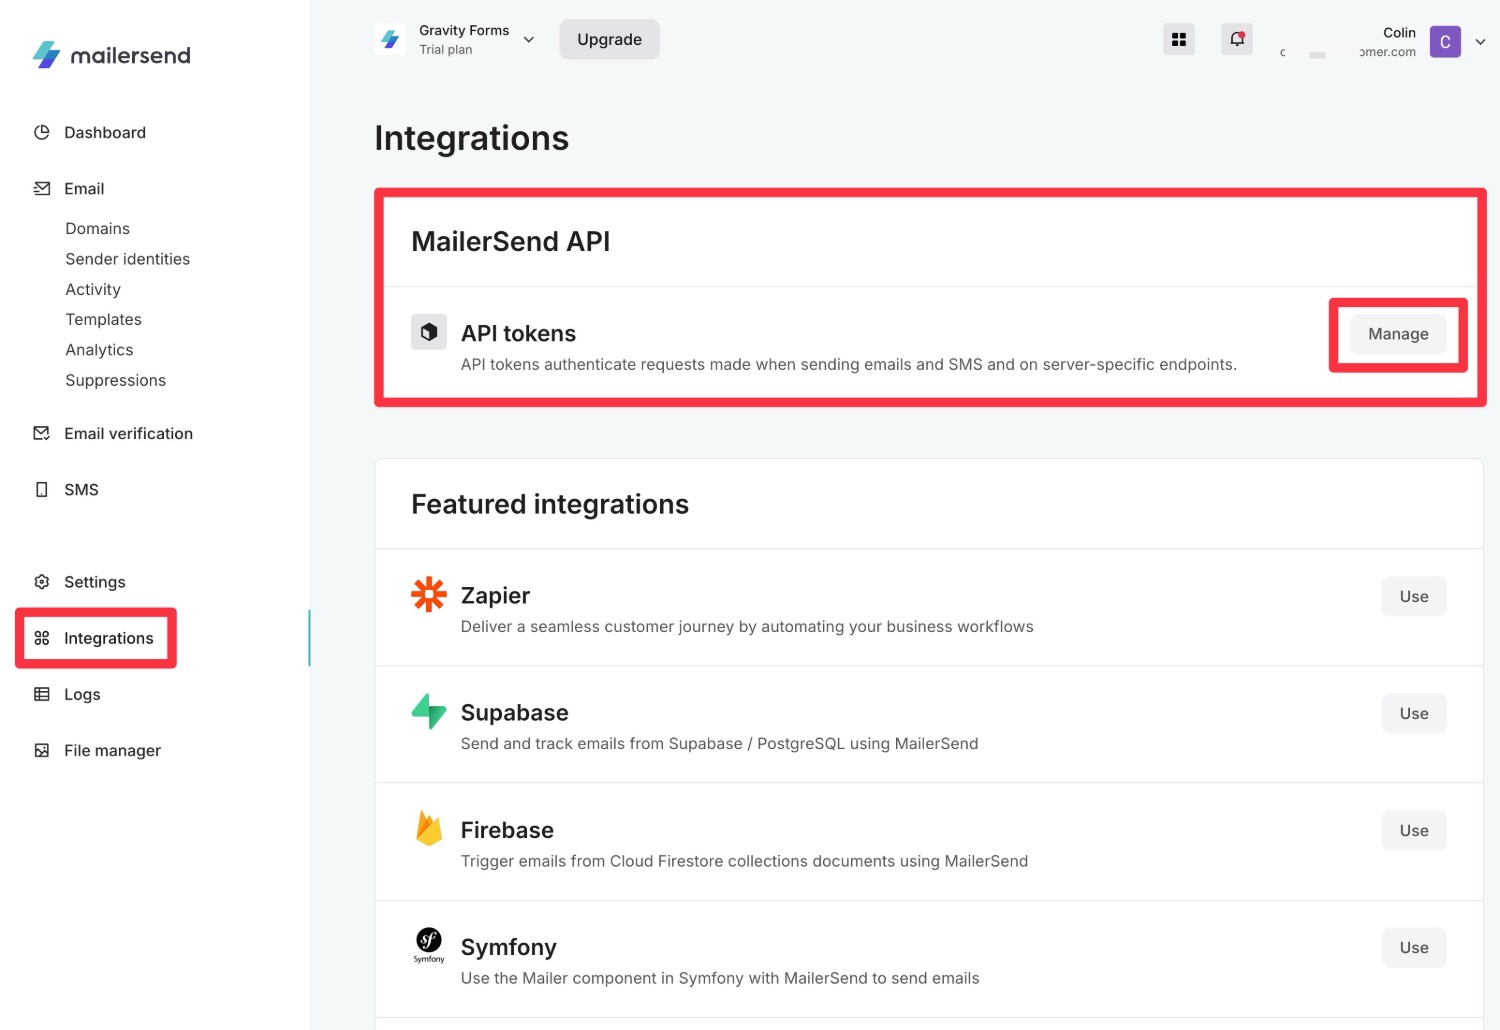
Select Integrations in your MailerSend dashboard and then click Manage next to API tokens.
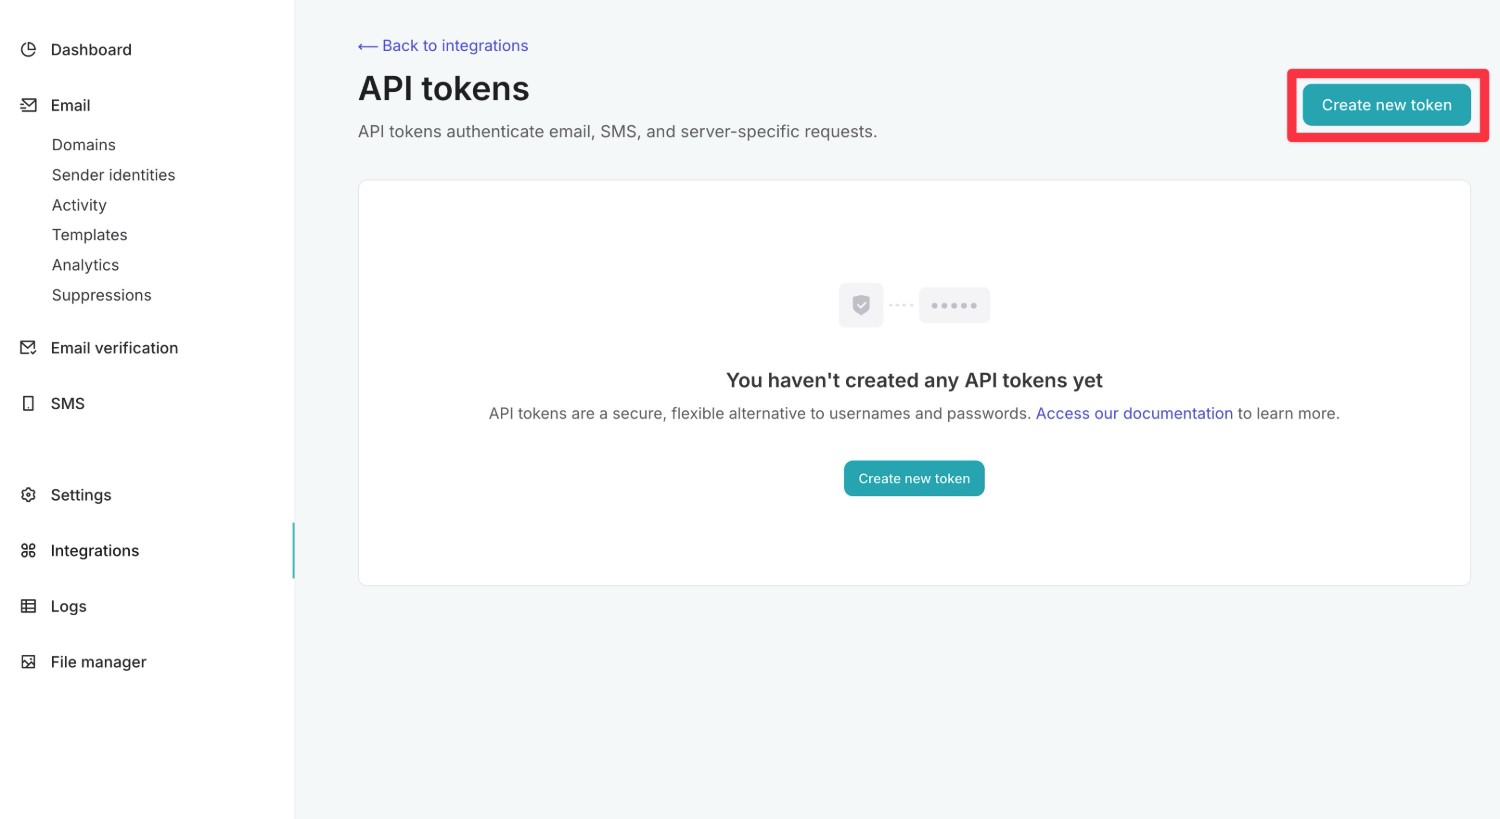
Then, click one of the Create new token buttons.
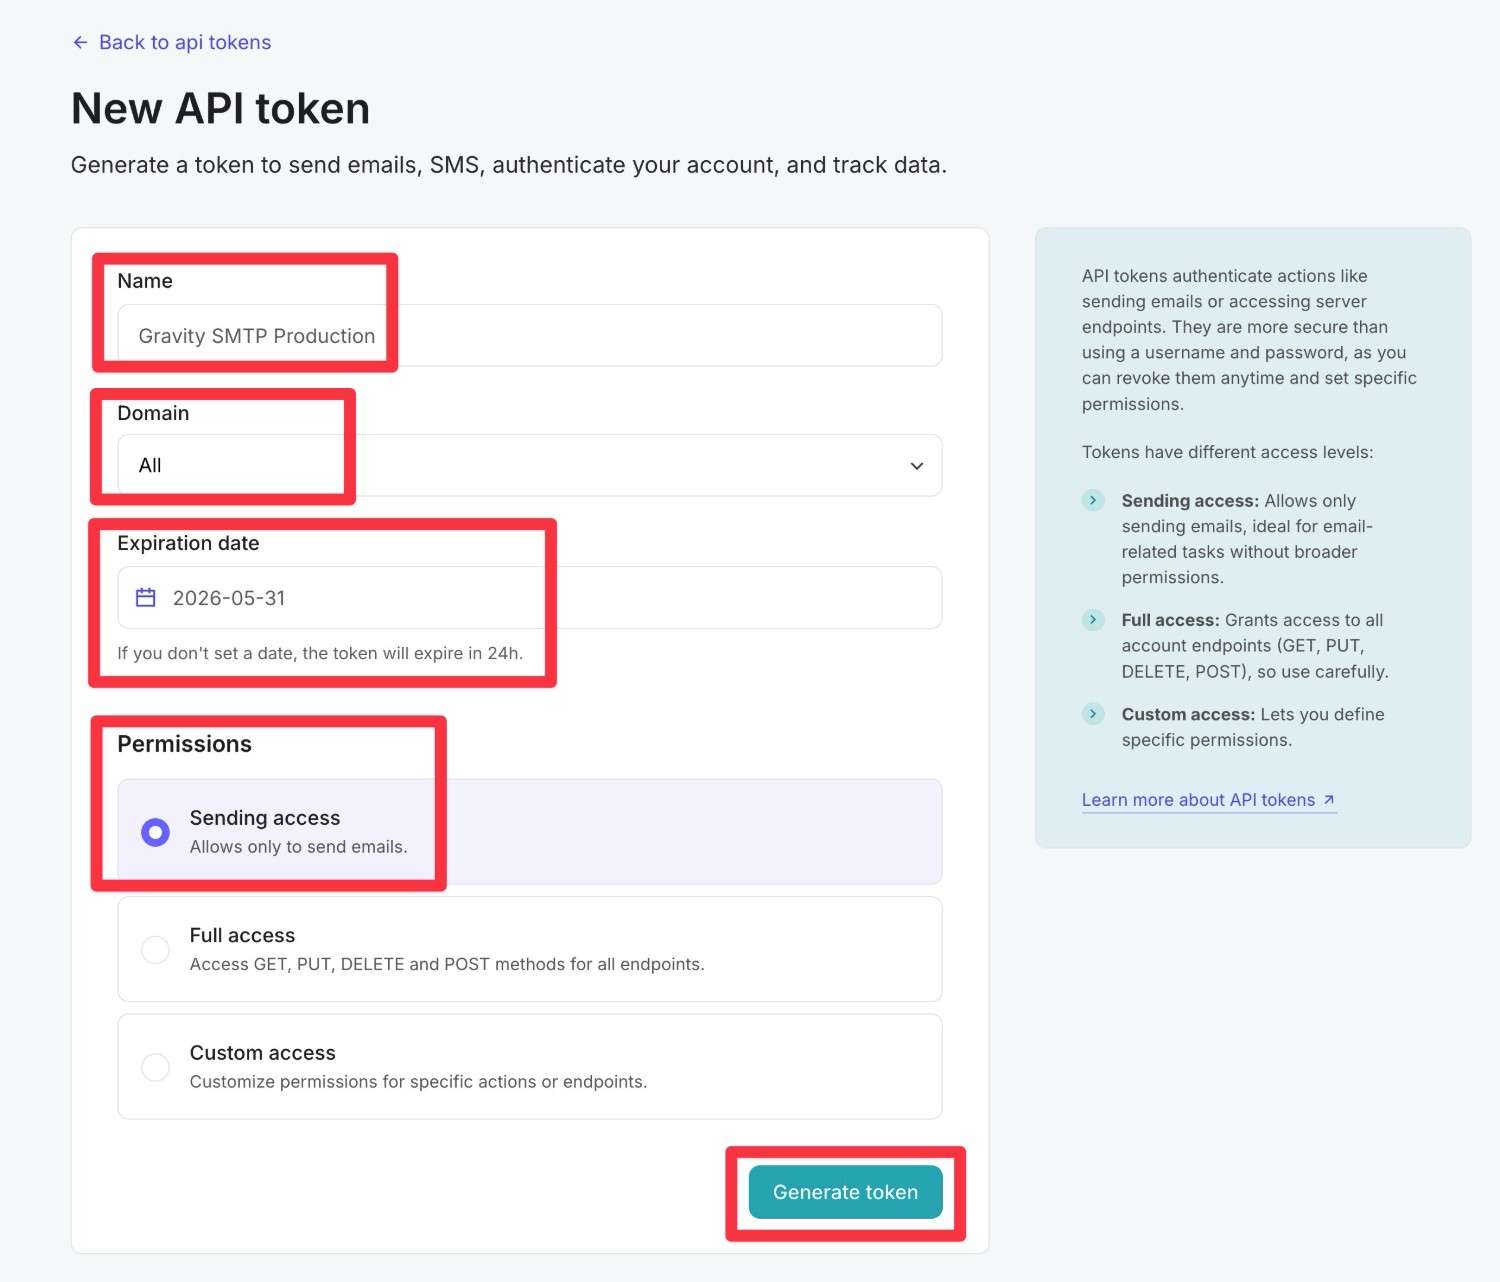
On the next screen, configure your token as follows:
- Name – Enter an internal name to help you remember it.
- Domain – All (or you can choose your WordPress site’s domain name).
- Expiration date – Choose a date far in the future (if you leave it blank, the token will expire in 24 hours).
- Permissions – Choose Sending access.
Then, click Generate token at the bottom.
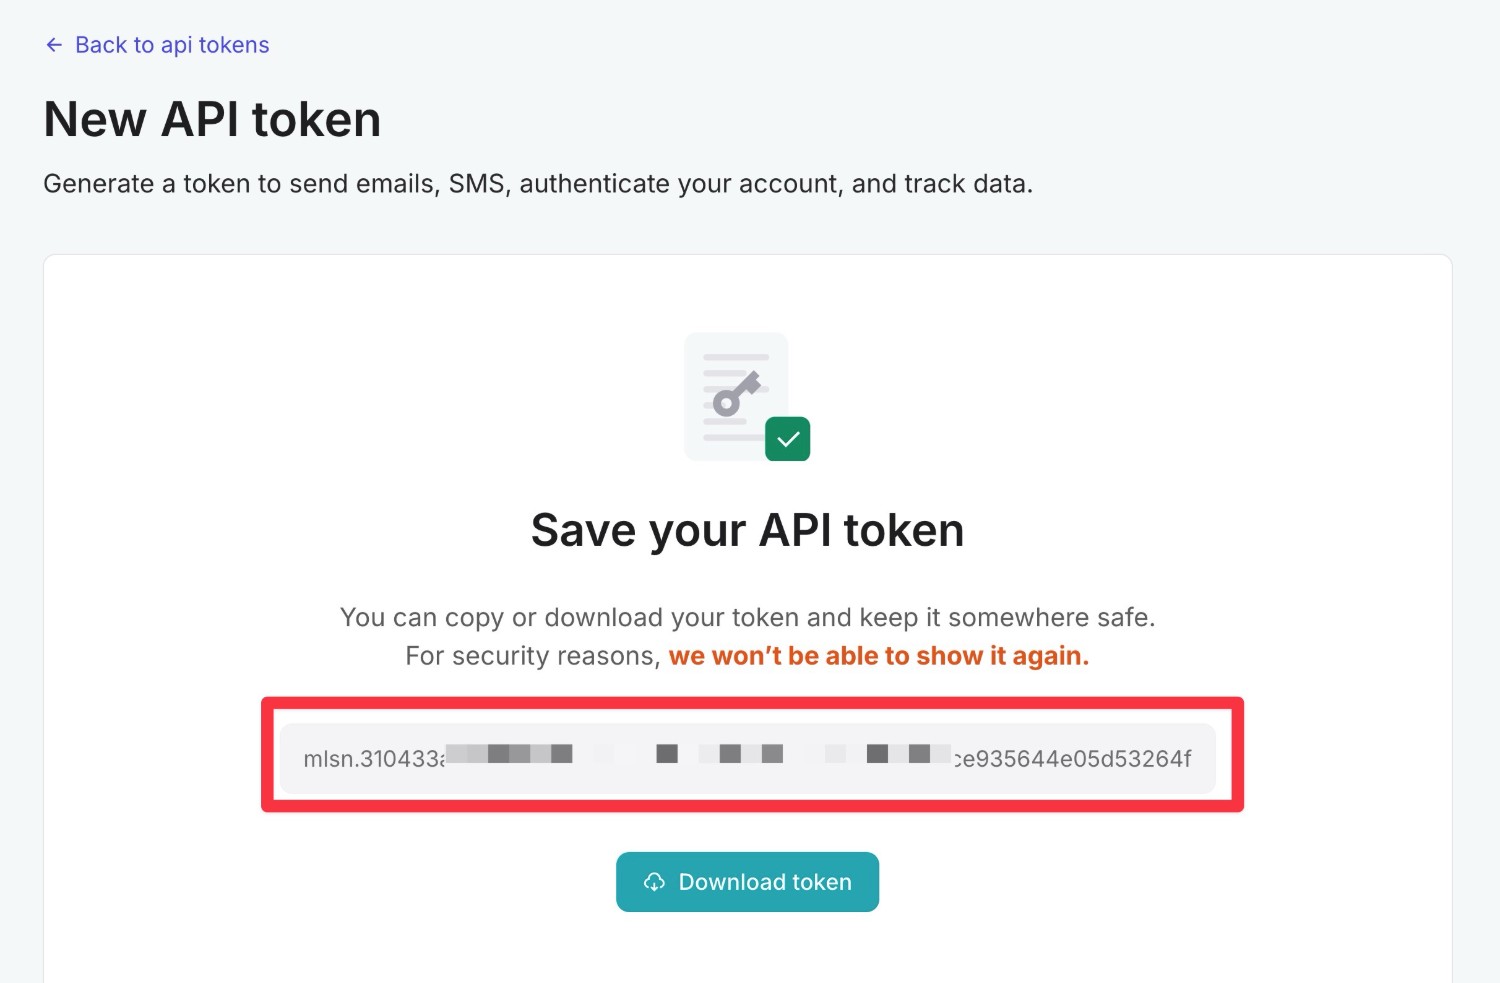
On the next screen, MailerSend will display your token.
Copy this token to a safe place because you’ll need it in the next step and MailerSend will only show it once.
Don’t worry, though. If you lose your API token, you can just repeat the same steps to create a new one.
5. Connect Gravity SMTP to MailerSend
Once you’ve authenticated your domain name and created your API token in the MailerSend dashboard, you’ll perform the rest of the setup from inside your WordPress dashboard.
To get started, you’ll want to connect the Gravity SMTP plugin to your MailerSend account by following these steps:
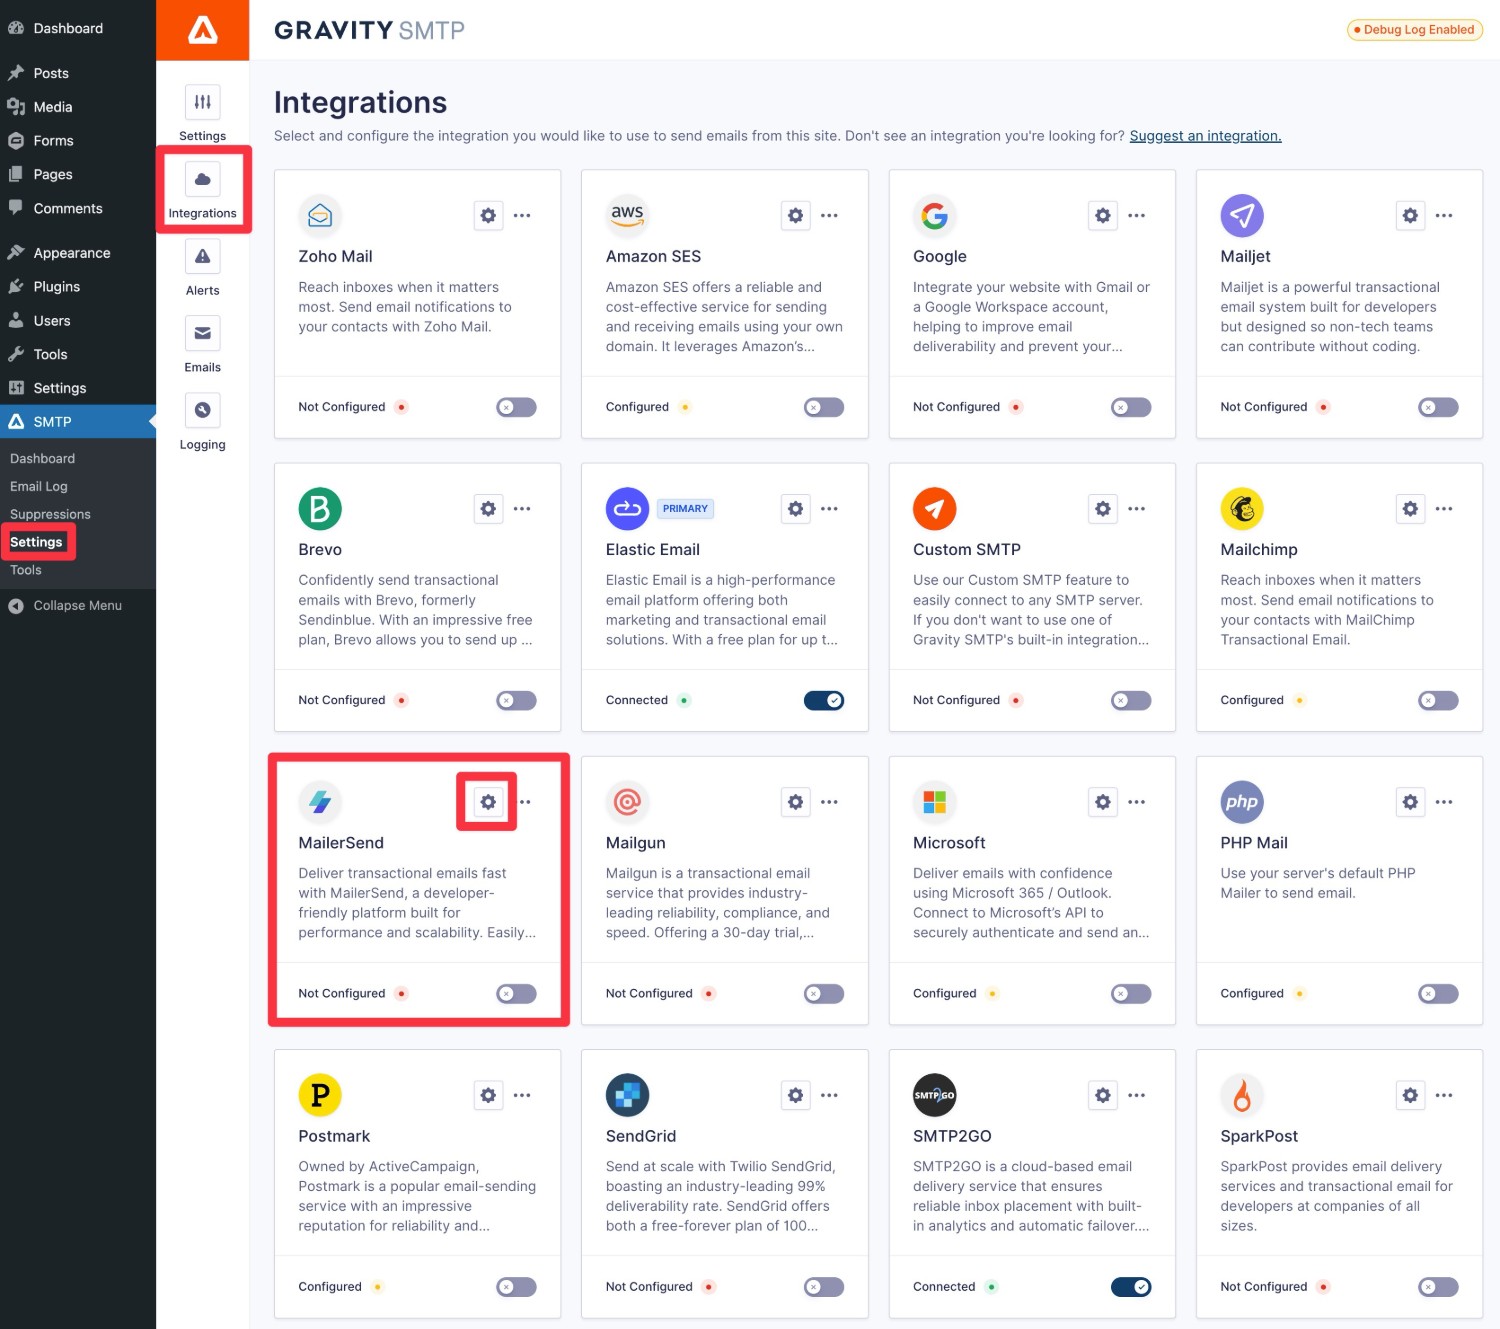
- Open your WordPress dashboard.
- Go to SMTP → Settings → Integrations to open the Gravity SMTP integrations area.
- Click the gear icon next to MailerSend to open its settings.
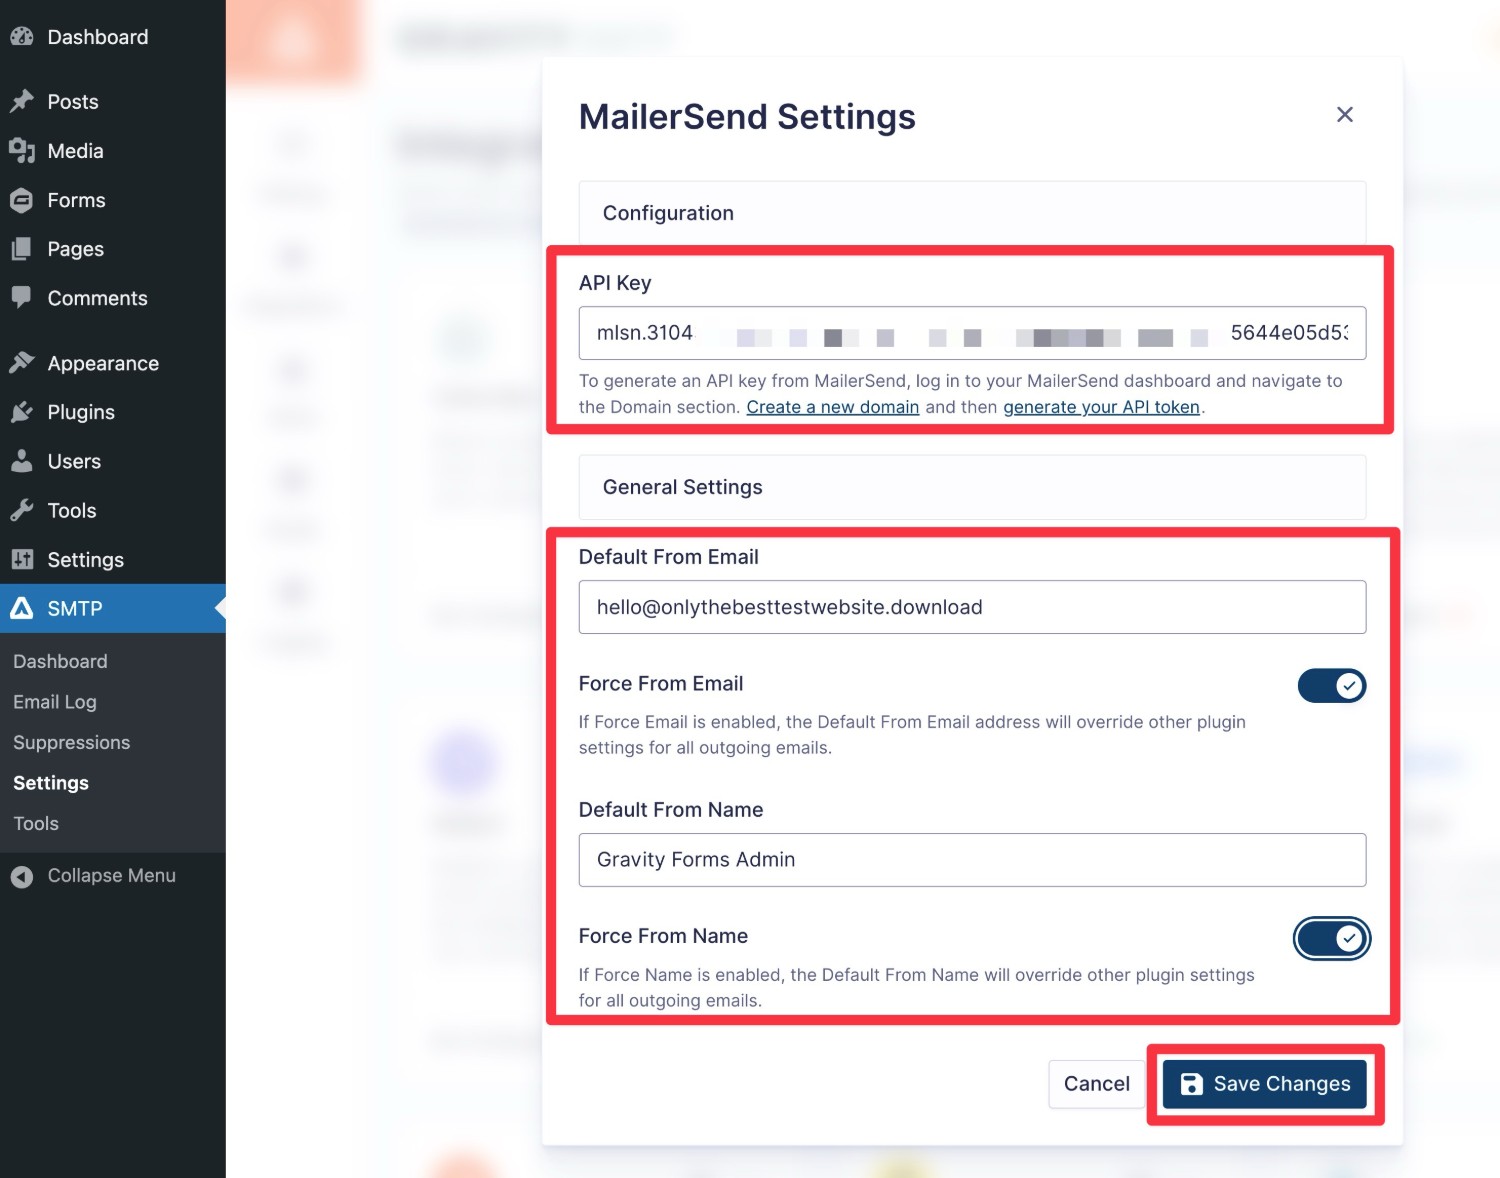
This should open a popup where you can configure the connection to MailerSend:
- API Key – Paste in the MailerSend API key that you created in the previous step.
- Default From Email – Enter the email address from which you want your site’s emails to be sent from. This email address must use the domain name that you authenticated with MailerSend. Or, if you used a single sender identity, it must use the exact single sender email address.
- Default From Name – Enter the name from which you want your site’s emails to be sent.
- Force From Email/Name – If you enable these toggles, Gravity SMTP will override any From Name/Email settings in plugins that you’re using and force all emails to use the Default From Email and/or Name.
Once you’ve made your choices, click Save Changes. This should close the popup.
To finish things out, you need to enable MailerSend as your site’s primary email sending service:
- Open the Gravity SMTP integrations list if you’re not already in that interface (SMTP → Settings → Integrations).
- Click the three dots icon next to MailerSend.
- Choose the Set As Primary option from the drop-down.
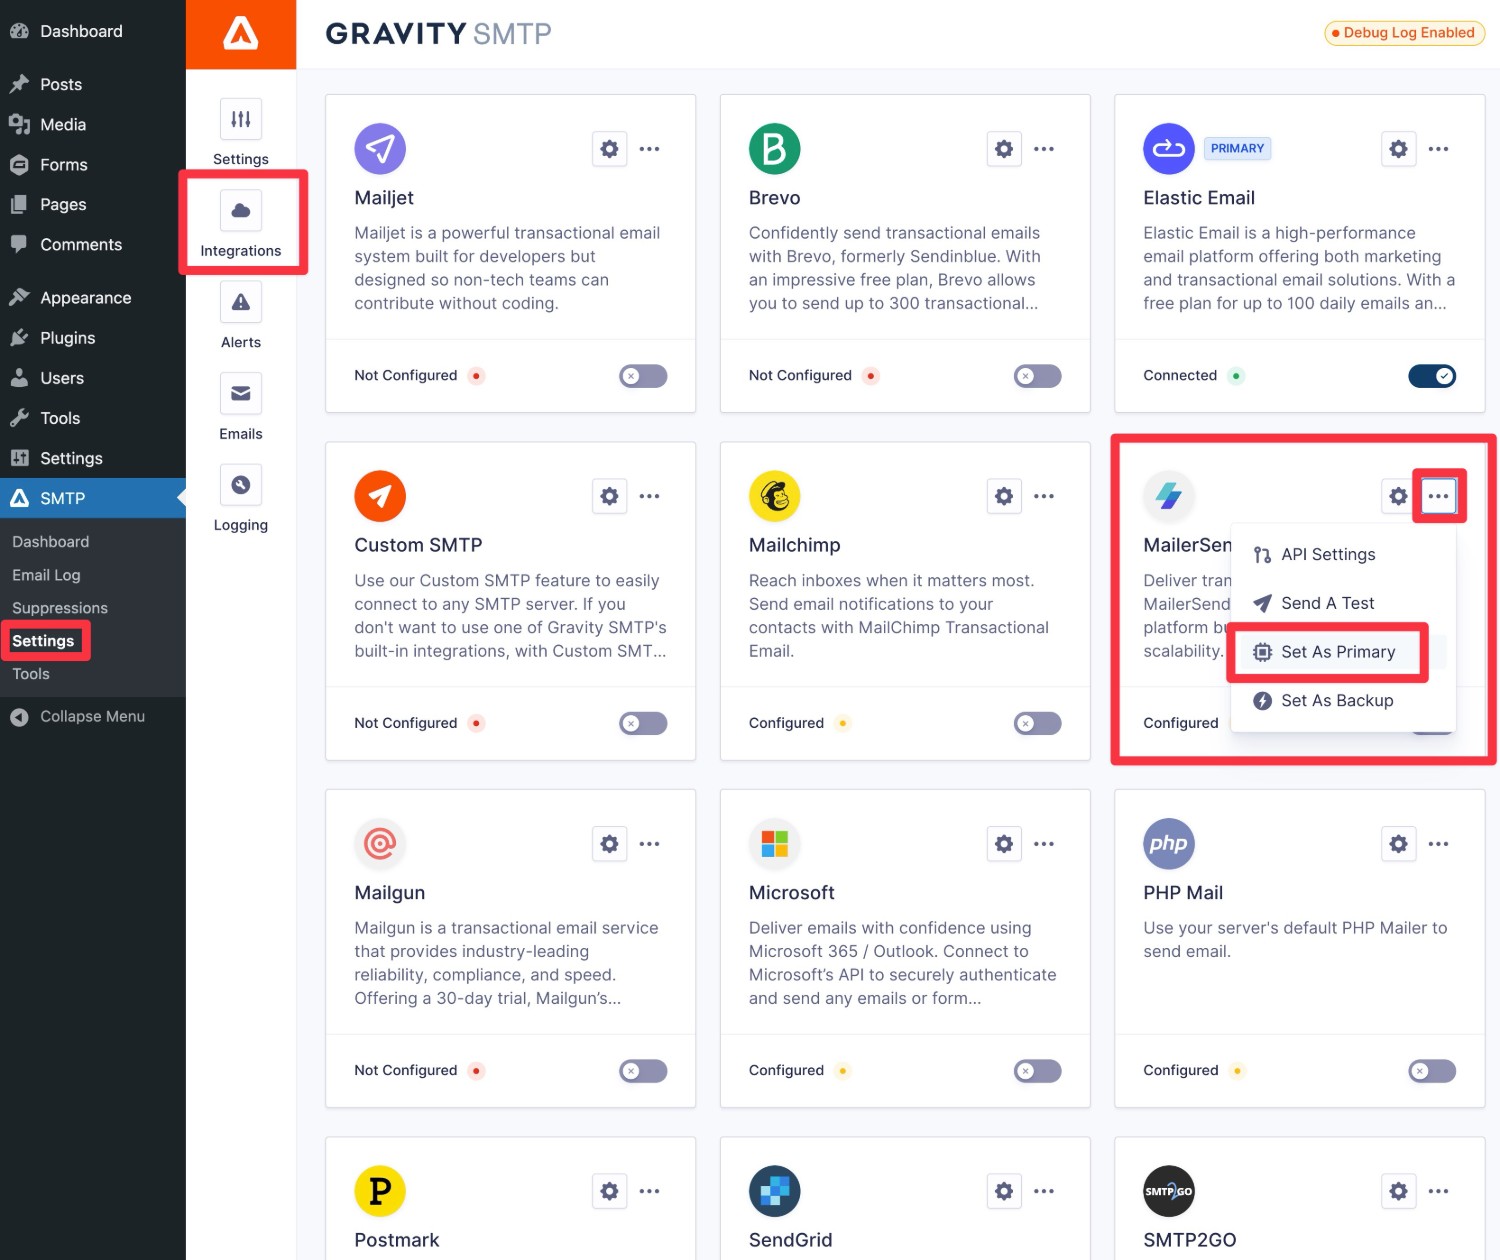
You should then see a Primary label appear next to MailerSend and the yellow Configured message will change to a green Connected message.
6. Send a Test Email
To make sure your site’s MailerSend connection is working, Gravity SMTP includes a built-in feature that lets you manually send a test email using MailerSend:
- Go to SMTP → Tools in your WordPress dashboard.
- Select the Send A Test tab (it should open by default).
- Enter the email address to which you want to send a test email in the Send To box.
- Make sure that MailerSend is selected in the Send With drop-down.
- Click the Send Test button.
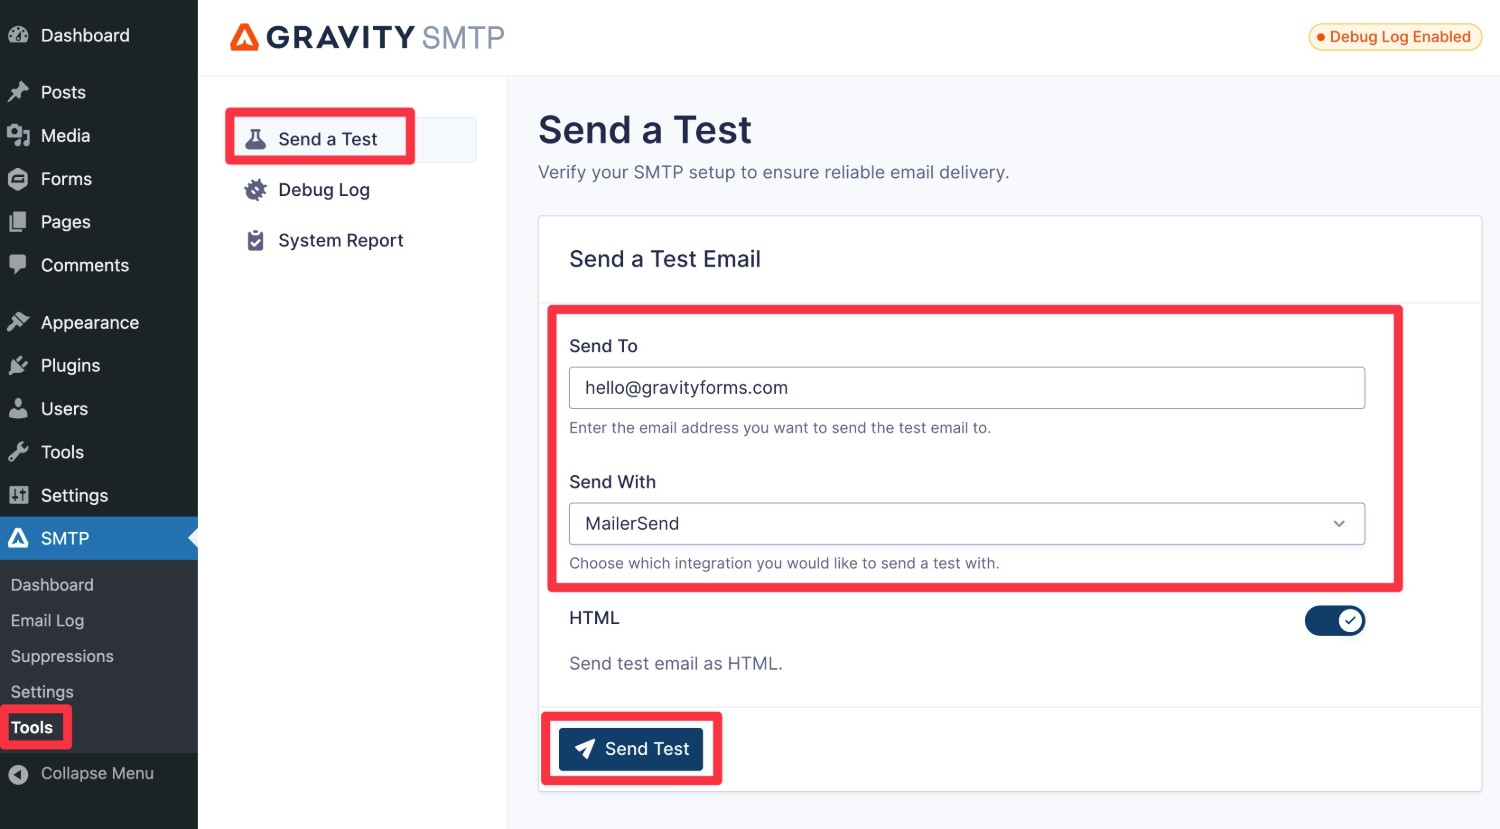
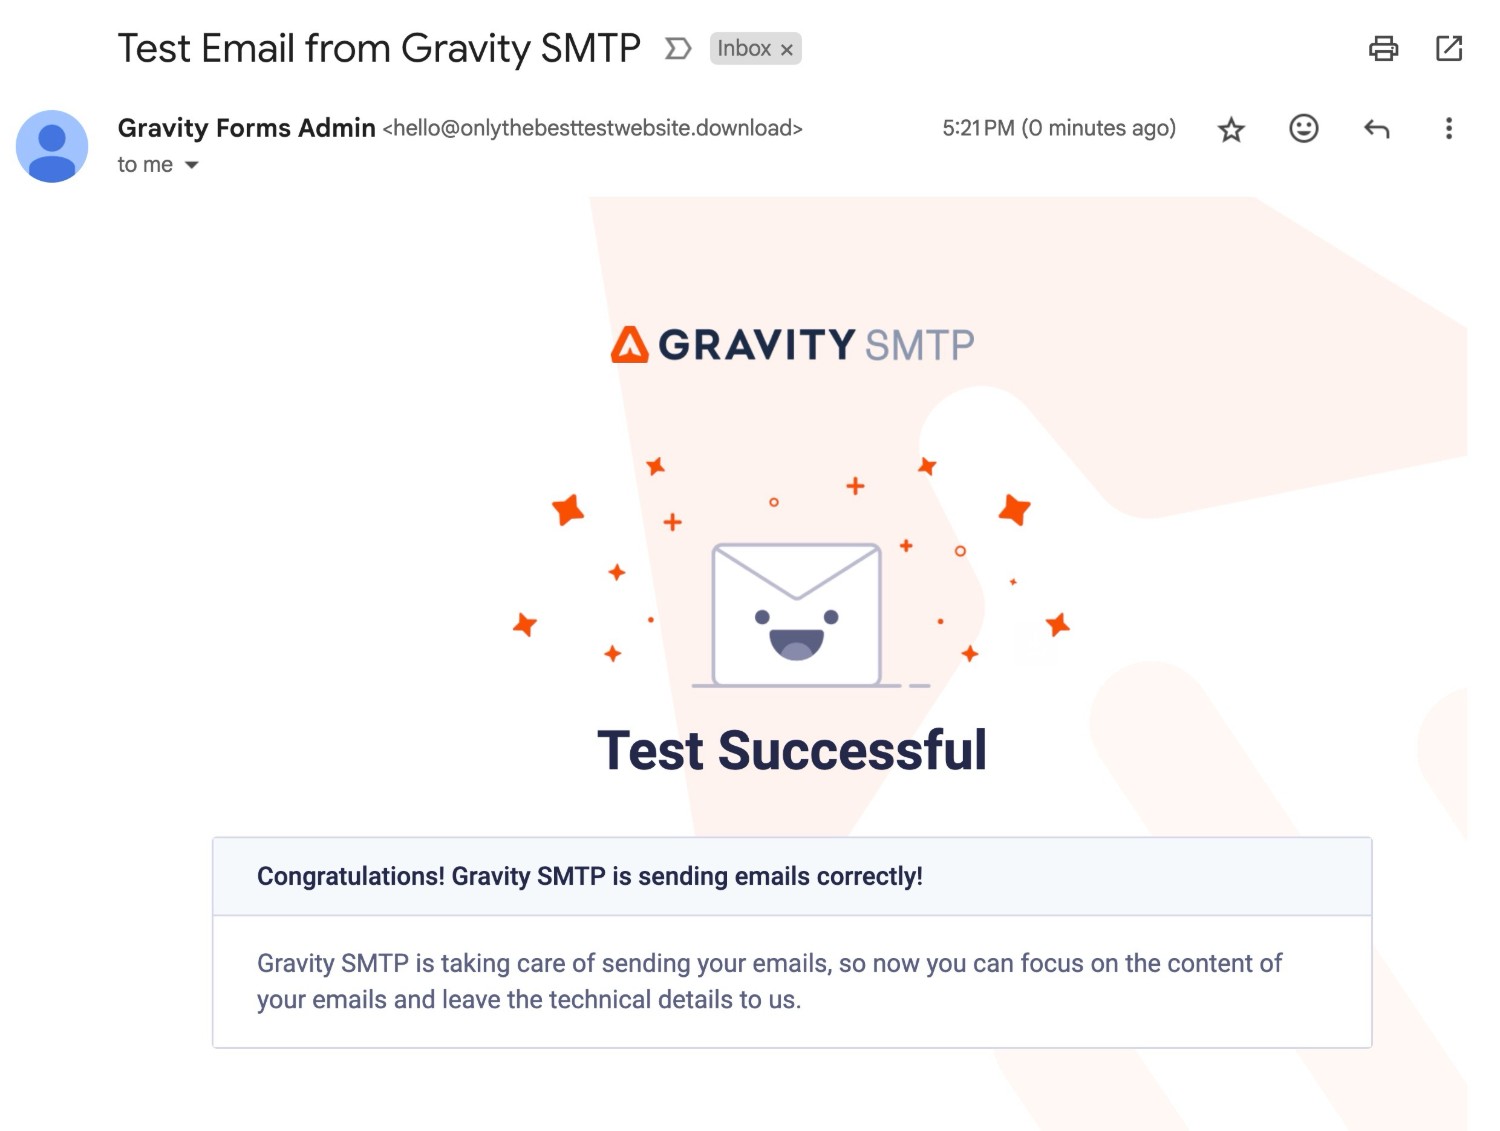
You should see an “Email successfully sent” message appear in the interface. When you open your email inbox, you should also see an email that looks something like below.
7. Set up a backup email sending service and alerts (Optional)
At this point, your site is already configured to send its transactional emails using MailerSend, so this step is 100% optional.
However, another one of the advantages of using Gravity SMTP to set up MailerSend on WordPress is that you can also access some other useful features to improve the reliability of your site’s transactional emails.
If you have a site where transactional emails are essential to your business goals and/or users’ experience, you might want to take the extra step of setting these up.
First up, Gravity SMTP lets you set up alerts to receive real-time notifications if your site’s emails ever fail to send via MailerSend:
If you want to go further, Gravity SMTP also lets you set up a backup email sending service. If an email ever fails to send via MailerSend for any reason (downtime, billing issue, etc.), Gravity SMTP will automatically resend the email using your backup service.
This lets you ensure the email gets delivered even if there’s a problem with MailerSend.
If you want to set up a backup transactional email service, the first step is to connect your site to that service. Below, we’ll link to guides for some of Gravity SMTP’s direct API connections, but Gravity SMTP also has a custom SMTP option that lets you use any service:
- SendGrid
- Mailgun
- Postmark
- Brevo
- Amazon SES
- Gmail/Google Workspace
- Outlook/Microsoft 365
- Mailchimp Transactional
- Elastic Email
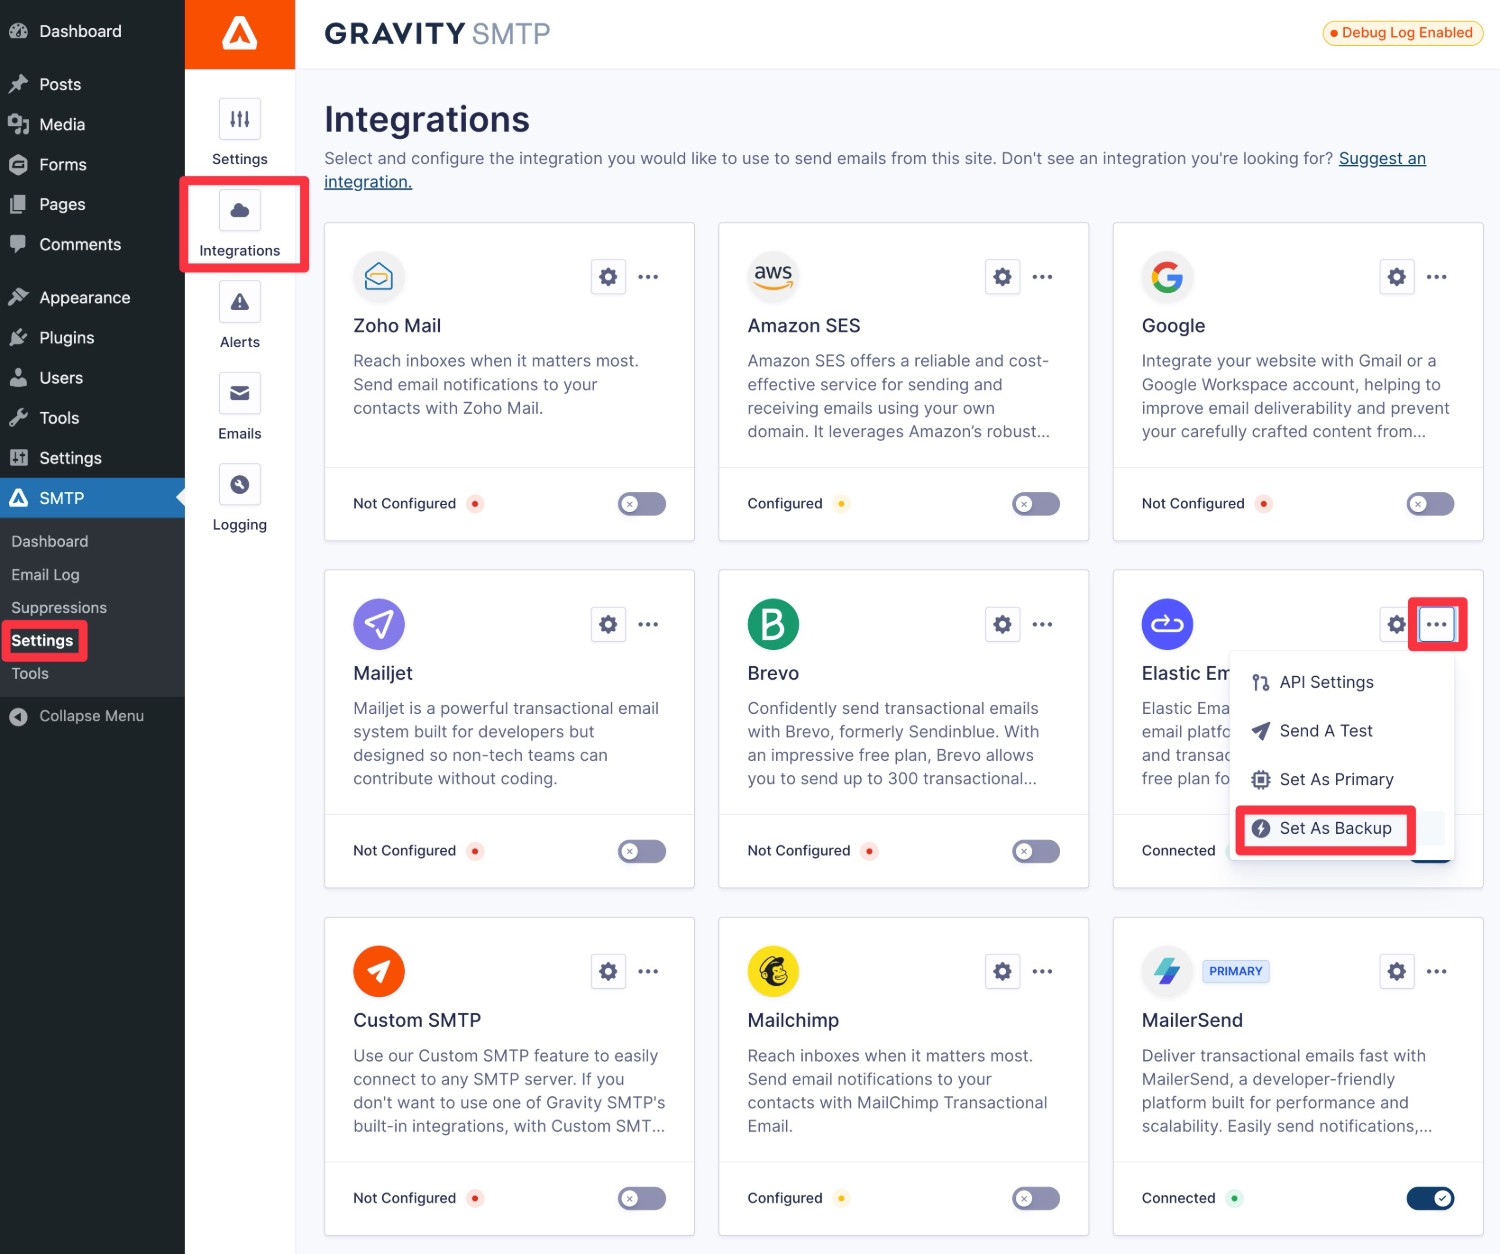
Once you’ve connected to the service, you can enable it as your backup service by following these steps:
- Open the Gravity SMTP integrations area (SMTP → Settings → Integrations).
- Click the three dots icon next to the service.
- Choose Set as Backup from the drop-down.
How to monitor your site’s email usage
In addition to helping you connect to MailerSend, Gravity SMTP also includes some really handy tools to help you monitor your site’s transactional emails.
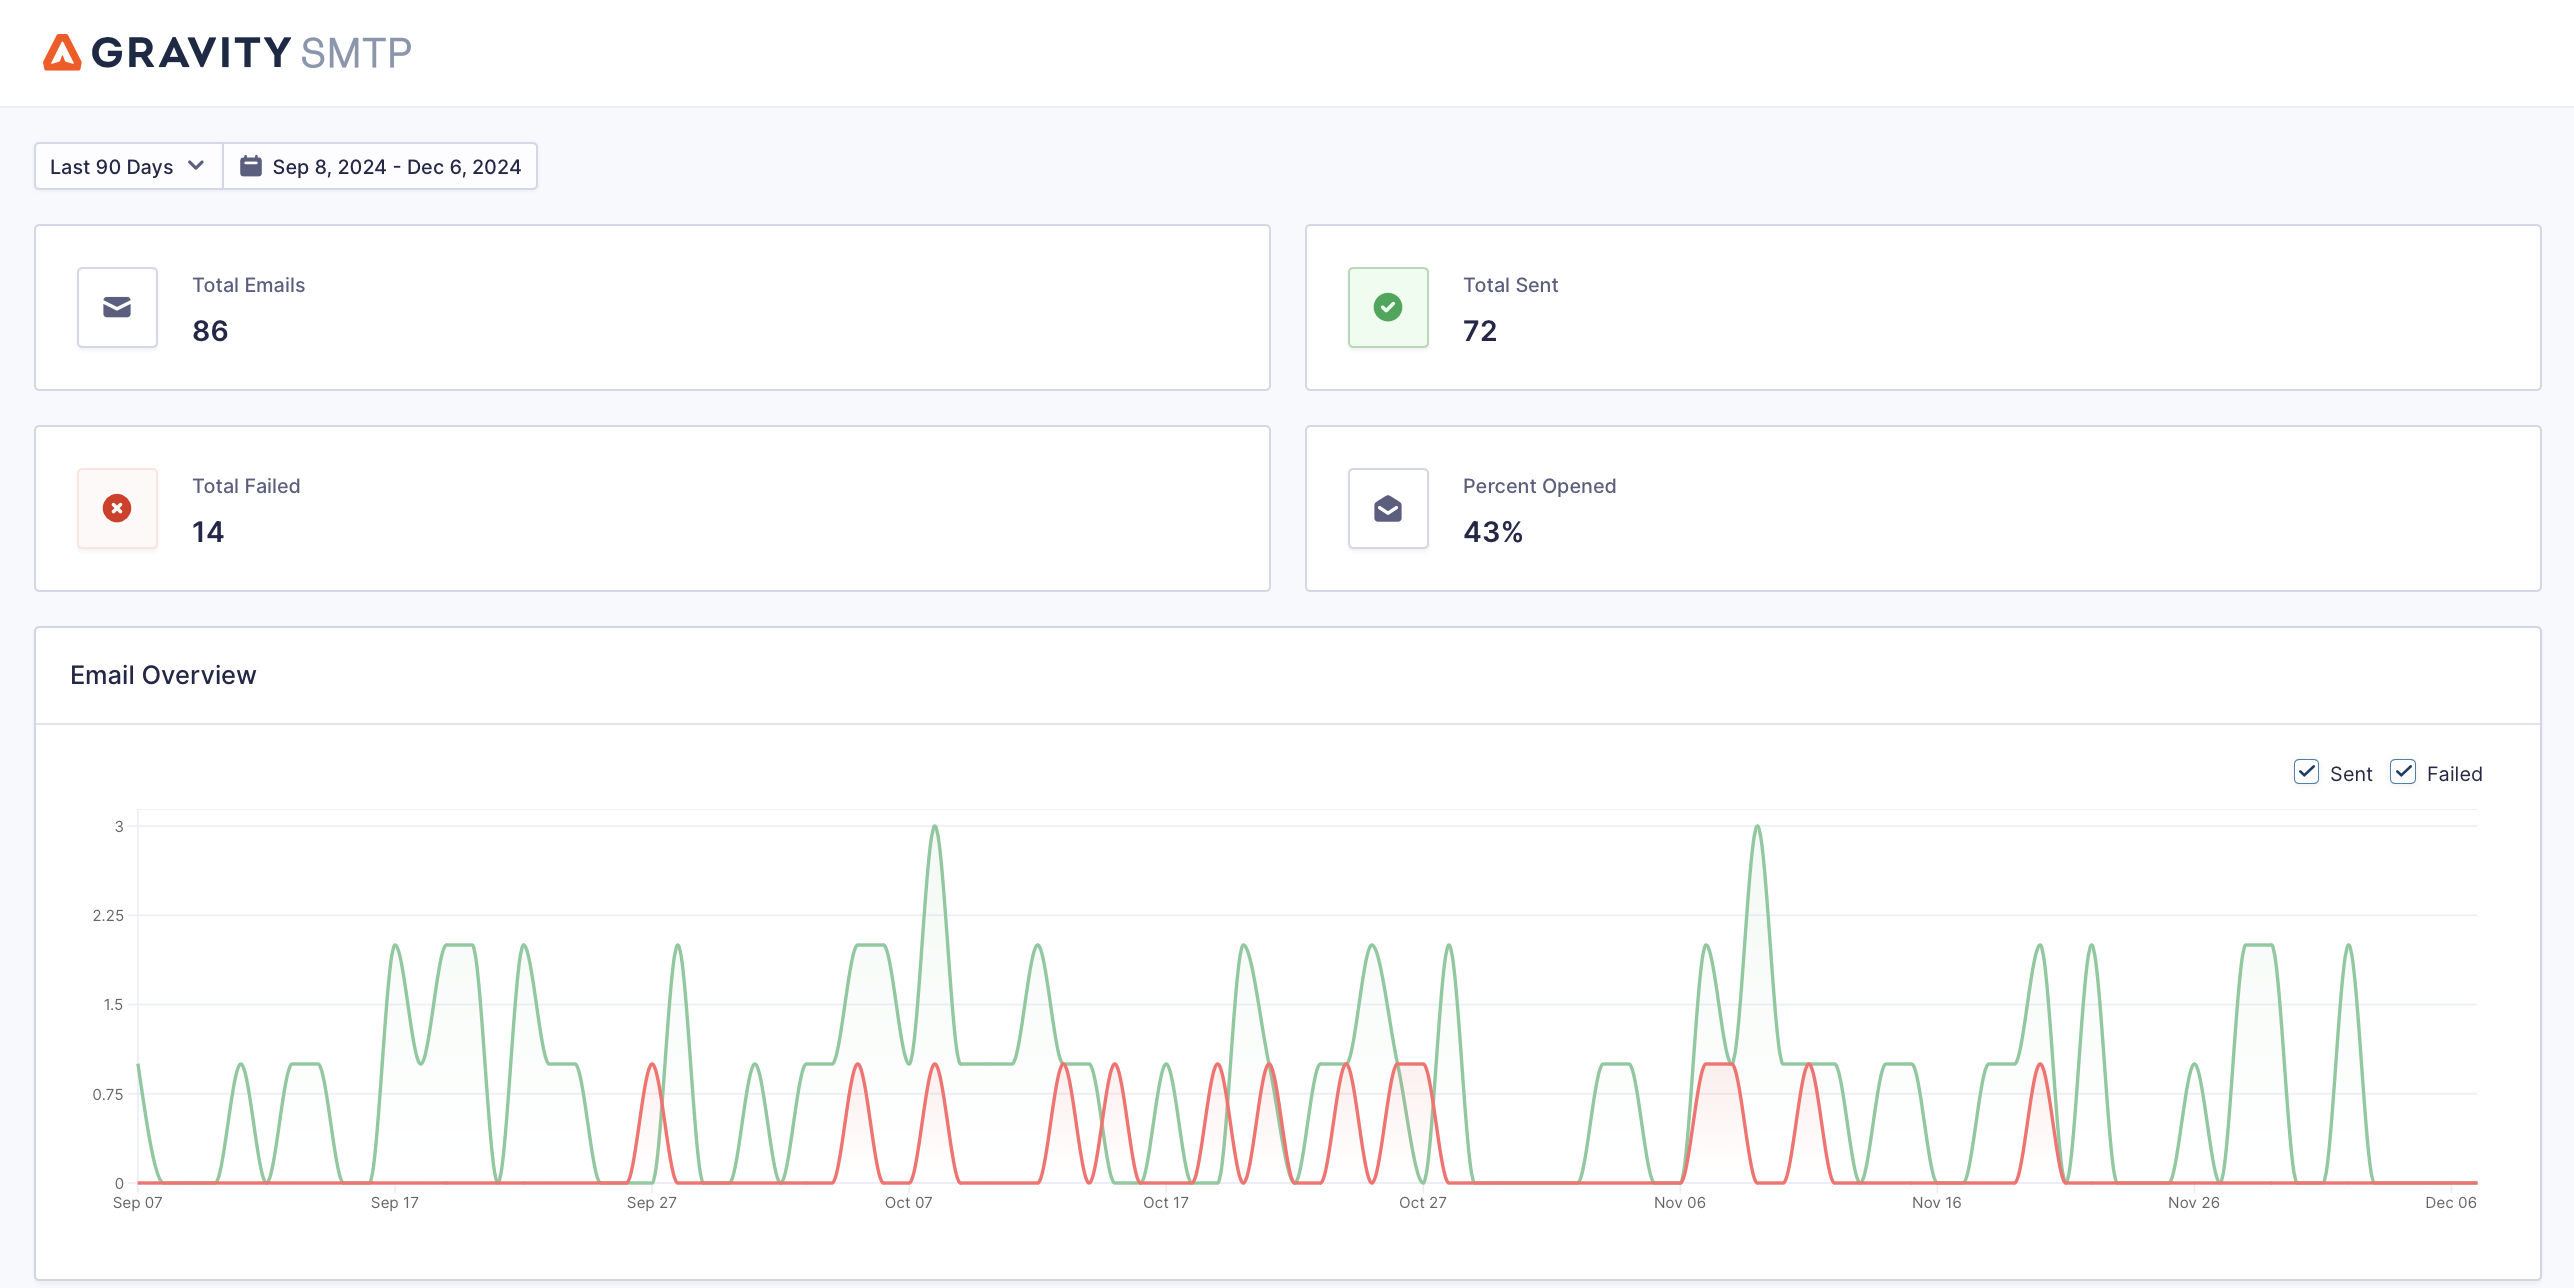
First off, you can go to Dashboard → Reports to view general high-level reports about your site’s usage:
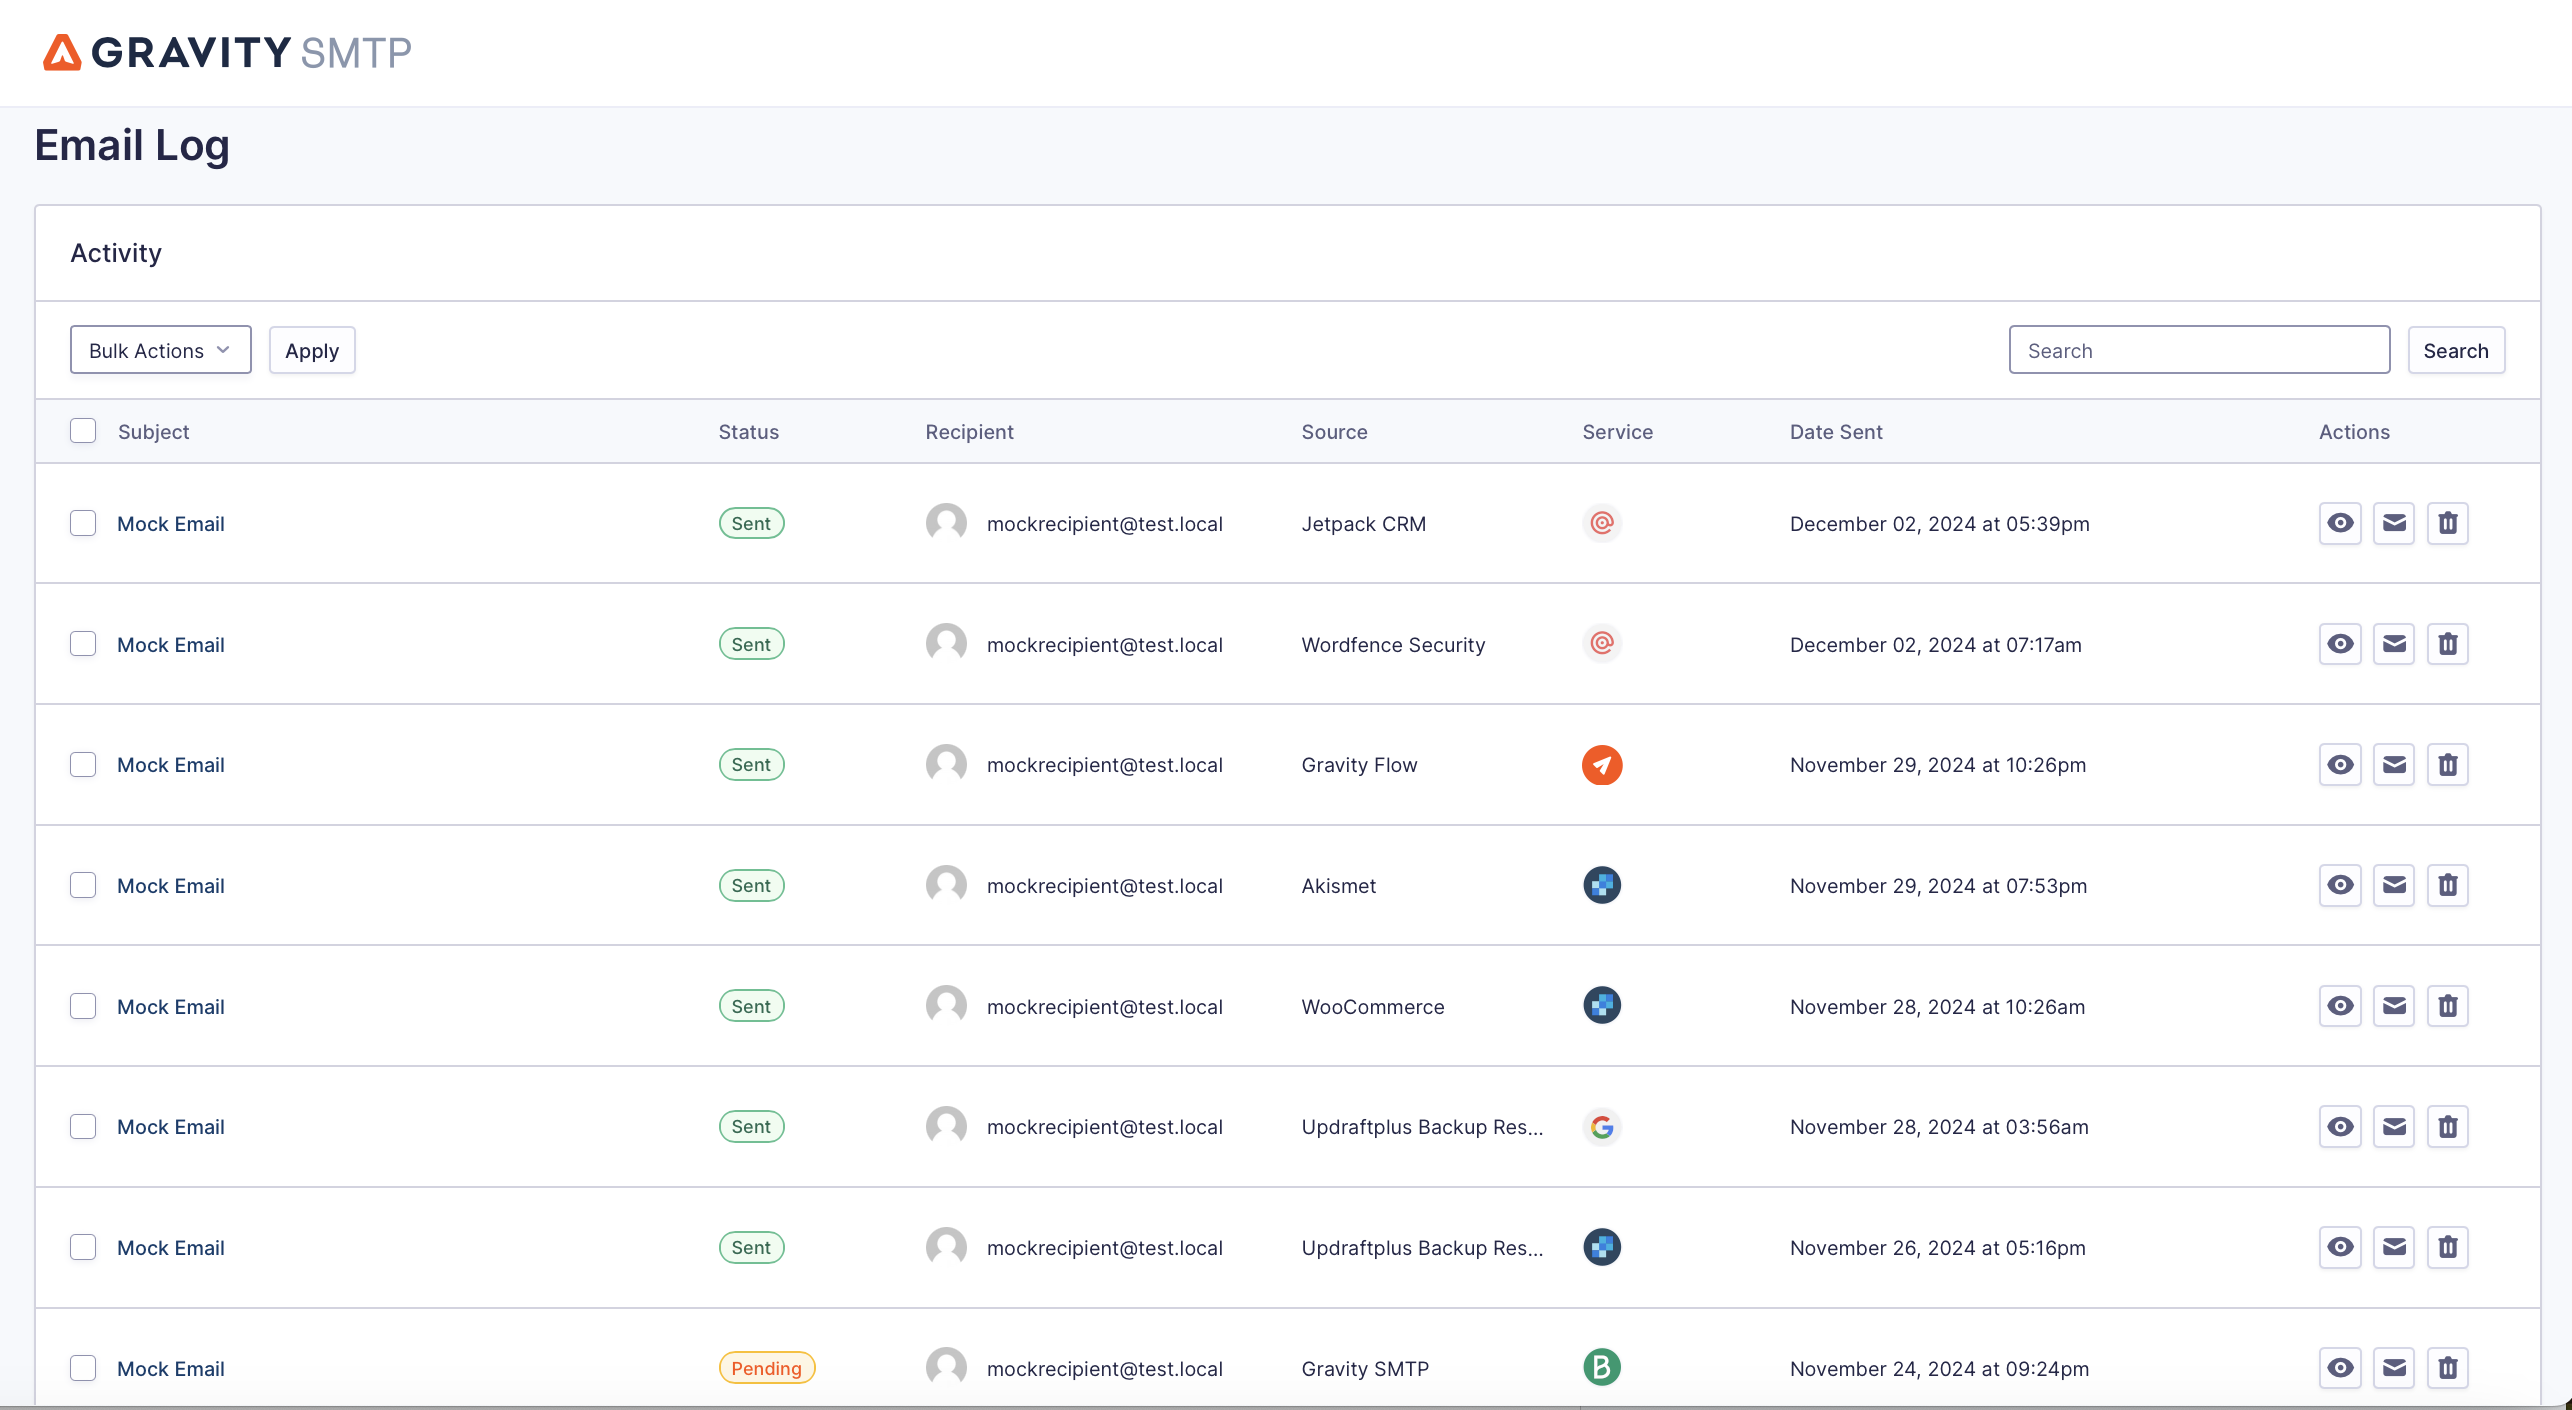
For a more detailed look, you can go to SMTP → Email Log to see a full log of all the emails that your site has sent, including technical information and the content of each email.
You can also control what content to log, how long to store the log, and other settings by going to SMTP → Settings → Email Log.
Get started with WordPress MailerSend sending today
From the same team behind MailerLite, MailerSend offers a reliable and affordable solution for WordPress transactional emails.
With the Gravity SMTP plugin, you can easily set up WordPress MailerSend transactional emails using the MailerSend API. Beyond that, you’ll also be able to access other helpful features such as real-time alerts, backup email sending services, reports, logging, and more.
Purchase or upgrade your license today, to set up Gravity SMTP and MailerSend on your WordPress site and start enjoying more reliable transactional emails.

If you want to keep up-to-date with what’s happening on the blog sign up for the Gravity Forms newsletter!

