
Want to use Brevo email to send your WordPress site’s transactional emails?
While Brevo (formerly known as Sendinblue) might be best known for its email marketing and digital marketing tools, it can also work great as a transactional email service for WordPress sites thanks to its generous free plan (and affordable paid plans).
With the Gravity SMTP plugin, you can easily configure your WordPress site to send all of its emails using Brevo, including core WordPress emails as well as emails from WordPress plugins that you’re using.
And in this post, you’ll learn exactly how to set it up, with a full guide on how to configure WordPress to send all of its emails using Brevo.
But before we do that, we’ll quickly run over why Brevo and Gravity SMTP make such a dynamic duo when it comes to WordPress emails.
Let’s dig in!
Brevo + WordPress SMTP plugin = more reliable emails
If you’re not sure why you need Brevo in the first place, let’s start with a quick rundown on how WordPress emails work.
By default, WordPress sends all of its emails using wp_mail, which uses your hosting server to send emails.
While this approach lets WordPress have a plug-and-play way to send emails, it’s not very reliable.
Some web hosts won’t even allow it in the first place. And even if your host does allow it, there’s a good chance that these emails will end up in users’ spam folders because they lack proper authentication.
With a WordPress SMTP plugin, you can configure your WordPress site to send all of its emails using Brevo’s sending service instead, which has two main benefits:
- You can be confident that your emails will actually be sent. Brevo is 100% dedicated to sending emails, whereas your WordPress site’s hosting server isn’t.
- Your emails are a lot less likely to get flagged as spam because you can more fully authenticate them.
How Gravity SMTP helps you use Brevo on WordPress
If you’re searching for a WordPress SMTP plugin that makes it easy to connect to Brevo, we think that our Gravity SMTP plugin is a great option for a few different reasons:
- Easy Brevo integration – connecting your WordPress site to Brevo is pretty much as simple as pasting your Brevo API key into the Gravity SMTP settings area.
- Supports other email sending services – in addition to Brevo, you can also connect your site to other email services like Mailgun, Postmark, SendGrid, and more. This lets you have backup services in place in case anything ever goes wrong with Brevo.
- Email testing tools – you can access multiple tools to help you test your site’s emails, including a tool to send a live test email as well as a “test mode” to track your site’s emails without sending real emails.
- Full email logging – you can log all of the emails that your site sends, including viewing technical details and a visual preview of the email. By default, Gravity SMTP will permanently store the email log, but you can adjust this storage period according to your preferences.
- Backup email sending methods – For mission-critical email sending, you can set up a backup email sending service. If an email fails to send via Brevo for any reason, Gravity SMTP will automatically resend it using your chosen backup service.
- Reliability (backed by the same team behind Gravity Forms) – while Gravity SMTP is an entirely standalone plugin, you can still expect the same reliability and support that you get from Gravity Forms, which is important when you’re dealing with something incredibly important like your site’s emails.
The Gravity SMTP team is also hard at work on adding new features and integrations. To have your say on what comes next, head on over to our feature request page.
Why choose Brevo over other email providers?
There are lots of great email sending services out there, so why use Brevo email over those other options?
Here’s a quick rundown of the standout features that Brevo offers:
- Generous free plan – you can send up to 300 emails per day for free, which is one of the most generous free plans that you’ll find.
- Good deliverability – Brevo offers good deliverability, which means your emails will actually make it to users’ inboxes.
- Performance analytics – you can see important metrics like opens, clicks, and so on.
- Marketing emails – while you’re free to exclusively use Brevo for transactional emails, Brevo also has tons of tools for email marketing. If you want a combined solution for all of your site’s emails, that can make it a good option.
How to set up WordPress to send emails using Brevo email
Now that you know a little more about using Brevo and Gravity SMTP to improve WordPress email sending, let’s get into the actual tutorial for how you can set this up on your own WordPress website.
1. Install the Gravity SMTP plugin
To get started, you’ll want to install and activate the Gravity SMTP plugin on the site where you want to set up Brevo email sending.
Gravity SMTP is a, standalone product, so you don’t need to be using Gravity Forms to use it (though it does work great with Gravity Forms).
Gravity SMTP is currently available at no extra cost to people with a Gravity Forms Elite license. If you’re holding the Elite license, you can download the Gravity SMTP plugin from your Gravity account.
2. Register for your free Brevo account
Next, you’ll want to register for your Brevo account, if you don’t already have one.

Unlike some other providers, Brevo does not have separate plans for transactional emails and marketing emails. Therefore, you should still sign up for the regular Brevo account even if you’re only going to be sending transactional emails.
As we mentioned earlier, Brevo has a pretty generous free plan that lets you send up to 300 emails per day, which will be plenty for most WordPress sites.
Note – if you’re also using Brevo for email marketing, the 300 emails per day limit applies to all of the emails that you send, including transactional emails and marketing emails.
If you need to exceed the free plan, Brevo’s paid plans start at around $8 per month to send up to 100,000 emails per month.
3. Authenticate your domain name with Brevo
In order to send emails with Brevo and make your domain name look more trustworthy to email clients’ spam folders, you’ll need to authenticate your domain name with Brevo.
Verifying your domain name shows that you actually control your domain name and boost your domain’s sender reputation.
This is also a requirement regardless of which WordPress SMTP plugin you use, so there’s no way to avoid doing it.
Here’s how to do it…
Add your domain name to Brevo
To start, you’ll want to add your domain name to your Brevo account:
- Click this link to open the Domains page. Or, you can click settings gear and then select Senders, domains, and IPs → Domains.
- Click Add domain.
- Enter your domain name in the box.
- Click Save this email domain.

Add DNS records to your domain name
Once you’ve added your domain name, you’ll need to authenticate your domain name by adding some DNS records.
Brevo offers three high-level methods to accomplish this:
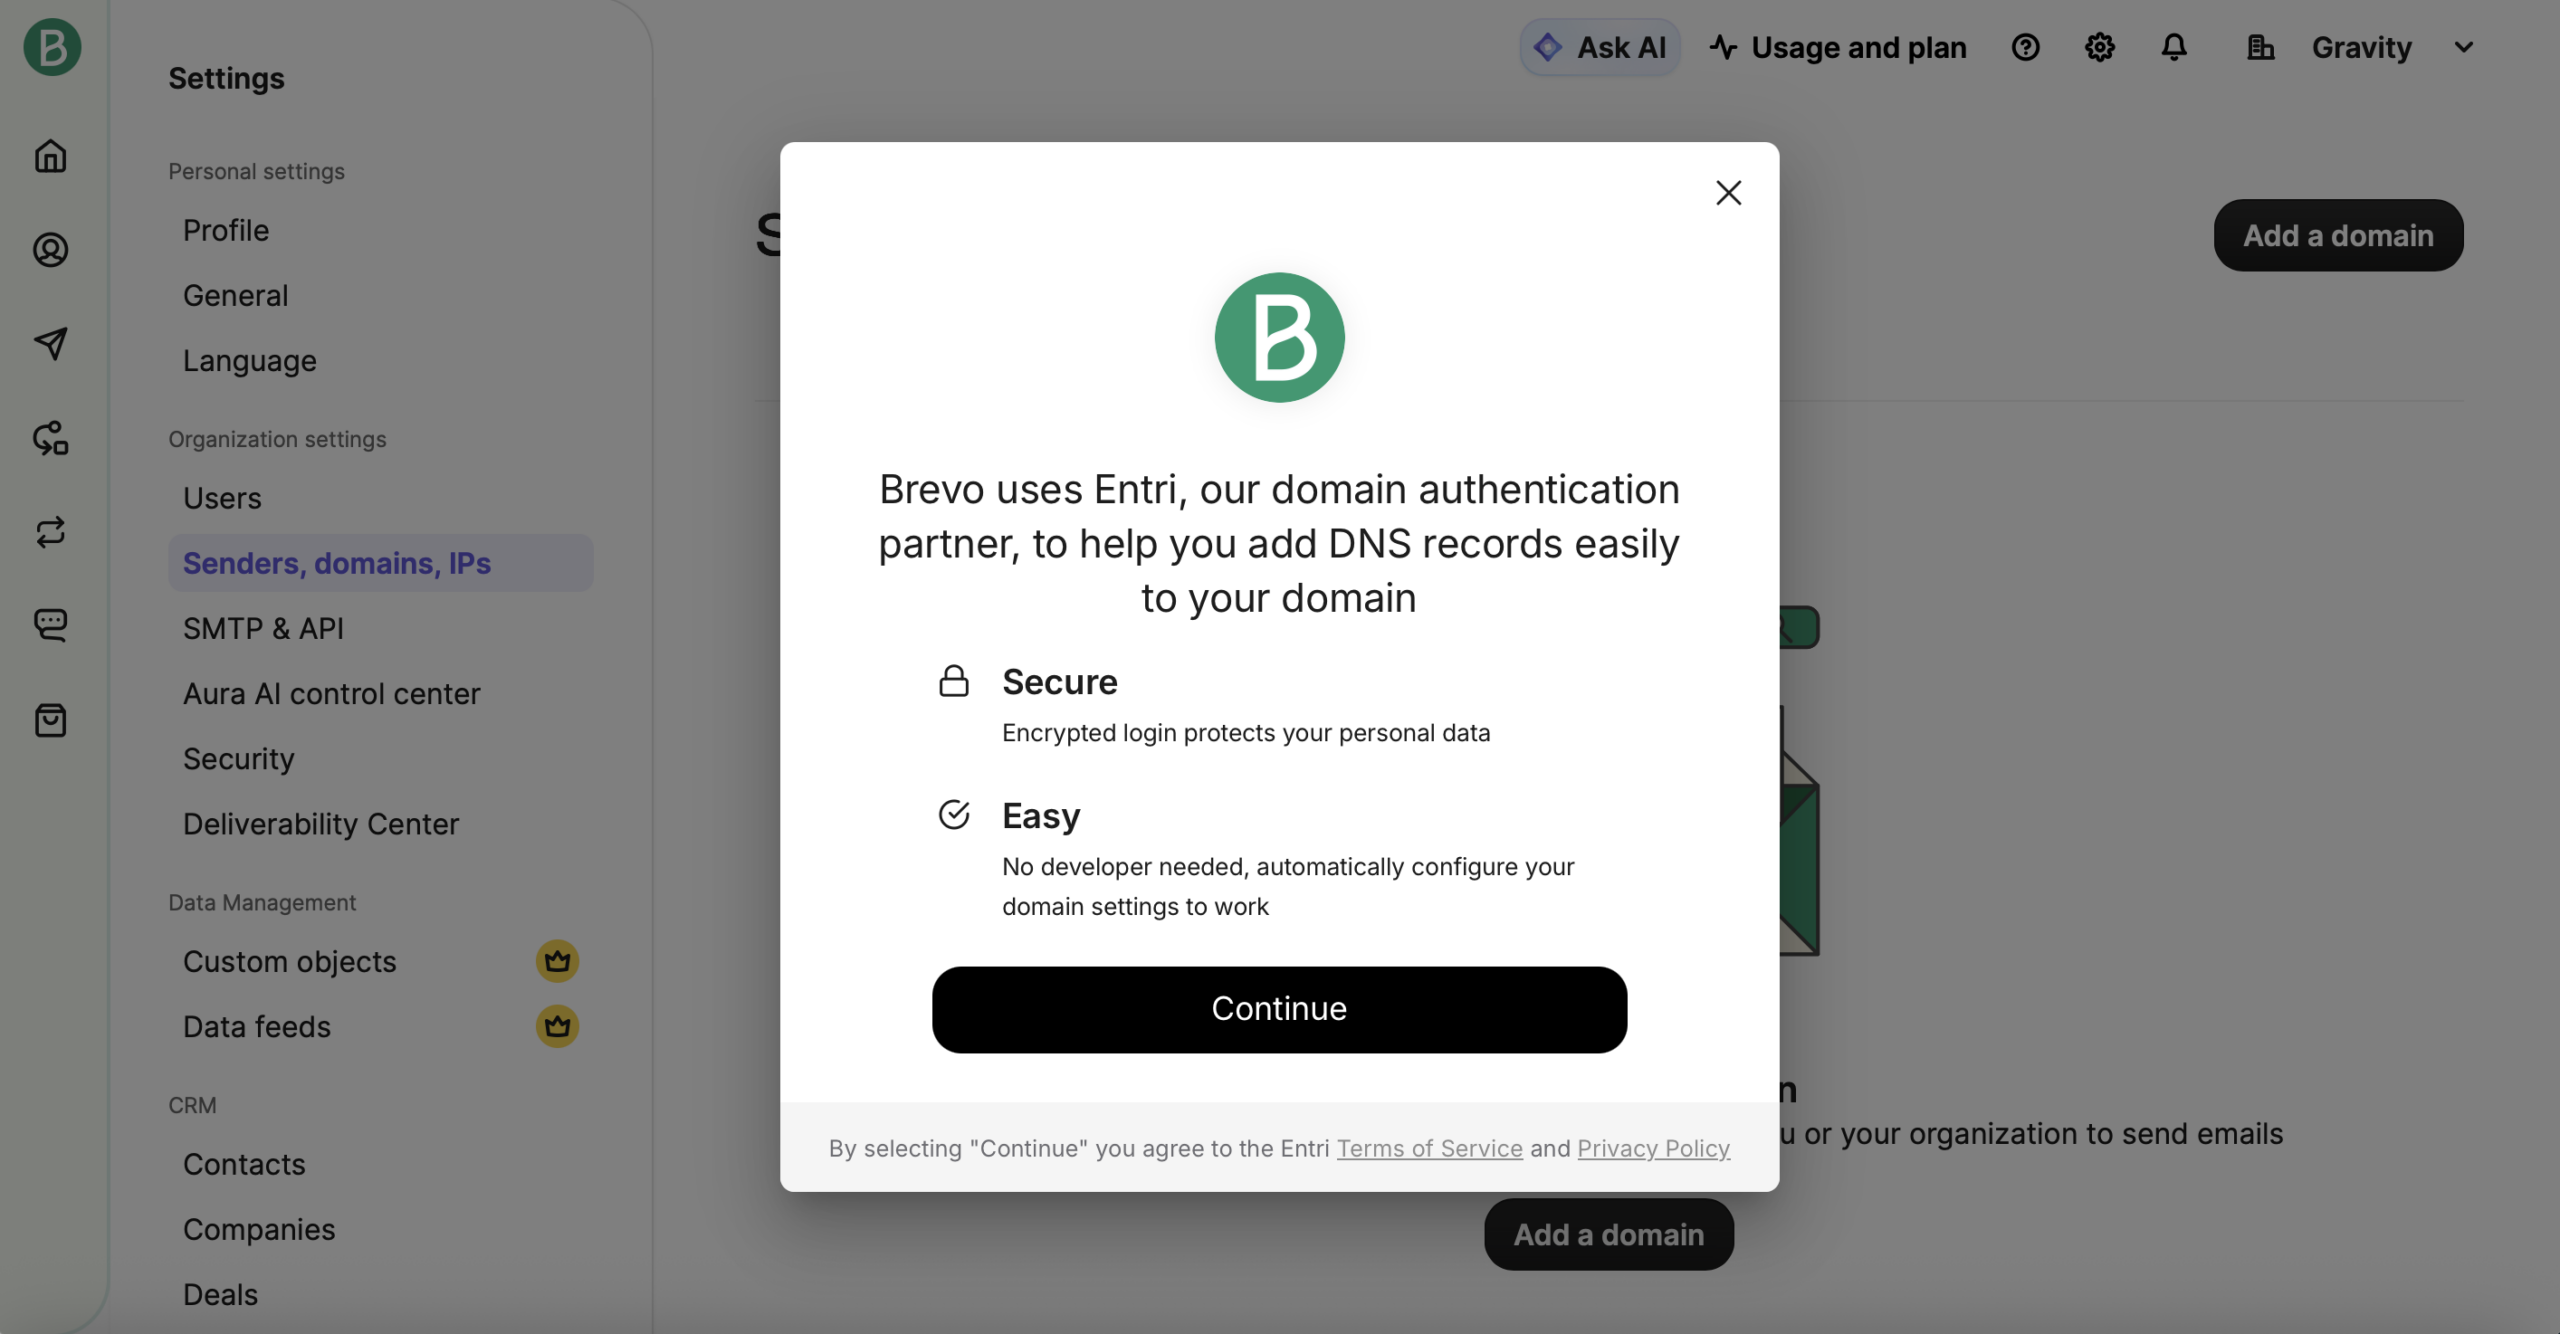
- Automatic authentication – if you use a domain registrar that supports Entri (Brevo’s automated service), you can automatically configure the DNS records to simplify the process.
- Manual authentication – you can manually add the records wherever you manage your domain’s DNS, which will typically be at one of three locations depending on your configuration – your web hosting provider, your domain registrar, or a service like Cloudflare.
If you use the automatic authentication method, your domain will automatically be verified once you complete the Entri wizard.
If you use the manual authentication, you’ll need to click the Authenticate this email domain button at the bottom to have Brevo check the verification.
You should then see green check marks appear next to each record. If you don’t, try waiting 30 minutes or so and then trying again, as it might take some time for the DNS changes to take effect.
4. Create a Brevo API key
Once you’ve added your domain name to Brevo, you need to create an API key, which is what Gravity SMTP will use to connect your WordPress site to Brevo.
Here’s how to create your Brevo API key:
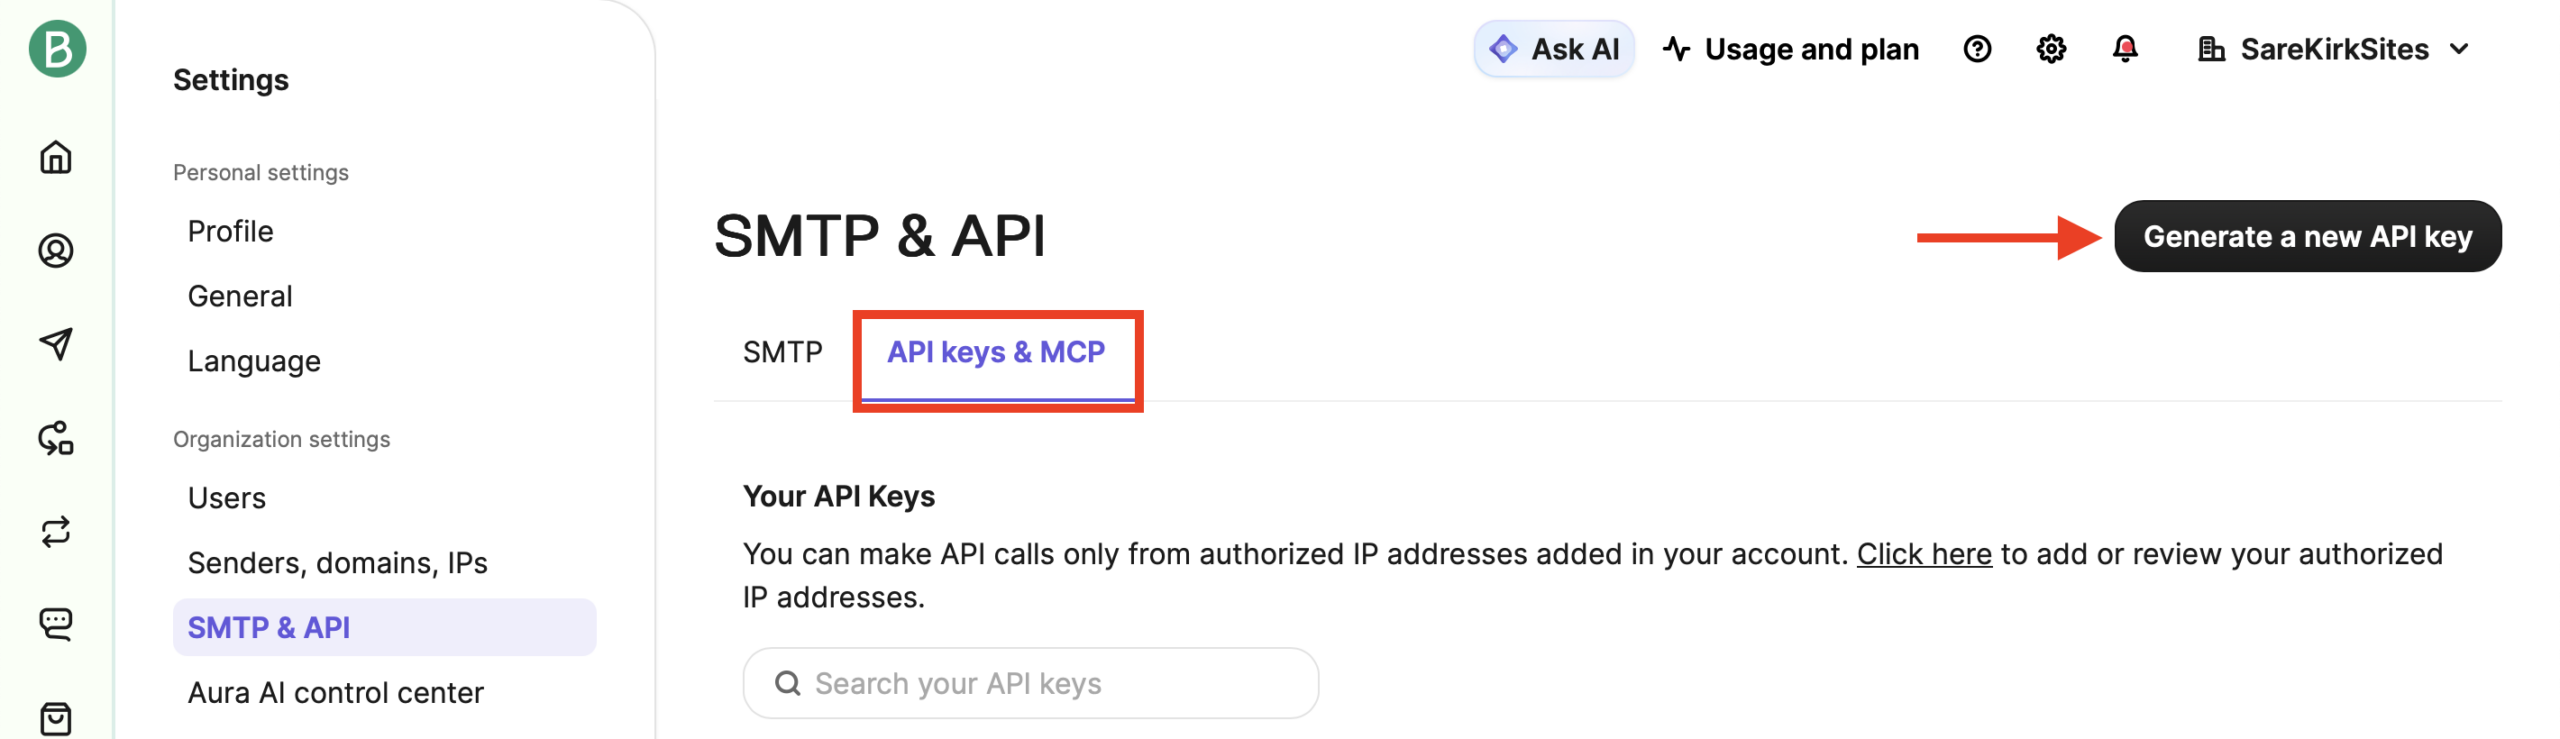
- Click this link to open the API key page. Or, you can click the settings gear and then select SMTP & API.
- Click Generate a new API key.
- Give your API key an internal name to help you remember it.
- Click the Generate button.
Brevo will then show you your API key. Brevo will only show this API key one time, so make sure to copy it to a safe place because you’ll need it in the next step.
Don’t worry, though – if you accidentally lose your API key, you can just create a new one by repeating the same steps.
5. Configure Gravity SMTP to use Brevo
Once you have your Brevo API key, you’re ready to configure Gravity SMTP to start sending your WordPress site’s emails via the Brevo email sending service.
Here’s how to set this up:
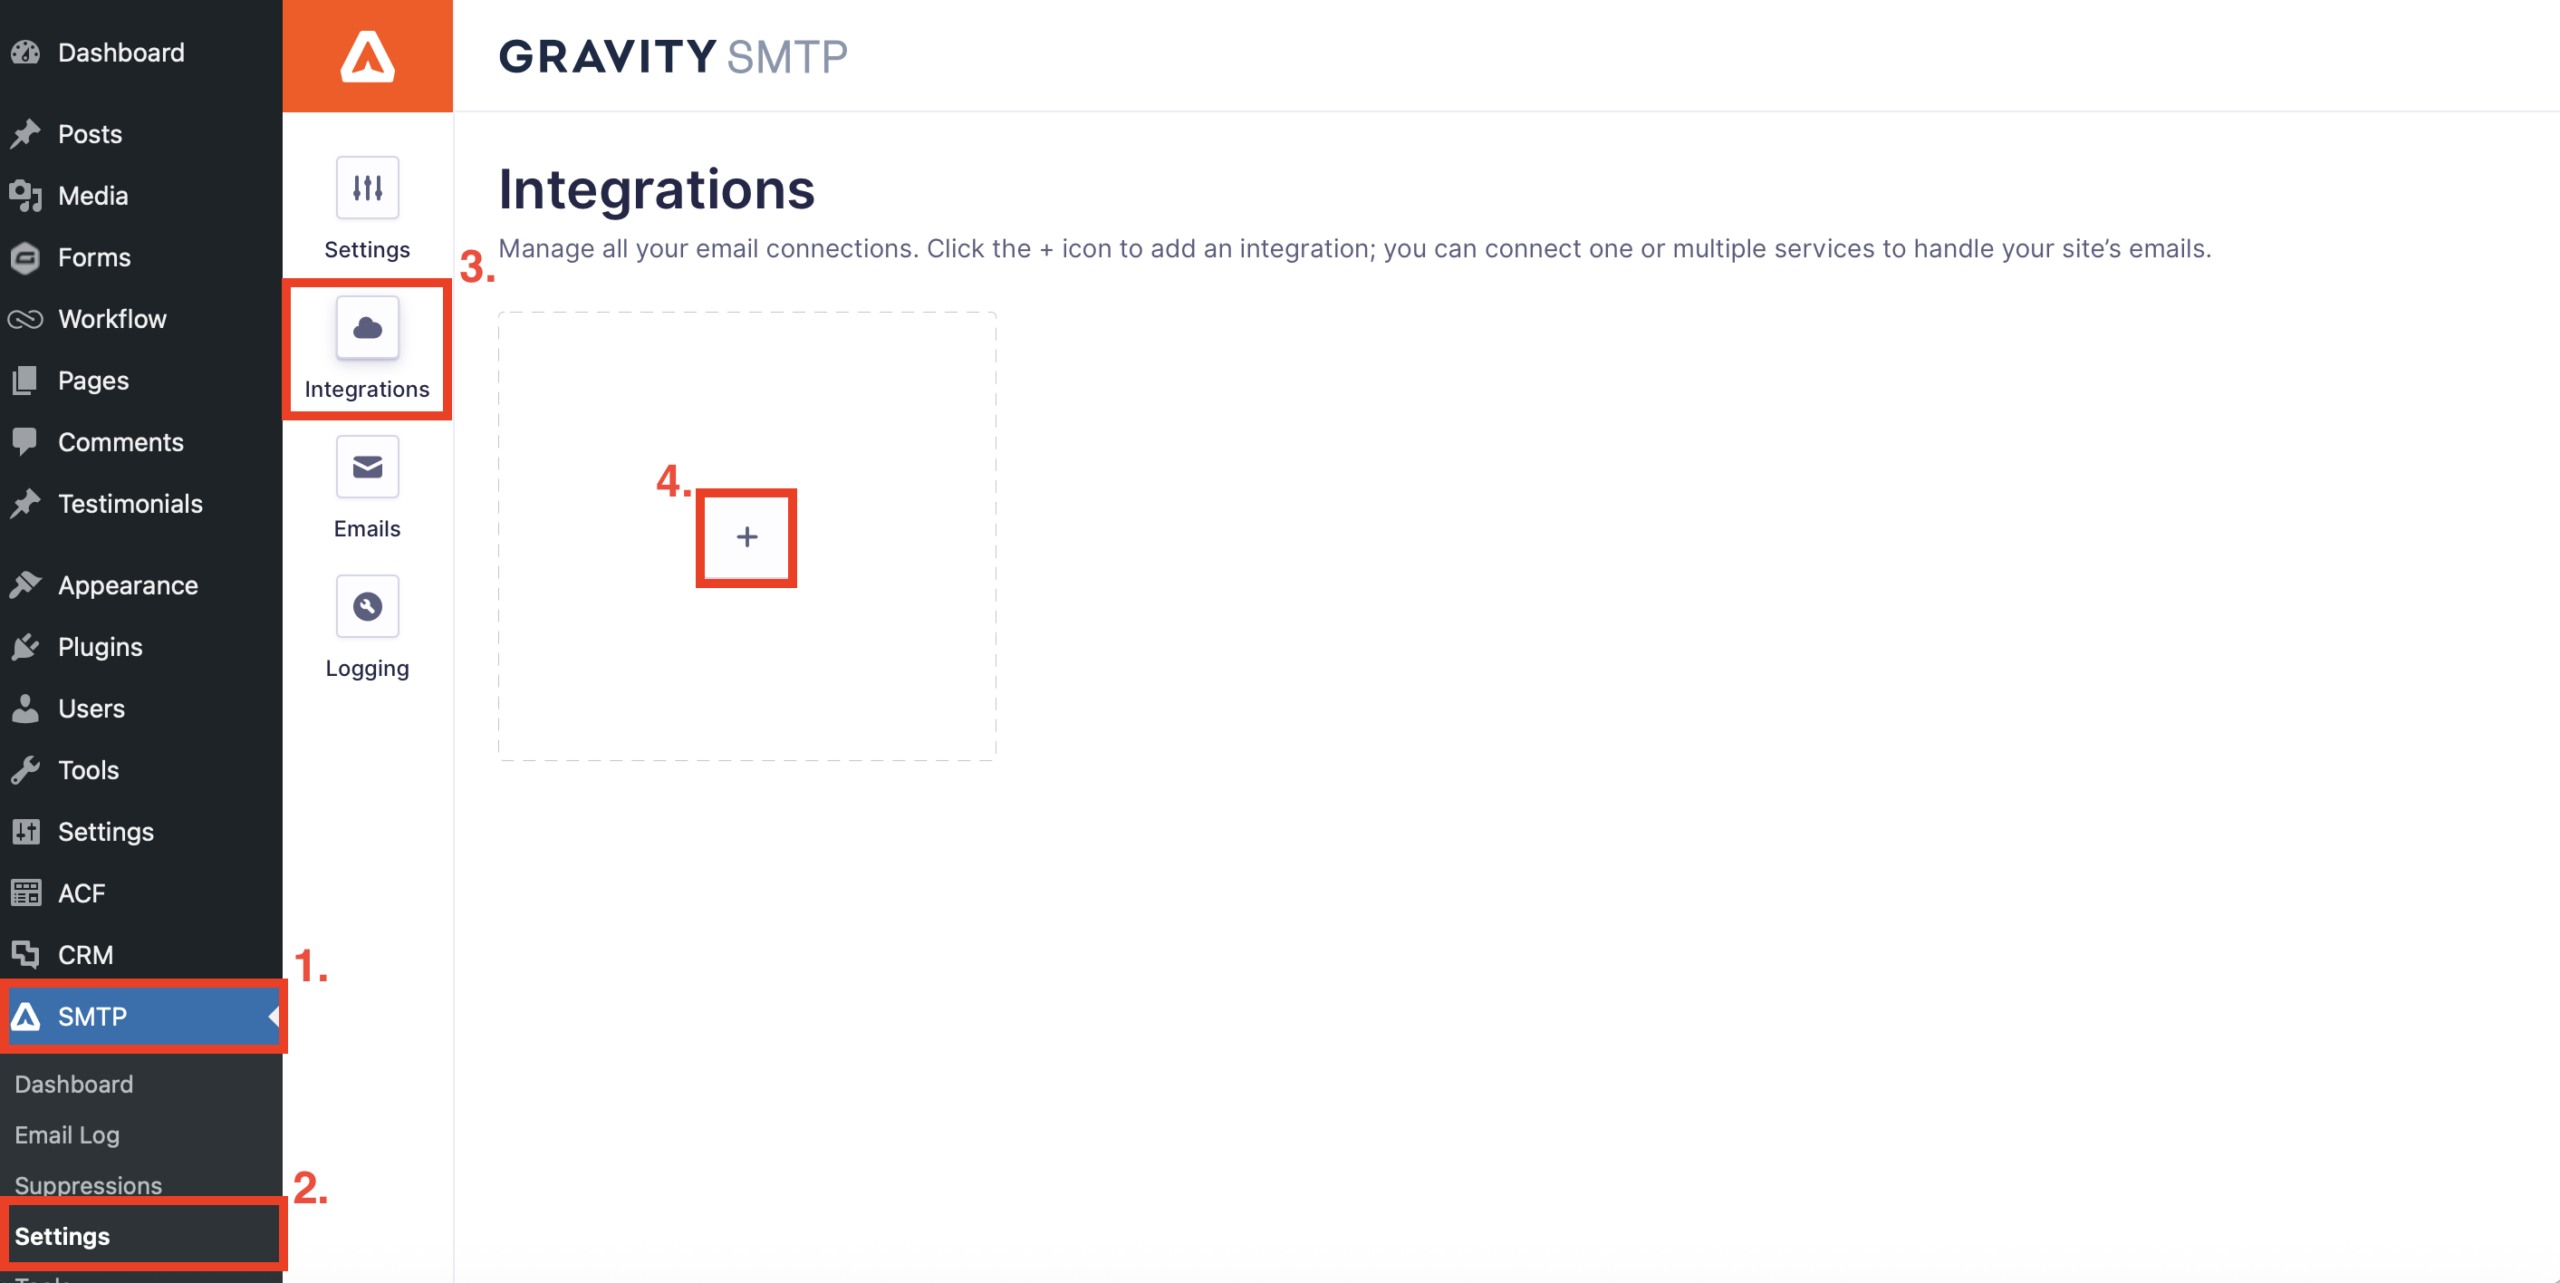
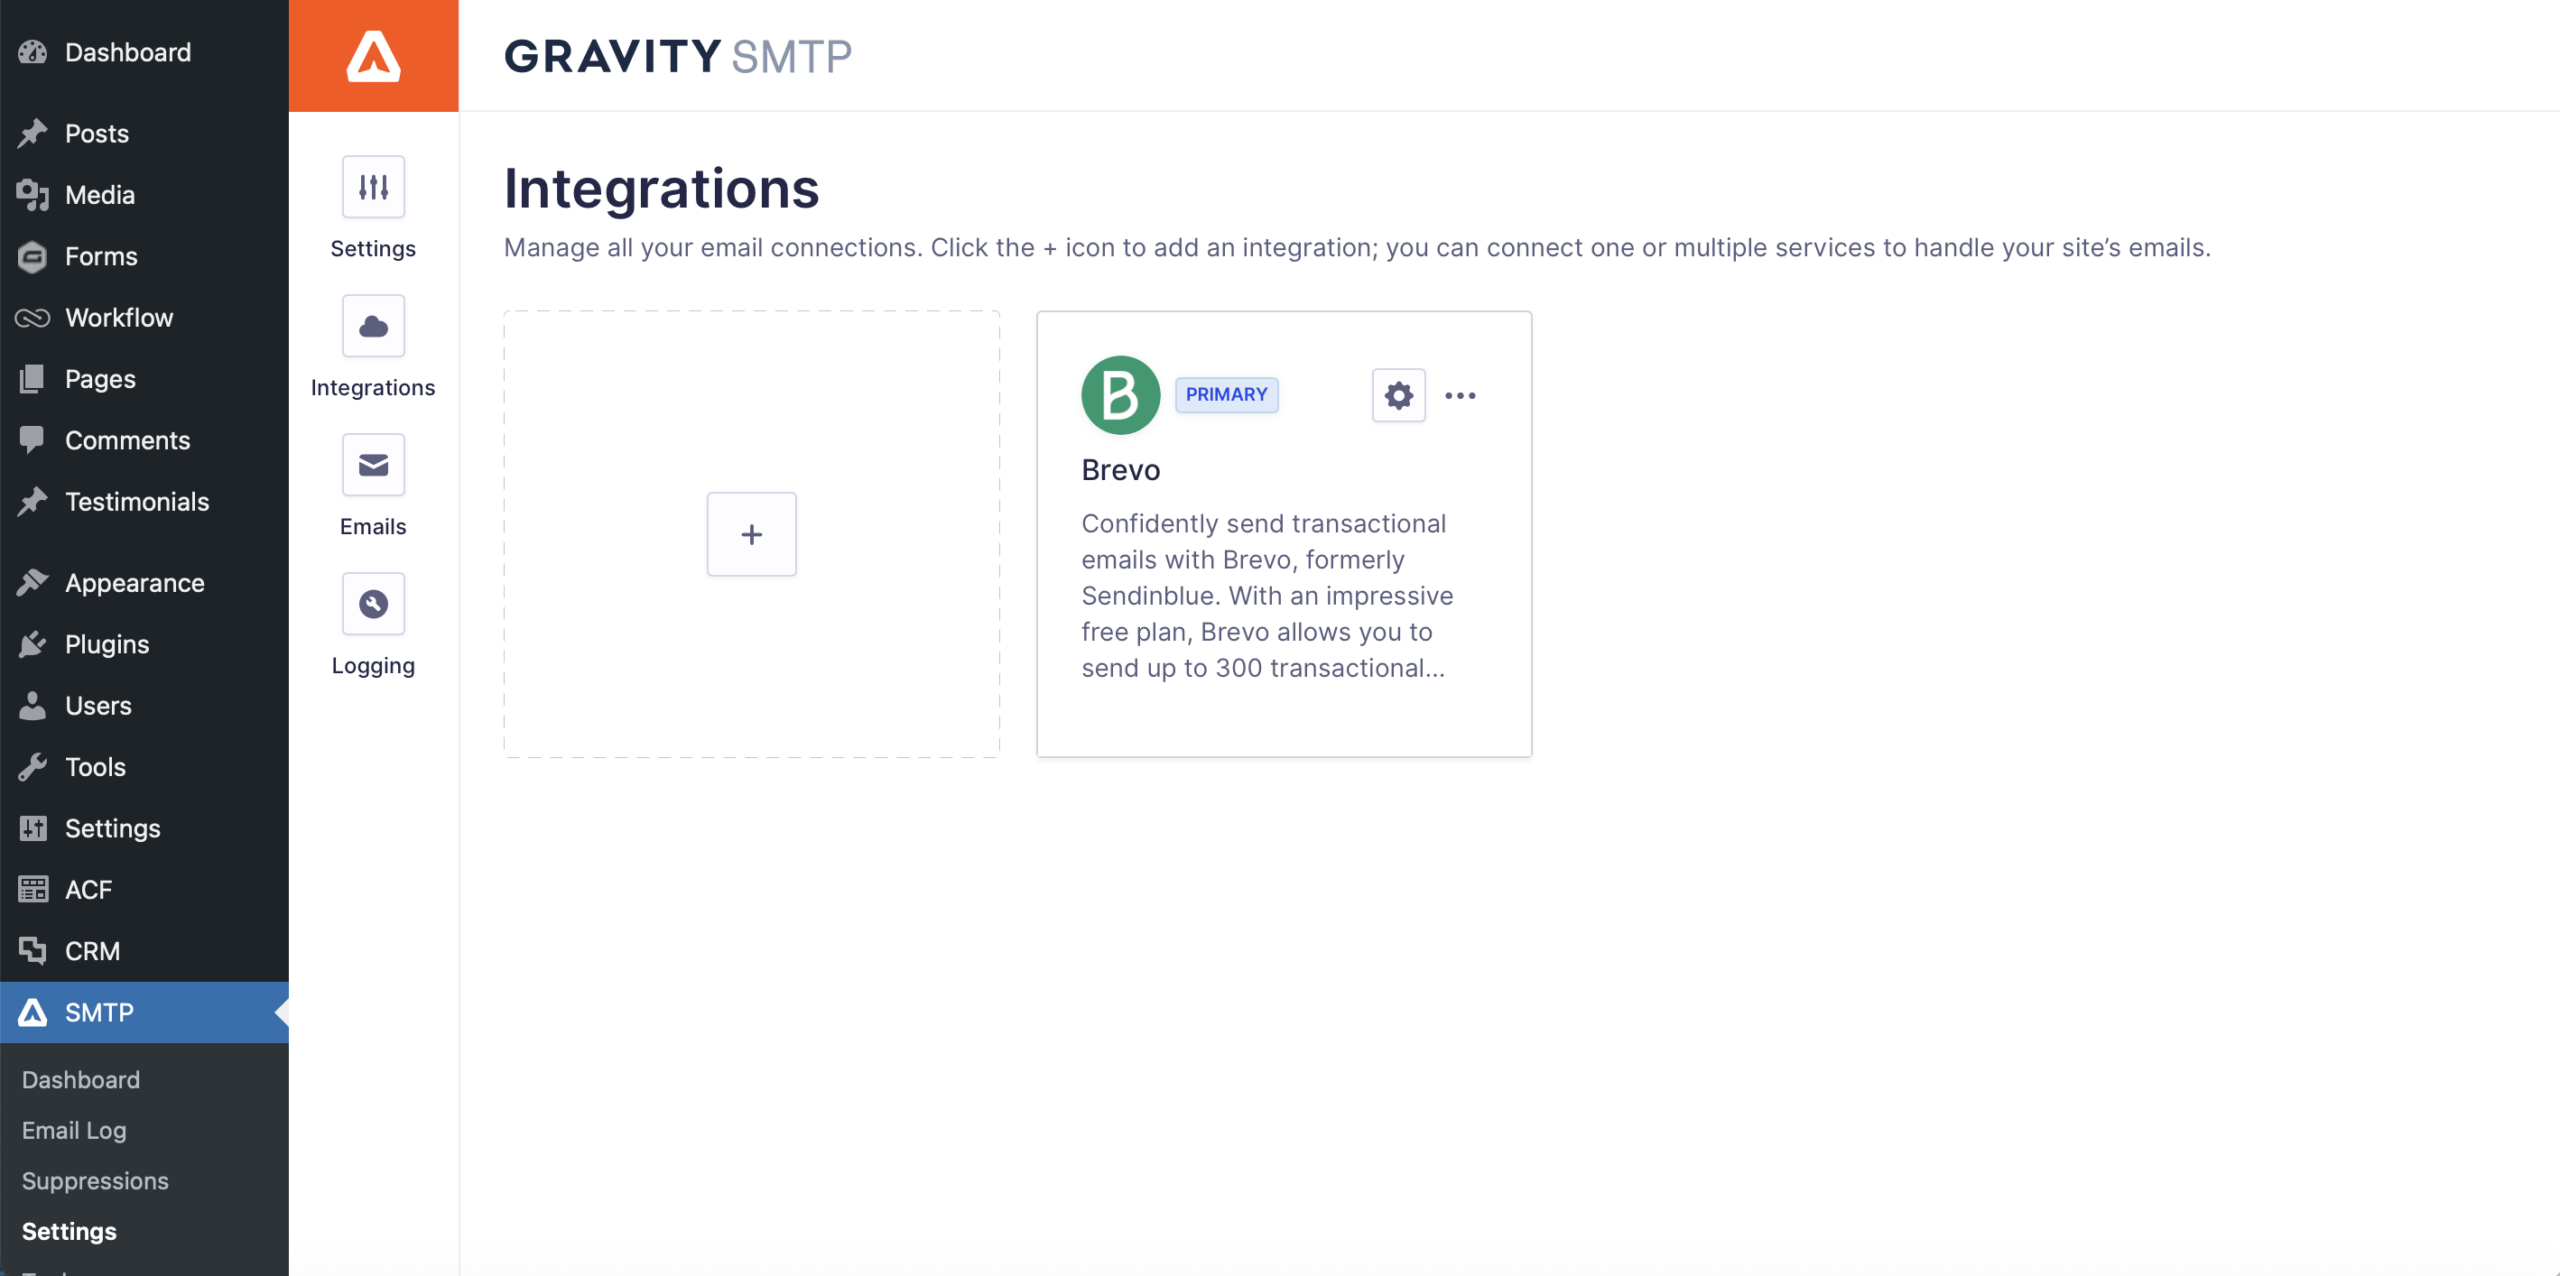
- Open your WordPress dashboard.
- Go to SMTP → Settings.
- Select Integrations.
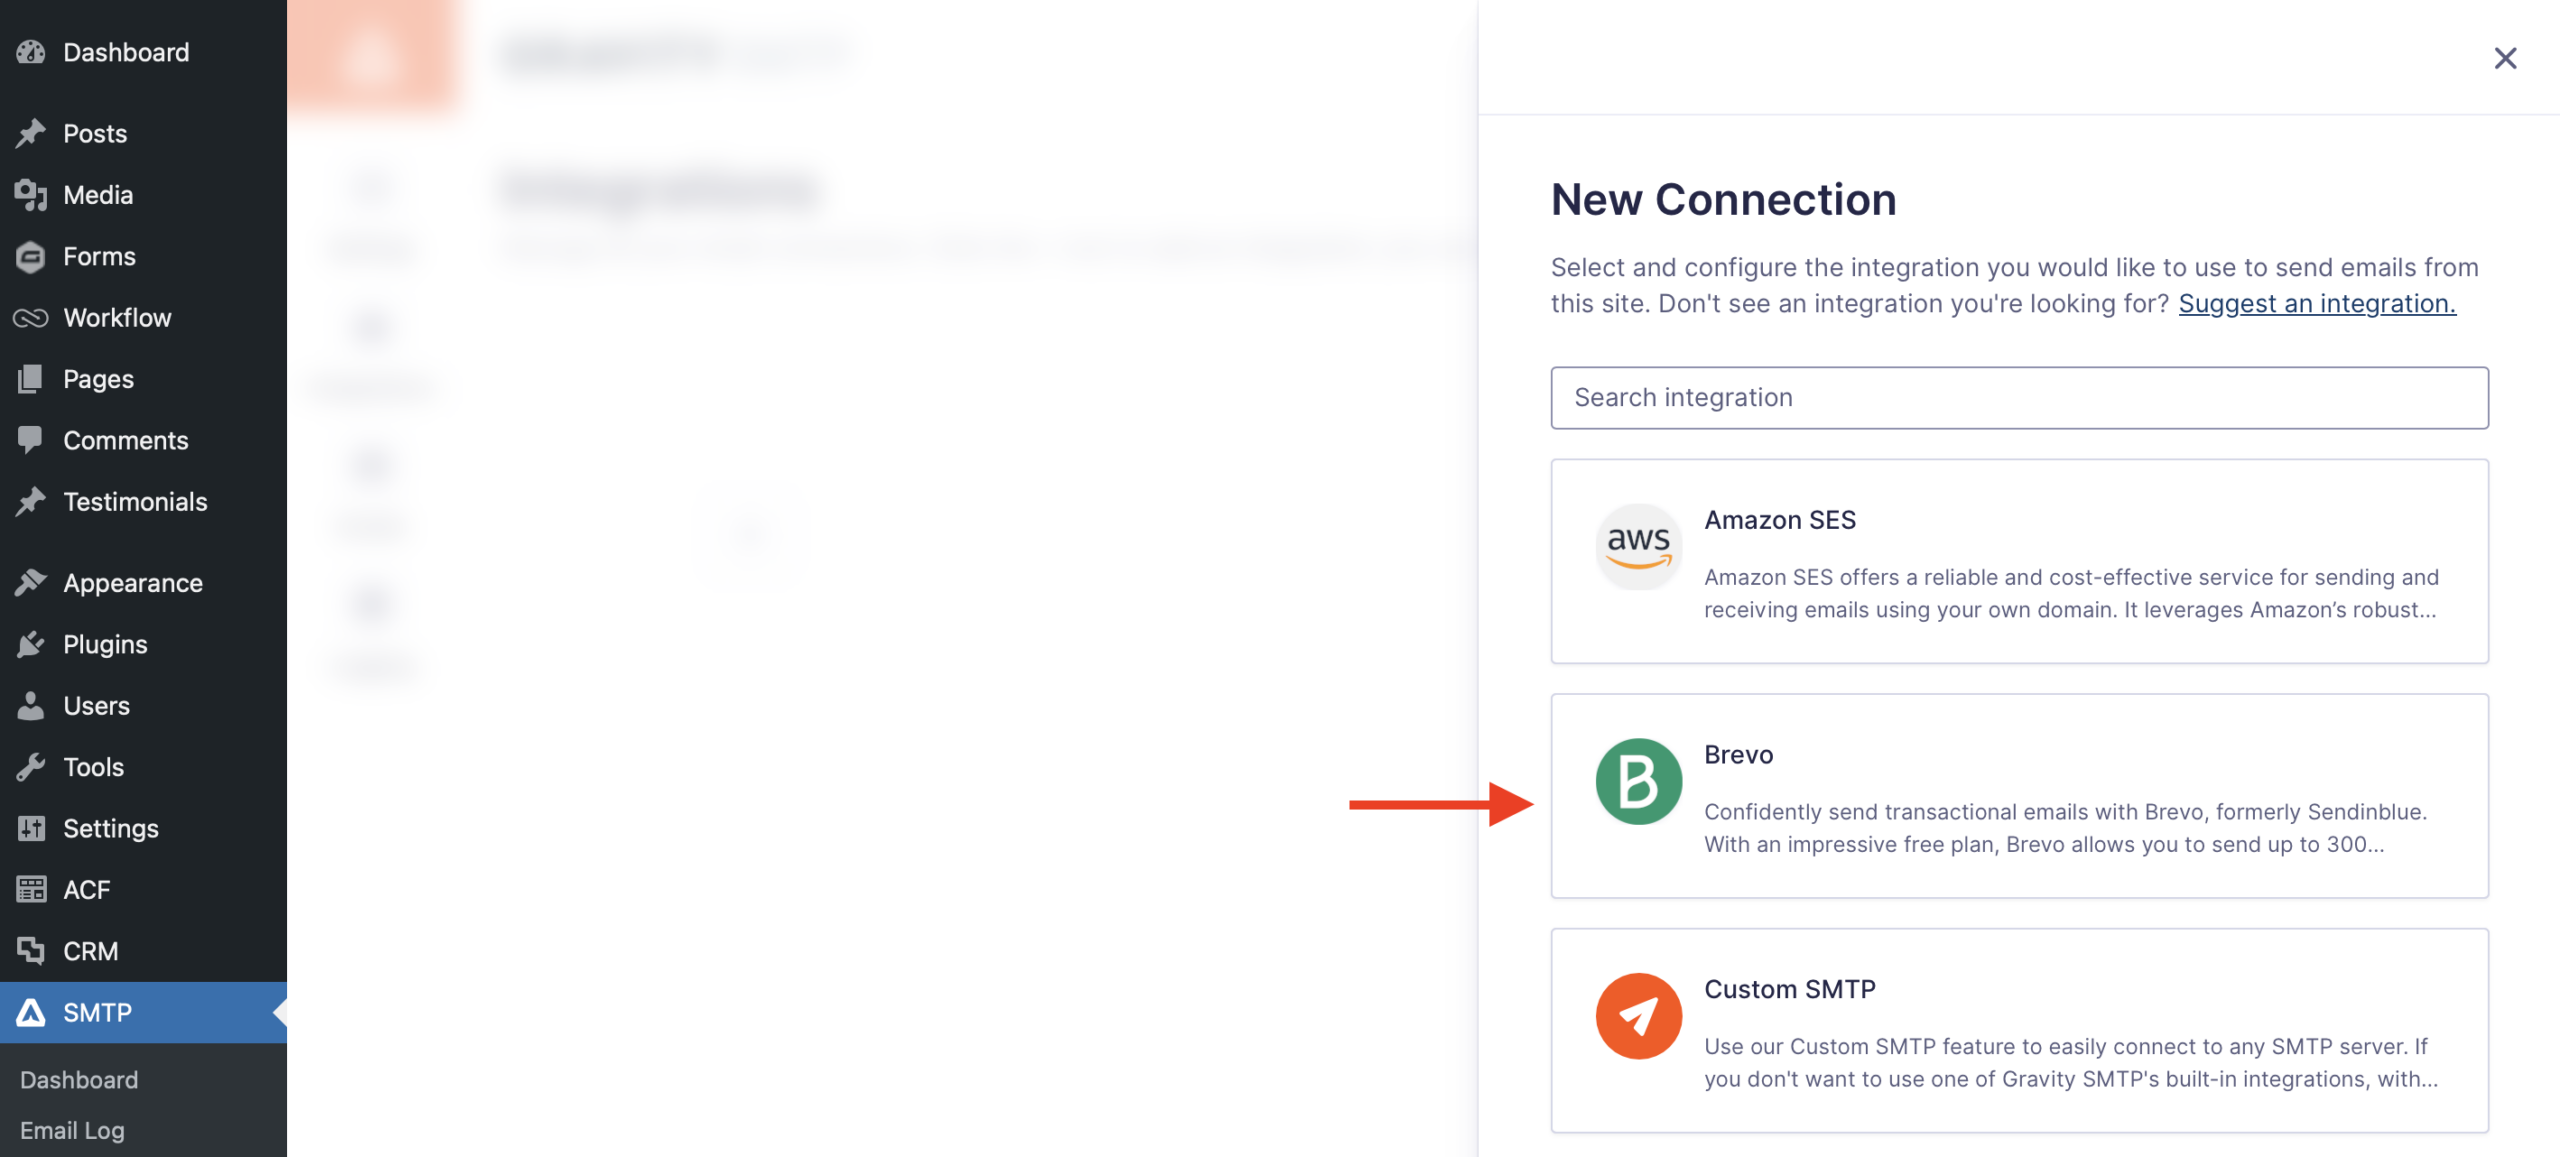
- Click the Plus icon next to Brevo to open the Brevo settings.
Next, select Brevo. Note that you will follow the same process should you need to integrate with a backup email sending service.
Here’s how to configure the Brevo settings:
- API Key – paste in the Brevo API key that you located in the previous step.
- Default From Email – enter the email address that you want your emails to come from.
- Force From Email – when enabled, this lets you force other plugins to use this From Email address for their emails, too (regardless of the plugin’s settings).
- Default From Name – enter the name that you want your emails to come from.
- Force From Name – this lets you force other plugins to use this name.
- Default Reply-To Email – enter the reply-to email address where you want replies to be sent
- Force Reply-To Email – if enabled, this will override other plugin settings for all outgoing emails
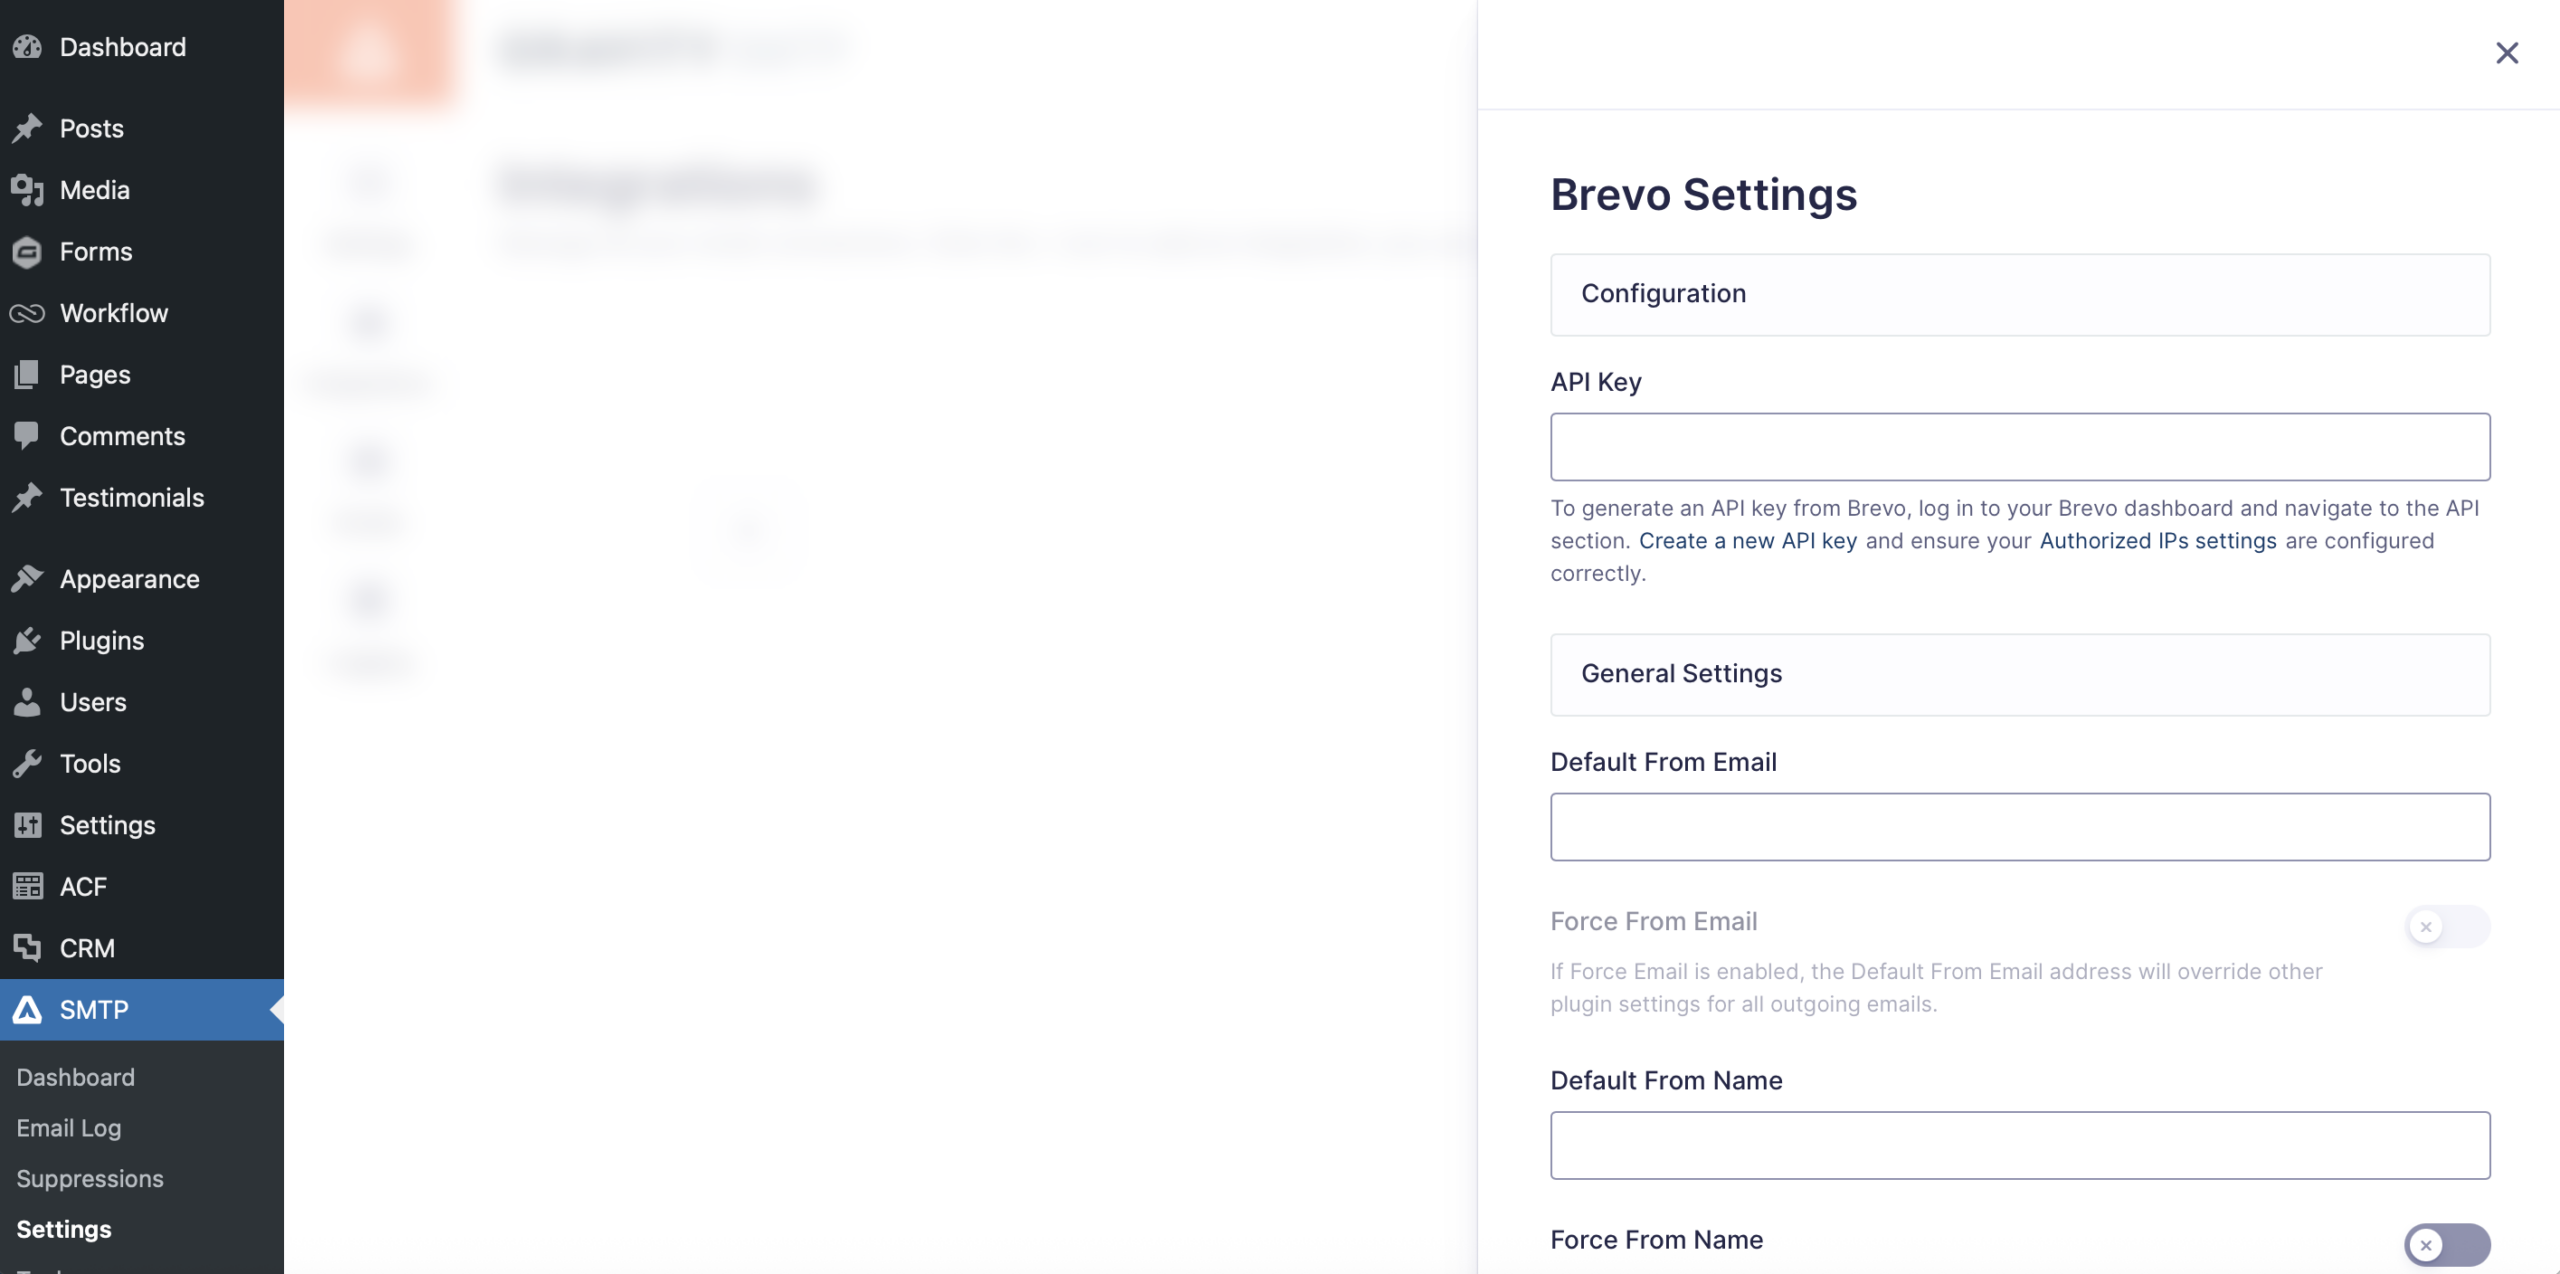
Once you’ve added everything, click Save & Enable at the bottom of the flyout.
Now, you should see that Brevo is integrated as your site’s primary email sending service.
6. Send a test email to make sure everything is working
To help you test your Brevo integration, Gravity SMTP includes a helpful feature that lets you easily send a test email.
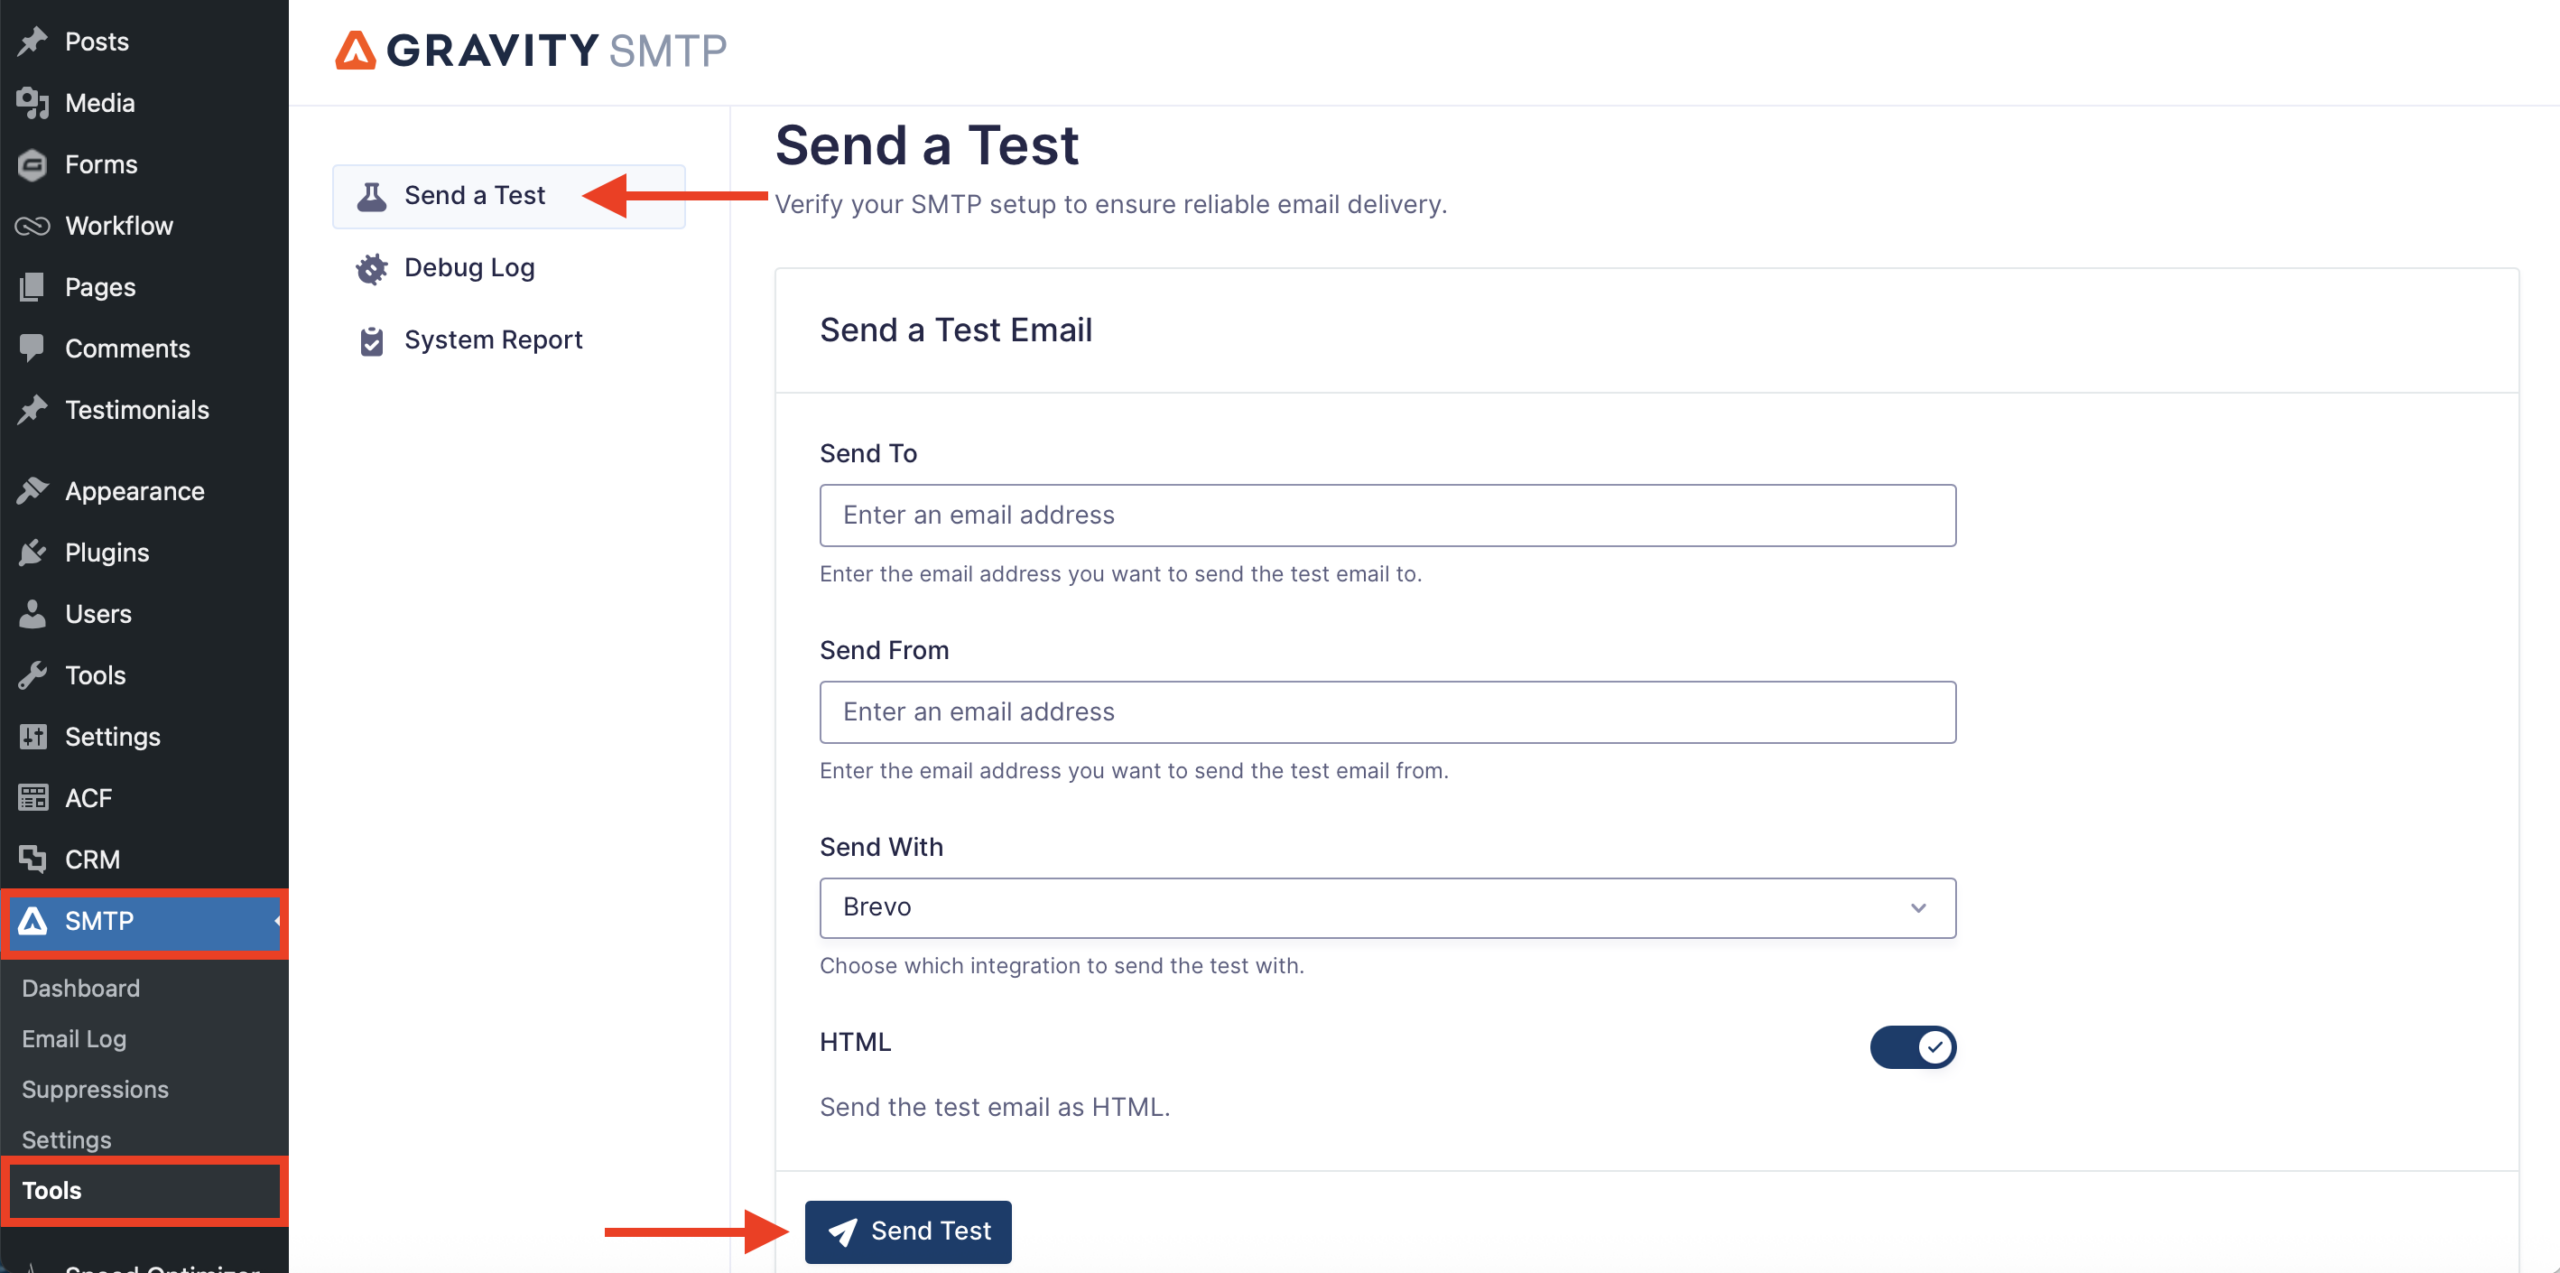
- Go to SMTP → Tools in your WordPress dashboard.
- Select the Send a Test tab.
- Enter the email address that you want to send a test email to in the Send To box.
- Click the Send Test button.
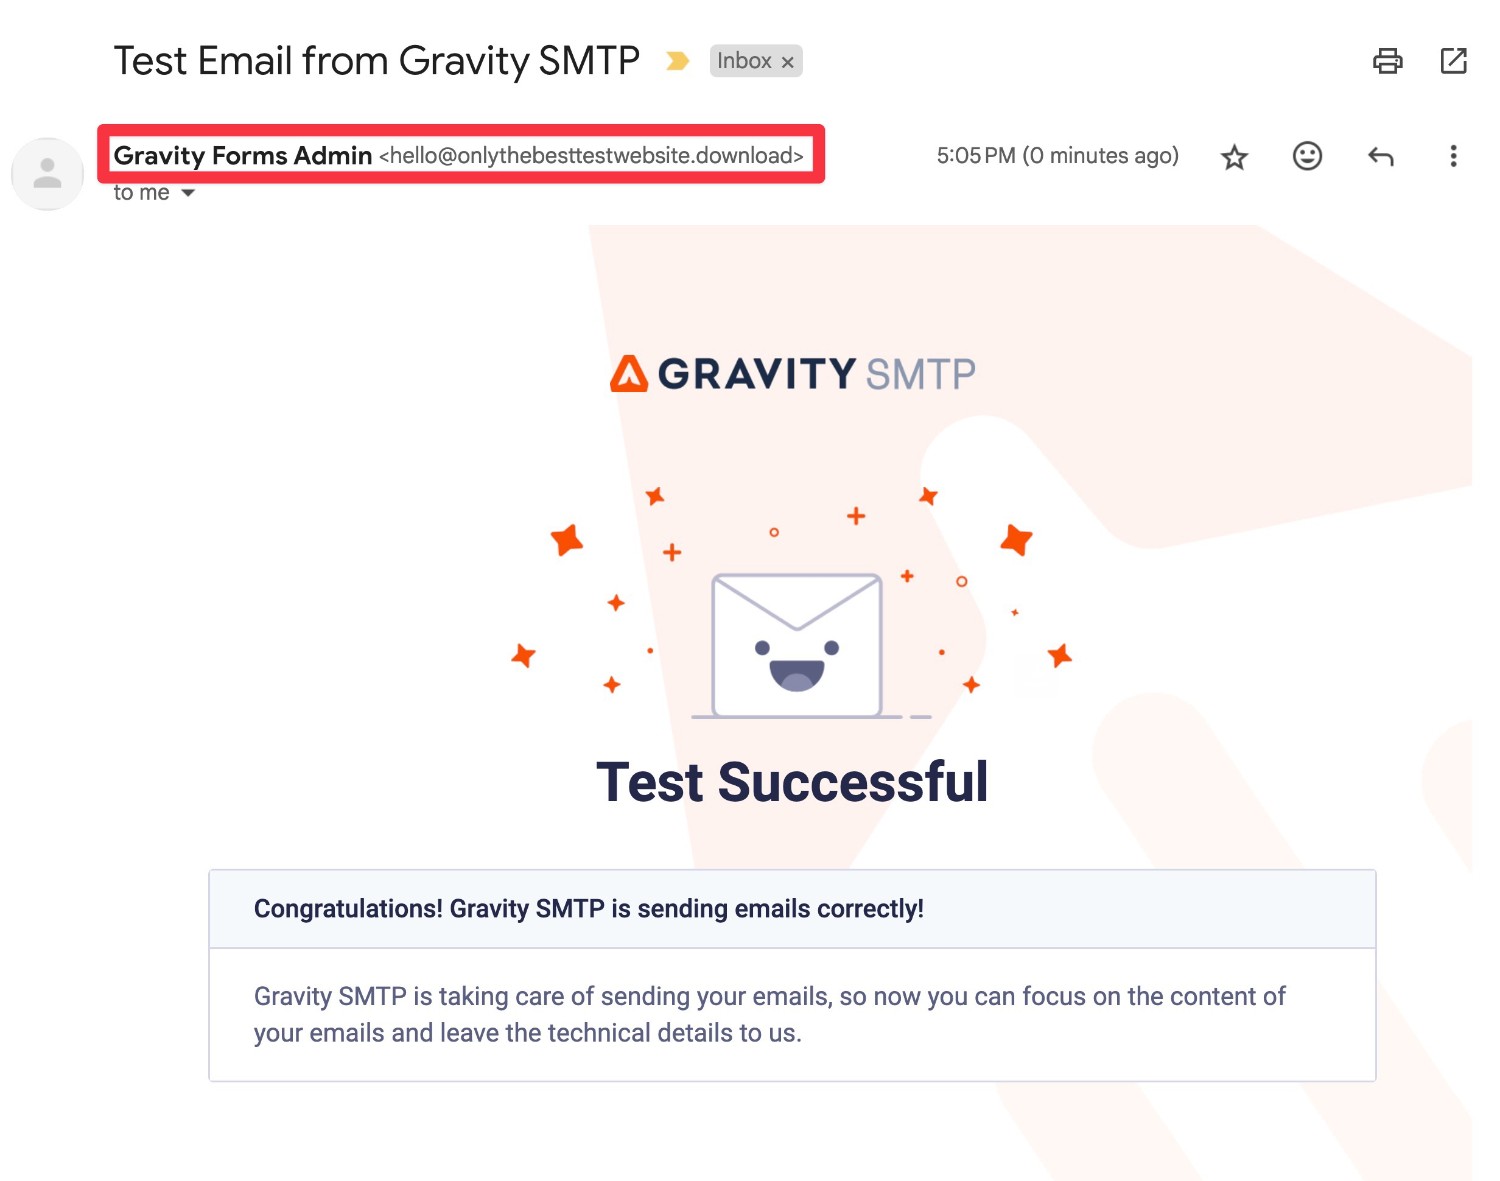
You should see a success message in the Gravity SMTP interface. Then, you should also see the email in the inbox of the email address to which you sent the test email.
In addition to making sure the email shows up, we also recommend looking at the From Name and From Email to make sure they’re appearing as you expect them to.
7. Set up a backup email sending service and alerts (optional)
At this point, your site is properly configured to send all of its transactional emails using Brevo, and you can consider this tutorial finished.
However, one of the nice things about Gravity SMTP is that it gives you some additional tools to ensure the reliability of your site’s transactional emails.
Firstly, Gravity SMTP also lets you set up an optional backup email sending service. If an email ever fails to send with Brevo for some reason, Gravity SMTP can automatically resend that email using your backup service.
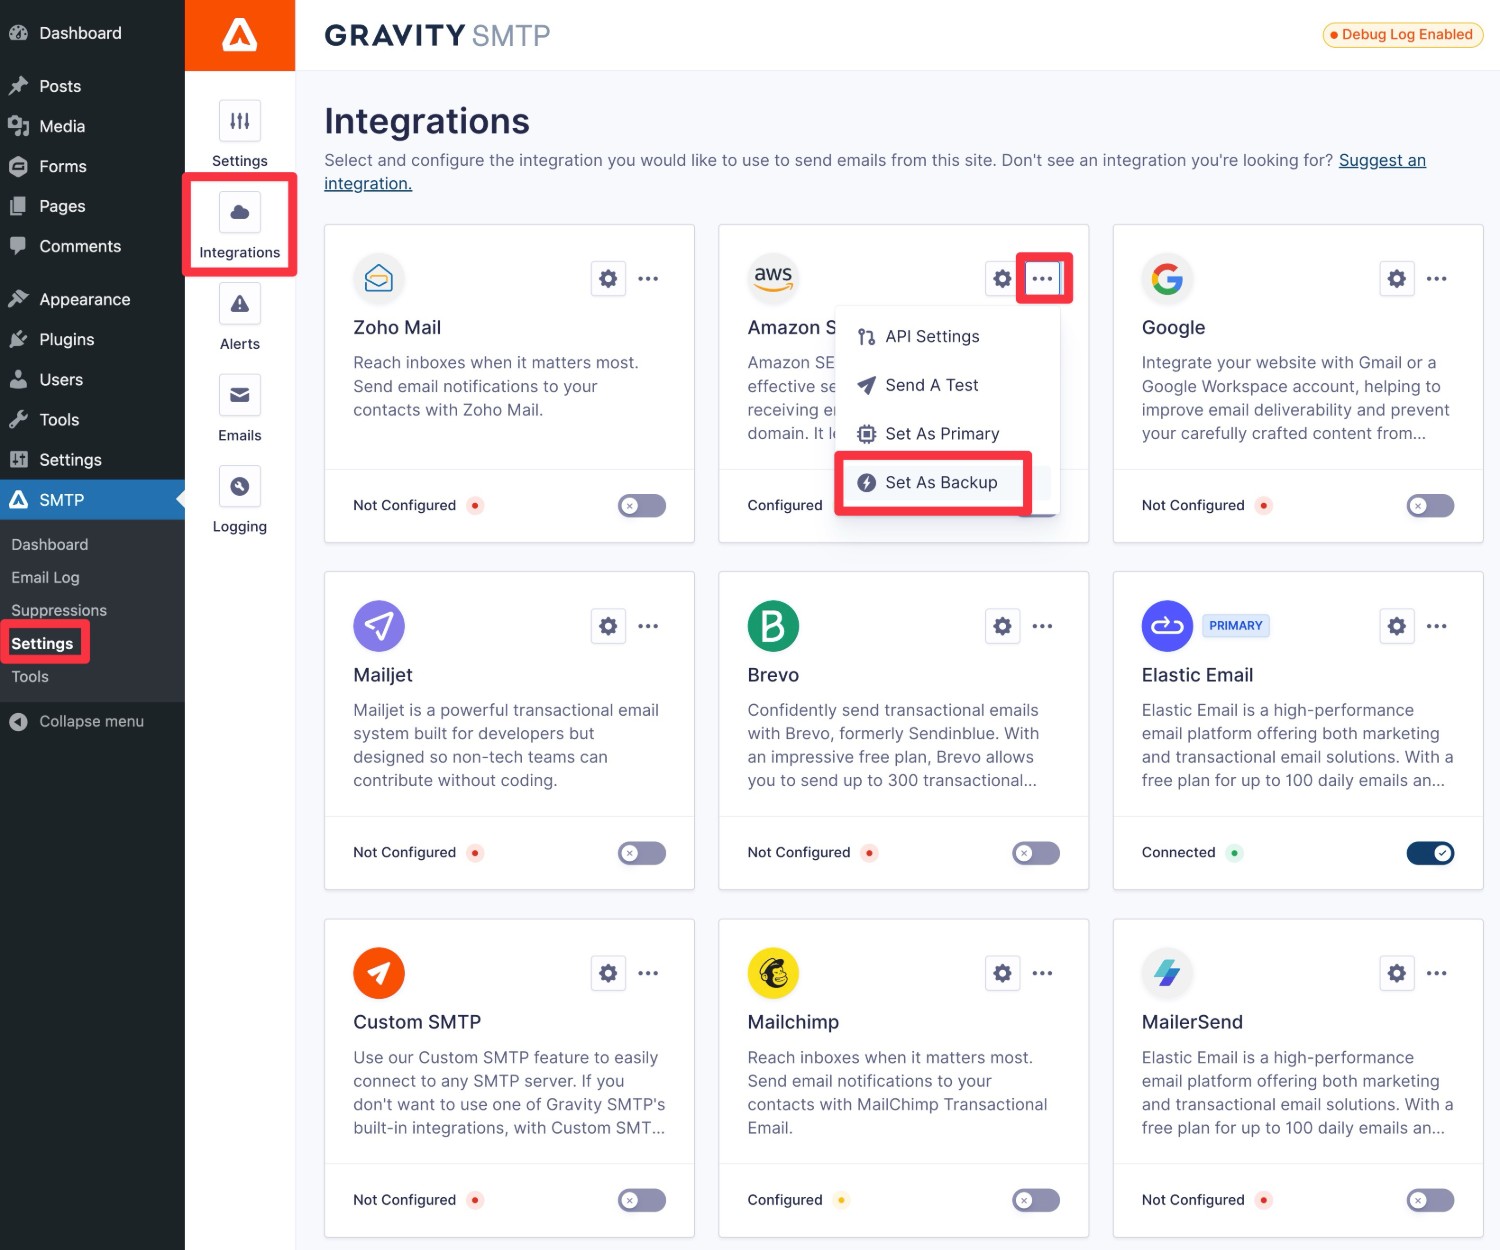
If you want to set up a backup email sending service, you first need to connect your site to that service. Here are guides for the direct API integrations that Gravity SMTP supports, though you also have the option to use a custom SMTP service:
- Amazon SES
- Elastic Email
- Emailit
- Gmail / Google Workspace
- Mailchimp Transactional
- MailerSend
- Mailgun
- Mailjet
- Outlook / Microsoft 365
- Postmark
- Resend
- SendGrid
- SMTP2Go
- SparkPost
- Zoho Mail
- Custom SMTP
Once you’ve connected to a service, you can click the three dots icon next to that service in the Integrations list and choose Set As Backup.
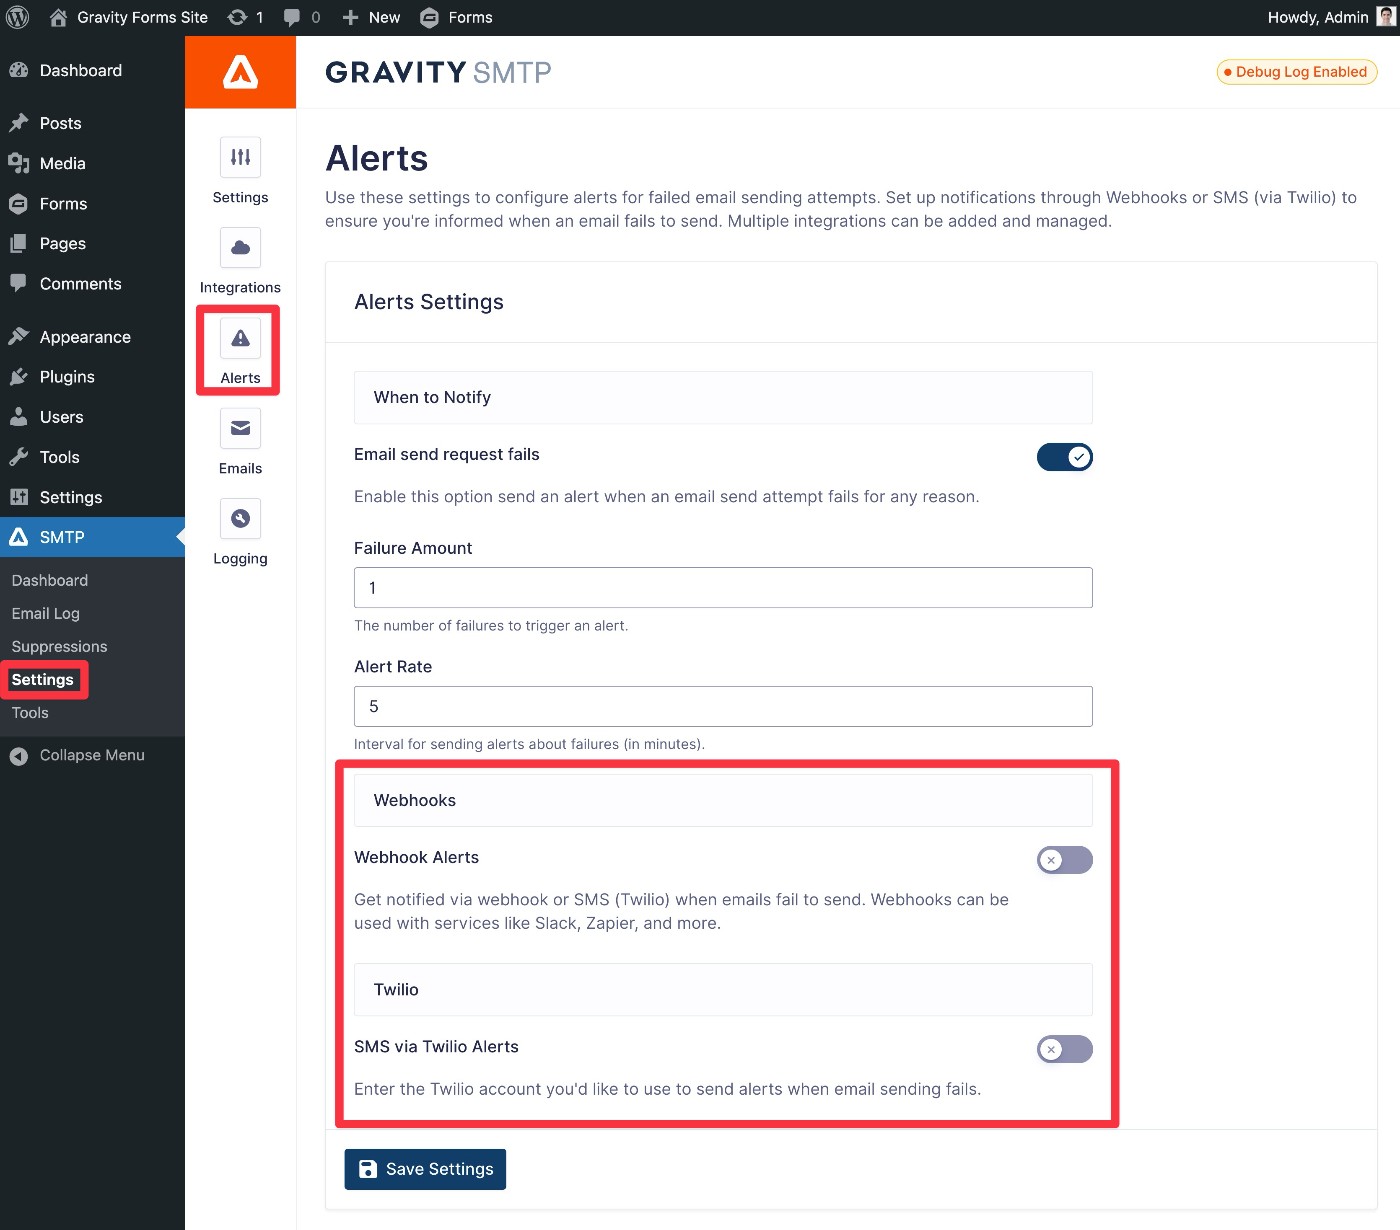
Secondly, if you want to set up real-time alerts, Gravity SMTP currently supports two methods:
- Webhooks – This lets you send an alert to any service that can receive webhooks, such as receiving a Slack message.
- SMS – This lets you receive real-time text messages using Twilio.
You can set up alerts by going to SMTP → Settings → Alerts and the links above cover tutorials for both methods.
9. Monitor your site’s emails with Gravity SMTP’s reporting and logging features
Another nice thing about using Gravity SMTP is that it can also help you log and monitor your site’s email sending.
This can help you stay on top of everything that’s happening and catch any issues before they become a problem.
Email logging
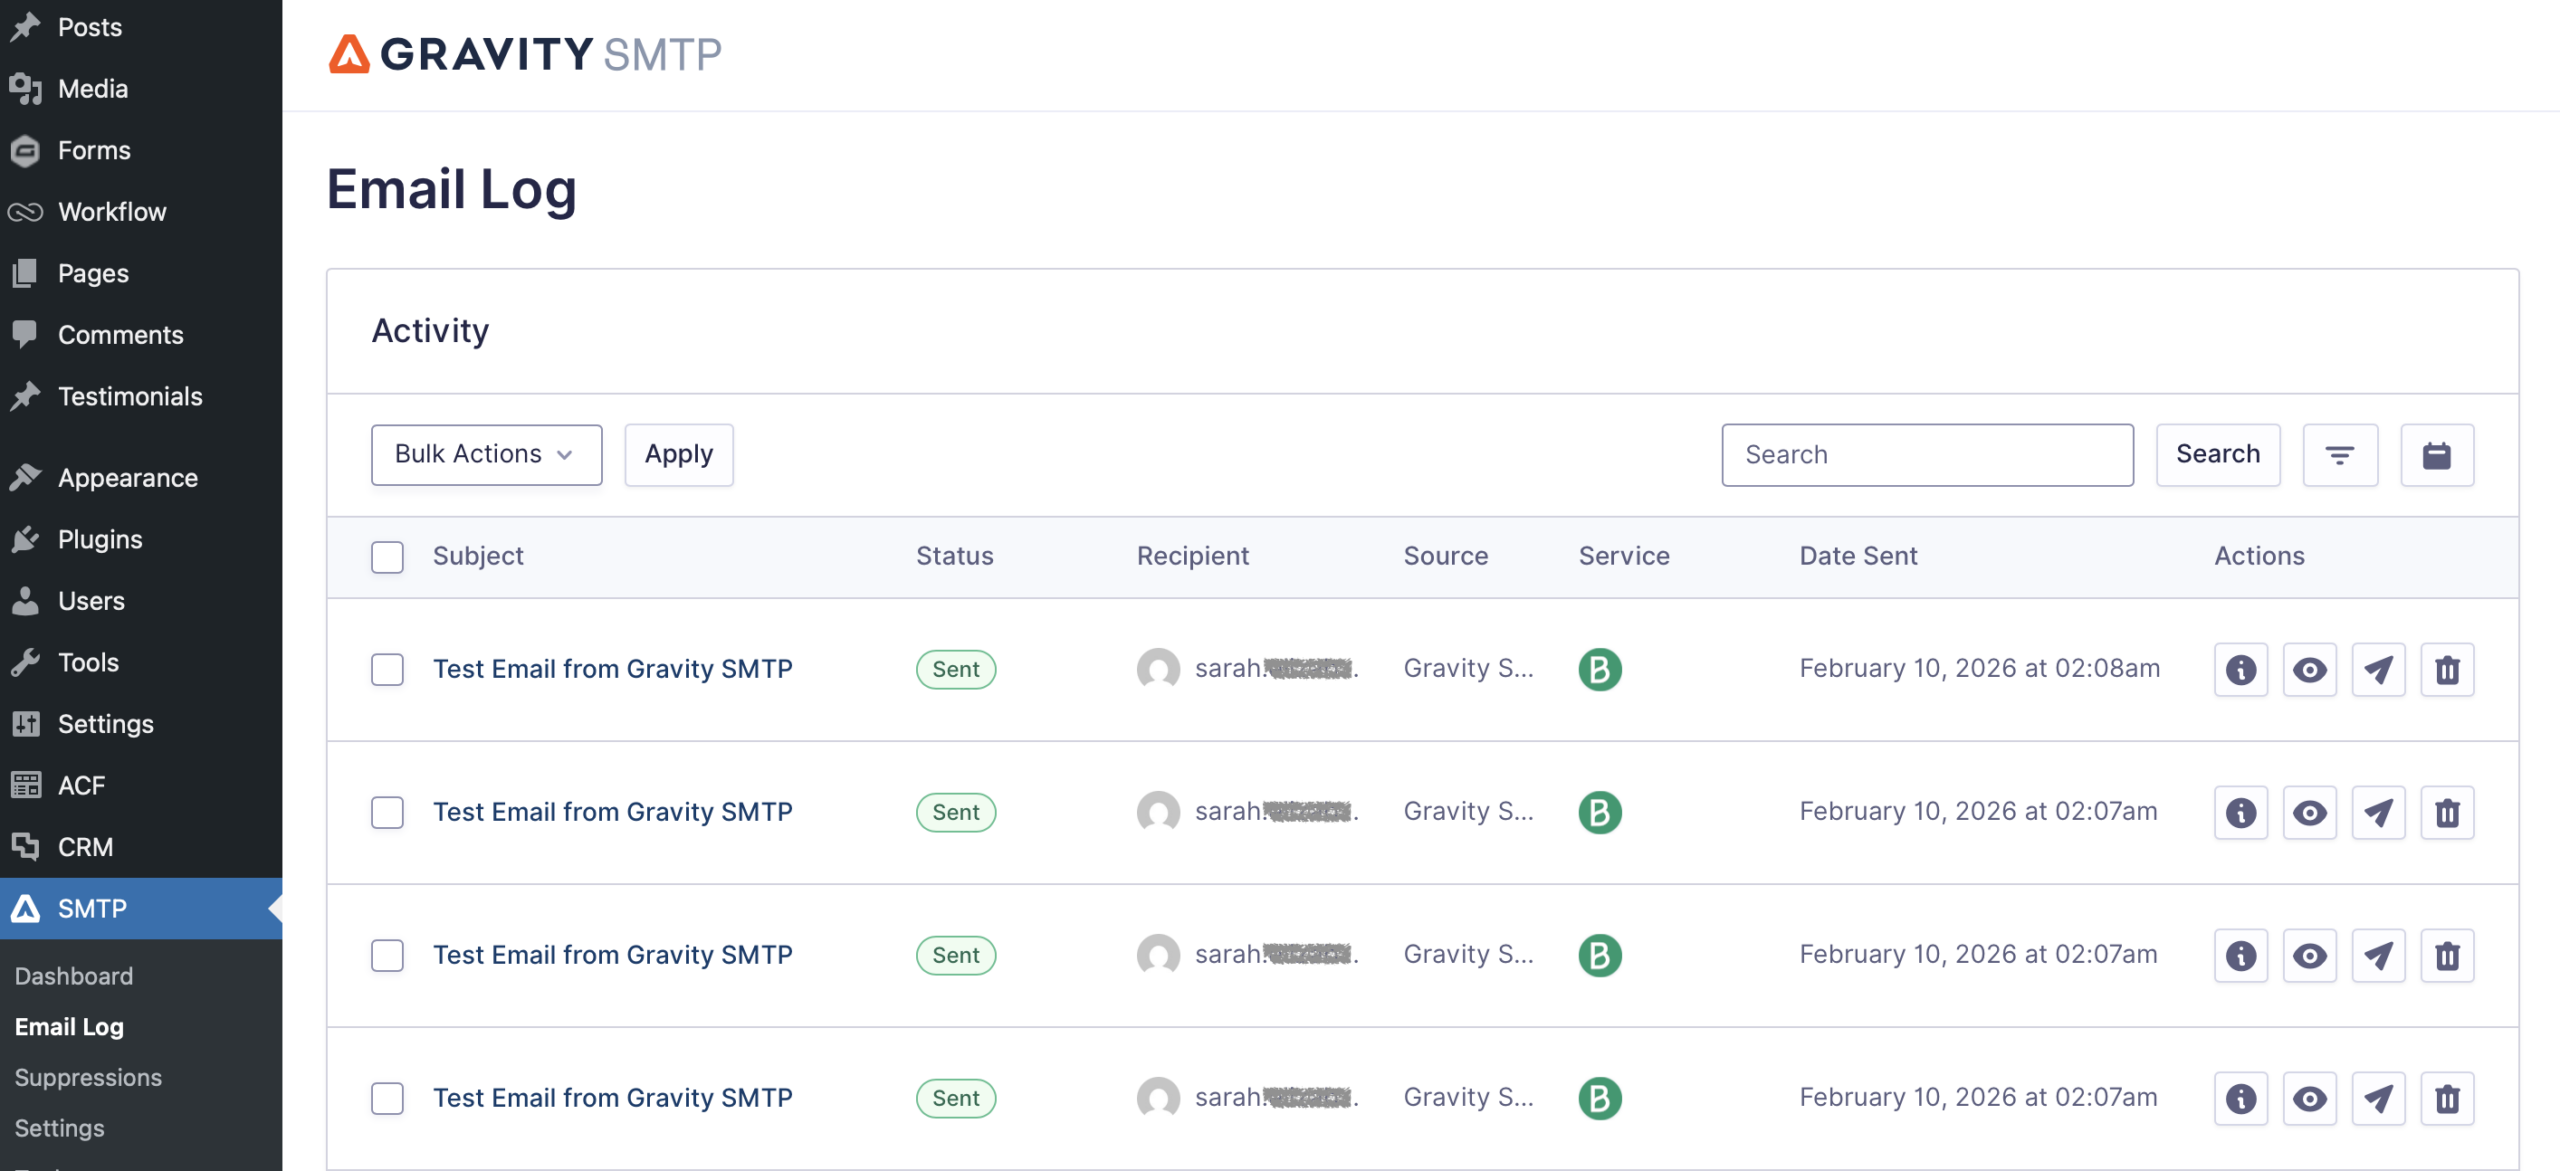
To view your site’s email log, you can go to SMTP → Email Log.
The main email log will show a list of all of the emails that your site has sent, including the source (e.g. the core WordPress software or a plugin that you’re using).
You can also use the Actions column to view more technical details or a preview of the email’s content/design.
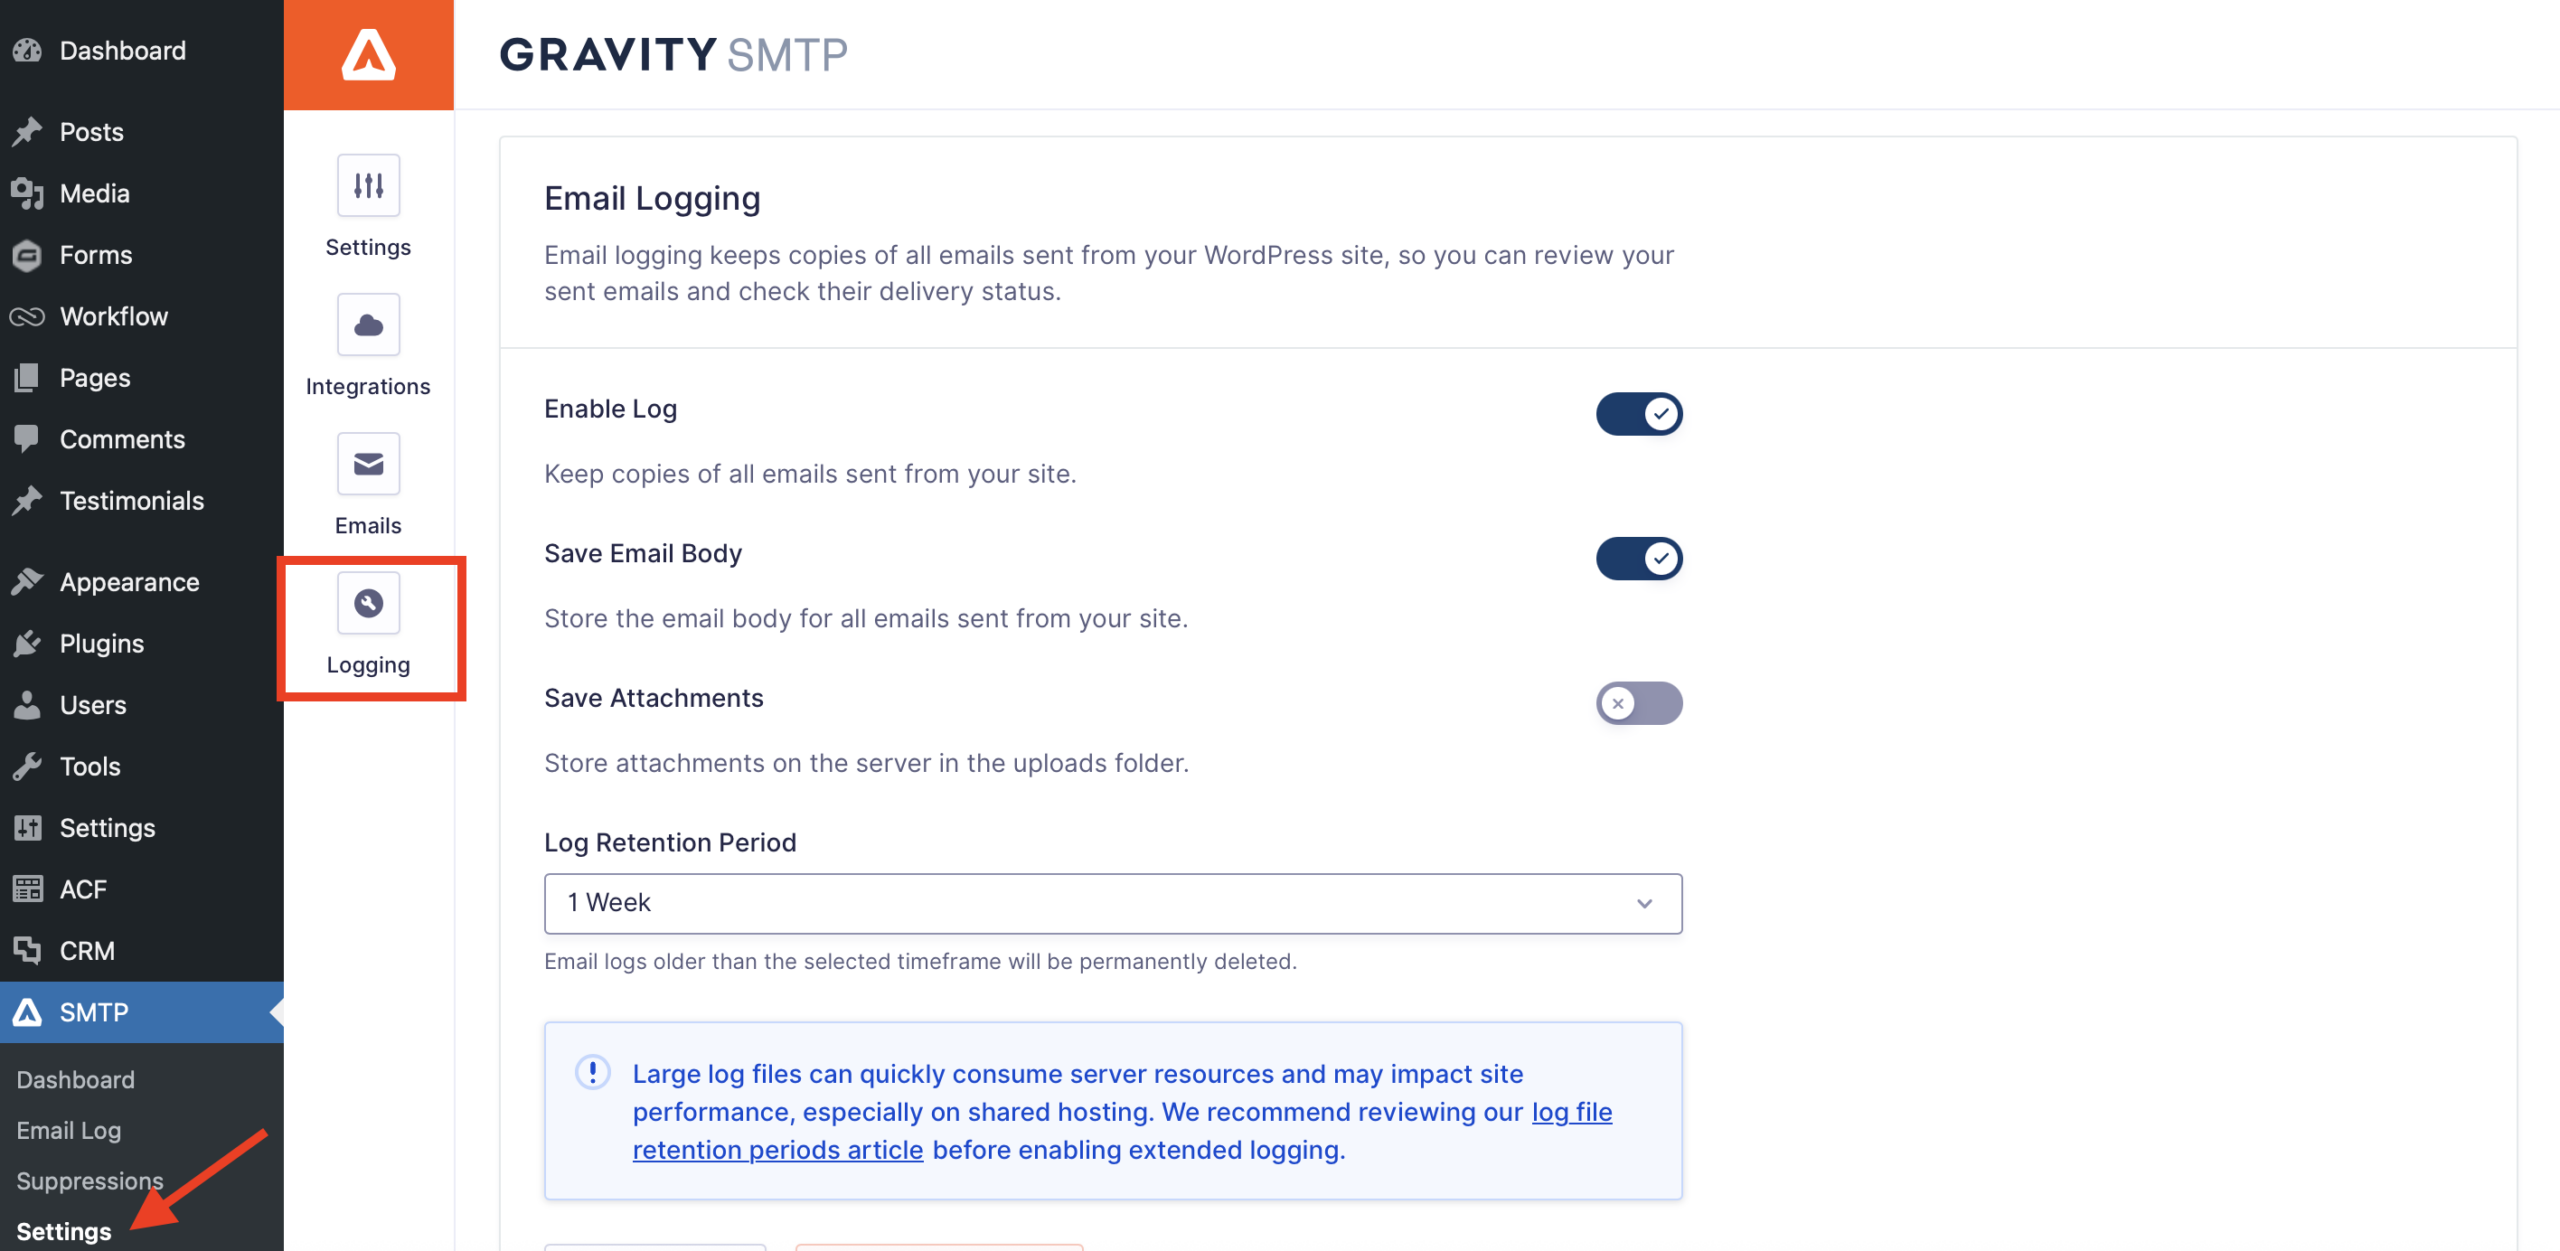
By default, Gravity SMTP will permanently log all of the emails that your site sends. However, if you want to shorten this period (or completely disable the email logging feature), you can do so by going to SMTP → Settings → Logging.
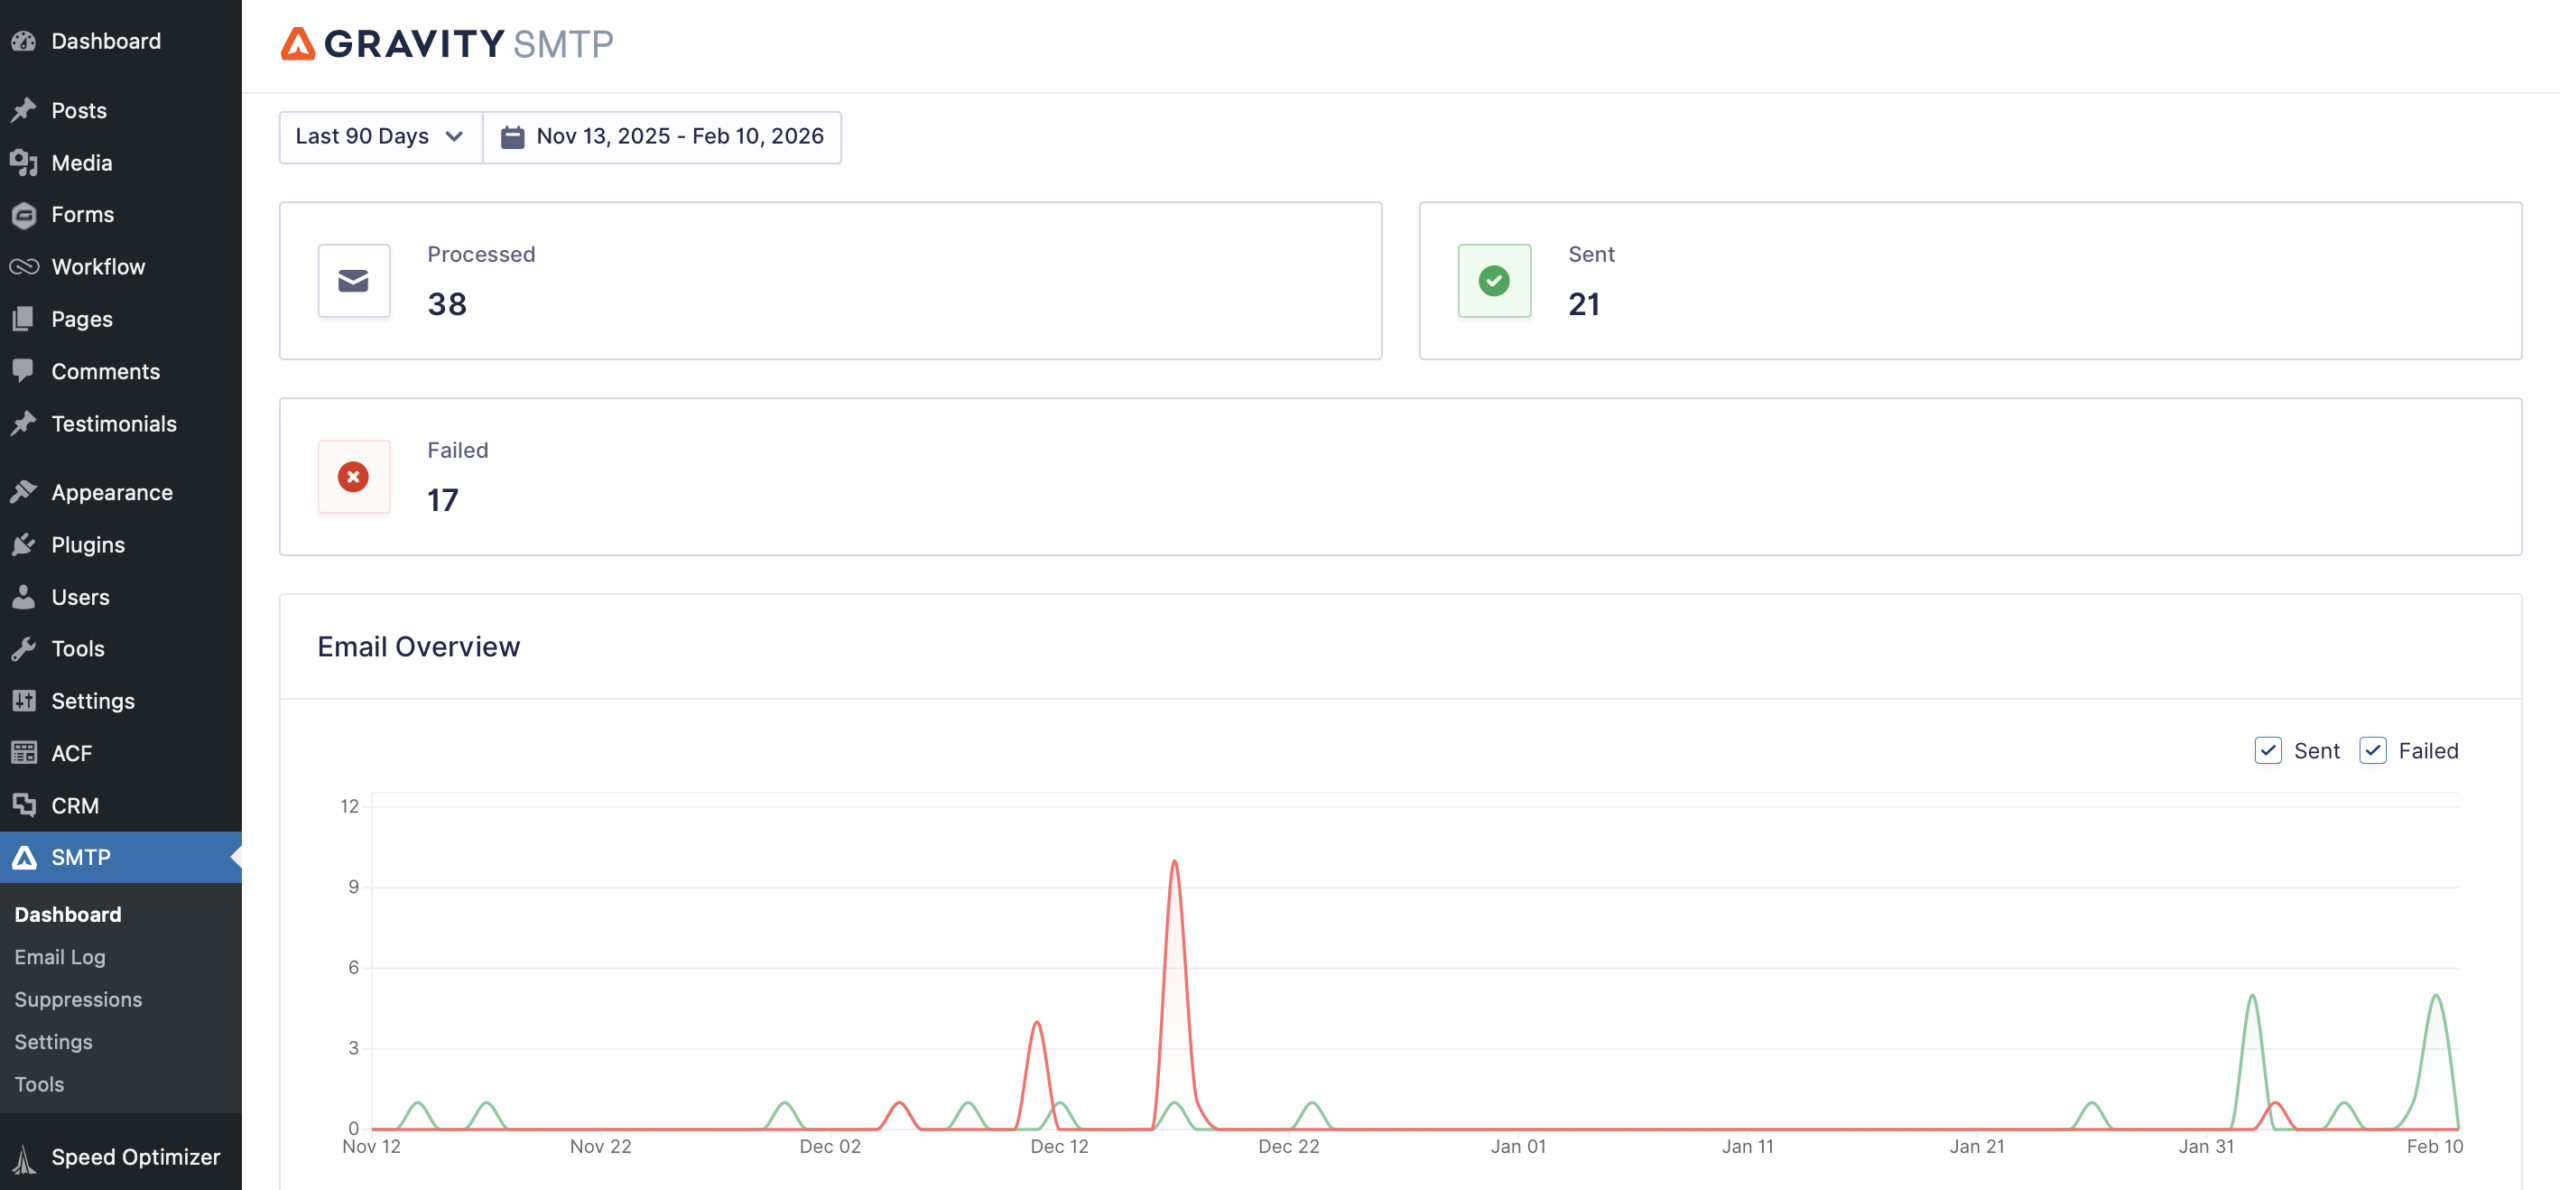
View reports
In addition to alerts and email logging, Gravity SMTP also offers multiple in-dashboard tools to help you keep an eye on your site’s emails.
To do this, go to SMTP → Dashboard to view high-level reports about your site’s email usage:
For more information on getting started with Gravity SMTP and Brevo, check out this documentation.
Start using Gravity SMTP and Brevo email for WordPress today
That wraps up our guide on how to send your WordPress emails using the Brevo SMTP service.
Brevo has one of the most generous free plans of any transactional email sending service, which makes it an especially great option if you’re looking for a cost-effective solution.
Once you use Gravity SMTP to set up Brevo, you can rest easy with the confidence that all of your site’s emails will make it to your users’ inboxes. And for even more peace of mind, Gravity SMTP’s logging features can help you stay on top of things and detect any problems going forward.
If you have a Gravity Forms Elite license and you’re ready to get started, install the Gravity SMTP plugin today and follow the above guide to start sending your WordPress site’s emails using Brevo’s transactional email service.

If you want to keep up-to-date with what’s happening on the blog sign up for the Gravity Forms newsletter!
"*" indicates required fields