While there’s a lot to like about the internet, it’s not always the most friendly place and some people won’t think twice before sending toxic or abusive comments via your website’s forms.
With the new Gravity Forms Moderation Add-On, you can use machine learning to proactively flag toxic or threatening content before it reaches you or your employees.
This add-on can help protect you and your employees from threatening or damaging content. And just generally, it can stop a toxic actor from being able to ruin your day.
In this post, we’ll briefly introduce you to how the Gravity Forms Moderation Add-On works.
Then, we’ll show you step-by-step how to configure the Moderation Add-On on your site and start automatically protecting your forms from toxic submissions using machine learning.
What Does the Gravity Forms Moderation Add-On Do?
In a nutshell, the Moderation Add-On helps you filter form entries to prevent insults, threats, attacks, and just general toxicity.
The Moderation Add-On is not just some static filter list, though. That’s one of the most unique things about this add-on.
Instead, it uses machine learning to help prevent toxic behavior, powered by the free Perspective API (part of a collaboration between Google’s Counter Abuse Technology team and Jigsaw).
This machine learning algorithm lets your site parse intent and meaning in a way that a static filter list doesn’t.
For example, consider these two different comments including the word “hate”:
- Not toxic – I hate missing your livestreams because you’re such a great content creator.
- Toxic – I hate you and your website is bad.
A static filter for “hate” would flag both of these, when it’s clear that the first example is a compliment.
With the Perspective API and the Moderation Add-On, you can accurately determine that only the second comment is toxic.
When someone submits a form, the Perspective API and Moderation Add-On will assign it a toxicity score between 0.0 (not toxic) and 1.0 (very toxic). More on this below.
The Moderation Add-On lets you set your own custom toxicity threshold to be as restrictive or as permissive as you prefer.
Then, based on this threshold, you can adjust form behavior:
- Choose whether to automatically delete toxic entries or still save them. If you decide to save entries, you can manage them from a new toxic entry dashboard that helps protect you from seeing toxic content.
- Use conditional logic to show different confirmation messages or send different notifications based on the toxicity score.
How to Set Up and Use the Gravity Forms Moderation Add-On
Now that you know what the new Moderation Add-On does, let’s get into how you can set it up on your site.
To use the Moderation Add-On, you’ll need two things:
- Gravity Forms Elite license – the Moderation Add-On is available on the Elite license. If you’re not already an Elite license holder, you can purchase a new Elite license or upgrade your existing license and only pay the prorated difference.
- Perspective API Key – while the Perspective API key is 100% free to use, you will need to perform a few steps to access your API key. We’ll show you how to do this below.
Here’s how it works…
1. Get a Perspective API Key
To start, you’ll need to obtain a free Perspective API key.
You can get the Perspective API key from your Google Cloud console, which lets you use your existing Google account.
However, unlike other APIs (such as the Places API for the Gravity Forms Geolocation Add-On), you need to register with Perspective via a Google Forms form before you can access the API.
Here are the different steps required to access your Perspective API key:
- Create a project in Google Cloud.
- Register for the Perspective API using the Google Forms form.
- Enable the API in Google Cloud
- Create a new API key for the Perspective API
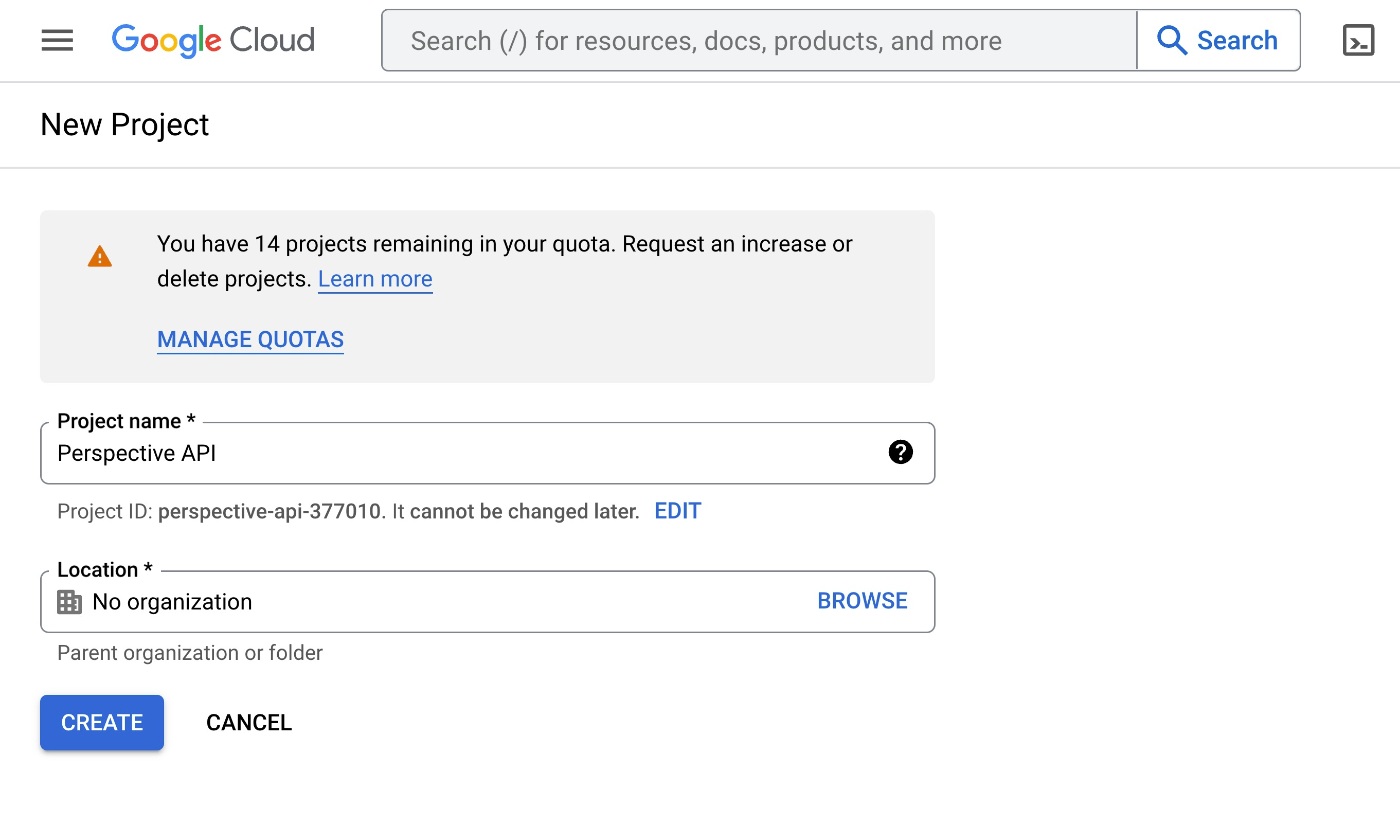
Create a Project In Google Cloud
To begin, go to Google Cloud and create a new project. This link should take you directly to the right page and you can use your existing Google account to access Google Cloud.
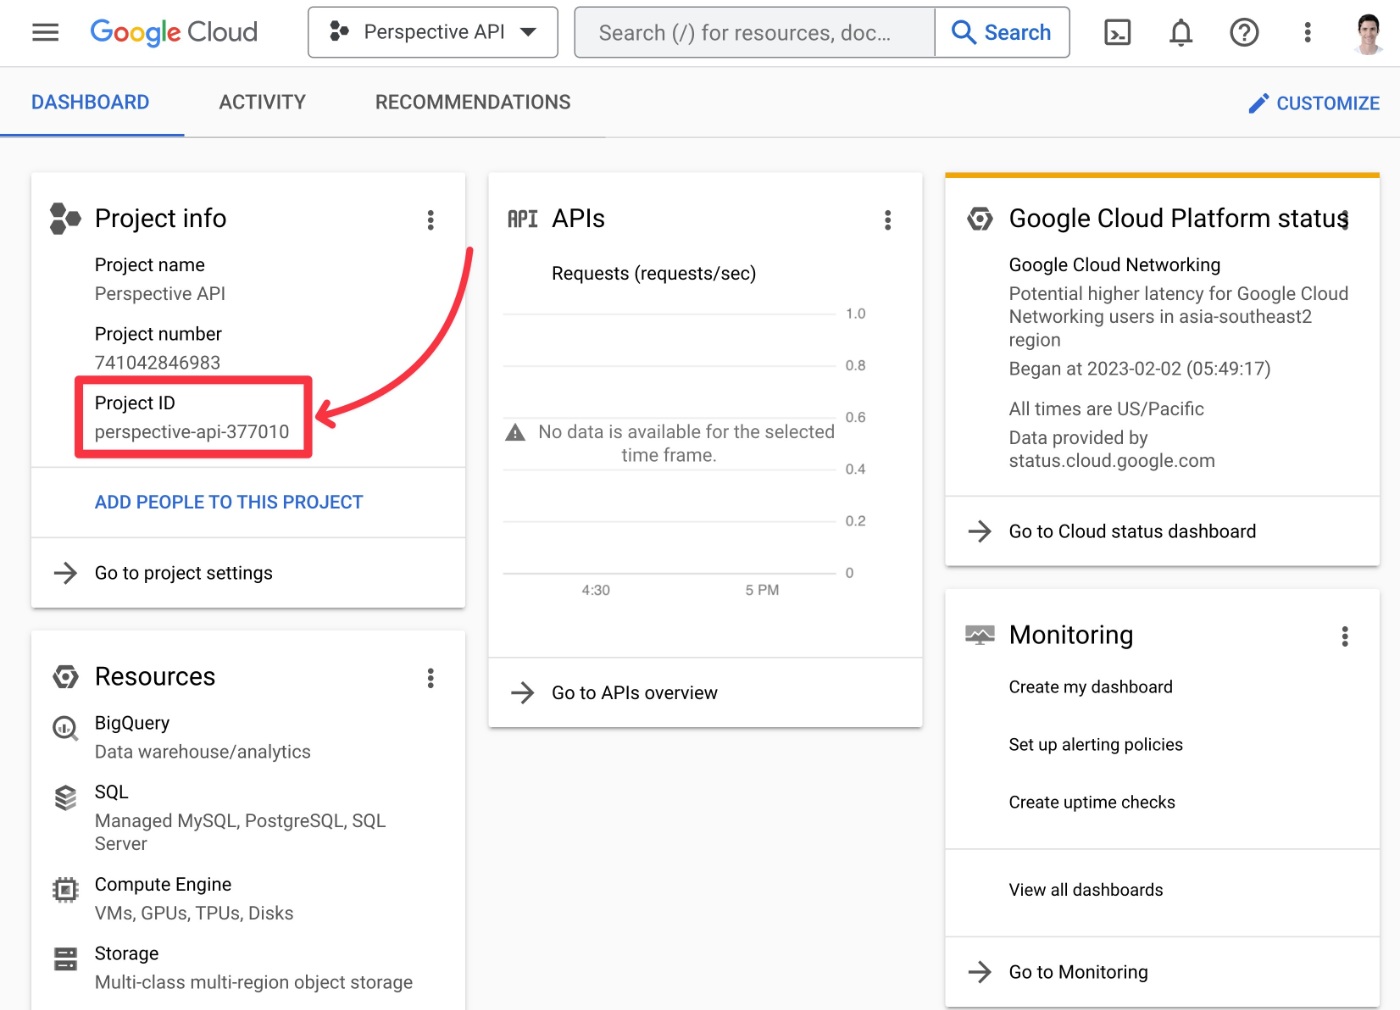
Once you create your project, you should be in the dashboard for that project.
Locate the Project ID under Project info and store it in a safe place because you’ll need it in the next step.
Request Access to the Perspective API
Now, open a new tab and click this link to open the Google Forms form that will let you request API access.
While it’s a little odd to request access via Google Forms, this is the official method that Perspective is using at this time.
Most of the fields are self-explanatory – you just need to add contact details and some information about your project.
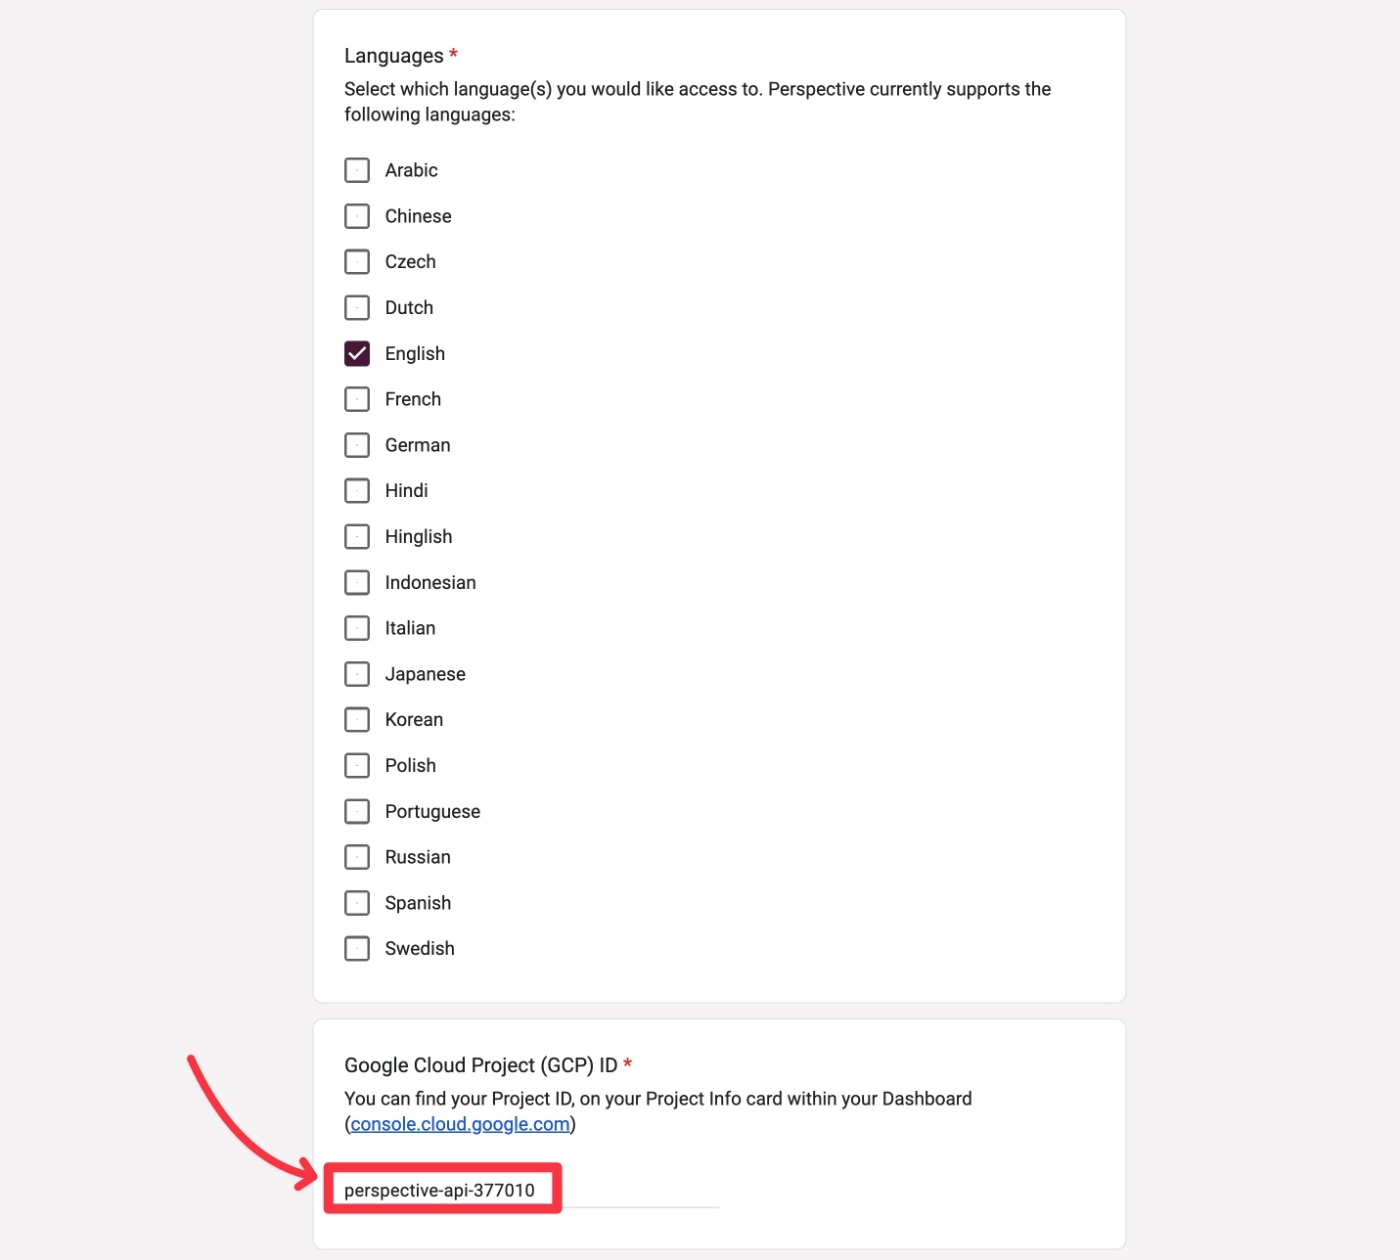
Make sure to paste in the Project ID from the project that you just created in the Google Cloud Project (GCP) ID box. We noted this in the screenshot above.
You should also make sure to choose the correct language(s) in the Languages list, as different languages have access to different filter options. If you choose English, you’ll get access to the most filter options.
Once you submit the form, you should receive a confirmation email within an hour. Personally, I received the confirmation email exactly 24 minutes after submitting the form.
That means you’ll need to wait a bit before you’re able to continue this tutorial. Go do something fun and then come back in an hour or so!
When you receive the confirmation email, it should look something like this:
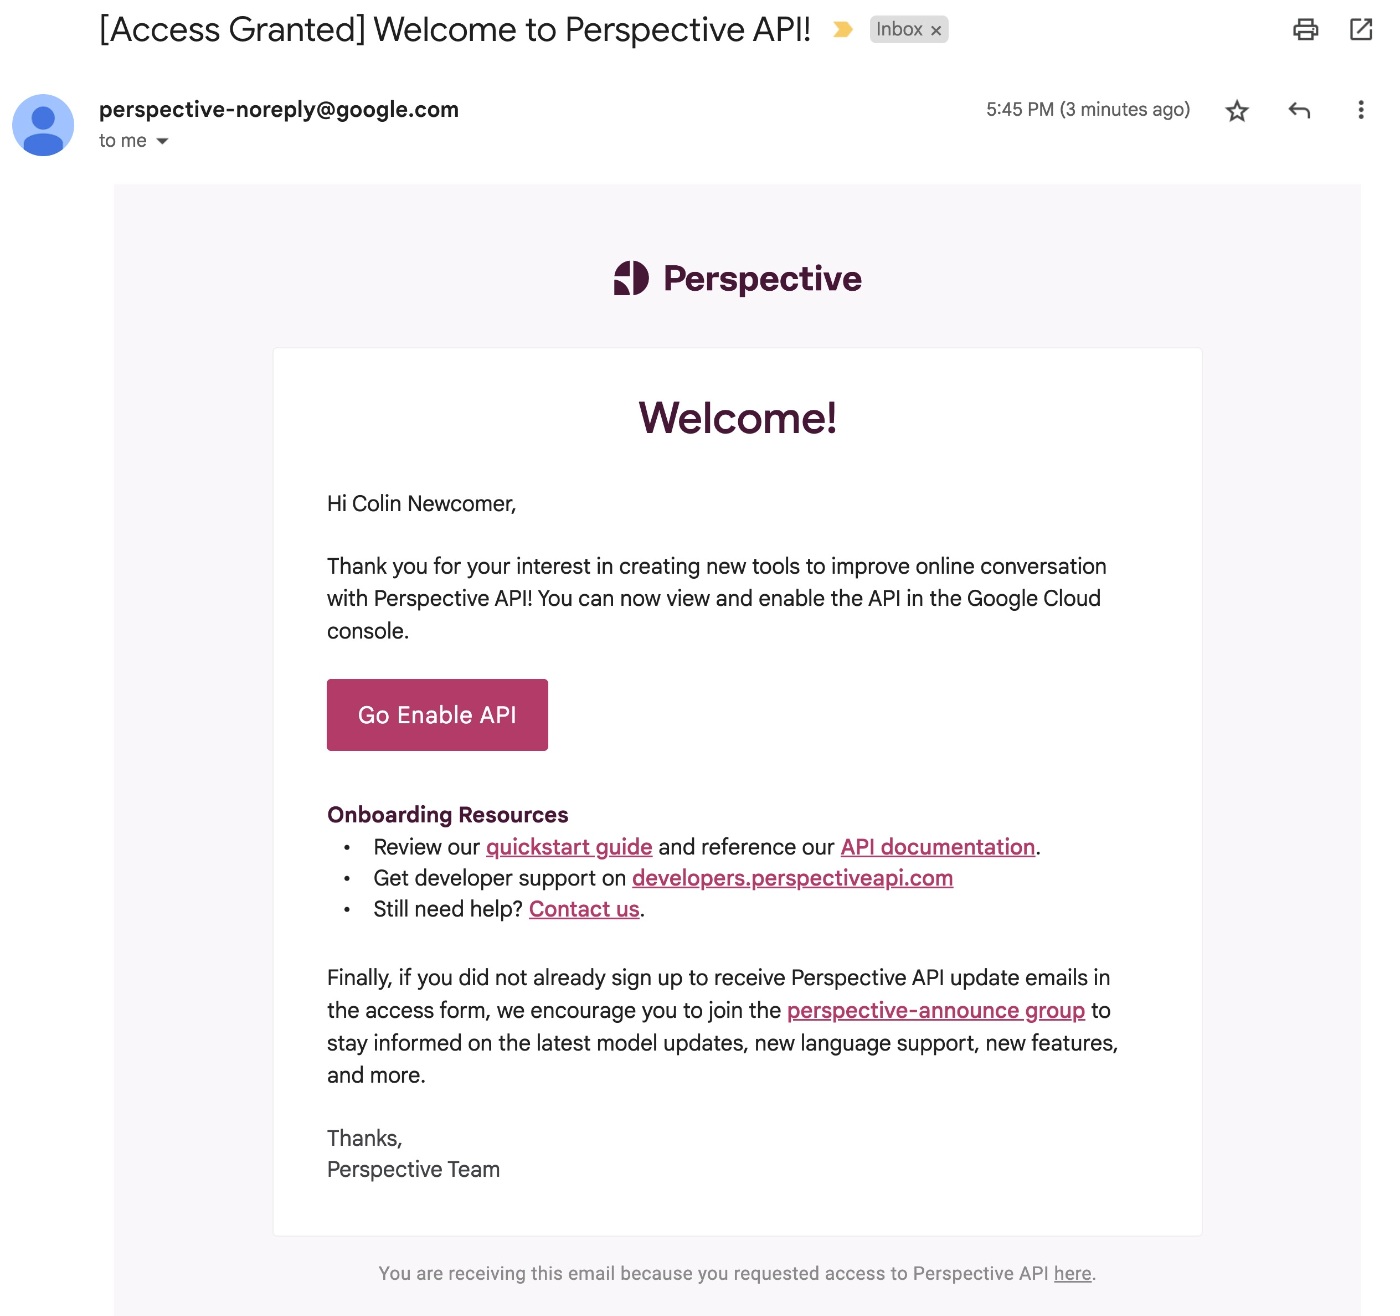
Enable the API in Google Cloud
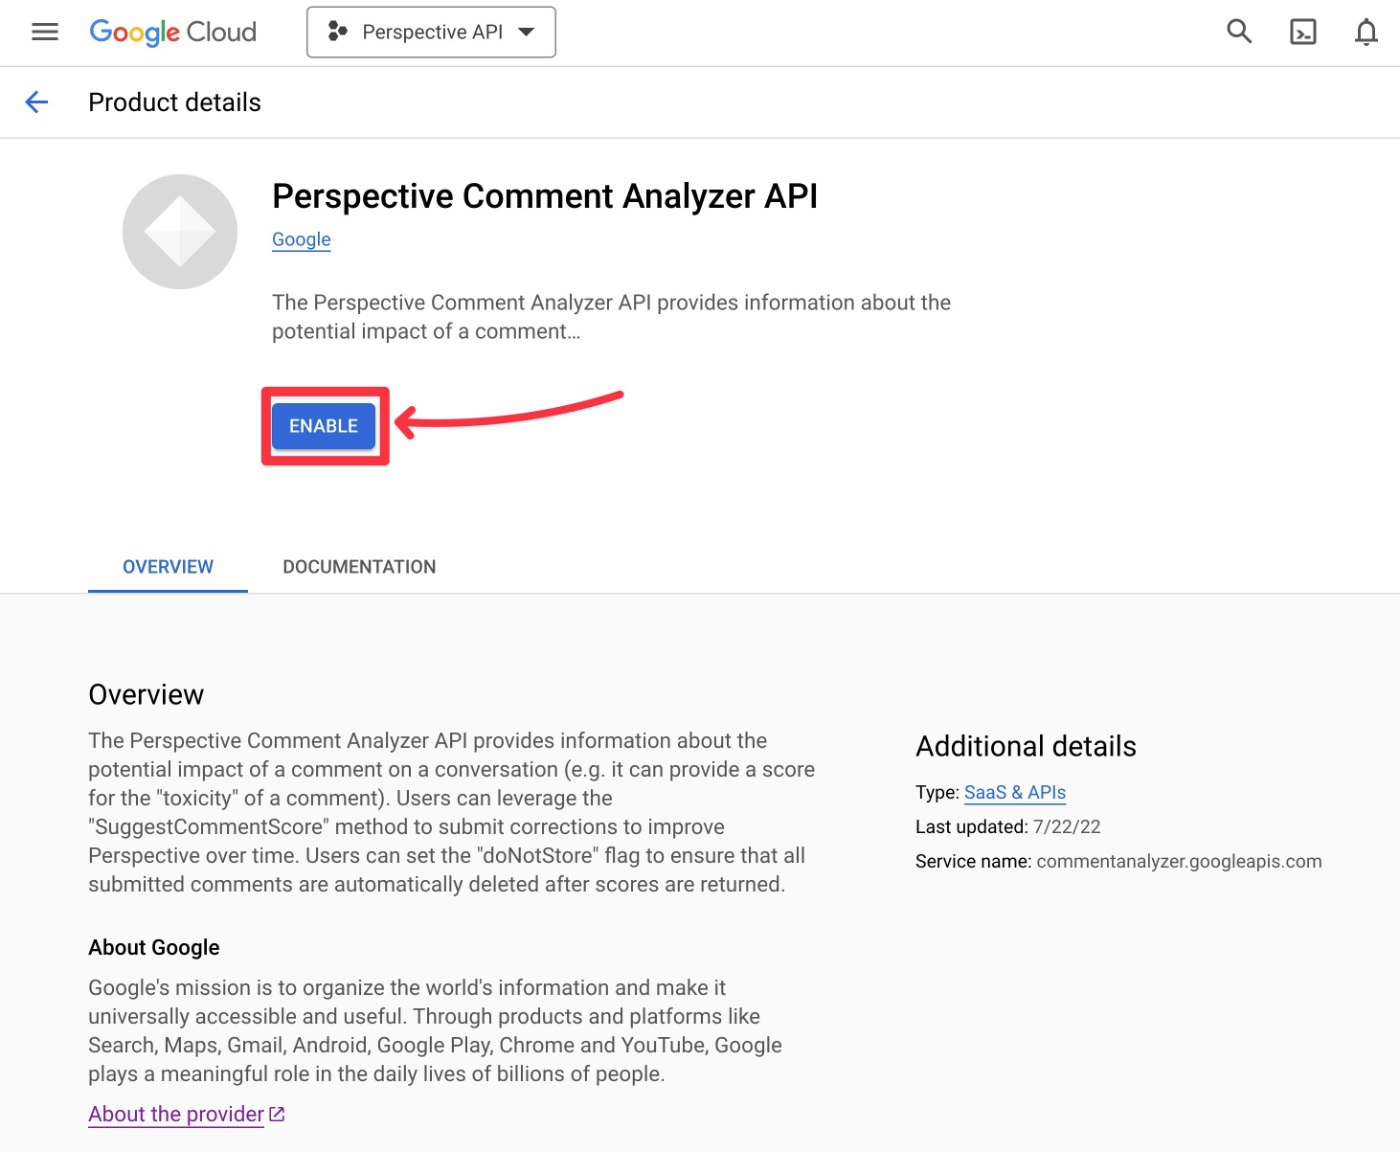
Once you receive the confirmation email telling you that Perspective has granted API access to your project, you can enable the Perspective API from your Google Cloud dashboard:
- Open your project dashboard in Google Cloud.
- Click this link to open the Perspective API page. You should also receive this link in your confirmation email.
- Click the Enable button.
Create API Key
Once you’ve enabled the Perspective API, click this link to go to the Credentials interface or click on the Credentials option in the Google Cloud sidebar.
Make sure that the project you created is selected in the drop-down (it should be selected by default).
Then, click the + Create Credentials link and select API key from the expanded list of options.
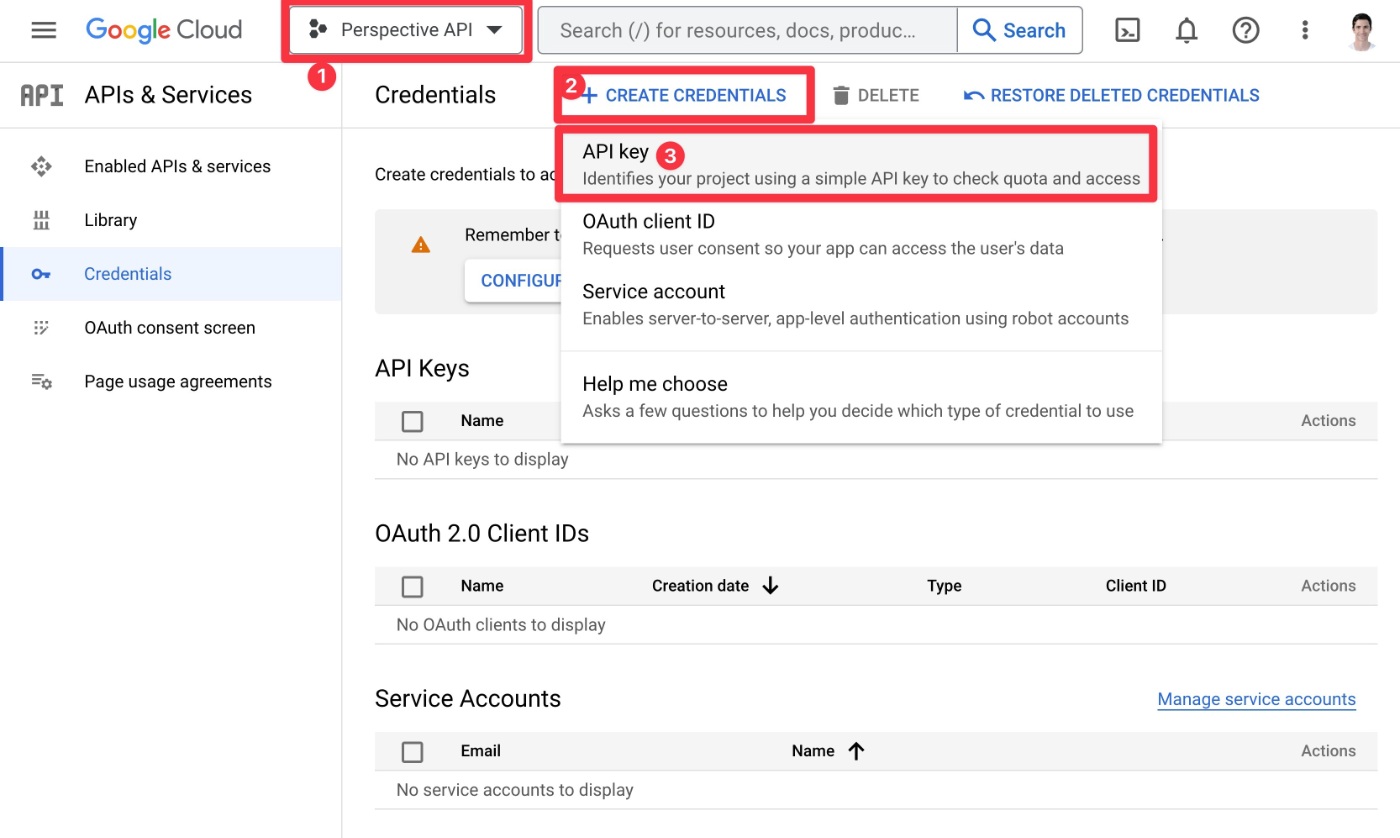
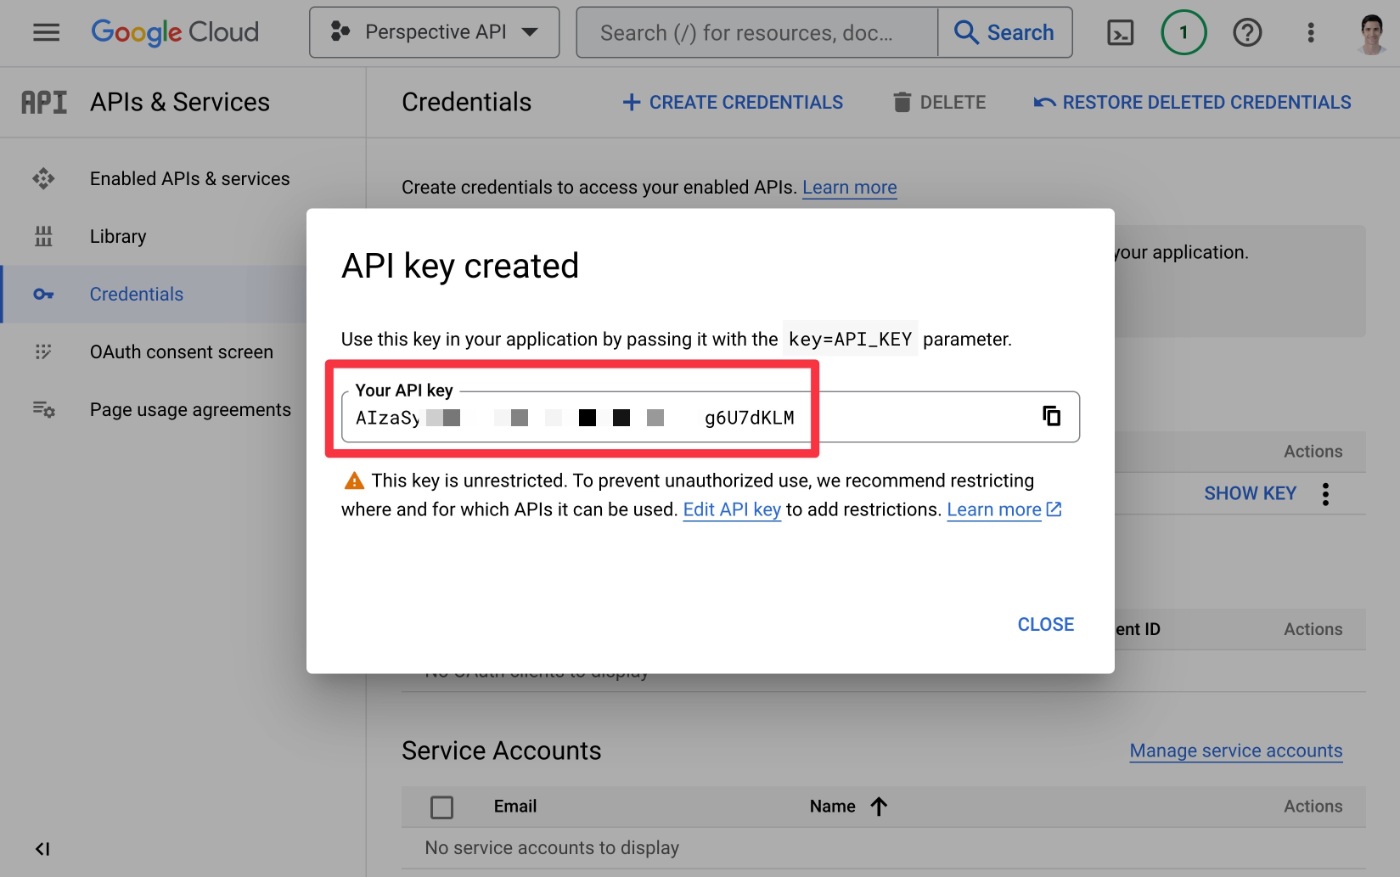
Google will now show you your API key in a popup. Copy this API key to a safe location because you’ll need it in the next step.
2. Add the Perspective API Key to Gravity Forms Settings
Once you have your Perspective API key, here’s what to do:
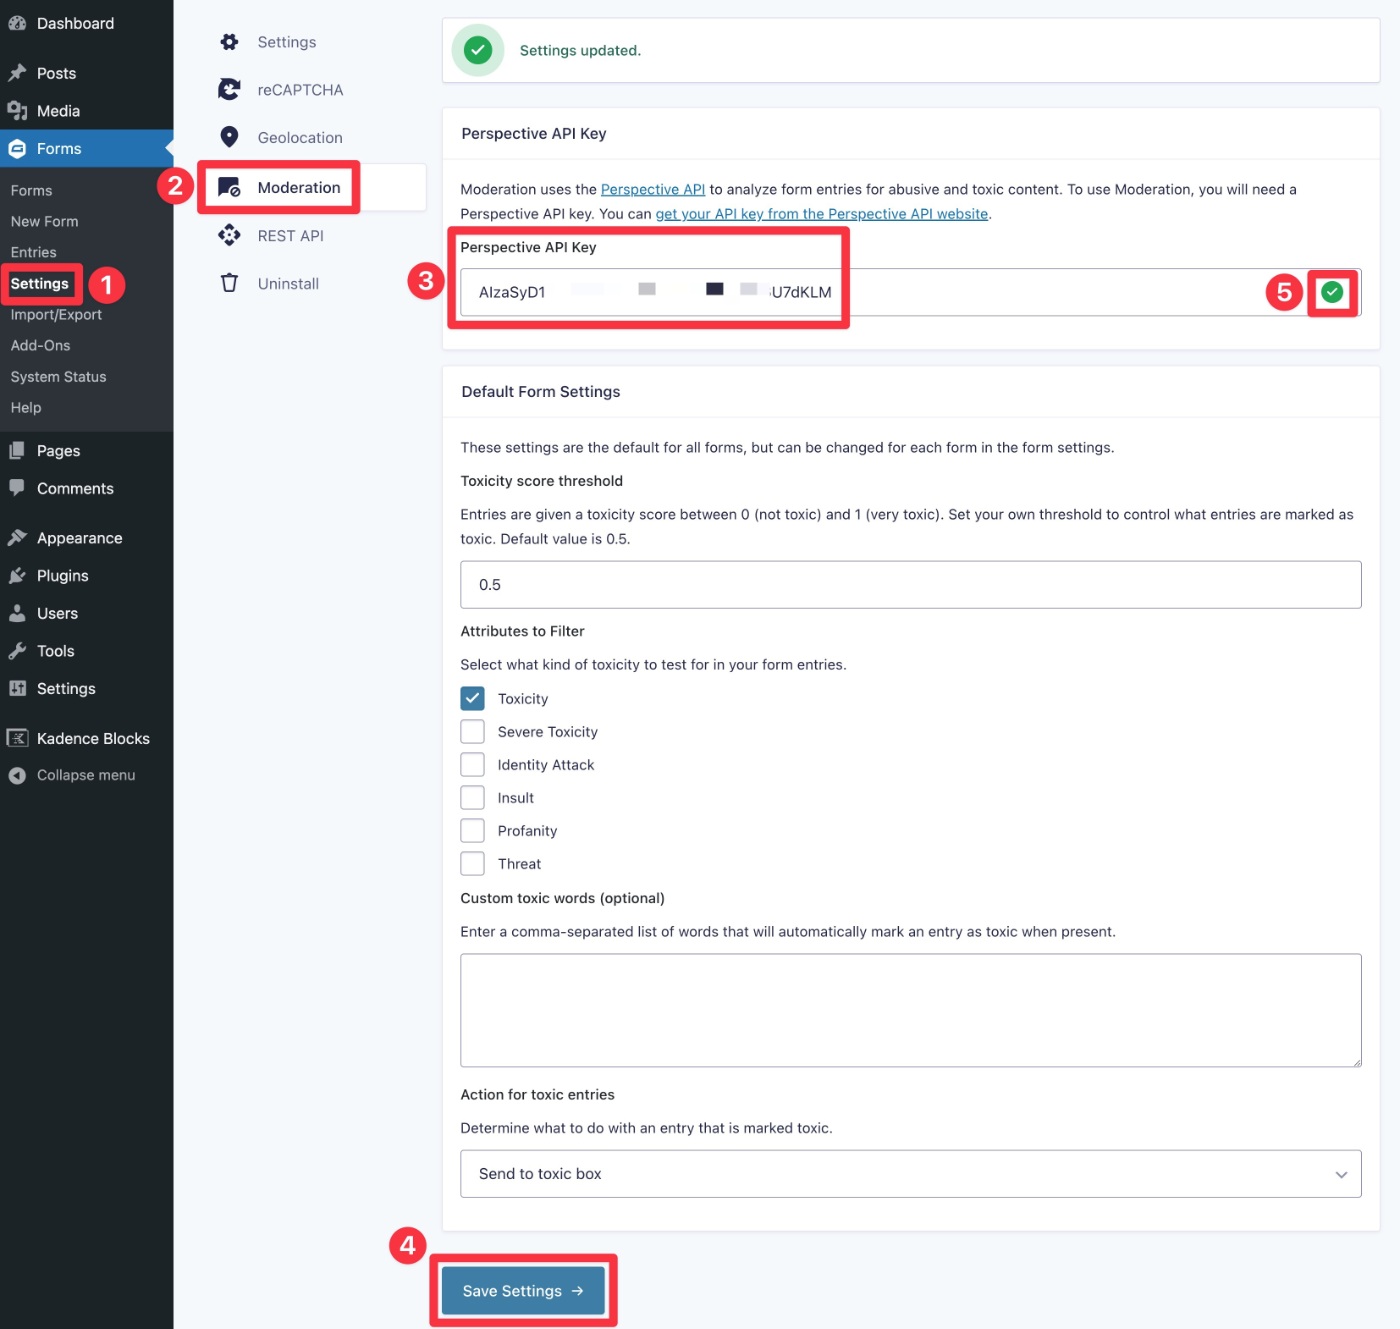
- Open your WordPress dashboard.
- Go to Forms → Settings.
- Click on the Moderation tab. If you don’t see this, make sure that you activated the Gravity Forms Moderation Add-On.
- Paste your API key into the Perspective API Key box.
- Click the Save Settings button at the bottom.
If you entered a working API key, you should see a green check mark appear next to the API key after hitting Save Settings.
If you see a red “X” instead, make sure that you enabled the Perspective API in Google Cloud and that you didn’t have any typos when adding the API key to the Gravity Forms settings area.
3. Configure Your Sitewide Moderation/Filter Options
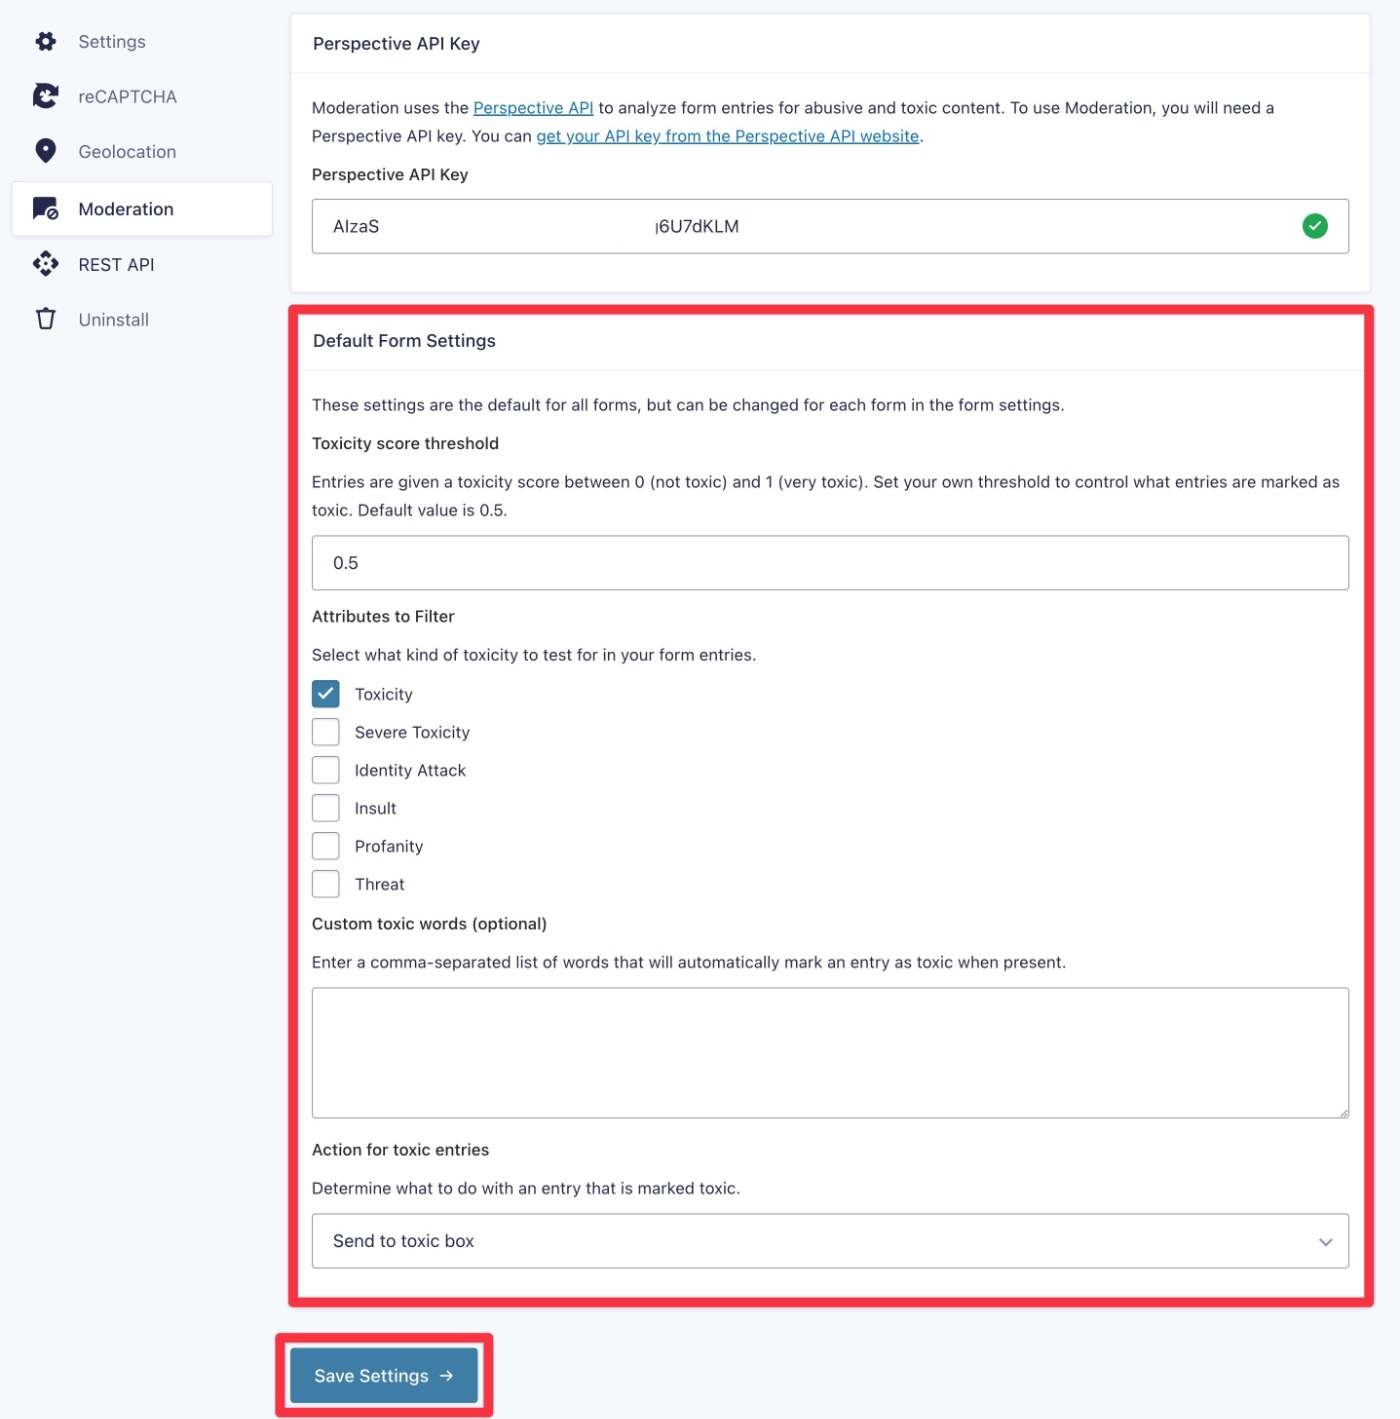
Once you’ve added your API key and verified that it’s working correctly (by looking for the green check mark), you can use the settings below to set up your default moderation behavior.
First, you’ll want to set your default Toxicity score threshold, which is a number from 0.0 (not likely to be toxic) to 1.0 (very likely to be toxic).
Here’s a summary of the plain language definitions:
- 0.0 – Not likely to be toxic – 0 out of 10 people would likely rate this as toxic.
- 0.5 – Uncertain if toxic – Some people may rate this as toxic and others may not.
- 1.0 – Very likely to be toxic – 10 out of 10 people would likely rate this as toxic.
For a more detailed explanation of the toxicity score, you can go to this page.
When in doubt, you can start at 0.5 and see how it works. By definition, these will be entries that some people might view as toxic, but others might not. In other words, the model isn’t totally certain and it will depend in some part on human interpretation.
Based on your experience, you can move the threshold number higher to make the rule more permissive (entries will be less likely to be flagged as abusive) or lower to make it more restrictive (entries will be more likely to be flagged as abusive).
You’ll also be able to adjust the toxicity score on a per-form basis – more on that in a second.
Below that, you can choose which attributes to filter from a list of preset options. If you chose English as your site’s language when creating your Perspective API key, you can choose any/all of six different attributes:
- Toxicity
- Severe Toxicity
- Identity Attack
- Insult
- Profanity
- Threat
For example, if you don’t mind profanity but just want to avoid toxicity, you could exclude profanity from the filter.
If you selected a different language, you might get a more limited set of options. For example, some languages only have an option for Toxicity.
Below the preset attributes, you can also add your own custom abuse words if desired.
Finally, you can choose what action to take when an entry is flagged as abusive. You currently have two options:
- Send to toxic box – Gravity Forms will still save the entry, but it will be moved to a special “Toxic” area rather than showing up with other entries. More on this below.
- Delete the entry – you can outright delete the entry right away to avoid storing it at all.
Make sure to click Save Settings again when you’re finished making your choices.
4. Adjust Moderation Options for Individual Forms (Optional)
By default, Gravity Forms will apply the settings from the previous section to all of the forms on your site.
If that’s what you want to happen, you don’t need to do anything else – you’re all finished!
However, if needed, you also have the option to disable or adjust the Moderation Add-On settings on a per-form basis according to your preferences.
There are a couple of ways that you can do this.
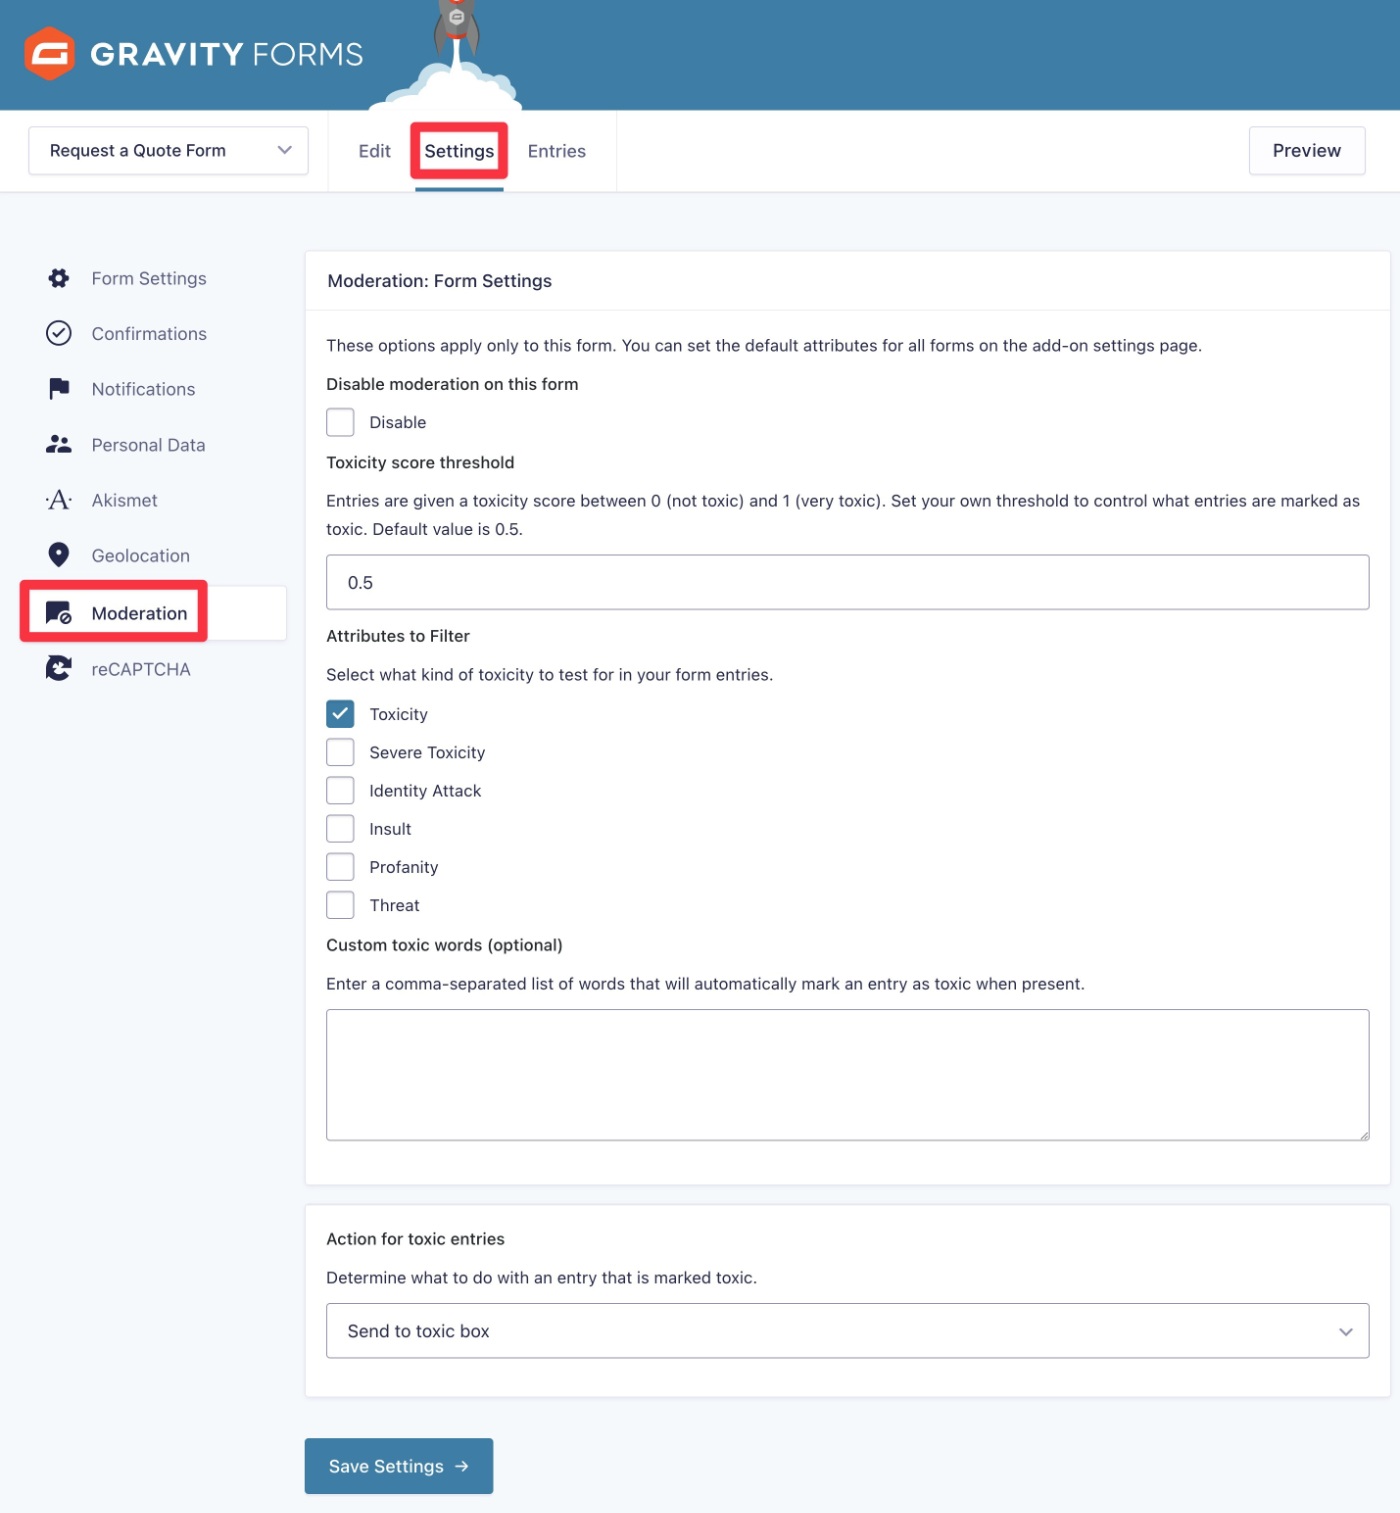
First, you can access the same moderation settings from above to tweak them for this specific form:
- Open the form where you want to adjust the Moderation settings.
- Go to Settings → Moderation.
- Adjust the settings as needed or check the Disable box to disable moderation on this specific form.
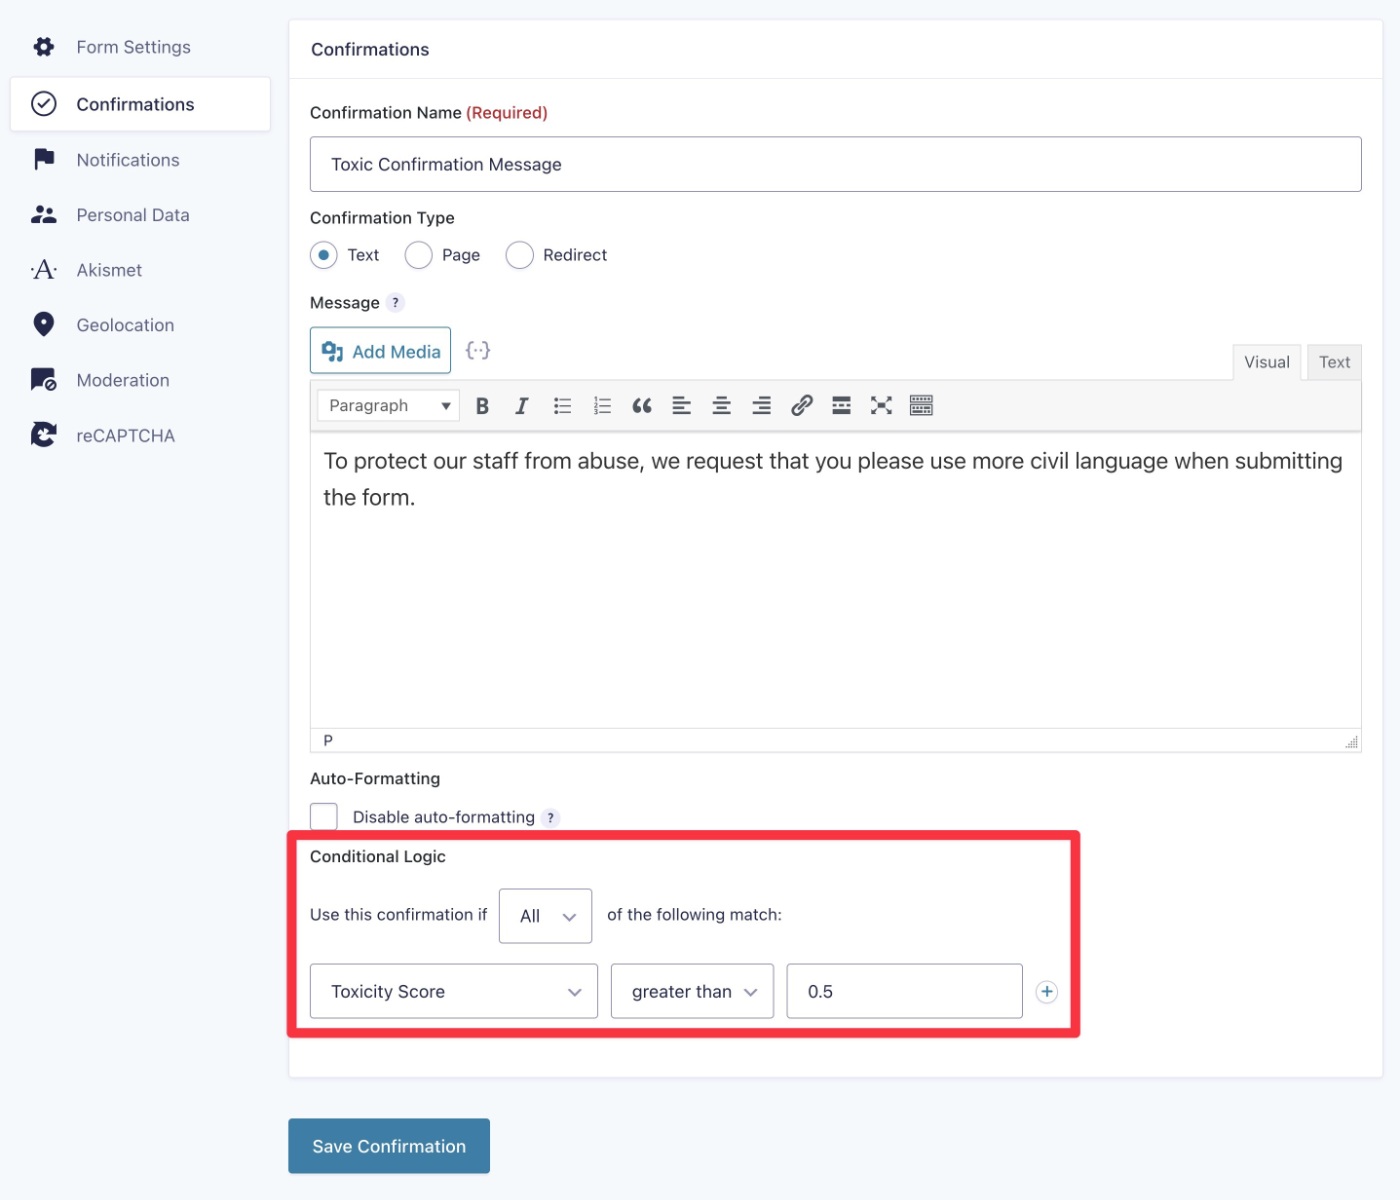
In addition to this, you can also use the toxicity score as a conditional logic option, which lets you display different confirmation messages or send different notifications based on the toxicity score of the submission.
For example, you could route abusive entries to a separate email address, or even just not send a notification at all. Or, you could display a confirmation message telling people that their entry has been flagged for toxicity.
You can set these up just like any other conditional logic rule for confirmations or notifications:
- Set the conditional rule equal to Toxicity Score.
- Choose your toxicity score threshold – from 0.0 (not likely to be toxic) to 1.0 (very likely to be toxic).
5. View Toxic Entries (Optional)
If you’re worried about false positives, Gravity Forms still gives you the option to view entries that have been flagged as toxic (as long as you enabled this in the add-on’s settings).
You don’t have to do this – you can also just skip this and delete entries without looking at them.
To find these entries, you’ll get a new Toxic filter in the Entries list for your form.
However, unlike other entries, you’ll see that information is blurred by default. To see the message, you need to click the eye icon to reveal it.

This is true both in the general entry list and in the detailed entry page:

You’ll also see an overall toxicity rating on the main entry list, as well as a toxicity score for each user-enterable form field in the entry details page.
Try the Gravity Forms Moderation Add-On Today
If you’re having issues with toxic form submissions on your WordPress site, the Gravity Forms Moderation Add-On gives you a smarter way to prevent issues by using the free Perspective API and its machine learning approach to blocking toxicity.
The Moderation Add-On is now available on the Gravity Forms Elite license.
If you’re already an Elite license holder, you can install the add-on today and follow this guide to get started.
If you’re not an Elite license holder yet, you can purchase a new Elite license today.
Or, if you’re already a Gravity Forms Basic or Pro license holder, you can upgrade to the Elite license and only pay the prorated difference. You can do this directly from your Gravity Forms Account page – there’s no need to talk to support.
If you want to test out the Moderation Add-On before upgrading your license, you can also spin up a fully functioning Gravity Forms demo site to test all of the add-ons, including the Moderation Add-On.

If you want to keep up-to-date with what’s happening on the blog sign up for the Gravity Forms newsletter!
"*" indicates required fields