With the new Gravity Forms Geolocation Add-On that we released in January 2023, you can now integrate Google Places-powered geolocation information into your forms to easily create geolocation WordPress forms.
On the frontend, you can offer user friendly features like address autocomplete. And on the backend, you’ll be able to view more detailed geolocation information about each form entry.
Plus, this is just the start for this add-on – in the future, we have plans for even more features, such as the ability to filter entries based on users’ locations.
In this post, you’re going to learn everything that you need to know about the new Gravity Forms Geolocation Add-On, including the following:
- What it does and how it helps you
- How to set up the Geolocation Add-On to create geolocation WordPress forms, from start to finish
What Does the Gravity Forms Geolocation Add-On Do?
As the name suggests, the Geolocation Add-On helps you work with geolocation WordPress forms in a couple of ways:
- Frontend – visitors can use autocomplete to more quickly fill out address fields in your form.
- Backend – you can view information about where your submissions come from.
So – how does that help?
Well, the Geolocation Add-On can benefit both you (as a site admin) and your users.
For your users, the main benefit of the Geolocation Add-On is that it lets you enable address autocomplete.
Instead of requiring users to manually enter all of their location information, users can just auto-fill the details after typing just a few characters. Of course, they’re still free to manually adjust those details if needed.

By streamlining the process of filling out your form and reducing friction, you can help lower your form abandonment rate.
For site admins, the Geolocation Add-On gives you more insight into where your customers come from – even if you don’t ask for them to fill out location data in the form itself.
With the add-on, you can automatically collect and store location data for each form entry. You’ll be able to see address information, as well as the longitude and latitude. To make this data even more accessible, you can also visually see the location on a map.
Having this extra location information can help you spot trends and refine your efforts.
For example, if you see that a significant portion of your entries come from a certain area, you could put extra emphasis on optimizing for traffic from that location. Or, you could introduce special shipping options for that area – there are a lot of different ways that you could use this information.
How to Set Up and Use the Gravity Forms Geolocation Add-On
Now that you know what the Geolocation Add-On does and how it can help your site, let’s get into the actionable part of the post – how to actually set up and use the Geolocation Add-On on your site.
To add geolocation WordPress forms to your site, you’ll need two things:
- The Geolocation Add-On – you’ll need to install it alongside the core Gravity Forms plugin. The Geolocation Add-On is available on the Gravity Forms Elite license, so you might need to upgrade if you’re not already on that plan.
- Google Places API key – this is needed to power the address autocomplete and mapping functionality.
Let’s go through it…
1. Create Your Google Places API Key
Generating the Google Places API key is the most time-consuming part of the process because you’ll need to work through Google’s interface in order to set up your API key.
However, the good news here is that it’s a one-time setup and it will only take around 15 minutes or less. So once you do the work to create your API key, you’ll never need to mess with these settings again.
Here’s a high-level look at the steps, and then we’ll go through them in detail:
- Create a new project in Google Cloud (you can use your existing Google account).
- Enable billing for your account. Most sites will not need to pay anything because you’ll likely stay within the free tier, but Google still requires you to add a billing method.
- Enable the necessary APIs for your project.
Let’s go through it…
Create a New Project
To get started, click this link to go to Google Cloud and create a project.
If you’re already logged in to your Google account, you should go straight to the interface. If you’re not, you’ll need to log in to Google first (or create a Google account).
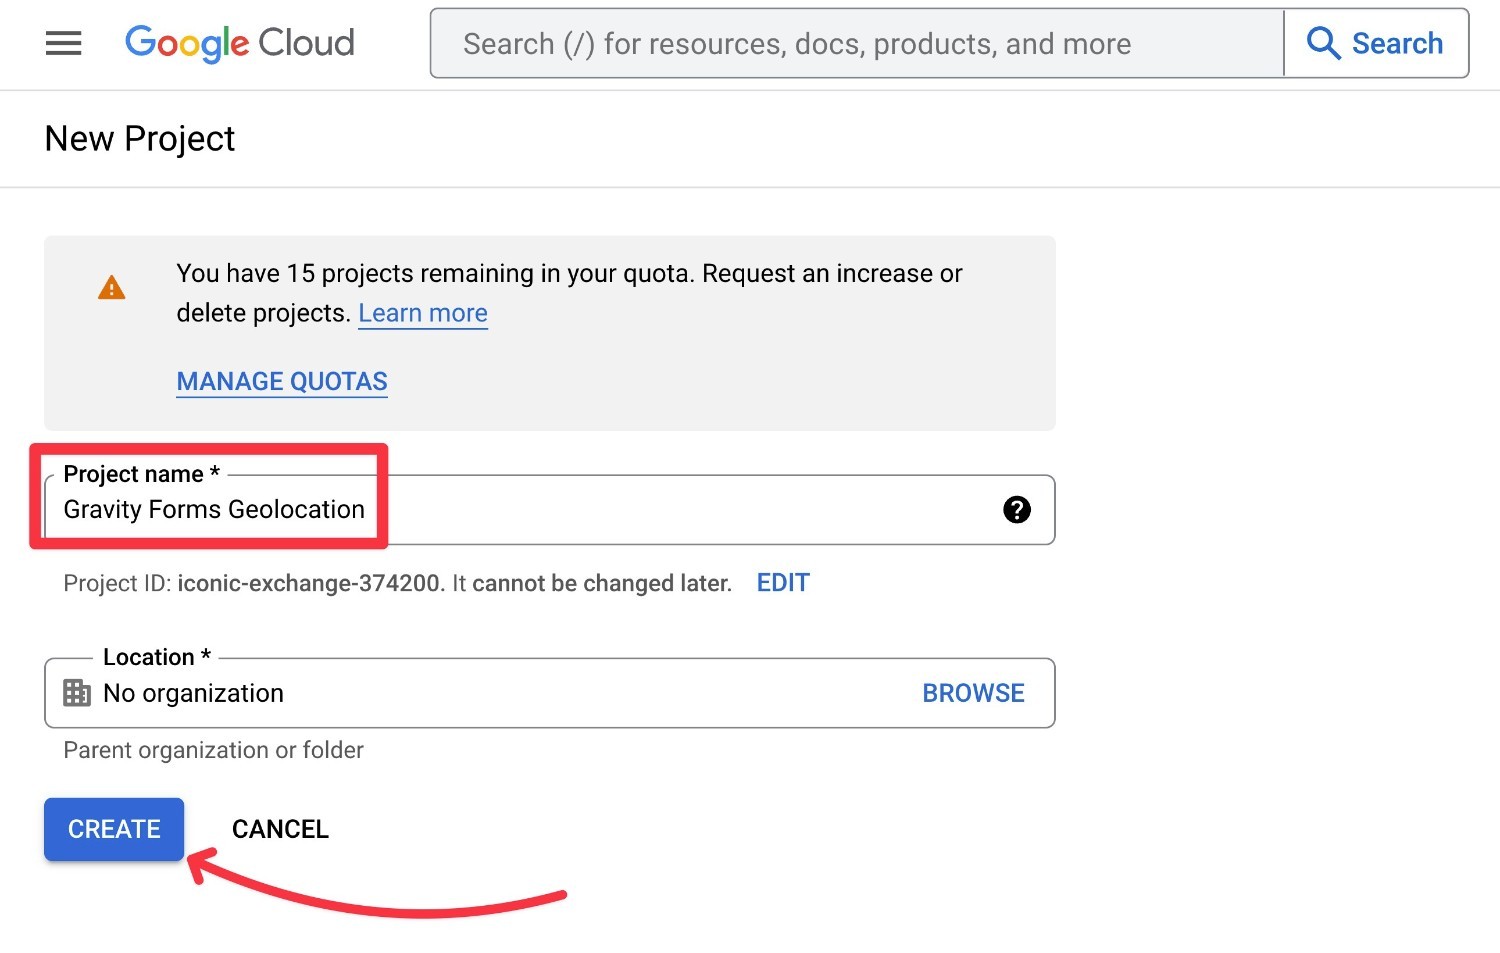
Once you click the Create button, you should be in your project dashboard, which looks something like this:
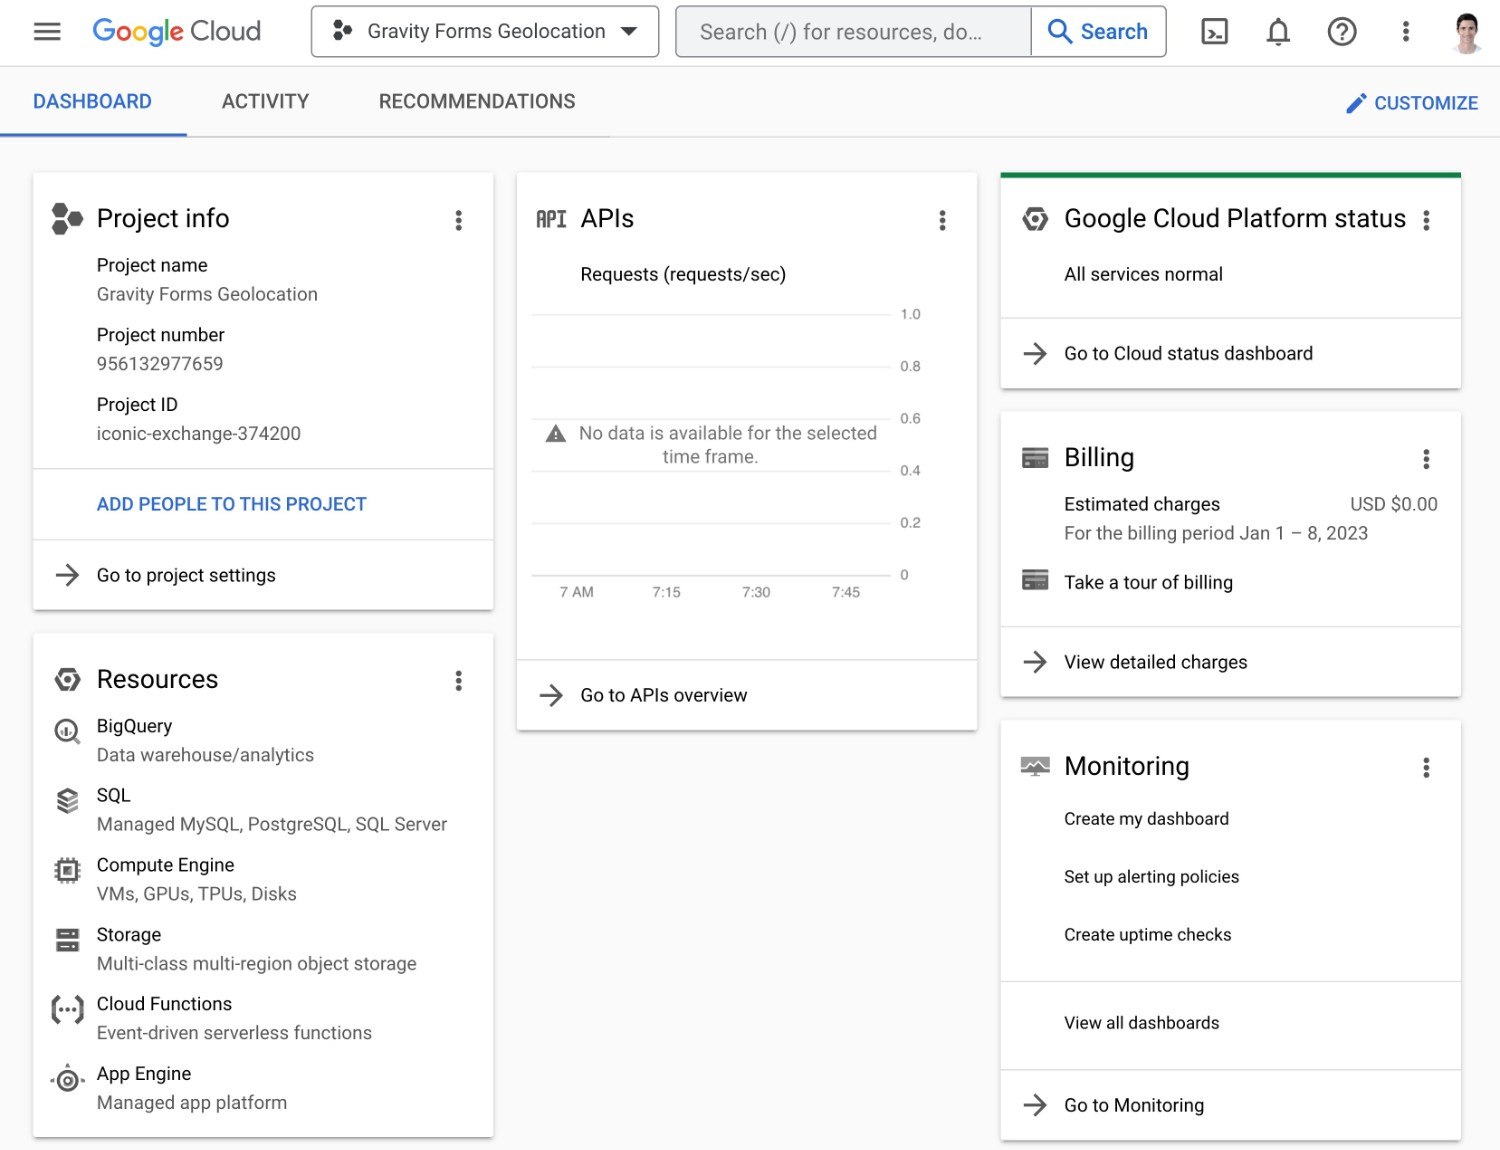
Keep this interface handy because you’ll need it in a second.
Enable Billing for Your Account
Next, you’ll need to enable billing for your account.
For the Places API, Google Cloud offers $200 in free usage credits per month, which should be more than enough to power geolocation usage for your form. This means that you should not need to pay any money to Google to use it.
However, Google still requires you to add a billing method to enable functionality, even if it’s unlikely you’ll ever be billed.
To enable billing, click the hamburger menu icon in the top-left corner to expand the side menu. Then, select the Billing option:

Then, follow the instructions to set up a billing method and enable billing for your project.
Again, you shouldn’t ever exceed the free usage tier ($200 in usage per month). But if you’re worried, Google Cloud lets you set up budgets and alerts to avoid any surprises. You’ll be able to automatically do this in the next section.
Enable the Google Places API Key
Once you’ve enabled billing, the next step is to enable the Google Places API for your project.
Here’s how to start:
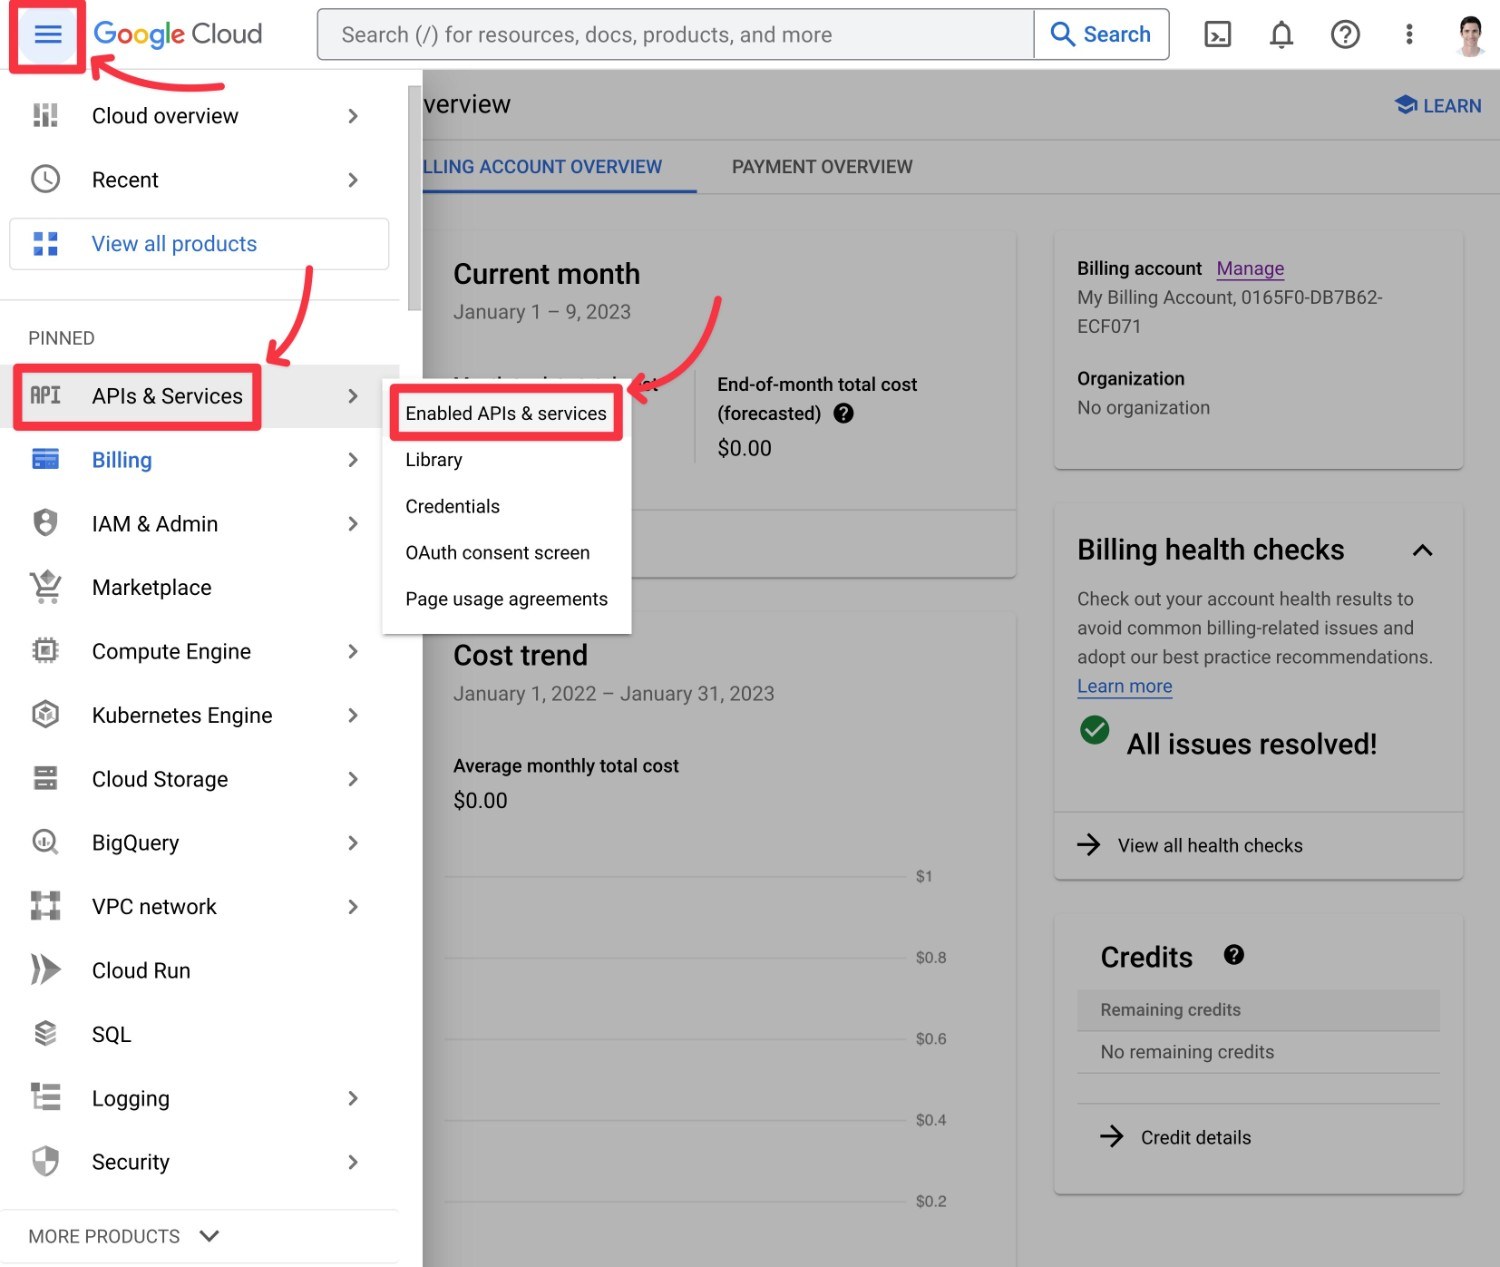
- Click the hamburger icon in the top-left corner.
- Hover over the APIs & Services option to expand a submenu.
- Select Enabled APIs & Services from the submenu.
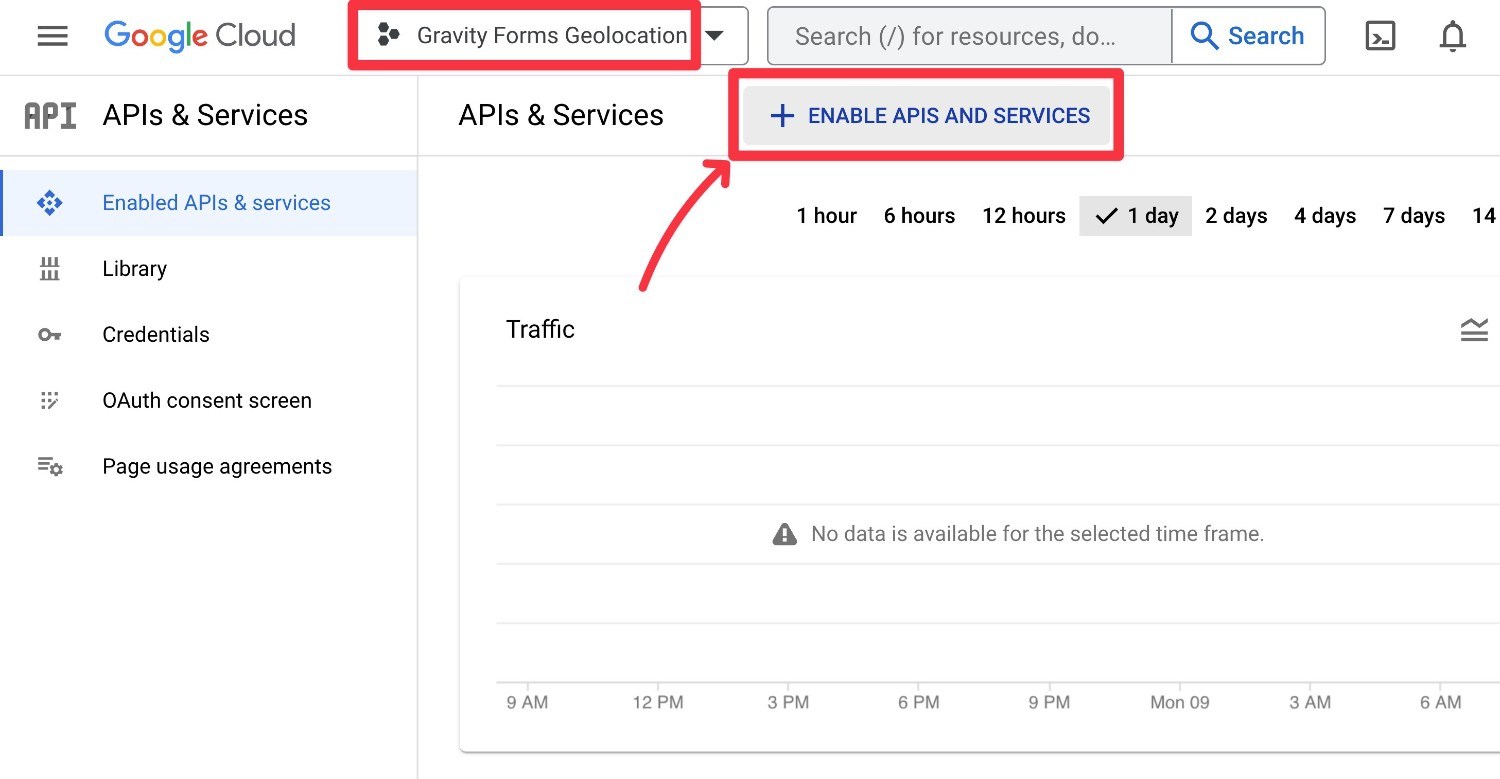
On the next screen, make sure that the right project is selected. Then, click the Enable APIs and Services button:
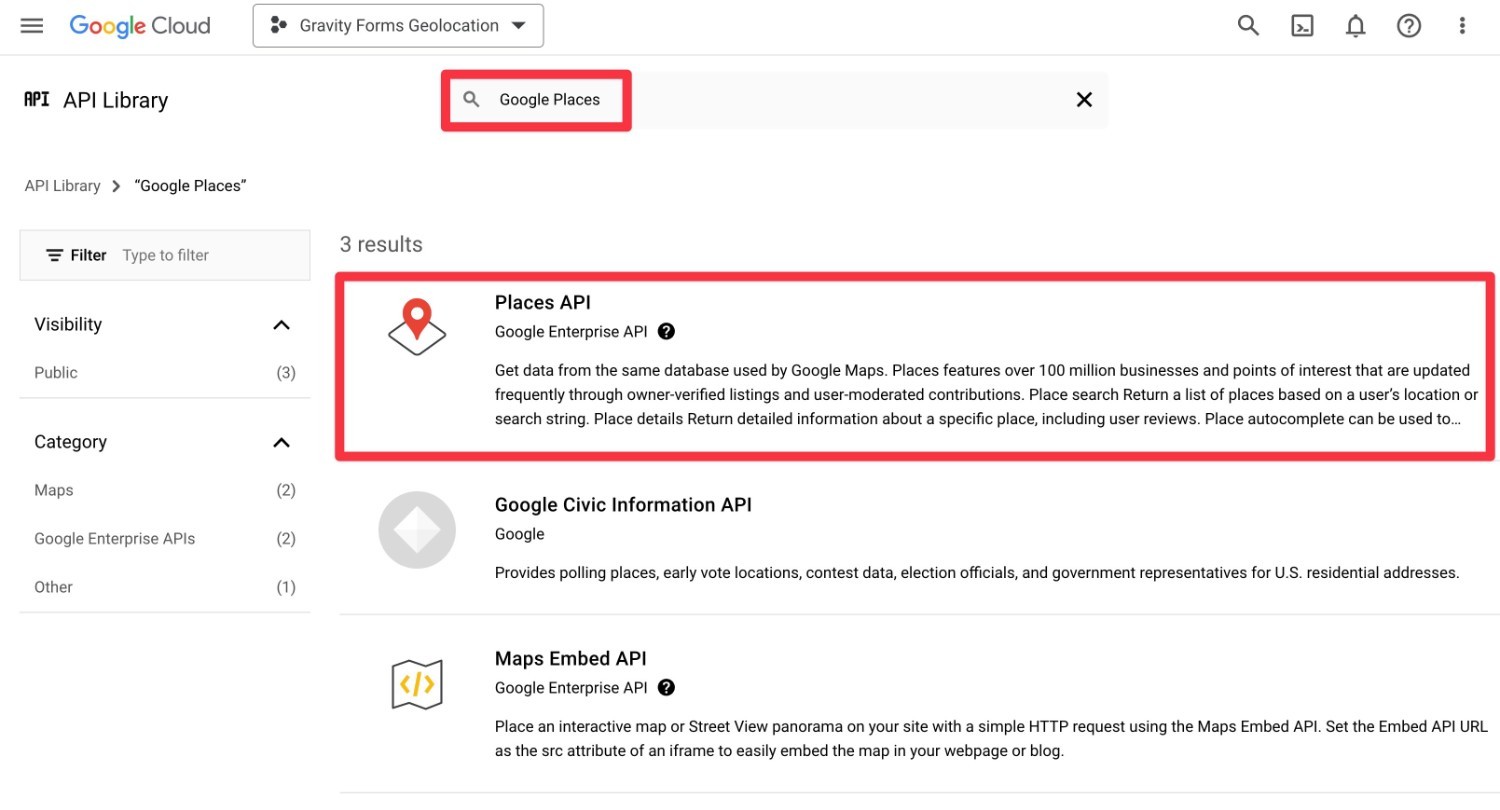
Use the search box to search for Google Places and select the Places API:
Then, click the Enable button:
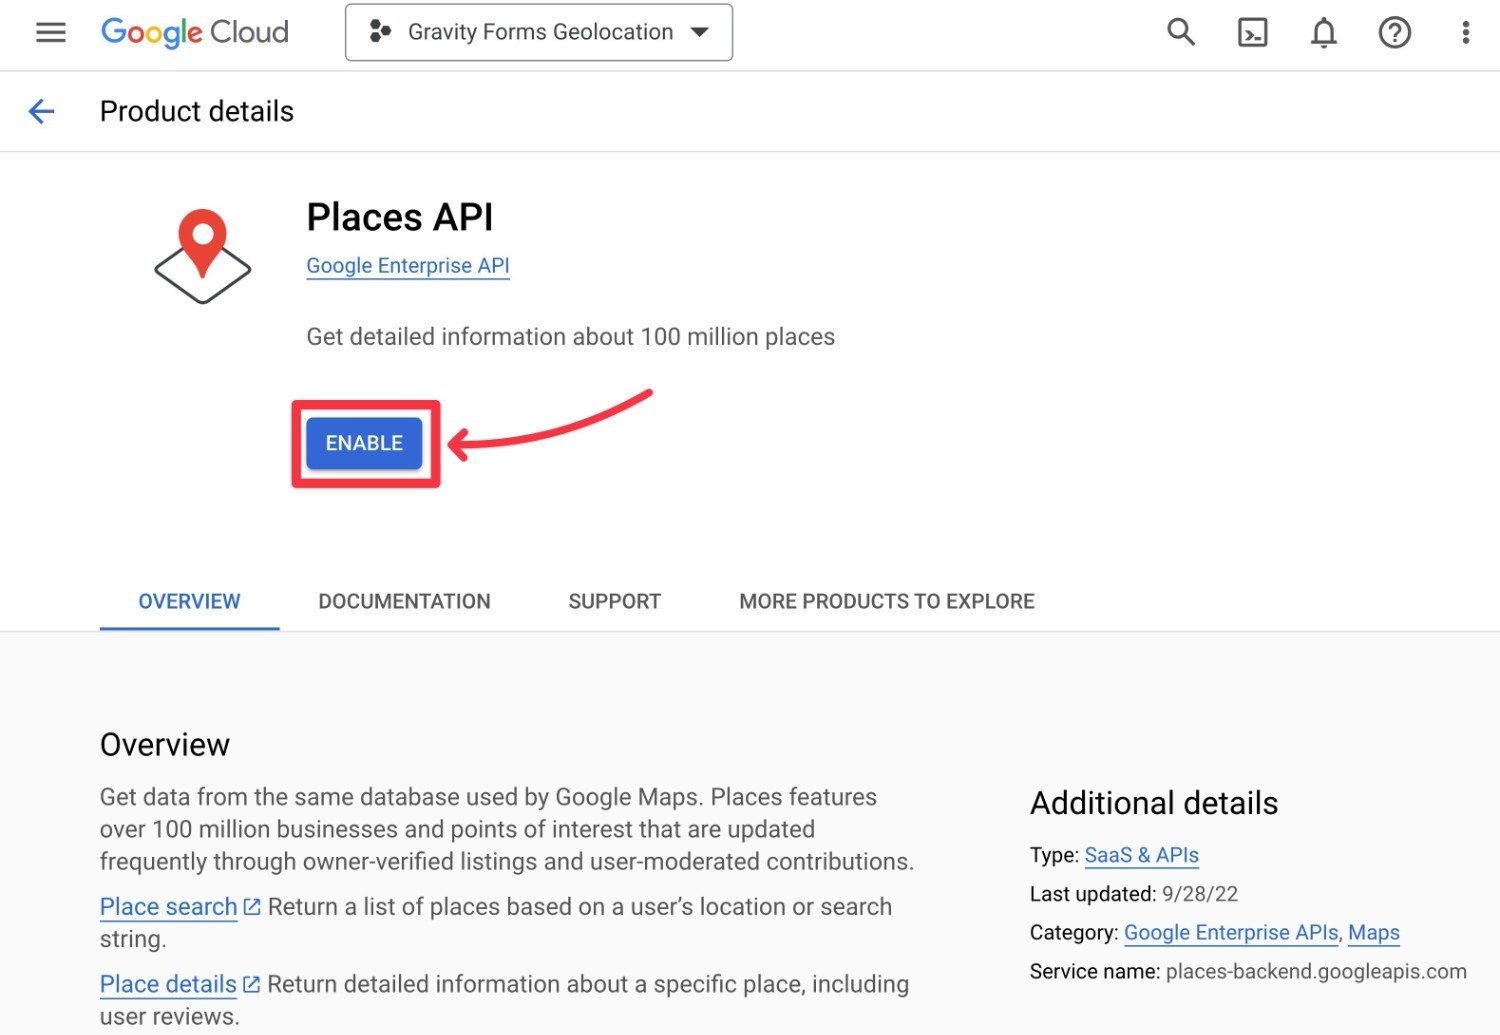
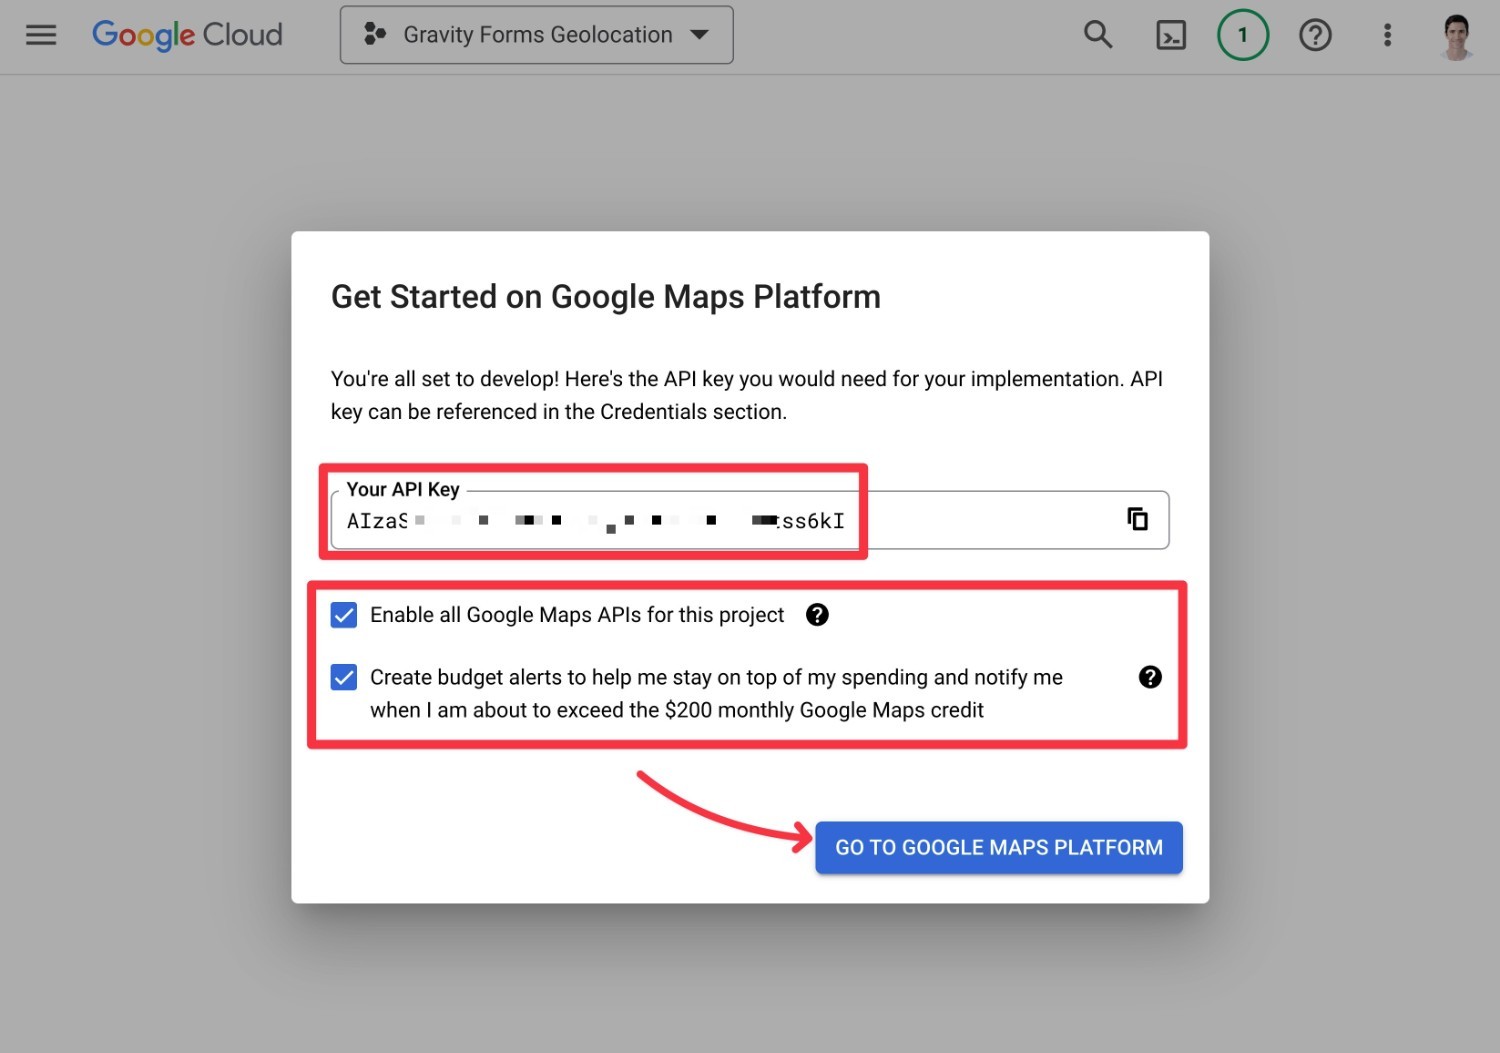
You should now see a popup that contains your API key. Keep this key handy because you’ll need it in the next step.
We also recommend checking both of the other boxes to enable all Google Maps APIs and create budget alerts.
* Note – you only need the Places API and Maps JavaScript API, so you’re free to disable all of the other APIs later if you prefer.
Then, click the Go to Google Maps Platform button:
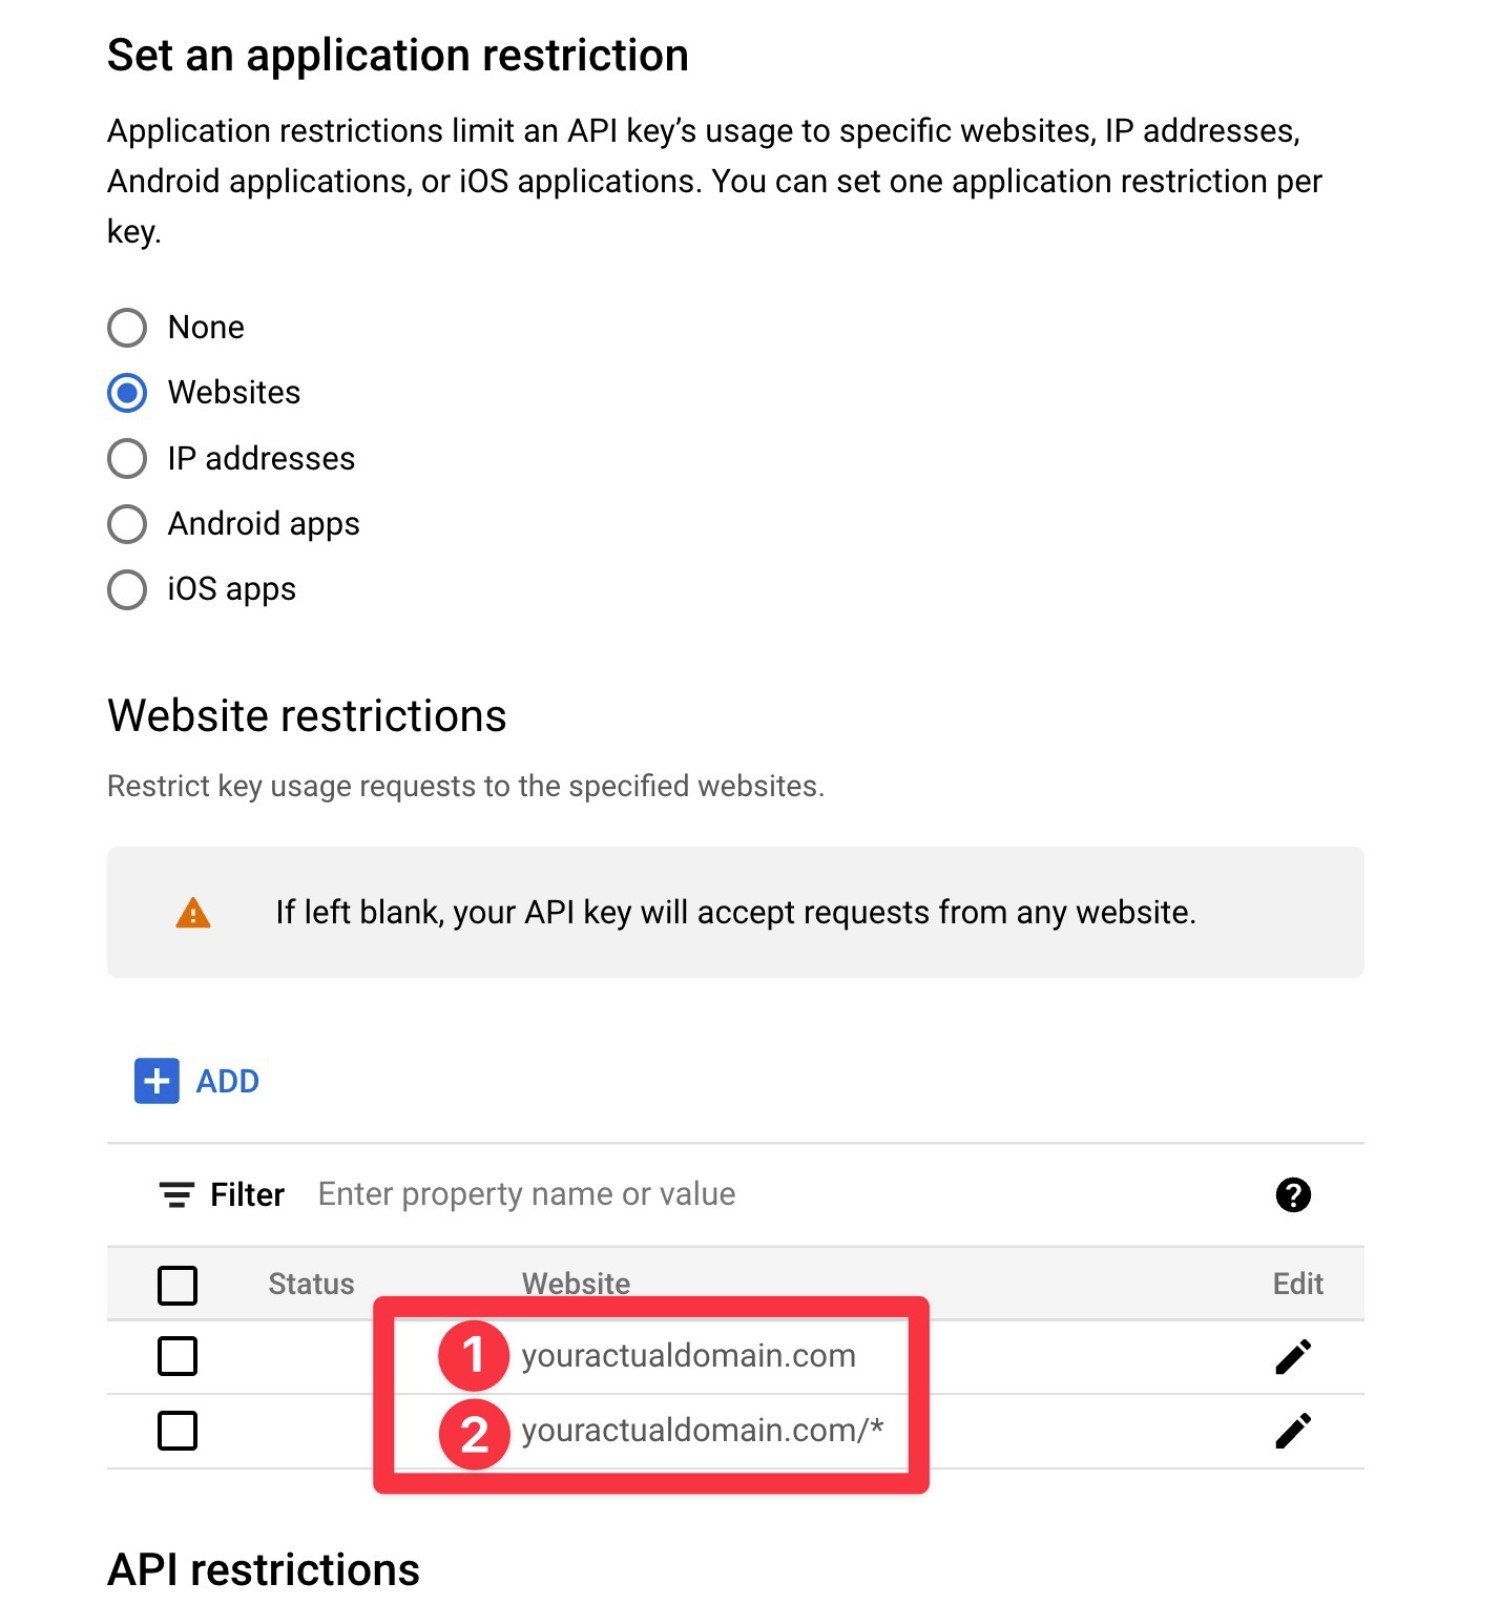
On the next screen, you’ll see a prompt to protect your API key, which helps you avoid a malicious actor trying to steal your usage.
To avoid issues, we recommend setting this up by using the restriction type drop-down to select HTTP referrers (web sites).
To set up proper HTTP restrictions for a regular domain name, you’ll want to add two different restriction rules:
yoursite.comyoursite.com/*

Here’s what it should look like with both HTTP restrictions added:
2. Add the API Key to Gravity Forms Settings
Once you have your Google Places API key, you need to add it to the Gravity Forms settings area in your WordPress dashboard:
- Open your WordPress dashboard.
- Go to Forms → Settings.
- Select the Geolocation tab in the settings area.
- Paste your Google Places API key into the Google Places API Key box.
- Click Save Settings.
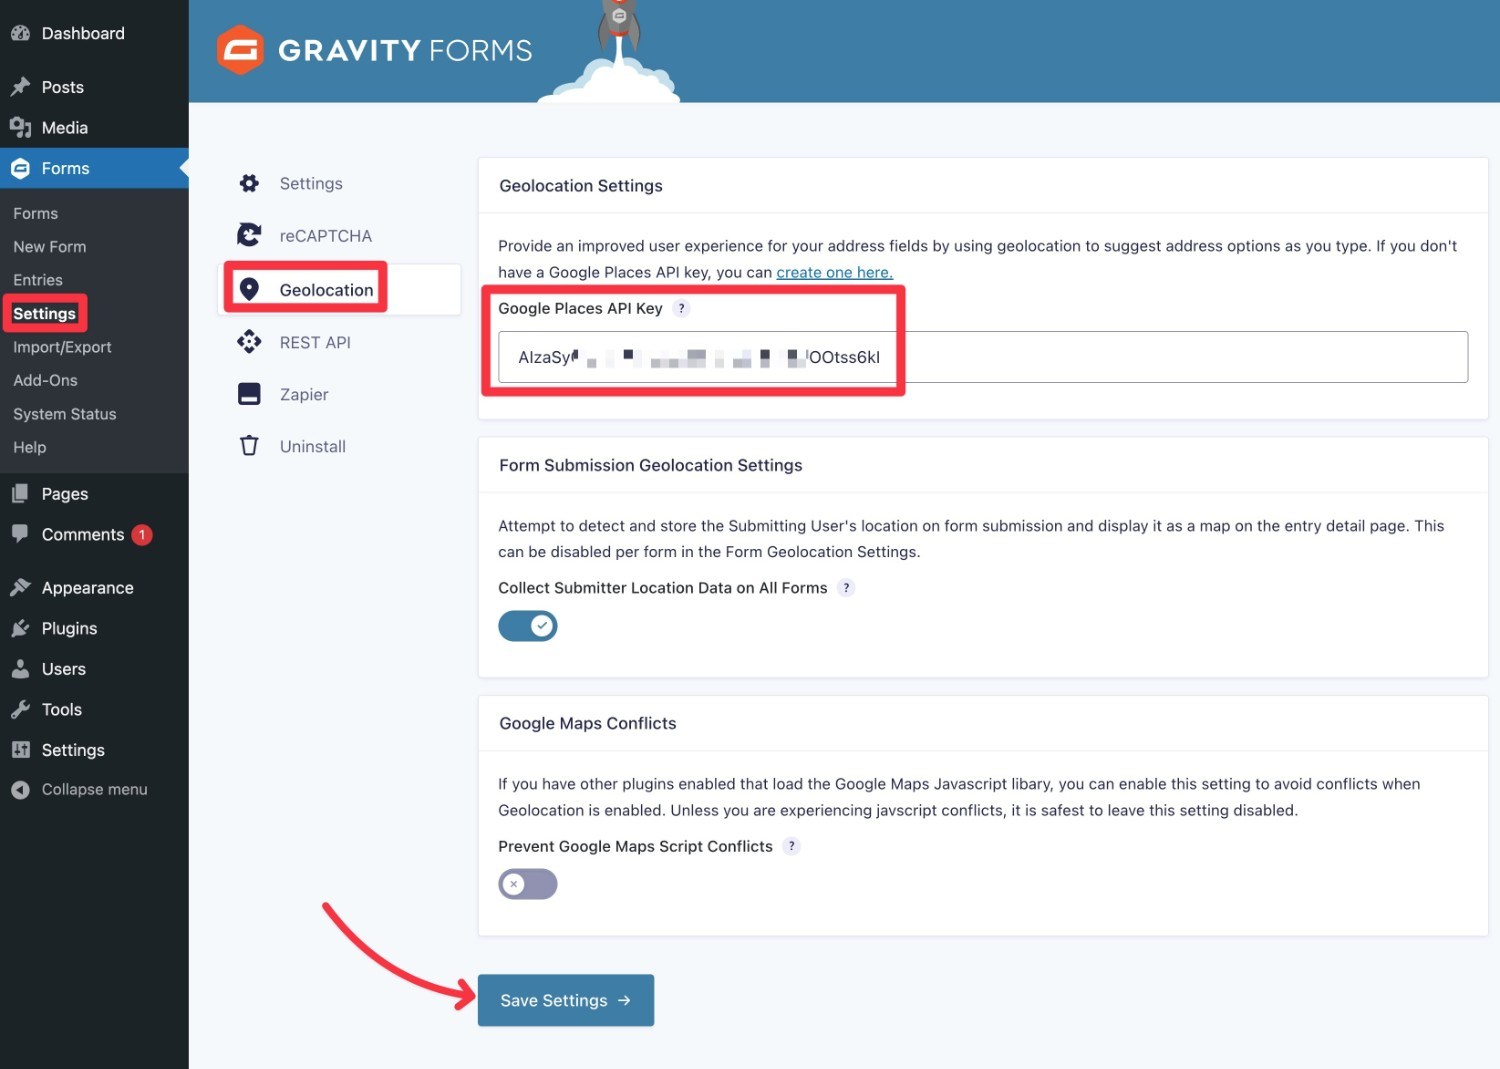
You should be able to leave the other two settings as the defaults. However, if you’re using another plugin that’s loading the Google Maps script, you might want to enable the Google Maps Conflicts option, depending on whether you experience any issues.
If you configured everything correctly and entered the correct Google Places API key, you should see a green checkmark next to the API key.
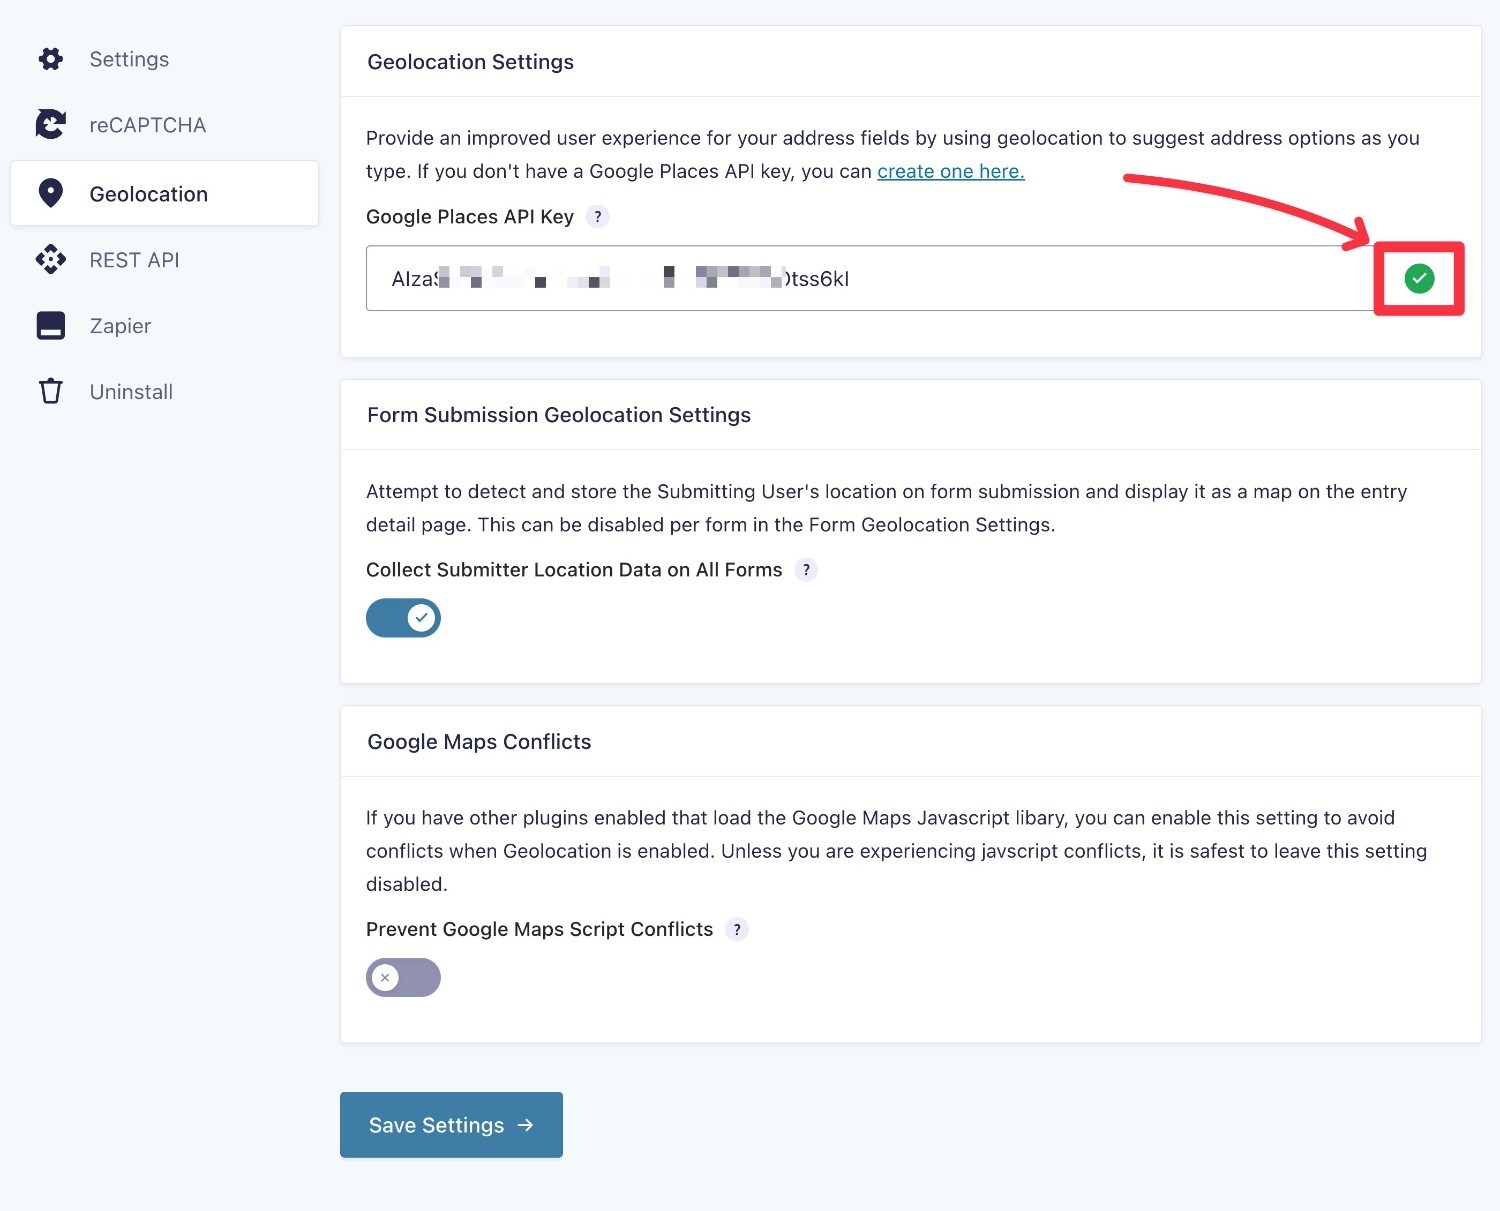
If you see a red X instead, make sure that you entered the correct API key and also check if you’ve enabled the relevant APIs. You’ll also want to make sure that you added both HTTP referrer restriction rules that we specified – it won’t work if you only enable one rule.
3. Configure Geolocation Settings for a Form
Now, you’re ready to configure the settings for a geolocation WordPress form.
There are a few ways that you can do this – let’s look at all of them!
Enable Geolocation Suggestions for an Address Field
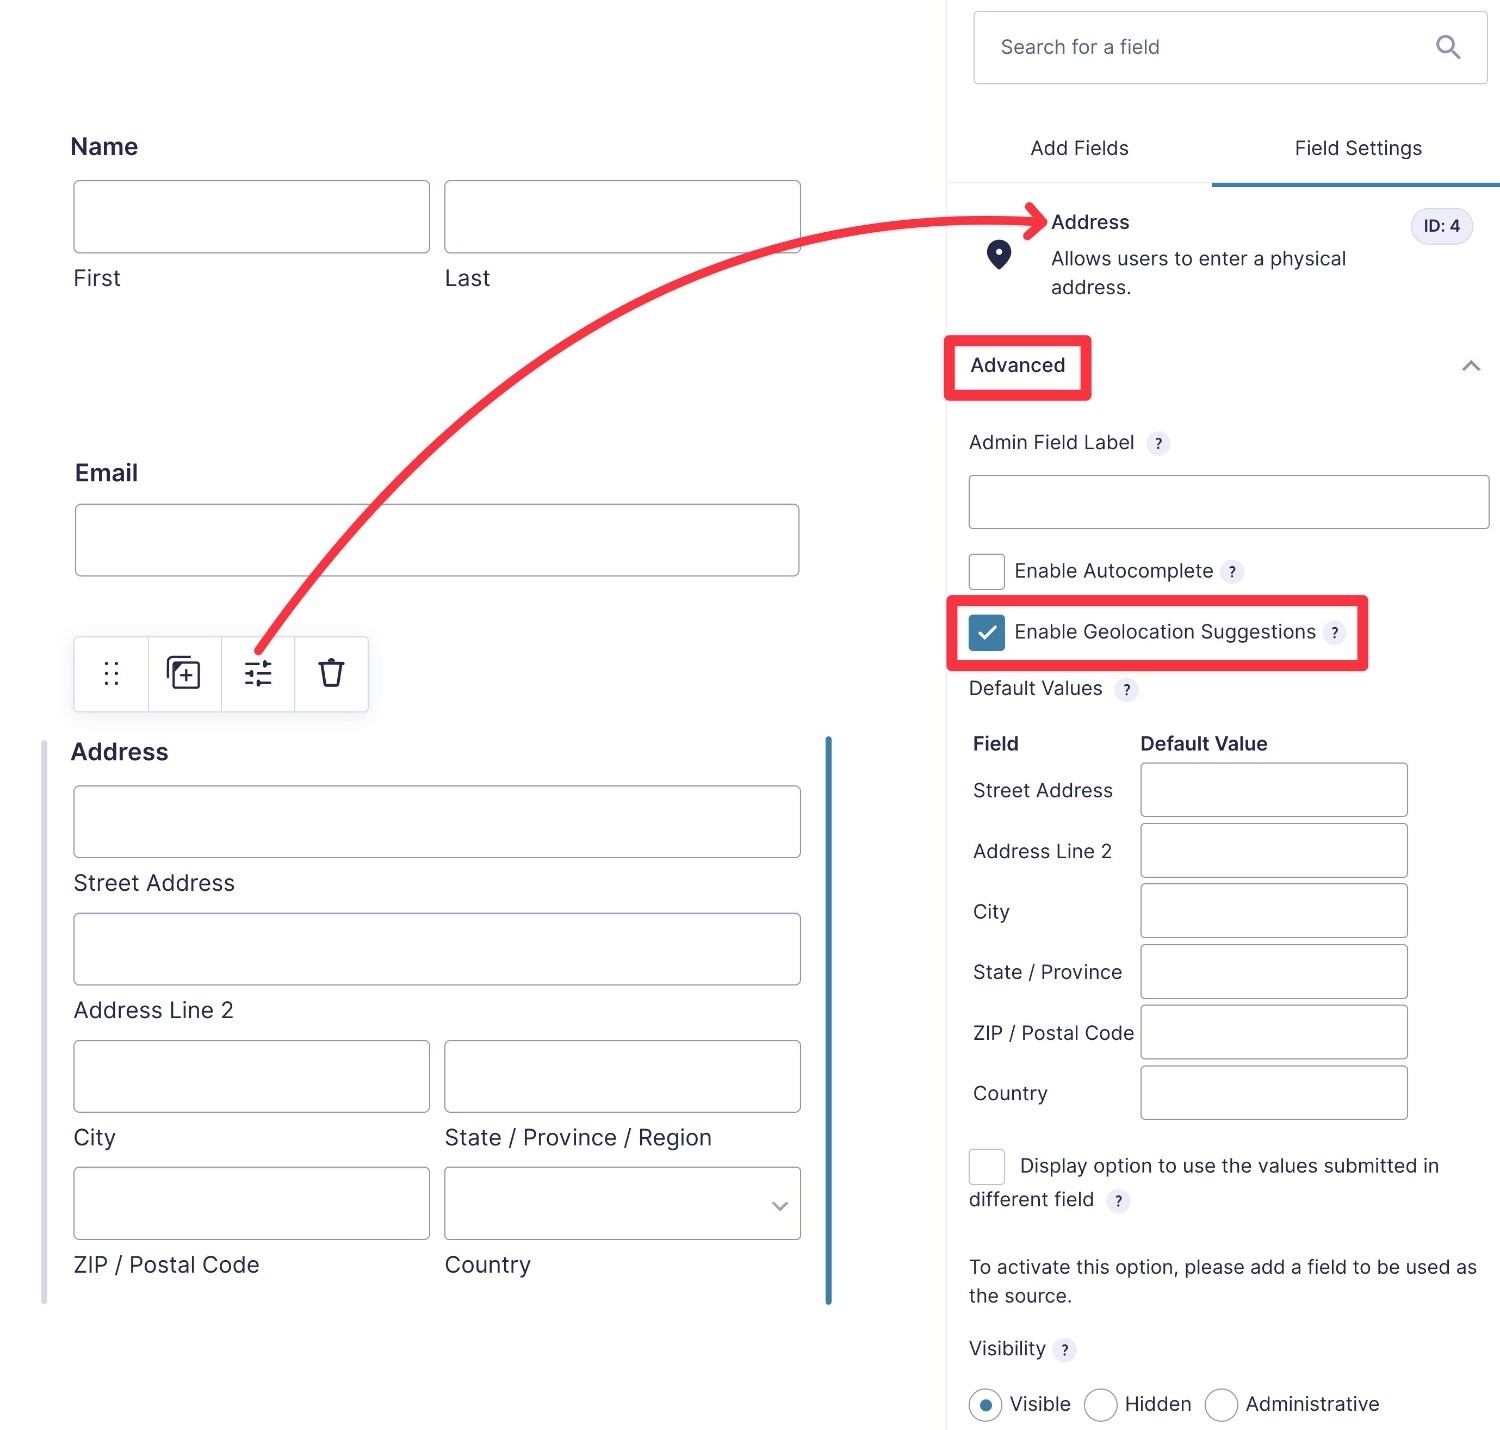
If you want to enable autocomplete geolocation suggestions for your form submitters, you can do that from the settings for the Address field.
To start, open the form editor and then open the settings for the Address field. Or, if you haven’t added one yet, add a new Address field to your form.
Expand the Advanced settings for the Address field. Then, check the box to Enable Geolocation Suggestions:
Enable/Disable Geolocation Data for Form Submissions
With the default setting, Gravity Forms will store location data for all form submissions. If you want to disable this sitewide, you can do this from the Gravity Forms settings area (pictured in Step #2 above – the same place where you added the API key).
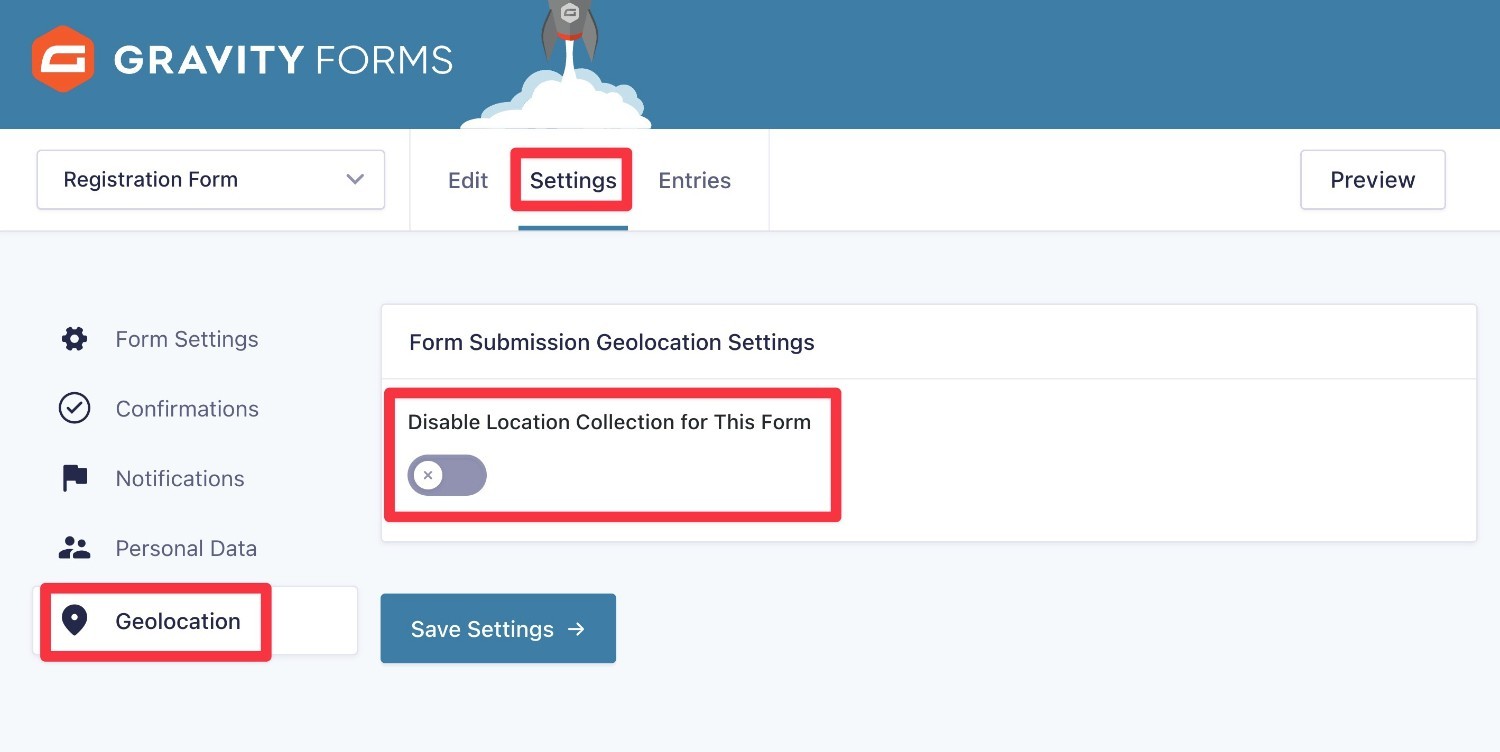
However, you can also enable/disable geolocation data at the individual form level, if you prefer more granular control.
To control this, open the Geolocation tab in the form settings area and use the toggle according to your preferences:
4. View Geolocation Data for a Form
Now that you’ve configured the Geolocation Add-On, you’ll be able to access geolocation data going forward for all entries (unless you’ve disabled it for that form).
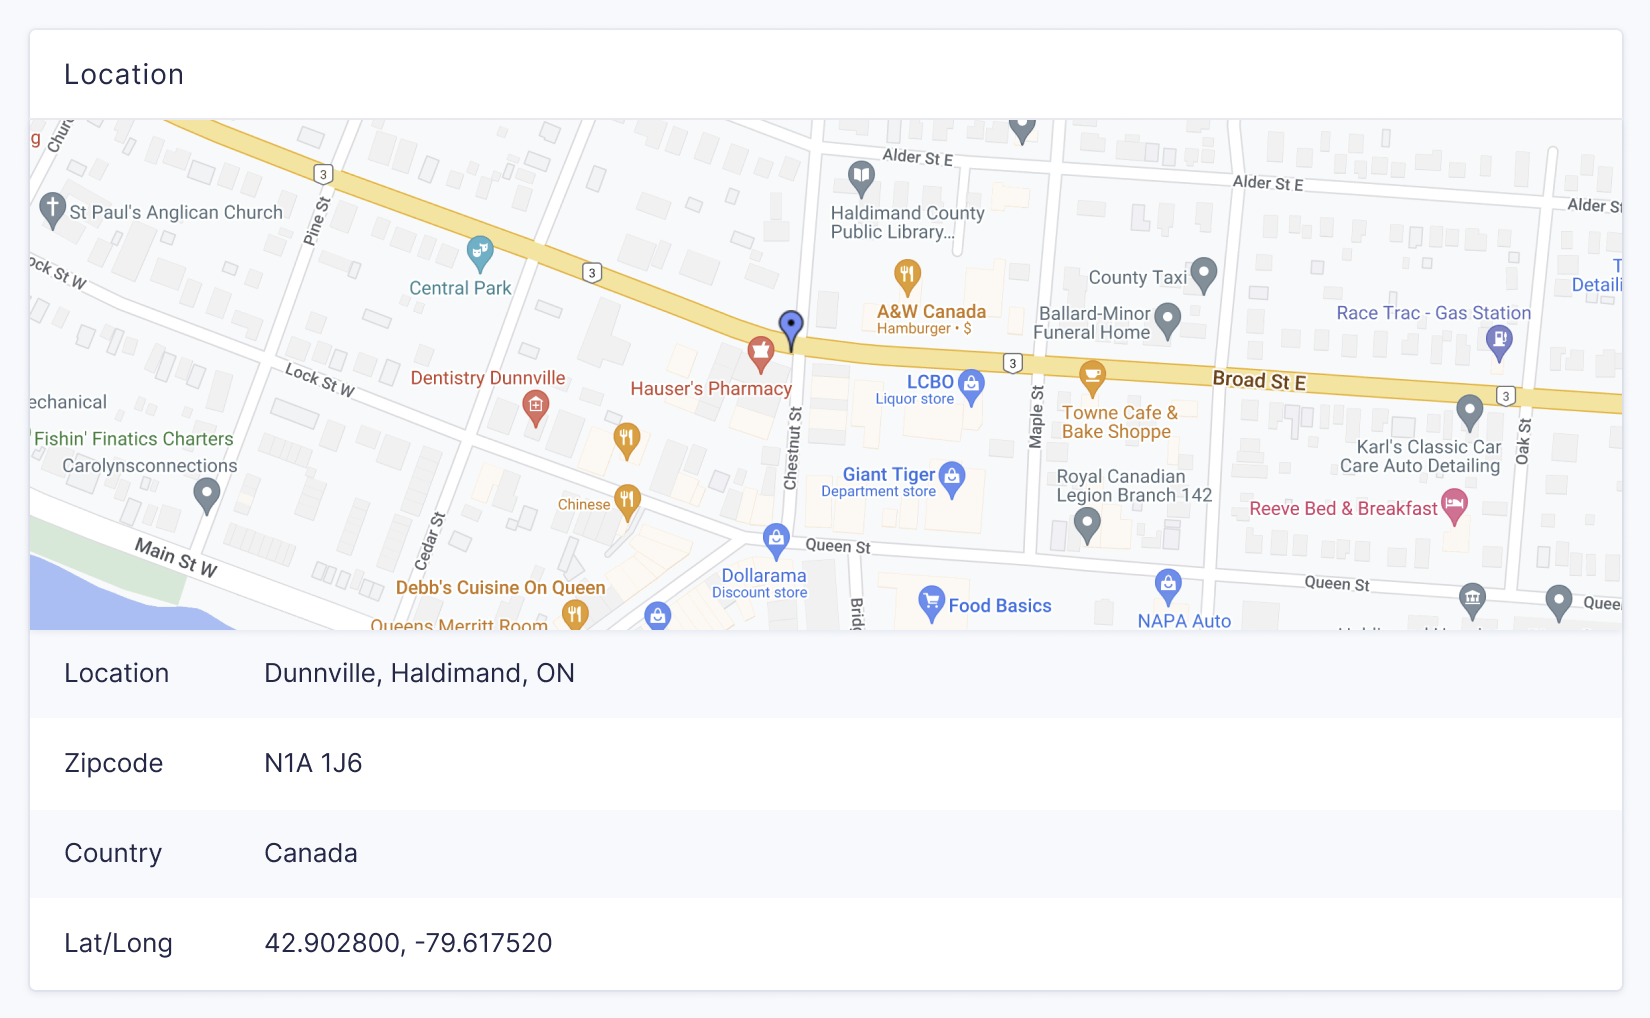
To see geolocation information, you can open an entry like you normally would.
Now, you’ll see two new pieces of information:
- You can view a map of the submitter’s location in the User Location box.
- You’ll also be able to see latitude and longitude details in the Address field (if applicable) in addition to the user’s address.
Note – you can still see a user’s location when they submitted the form even if there’s no Address field in the form.
Get Started With Geolocation WordPress Forms Today
The Gravity Forms Geolocation Add-On helps you improve how your forms work with geolocation data.
For your users, you can use the Geolocation Add-On to create a better experience with features like address autocomplete.
As a site admin, you’ll also be able to view useful information such as a user’s location when they submitted the form.
Going forward, we also have plans to add other helpful new features, such as the ability to filter entries based on the user location data.
If you’re already a Gravity Forms Elite license holder, you can install the Gravity Forms Geolocation Add-On today.
If you’re not an Elite license holder yet, you have two options to try it out:
- Purchase the Gravity Forms Elite license. If you’re already holding a different Gravity Forms license, you can upgrade and only pay the prorated difference between the two.
- Spin up a free, fully functioning demo site to test the Geolocation Add-On (and all other official add-ons).

If you want to keep up-to-date with what’s happening on the blog sign up for the Gravity Forms newsletter!
"*" indicates required fields