WordPress to Zendesk: Turn Gravity Forms entries into Zendesk tickets with Zapier

Using a customer retention and support software like Zendesk for your business is a great idea to improve client communication. When someone contacts you for support, it helps keep track of your entire communication with them.
You can make this process more seamless by connecting Zendesk directly to your WordPress web forms. By using Gravity Forms, and its Zapier Add-On, you can easily do so, and in this tutorial we will show you how.
In the following, you will learn why Zendesk is an excellent solution to manage your customer support, why it’s a good idea to team it up with Gravity Forms, and how to establish a connection between the two.
We have a lot to go through, so let’s get started.
Why use Zendesk + Gravity Forms?
Before getting into how to connect Gravity Forms with Zendesk, let’s first talk about what makes these two powerful tools great candidates to manage your customer experience:
Gravity Forms: An intro
Submitting a form is the very first step for many customers, and it’s crucial that you collect the right information in an easy and supportive way. Using Gravity Forms, you can easily create custom support forms that cater to the needs of your customers, as well as the team dealing with the tickets.
Key features include:
- Intuitive drag-and-drop builder with ready-made templates to help you create and launch forms quickly and easily.
- Powerful built-in features including conditional logic, multi-page forms, calculations, file uploads, notifications, confirmations, and more.
- Extensive integrations & add-ons that connect your forms to CRMs, automation platforms, payment processors like Stripe, and countless other business apps.
- Reliable documentation & support with detailed guides, developer resources, and expert assistance when you need it.
- Gravity SMTP included with Elite so you can send reliable form notifications and all other WordPress emails with improved deliverability.
As you can see, Gravity Forms offers everything you need to build powerful, flexible, and data-rich support forms. With more than 30+ field types and fully customizable form layouts, you can collect exactly the information your team needs to help deal with any customer issue.
Zendesk: An intro
Zendesk is packed with features, enabling you to provide an impactful experience for your customers throughout their support journey.
Key features include:
- Many support options – From chatbots and messaging to emails and voice chat Zendesk allows you to care for your customers across many channels.
- AI features – Zendesk offers AI-powered bots for customer support and automation that can work together with human agents or on their own. For example, the Zendesk AI can suggest replies to support requests and connect customers with the right person for their inquiry.
- Analytics and reporting – See all customer data in one place so you always know where they are in their journey. Zendesk also allows you to gain useful insights from the collected data and use it for personalization.
- Support management – Collect feedback on the performance of your support team to improve staffing and use it for quality assurance.
- Many integrations – Zendesk integrates well with other software and allows you to offer customer support via WhatsApp, Facebook, Slack, and more.
More than 100,000 customers trust Zendesk. Their plans start from $19/month, and there is a free trial.
Zapier and the Gravity Forms Zapier Add-On

As mentioned in the introduction, the connection between Gravity Forms and Zendesk will be established using Zapier. In case you are not familiar with it, Zapier is a platform that lets you connect different apps and create automatic workflows between them, so-called “Zaps”. Its library includes almost 8,000 web apps you can link together in this way, such as:
- Google Sheets, Docs, Drive, Gmail, and more
- Facebook, Pinterest, LinkedIn, Instagram, and other social media networks
- Project management tools like Asana and Notion
- Accounting tools such as FreshBooks
You can find the full list on the Zapier website. Naturally, Gravity Forms cnd Zendesk are also on it.
To be able to connect Gravity Forms to Zapier and take advantage of the possibilities Zapier offers, you need the Gravity Forms Zapier Add-On. It is one of our most popular extensions and allows you to work with the information you collect through your forms in many different ways.
Let’s now find out how to use Zapier and the Zapier Add-On, to send Gravity Forms entries to Zendesk…
Note: The Zapier Add-On is available with Gravity Forms Pro and Elite licenses. Get yours today or upgrade your license and only pay the pro-rated price. Alternatively, if you don’t feel ready to commit yet, you can also follow along with the tutorial by creating a free demo site. It comes with all the necessary add-ons and functionality you need for this purpose.
How to Connect your WordPress forms and Zendesk via Zapier
For the following tutorial, we will assume that you already have a WordPress website with the Gravity Forms main plugin installed. You’ll also need a a Zendesk and Zapier account, but we’ll talk more on this below.
1. Sign up to Zendesk
The first thing you need is a Zendesk account. You can get that over at the Zendesk homepage by clicking on one of the buttons to start a free trial.

This will start the sign-up process.
Follow the instructions, and after you have verified your email address, you’ll land on the Zendesk dashboard.
2. Create an API token
To establish a connection between Zendesk and Zapier (and consequently, your WordPress website), you will need an API token. Since you are already logged into Zendesk, how about we create that right away?
You do this in the Admin Center. You access it by clicking the Zendesk Products option (it looks like four small squares) and then choosing Admin Center.

Once there, in the left sidebar, access Apps and integrations, then API tokens under APIs. Click the button that says Add API token, give your token a name and click Save. You’ll now be shown your API token.

Be sure to copy your token, since this is the only time Zendesk will show it to you.
3. Get a Zapier account
The next thing you’ll need to connect WordPress to Zendesk is a Zapier account. You can create one by visiting the Zapier homepage. Click one of the many calls to action here.
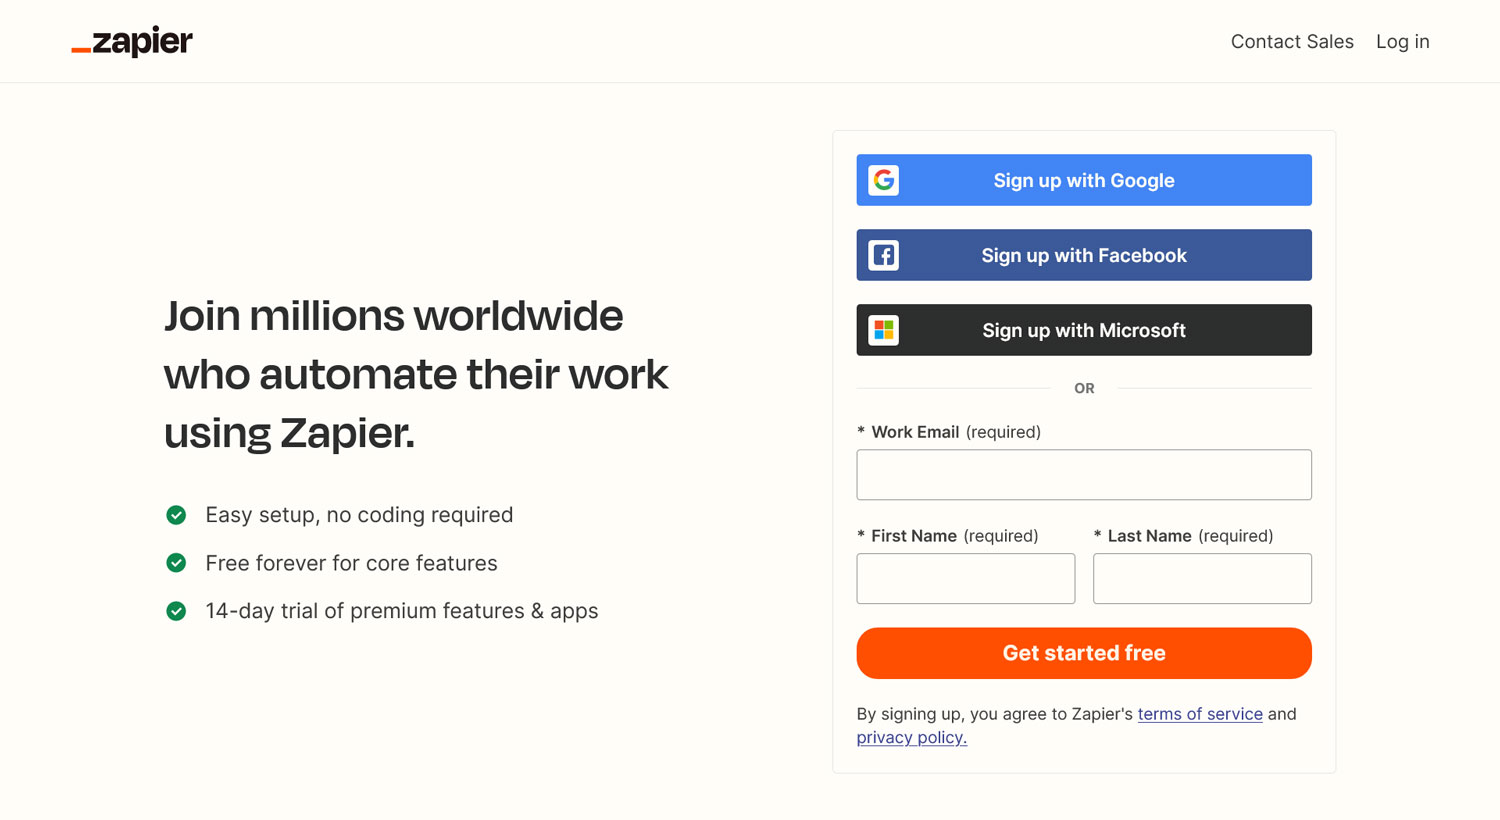
It’s worth noting that you’ll need a premium Zapier account to connect with Zendesk.
Once your Zapier account is set up, it’s time to turn to your WordPress website.
4. Create your form
You need a form on your WordPress site to connect to Zendesk. In this case, since our goal is to create a ticket in Zendesk when someone submits it, it makes the most sense to create a support request form. That way, when someone gets in touch via your website, the request pops up in your customer experience software so you can take care of it.
Create a form by going to Forms → New Form. Doing so opens up a pop-up with the option to start with an empty form or hit the ground running with a pre-built template.

For our purpose, we’ll select simple contact form and customize it.
You’ll be asked to give the form a name, and then after that, you land on the form editor screen. Here, simply click on existing fields and make changes on the right or add more fields from the same sidebar. Below you can see the fields we’ve added to make it relevant to our use case.

Once you’re finished customizing, embed your form on any page or post on your website and click Publish.
5. Install and set up the Zapier Add-On
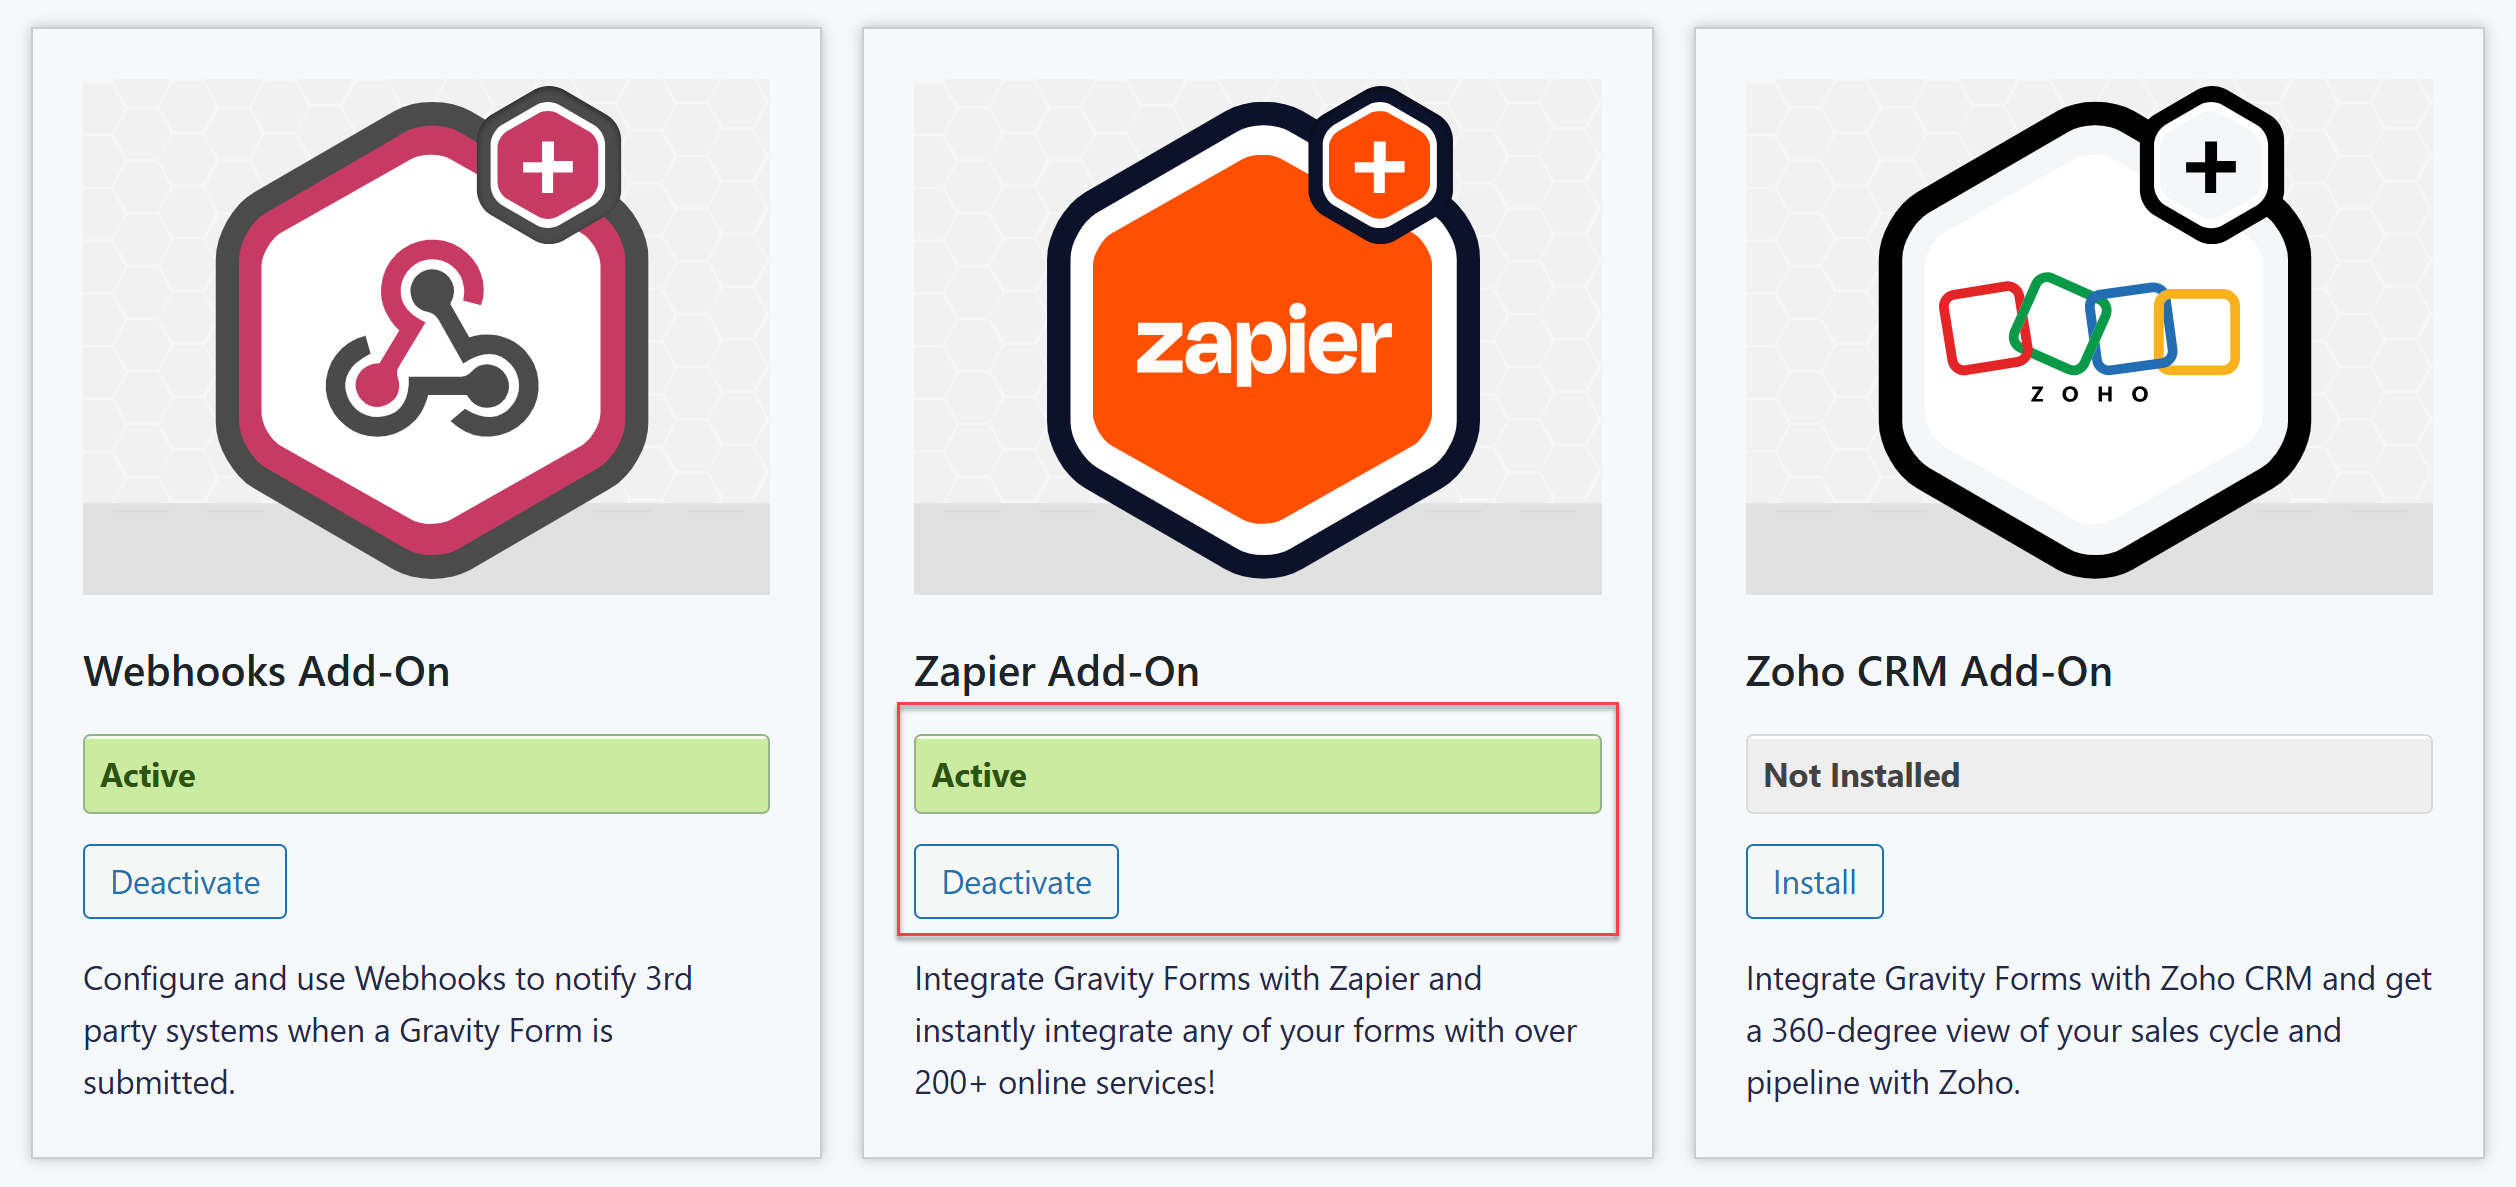
Now it’s time to get the Gravity Forms Zapier Add-On installed on your site. For that, go to Forms → Add-Ons in your WordPress dashboard, find it by name and click Install > Activate.
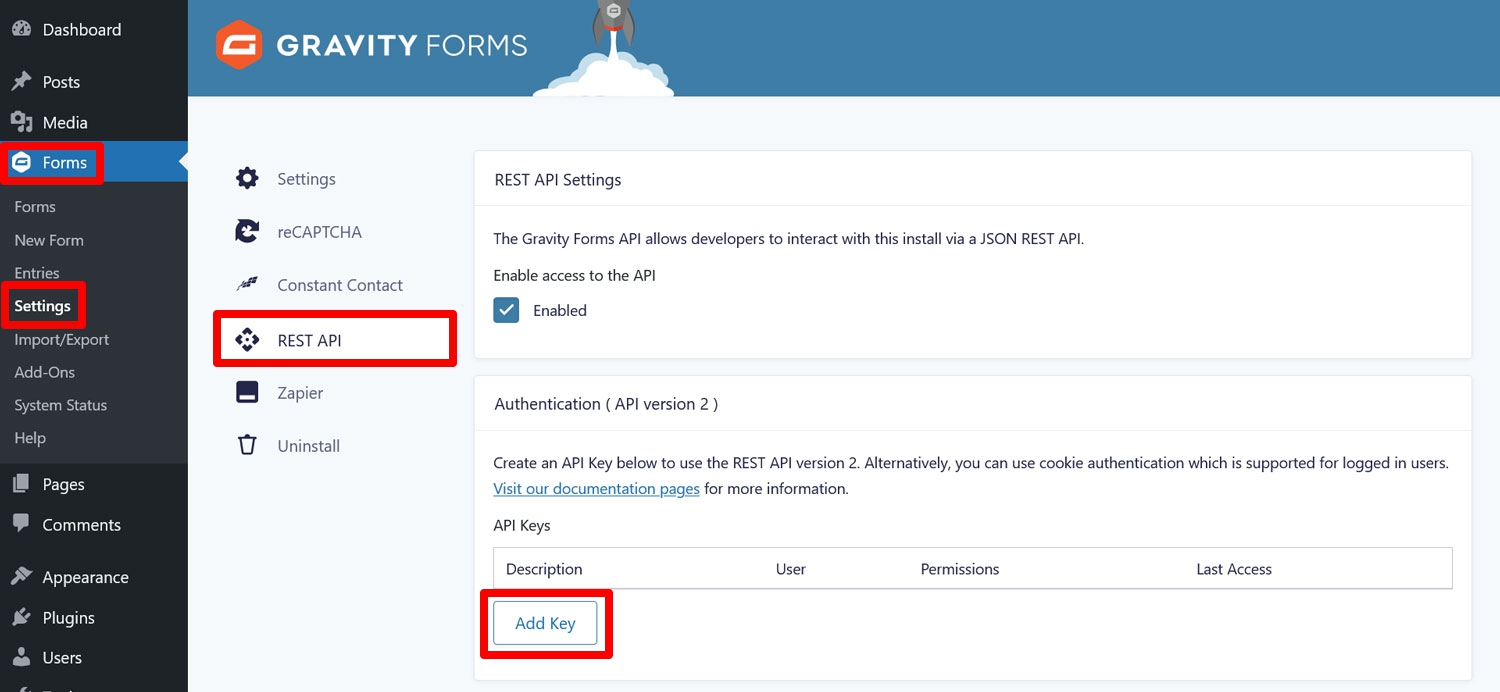
After this, navigate to Forms → Settings → REST API where you can create an API key – you’ll use this to connect to Zapier.
Under REST API Settings, check the box to enable the API and click on Add Key under Authentication (API version 2).
Fill out the pop-up that appears as follows:
- Description: This helps you distinguish between different API keys.
- User: Select a user with the permission level to view and edit entries.
- Permissions: Choose Read/Write from the drop-down menu.
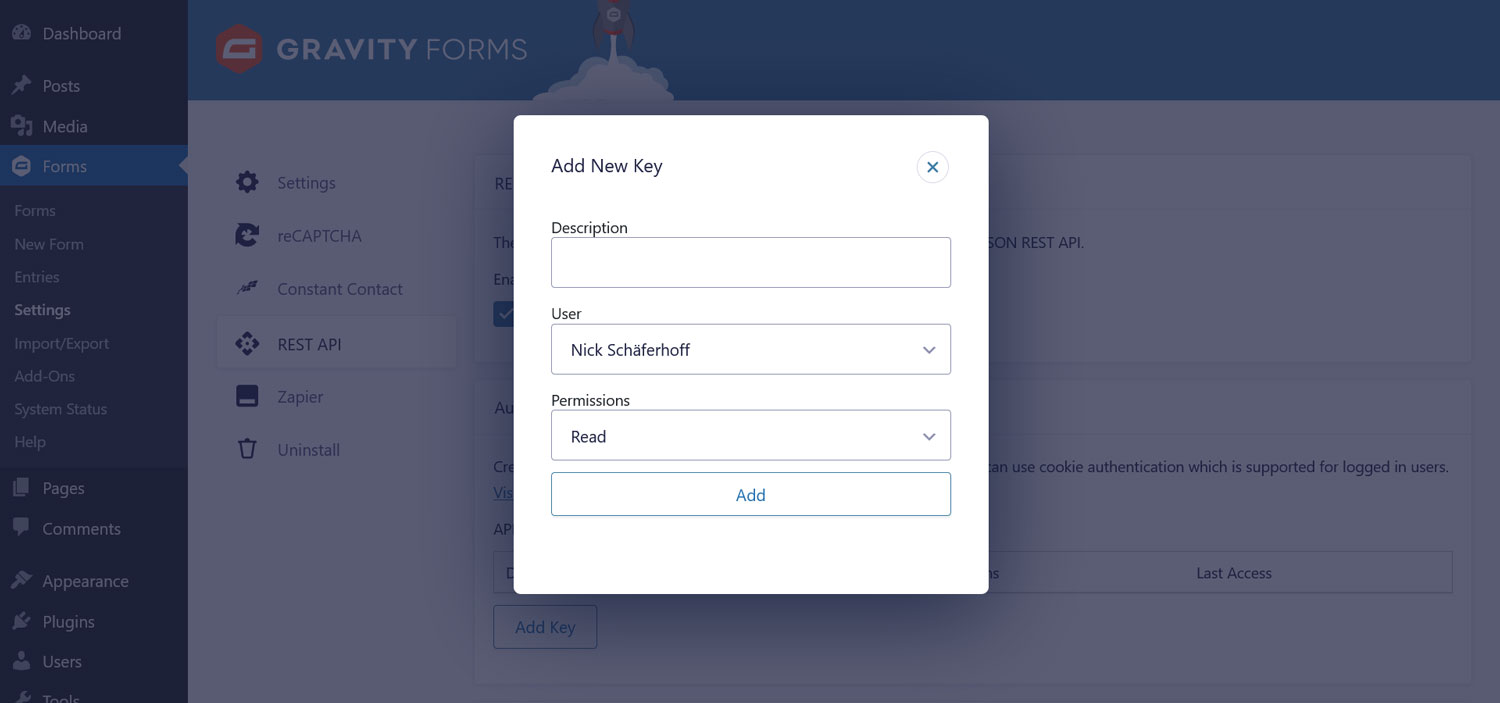
Click the Add button to reveal your consumer key and consumer secret.
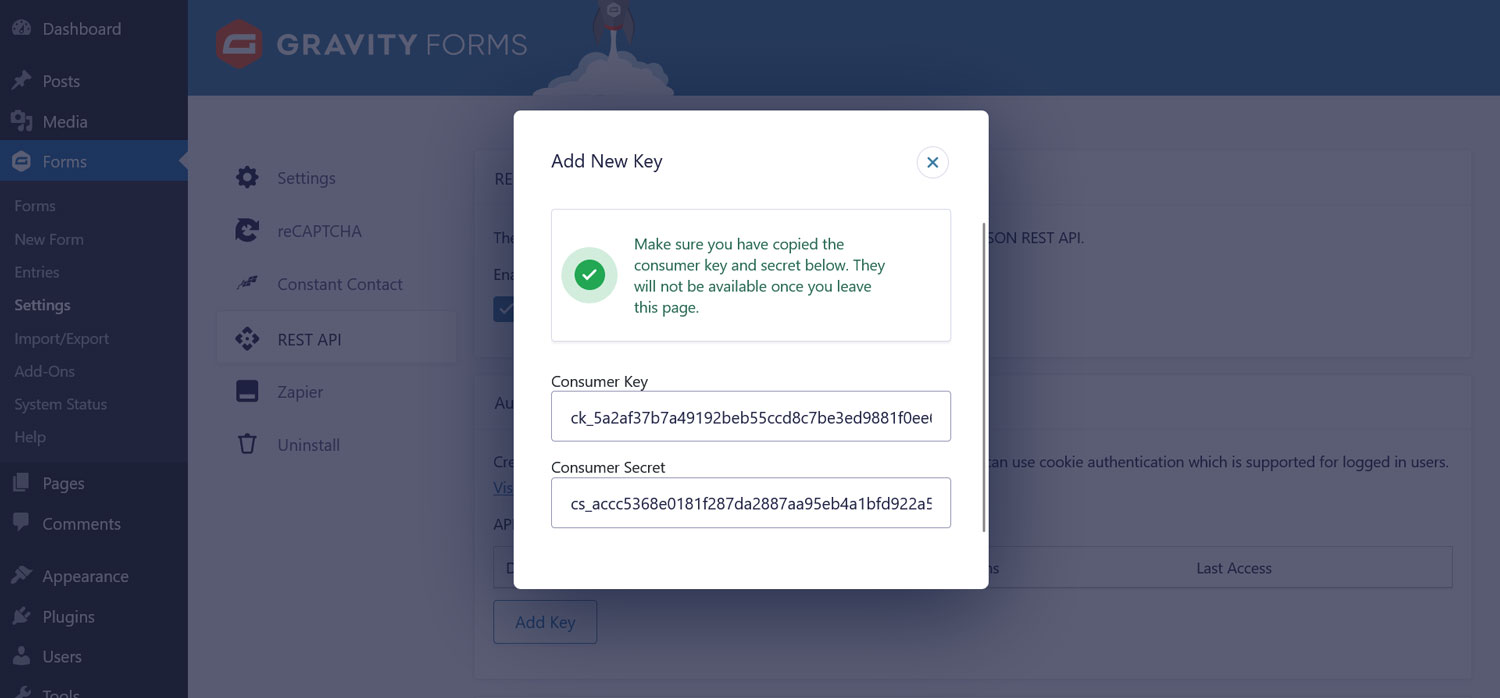
Copy and store those somewhere safe. This is the only time you will see them once you close this window. When you have done so, save the settings by clicking Update.
6. Create your Zap and connect Zapier to Gravity Forms
Now, it’s time to set up your Zap in Zapier. You have the option to use a pre-built one or create a Zap from scratch. The Gravity Forms / Zapier integrations page contains every Zap already available for Gravity Forms.
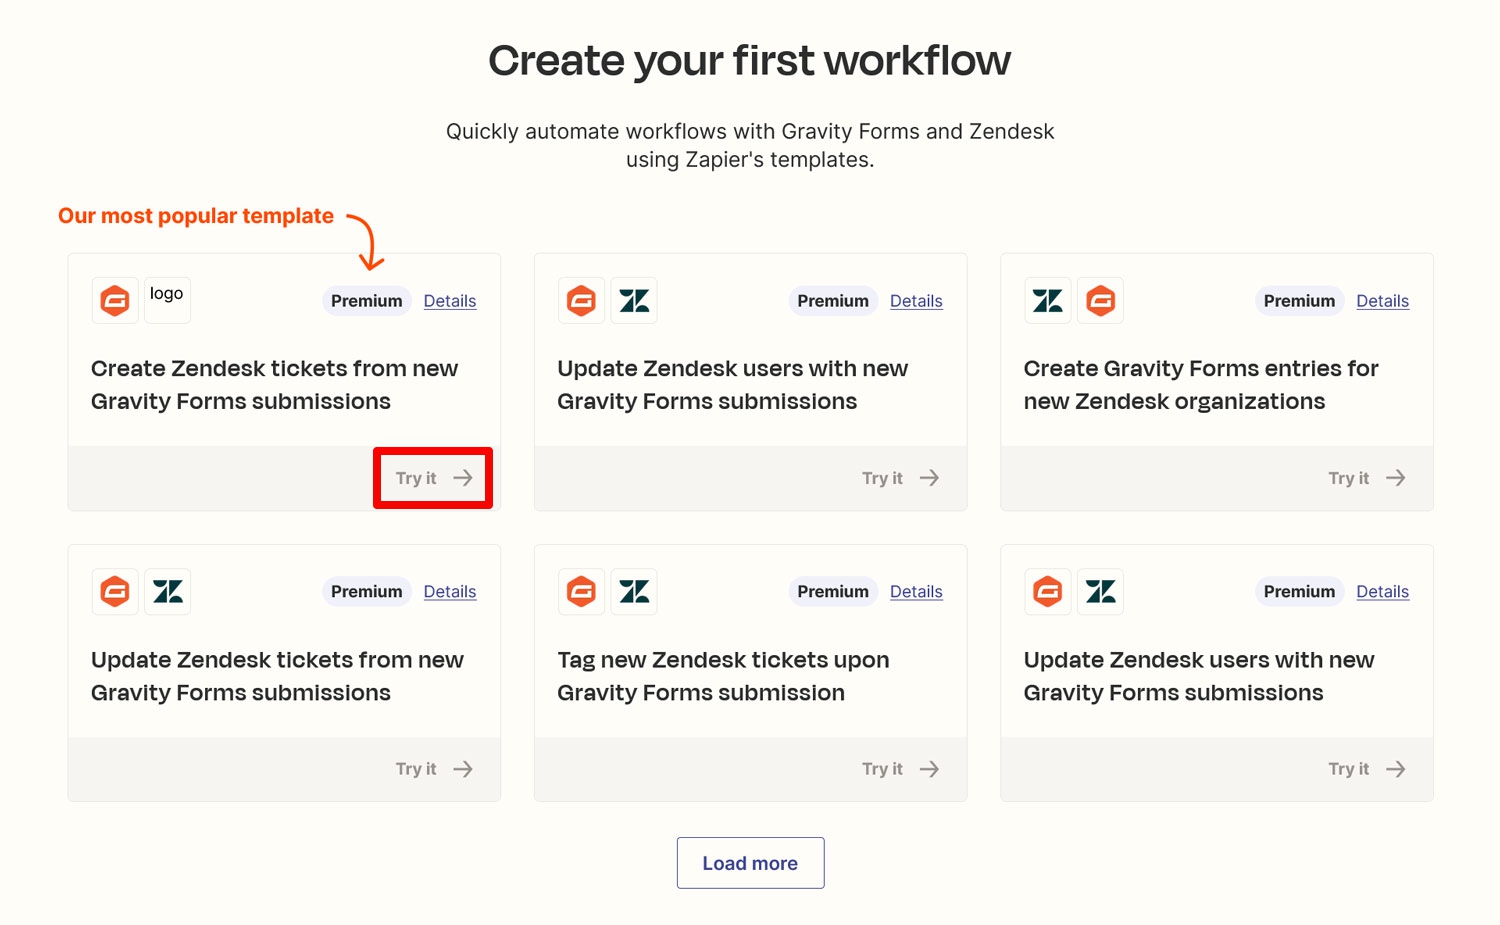
Search for Zendesk to see what Zaps exist for the combination of the two. The Gravity Forms / Zendesk page shows you pre-built zaps and the available triggers and actions for both apps.
In our case, the trigger will be a form submission, and the action will be creating a ticket in Zendesk. It’s the most popular zap for this combination, too. Click on Try it.
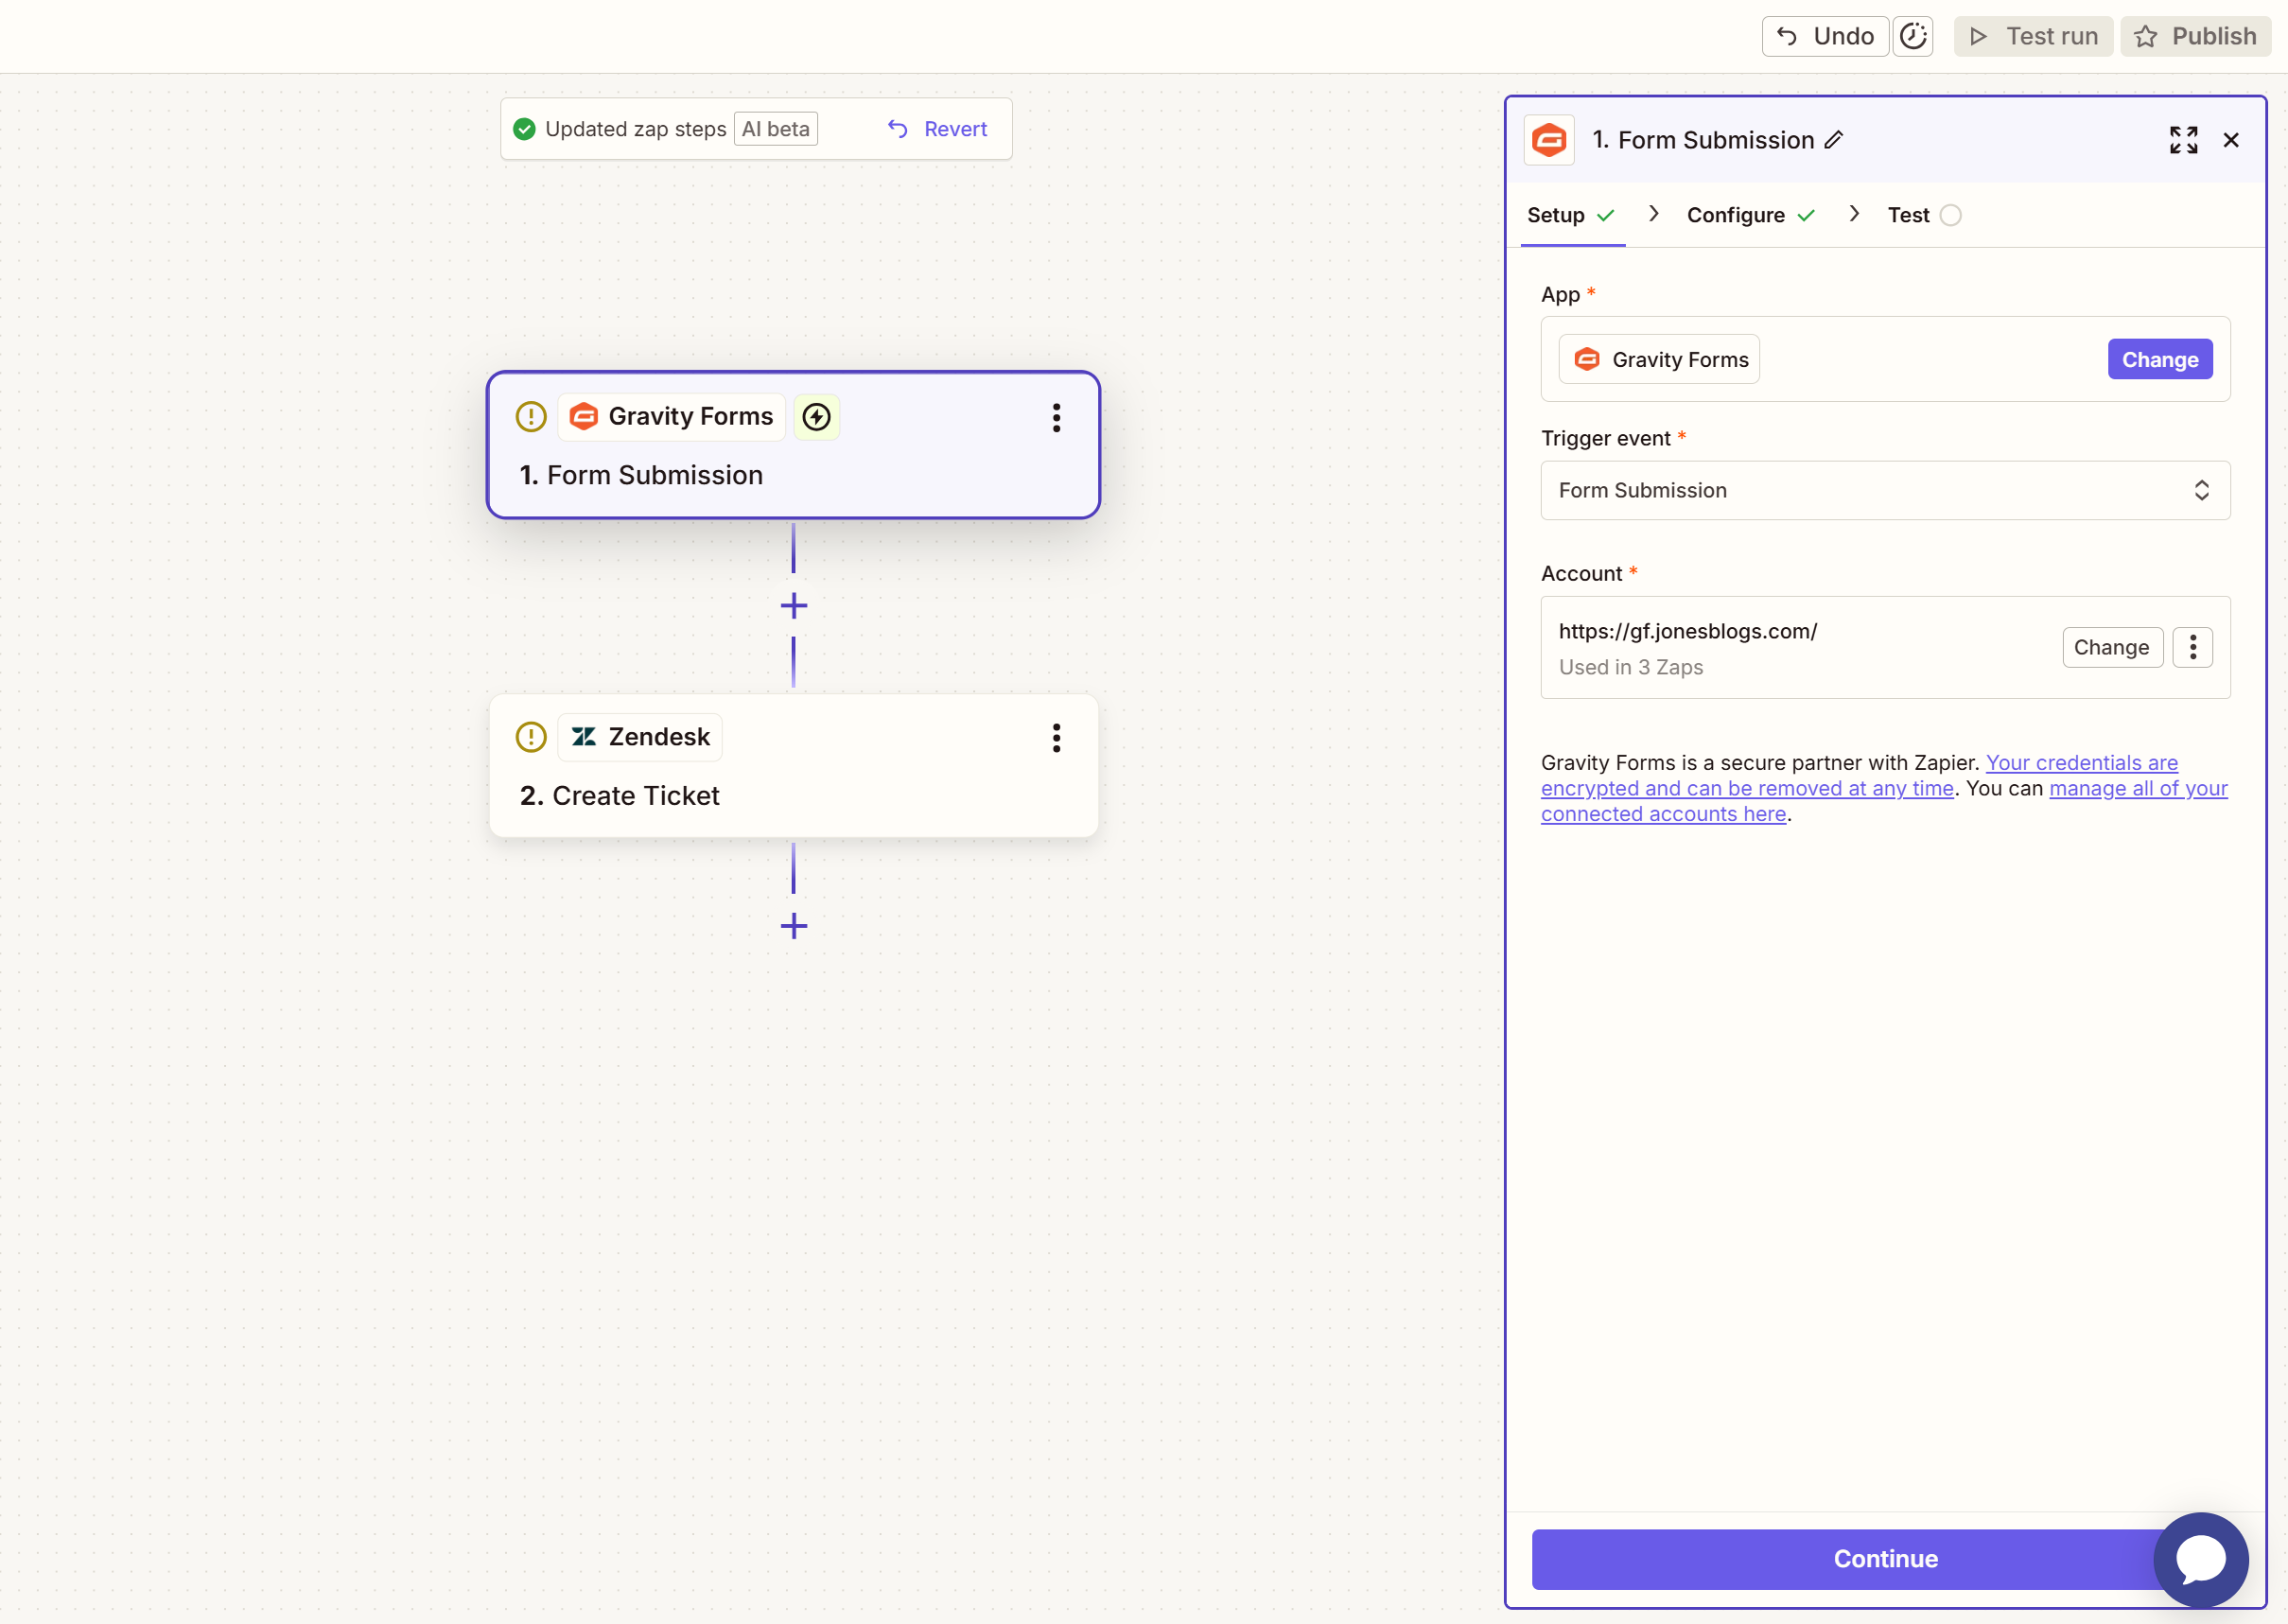
On the next screen, first name your zap. You’ll see Zapier will have pre-populated the App and Trigger Event based on the pre-built Zap you selected.
If this is the first time connecting Gravity Forms to Zapier, you will also need to Connect a New Account.
This will open up a new window where you first need to authenticate. Enter your site URL and the Consumer Key and Consumer Secret you created earlier.
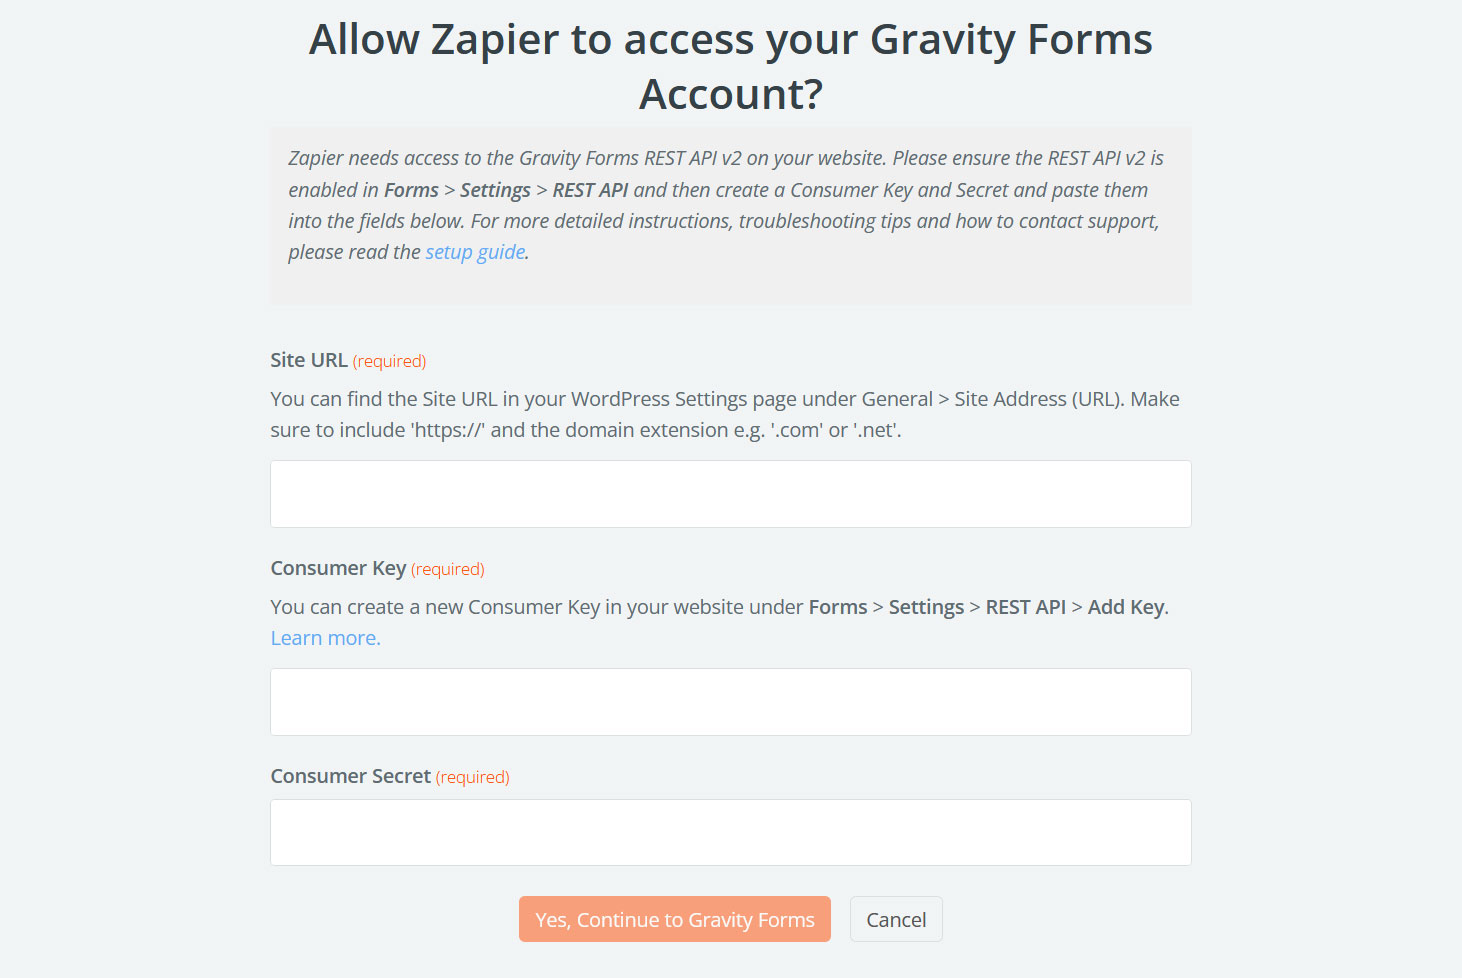
When done, click Yes, Continue to Gravity Forms. After that, that part of the connection should be visible in Zapier and you can move on to the next step by clicking Continue.
Under Configure, you will need to choose the web form you want to use as the trigger, such as the one we created earlier.

The Use Admin Field Labels? section is only important if you added Admin Labels. If that’s not the case, set it to False.
The last setting is Unique Name. It requires you to input a descriptor for this particular Zap and form. Gravity Forms will use it for handling the data (i.e. creating a feed). For that reason, it needs to be one of a kind and not be used for any other purpose.
Once you have finished, click on Continue again. You are then asked to Test the Trigger.
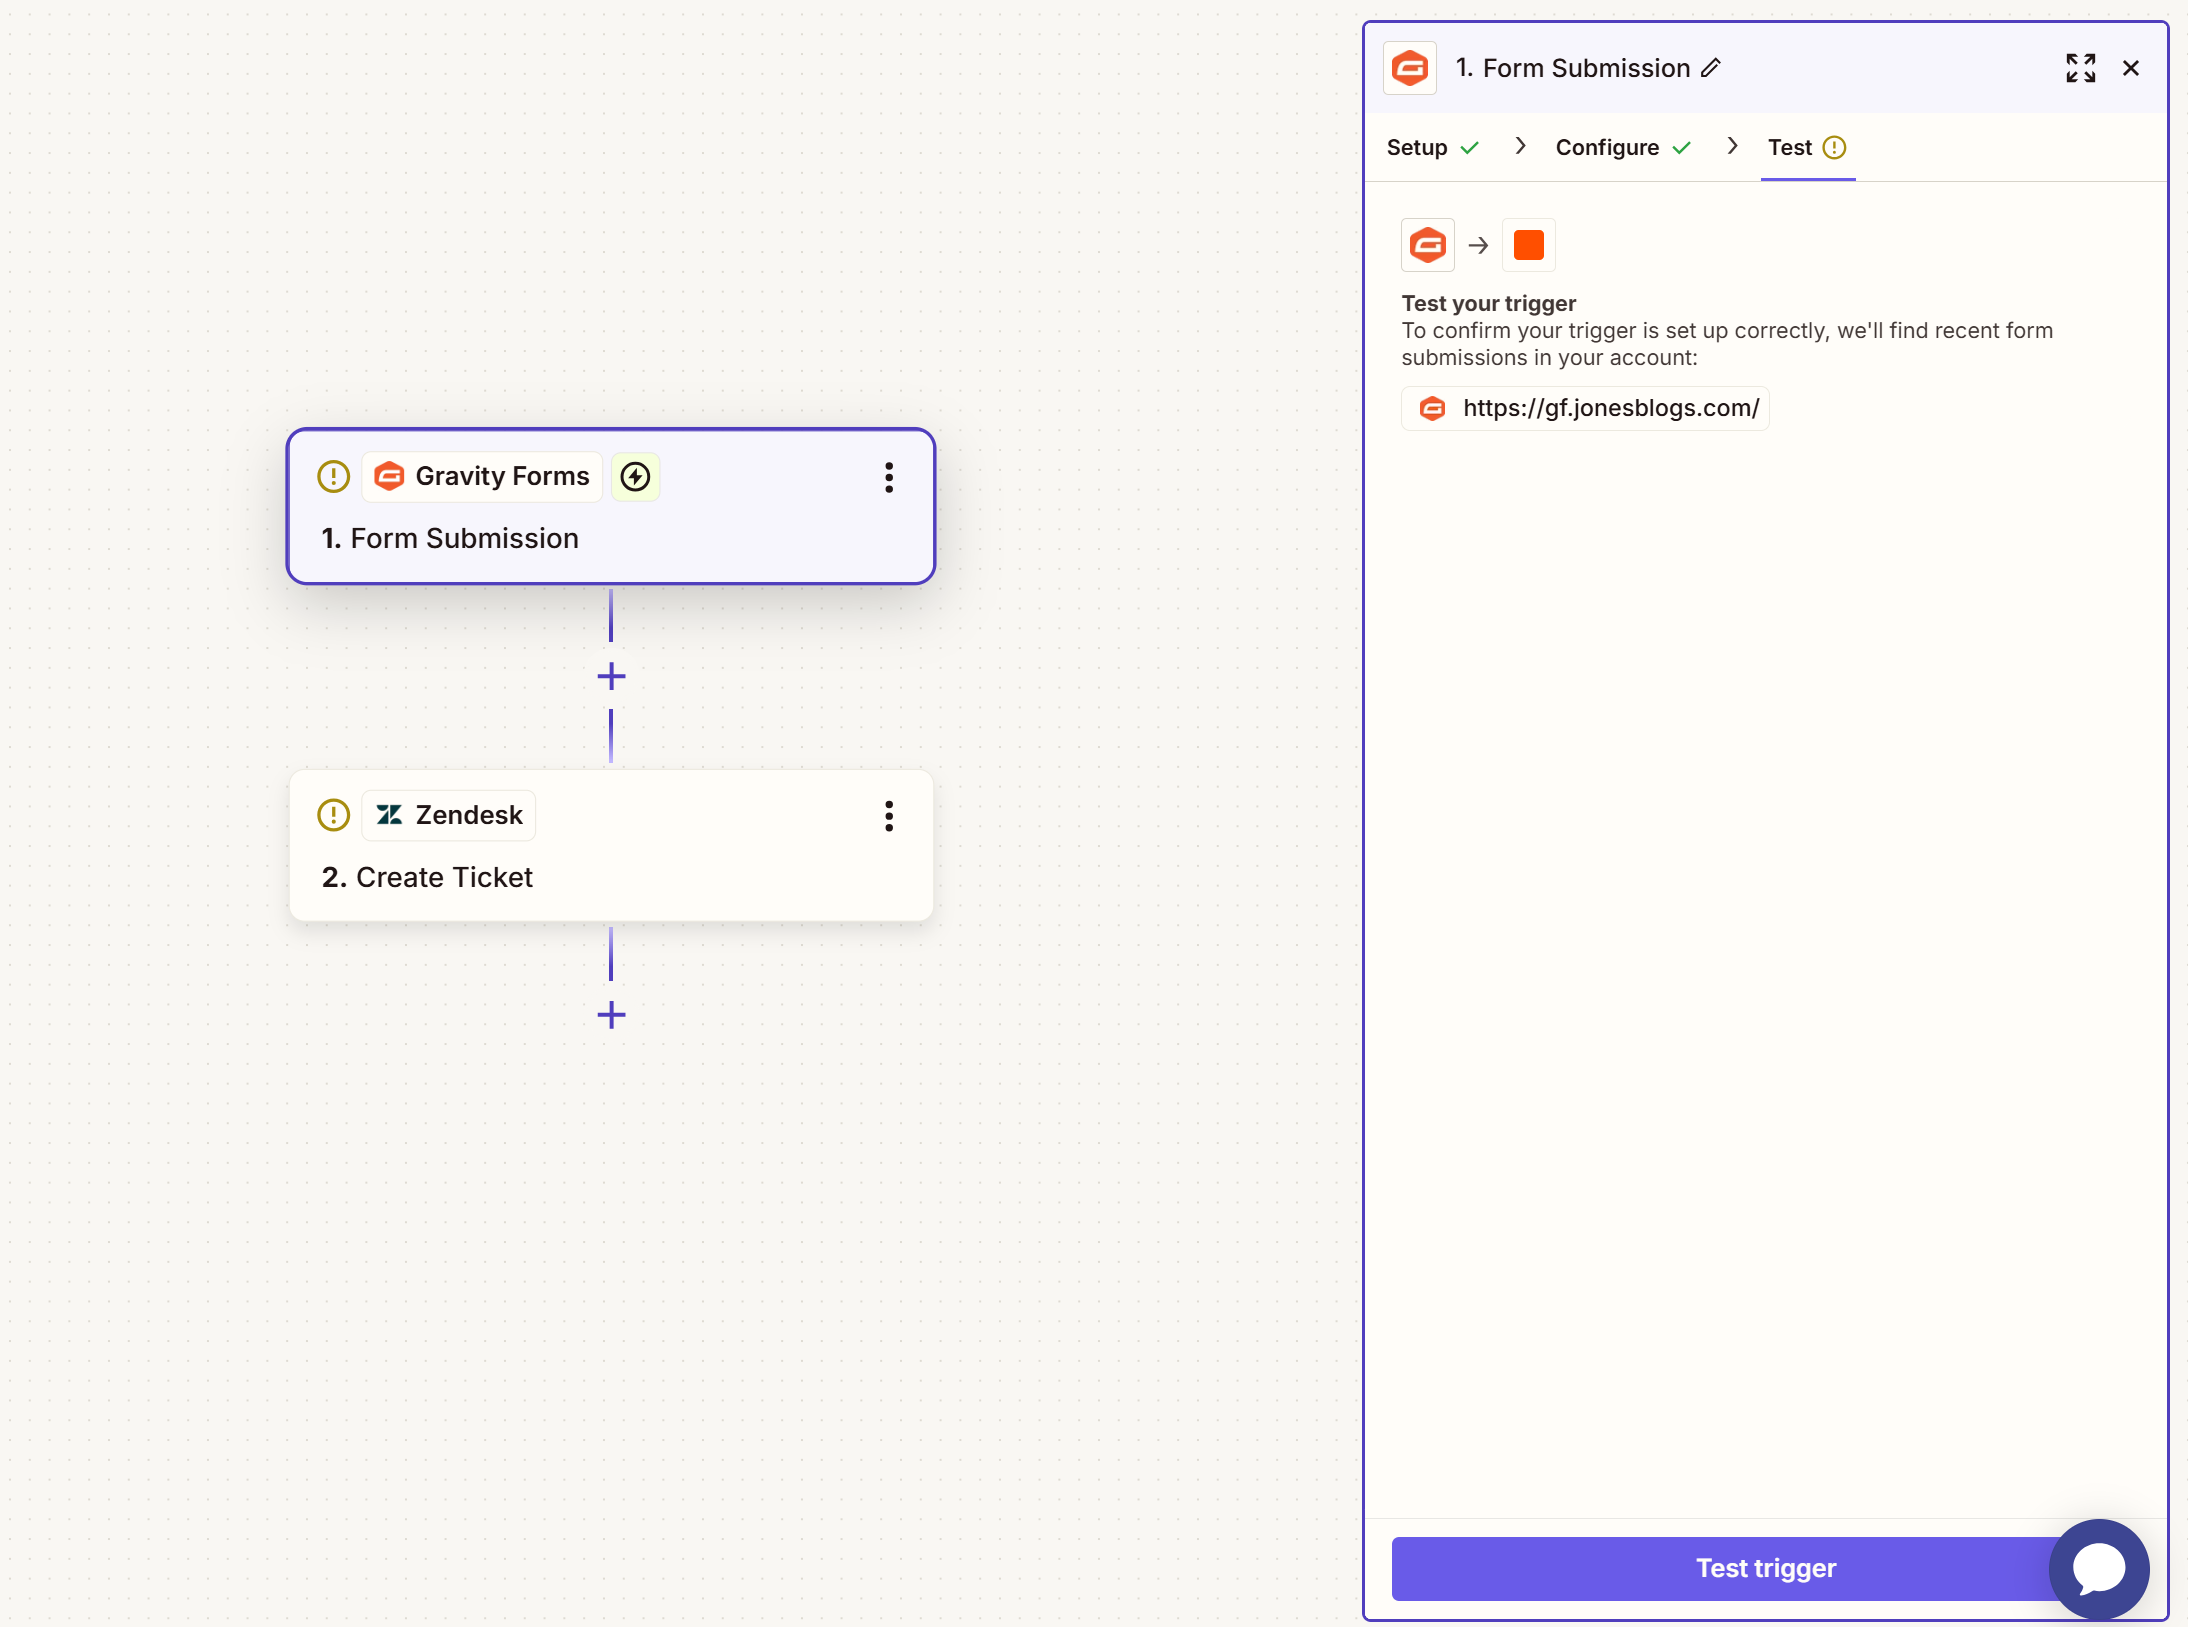
Zapier will then load example data from Gravity Forms for testing the connection. If all works as intended, click Continue with Selected Record – Zapier will now move on to the next step.
7. Establish a connection to Zendesk
In the second half, we need to establish a connection to the other part of the equation – Zendesk. Again, the Zap you selected will pre-populate the App and Action Event, but it’s here you’ll need to connect Zapier with your Zendesk Account.

When you click Sign in, it opens up a window where you need to input the information to authenticate yourself.
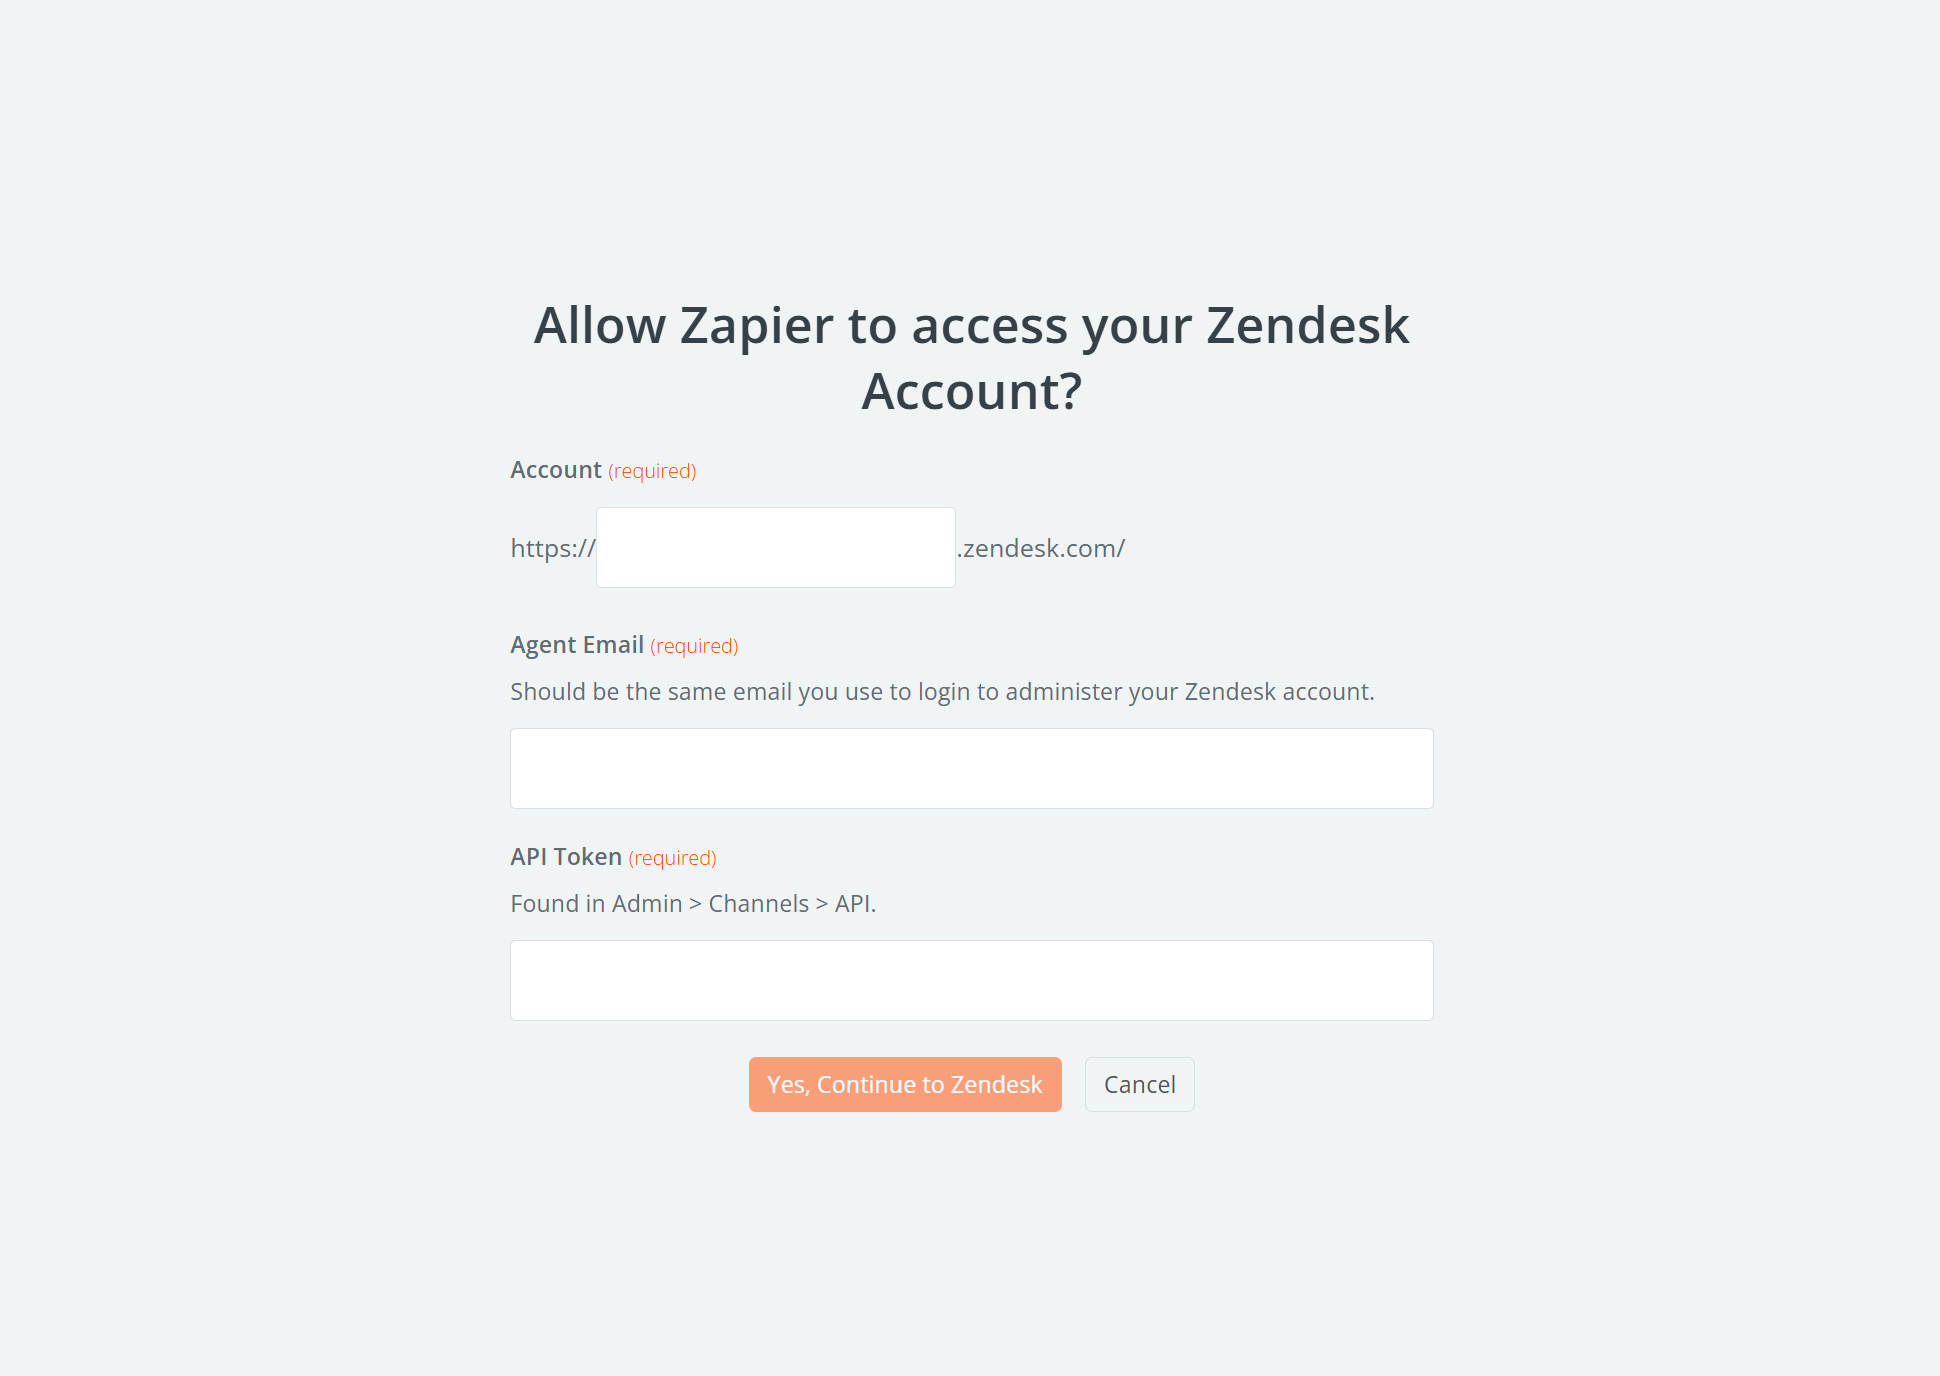
Once that is done and your accounts are connected, click Continue again.
Under Configure, you’ll now be presented with a number of options. For example, you can automatically assign the ticket to someone (or even insert an intermediate step where Zendesk looks for the right person), assign the ticket to a group, add tags to it, set a priority or type, add email addresses to send the ticket to, and a lot more.
The only two required data sets are the ticket subject and content, but at the very least, you’ll probably also want to map the name and email fields. In order to send them over correctly from WordPress to Zendesk, you need to insert the respective Gravity Forms sample data into those fields.
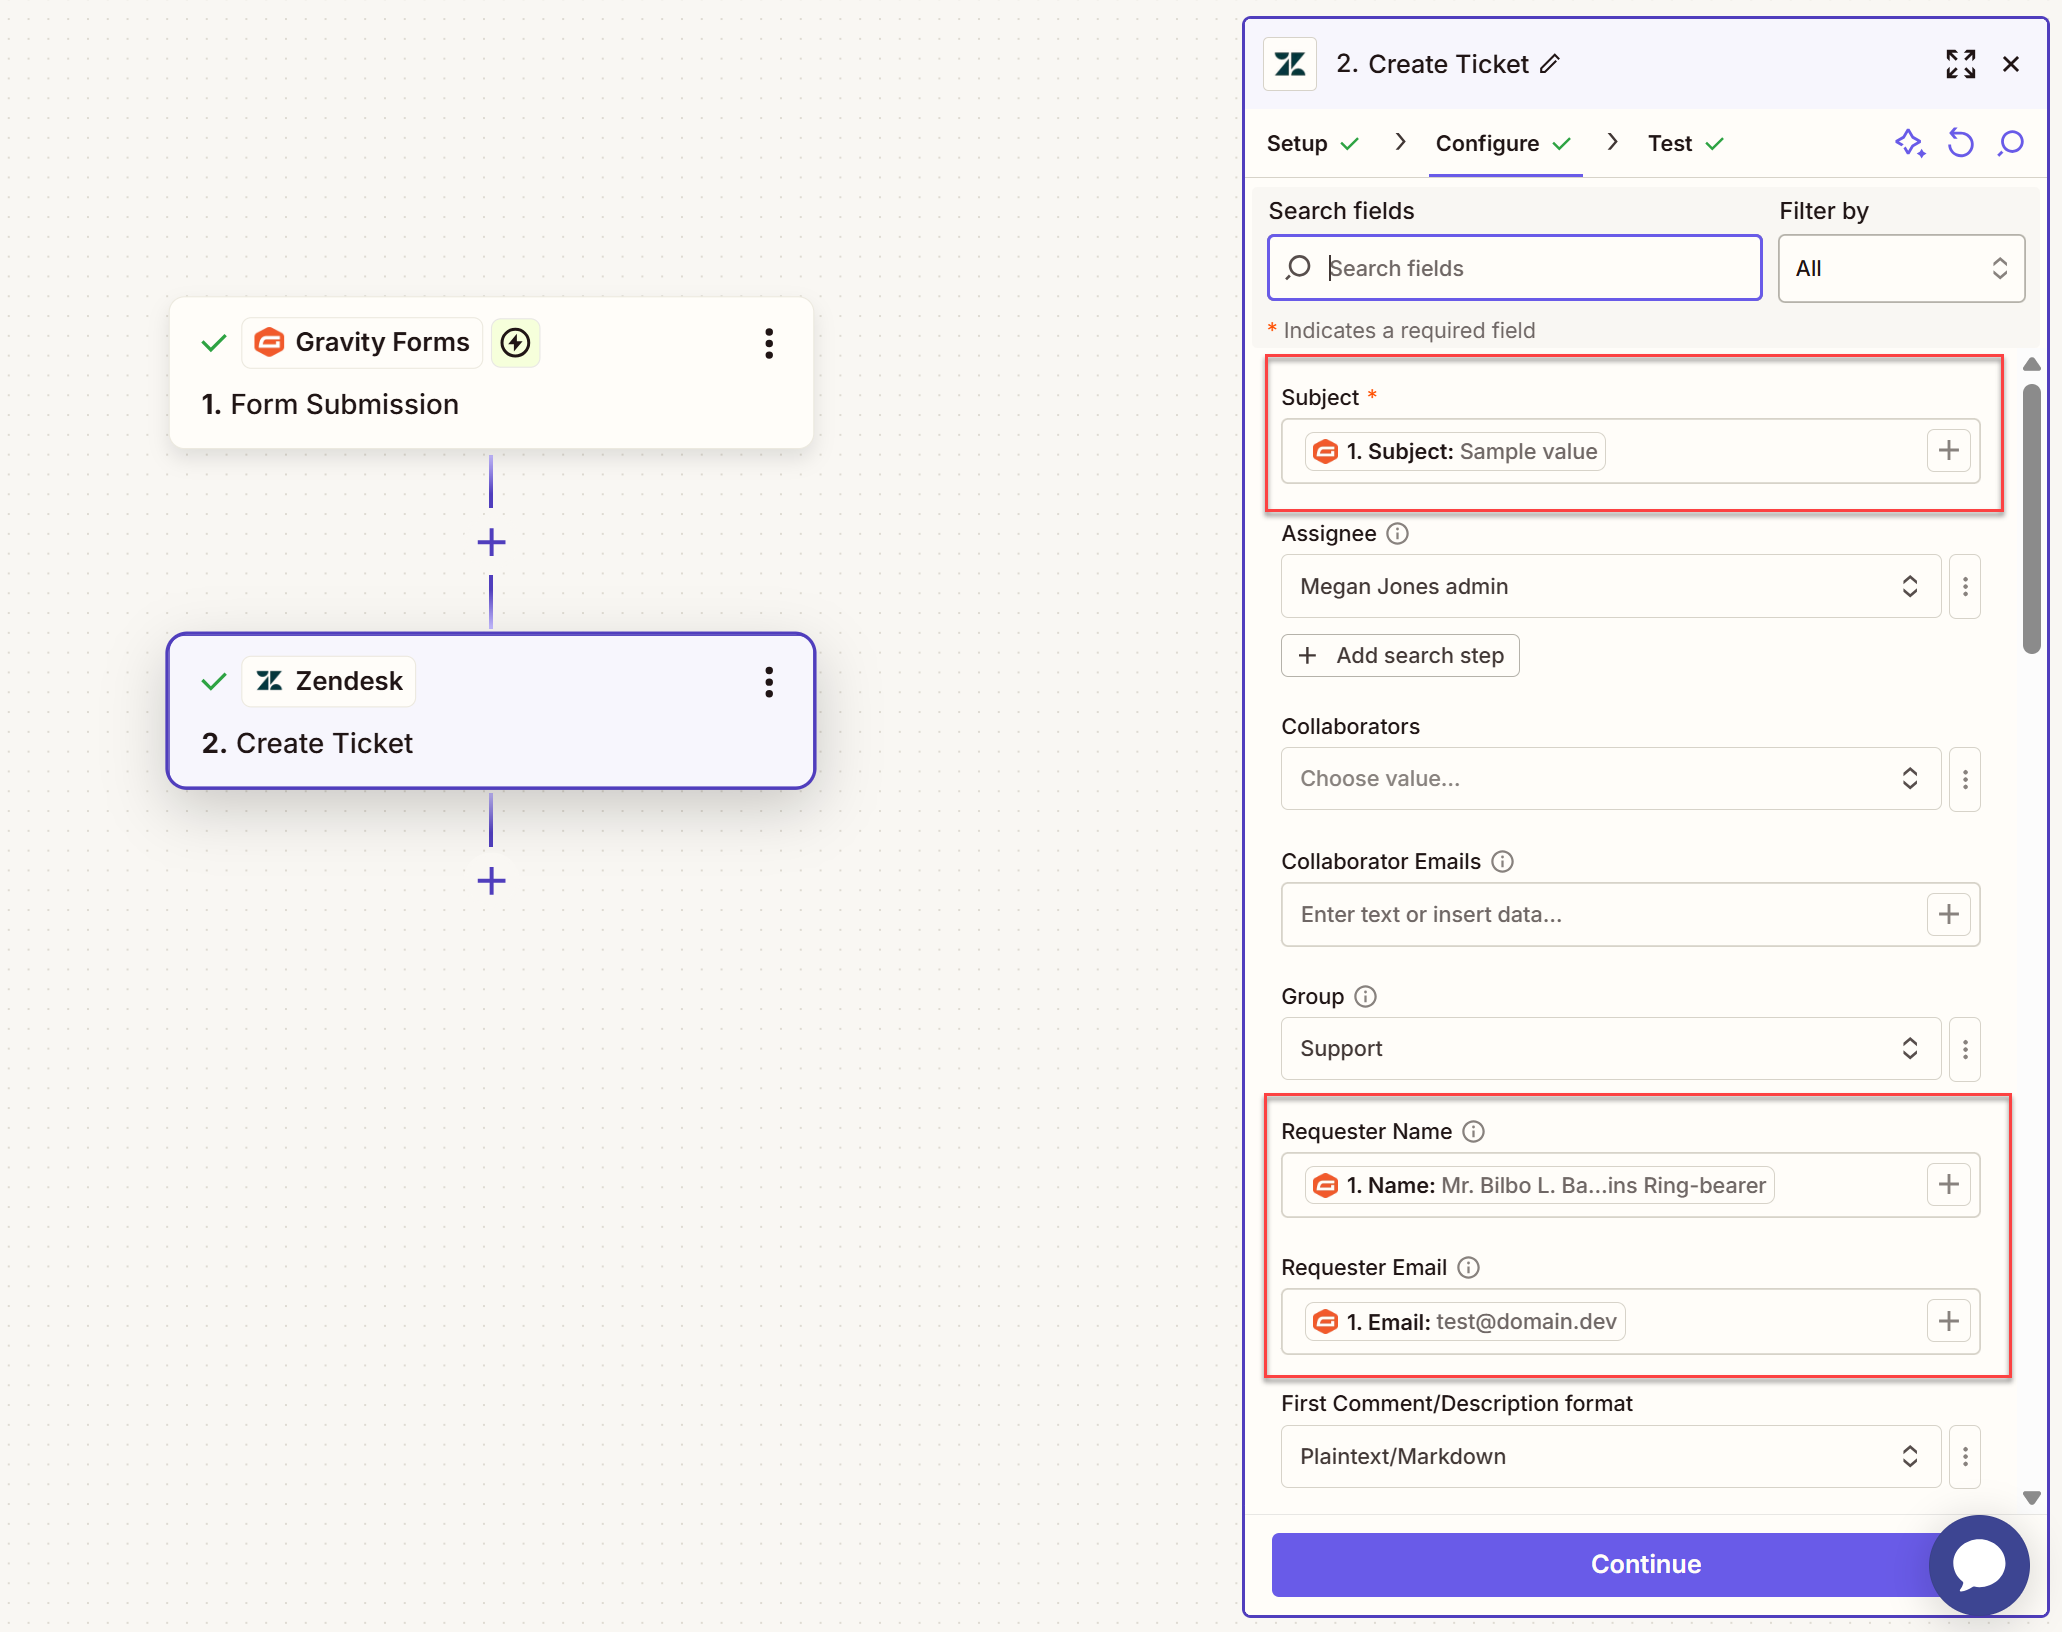
If there is other information you want to send to Zendesk from Gravity Forms, you can configure that as well. When you are ready, click Continue.
8. Test and publish
Zapier will now show you the configuration and ask you to test your setup. Click Test Step to run it and send a ticket to Zendesk.
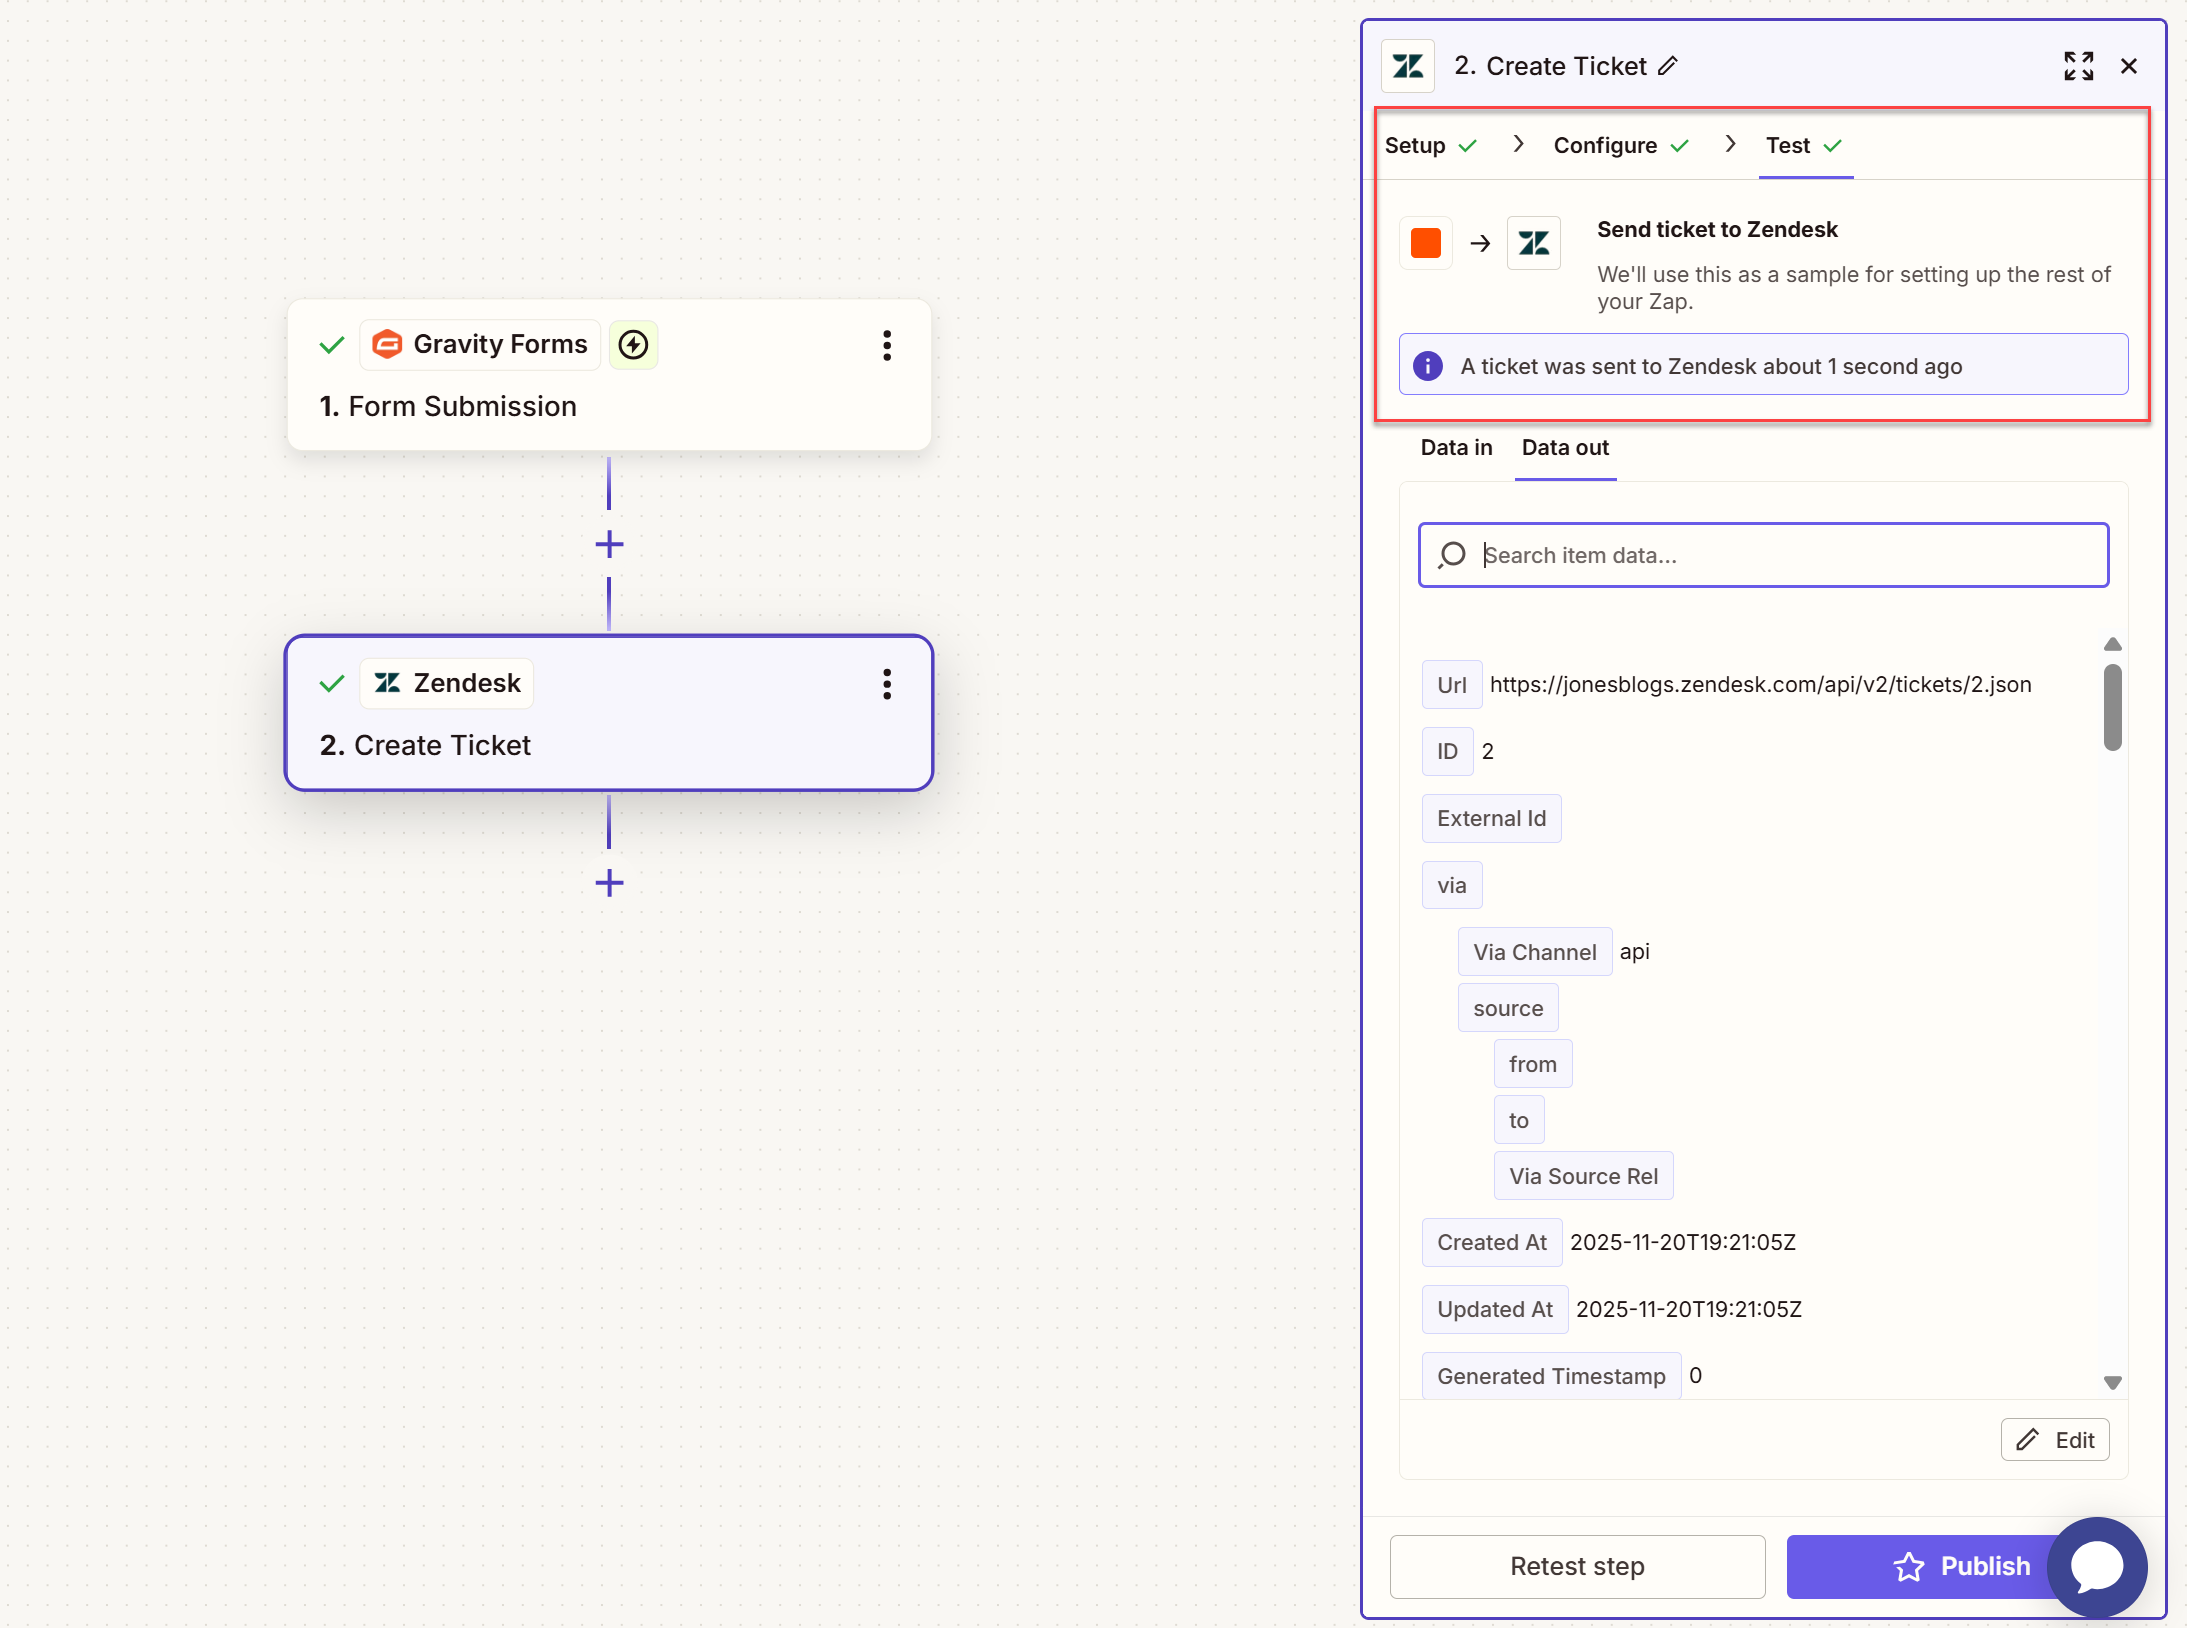
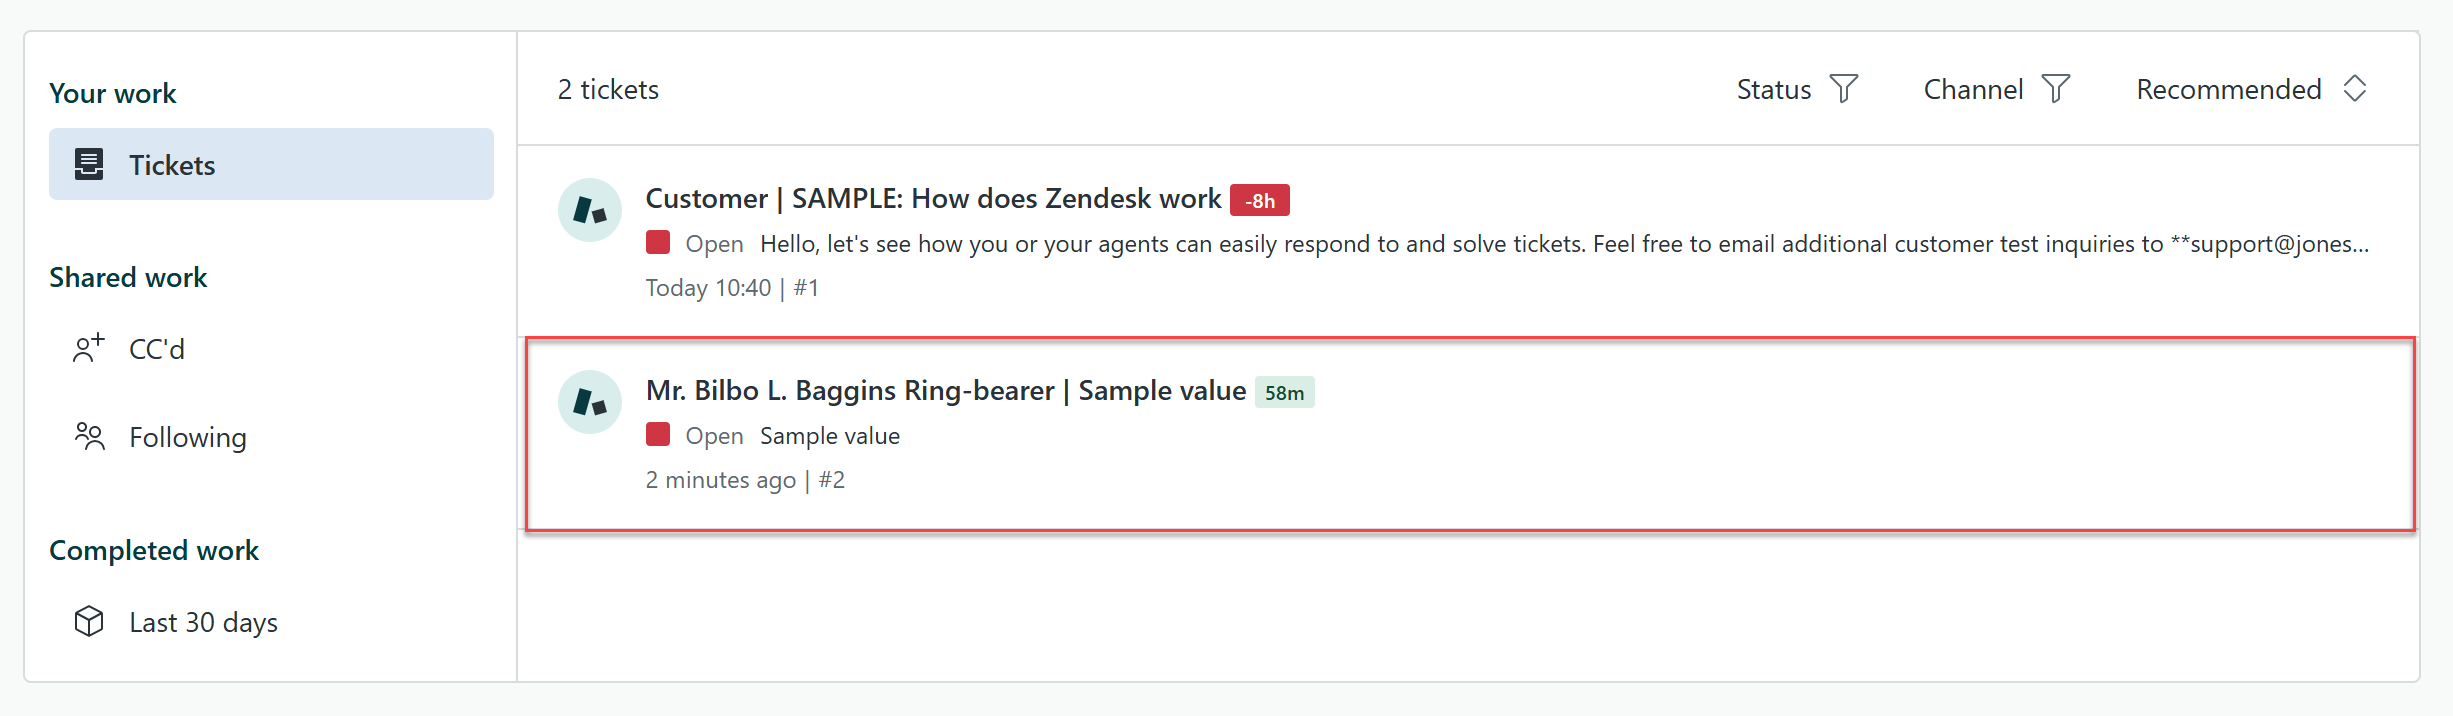
Head over to your Zendesk dashboard. If everything worked as expected, you should see a ticket with the sample data there.
Nice! To make the functionality available on your site, you now just need to publish the Zap by clicking the button of the same name.
Be sure to test this setup via the live form on your site too. If the form entry arrives in your Zendesk dashboard, you are all good.
For more information on using the Zapier Add-On, visit the Gravity Forms Documentation.
Get started with Gravity Forms and Zendesk
Getting customer support right is crucial for any business. Zendesk is one of the most popular and powerful solutions out there. Once paired with Gravity Forms, you’ll be able to accept tickets from your WordPress website, collecting the information your support team needs to ensure they can give the right answers to customers, first time.
Read to get started? Purchase a Pro or Elite license to get started with the Gravity Forms Zapier Add-On. Or, if you’re an existing customer, simply upgrade your existing license today.